Set up Salesforce connect to consume a Jitterbit Design Studio OData service API in Jitterbit API Manager
Introduction
This page describes how to set up and configure Salesforce Connect (formerly Salesforce Lightning Connect) to securely consume an OData service API and display the data in real-time. The example shown will expose and display data from an SAP source using the OData 2.0 protocol.
Prerequisites
- Your Salesforce Org must be provisioned to access the Salesforce Connect modules including external data sources and external objects.
- Create a new project in Design Studio.
- Create a Jitterbit entity in Design Studio.
- Create an API entity operation in Design Studio.
- OData service configuration in API Manager.
Create an external data source and external object in Salesforce
-
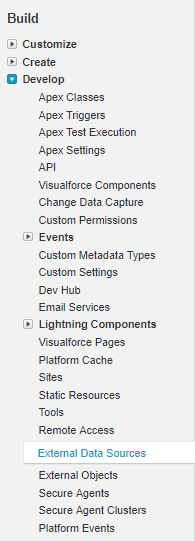
Log in to your Salesforce Org. Within the panel on the left side of the page, scroll down to Build, select Develop, and select External Data Sources. You will need access to these features to set up Salesforce Connect. If you do not have access to these features, contact your Salesforce representative:
-
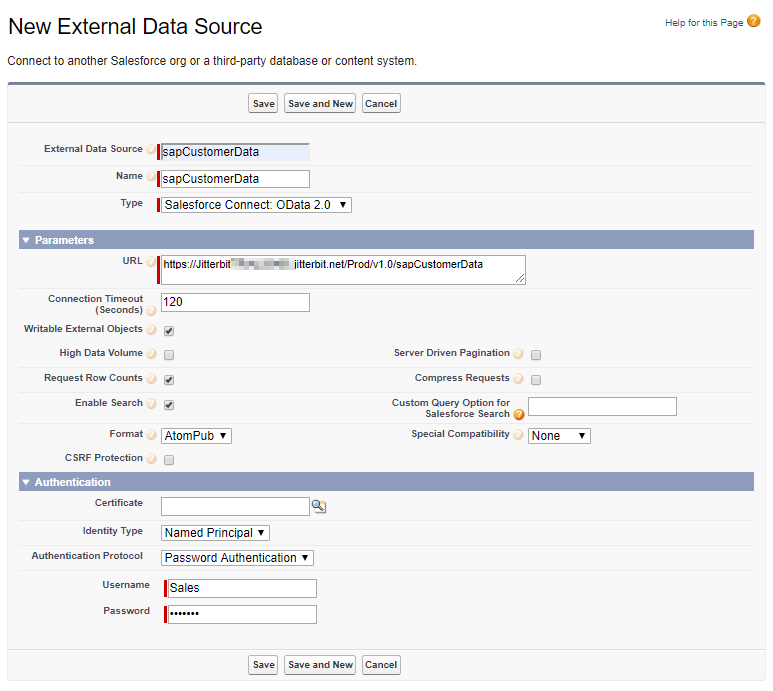
Click the New External Data Source button:
-
Required fields display a red vertical bar to the left of the field.
-
External Data Source: Enter the Name of the OData service API into the External Data Source field.
-
Name: Press the Tab key. The Name field is automatically populated with the name of the OData service API. The API External Data Source and Name can be the same.
-
Type: Click in the Type field and select Salesforce Connect: OData 2.0 in the dropdown list.
Note
Harmony currently only supports OData 2.0.
-
URL: Enter or paste the full URL of your OData service API into the URL field. (On the My APIs page in API Manager, hover over the API tile and click on the Copy URL link.)
Note
Make sure that the URL starts with HTTPS (and not HTTP). If you are using an HTTP URL, the data will not be protected when requested and sent back to Salesforce.
-
Writable External Objects:
- Check this box if you want to allow Salesforce to POST, PUT, DELETE, or MERGE data in the SAP or database source using the OData service API. In this case, multiple operations will be assigned to the API which are assigned one or more of these methods.
- Leave this box unchecked for read-only access. In this case, the operation method in the OData service API must be set to GET.
-
Identity Type: Click in this field and select Named Principal in the dropdown list if you do have profiles assigned to the API and if you want to use a central name for all of your Salesforce users.
-
Authentication Protocol: Click in this field and select the appropriate Authentication Protocol from the dropdown list based on the security profile assigned to the API.
- Additional fields display depending on the protocol selected.
- In the example shown above, Password Authentication was selected and Username and Password fields displayed. Enter the appropriate Username and Password.
-
Click Save.
-
-
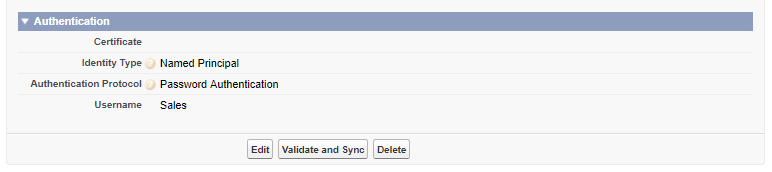
Scroll down to the Authentication section. Click the Validate and Sync button:
-
The Validate External Data Source page displays:
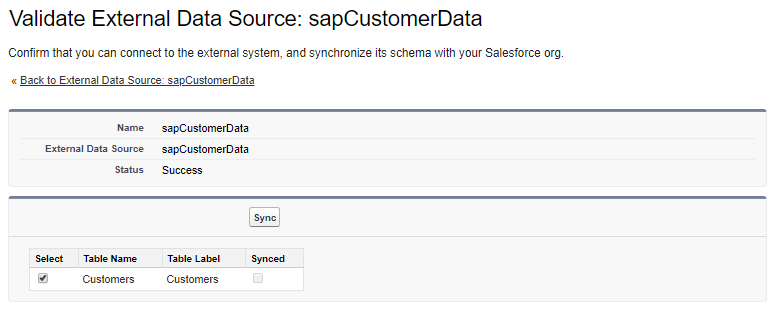
- Click the appropriate checkbox to select the Table Name. In this example, Customers was selected.
- Click on the Sync button to check the URL, validate that the format is acceptable, and automatically create a new External Object in Salesforce.
-
Scroll down to the Authentication section:
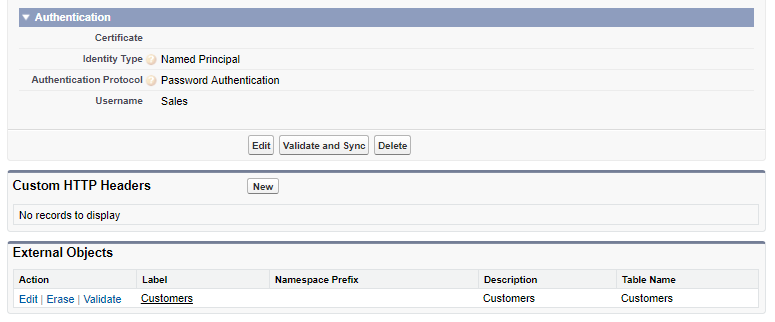
- The External Objects section displays the new External Object you created.
- Salesforce external objects are similar to other custom objects except that the data is not stored in Salesforce. The data is retrieved in real-time from the data source. The external object supports APIs and other customization. When using an external object, remember to always provide a filter to refine the data.
- See the Salesforce documentation Define External Objects for additional information about Salesforce external objects.
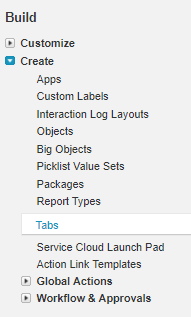
Create a new custom tab in Salesforce
-
Within the panel on the left side of the page, scroll down to Build, select Create, and select Tabs:
-
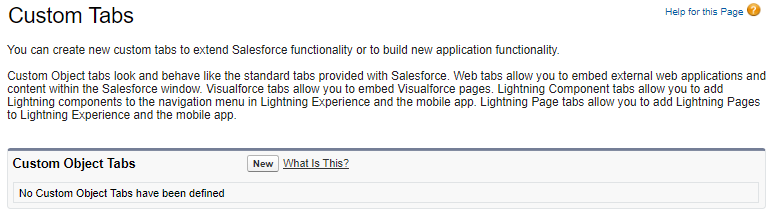
Scroll down to the Custom Object Tabs section and click New to create a new tab in Salesforce:
-
New Custom Object Tab, Step 1 of 3:
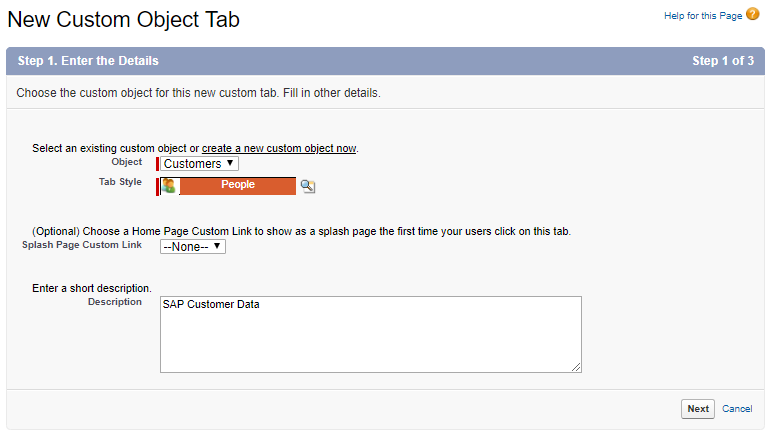
- Object: Click in the Object field and select the new external object you created from the dropdown list. In this example, Customers was selected.
- Tab Style: Click the Tab Style field to display a popup containing style options. Select a tab style in the popup.
- Description: Enter a short description of the external object.
- Click Next.
-
New Custom Object Tab, Step 2 of 3:
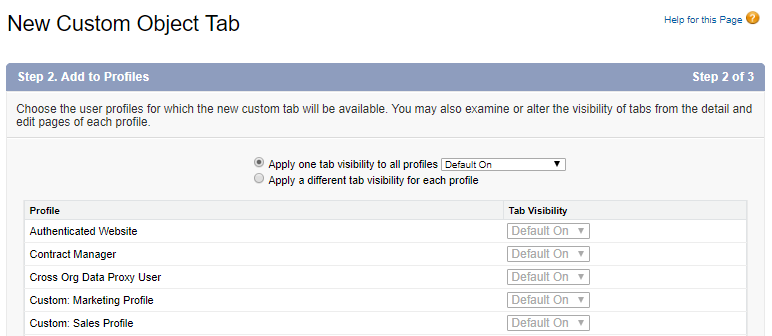
- Customize Tab Visibility with Profiles as desired. In this example, Tab Visibility is set to Default On for all Profiles.
- Click Next.
-
New Custom Object Tab, Step 3 of 3:
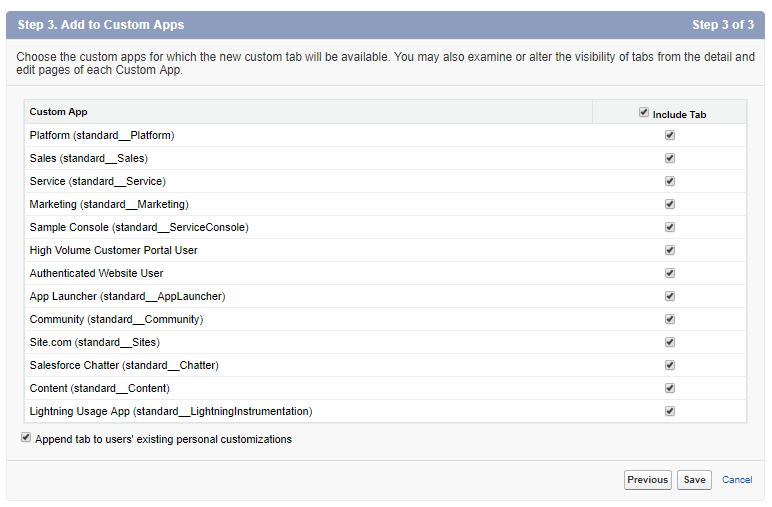
- Select the Custom Apps for which the new custom tab will be available by clicking on the associated checkboxes. All apps are included in the above example.
- Click Save.
-
Click on Home in the top toolbar:
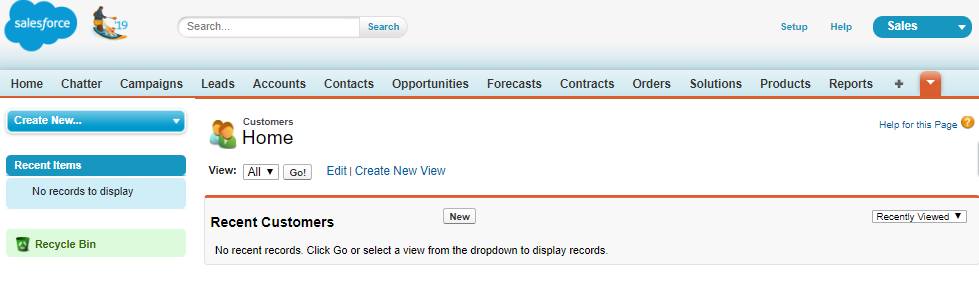
- If your new tab does not automatically display, click on the plus sign on the right side of the toolbar to list all tabs.
- Click on the new tab you created (in this example Customers).
- Click on Create New View
- Customize the View as desired. Enter a Name for the view.
- Click Save.
-
In the example shown in the image below, the Customers in US view is set to display all customers where Country = US:
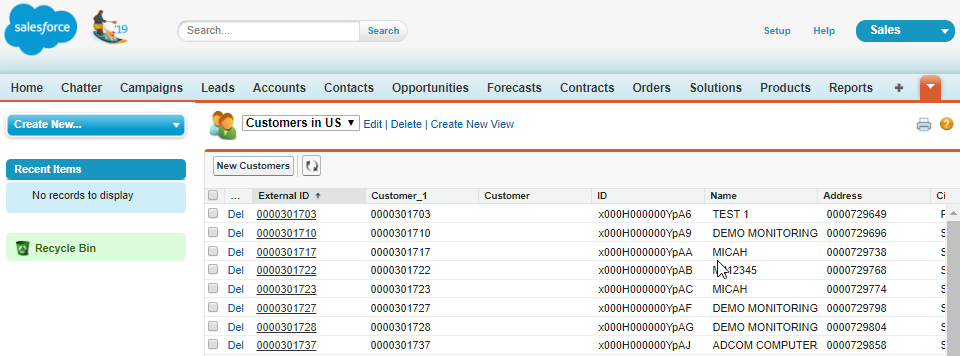
- The data is retrieved in real-time and is not being stored in Salesforce.
- You can drill down for more detail or change filters as needed.
- Jitterbit API Manager will continue to service the requests in real-time and work together with Salesforce Connect to provide access to the data.
Additional Salesforce connect resources
These resources from Salesforce documentation may be helpful: