Google OAuth 3-legged 2.0 API security profile
Introduction
Within a security profile, you can configure Google as an OAuth 2.0 identity provider to provide API consumers access to an API using Google authentication.
Note
This API security profile does not currently support 2-legged OAuth.
This page shows how to configure and use Google authentication with a Jitterbit custom, OData, or proxy API by following these steps:
- Configure Google as an identity provider
Configure a Google project and obtain the client ID and client secret that you will need to use as input for configuring a security profile in API Manager. - Configure a security profile in API Manager
Configure and test Google as the identity provider in API Manager. You will need to use the client ID and client secret obtained in the previous step. - Assign a security profile in API Manager
Assign the security profile to one or more Jitterbit custom, OData, or proxy APIs. - Access an API with Google authentication
API consumers are able to use Google authentication to consume Jitterbit custom, OData, or proxy APIs that the security profile is assigned to.
For additional information, see the Google API Console Help topic Manage APIs.
1. Configure google as an identity provider
Follow these steps to create a Google project and obtain the client ID and client secret needed for configuring Google as an identity provider for a security profile:
-
Log in to the Google API Console.
-
In the Google API Console, from the Dashboard, click Create Project. Depending on your use case, you may need to create more than one project to segregate access for different security profiles.
-
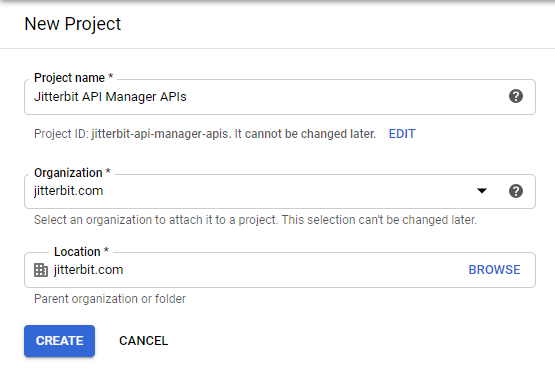
On the New Project screen, enter a Project name of your choice. For example, you might name the project Jitterbit API Manager APIs if the security profile will be assigned to all APIs that you want to use Google authentication with, or you might name the project Jitterbit API Manager Customer APIs for a specific group of APIs to be assigned the security profile.
If required, select an appropriate Organization and Location. Then click Create:
-
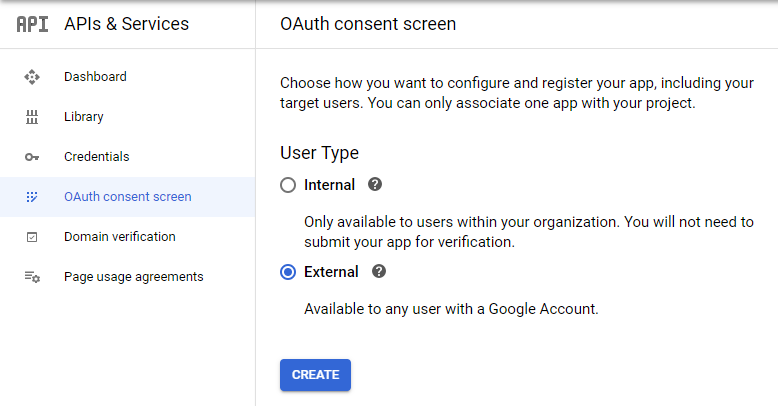
Go to the project's OAuth consent screen tab and select External. Then click Create:
-
Within the resulting OAuth consent screen configuration area, provide an App name (for example, Jitterbit API Manager APIs) and complete the required contact information fields. Any further configuration beyond the defaults is optional. Click Save and Continue.
-
Go to the project's Credentials tab to configure the credentials for the security profile:
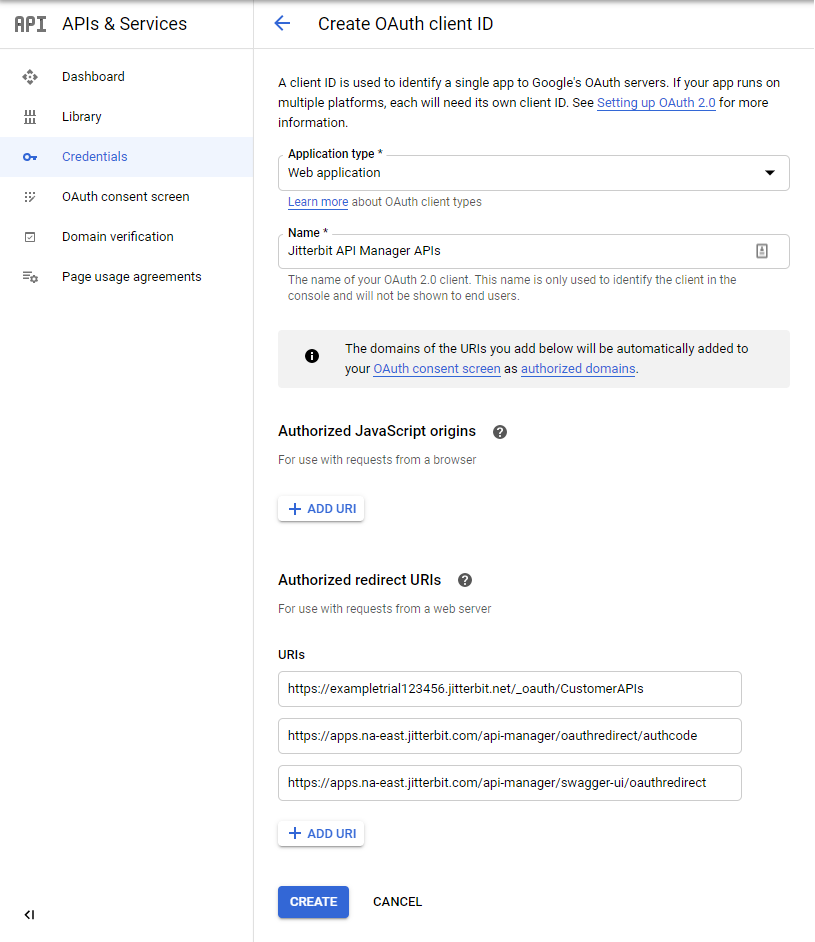
- Click Create Credentials and use the dropdown to select OAuth client ID.
- Select an Application type of Web application.
- Provide a Name (for example, Jitterbit API Manager APIs).
-
Under Authorized redirect URIs, click Add URI and enter the URIs appropriate for your Harmony organization and region:
-
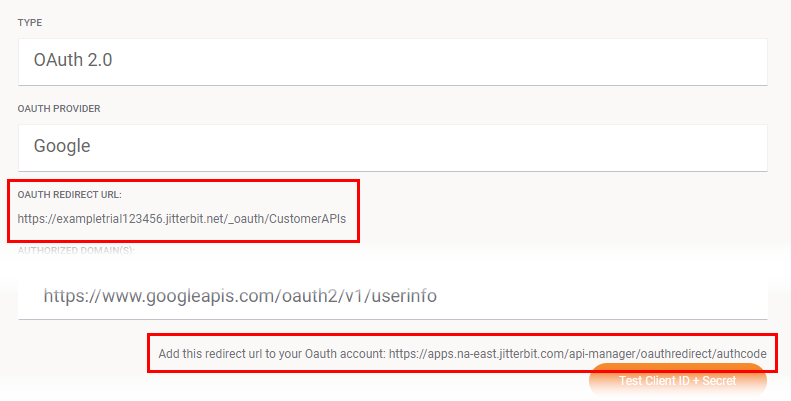
Enter the two URI values copied from the security profile configuration screen (the image below is cropped to show the relevant areas):
-
Enter the URI value appropriate for your region (see Finding my region):
- NA:
https://apps.na-east.jitterbit.com/api-manager/swagger-ui/oauthredirect - EMEA:
https://apps.emea-west.jitterbit.com/api-manager/swagger-ui/oauthredirect - APAC:
https://apps.apac-southeast.jitterbit.com/api-manager/swagger-ui/oauthredirect
- NA:
-
-
After clicking Create, the client ID and client secret are provided. Retain these for later use, as they will be required when configuring the security profile.
2. Configure a security profile in API Manager
Follow the instructions for Configure a security profile in Security profile configuration.
Caution
The Profile name must not contain any spaces. If the Profile Name contains spaces, you will receive a redirect error when attempting to access an API to which the security profile is assigned.
During configuration, select OAuth 2.0 as the authentication Type and Google as the OAuth provider:

Enter the OAuth client ID and OAuth client secret values obtained in the previous section, Configure google as an identity provider:

Click Test Client ID + Secret to verify connectivity with the identity provider using the configuration.
3. Assign a security profile in API Manager
To use the security profile with an API, follow the instructions for configuring a custom API, OData service, or proxy API and select the security profile configured with Google OAuth 2.0 authentication.
4. Access an API with google authentication
Once you have saved and published a custom API, OData service, or proxy API, its API is accessible by URL in the application calling the API using the configured authentication method.
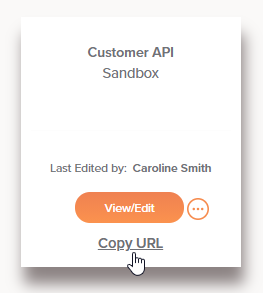
To consume the API, use the link to Copy URL and use it within the calling application:
If the API supports GET, you can also paste the URL into a web browser to consume the API manually.
The browser redirects to the native login interface for Google. Provide your credentials to authenticate with Google.
If the authentication is successful, the expected payload is displayed in the web browser.