Okta 3-legged OAuth 2.0 API security profile
Introduction
Within a security profile, you can configure Okta as an OAuth 2.0 identity provider to provide API consumers access to an API using Okta authentication.
This page shows how to configure and use Okta authentication with a Jitterbit custom, OData, or proxy API by following these steps:
- Configure Okta as an identity provider
Configure the Okta instance as an identity provider and obtain the Okta client ID and client secret that you will need to use as input for configuring a security profile in API Manager. - Configure a security profile in API Manager
Configure and test Okta as the identity provider in API Manager. You will need to use the client ID and client secret obtained in the previous step. - Assign a security profile in API Manager
Assign the security profile to one or more Jitterbit custom, OData, or proxy APIs. - Access an API with Okta authentication
API consumers are then able to use Okta authentication to consume Jitterbit custom, OData, or proxy APIs that the security profile is assigned to.
For additional information, see the Okta documentation OAuth 2.0 and OpenID Connect Overview.
For Okta 2-legged OAuth security profile configuration, see Okta 2-legged OAuth 2.0 API security profile.
1. Configure Okta as an identity provider
-
Log in to the Okta Developer Console as a user with administrative privileges.
-
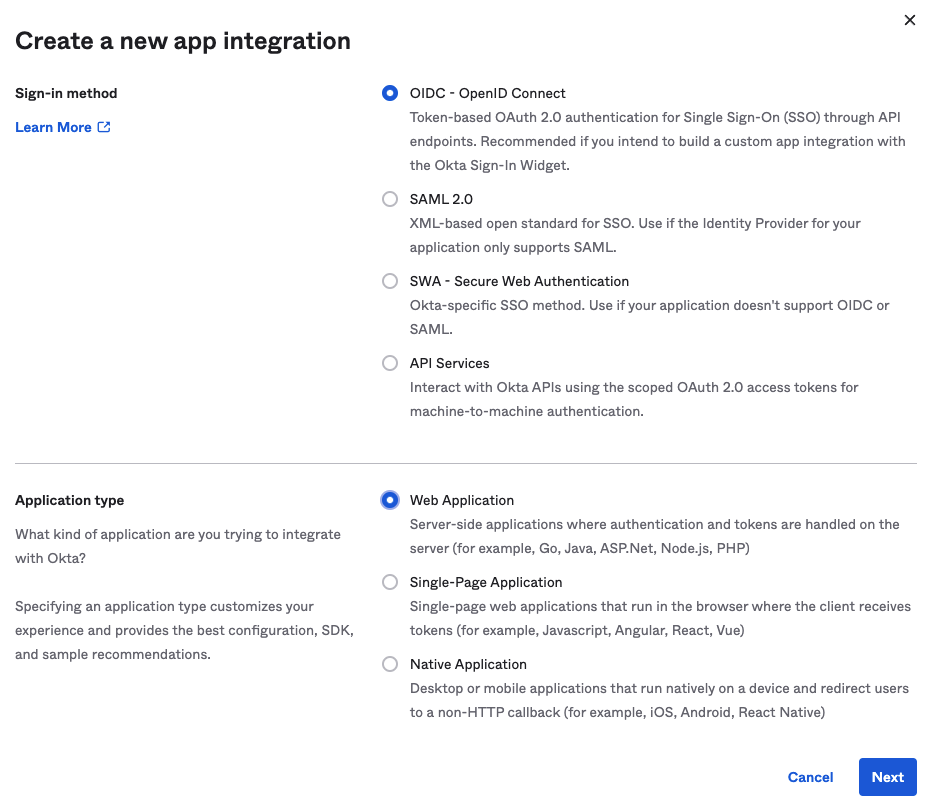
In Okta's Developer Console, navigate to Applications > Applications, then click the Create App Integration button.
-
In the Sign-in Method step of the Create a New App Integration page, select OIDC - OpenID Connect. For the Application type, select Web Application and then click Next.
-
In the General Settings step of the New Web App Integration page, configure the credentials for the security profile:
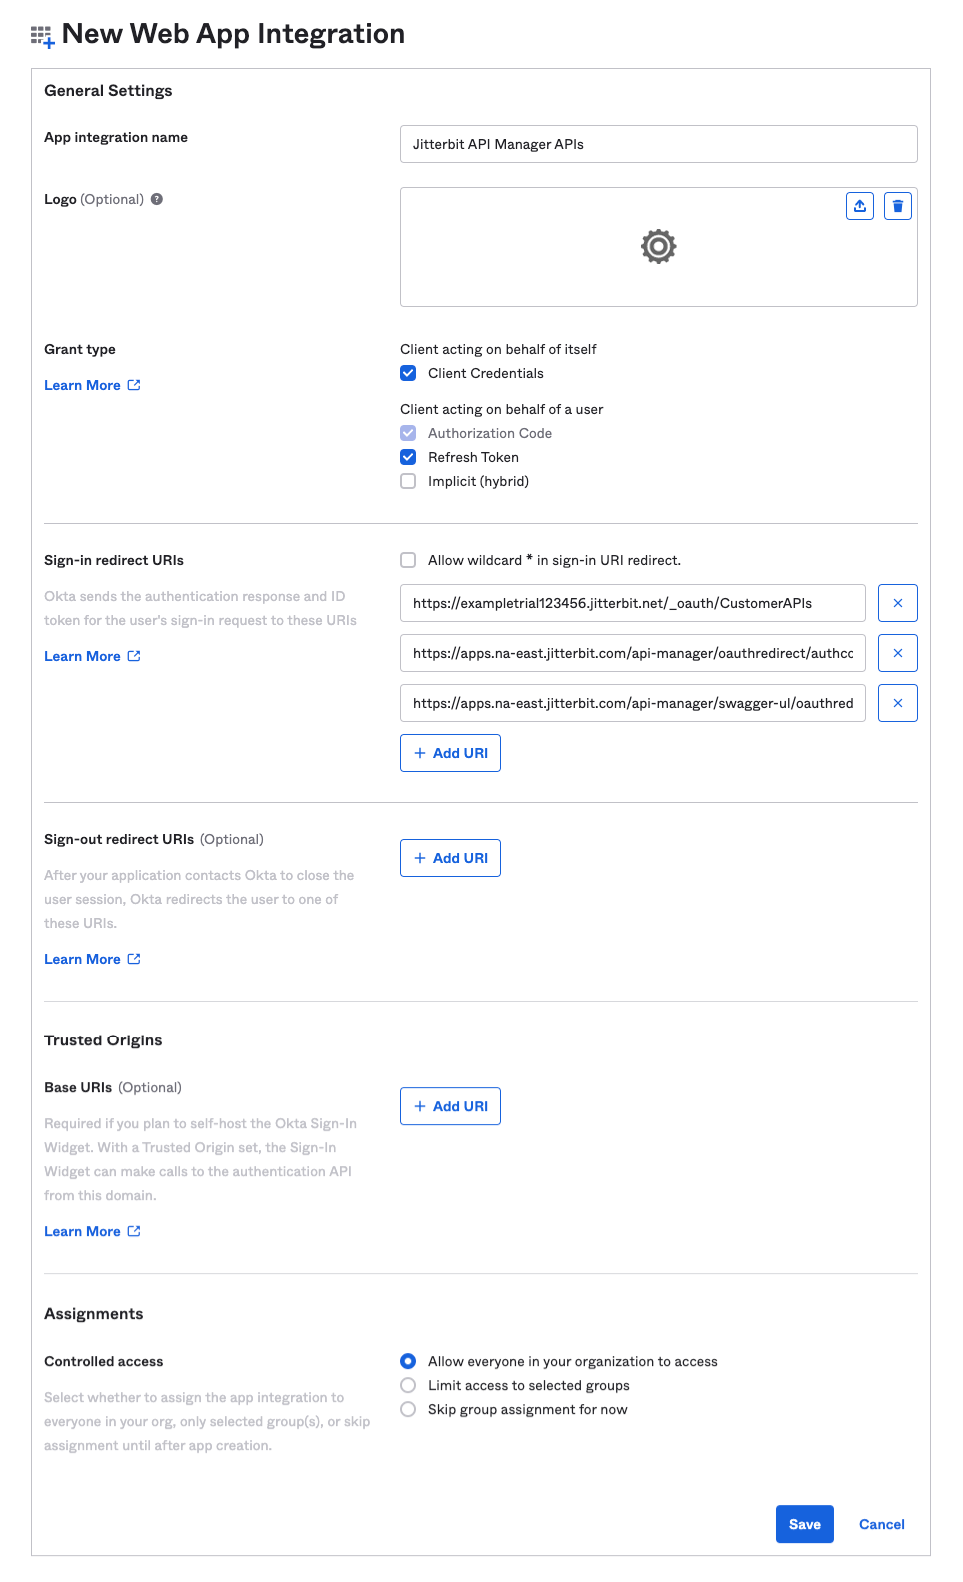
-
Enter an App Integration Name (for example, Jitterbit API Manager APIs).
-
Under Grant type:
- If you will be configuring 2-legged OAuth in the security profile (by using the setting 2-legged OAuth Flow), select Client Credentials under Client acting on behalf of itself.
- Select Refresh Token under Client acting on behalf of a user.
-
Enter the three Sign-in redirect URIs appropriate for your Harmony organization and region:
-
Enter the two URI values copied from the security profile configuration screen (the image below is cropped to show the relevant areas):
-
Enter the
swagger-uiURI value appropriate for your region (see Finding my region):- NA:
https://apps.na-east.jitterbit.com/api-manager/swagger-ui/oauthredirect - EMEA:
https://apps.emea-west.jitterbit.com/api-manager/swagger-ui/oauthredirect - APAC:
https://apps.apac-southeast.jitterbit.com/api-manager/swagger-ui/oauthredirect
- NA:
-
-
Clear the Sign-out redirect URIs.
-
Under Trusted Origins, clear the Base URIs.
-
Under Assignments, assign the group that you want (if you set Group Assignments for your app) or leave the Everyone default. For instructions on how to assign the app integration to individual users and groups, see Assign app integrations in the Okta product documentation.
-
-
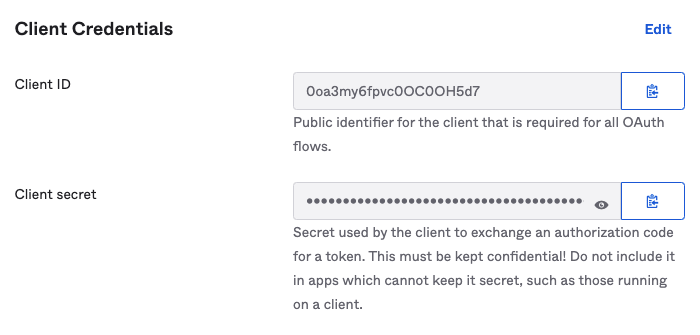
After clicking Save, the Client ID and Client secret are displayed in the General tab under Client Credentials. Retain these for later use, as they will be required when configuring the security profile:
2. Configure a security profile in API Manager
Follow the instructions for Configure a security profile in Security profile configuration.
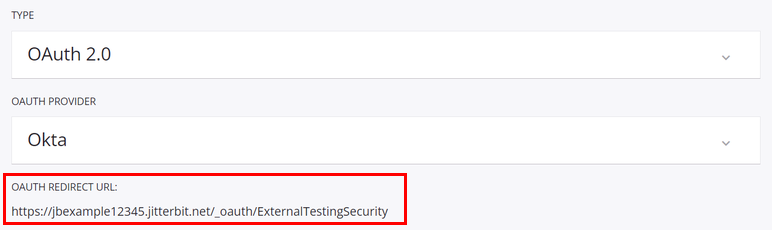
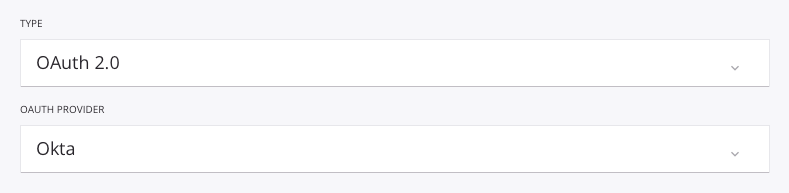
During configuration, select OAuth 2.0 as the authentication Type and Okta as the OAuth Provider:
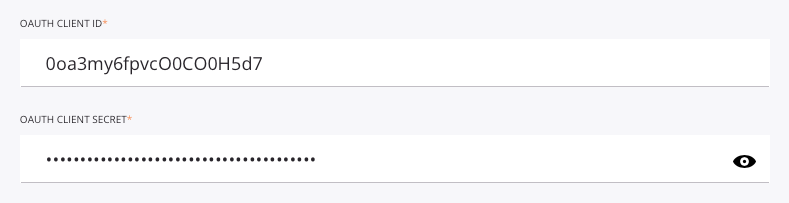
Enter the OAuth Client ID and the OAuth Client Secret values obtained in the previous section, Configure Okta as an identity provider:
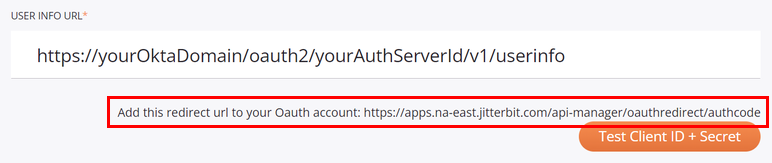
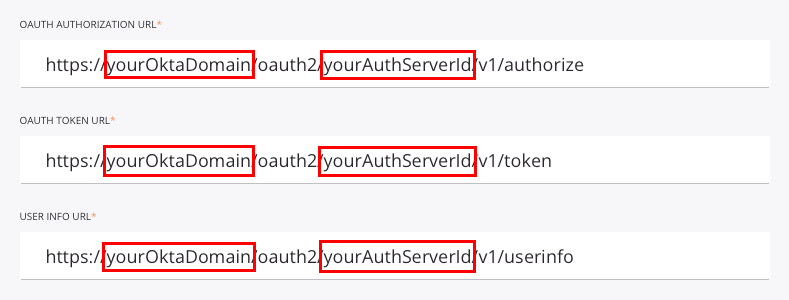
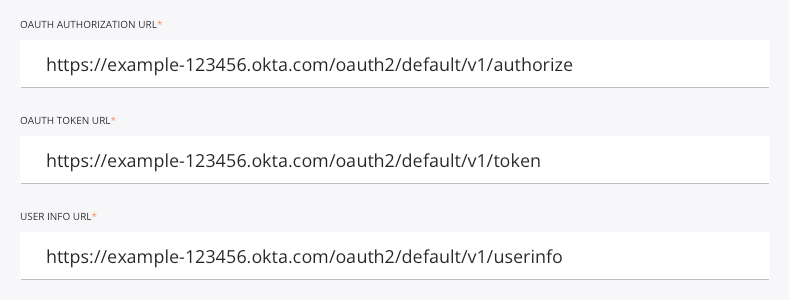
Edit the OAuth Authorization URL, the OAuth Token URL, and the User Info URL to replace the placeholder domain (yourOktaDomain) and the placeholder authorization server ID (yourAuthServerId) with those for your Okta instance:
yourOktaDomain: Replace with the Okta domain, also called the Okta URL. See Find your Okta domain.yourAuthServerId: Replace with the Okta authorization server ID. See Create an authorization server.
For example, when configured, the field input should be similar to that shown here:
3. Assign a security profile in API Manager
To use the security profile with an API, follow the instructions for configuring a custom API, OData service, or proxy API and select the security profile configured with Okta OAuth 2.0 authentication.
4. Access an API with Okta authentication
Once you have saved and published a custom API, OData service, or proxy API, its API is accessible by URL in the application calling the API using the configured authentication method.
To consume the API, use the link to Copy URL and use it within the calling application:
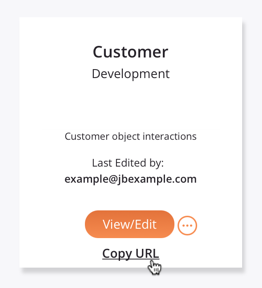
If the API supports GET, you can also paste the URL into a web browser to consume the API manually.
When 3-legged OAuth 2.0 is being used, the browser redirects to the native login interface for Okta. Provide your credentials to authenticate with Okta.
If the authentication is successful, the expected payload is displayed in the web browser.