Publish Jitterbit App Builder app as a REST API endpoint
Overview
In App Builder you can configure an App Builder server to be an API so that the application data can be accessed via an API Key. This feature allows you to create an API Key and Endpoints on applications. This guide will show an example using Northwinds data, and utilizes an API Key to connect to an Endpoint created in a selected application.
Note
This article outlines steps to publish App Builder App as a REST API Endpoint. When you package an App Builder app into an LP and deploy it in other environments, the Endpoint configuration in IDE > REST APIs will persist. All other configuration needs to be manually recreated in any additional environments.
How to publish App Builder app as REST API endpoint
First you will need to set up a Security Provider API Key to provide authentication to access the Endpoints:
- Navigate to the IDE > Security Providers
- Click + User Authentication from the User Authentication panel
- Assign the provider a Name. For example: API Key
- Select API Key as the Type value
- Check to select Enabled
- Click Save
Depending on your use case you can configure the following Properties:
- If you want to type the API into your browser location bar for testing (not very secure), then
- Click + Property from the Properties panel
- Select
AllowApiKeyInQueryStringas the Parameter - Enter True as the Value
- Click the checkmark to save the record
- If you are using HTTP, not recommended configuration, then you need to add the following:
- Click Create
- Select
AllowInsecureHttpas the Parameter - Enter True for the Value
- Click the checkmark to save the record
Next you will need to configure an Endpoint to access an applications data source:
- Navigate to IDE > REST APIs
- Click the Manage Endpoints button from Application panel
- Select the application where you want to configure the Endpoint. For example: Northwinds Design
- Click the pencil edit icon for the application
- Enter the Endpoint value into the Endpoint field. For example: Northwinds
- Click the Proceed button
Next you will Publish the Endpoint you created in the previous step:
- Navigate to IDE > REST APIs
- Click the Doc icon for the API to view information you will need later to connect to this Endpoint
- Click + Business Object from Business Objects panel and select a Table to set a value for the Endpoint. For example: Category (Source)
- Click the checkmark icon to save the record
- Click the Structure icon to control which fields are available in the API
- Uncheck Include By Default and/or delete field(s) entirely to limit access via API connection
- From the Tables panel, click the Open Record icon to expand and view Resource Details pop-up
- The Name of the resource will need to be appended to the Base URL and Endpoint from the API Document to retrieve this information
- Click Edit to set Default Get Limit or Get Max Limit, these values control the amount of records returned on GET calls to your API endpoint
Last, you will configure API Keys for specific Users:
- Navigate to IDE > User Management
- Select an existing User or Create a New User to use for the API call
- The User must be configured with the Login Type Interactive
- The User does not need to have Local Authentication
- On the selected/created User record click the Keys icon
- Click Create and select the API Key created in the first step as the Provider
- Click Save
- The generated Key is what the User will use to access the published API
Optionally, you can set up roles/security groups for the Object(s) being accessed as Endpoints.
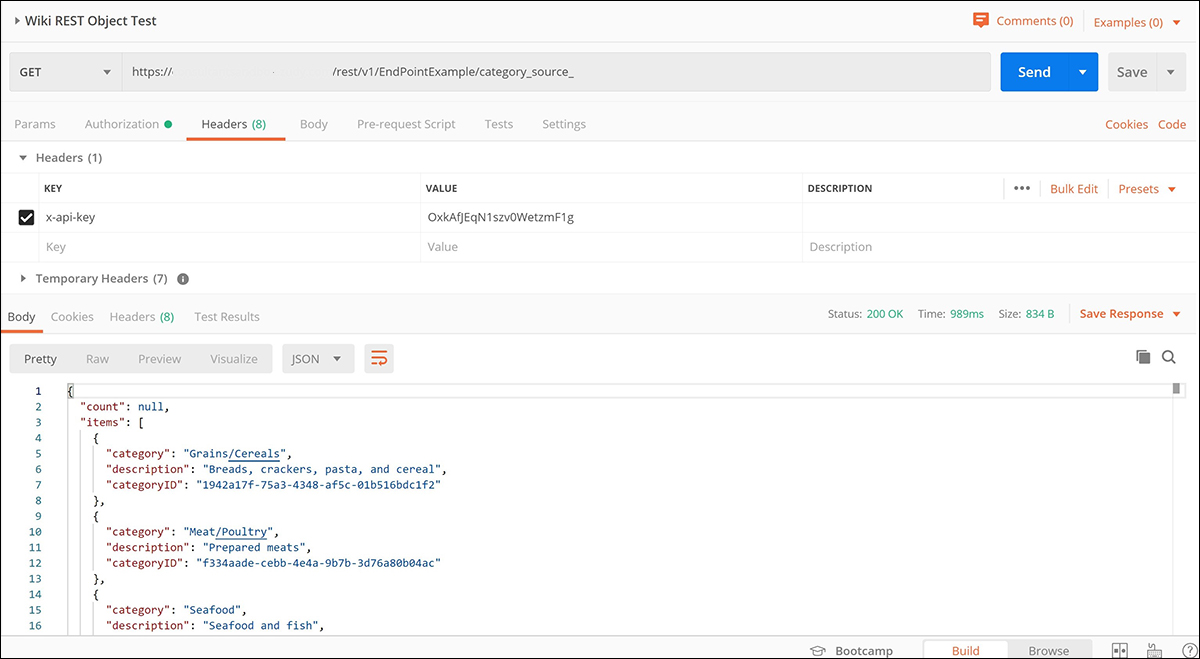
To test or setup the use of your new API endpoints, use the API Key from the previous step, the Base URL and Endpoint information from the API document, and the Name from the resource details.
