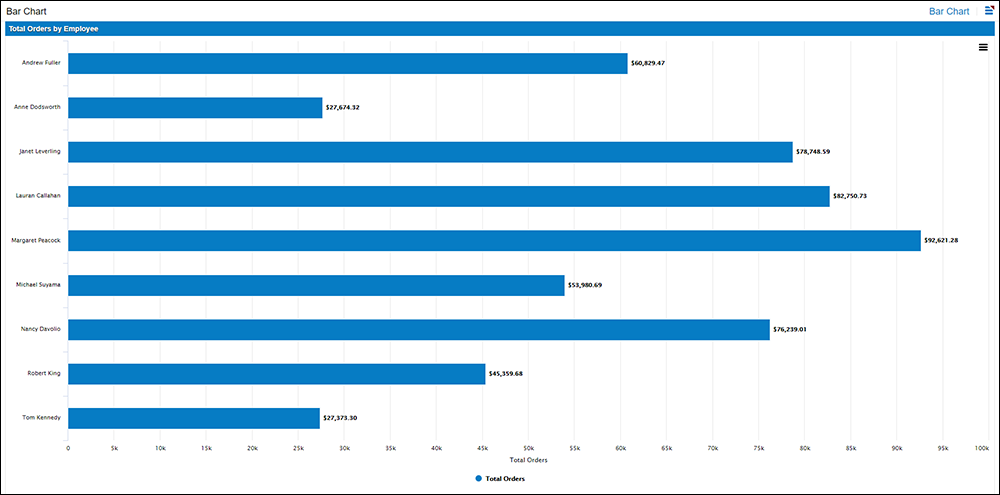
How to create a basic bar chart in Jitterbit App Builder
In this example we will use the Northwinds database to create a Bar chart that displays the total orders for each employee. In order for a Bar Chart to display properly it requires at least 2 Controls be defined, one for the Category and one for the Value. Additional Controls may be defined if you are specifying Color, Sort, Flag, or JSON Options Object.
How to configure
- Create a Business Object that targets the OrderDetail table
- Add the Order table, and join it with the OrderDetail table using an Inner Join, using OrderID as the Join Columns
- Add the EmployeeID column from the Order table
- Add an Expression using the Sum function to find the total Orders for each employee. For example:
SUM(O.Quantity*O.UnitPrice*(1-O.Discount)) - Set the Logical Data Type to Currency
- Create a Page with a Chart Panel Type
- Select the defined Business Object containing the underlying data
- Click Next, review and click Finish
- Confirm the Chart Type is set to Bar
- Confirm the Category Control Type has been added using the EmployeeID column
- Confirm the Value Control Type has been added using using the Sum Expression value created in step 4

Accelerator shortcut
There is an Accelerator button named Publish to UI Layer available in the Business Logic Layer to help expedite adding Chart pages to apps. When you create a Chart type Rule, and specify the Value and Category, the Publish to UI Layer button will generate a Chart page that resides under a Reports navigation menu.