Configure Google Fonts for use in Jitterbit App Builder
This guide will step you through how to use Google Fonts in an App Builder application. If you are looking to specify different weights for the Google Fonts your application will use, there may be additional configuration required to achieve the desired result. To leverage different Google Font weights from App Builder you need to update the import code to include a "0," before each weight specified in the Goolge API syntax when configuring the Site Widget Parameters.
There are two main areas that need to be configured, the first involves configuring a Site Widget. After that is configured, you'll need to modify your app Theme to leverage the font selected through the Application Layer UI/UX.
Configure a site widget to connect to Google Fonts
- Navigate to the IDE > Additional Settings
- Click on Site Widgets
- Click + Widget Registration under Site Widgets
- Click the drop down menu for the Widget column, and select Web Font Loader
- Click the checkmark icon to save
- Click + Parameter under Site Widget Parameters
- Select WebFontName as the Parameter value
-
Enter the Google Font API information for the named Google Font you wish to use in the Value field. This step is where you modify the provided Google API syntax to include a
0,before the specified weights. For example:- Google Font syntax:
Lato:wght@100;300;400;700&display=swap" - Modified syntax to enter into Value field:
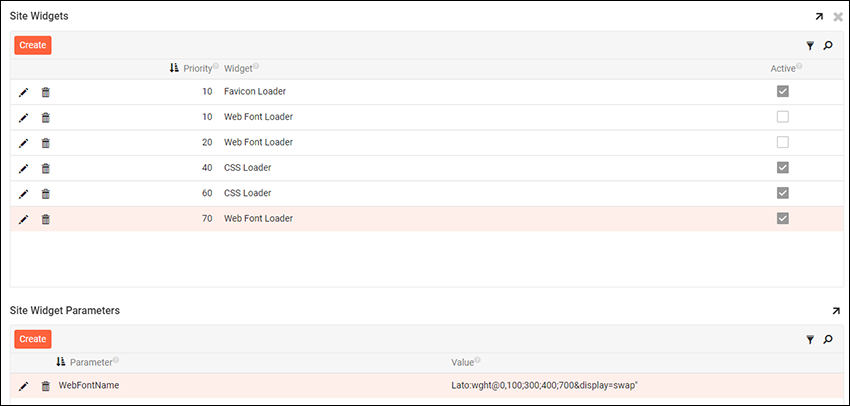
Lato:wght@0,100;300;400;700&display=swap"
- Google Font syntax:
-
Click Save

Example Web Font Loader widget to specify Google Font
Modify your theme to specify font value
- Navigate to App Workbench > Look & Feel
- Locate your app Theme Collection and click into the corresponding app Theme
- Click the Theme's Open Record icon to expand the Theme information
- Select the Page Component and click + Style under Styles
- Select the Container Page as the Area
- Select Font as the Style Type
- Select All States as the State
- Specify the Value 1 Font Family information to provide information on the Google font you wish to use. For example: Lato, sans-serif
- Enter a Technical Help description
- Click + Style under Styles
- Select the Container Site as the Area
- Select Font as the Style Type
- Specify the Value 1 Font Family to match step 8. For example: Lato, sans-serif
- Click Save

Example Styles configured to specify Google Font type
After completing the steps described above check to ensure that your Theme is associated with your App. Assuming that it is, you can now navigate to view your application, refresh the web browser, and see the new font.