Generate Recipe and Edit Recipe pages in Jitterbit Citizen Integrator
Introduction
Citizen Integrator, accessible via the Harmony portal, is Jitterbit's click-and-run web application for non-technical users to quickly customize and deploy Design Studio integrations using pre-built Citizen Integrator recipes.
Within Citizen Integrator, you can upload a Design Studio project to generate a Citizen Integrator recipe and then configure the recipe steps on the Generate Recipe page. For existing recipes, the Edit Recipe page also makes those steps available for editing.
Note
Citizen Integrator recipes can be generated from or imported into Design Studio only. For Integration Studio, instead use Integration Studio integration recipes or Integration Studio process templates, accessed through Jitterbit Marketplace.
Warning
Only users who are members of a role with Admin permission within the selected organization are able to generate and edit Citizen Integrator recipes within the organization.
Access the generate recipe page
The option to generate a Citizen Integrator recipe is available from the Citizen Integrator - My recipes page. After recipe generation, you will be brought to the Generate Recipe page to further configure your recipe steps.
From the My Recipes page, under the My Recipes section, the option to generate a recipe is available only for users with Admin permissions within the selected organization.
Click the JPK icon  to open a window where you can upload a Design Studio Jitterpak that will generate a recipe.
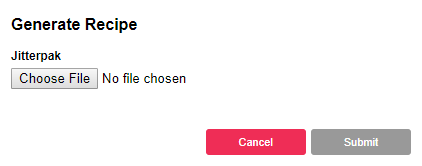
In the Generate Recipe window, use the Choose File button to browse to the Jitterpak (.JPK) you would like to upload.
Then click Submit to generate your new recipe and open the Generate Recipe page where you can further configure your recipe steps (see Generate or edit recipe steps below).
Access the edit recipe page
The option to edit a Citizen Integrator recipe is available from the Citizen Integrator - My recipes page.
From the My Recipes page, under the My Recipes section, the option to edit a recipe will become available once you have selected only one recipe within the table, and will be available only for users with Admin permissions within the selected organization.
To select a recipe, click anywhere on the row, or check the box to the left of the recipe.

Then click the edit icon  to open the Edit Recipe page where you can update your recipe steps (see Generate or edit recipe steps below).
Generate or edit recipe steps
Once you have accessed the Generate Recipe or Edit Recipe pages as described above, you can configure the recipe steps through the Citizen Integrator user interface as follows.
Recipe name and description
In the first section, enter basic name and description for your recipe.

- Recipe Name: Provide or modify the name of your recipe.
- Recipe Description: Provide or modify the description of your recipe.
Recipe project variables
The next section is used to add any project variables to the recipe that you want users to be able to set values for when using the recipe. For more information see Variables.
Remove or restore project variables
On the left side, any existing project variables will be listed.
- Generate Recipe: Upon generating a recipe, all project variables from the Jitterpak file are displayed. If no project variables are included in the Jitterpak, none will be displayed.
- Edit Recipe: When editing a recipe, existing project variables from the recipe JSON metadata or previously generated recipe are displayed.
To remove a project variable from the recipe, click the trash icon  next to the project variable name on the left.
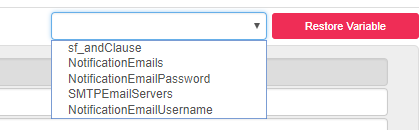
To restore a project variable that you have previously removed, use the dropdown on the top right to select a previously removed variable and click the button Restore Variable.
Tip
You are not able to add new project variables that do not already exist within the Jitterpak for the recipe. If you want to add a new project variable, then you must first create it within the Jitterpak in Design Studio.
Configure project variables
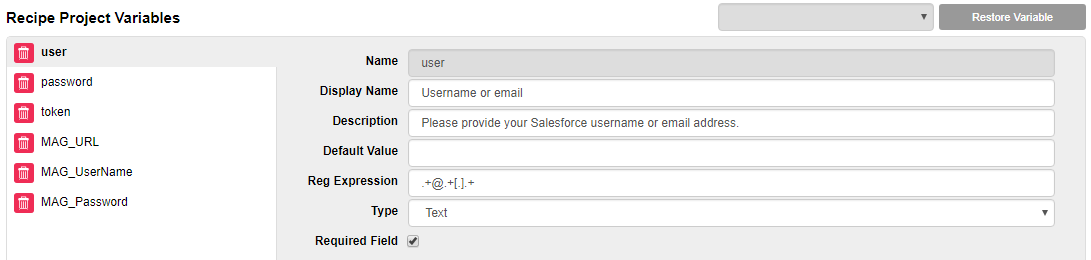
On the right side, the fields for the selected variable are available to be configured.
-
Name: The name of your existing project variable is not editable.
-
Display Name: This field can be used if you want a different name to display in the Citizen Integrator interface.
-
Description: This field can be used to insert text below the field, for example to provide instruction on what users should enter.
-
Value: This field can be used if you want to assign a default value to your project variable. This can be used to provide a default value with other optional values for the project variable. For example, a default value of "Production" with other options for "Development" or "QA." These options are provided under the Type field.
-
Reg Expression: This field can be used to provide a regular expression (string) that the project variable value must match when the recipe is configured before the Test Connection or Run Operation actions can be used. For example:
".+@.+[.].+". -
Type: This field can be used to define the type of value that the user can provide. Use the dropdown to select from text, password, checkbox, dropdown, or text area. For checkbox and dropdown, additional options become available to configure. Enter a Label and Value for each selection or use the trash icon to remove a row.

-
Required Field: If this box is checked, the project variable field will be required to be completed when the recipe is configured before the Test Connection or Run Operation actions can be used.
Recipe steps
The next section is used to set up the steps that users will need to go through in order to configure the Citizen Integrator recipe.
Add or remove steps
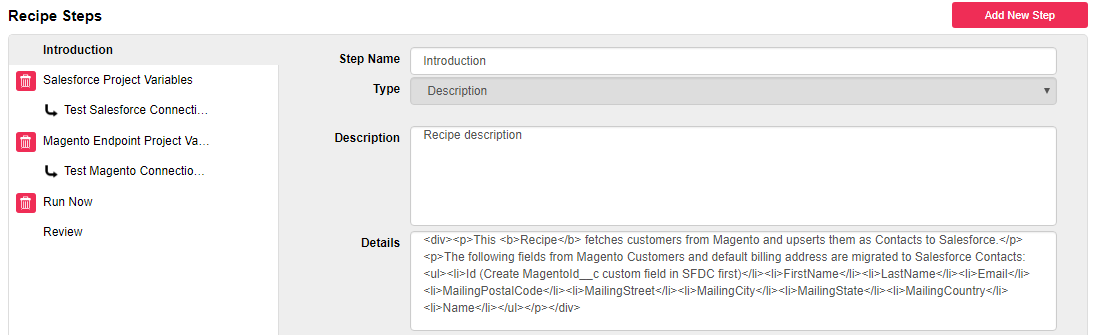
On the left side, any existing recipe steps will be listed.
- Generate Recipe: Upon generating a recipe, Introduction and Review steps are added by default.
- Edit Recipe: When editing a recipe, existing steps from the recipe JSON metadata or previously generated recipe are displayed.
To remove a step from the recipe, click the trash icon next to the step name on the left. The Introduction and Review steps, as well as any auto-generated steps, cannot be removed.
To add a new step click the Add New Step button on the top right. A new step will be created before the Review step.
Configure steps
On the right side, the fields for the selected step are available to be configured. The following fields are common for all step types:
- Step Name: Enter a name for the step to appear within the recipe (e.g. Introduction or Salesforce Authentication).
- Type: Select from one of the following step types:
- Description: Used to provide information about the recipe and/or its components.
- Step Configuration: Used to define one or more project variables to verify connectivity for a specific endpoint.
- Run Operation: Used to run an operation before the recipe gets deployed.
- API Binding: Used when there is a need to externalize operations as APIs.
- Description: Enter a description of the step to appear within the recipe.
Each step type and any fields that become available when the step is selected are covered in detail below.
Note
Additional information and documentation on all possible parts of the JSON metadata file is provided in Creating New Recipes.
- Description: This step type is used to provide information about the recipe and/or its components.
- Details: Enter any HTML here that you would like to be rendered within this step.
-
Step Configuration: This step type is usually used for testing an endpoint connection.
- Required: Check this box if you want to require this step to be completed before deploying the recipe (e.g. to test or validate that an endpoint connection is successful).
- Project Variable(s): Use the dropdown to add project variables to the step, or use the trash icon to remove them. Project variables are configured in the previous section.
-
Action: Check this box if you want to include an action within the step (e.g. test the connection using provided credentials). When checked, the following additional fields become available:
- Button Name: Enter a name to appear on the action button (e.g. Test Connection).
- Step Action: Use the dropdown to select an action. All existing endpoints from the Jitterpak file will be listed in the dropdown.
After selecting an action, an action step will automatically be added under the current step. You will then need to click on the auto-generated step in the list of steps on the left to configure the step details. More information is provided under the auto-generated step type below.
-
Run Operation: This step type is used to run an operation from the Jitterpak file.
- Required: Check this box if you want to require this step to be completed before deploying the recipe.
- Operation Path: All existing operations from the Jitterpak file will be listed here. Select the operation that you want to run on this stop.
- Operation Description: Enter a description about the selected operation to provide information in the recipe about what the operation does.
- API Binding: This step type is used when there is a need to externalize operations as APIs. The fields should contain the needed information for the API. See API Manager for more information.
-
Auto-Generated Step: This step type is automatically created when you choose the Step Configuration type and check the Action checkbox with a selected Step Action.
-
Run Operation: Refer to the Run Operation step above for information about configurable fields.
-
Test Connections: All needed variables are shown based on the selected action. You can either hard-code a default value, or use project variables set up in the previous section.
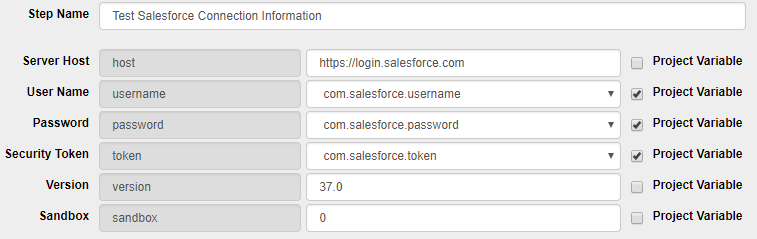
- Default Value: Type a default value into the text box to hard-code the value of the variable. Users will not be able to change this value when deploying a recipe.
- Project Variable: Check the checkbox and use the dropdown to select a project variable to use that you have set up in the previous section.
-
Post-configuration
Once you have configured your generated or edited Citizen Integrator recipe as described above, use the buttons on the bottom of the page when ready.

-
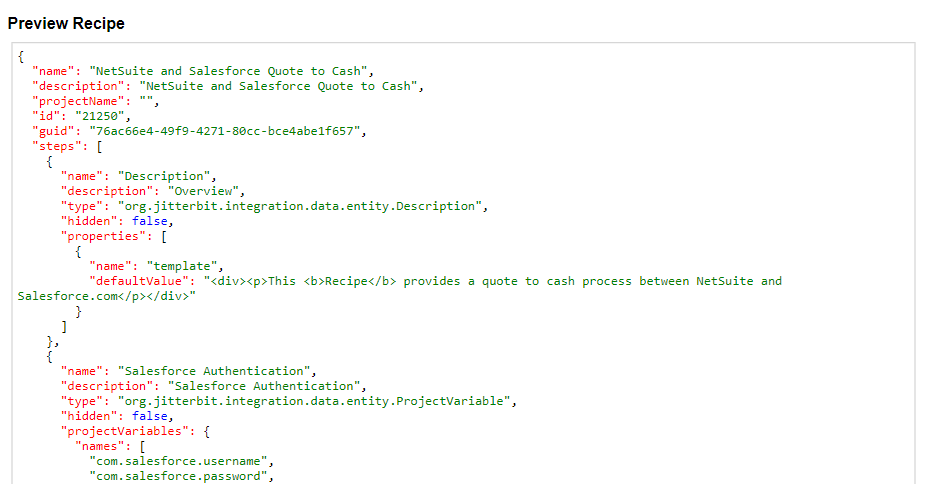
Preview: Use this button to see a preview of the generated JSON file to be used for your recipe.
-
Save to File: Use this button to download the generated JSON file.
-
Cancel: Use this button to close the page without saving changes.
-
Upload / Update: These buttons will validate the recipe and either upload it into selected organization (on the Generate Recipe page) or update the recipe (on the Edit Recipe page).