Send changed Salesforce object records to a database via Salesforce workflow rule and API Manager
Introduction
This integration design pattern sets up a Salesforce workflow rule that sends an outbound message to an API Manager API when an object changes (in this example, the Account object). A Cloud Studio project processes the Salesforce outbound message, maps the object's data, and saves it to a database.
Note
Configure an outbound Salesforce message with an API Manager API is a similar integration design pattern that uses Design Studio. Send changed Salesforce object records to a database via Salesforce flow and API Manager is an identical integration pattern that uses a Salesforce Flow instead of a Workflow Rule.
To set up this pattern, follow these sections in order:
- Part 1: In Salesforce, set up a workflow rule to send an outbound message when an object changes, and download the WSDL file that defines the message.
- Part 2: In Cloud Studio, set up an operation chain to receive the Salesforce outbound message, and store the mapped values in a database.
- Part 3: In API Manager, set up an API as an endpoint for Salesforce.
- Part 4: Return to Salesforce to update the outbound message's endpoint URL, activate the outbound message, then test the completed integration design pattern.
Part 1: Salesforce workflow rule and WSDL file
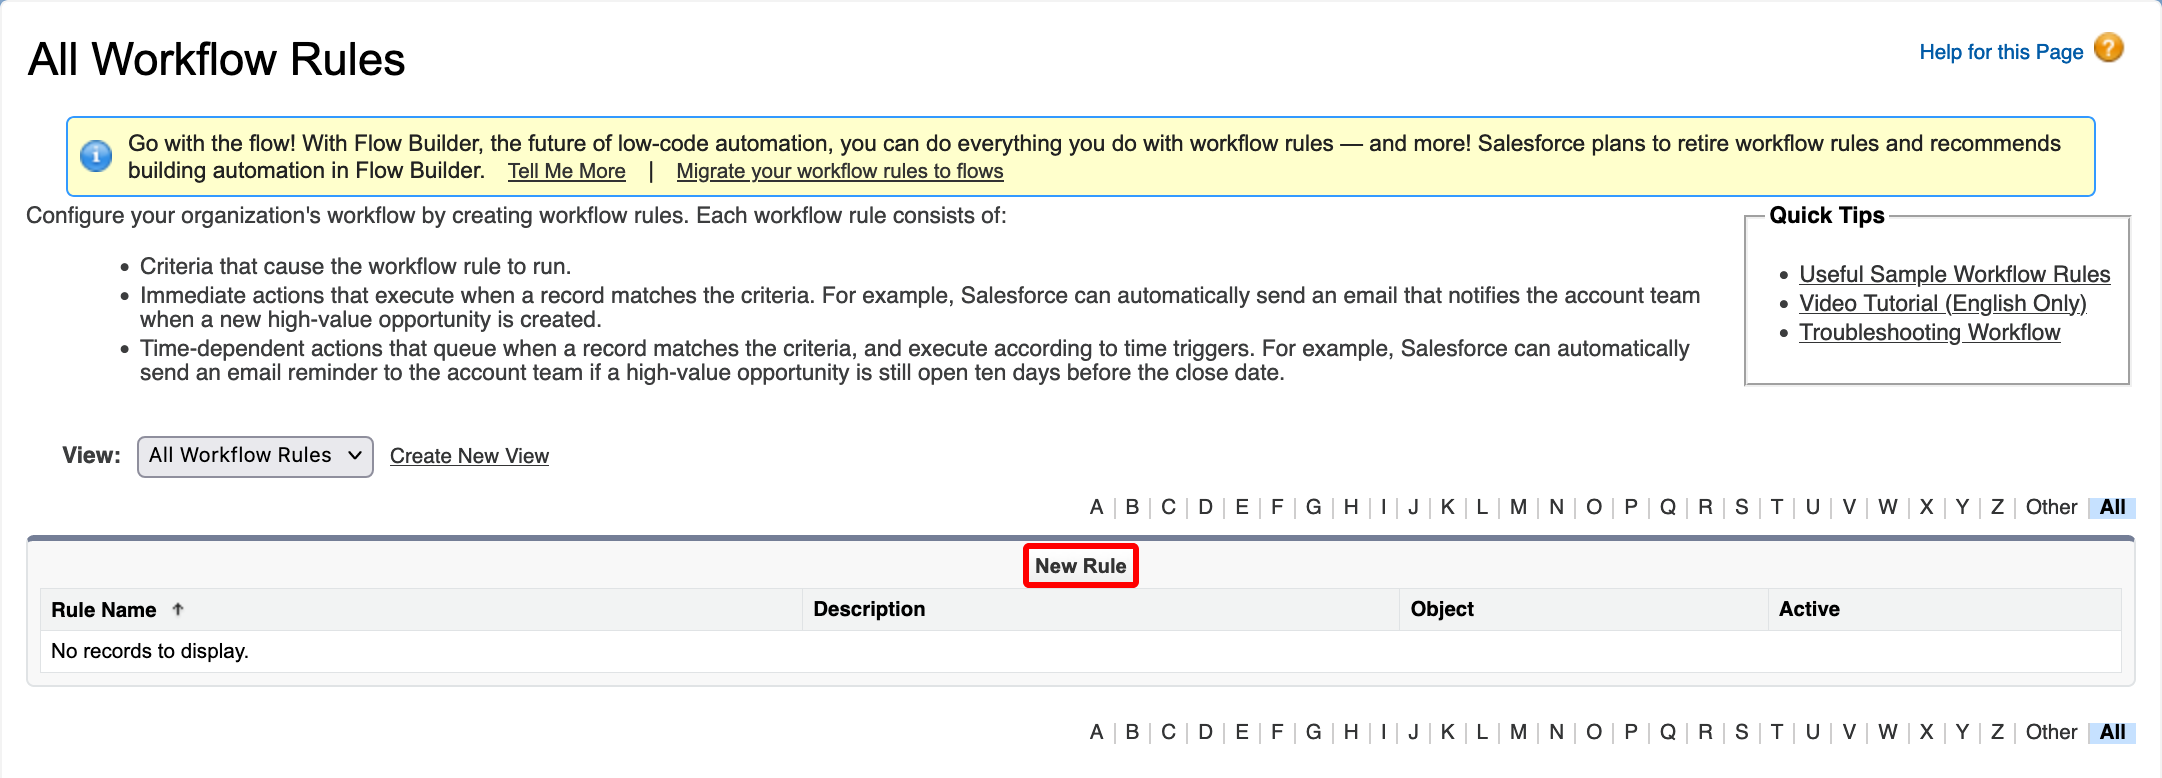
- In Salesforce, select Setup > Platform Tools > Process Automation > Workflow Rules.
-
On the Workflow Rules page, click the New Rule button (highlighted in the image below). If a Try It in Flow Builder dialog opens, click Continue with Workflow Rules.
-
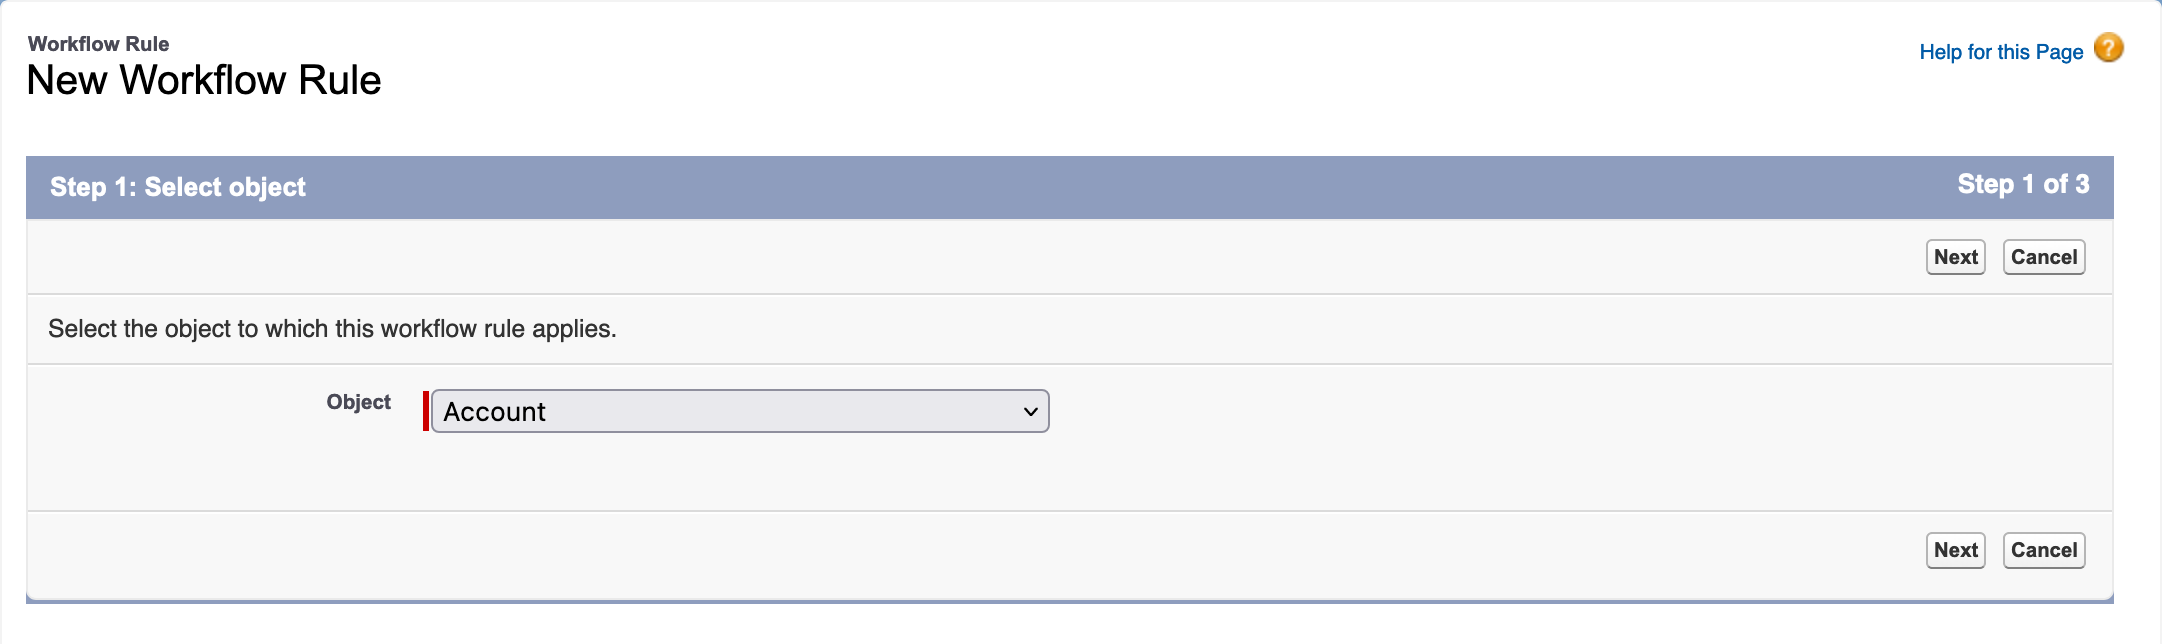
On the New Workflow Rule page, click the Object menu, select Account, then click Next.
-
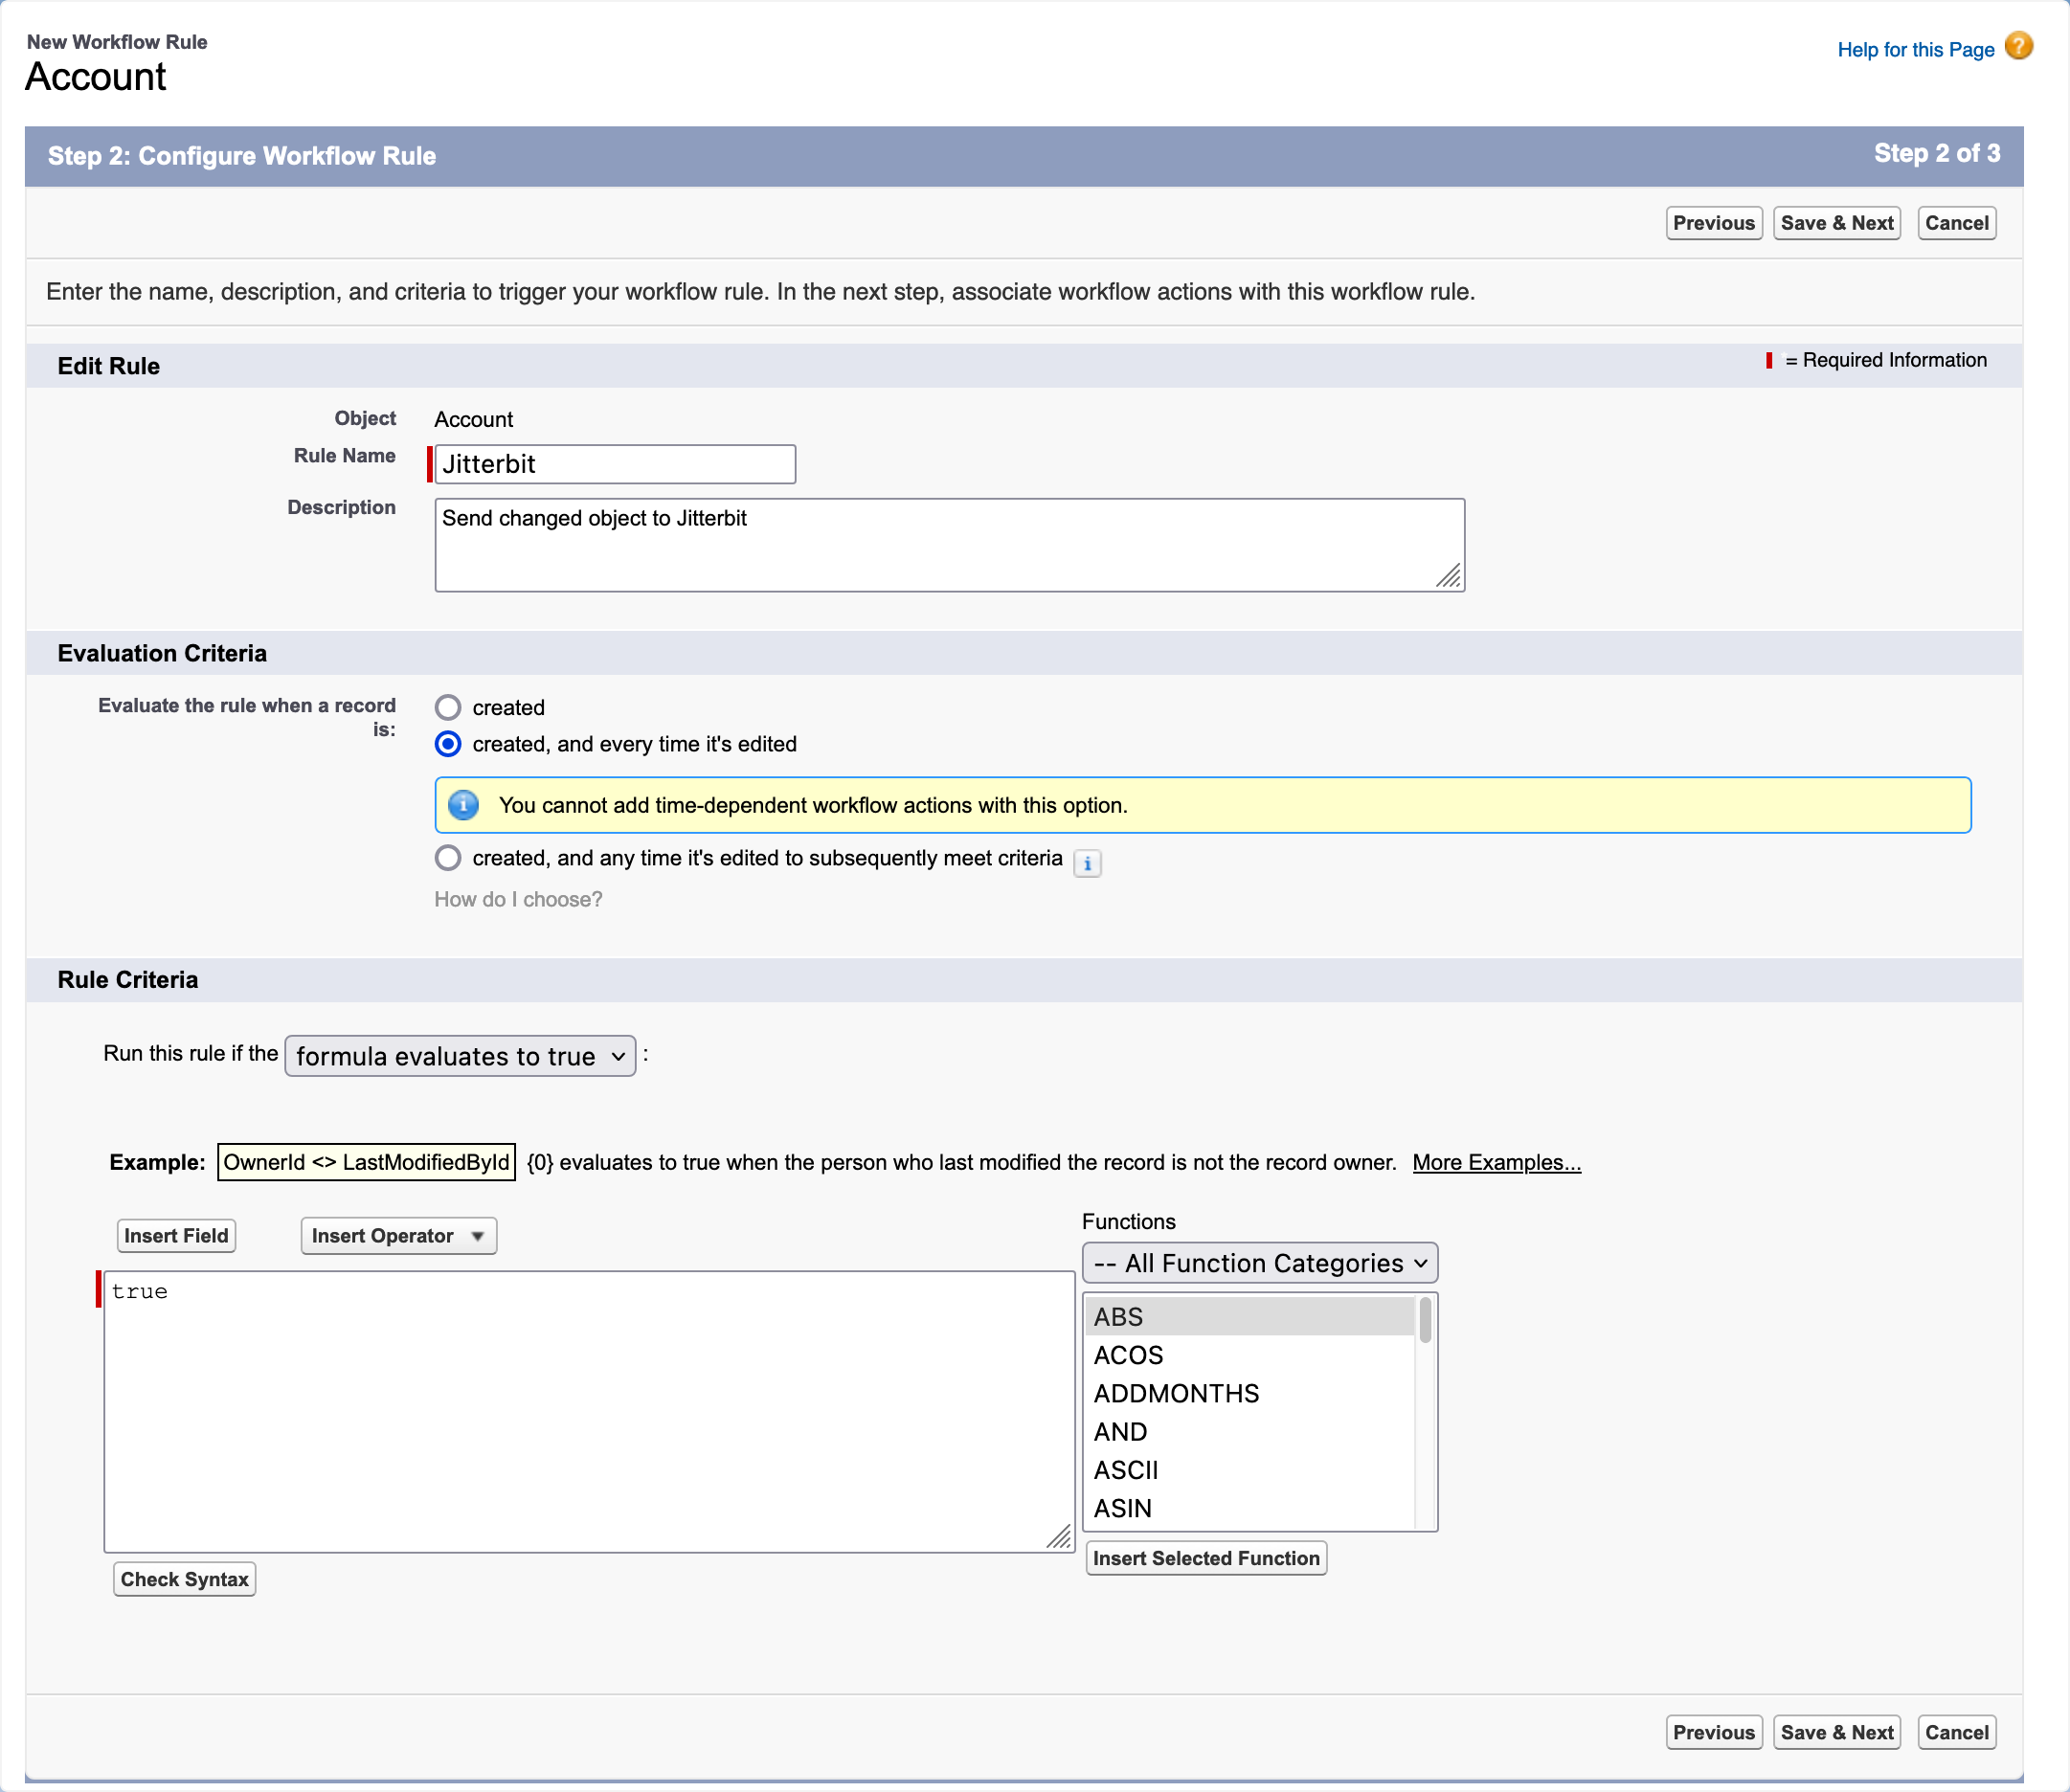
On the Account page, enter values for the following, then click Save & Next:
- Rule Name: Your choice of name.
- Description: (Optional) A description for this rule.
- Evaluation Criteria: Created, and Every Time It's Edited.
- Rule Criteria: Click Run This Rule If the, then select Formula Evaluates to True.
- In the formula field, enter true.
-
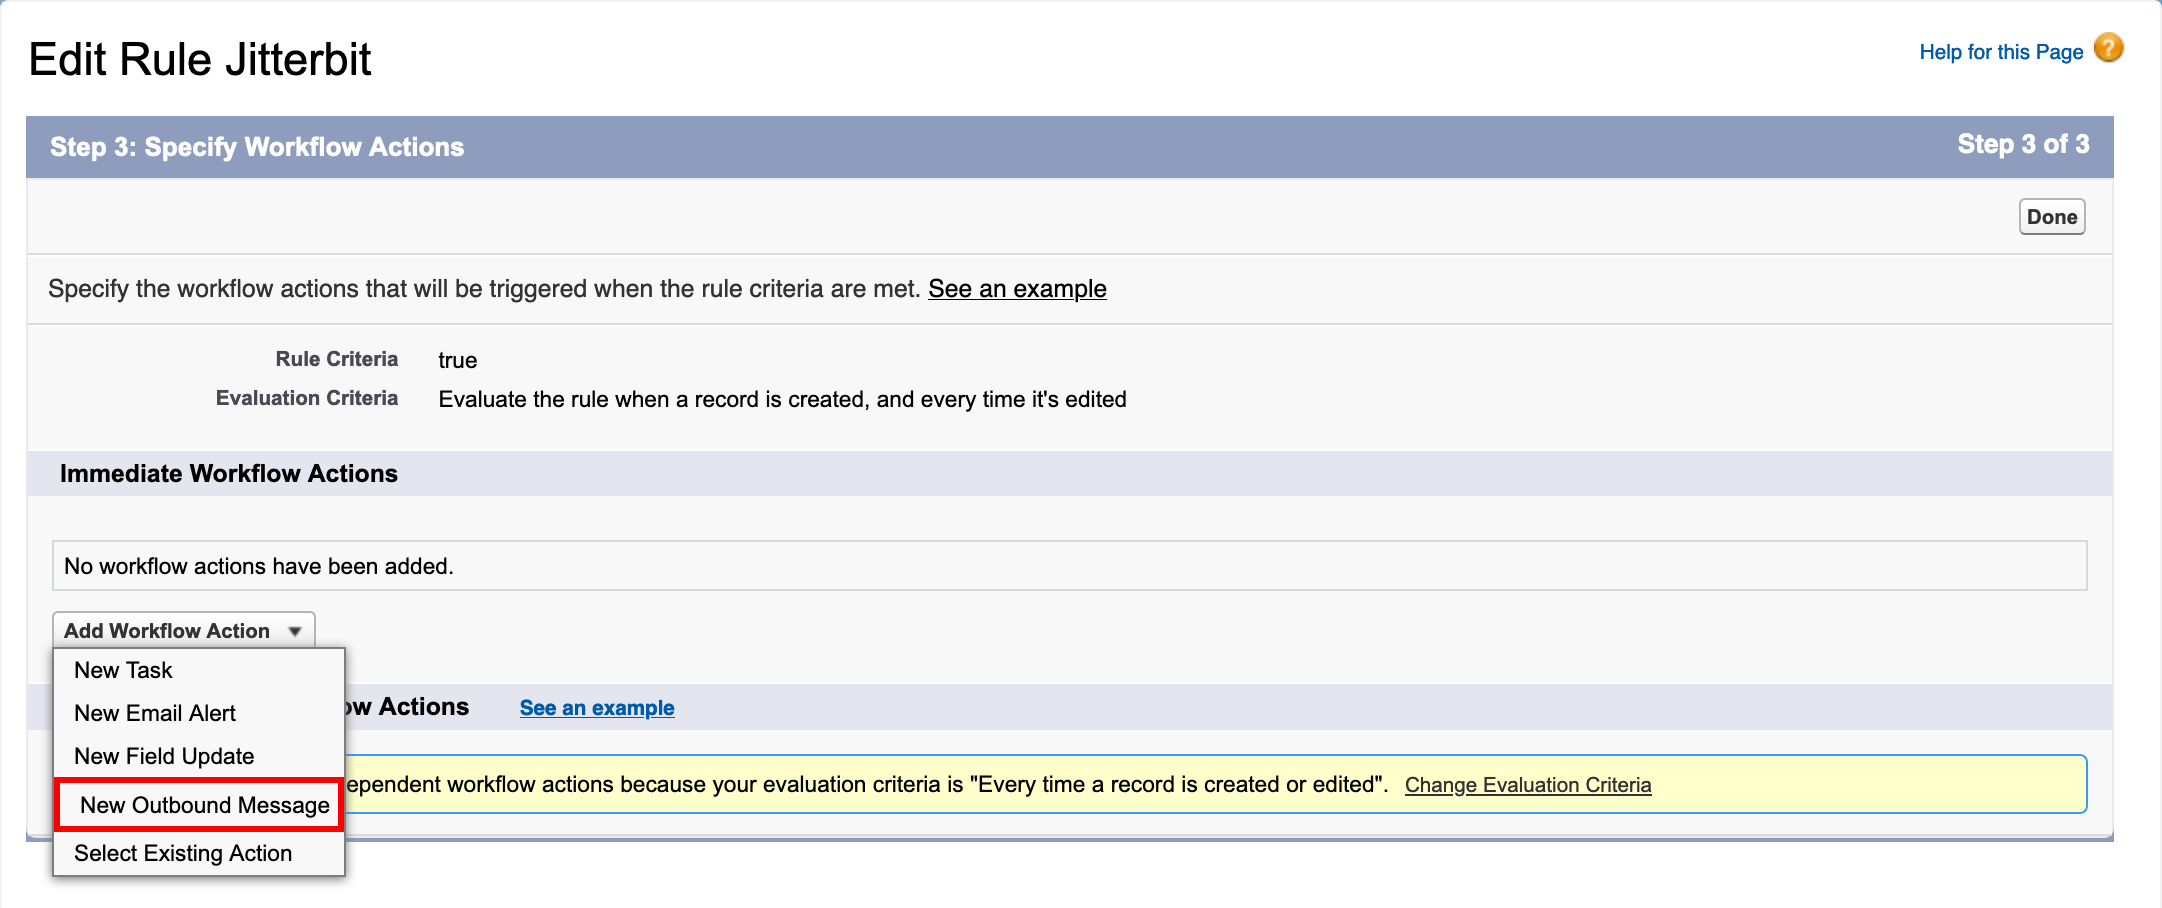
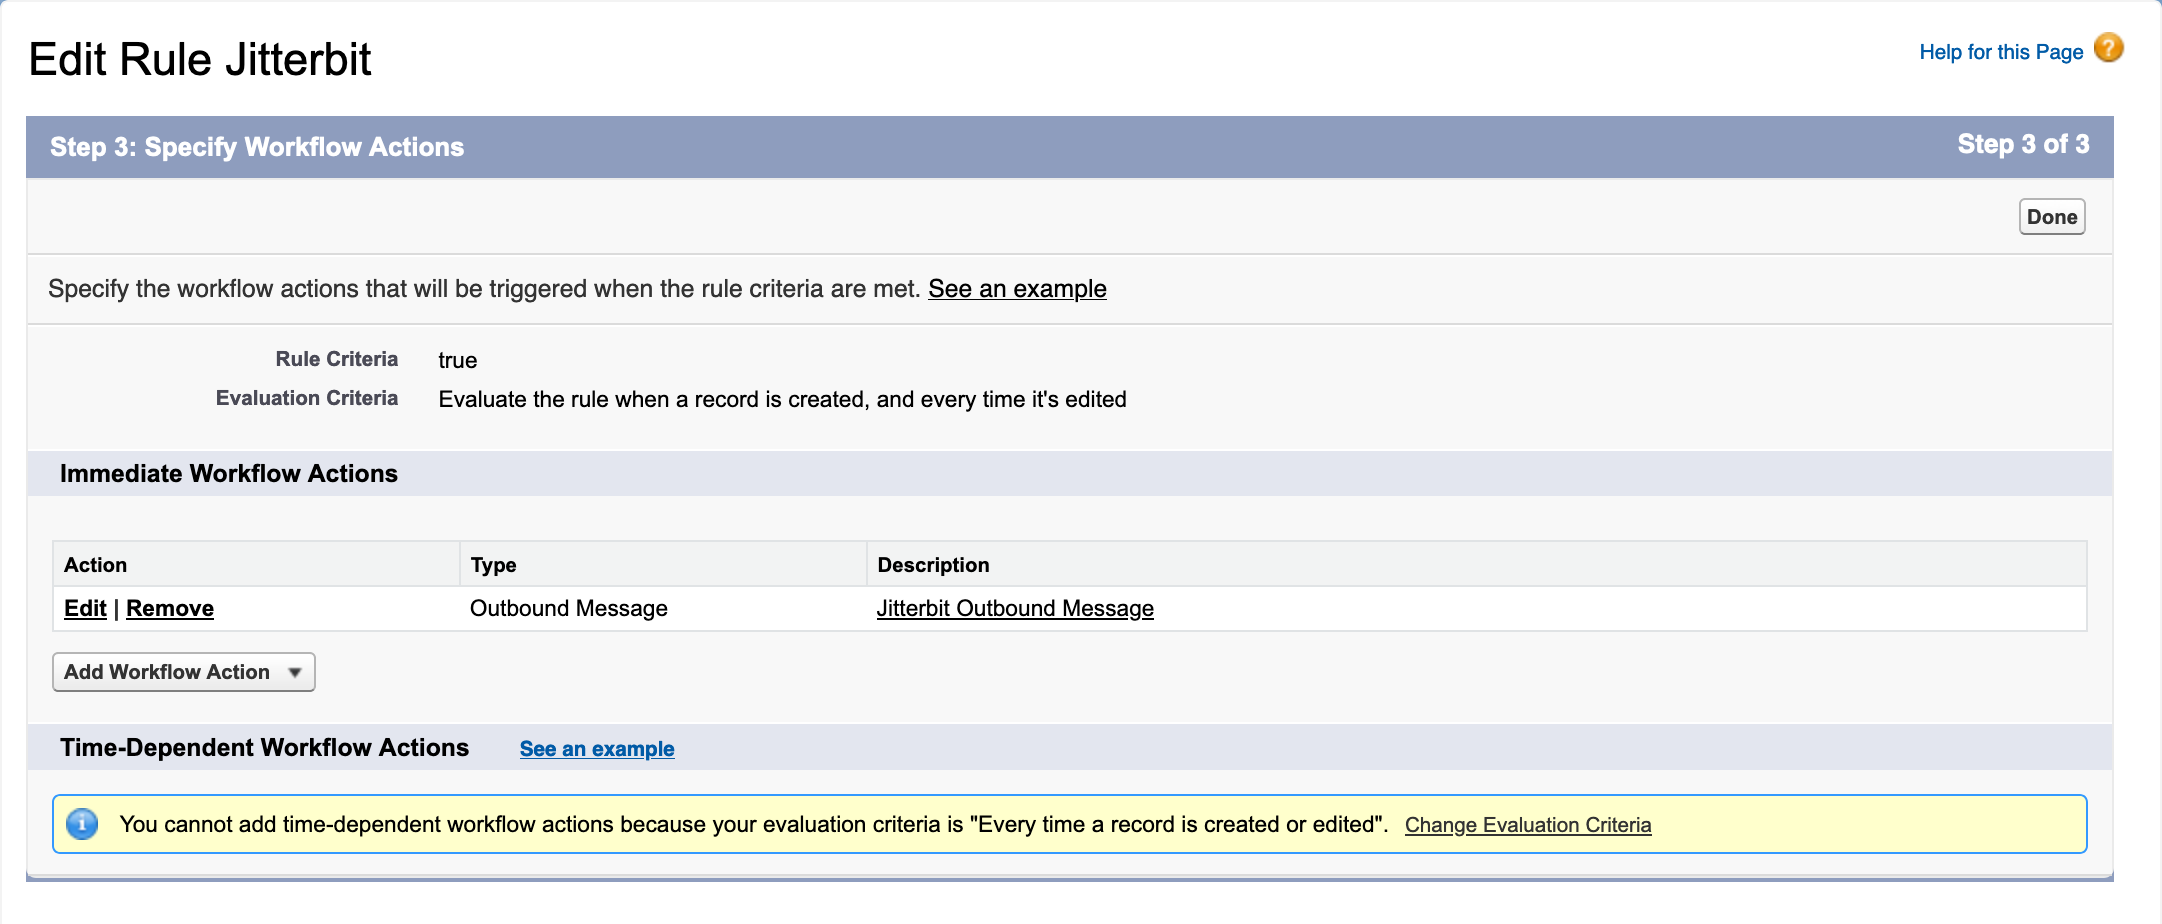
On the Edit Rule page, click Add Workflow Action, then select New Outbound Message (highlighted in the image below).
-
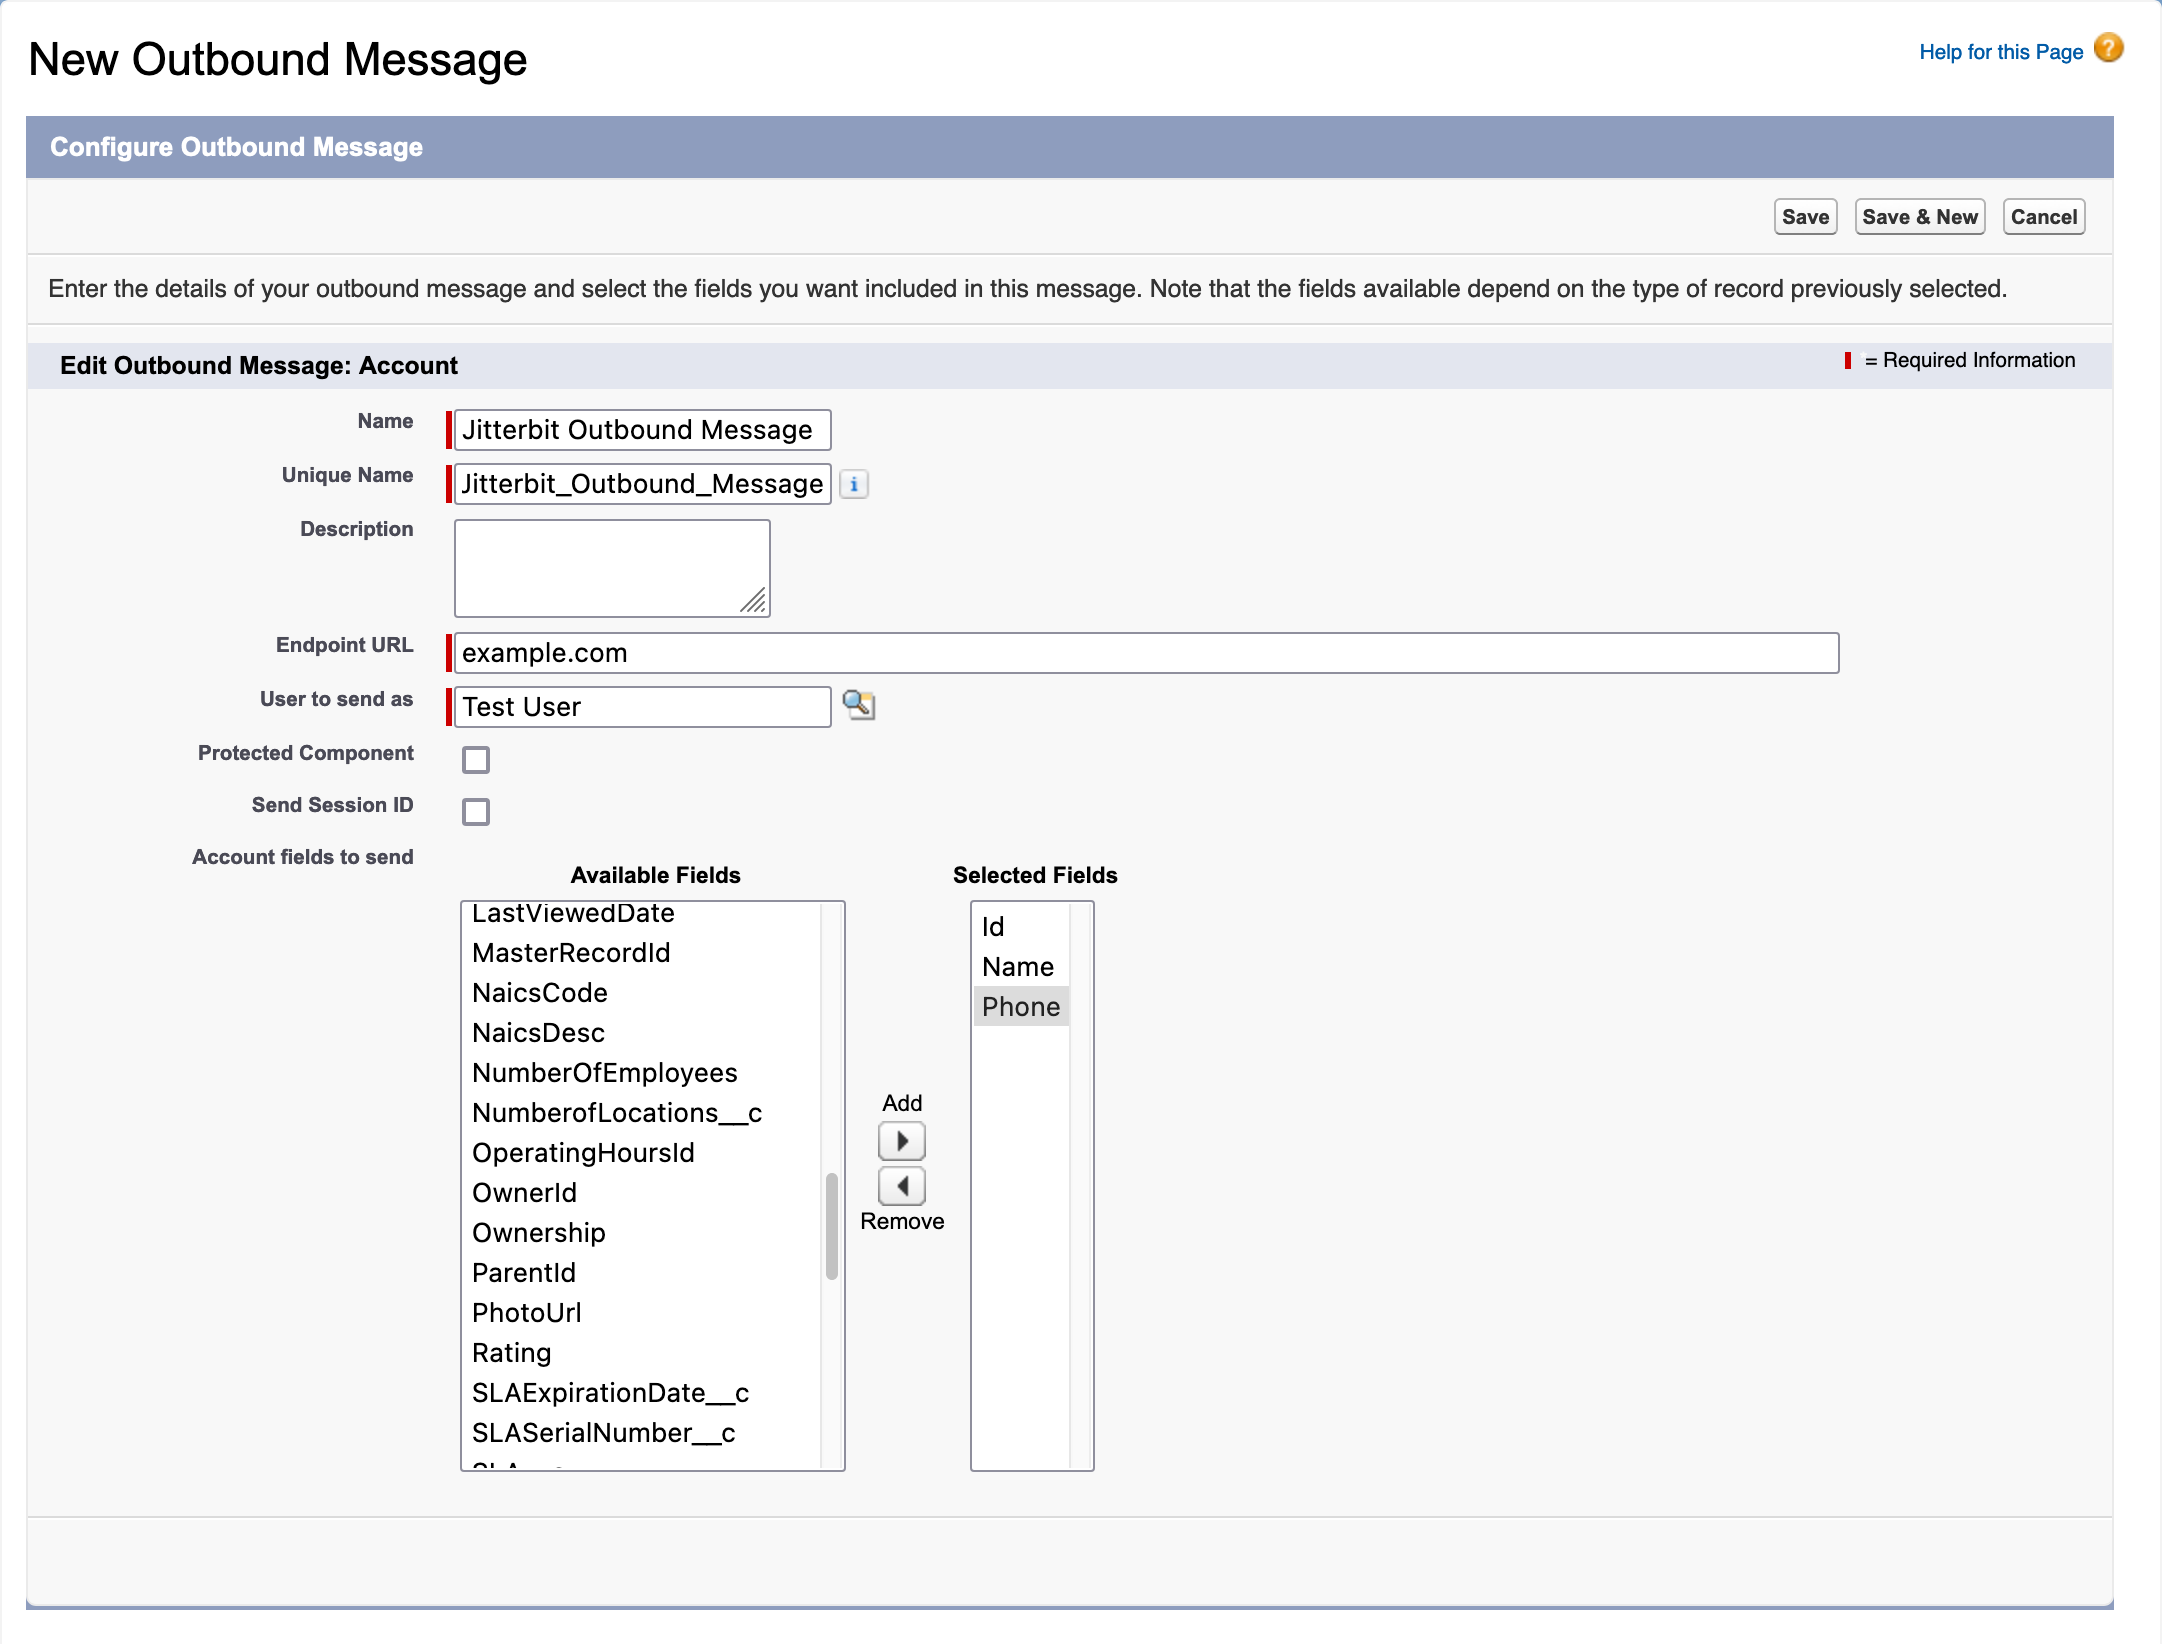
On the New Outbound Message page, enter values for the following, then click Save:
- Name: Your choice of name.
- Unique Name: This name is automatically generated based on the value for Name and the field's naming rules.
- Description: (Optional) A description for this outbound message.
- Endpoint URL: example.com. This temporary URL is updated later.
- User to Send As: Enter the user that sends the outbound message. The value defaults to your Salesforce username.
- Protected Component: Not selected.
- Send Session ID: Not selected.
- Account Fields to Send: Select the object fields to send. In this example, only Name and Phone are selected. The Id field is selected automatically, because it is the key field for the object.
-
On the Edit Rule page, click Done.
-
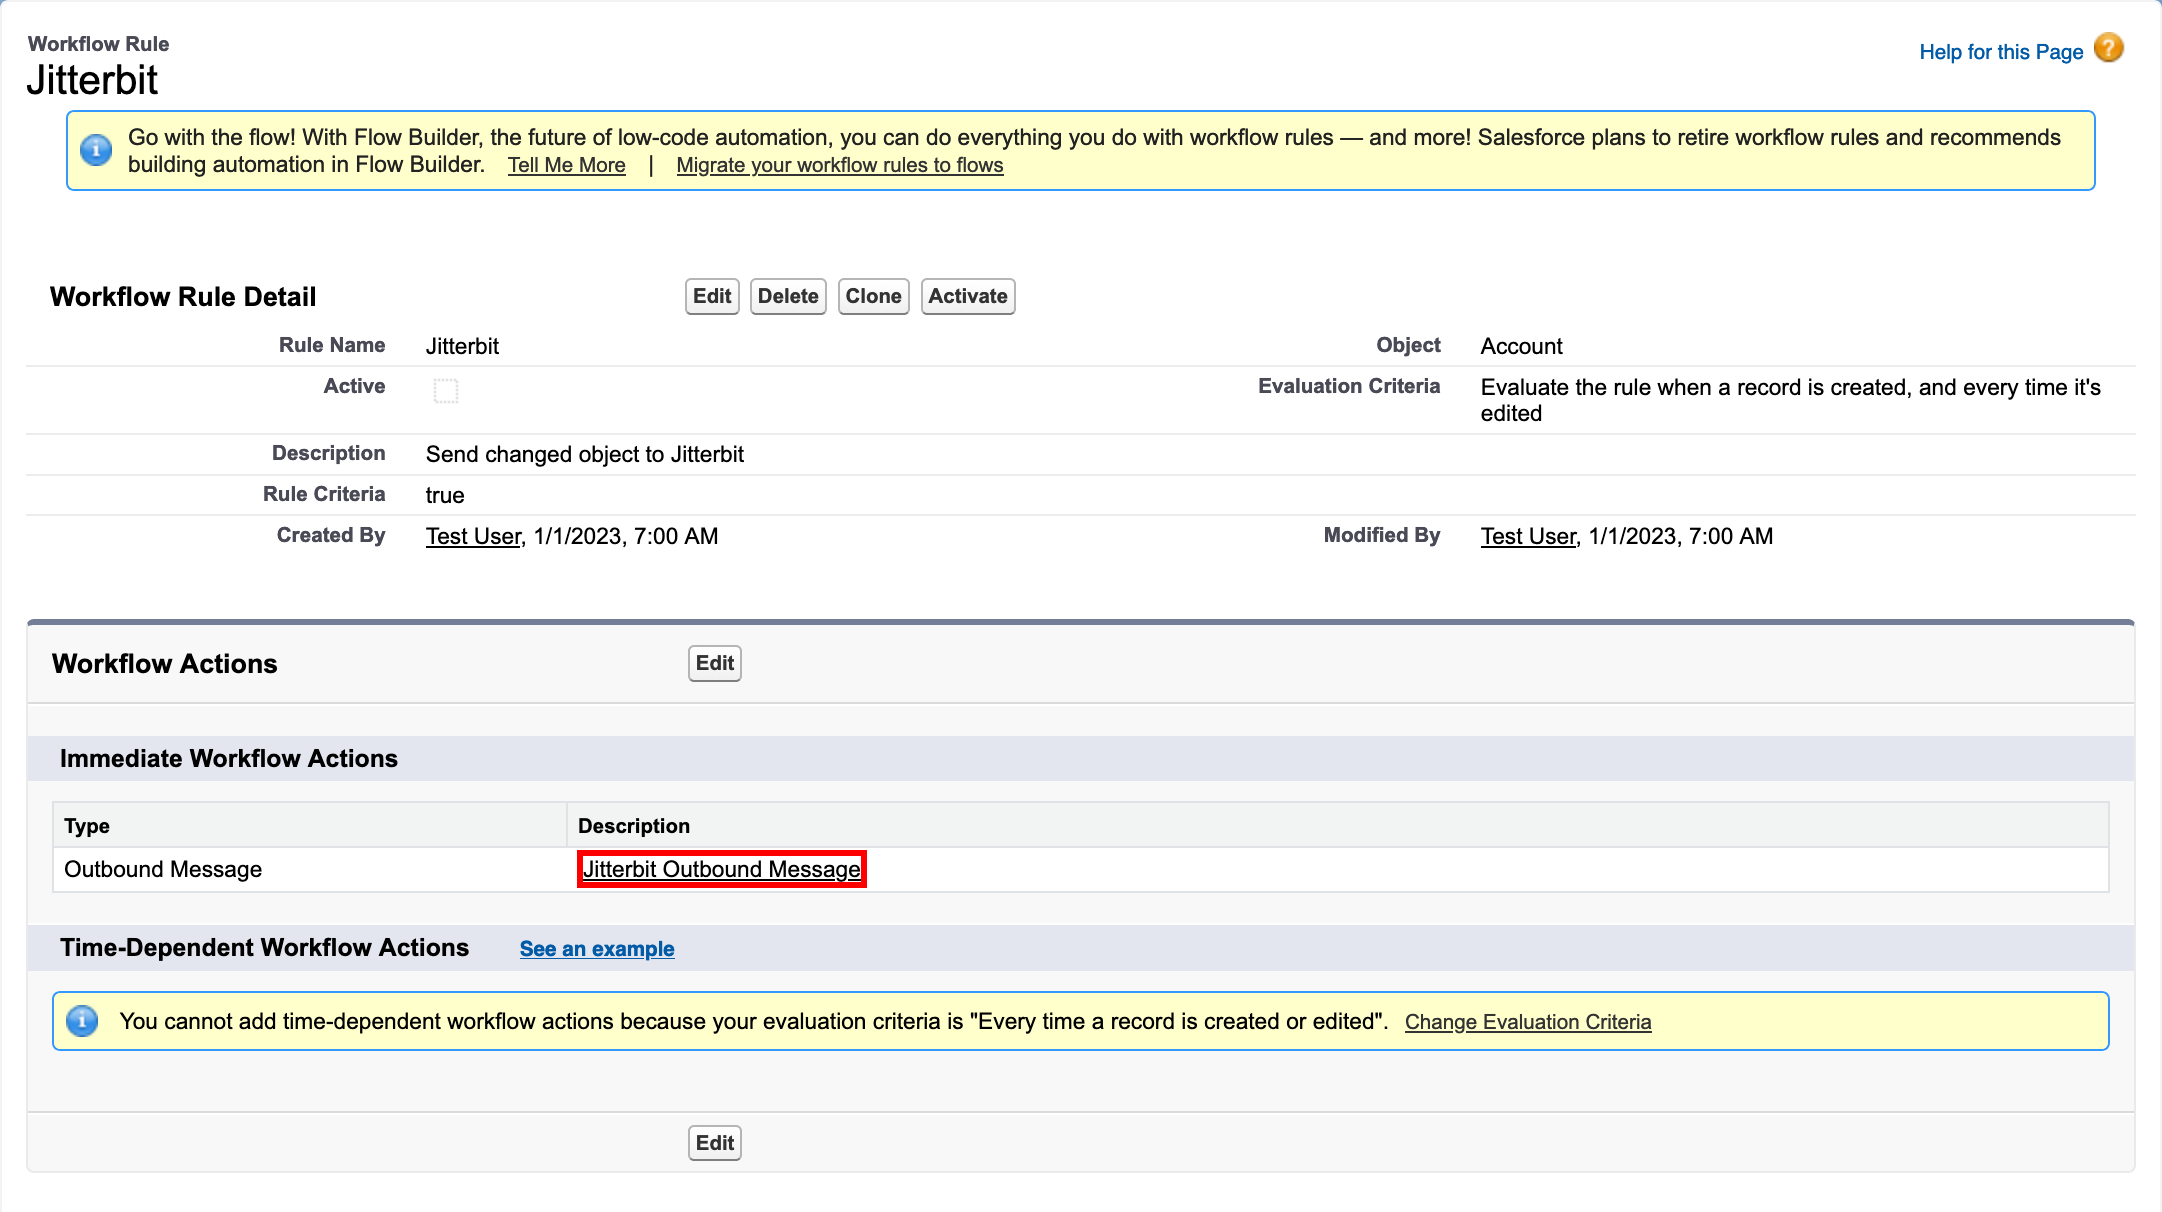
On the Workflow Rule page, in the Immediate Workflow Actions section, click the description link for the outbound message (highlighted in the image below).
-
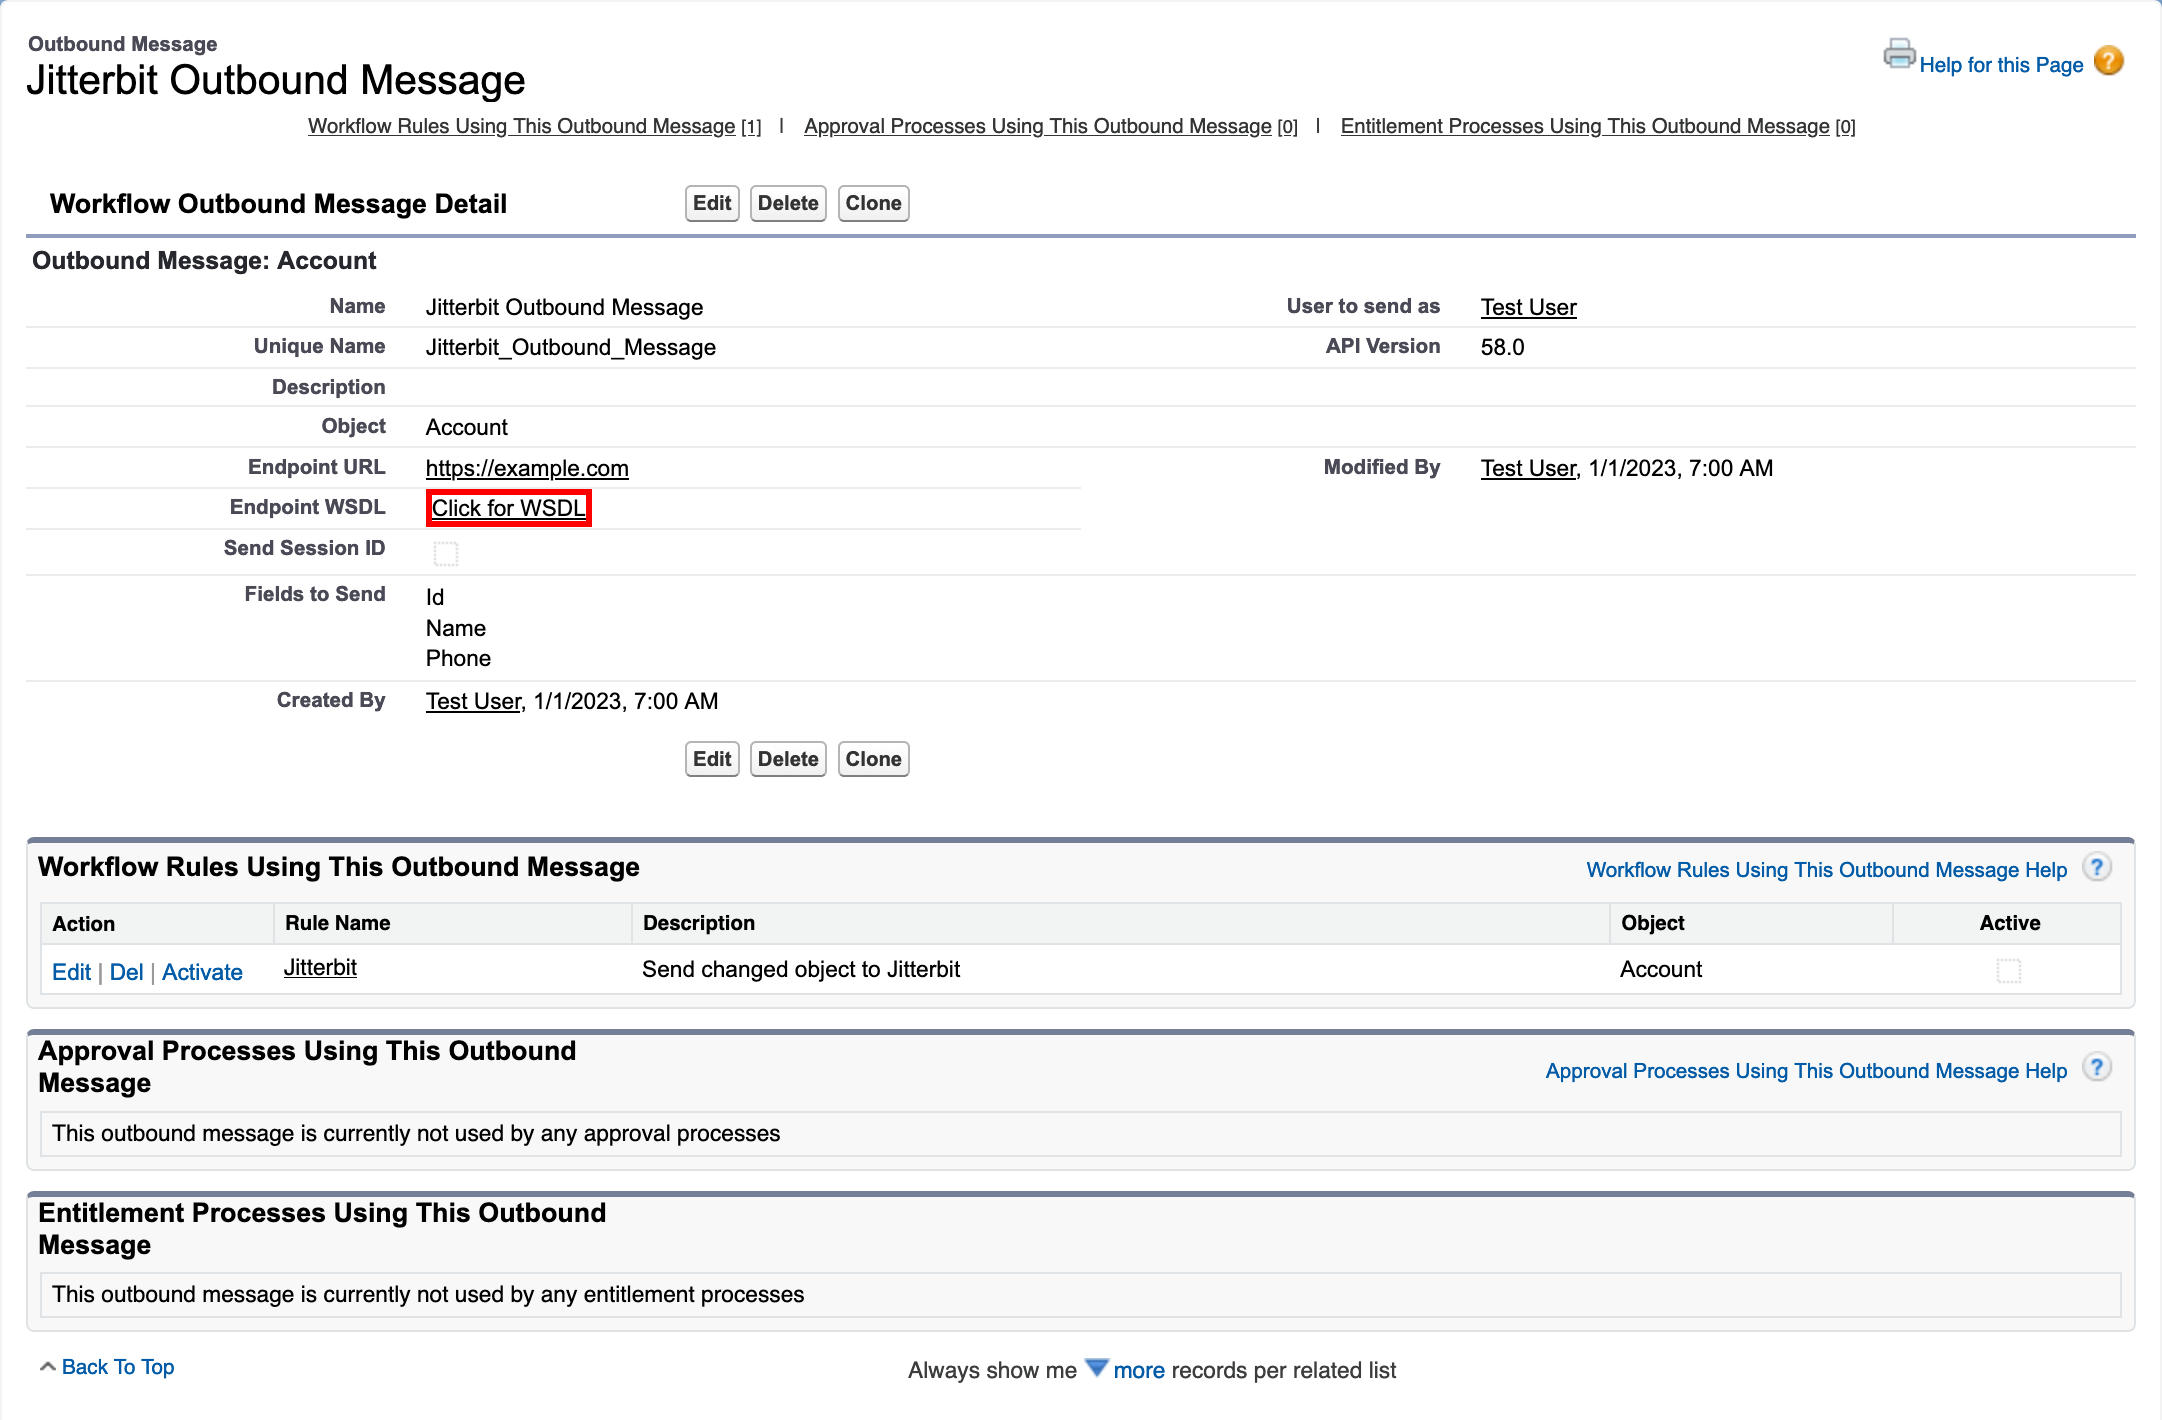
In the message's Workflow Outbound Message Detail page, click the link Click for WSDL in the row labeled Endpoint WSDL (highlighted in the image below).
-
An XML file opens in a new browser window. Save the file with a
.wsdlextension. Depending on your operating system, you may have to set the file's extension after downloading.
Part 2: Cloud Studio operations
Define the 'Salesforce Outbound Message' operation
-
Create a new Cloud Studio project.
-
Drag a SOAP Request activity from the design component palette and drop it onto an empty operation in the design canvas.
- Set the operation name to Salesforce Outbound Message.
- Double-click the SOAP Request activity instance in the operation to open its configuration screen.
- In step 1, select Upload File, click Browse, select the WSDL file previously downloaded, then click Upload.
- Click Port and select Notification (the only option). The remaining fields are automatically filled and need no further editing.
-
Click Next.

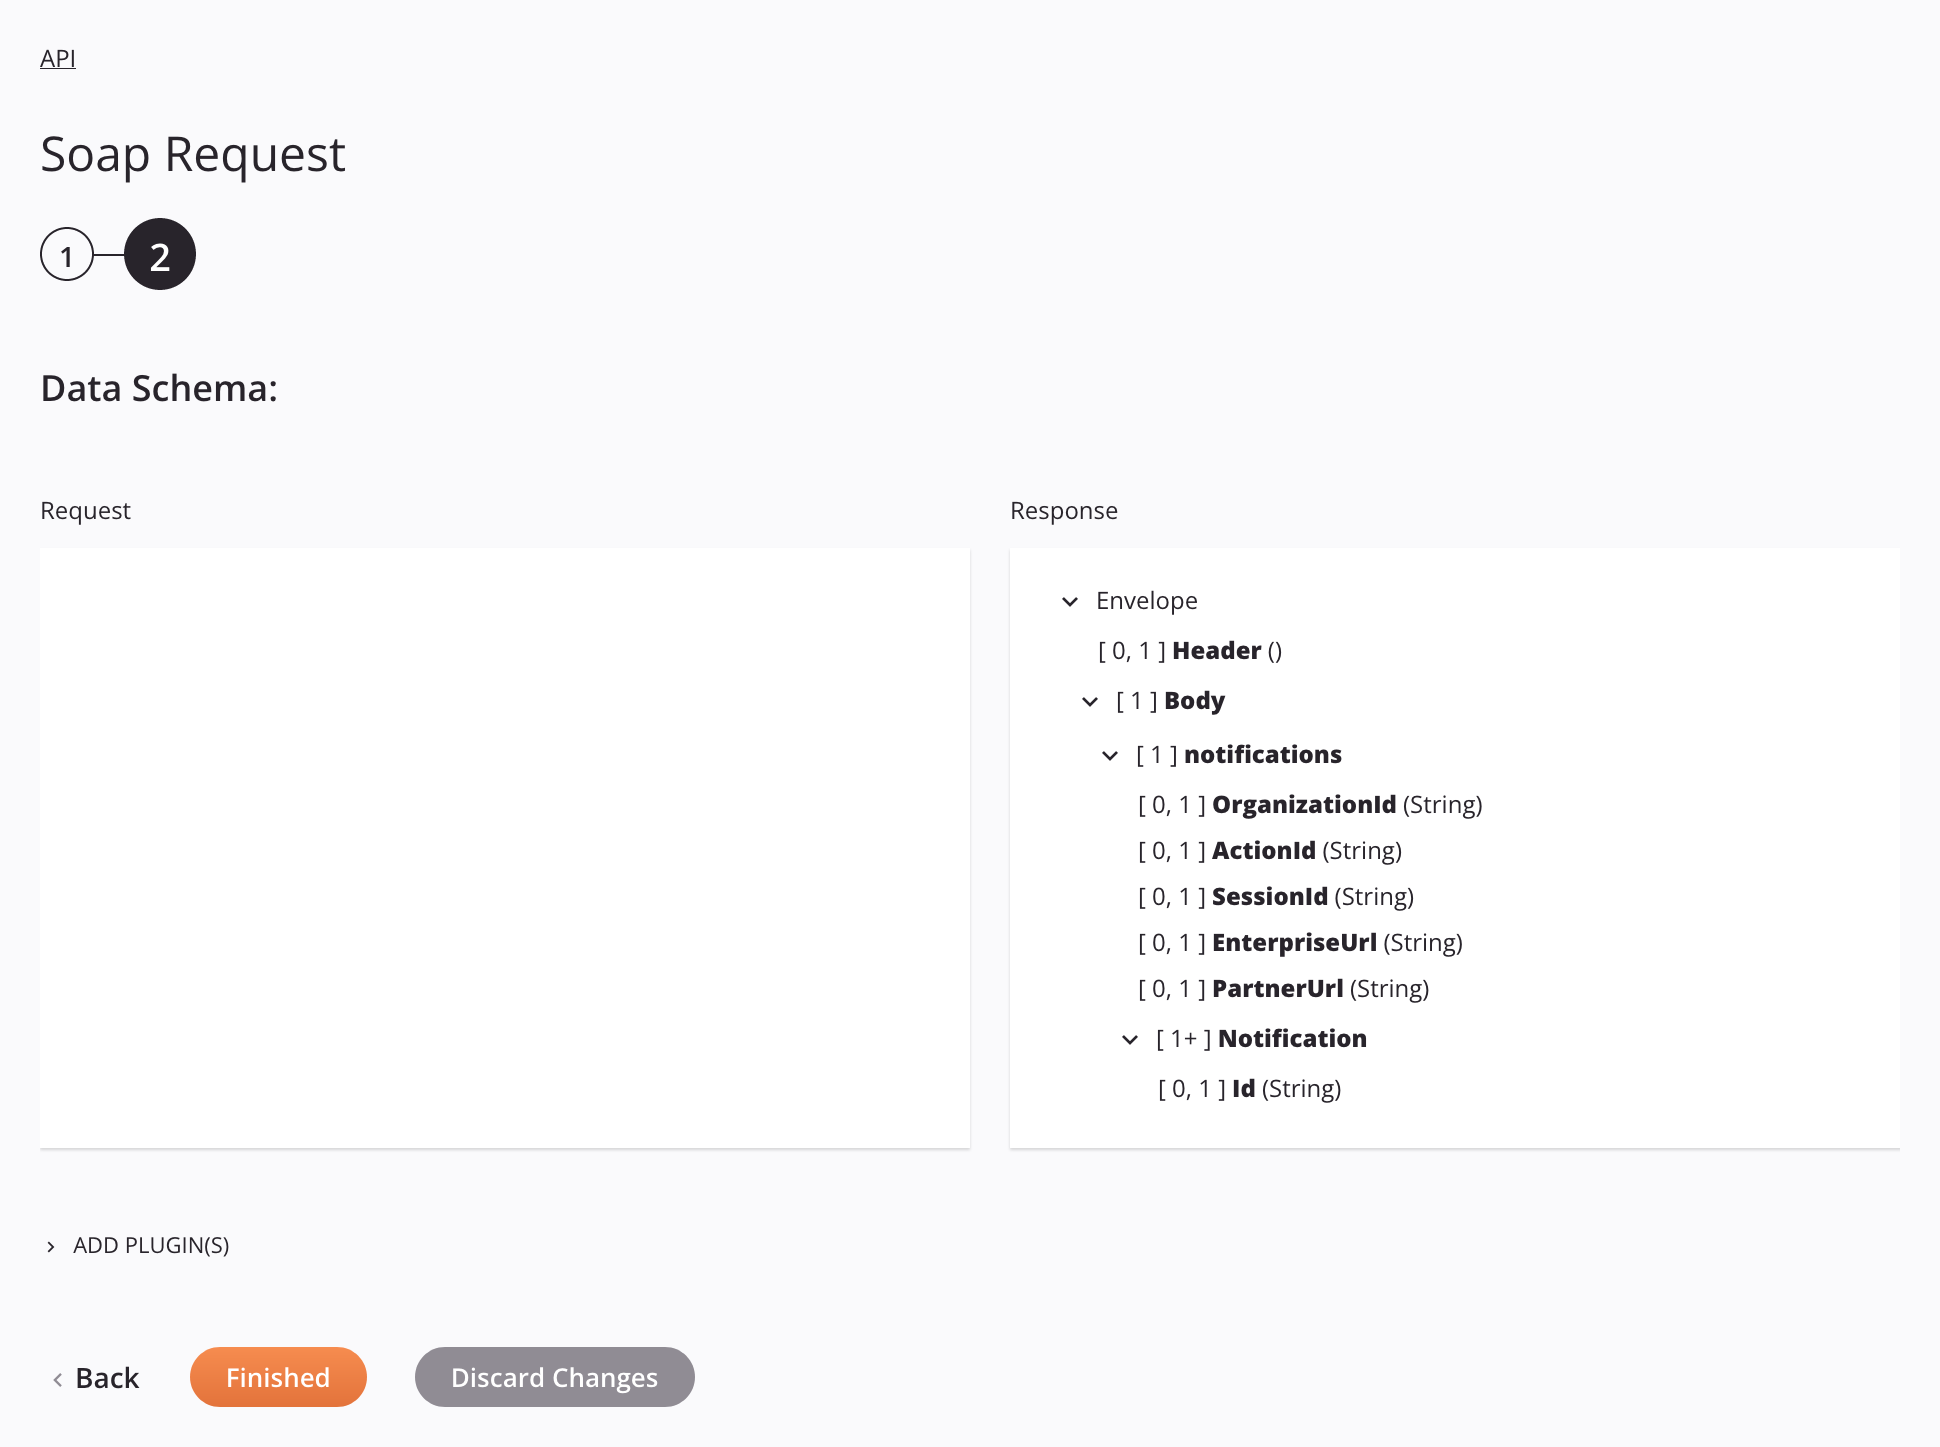
-
In step 2, click Finished.
-
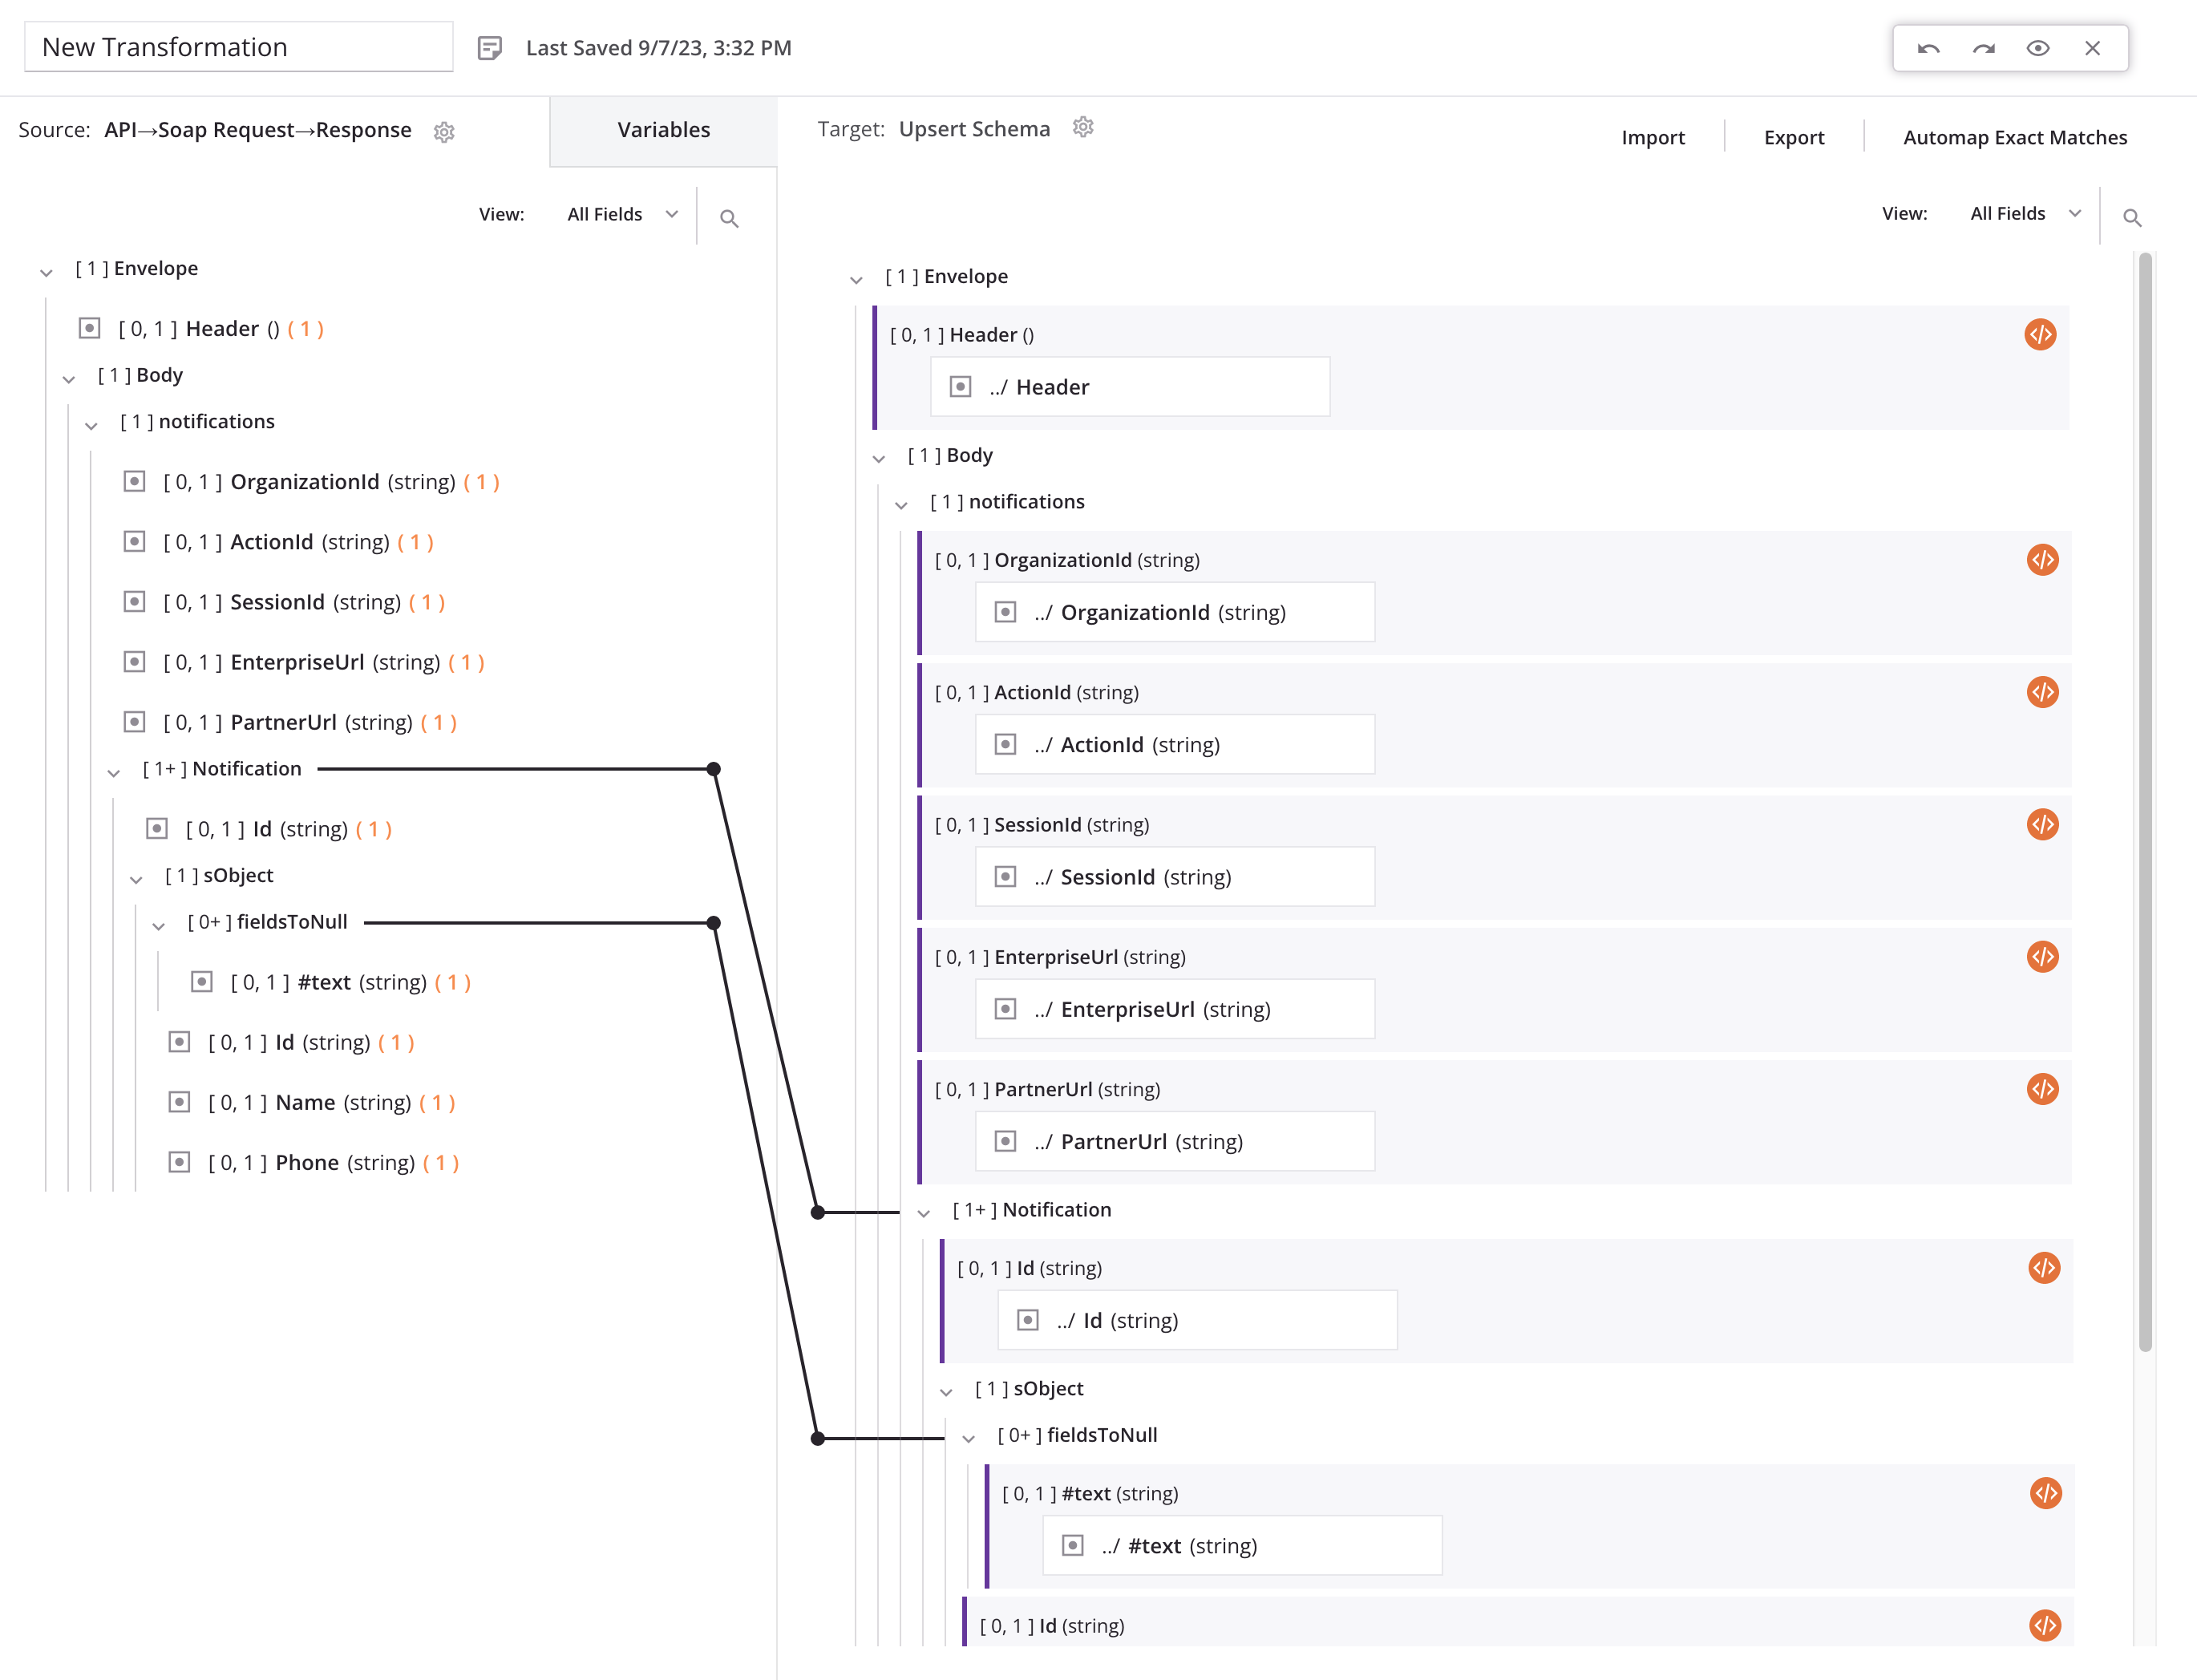
Add a new transformation to the right of the SOAP Request activity.
- For the target schema, click Mirror Source Schema.
- Click Automap Exact Matches, or manually map source to target fields.
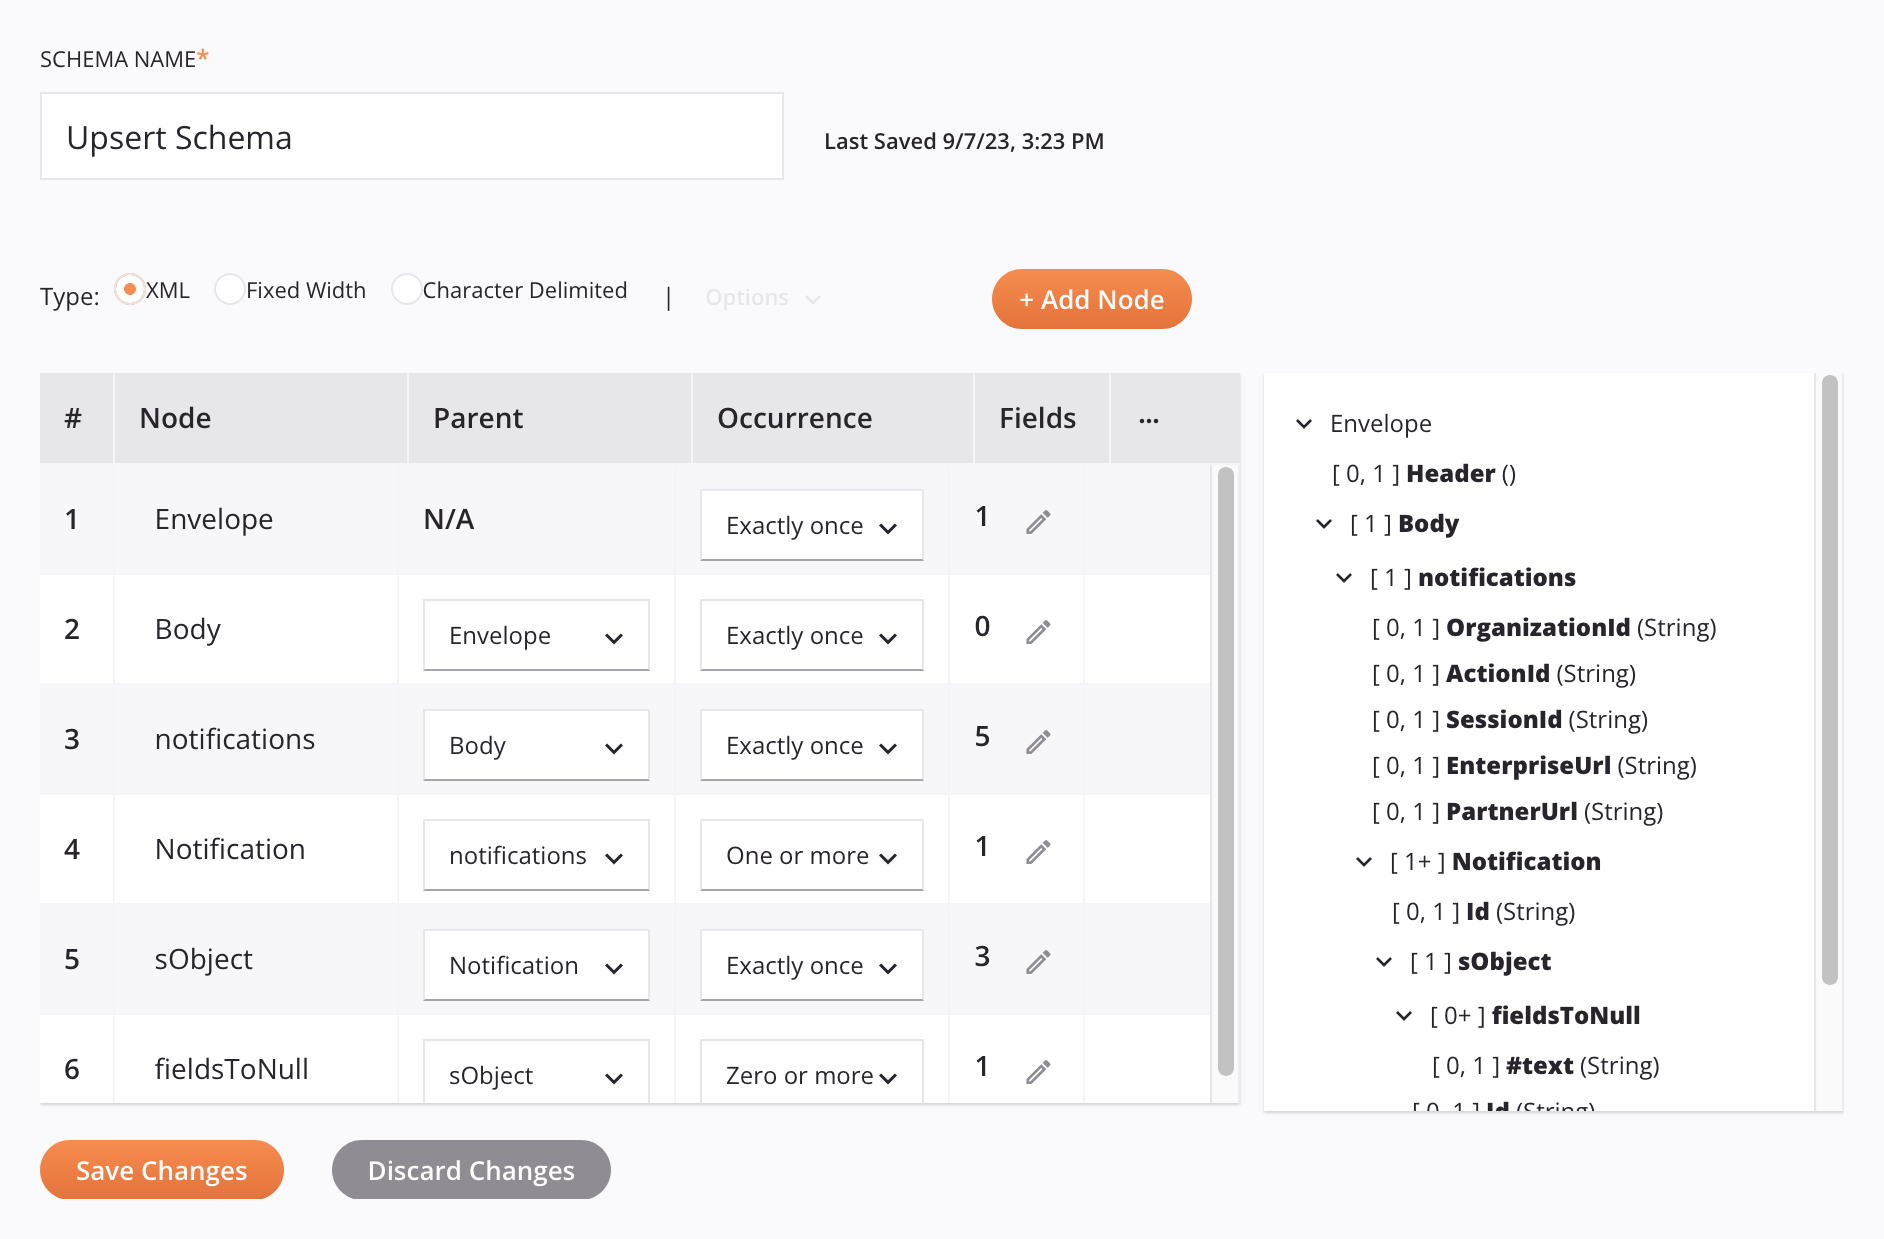
-
In the target schema, click Edit Schema, set the schema name to Upsert Schema, then click Save Changes.
-
Close the transformation to return to the workflow.
-
In the component palette's Connectors category, find and click the Variable connector.
- Leave the connection and variable names with their defaults, then click Save Changes.
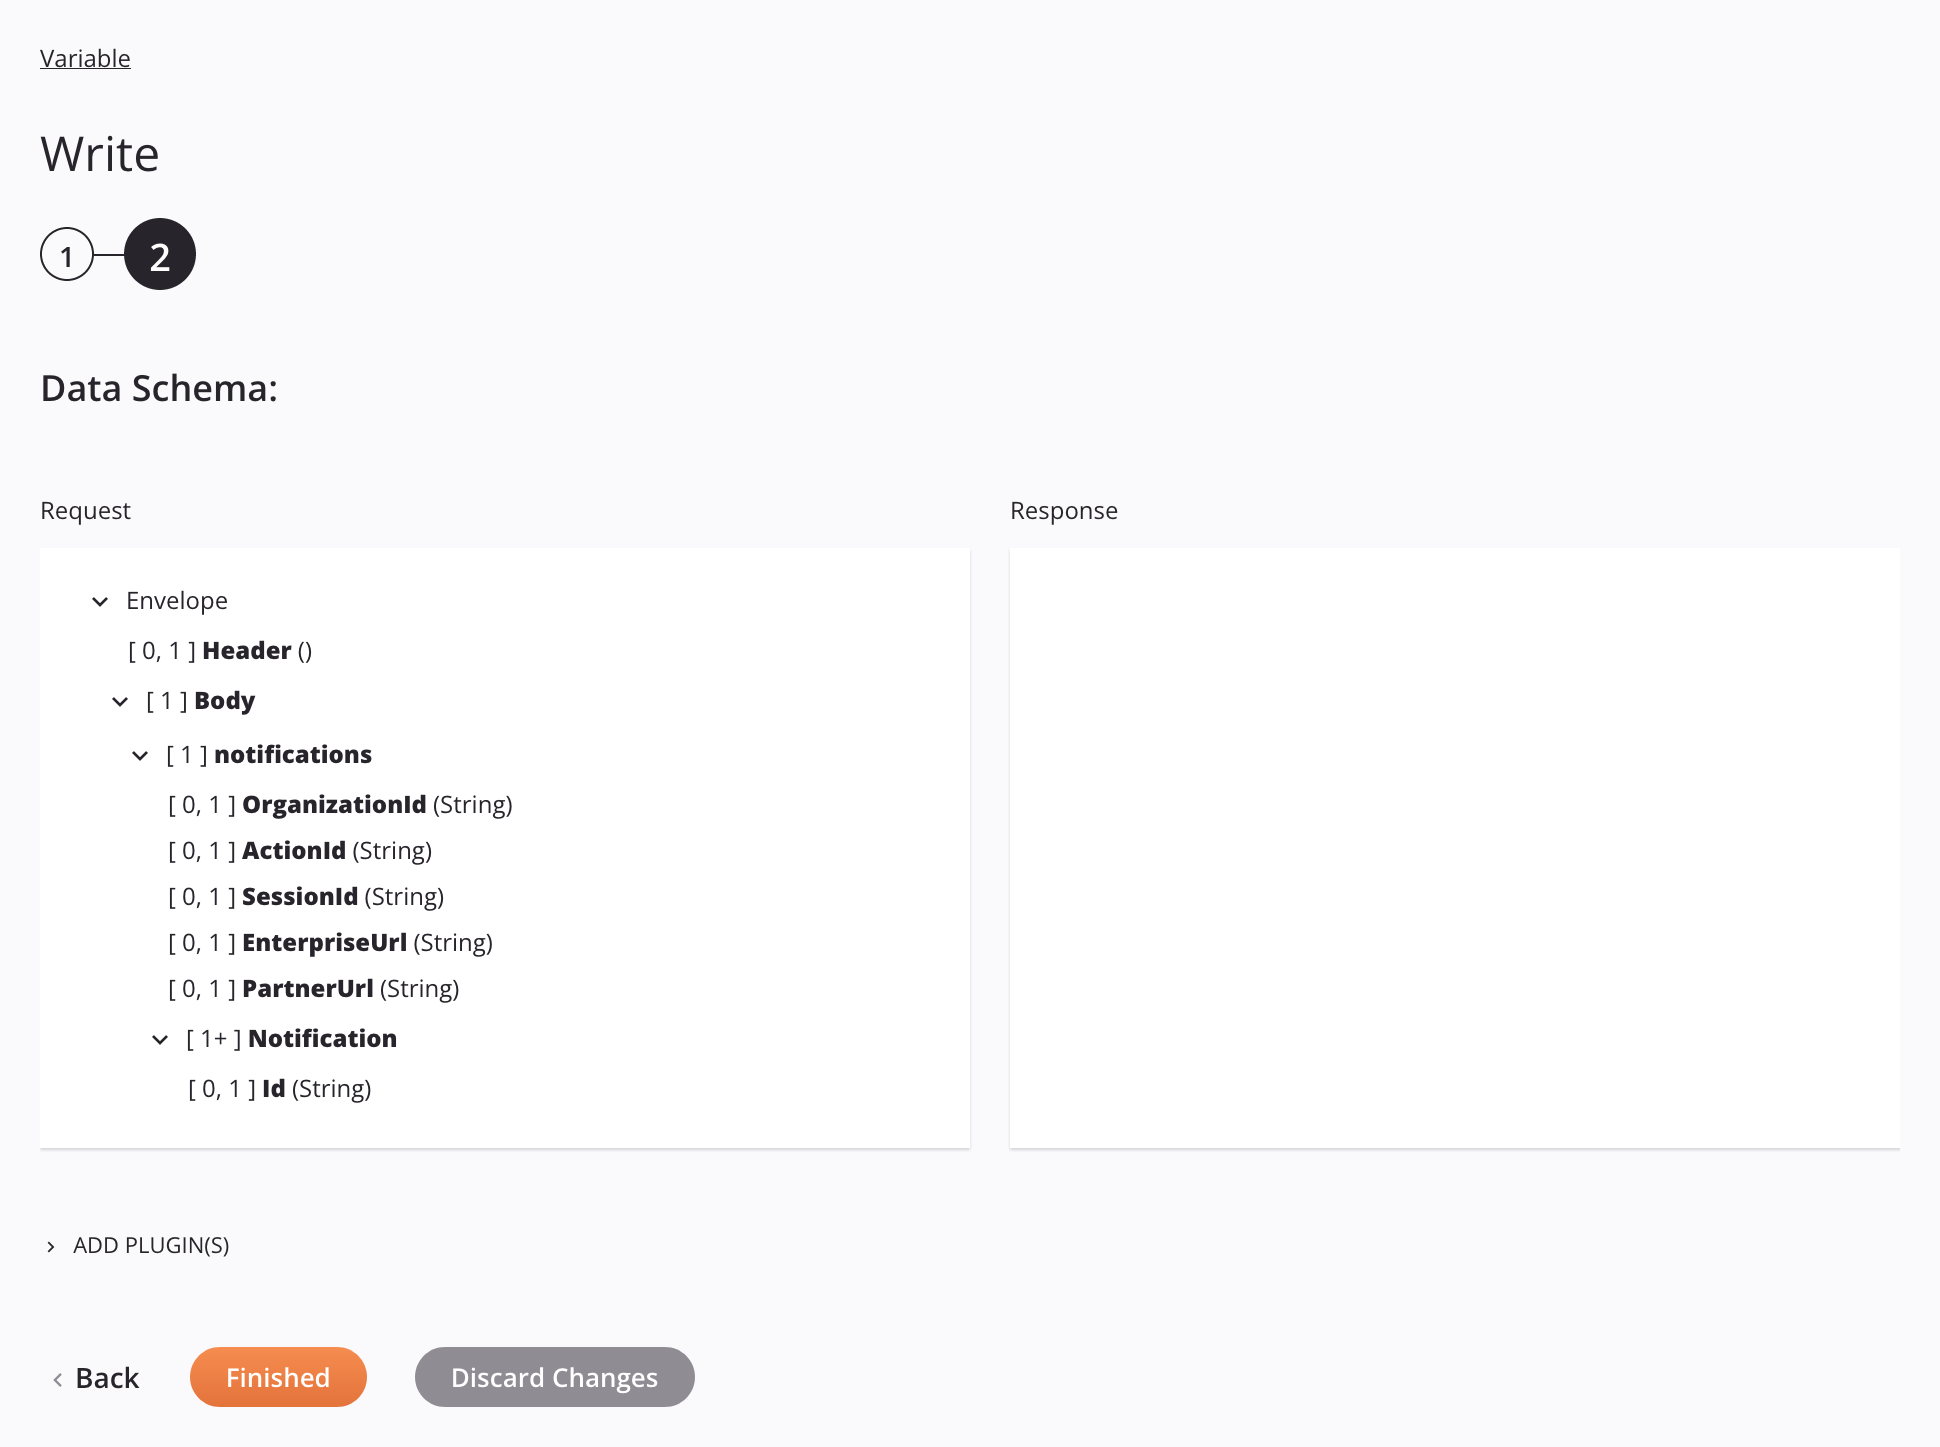
- Drag a Variable write activity from the component palette and drop it onto the Salesforce Outbound Message operation, to the right of the transformation.
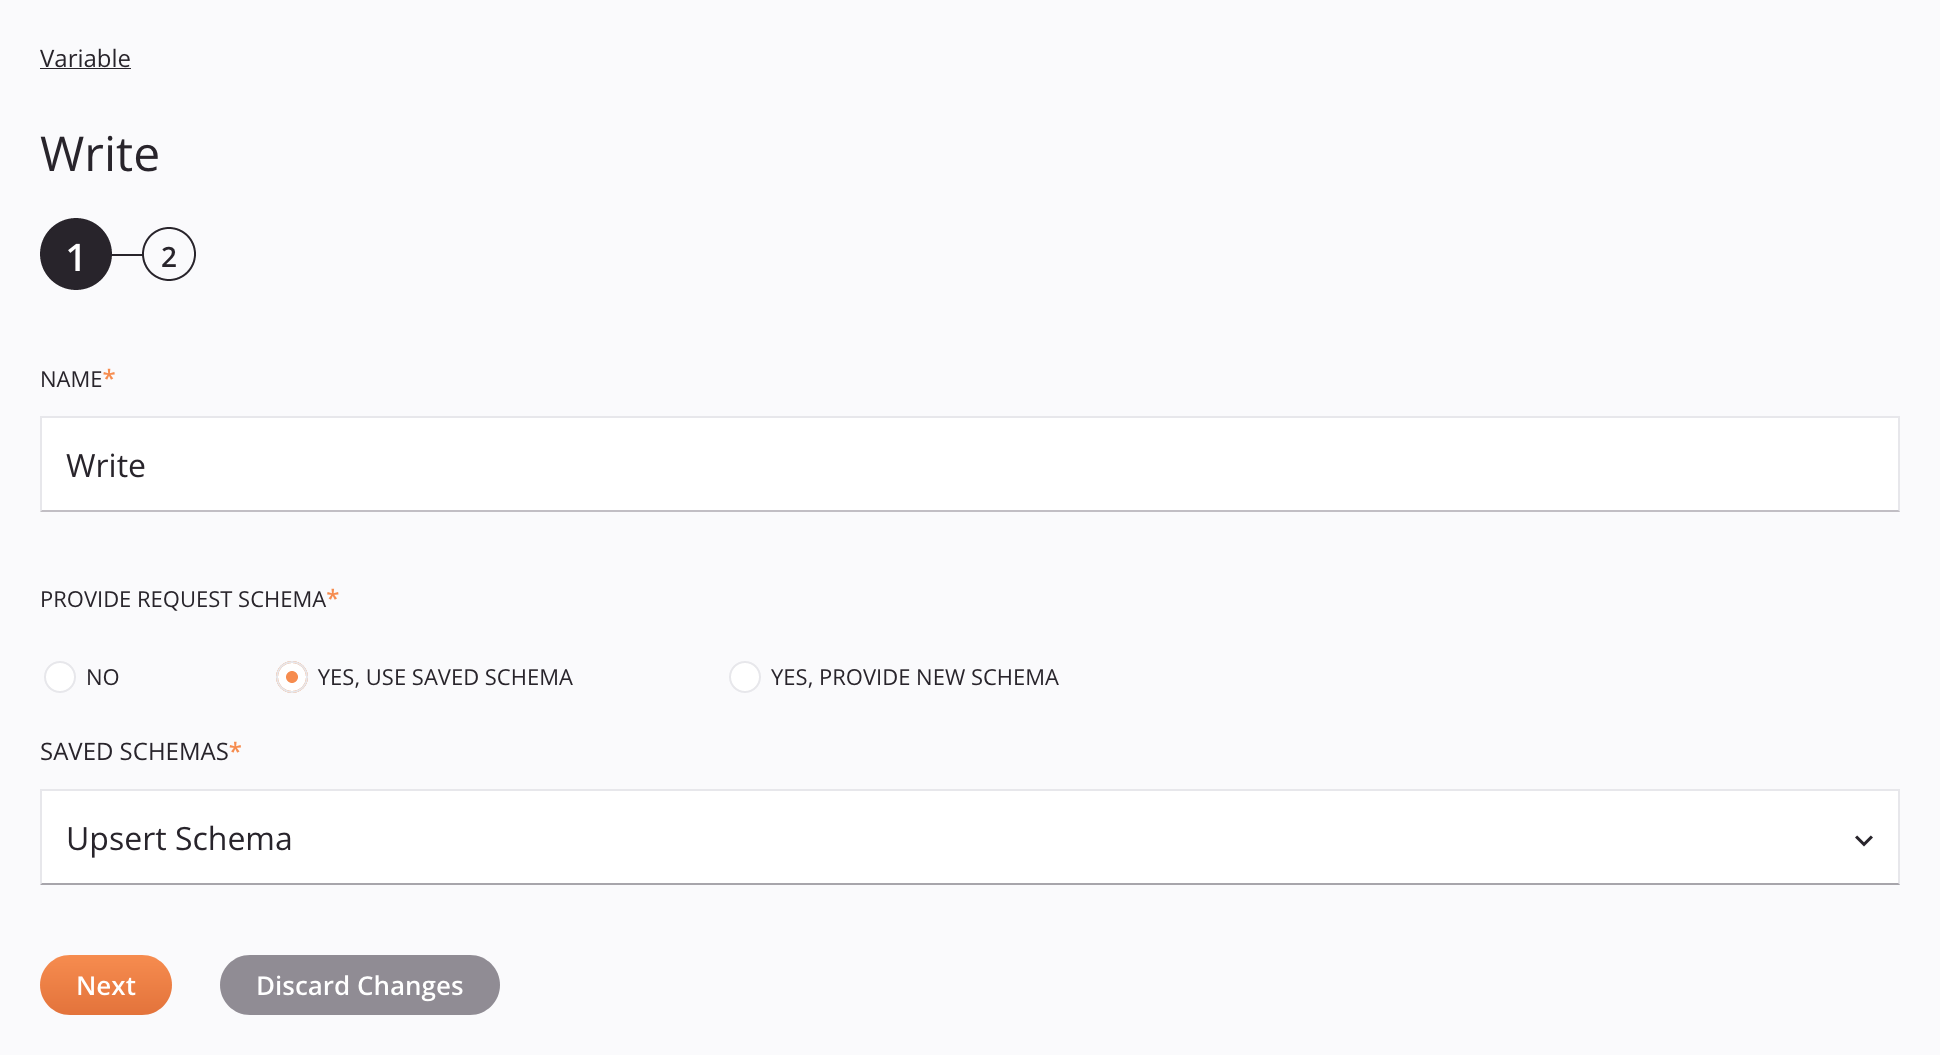
- Double-click the Write activity.
-
In step 1, select Yes, Use Saved Schema, click Saved Schemas, select Upsert Schema, then click Next.
-
In step 2, click Finished.
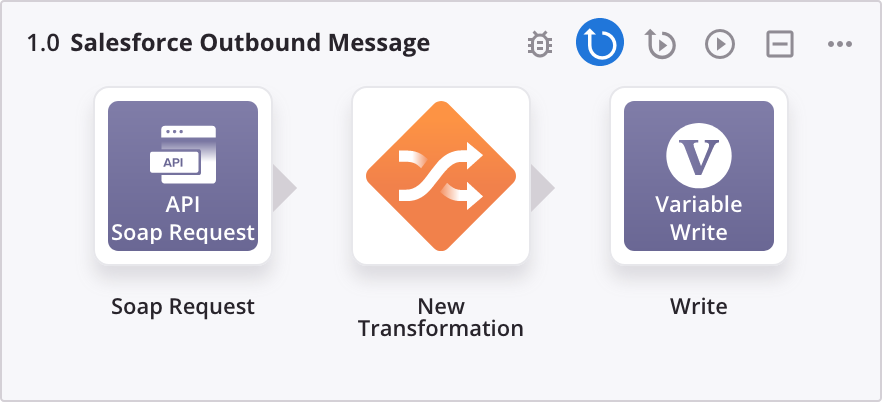
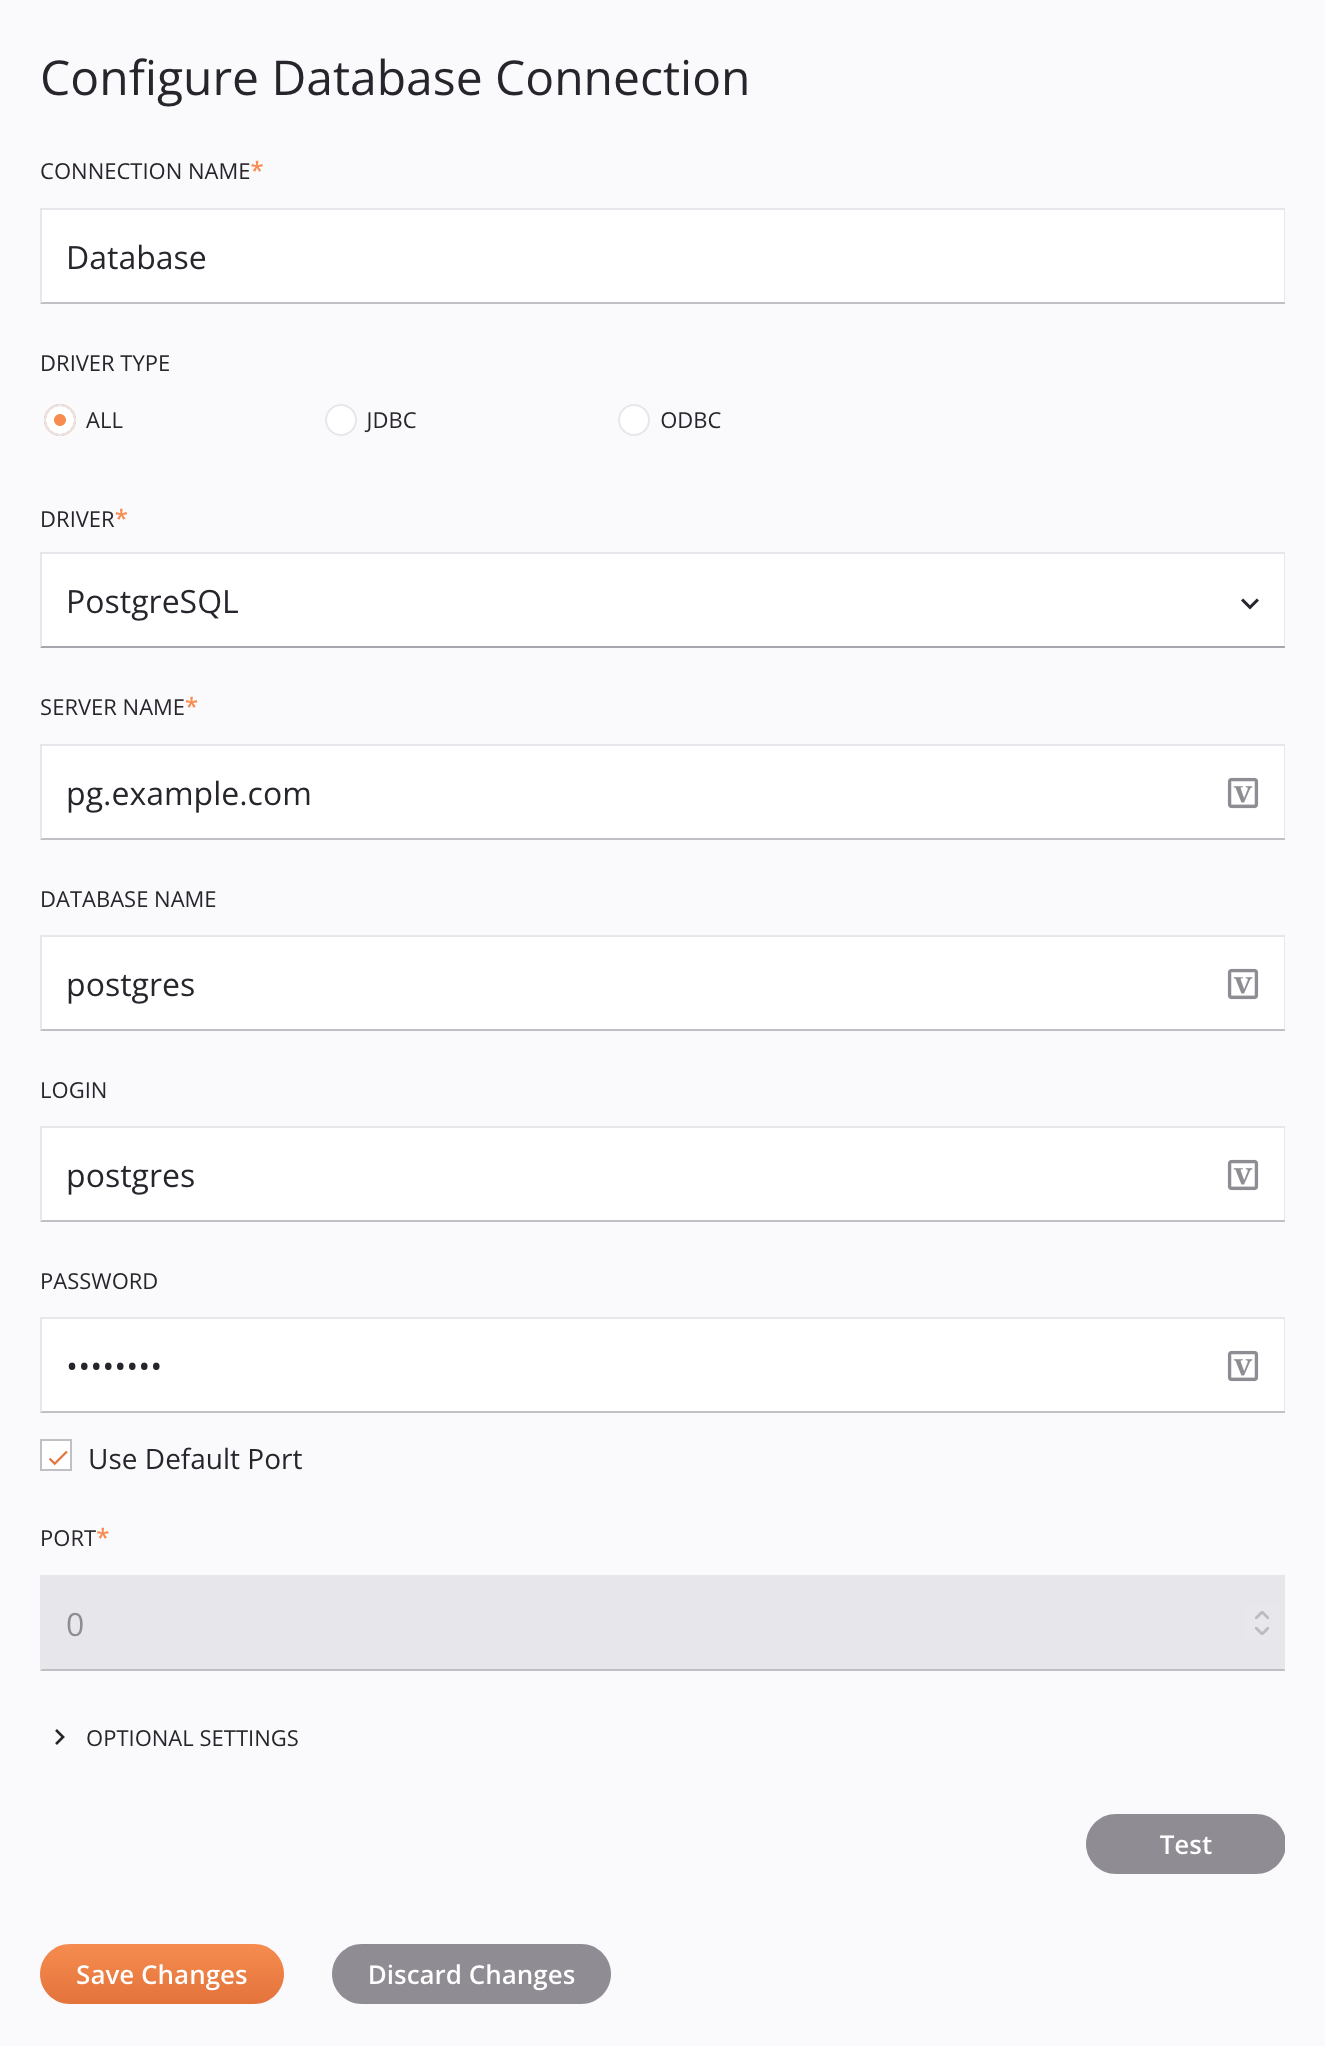
The Salesforce Outbound Message operation:
Define the 'Salesforce Response' operation
- Drag a SOAP Response activity from the component palette and drop it onto an empty operation in the design canvas.
- Set the operation name to Salesforce Response.
- Double-click the SOAP Response activity.
-
In step 1, select Select Existing, select the WSDL file previously uploaded, then click Next.
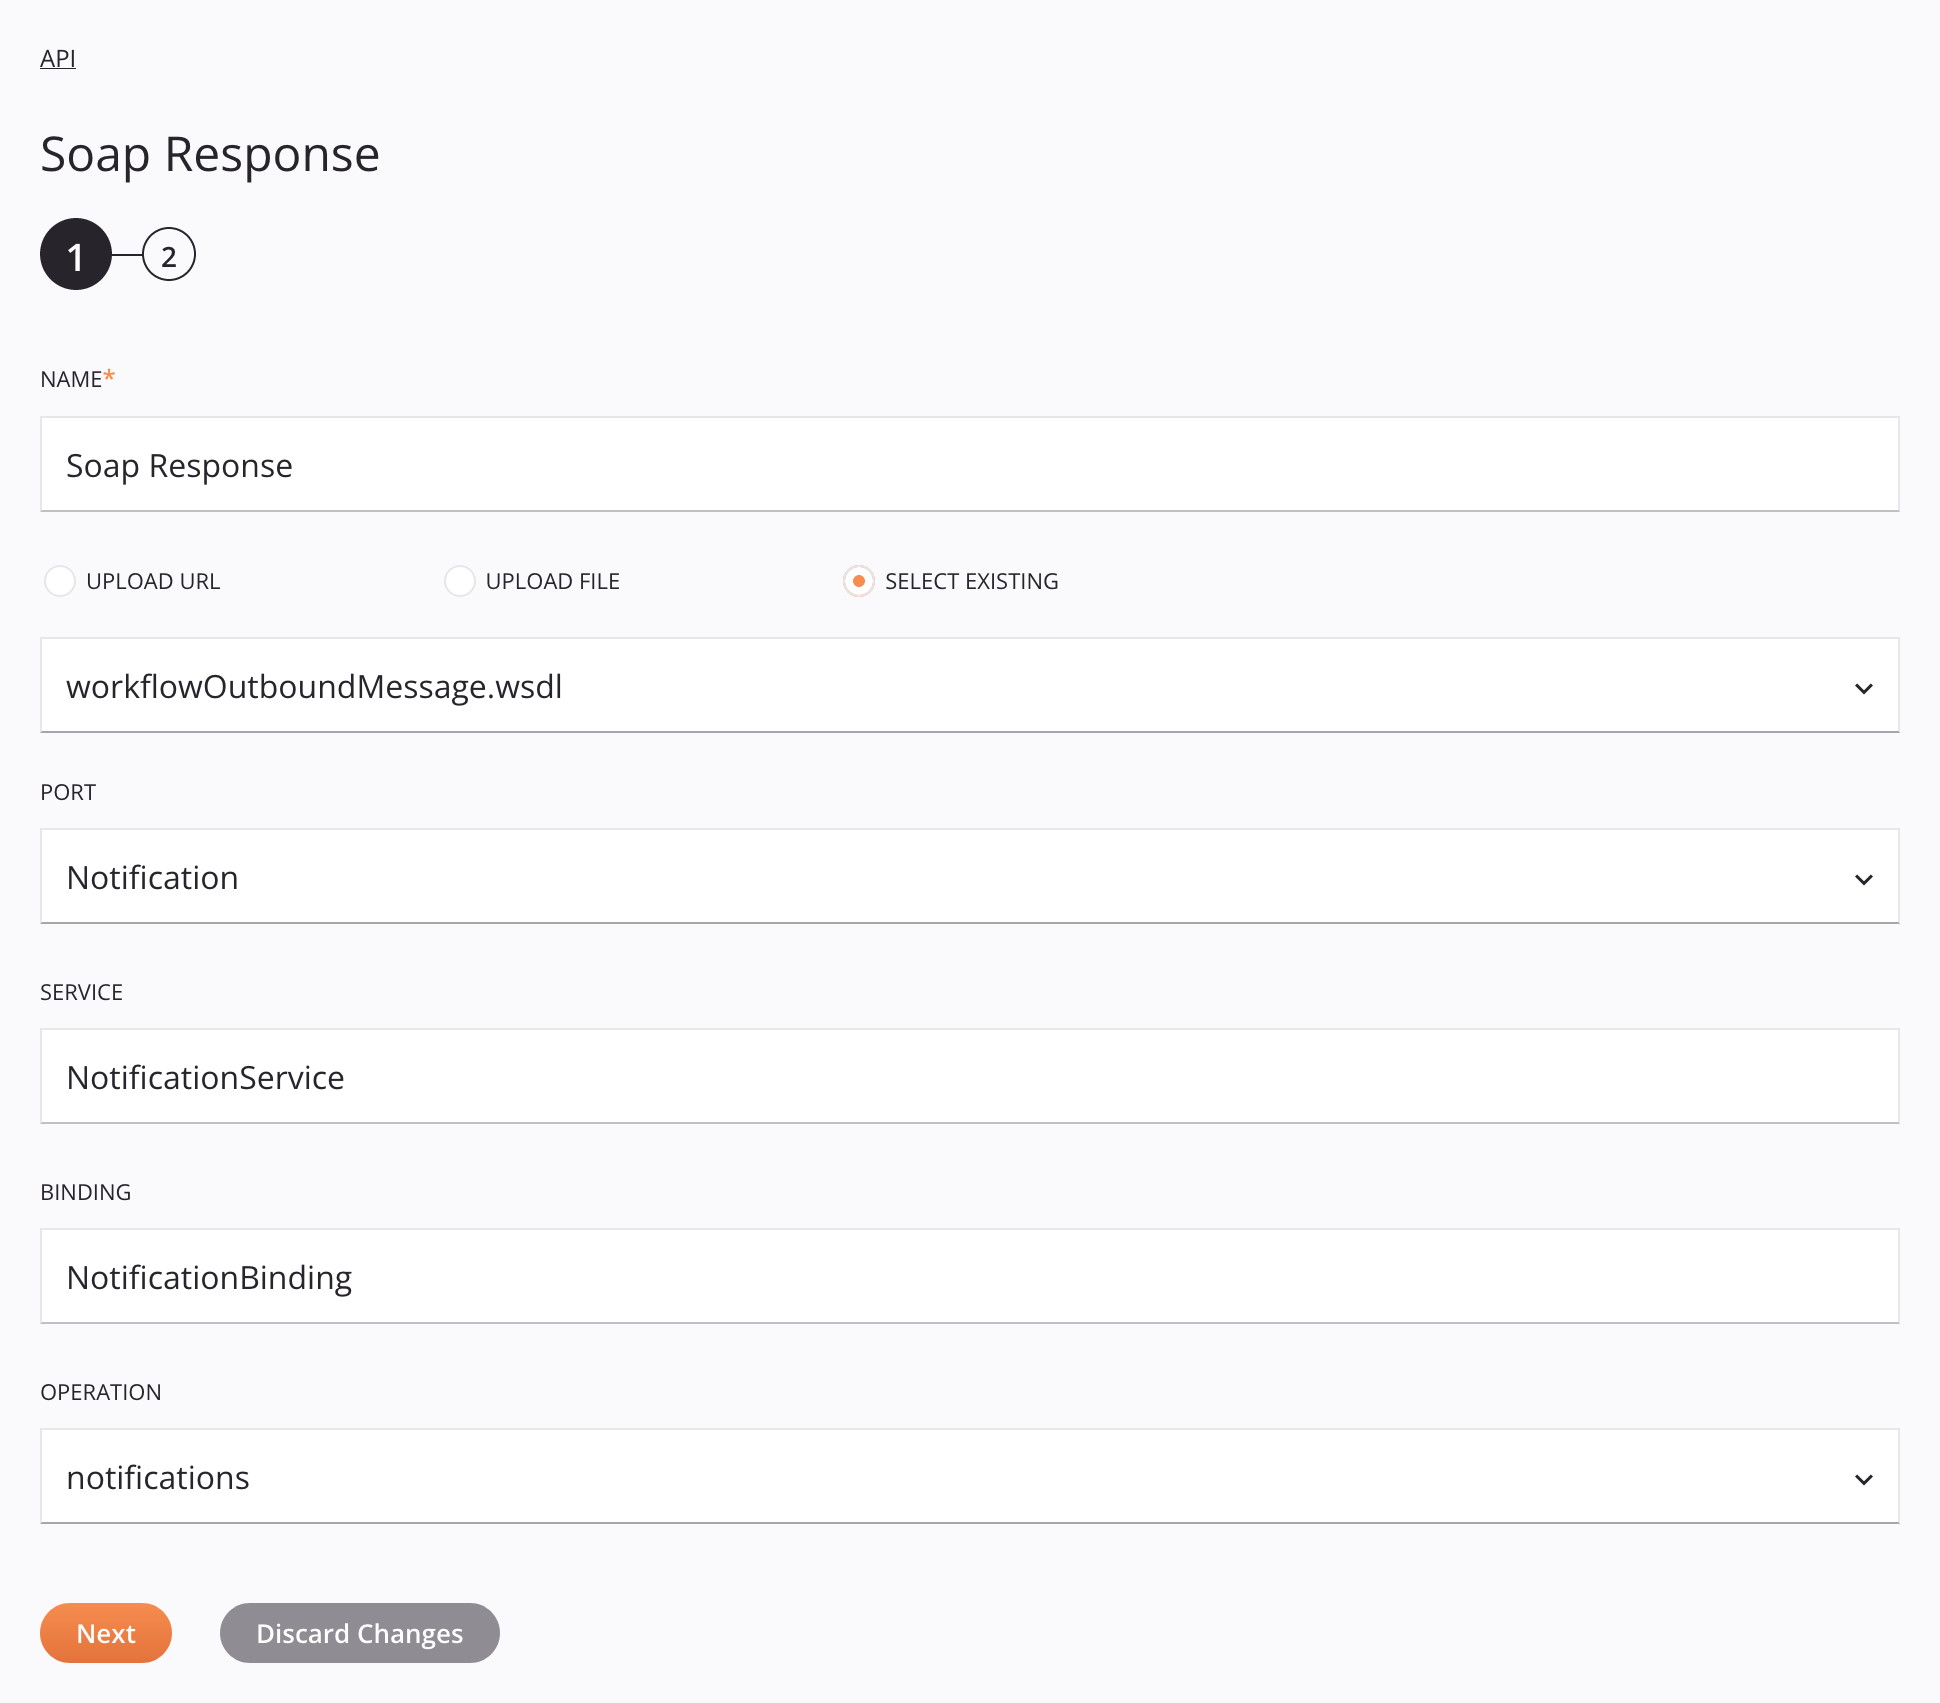
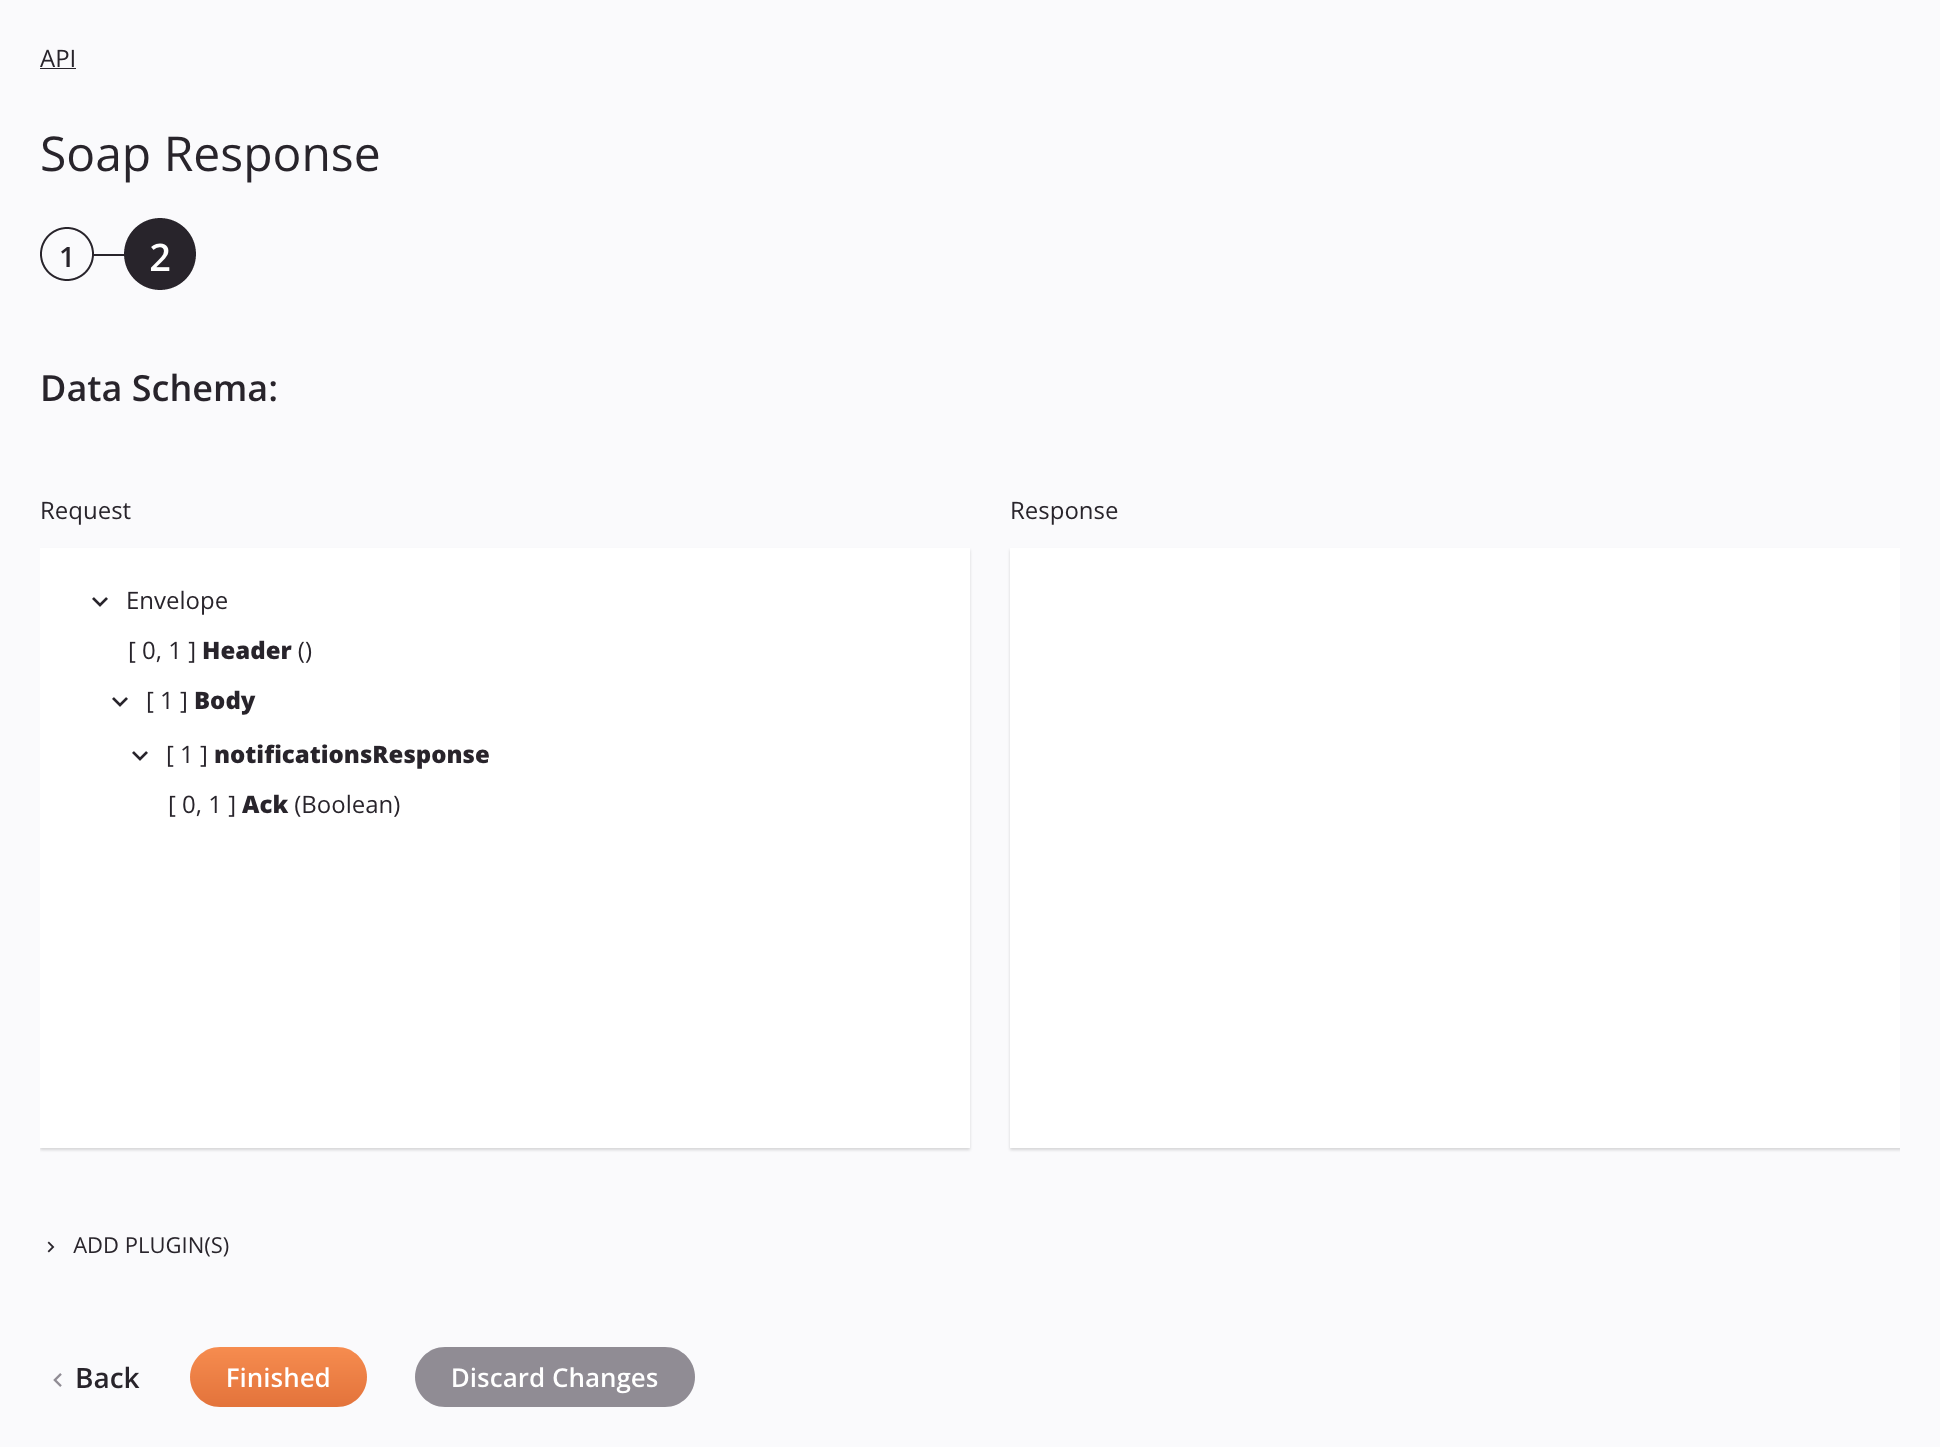
-
In step 2, click Finished.
-
Add a new transformation to the left of the SOAP Response activity in the Salesforce Response operation.
-
Add a custom value to the Ack field with the value true, then close the transformation to return to the workflow.
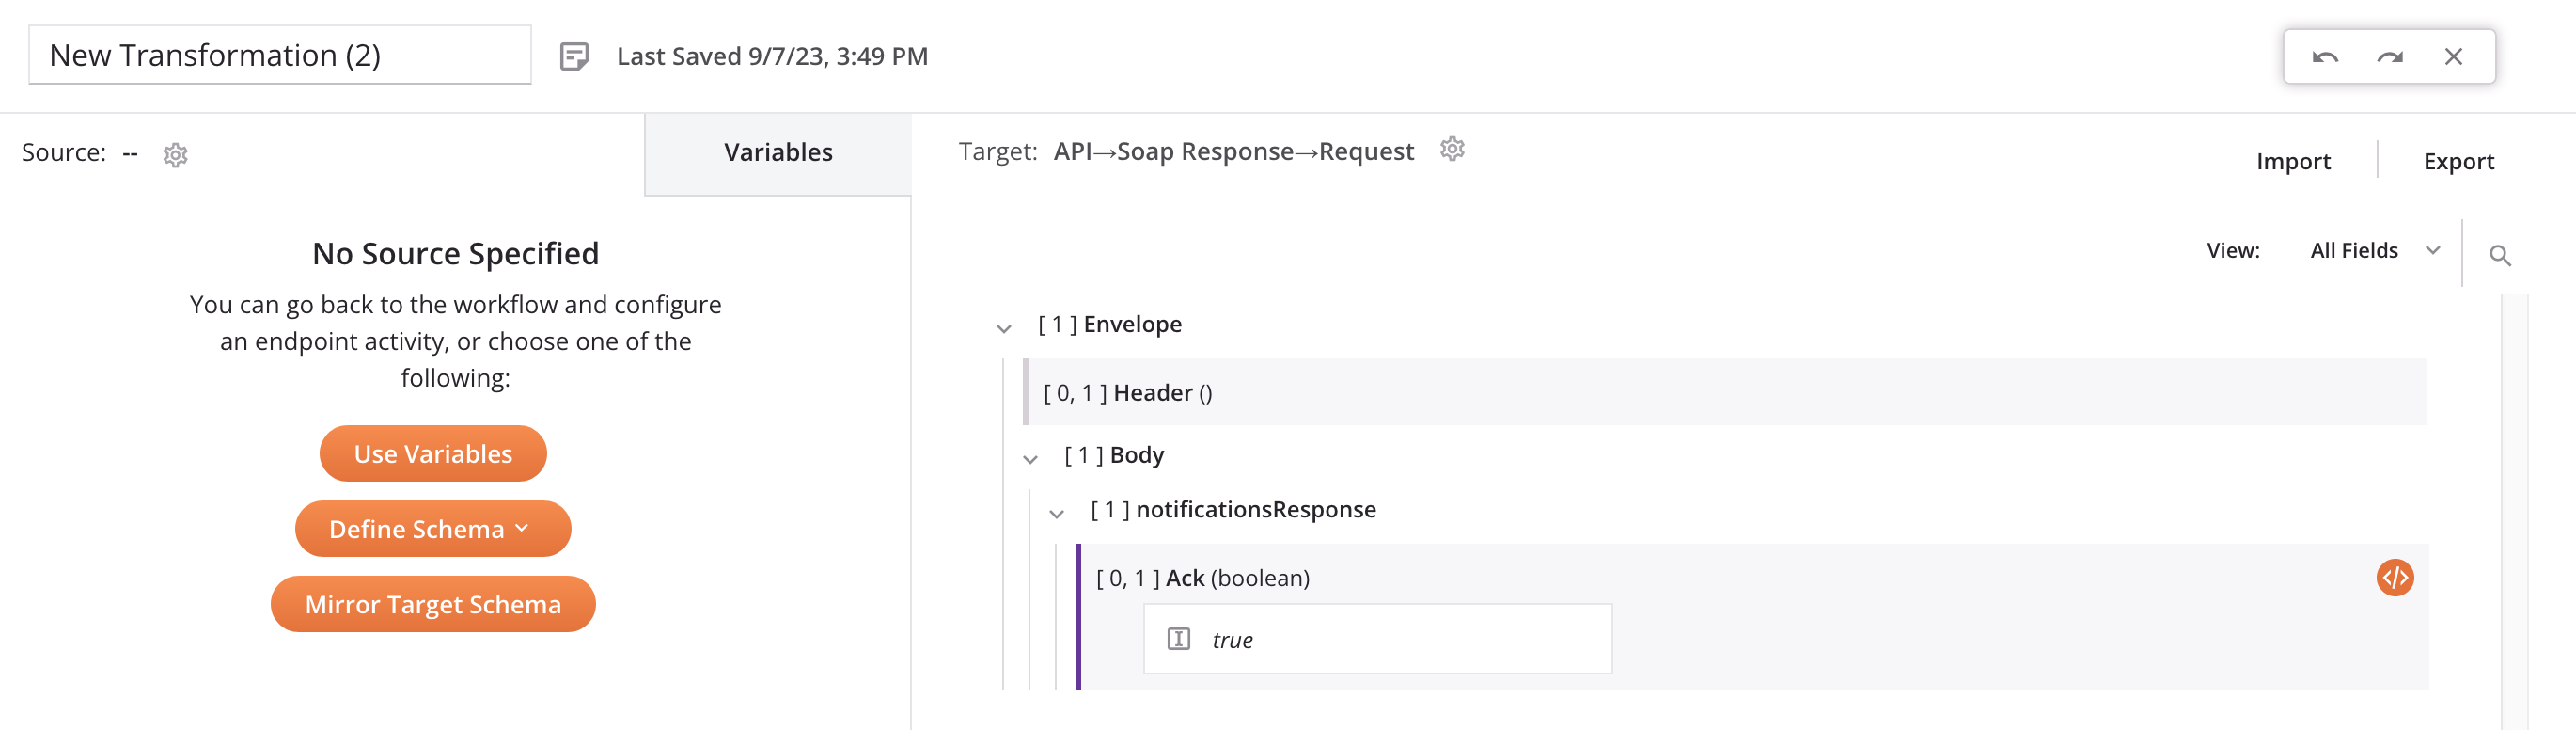
The Salesforce Response operation:
Define the 'Database Upsert' operation
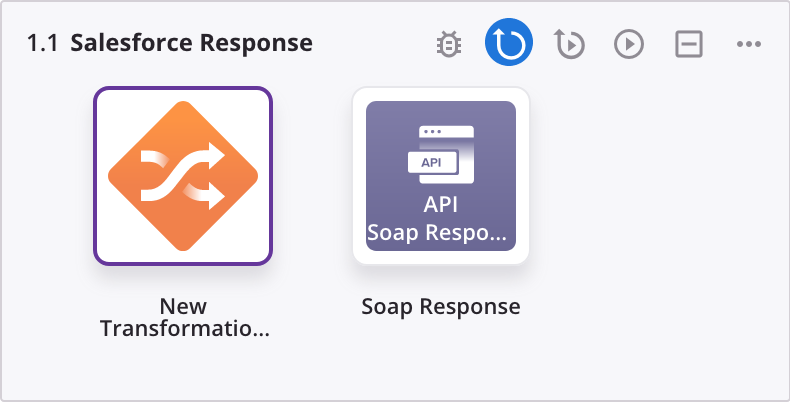
- Drag a Variable read activity from the component palette and drop it onto an empty operation in the design canvas.
- Set the operation name to Database Upsert.
- Double-click the Read activity.
-
In step 1, select Yes, Use Saved Schema, click Saved Schemas, select Upsert Schema, then click Next.

-
In step 2, click Finished.
-
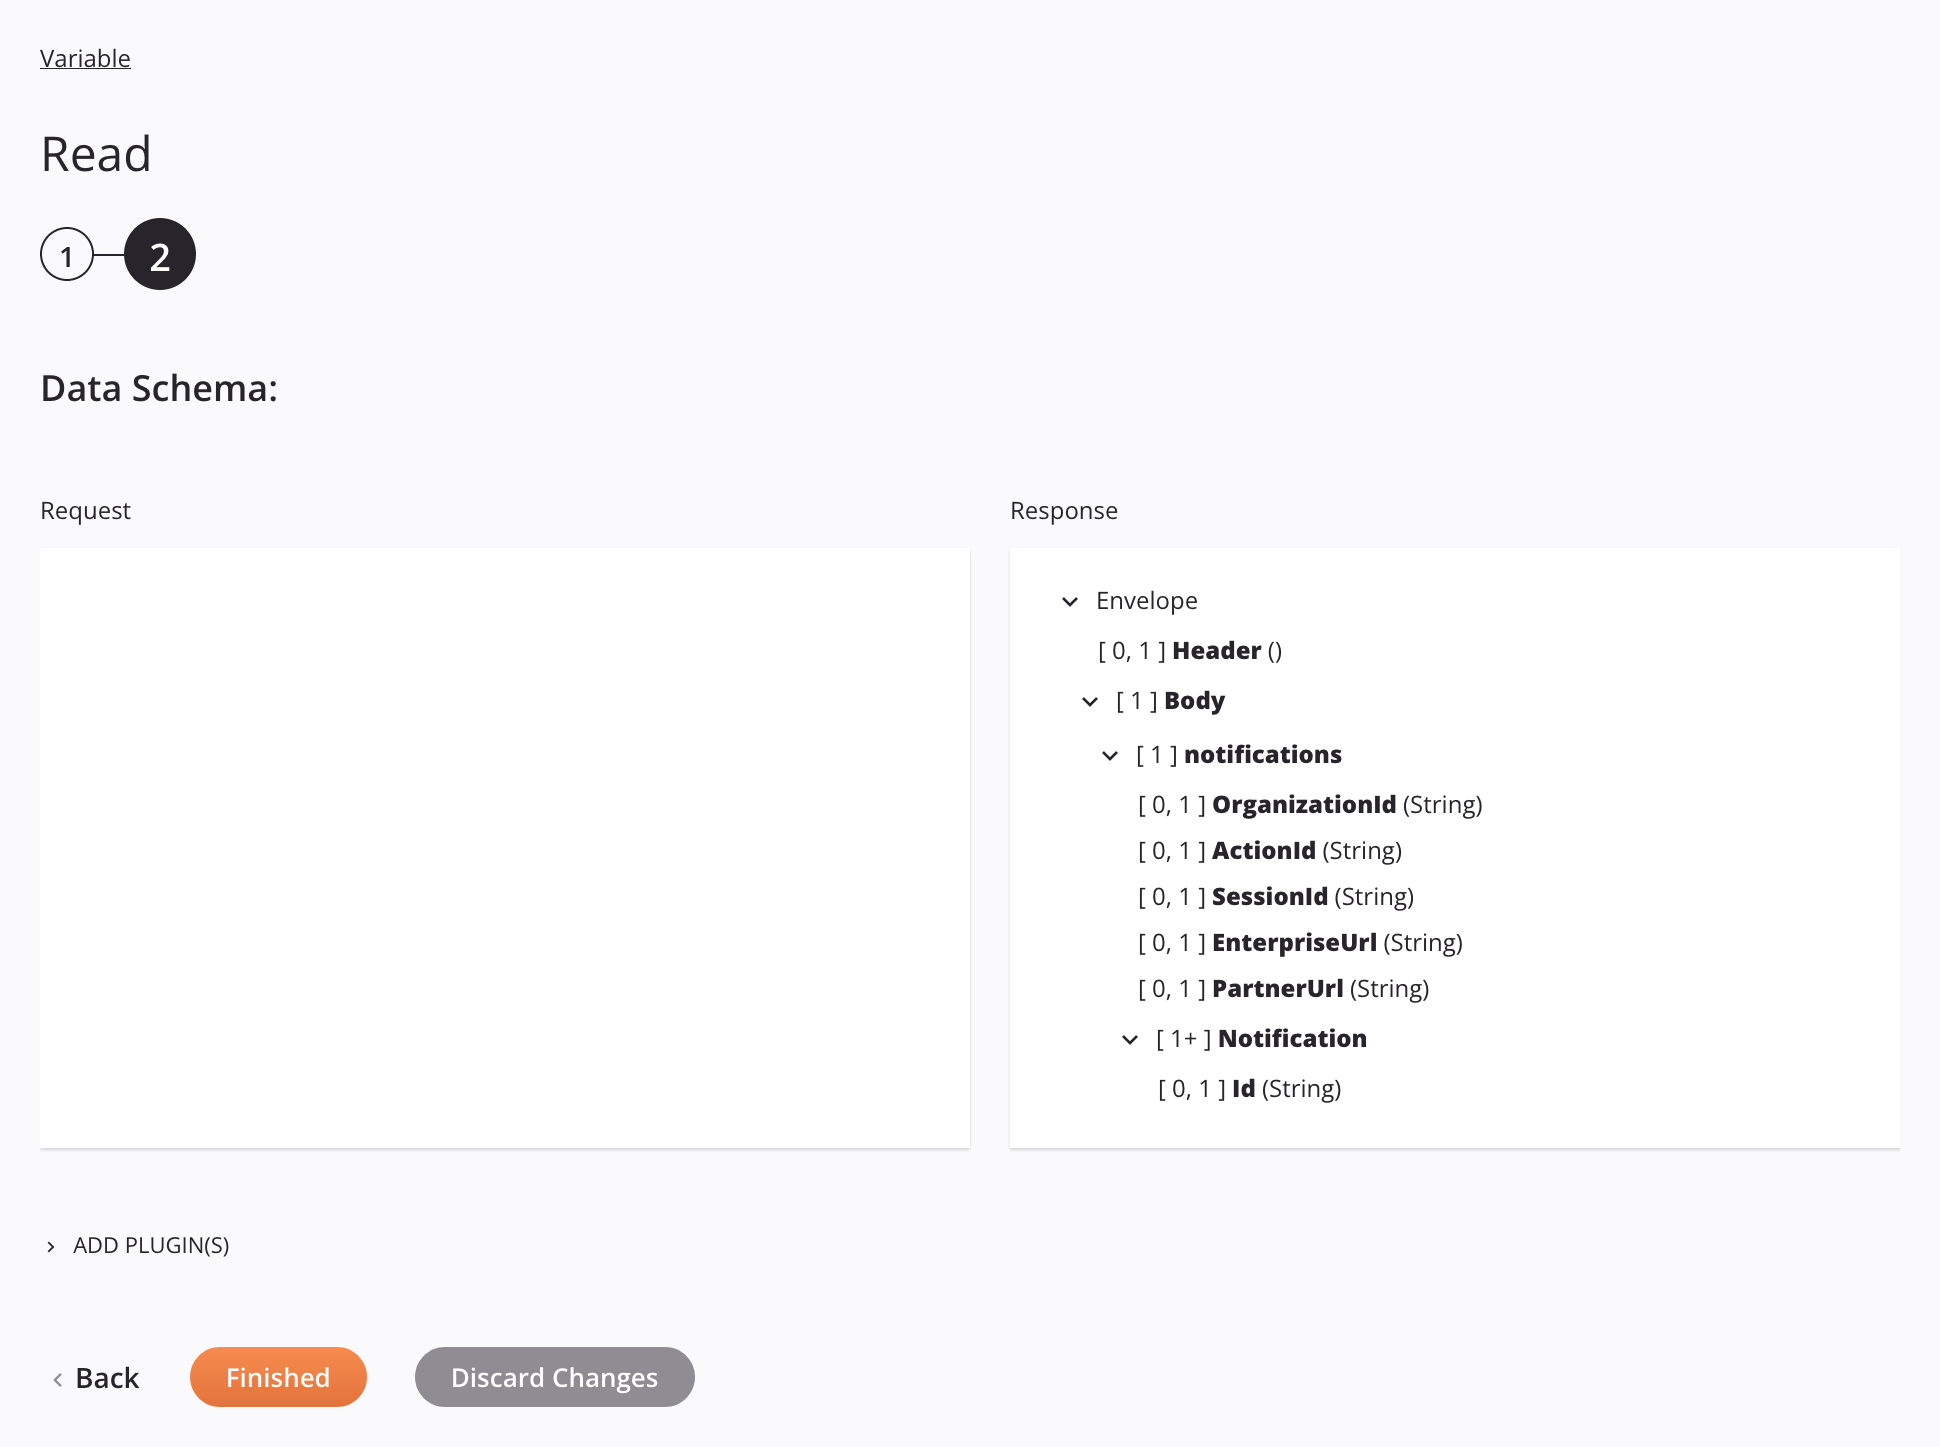
Set up a Database connection for your target database, then click Save Changes. (A connection to a PostgreSQL server is shown in this example.)
-
Drag a Database Upsert activity from the component palette and drop it onto the Database Upsert operation, to the right of the Read activity.
- Double-click the Upsert activity.
-
In step 1, click Refresh, select the target database table, then click Next.
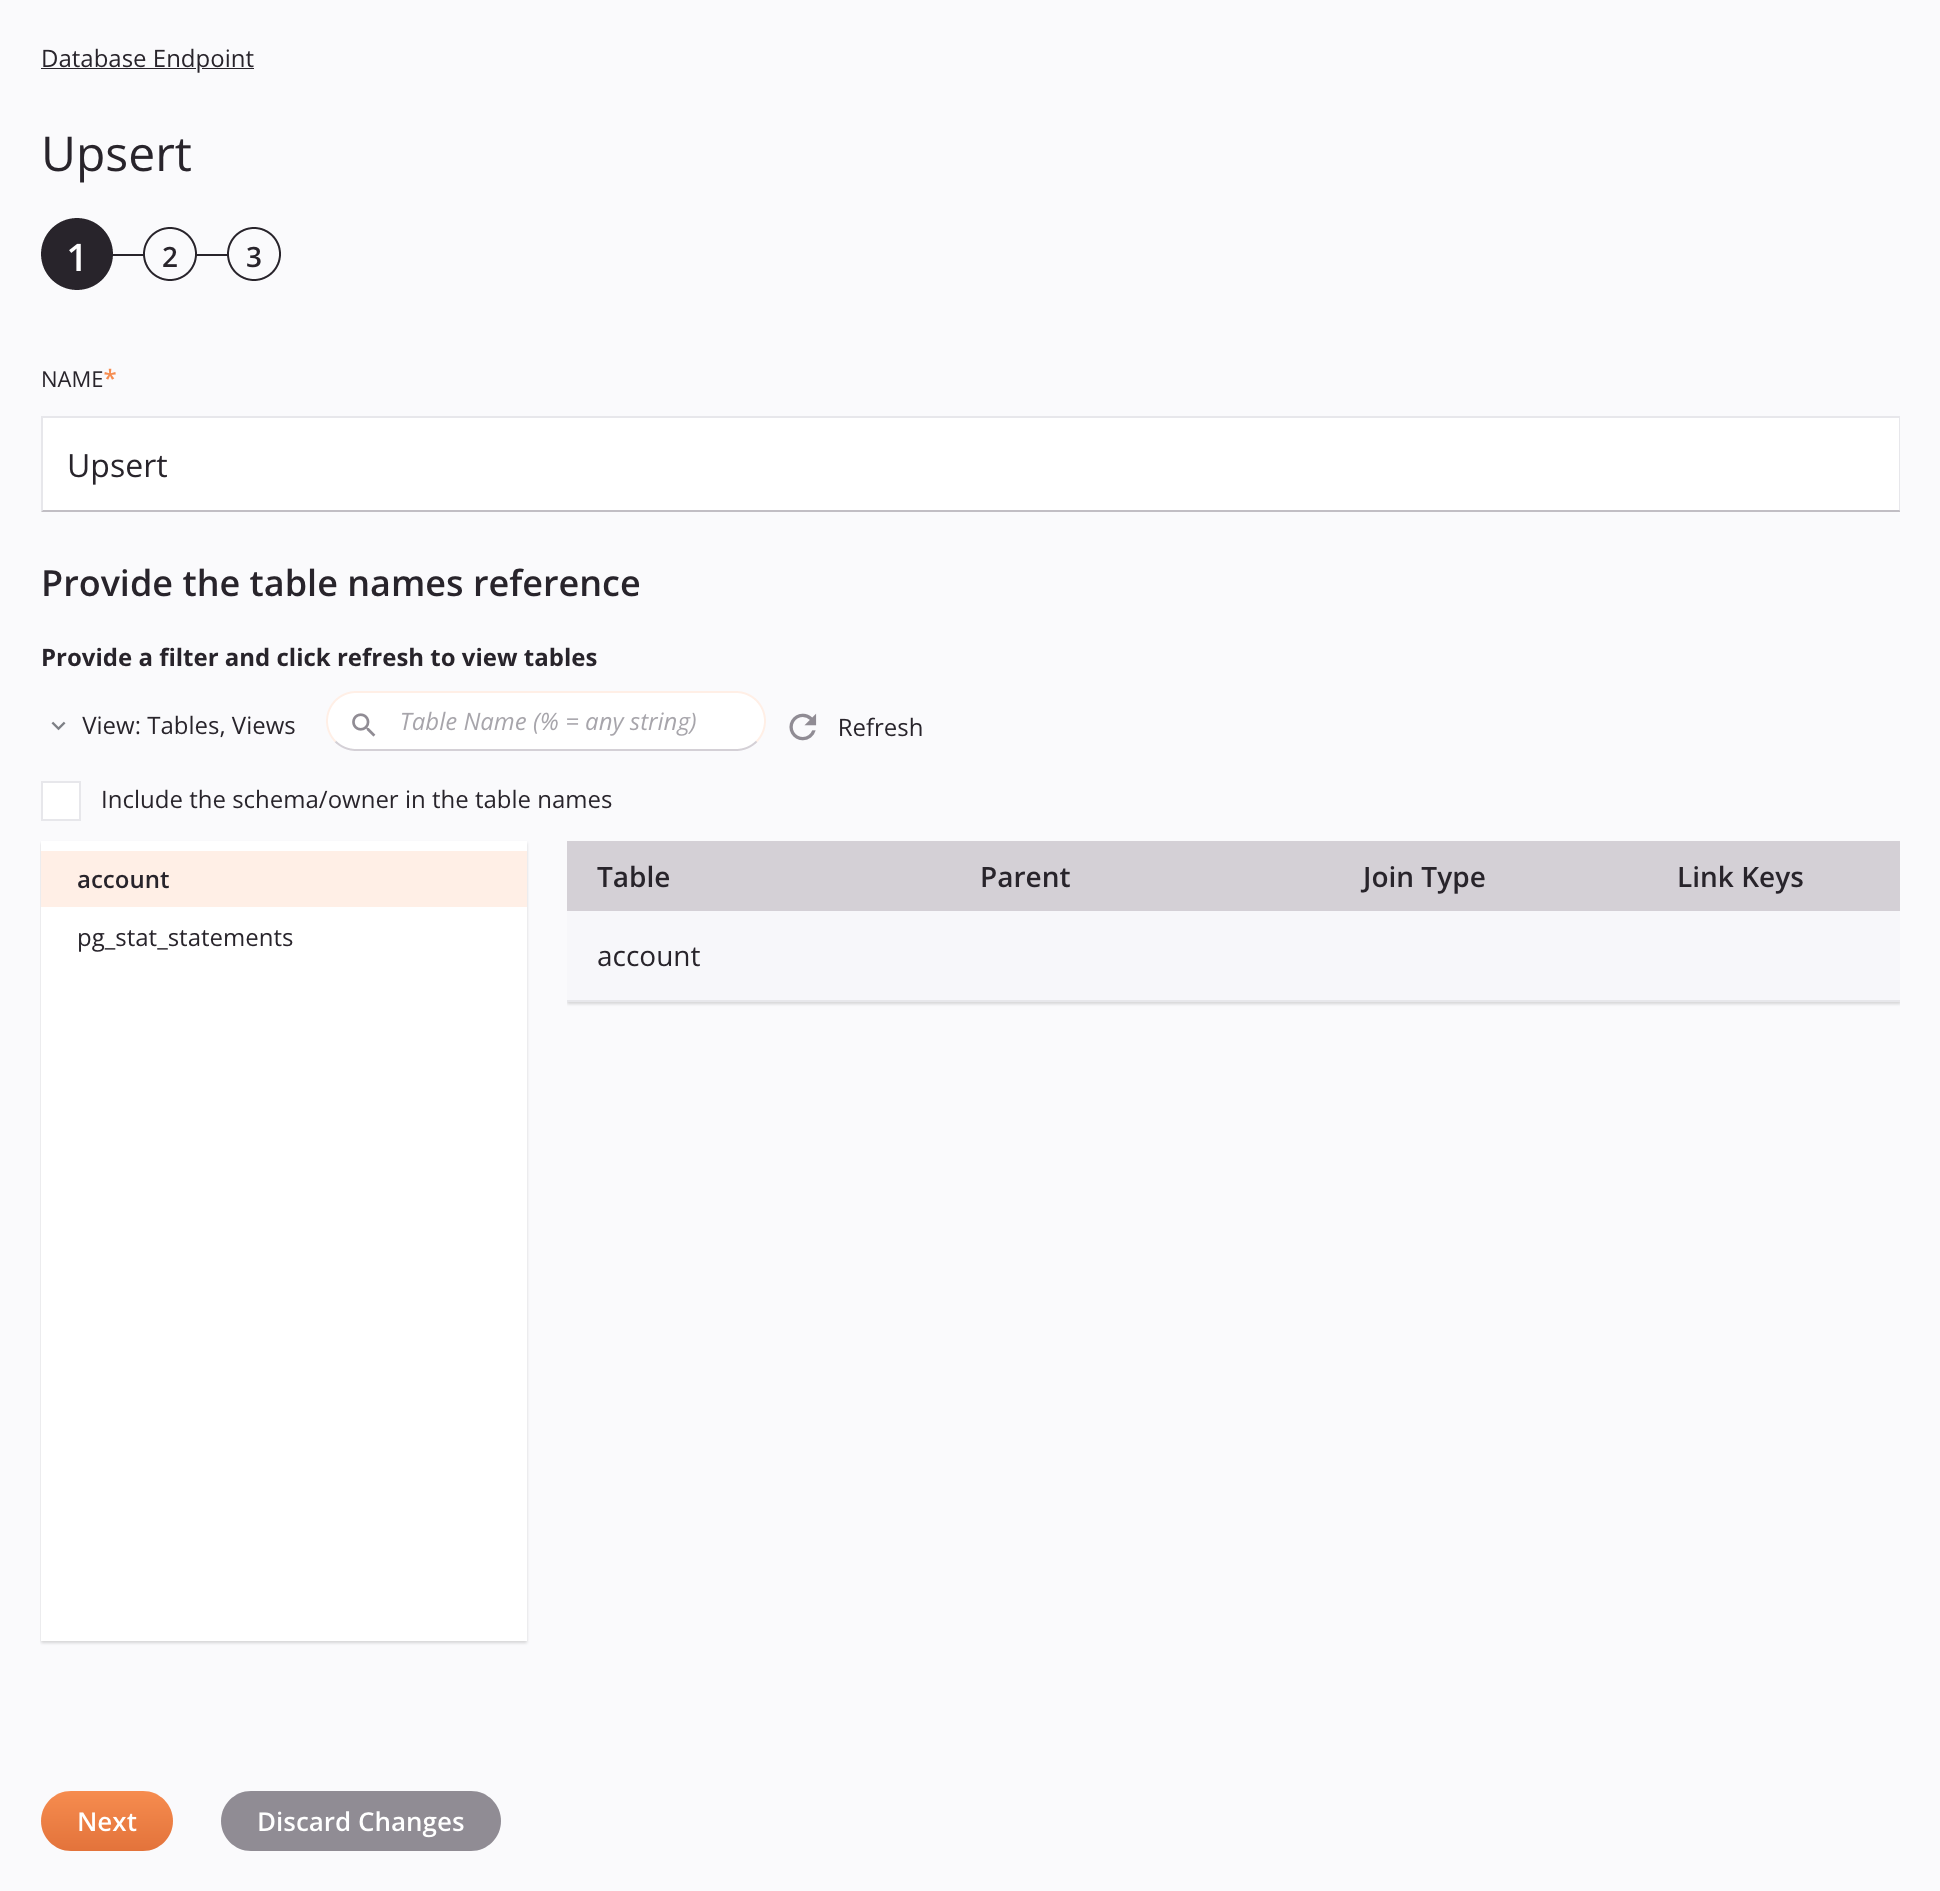
-
In step 2, select the columns to be updated, then click Next.
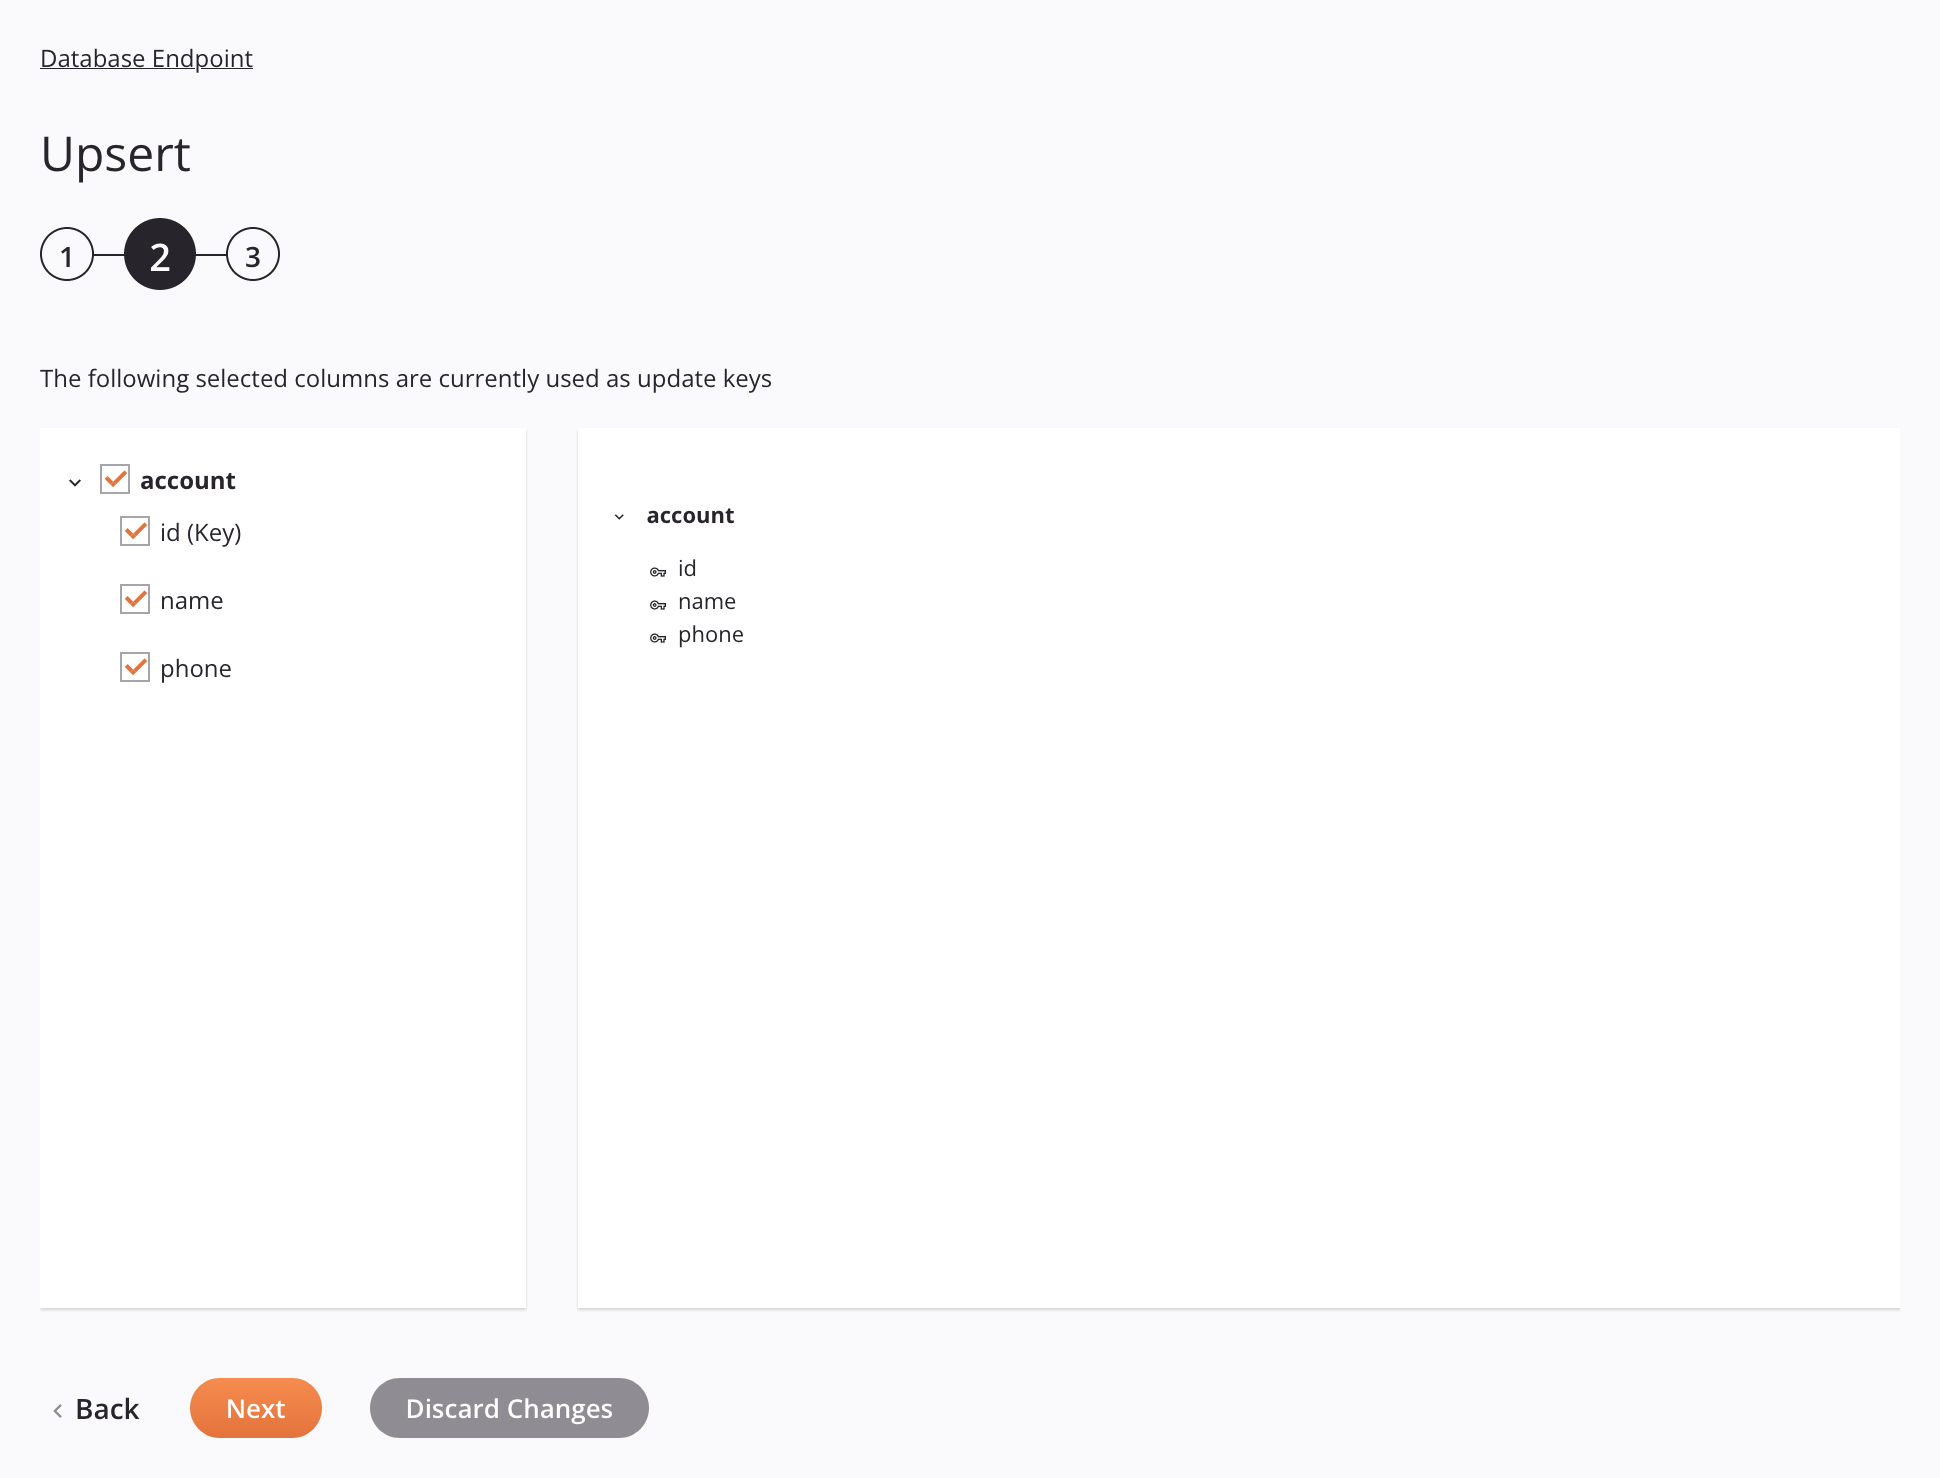
-
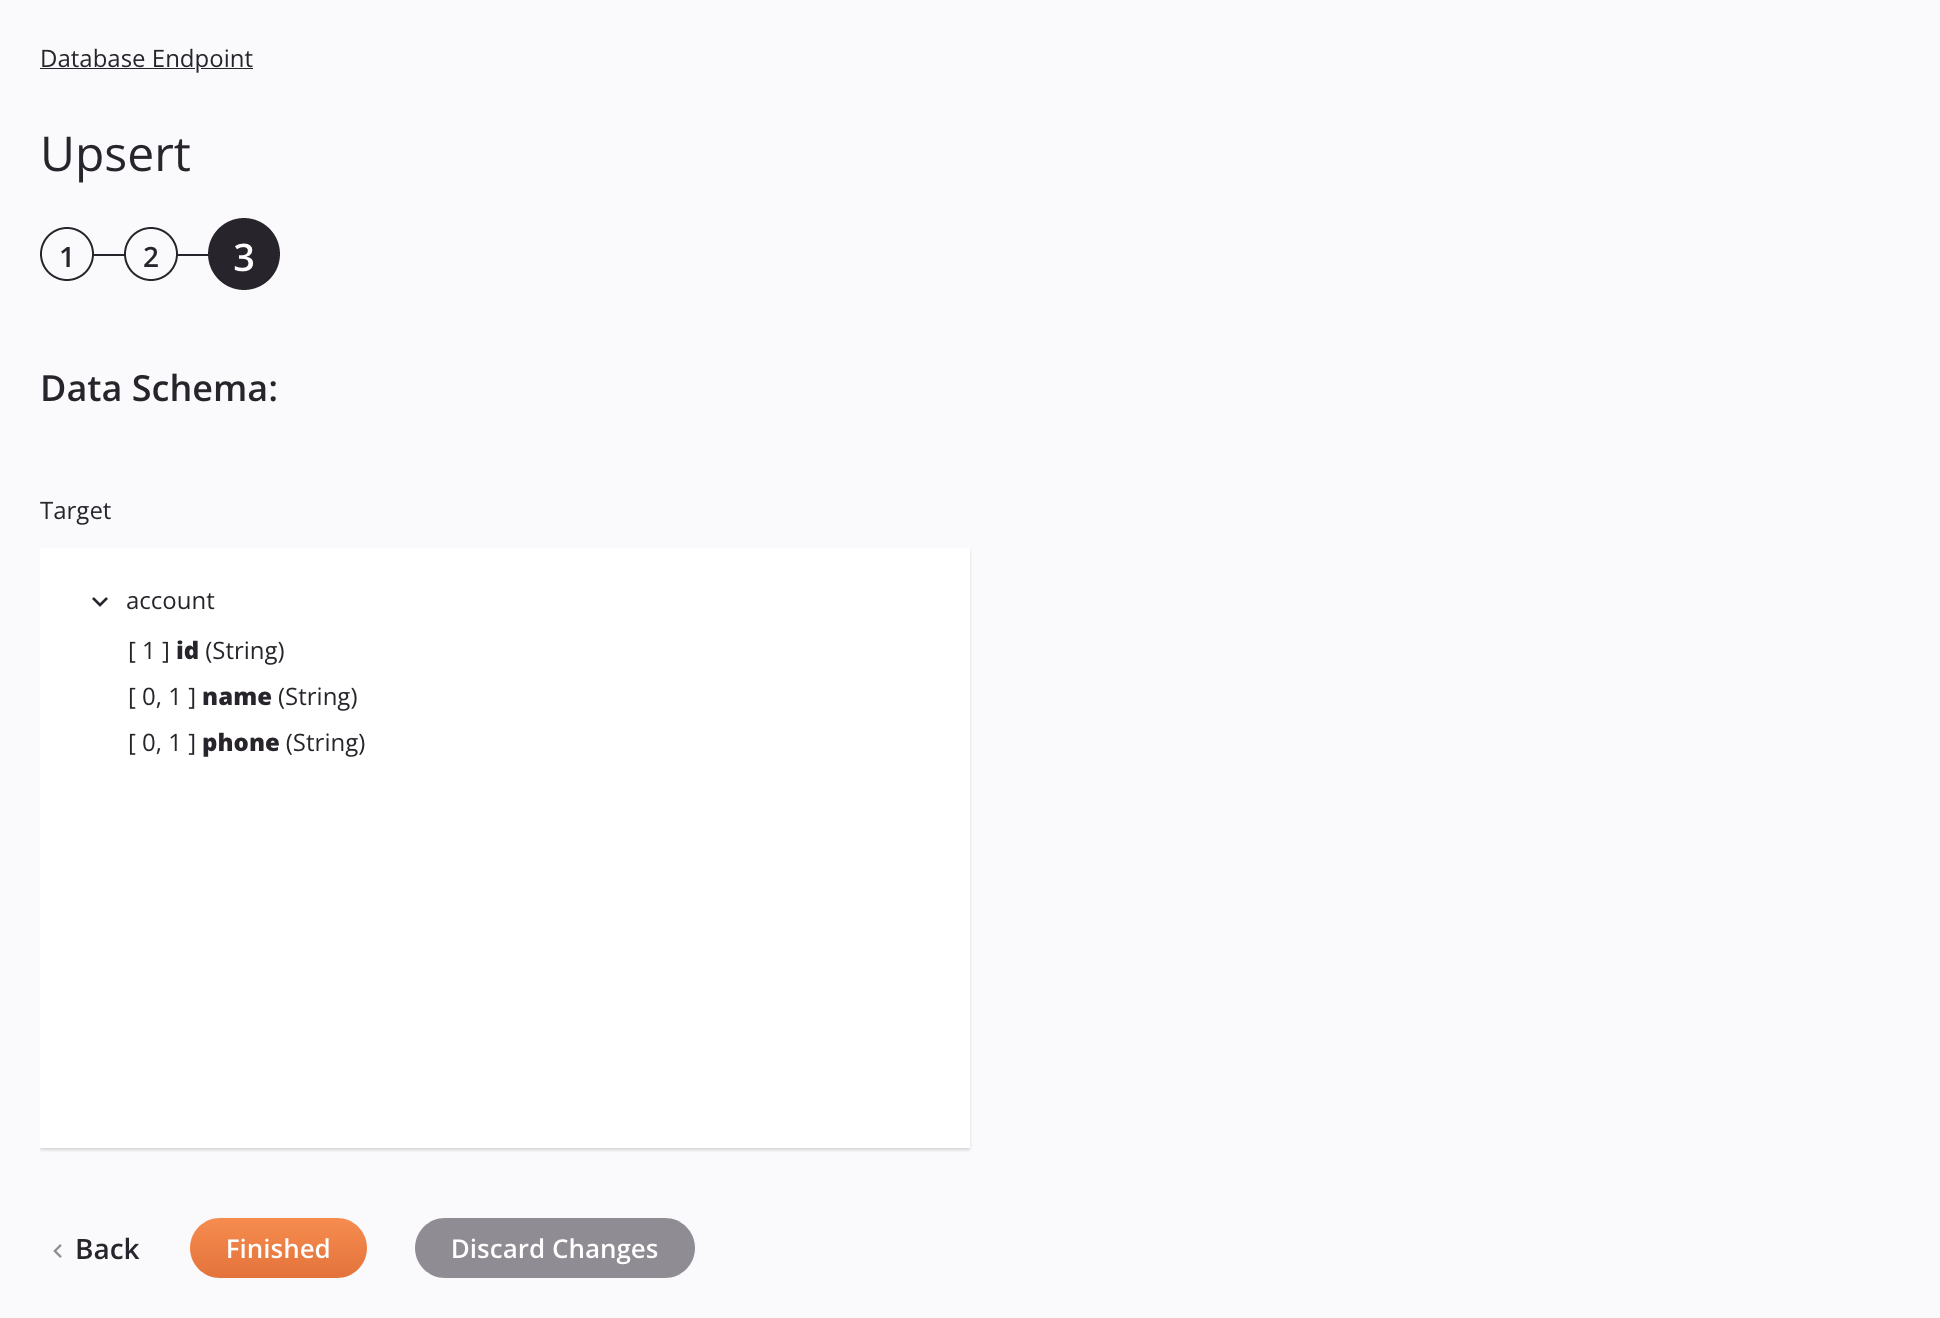
In step 3, click Finished.
-
In the Database Upsert operation, add a new transformation between the Read and Upsert activities.
-
Manually map source Salesforce object fields to target database columns, then close the transformation to return to the workflow.

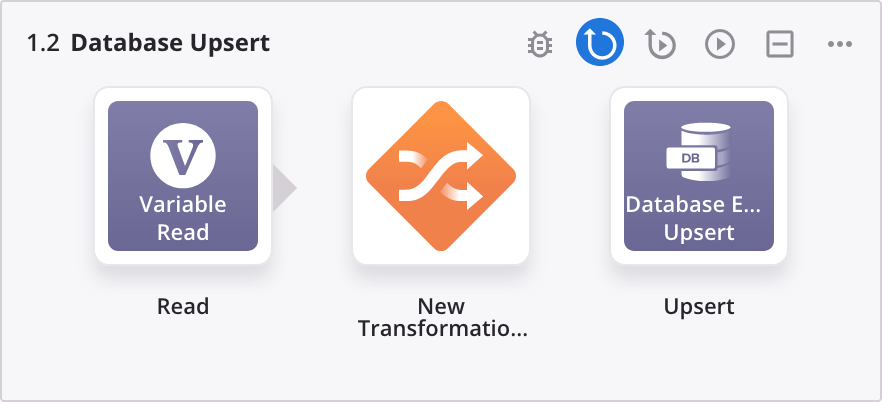
The Database Upsert operation:
Operation actions and deployment
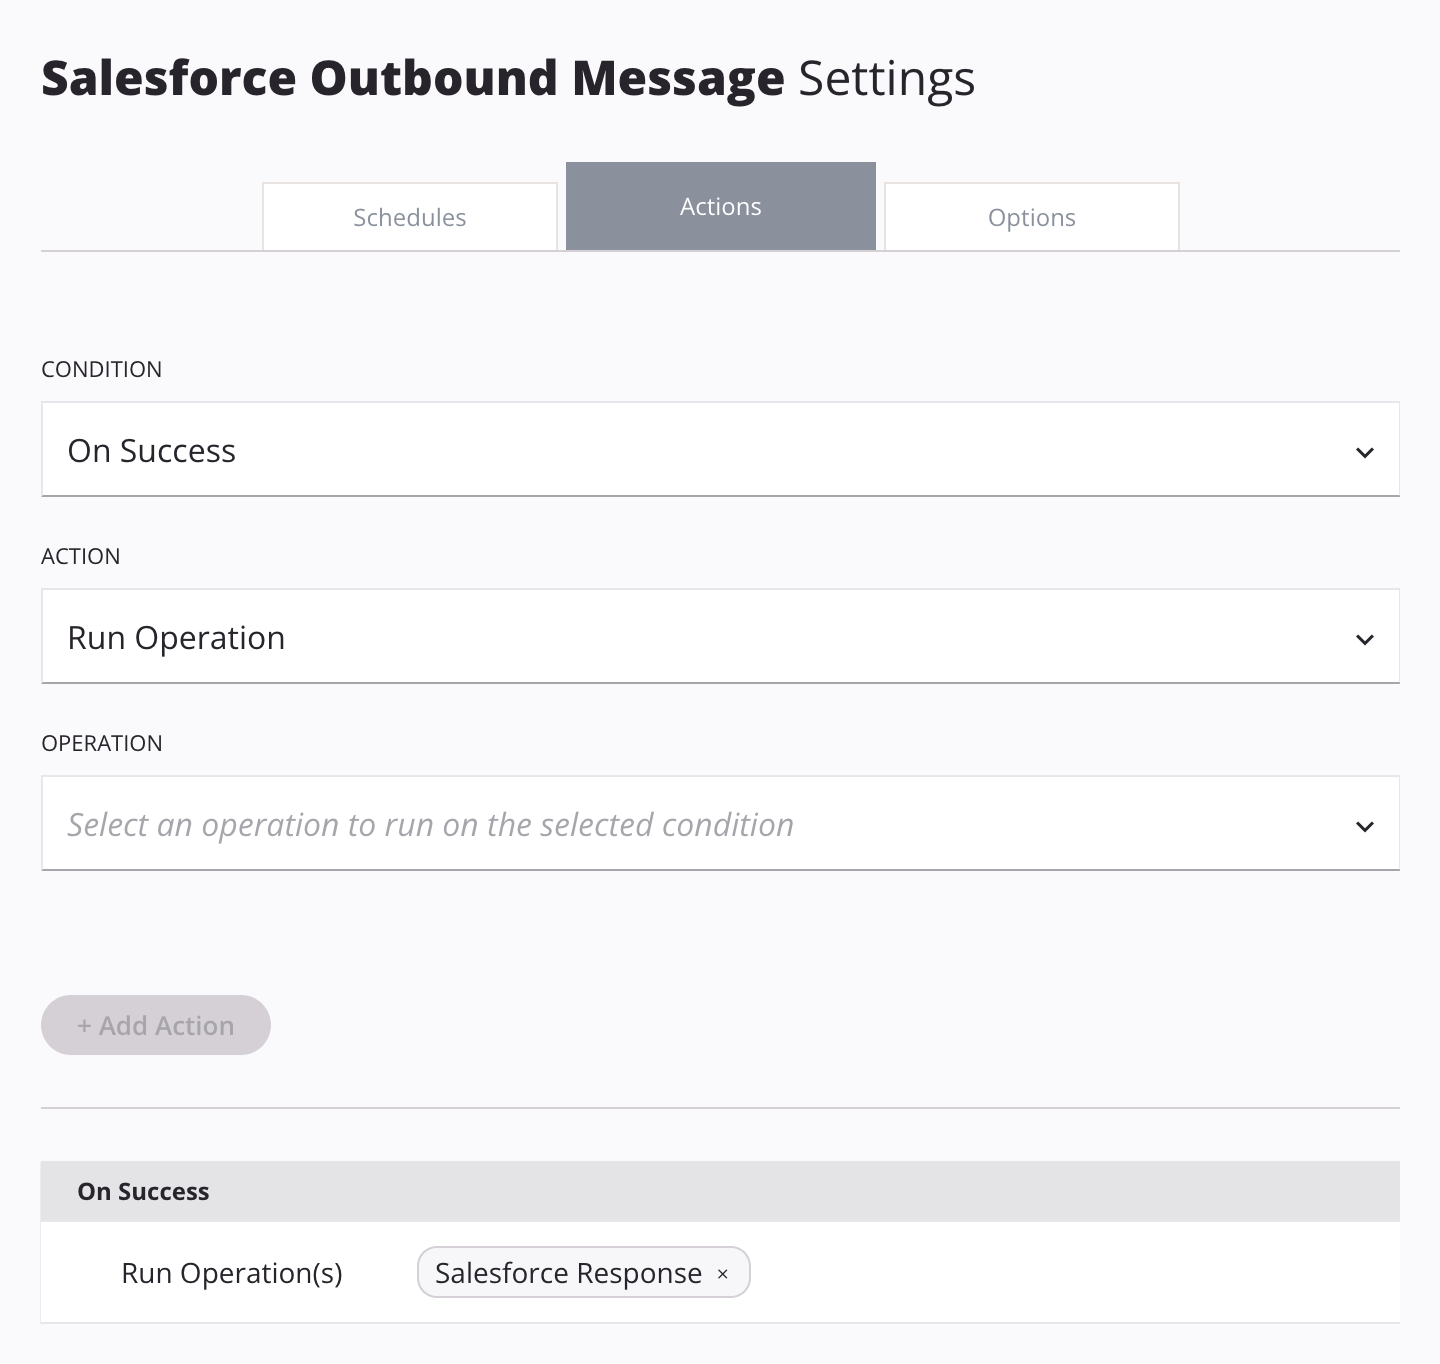
- Open the settings screen for the Salesforce Outbound Message operation.
- Select the Actions tab, then set the following field values:
- Condition: On Success.
- Action: Run Operation.
- Operation: Salesforce Response.
-
Click + Add Action, then close the operation settings screen.
-
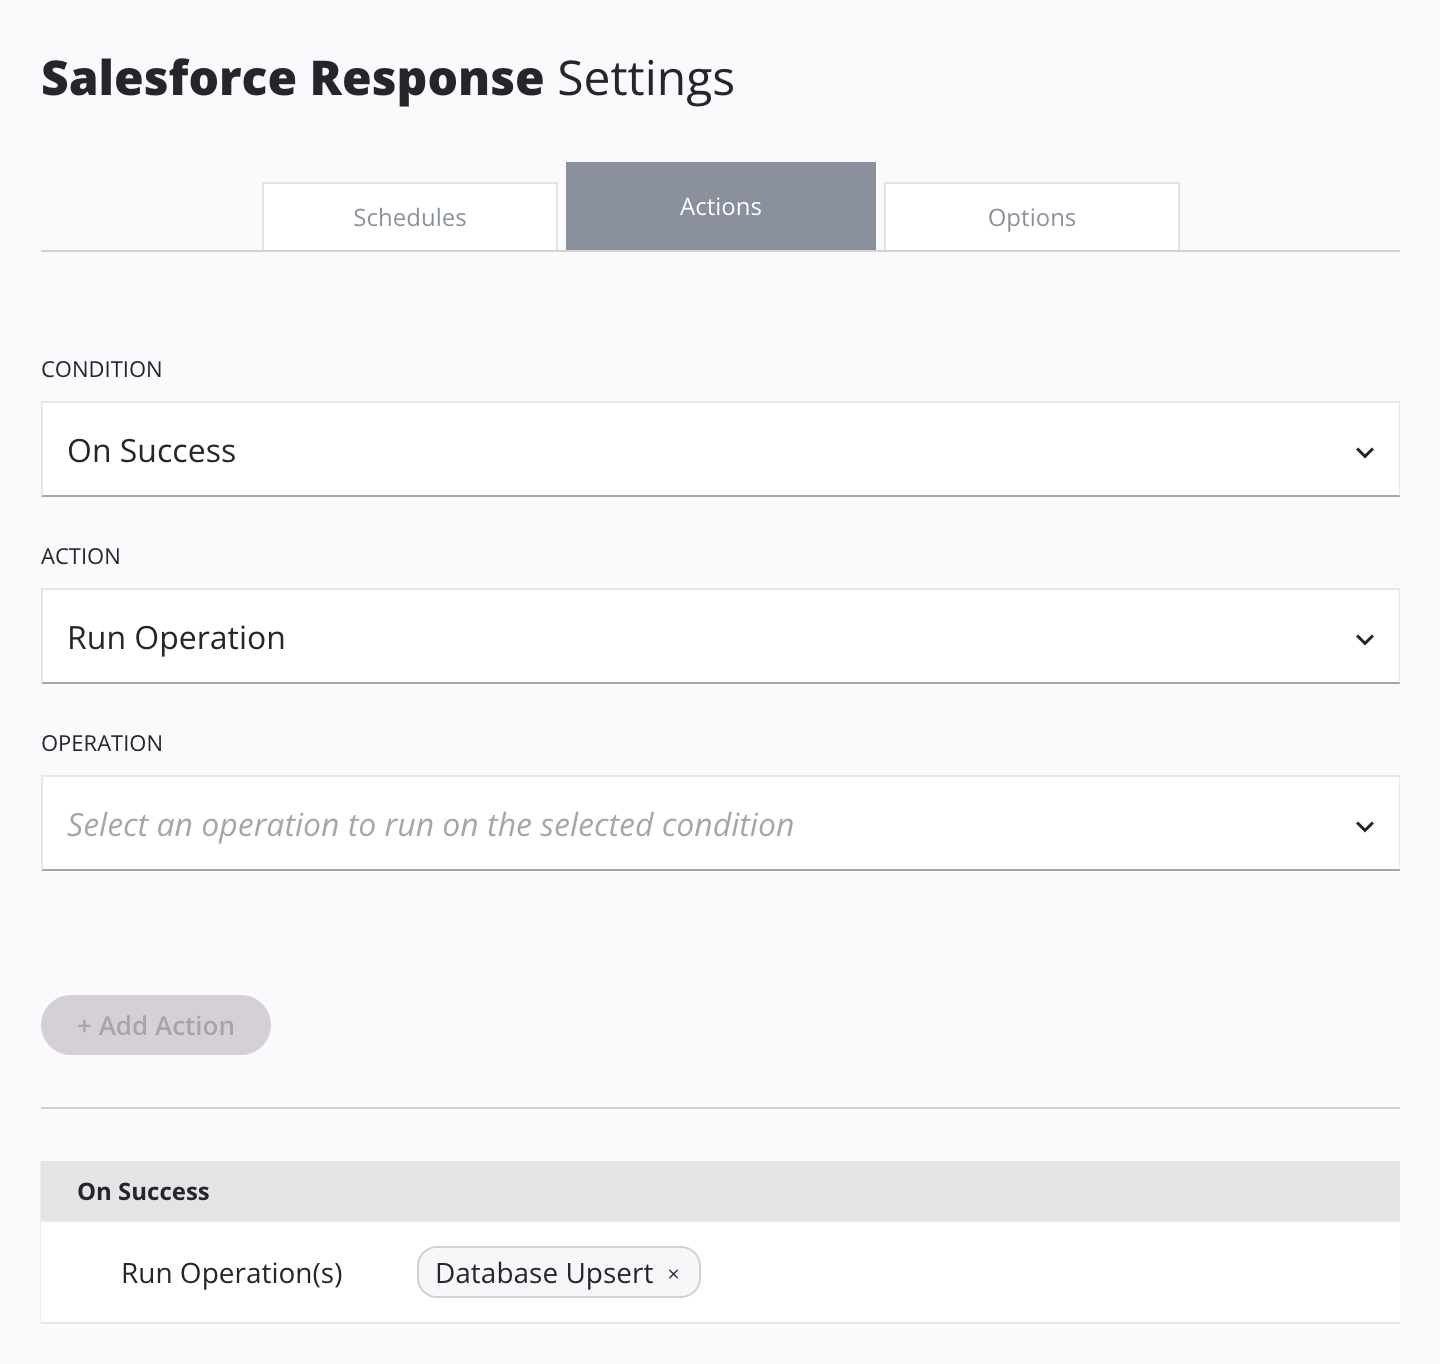
Open the settings screen for the Salesforce Response operation.
- Select the Actions tab, then set the following field values:
- Condition: On Success.
- Action: Run Operation.
- Operation: Database Upsert.
-
Click + Add Action, then close the operation settings screen.
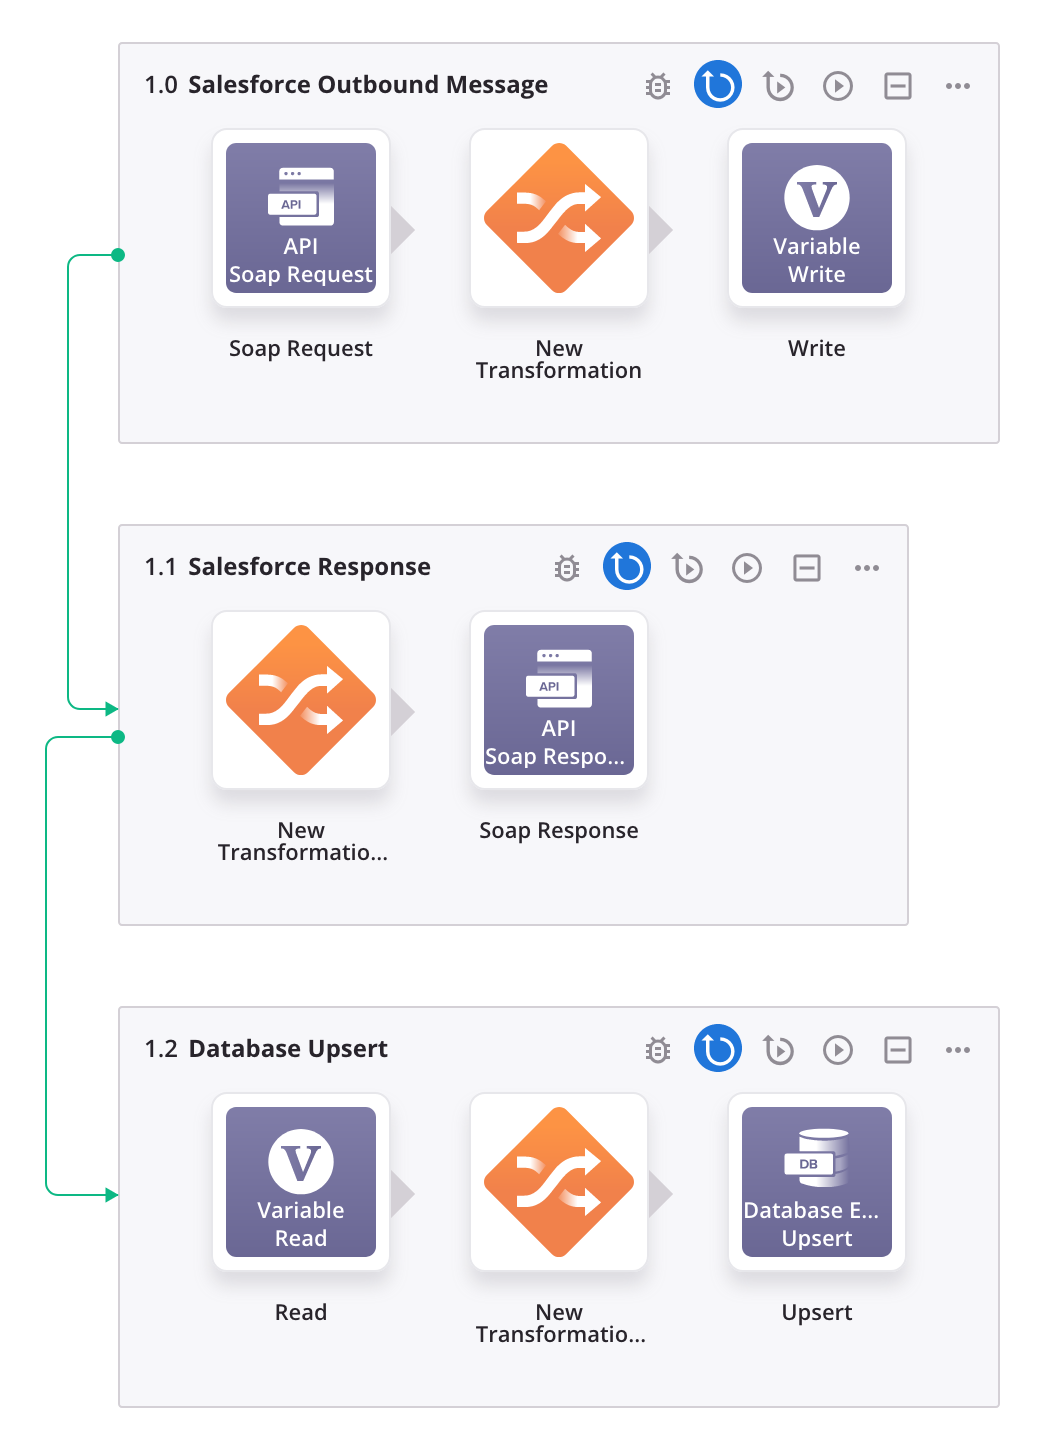
The completed project, prior to deployment:
-
Deploy the project.
Part 3: API Manager API
- In API Manager, select My APIs, then click New API.
-
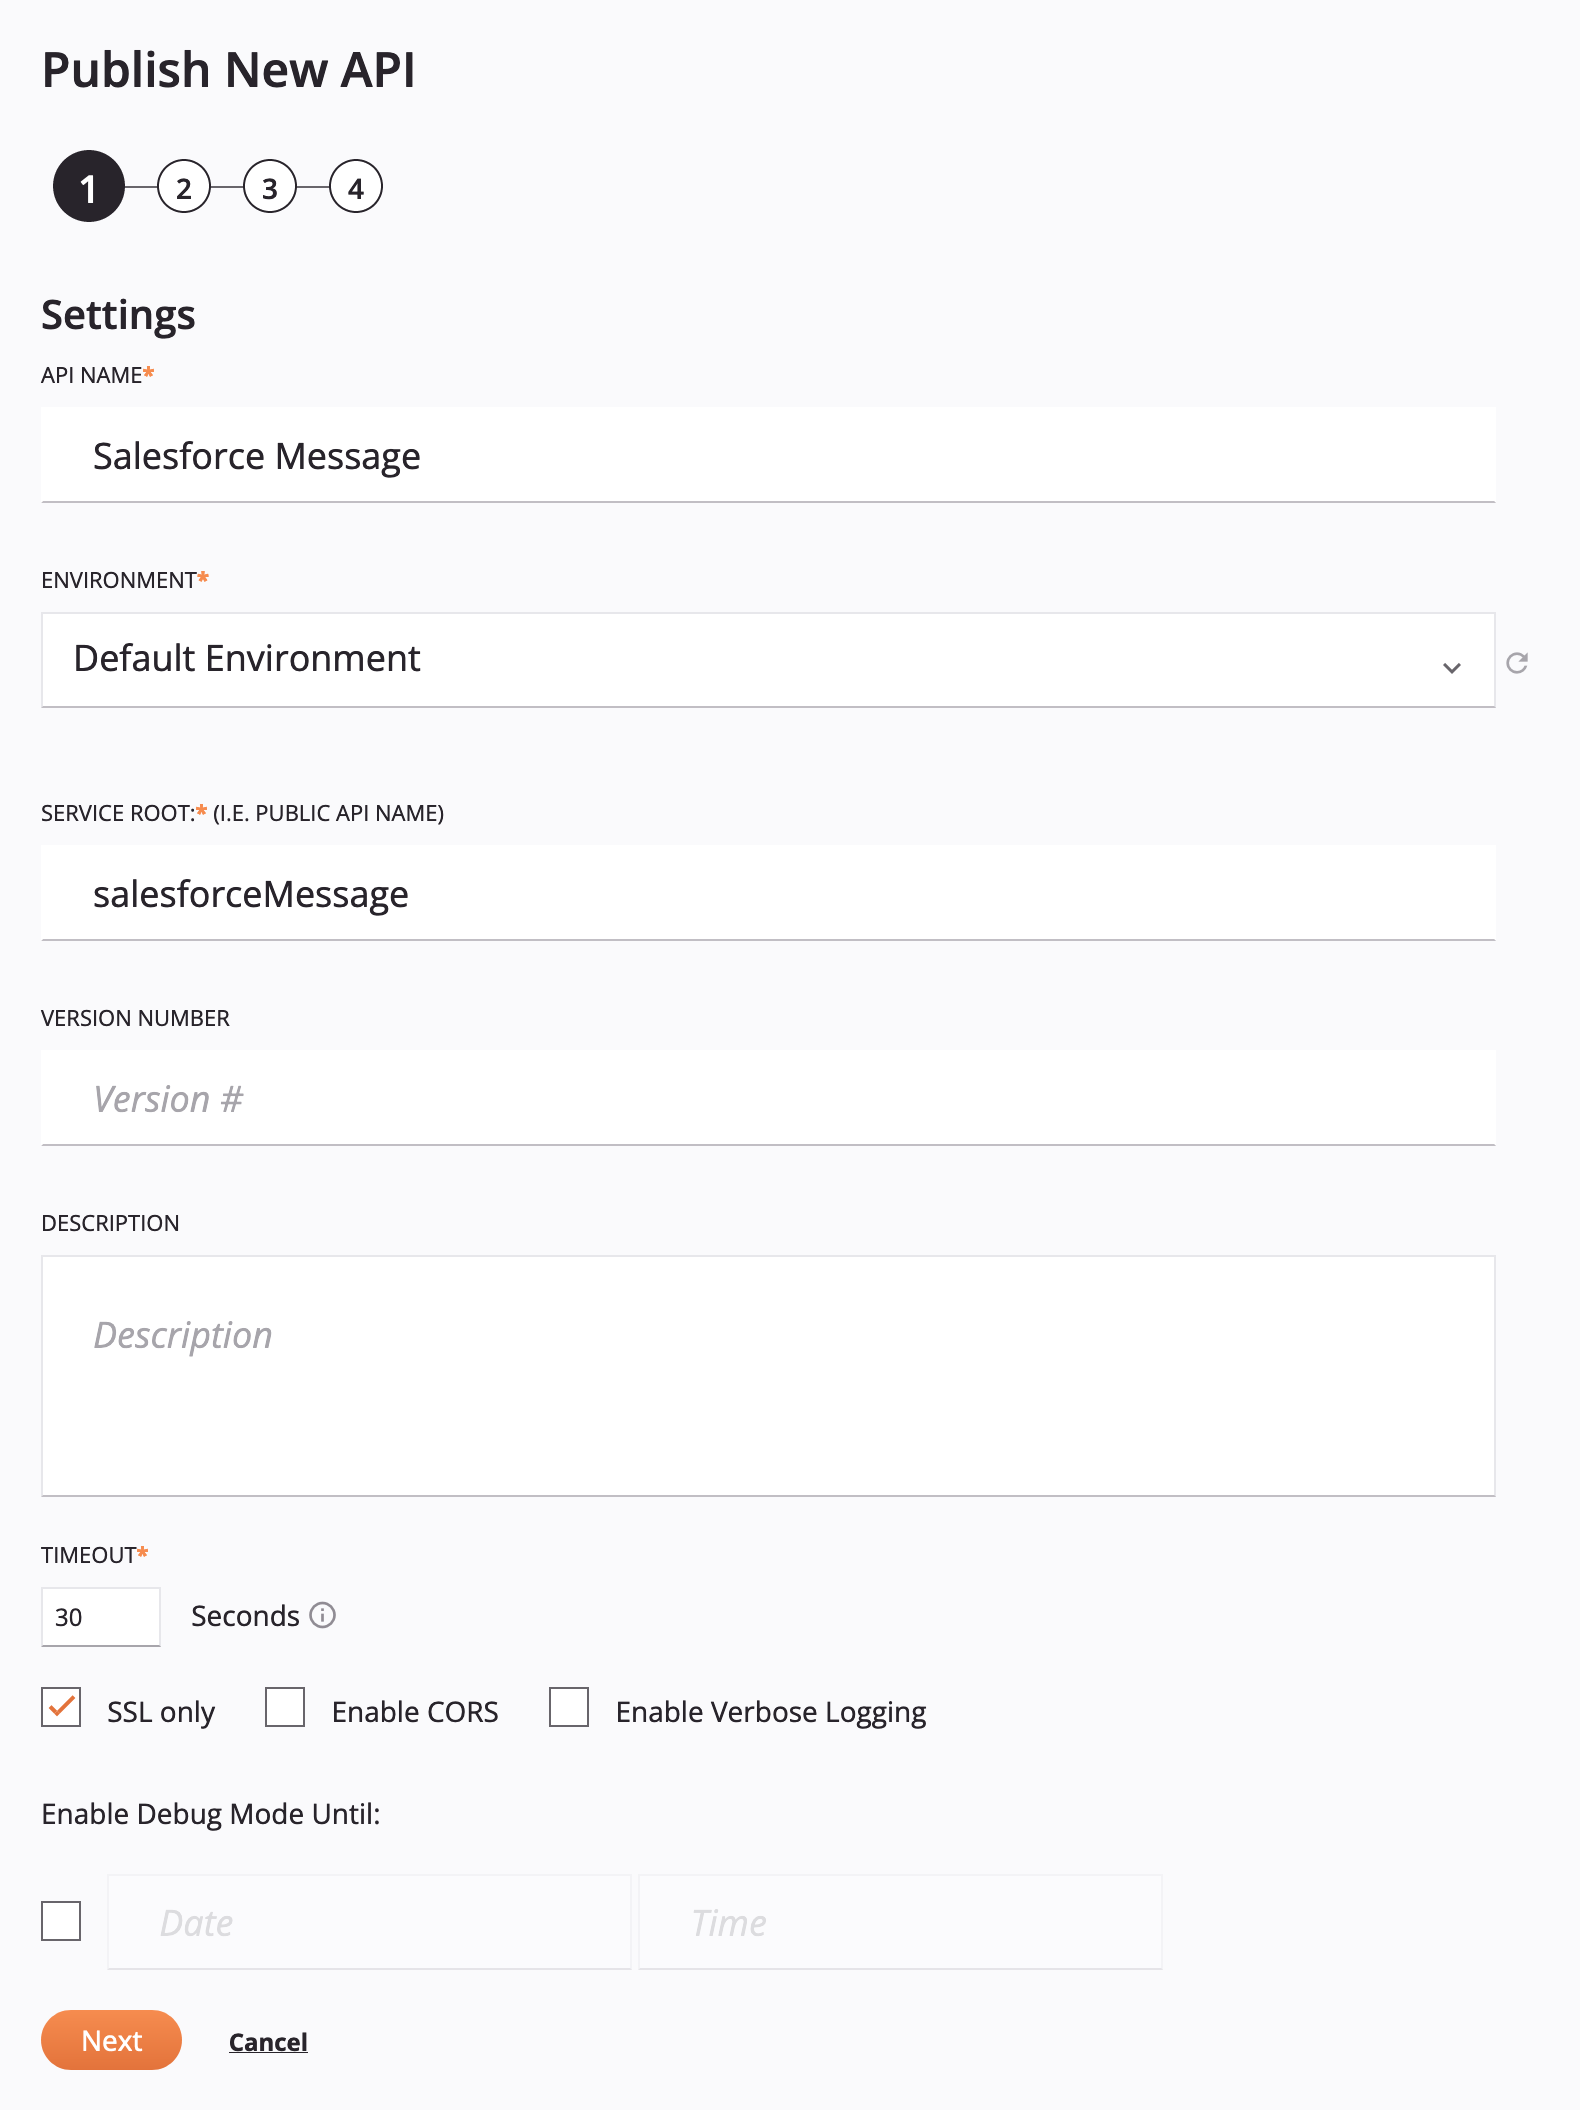
In step 1 of the Publish New API page, enter values for the following, then click Next:
- API Name: Enter a name for the API.
- Environment: Select the environment where the Cloud Studio project was deployed to.
- Service Root: Leave the initial value derived from the API name.
- Version Number: (Optional) Enter an API version number.
- Description: (Optional) Enter a description for this API.
-
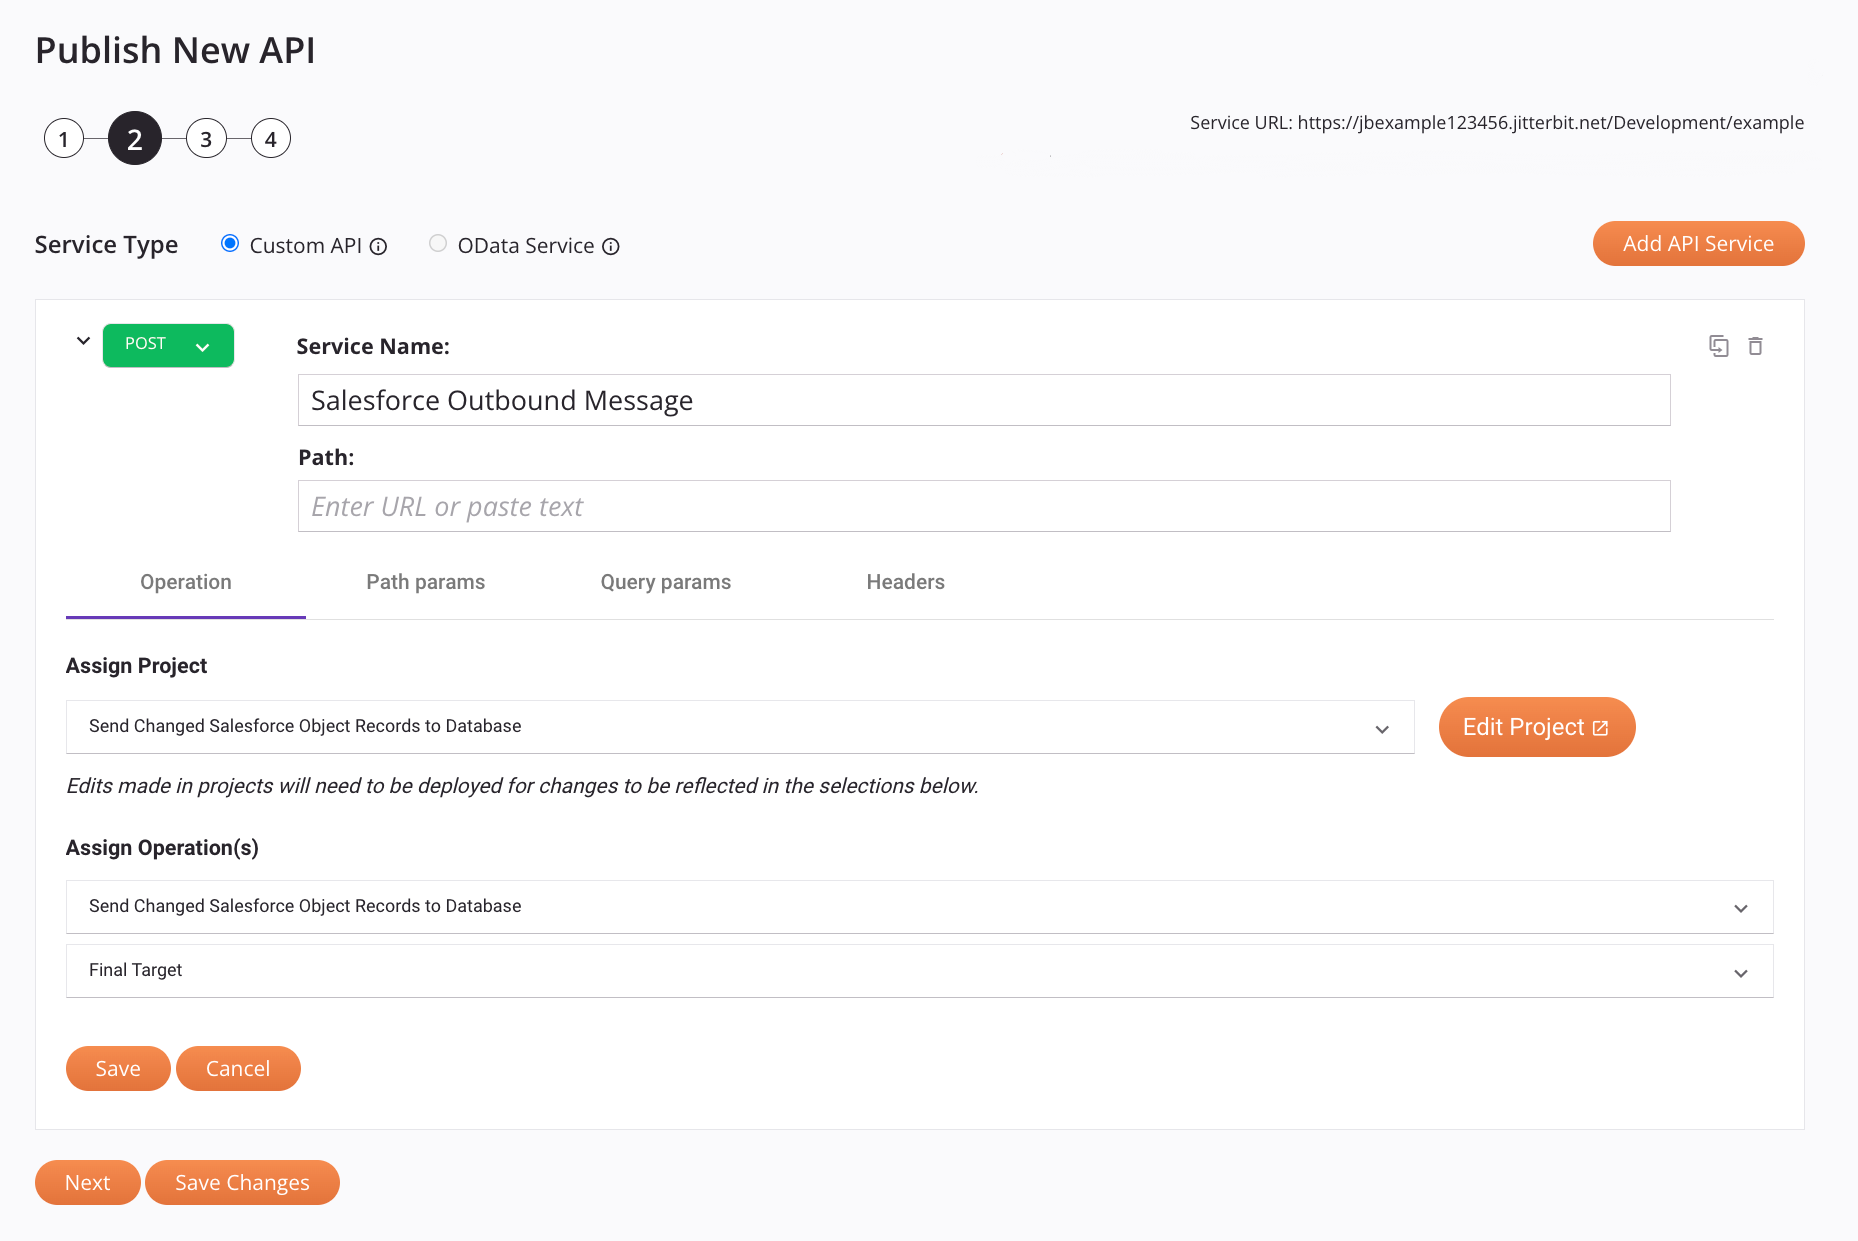
In step 2, select Custom API as the Service Type and then click Add API Service. For the new API service, enter these values for the following fields, click Save, and then click Next:
-
Request Method: Use the menu to select the POST request method for the API service. By default, the request method is set to GET.
-
Service Name: Enter a service name.
-
In the Operation tab, select these values:
-
Assign Project: From the menu, select your Cloud Studio project.
-
Assign Operation(s):
-
Operation: Selcect the Salesforce Outbound Message operation.
-
Response Type: Select Final Target as the response type.
-
-
-
-
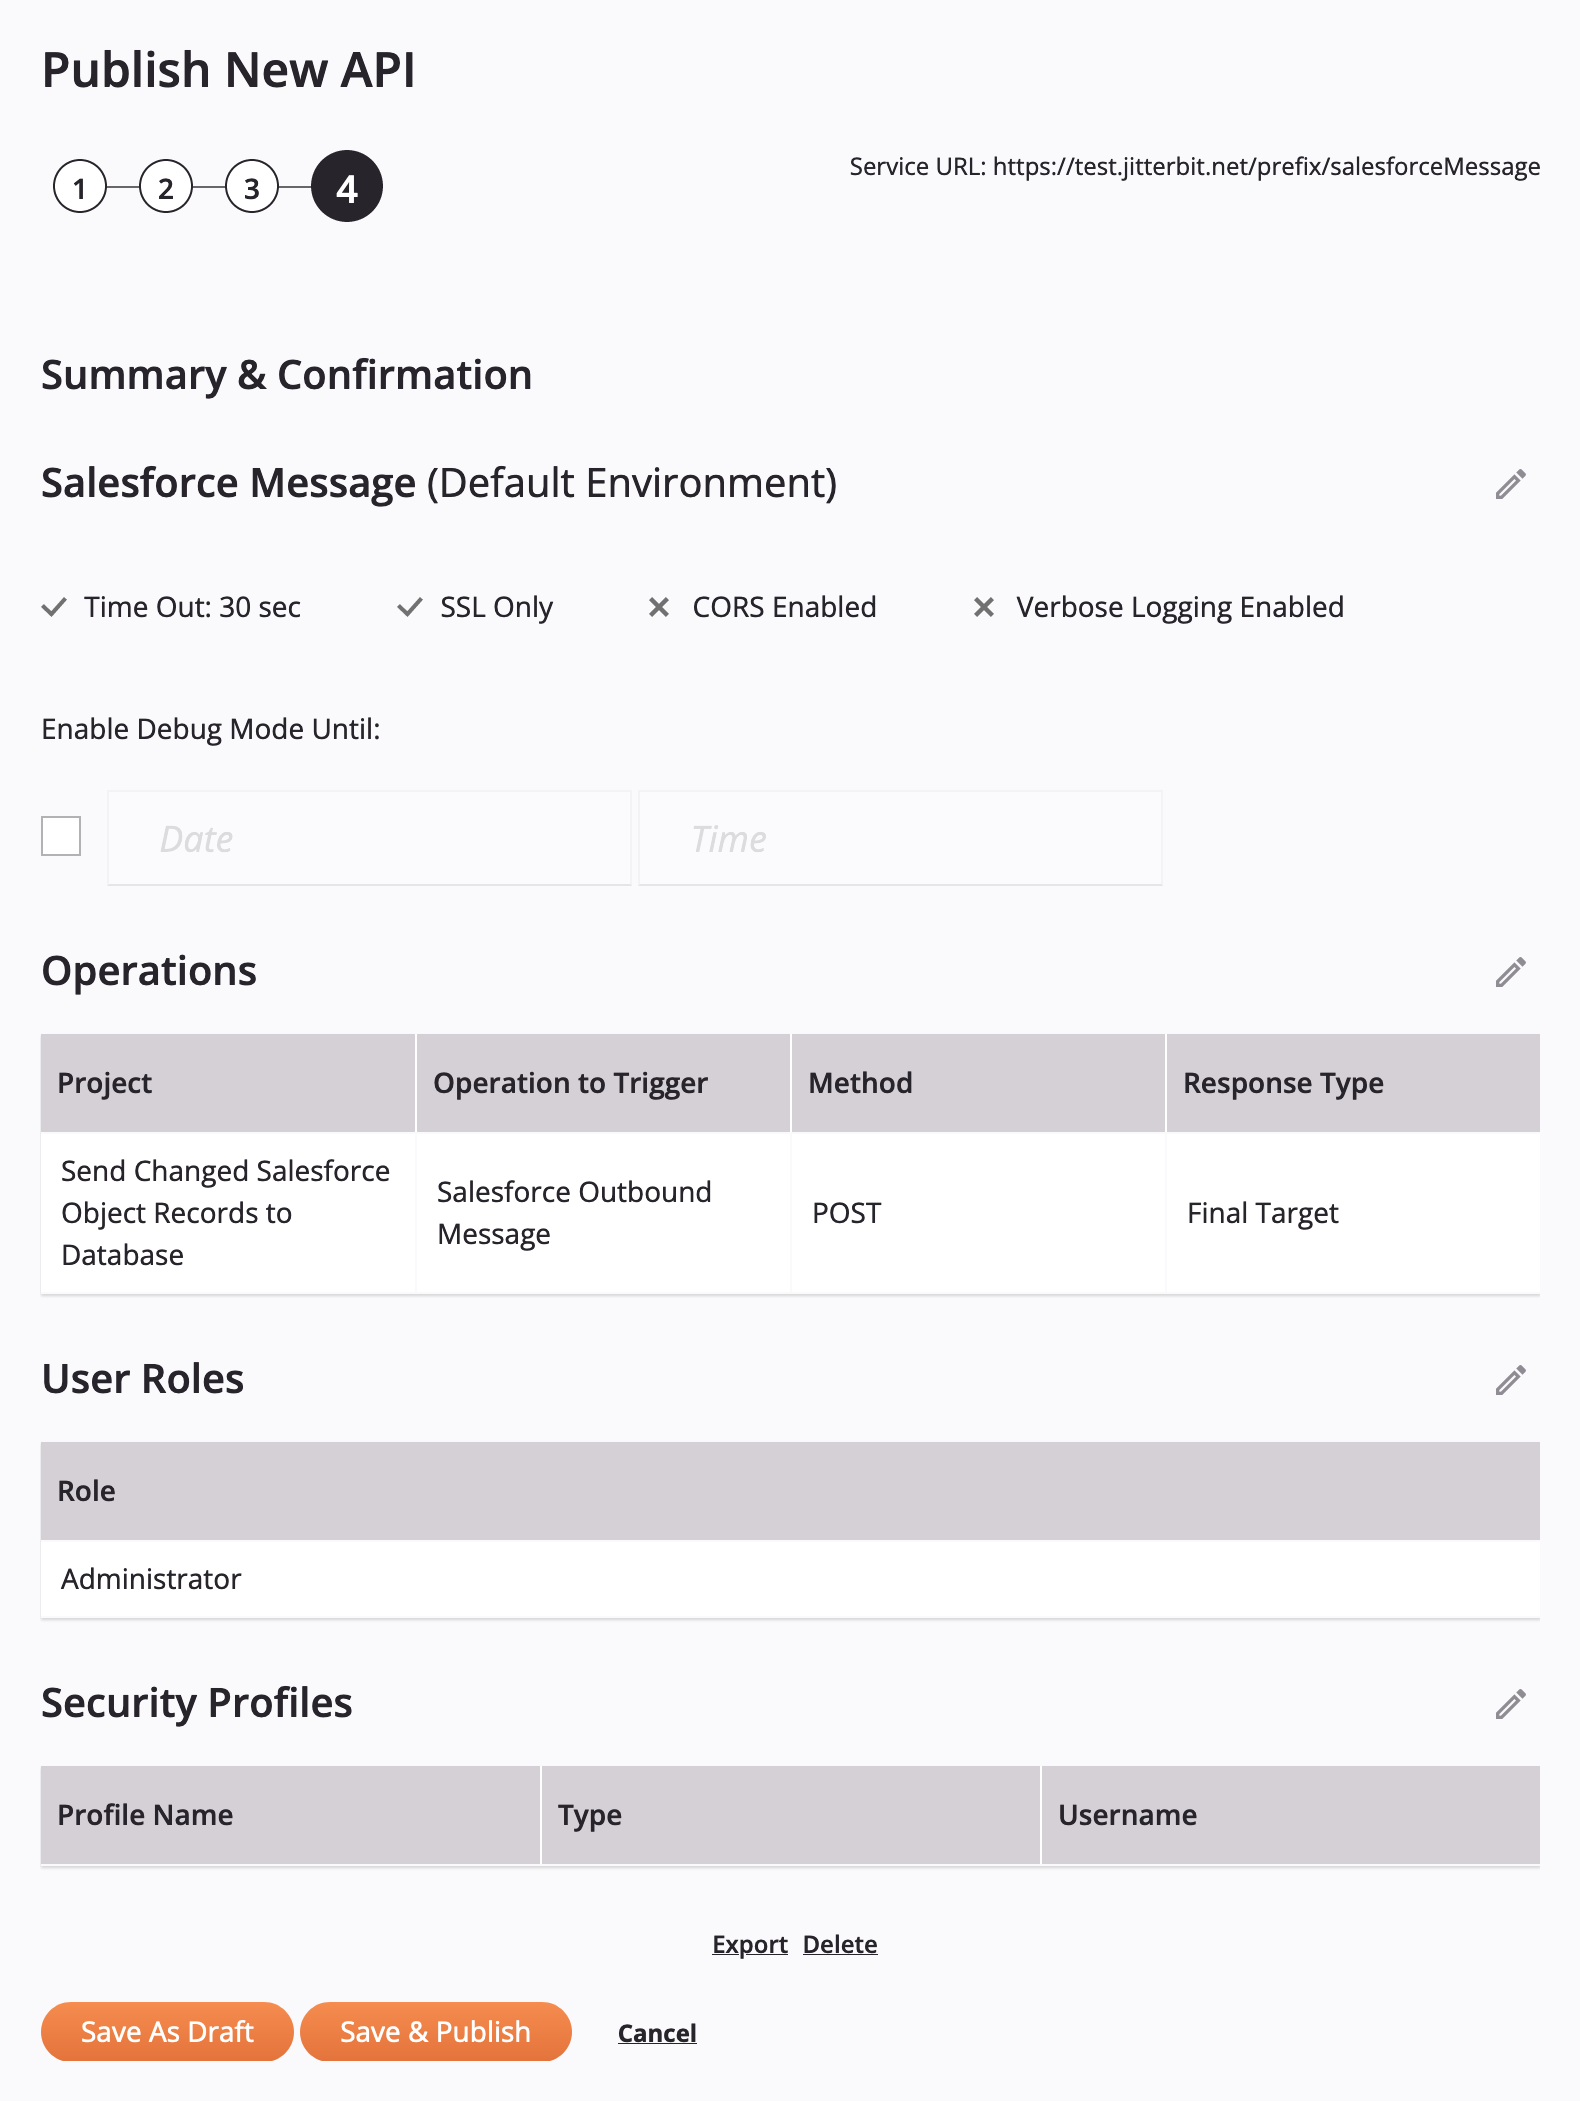
In step 3, click Skip This Step.
-
In step 4, click Save & Publish.
-
In the dialog titled All Set, Your API is Live!, click Copy URL, then click Dismiss.
Part 4: Update Salesforce endpoint URL and activate
- In Salesforce, select Setup > Platform Tools > Process Automation > Workflow Actions > Outbound Messages.
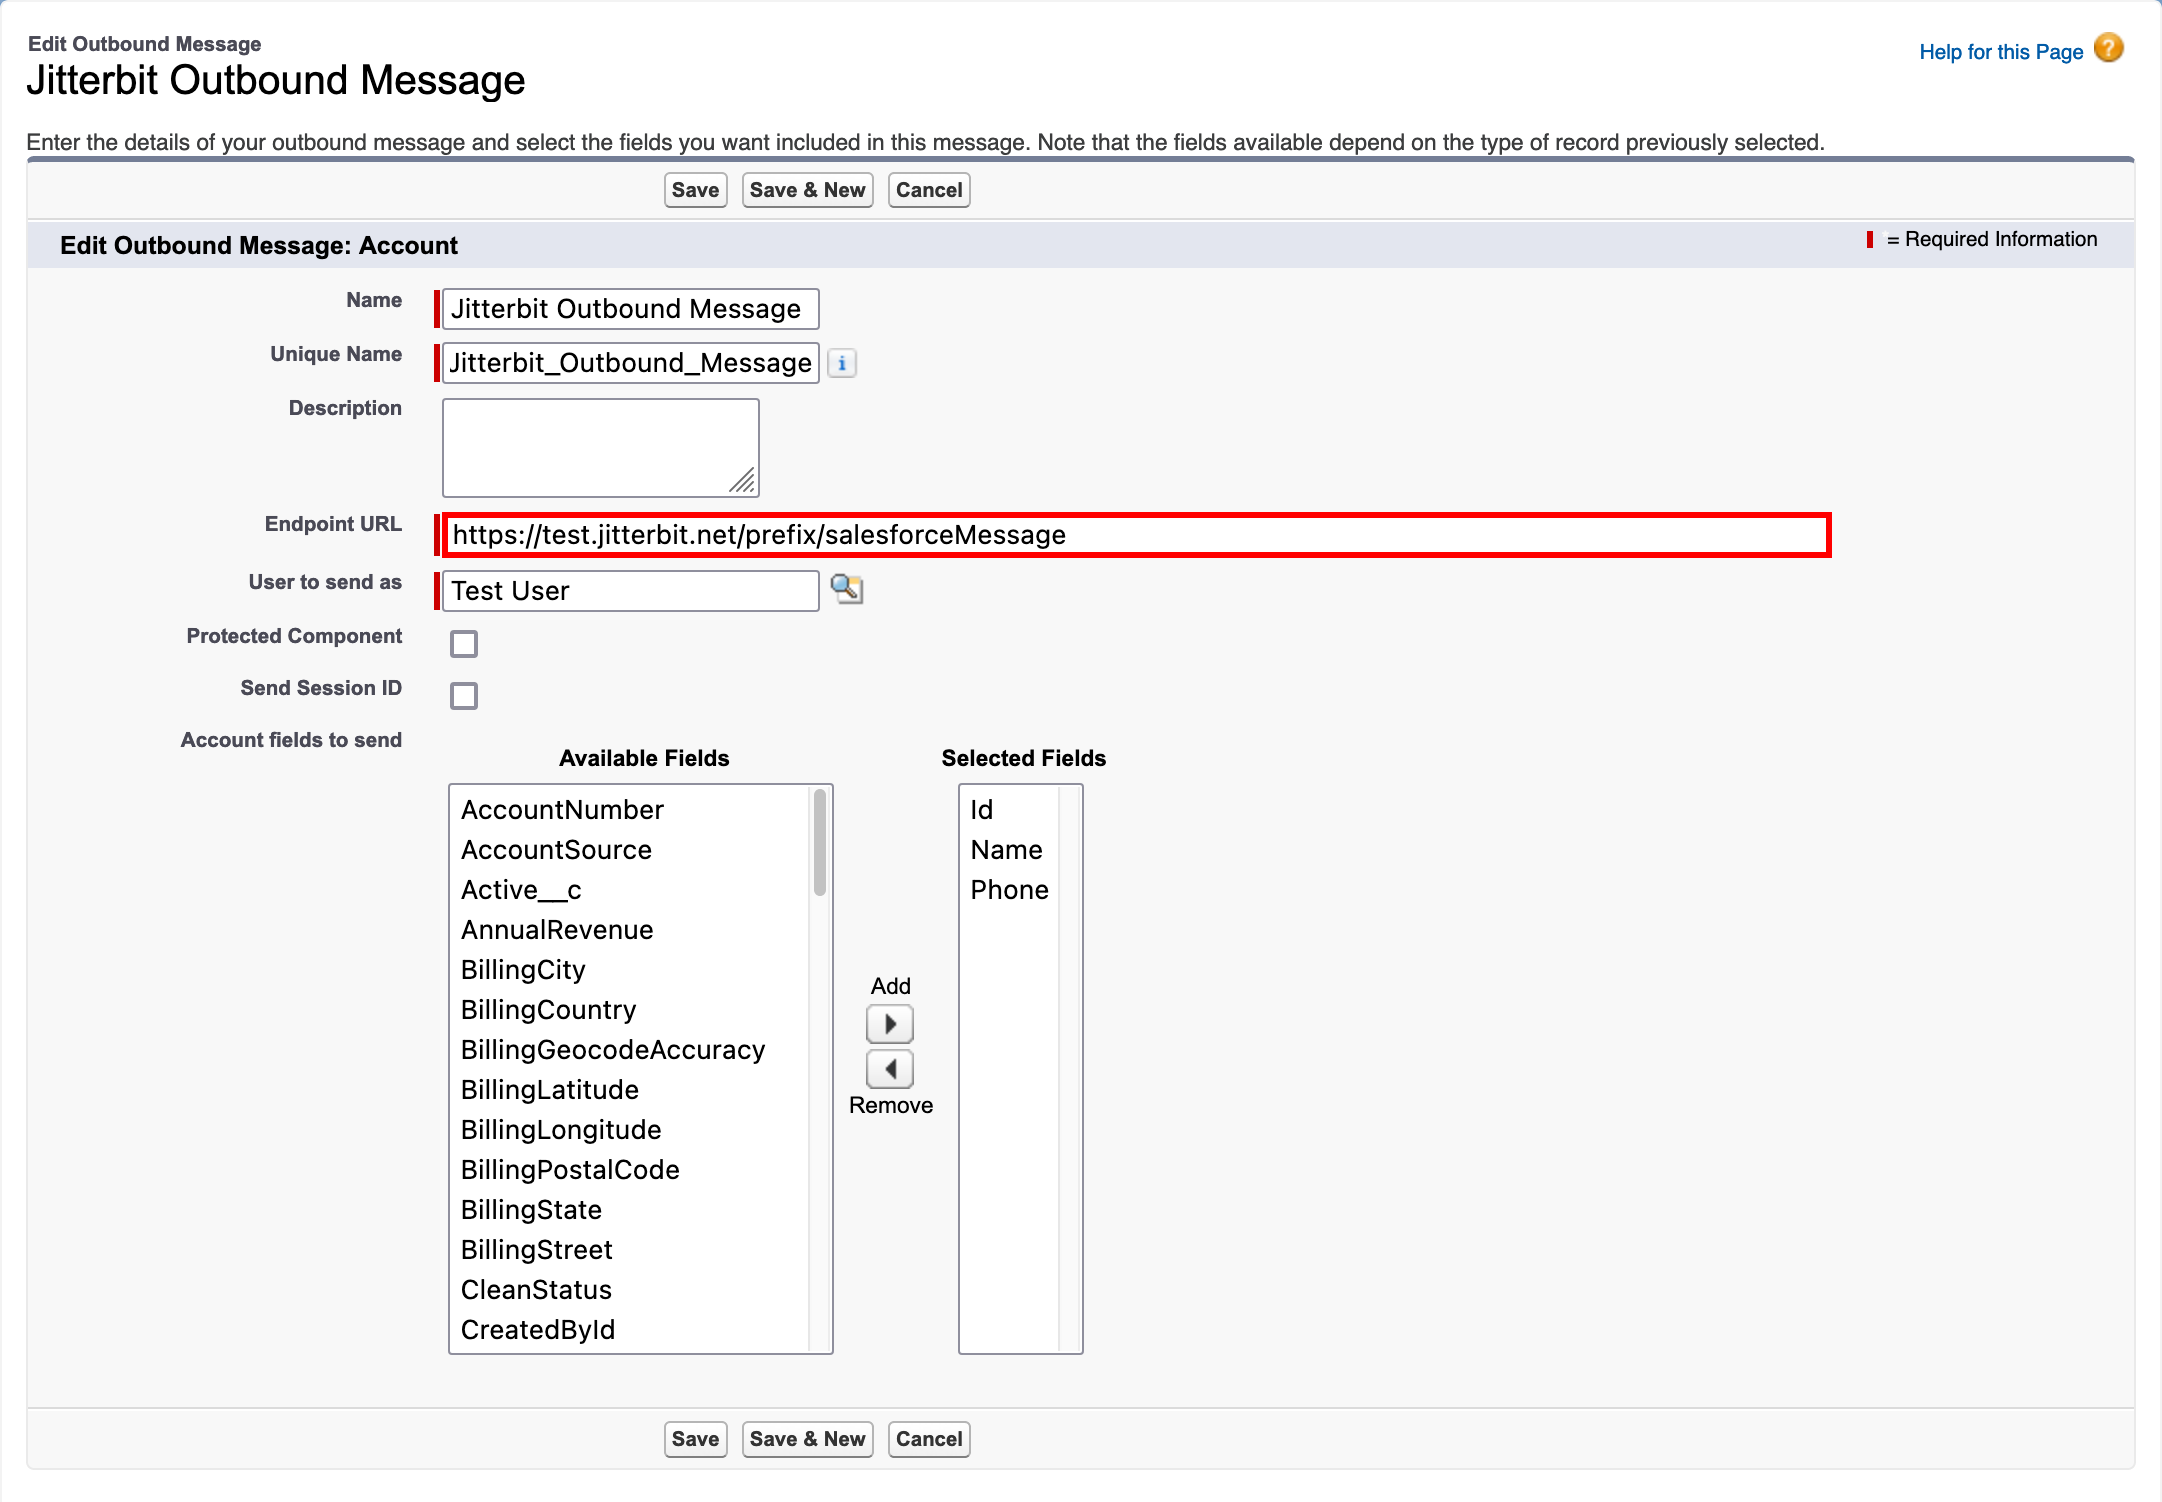
- On the Outbound Messages page, click Edit for your outbound message.
-
Replace the contents of Endpoint URL field (highlighted in the image below) with the URL copied at the end of the previous section, then click Save.
-
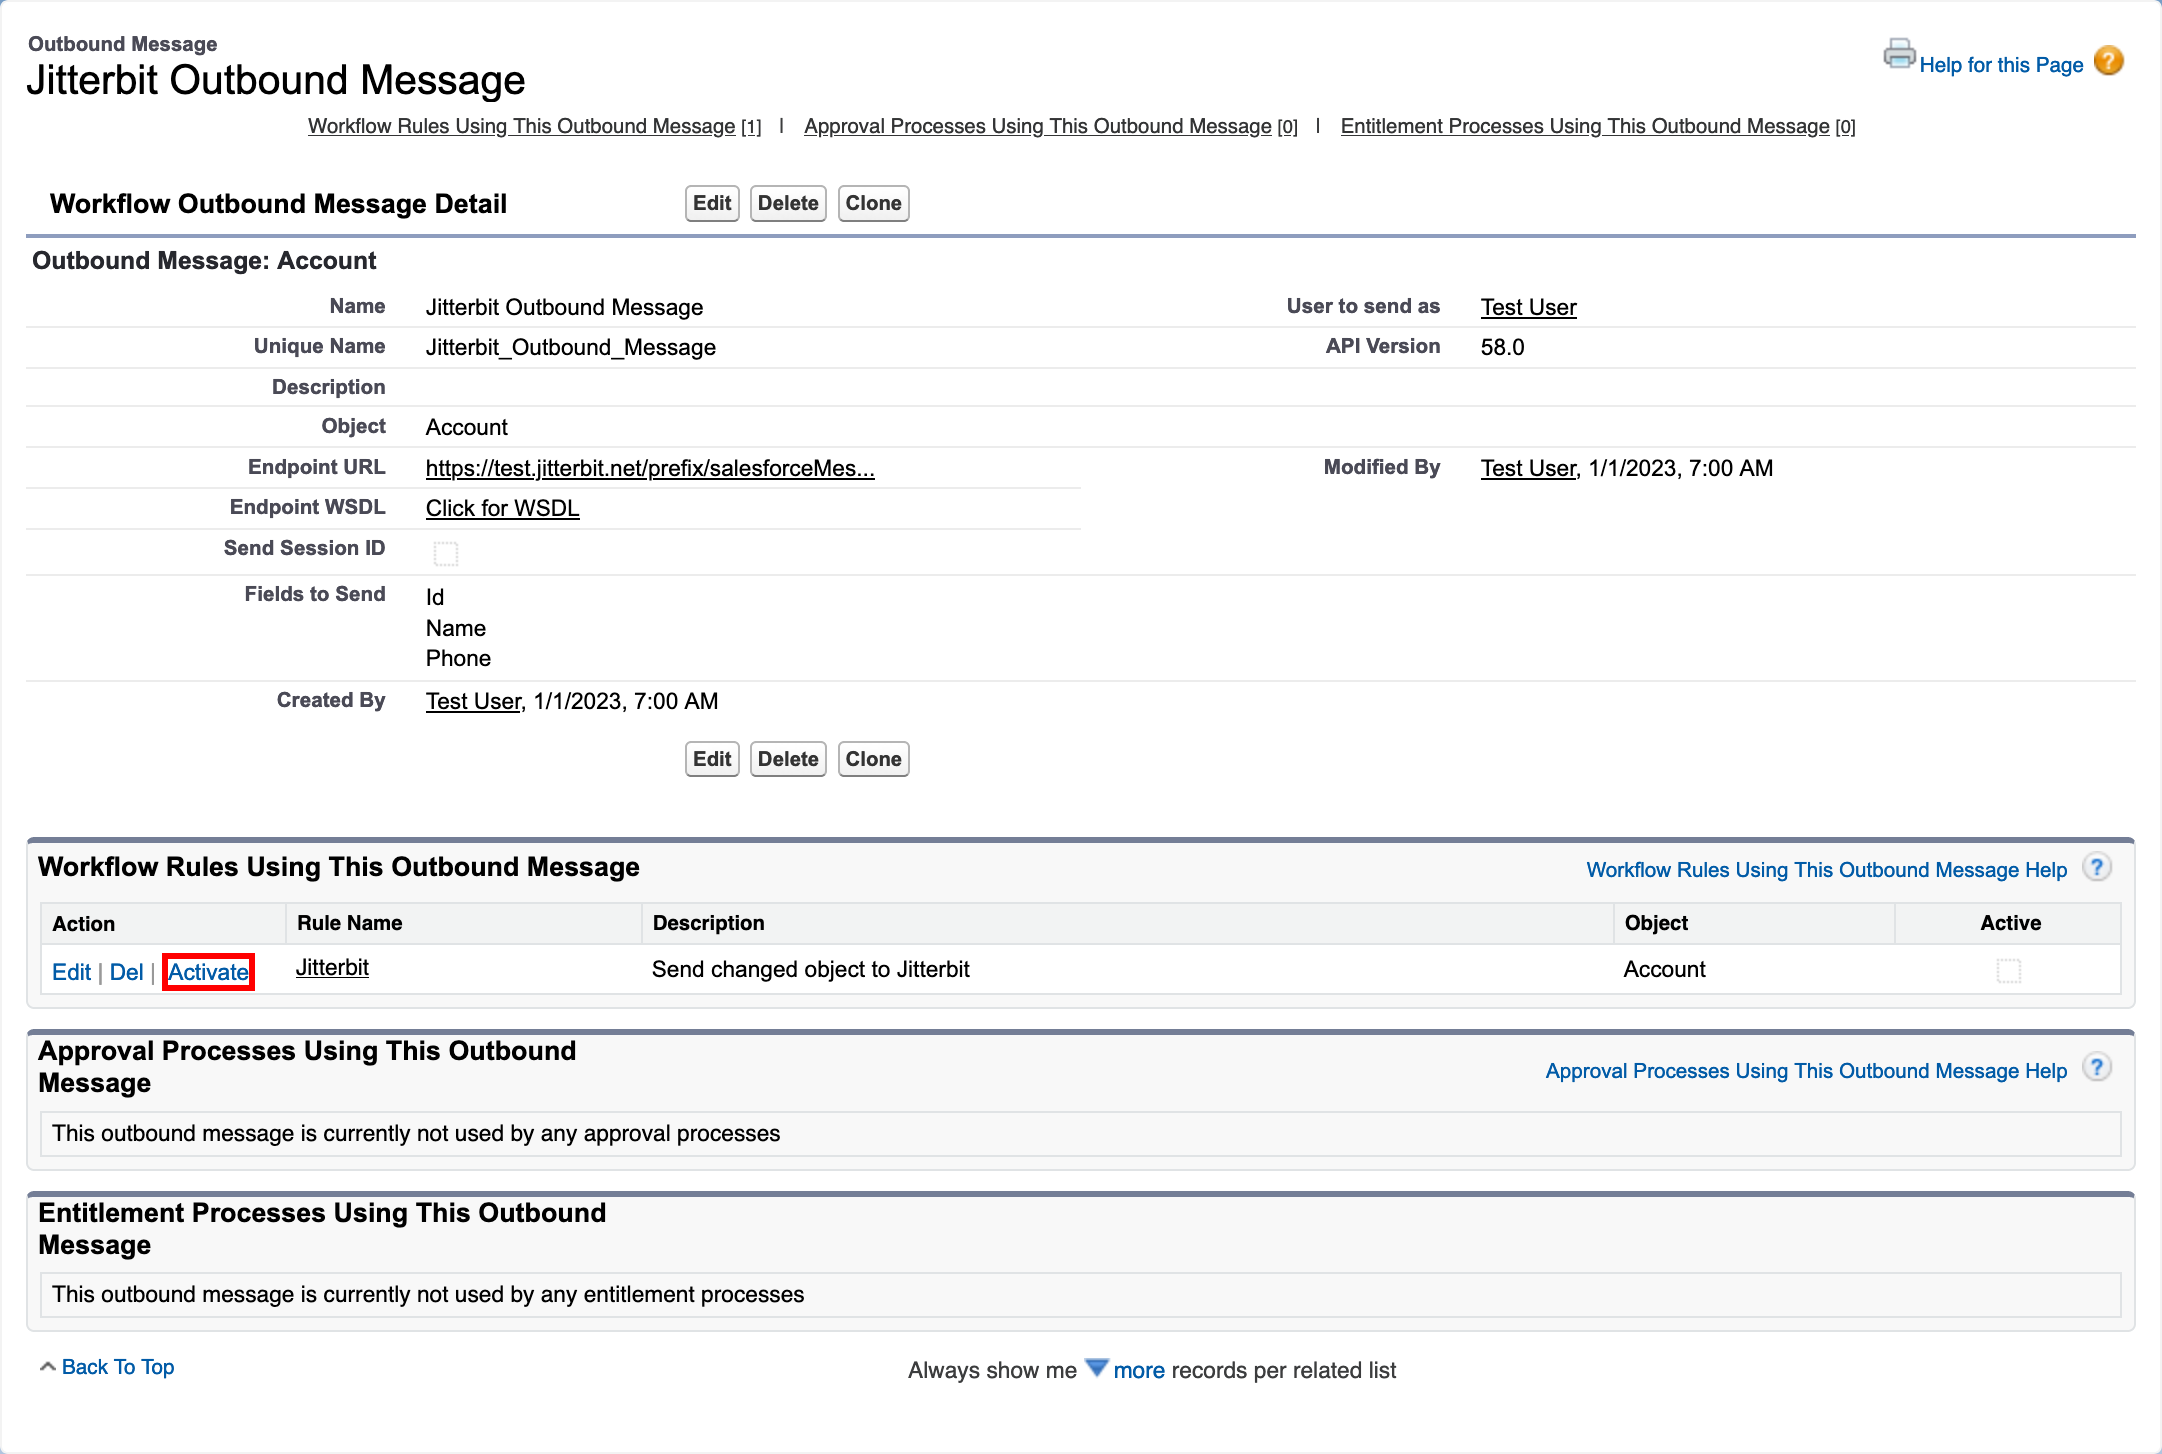
In the Workflow Rules Using This Outbound Message section, click Activate for the rule (highlighted in the image below).
Test the integration
To test this integration design pattern, follow these steps:
- In Salesforce, open the Service app, and select the Accounts tab.
- Edit an account contact, then save it.
- Log into your database and query the target table.