Cloud Studio permissions, collaboration, and saving
Introduction
This page provides basic information about working with Cloud Studio, including what access is granted by various permissions, how collaboration works when editing projects simultaneously with other users, how saving works, and how undo and redo work.
Project permissions
Access to projects is restricted based on the combination of user role permissions and environment access levels as defined through the Management Console. User role permissions are set through the User Management page, while environment access levels are set through the Environments page.
A user must be a member of an user role with either Read or Admin permission in order to access Cloud Studio. Both the Read and Admin permissions provide the same privileges within the Cloud Studio application. As projects must be created within an environment, the areas of Cloud Studio that these members can view or edit depends on the access levels that the role is granted at the environment level.
Permission and access level matrix for Cloud Studio and related pages
The table below details the combination of organization role permissions and environment access levels that are needed in order to access, edit, and perform actions in Cloud Studio and related pages. Note that the differences afforded by the Read and Admin permissions are the ability to access and edit other Harmony portal pages and applications (see Harmony permissions and access).
In addition, the View Logs access level does not provide access to Cloud Studio but instead provides access to Cloud Studio operation logs within the Management Console.
| Environment Access Level | Organization Role Permission of Read or Admin |
|---|---|
| View Logs | Access to:
|
| Read | Access to:
|
| Execute | Ability to perform these actions:
Access to:
|
| Write | Access to and the ability to make edits and perform all actions in Cloud Studio. For example:
|
Troubleshooting
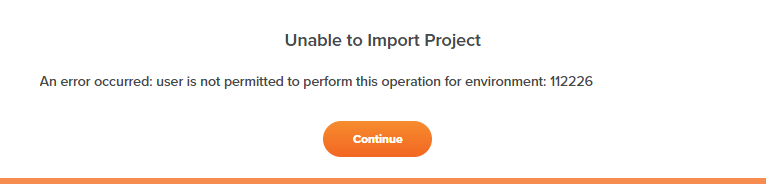
Users with only Read or Execute access in a specific environment are able to see the same options to perform actions that are available to users with Write access. However, on attempting to perform such an action, an error occurs, with text indicating the user is not permitted to perform the action.
If you receive an error message such as one of those shown below, contact an administrator of the Harmony organization to ensure you are a member of the appropriate organization role and that your role has been granted the appropriate access level in the environment (see Harmony permissions and access).

Collaboration
Users who are a member of a role with Write access in an environment can edit integration projects concurrently with other users — called project collaborators — as well as make edits to different parts of a project. Cloud Studio automatically synchronizes workflows and components across multiple users.
User avatars
When multiple users have the same project open in the project designer, avatars of the other users are shown in the project toolbar.
Automatic synchronization
If a workflow is being edited by another user, those changes are reflected in real time on the design canvas. You can also make workflow changes simultaneously, with your changes reflected in real time for other users. An audit log of changes made by all users is provided in the project history.
Concurrent editing
You may edit workflows and components concurrently with other users, with any edits being autosaved and synchronized in real time.
In the rare event that user A edits a workflow or component prior to receiving the latest changes from user B, user A's edit will be rejected until the synchronization is completed. In this case, an error message indicates that a project edit action conflicted with another user. Refresh the workflow or component to fetch the latest changes.
If a conflict is detected while editing a workflow or component that autosaves (see Automatic saving in Saving below), autosaving is temporarily suspended until you manually refresh that component. This provides an opportunity for you to copy your work, should you want to paste it after refreshing.
Deployment
If edits by multiple project collaborators have not yet been deployed, all users' updates will be deployed when a single user deploys.
Saving
Changes you make to a project are either saved automatically with autosave, or saved manually with a command button or keyboard shortcut on a configuration screen.
Automatic saving
While editing a project or project component, your changes are autosaved when you perform one of these actions:
-
Close a project component (transformation, script, etc.)
-
Close the project
-
Log out of the Harmony portal
These include when the project or component is closed due to Harmony session timeout or navigating away from the project.
In addition, some screens, such as the configuration screens for scripts and transformations, have an autosave component that applies only while that screen is open. Autosaving is temporarily suspended if a conflict is detected with another user (see Concurrent editing in Collaboration above).
Manual saving
Many configuration screens have explicit buttons that can be clicked to save an individual component configuration. These buttons may be labeled in a variety of ways. For example: Save Changes, Save & Exit, Finish, or Finished. If a conflict with another user is detected while making changes to the same configuration screen, an error message indicates that the configuration cannot be saved until you refresh to fetch the latest changes.
In addition, the script and transformation configuration screens support manual saving using Control+S (Windows or Linux) or Command+S (macOS).
Save status
The save status on autosave screens is displayed along the top of each screen.
Design canvas
The save status of a project is reflected within each workflow, on the far left of the design canvas header:

Script
The save status for the script editor is displayed below the script name:

Transformation
The save status for the transformation configuration screen is displayed to the right of the transformation name:

The presence of an asterisk following the time indicates that the transformation has unsaved changes:

Undo and redo
While designing a project, you can undo or redo your own actions while you have the project open. Closing the project or logging out of the Harmony portal will reset the undo/redo stacks.
Undo and redo are available for project design only; project restore events and actions that interact with Harmony, such as deploying a project, cannot be undone or redone.
Basic undo and redo
Basic undo and redo capabilities that are provided by your browser and operating system are supported within the component configuration screens for connections, activities, email notifications, schemas, and scripts.
Components that provide multiple configuration steps support undo and redo only within each configuration step; when the current screen is exited, the undo/redo stack is reset. For basic undo and redo, each undo/redo stack is separate and on a per-step basis.
To use basic undo and redo, use the standard keyboard shortcuts supported by your browser and operating system.
Enhanced undo and redo
The design canvas and transformations support enhanced undo and redo capabilities. For enhanced undo and redo, the undo/redo stacks persist while navigating through and making changes within other components. The design canvas has a single undo/redo stack that persists while the project is open. Each transformation has its own undo/redo stack that persists while the project is open. That is, you can edit other components and then return to the design canvas or a transformation edited since the project was open in order to undo or redo changes made there.
The undo and redo options are accessible through the UI using the design canvas actions menu or the transformation toolbar and are also supported using the keyboard shortcuts Control+Z and Control+Y (Windows or Linux) or Command+Z and Command+Y (macOS).
All design changes made on the design canvas and within transformations can be undone or redone. You can backtrack through all the changes you made on the design canvas or within a transformation since you opened the project.