Create a Coupa lookup as a custom field
Introduction
This page describes how to create a lookup in Coupa and how to add that lookup as a custom field in Coupa.
This process is required for certain Cloud Studio process templates.
Create a lookup in Coupa
Follow these steps to create a lookup in Coupa:
-
Log in to the Coupa instance as an administrator.
-
Go to Setup > Company Setup > Lookups.
-
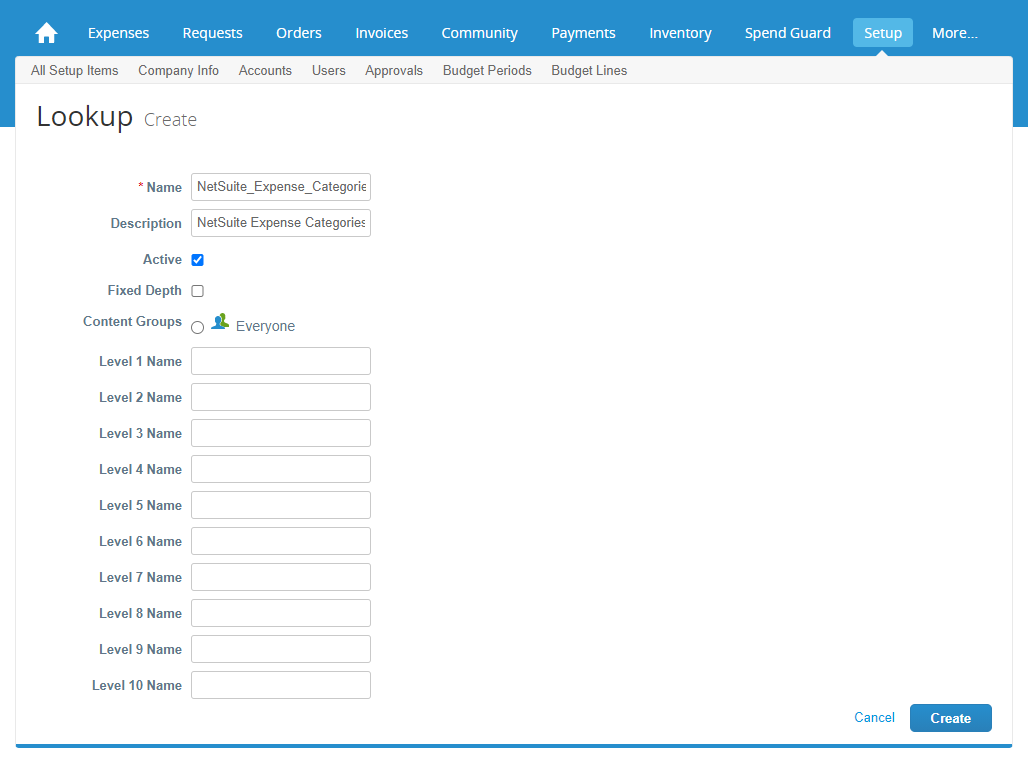
On the Lookups screen, click Create:

-
On the Lookup Create screen, enter the desired Name and Description (for example, NetSuite_Expense_Categories and NetSuite Expense Categories, respectively) and select Active. Then click Create:
Note
Once a Coupa lookup is created, it can be deactivated (by clearing the Active checkbox) but cannot be deleted.
Add a lookup as a custom field in Coupa
Follow these steps to add a lookup as a custom field in Coupa:
-
Log in to the Coupa instance as an administrator.
-
Go to Setup > Company Setup > Custom Fields.
-
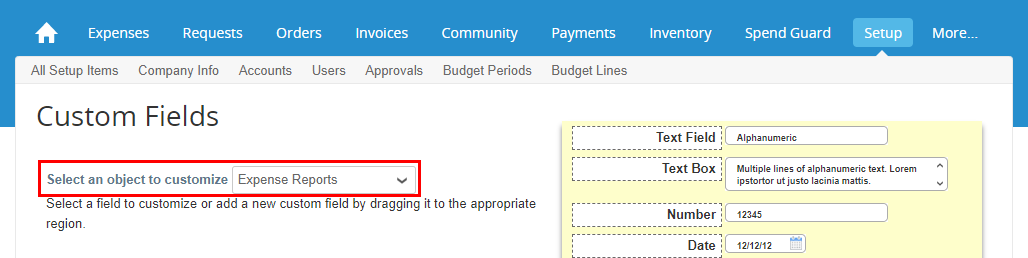
On the Custom Fields screen, use the Select an object to customize dropdown to select the object to which to add the lookup as a custom field. In this example, the Expense Reports object is selected:
-
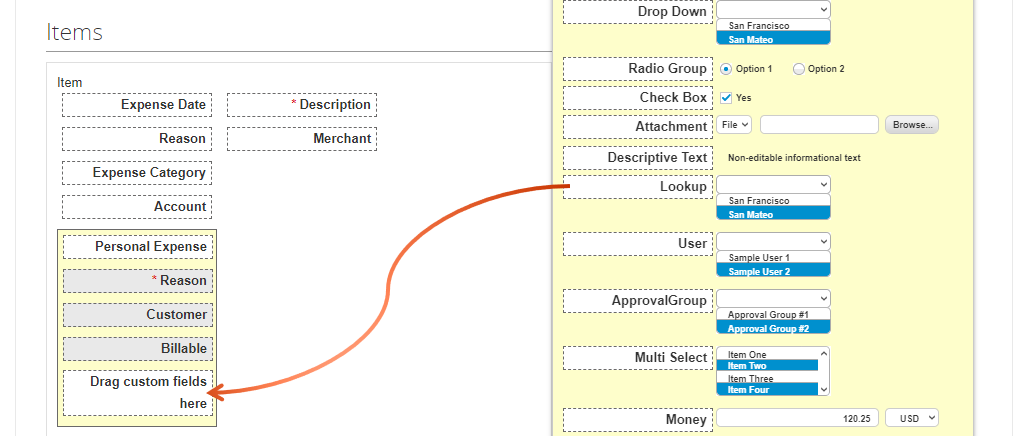
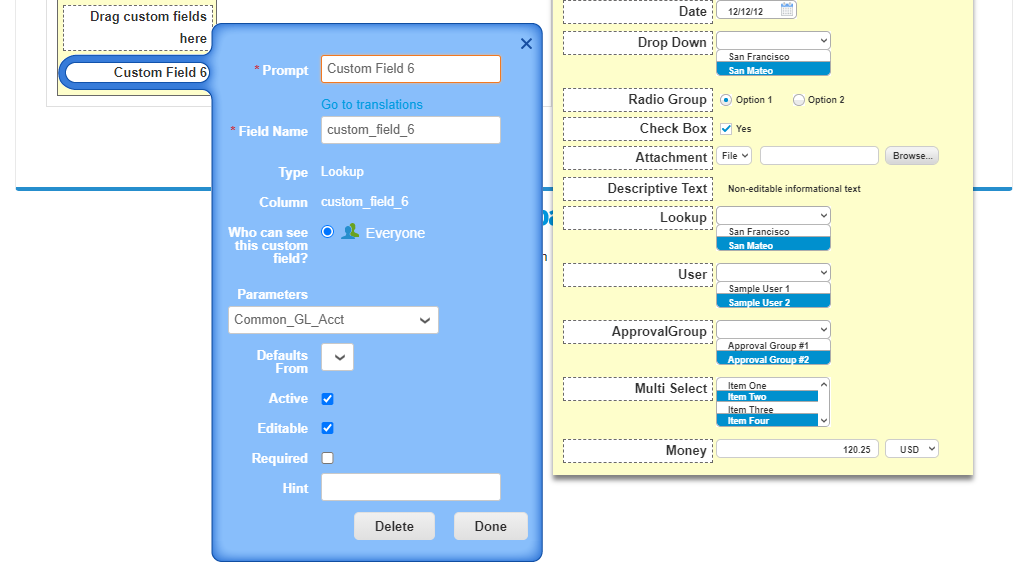
Scroll to the Items section of the Custom Fields screen. Then drag the Lookup field from the right side of the screen to the field that reads Drag custom fields here:
-
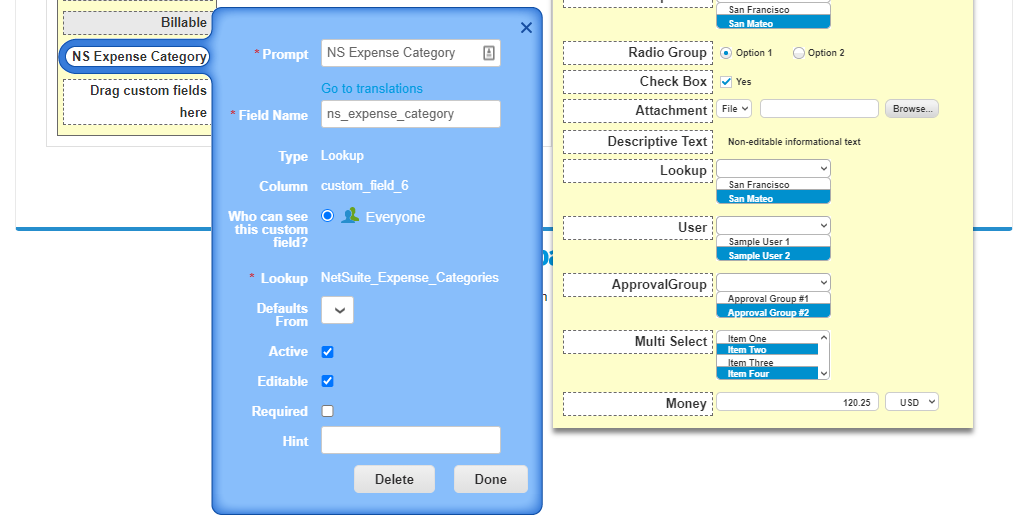
On dropping the Lookup field, a lookup custom field is added with a default field name (for example, Custom Field 6) and a dialog opens to configure its details:
-
Configure the lookup custom field details as required, and then click Done: