Email prerequisites for a Microsoft 365 OAuth 2.0 connection
Introduction
These are the prerequisites for using the Email connector with a Microsoft 365 OAuth 2.0 connection using Resource Owner Password Credential (ROPC) authentication:
All prerequisite tasks will require you to log in to the Azure portal with an Azure account with the Exchange Administrator admin permissions enabled. Exchange Administrator is required to download the Exo2 powershell module needed in connect the app registration to exchange online. This account's username and password will also be used in Obtain access tokens for ropc authentication.
Some tasks will also require Windows PowerShell and curl, Postman, or a similar tool for sending POST requests.
Create an app registration
Follow these steps to create an app registration with the Microsoft identity platform:
-
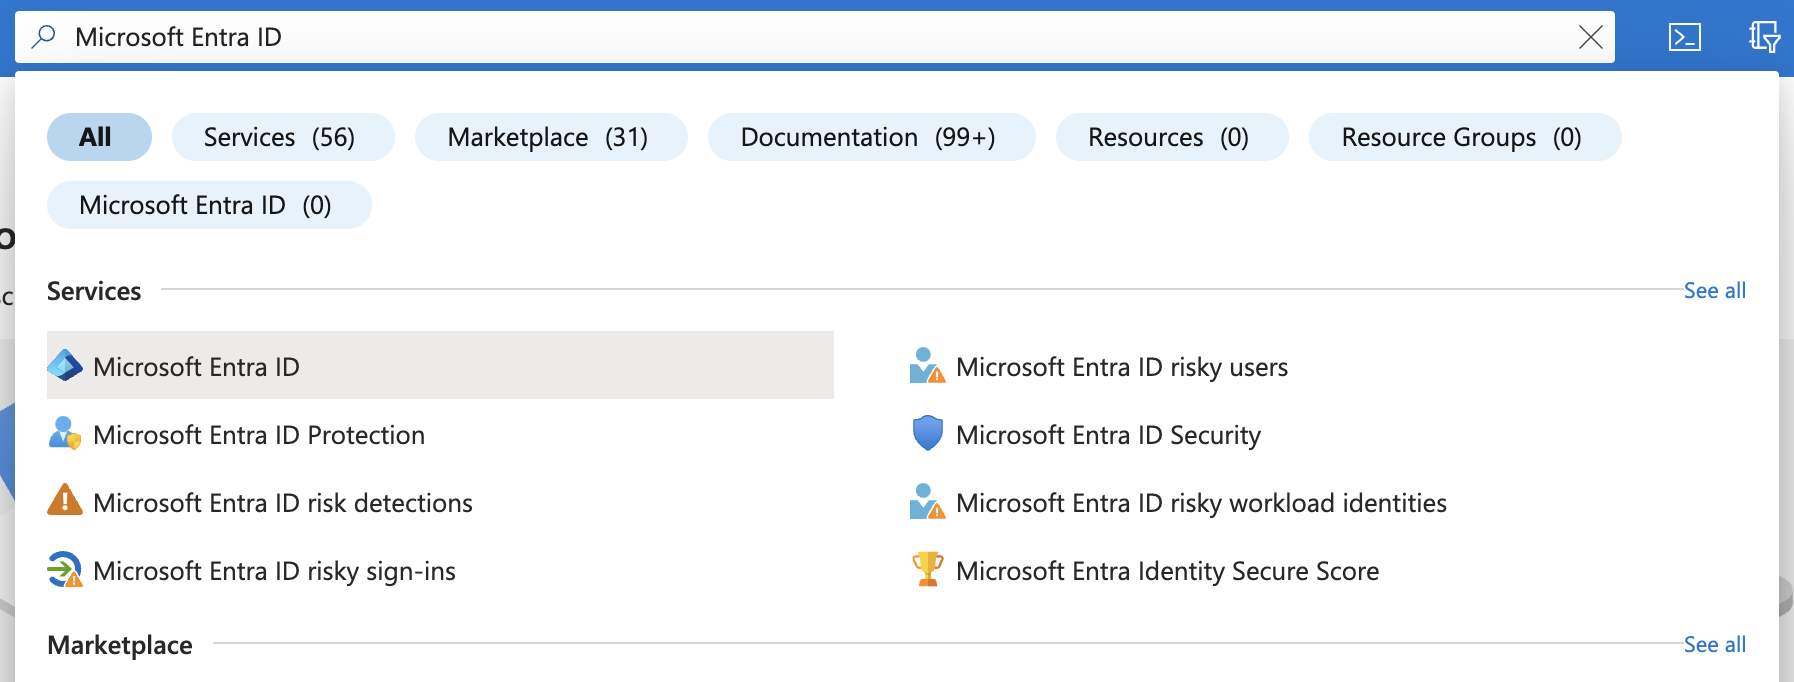
In the Azure portal, search for and click Microsoft Entra ID (previously known as Azure Active Directory or Azure AD):
-
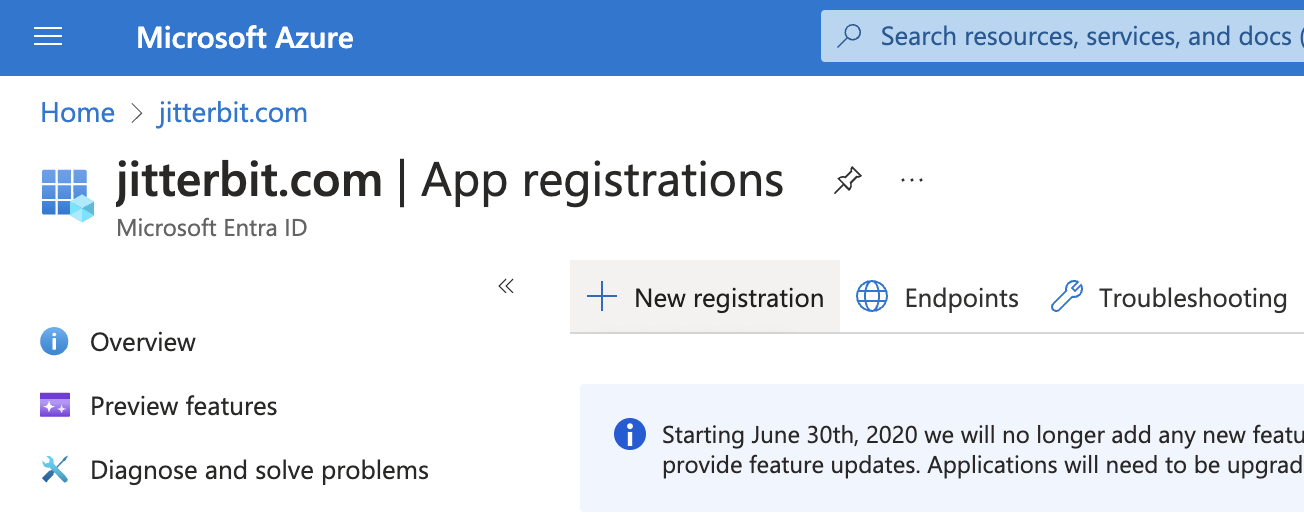
In the left sidebar under Manage, click App registrations.
-
Click New registration:
-
Enter a Name for your app. This display name will be visible to users:

-
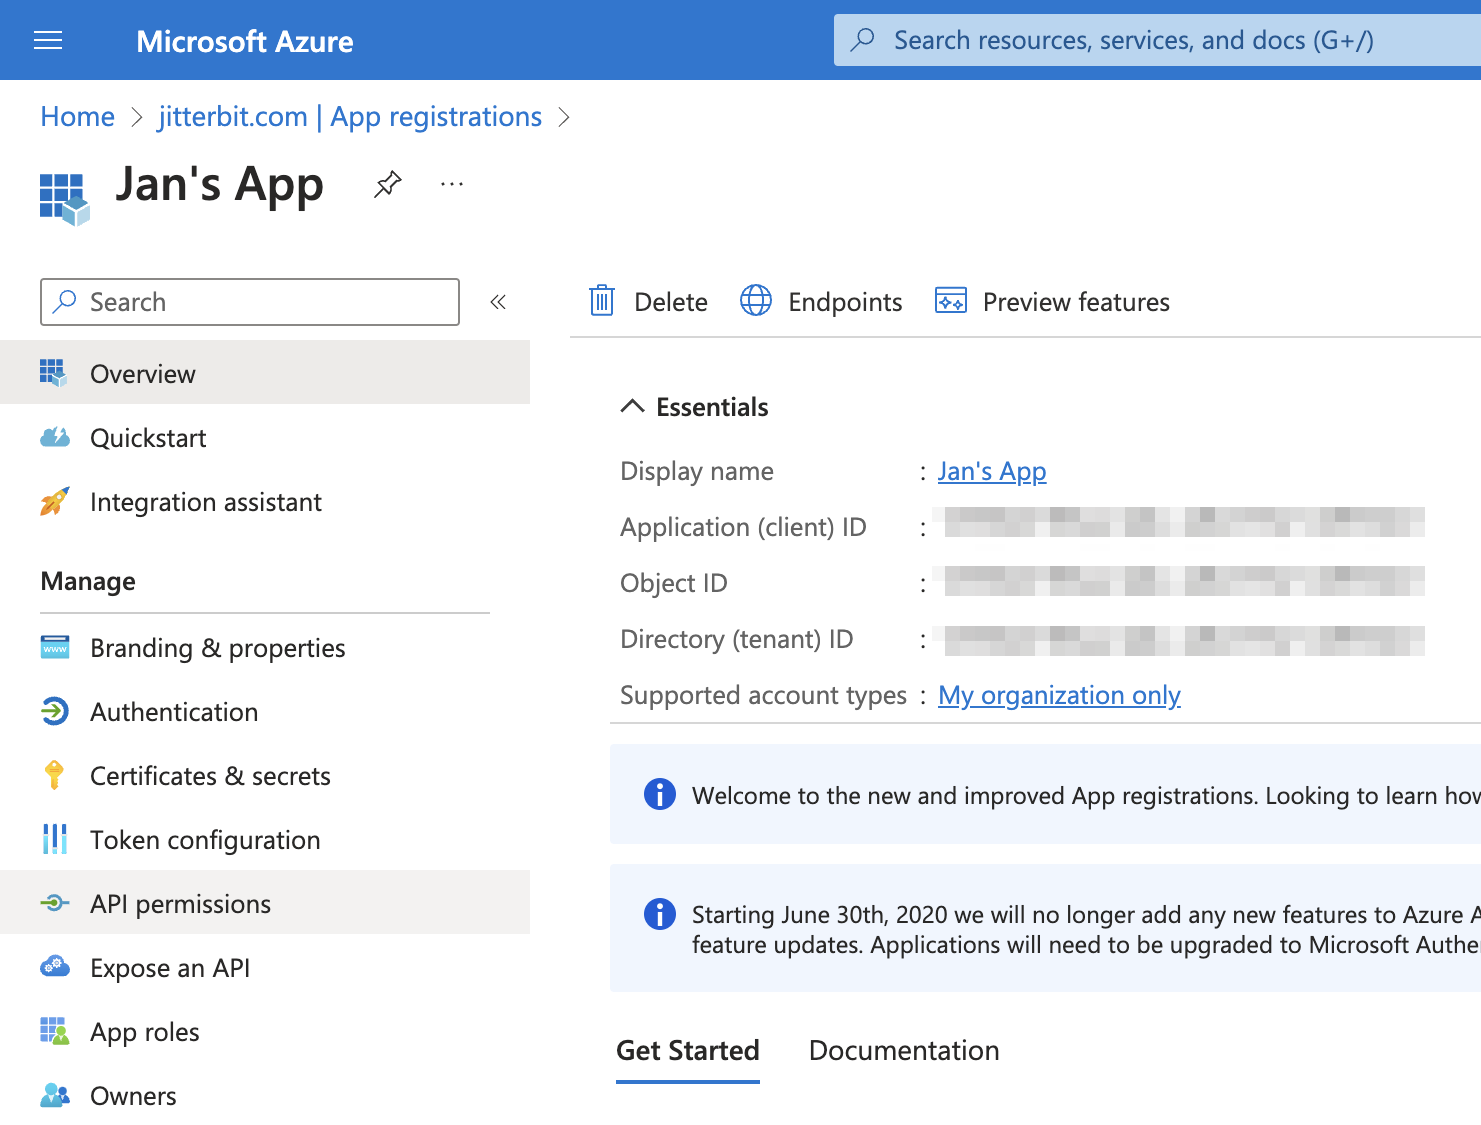
Click Register to complete the app registration. You are then directed to the app's Overview page:
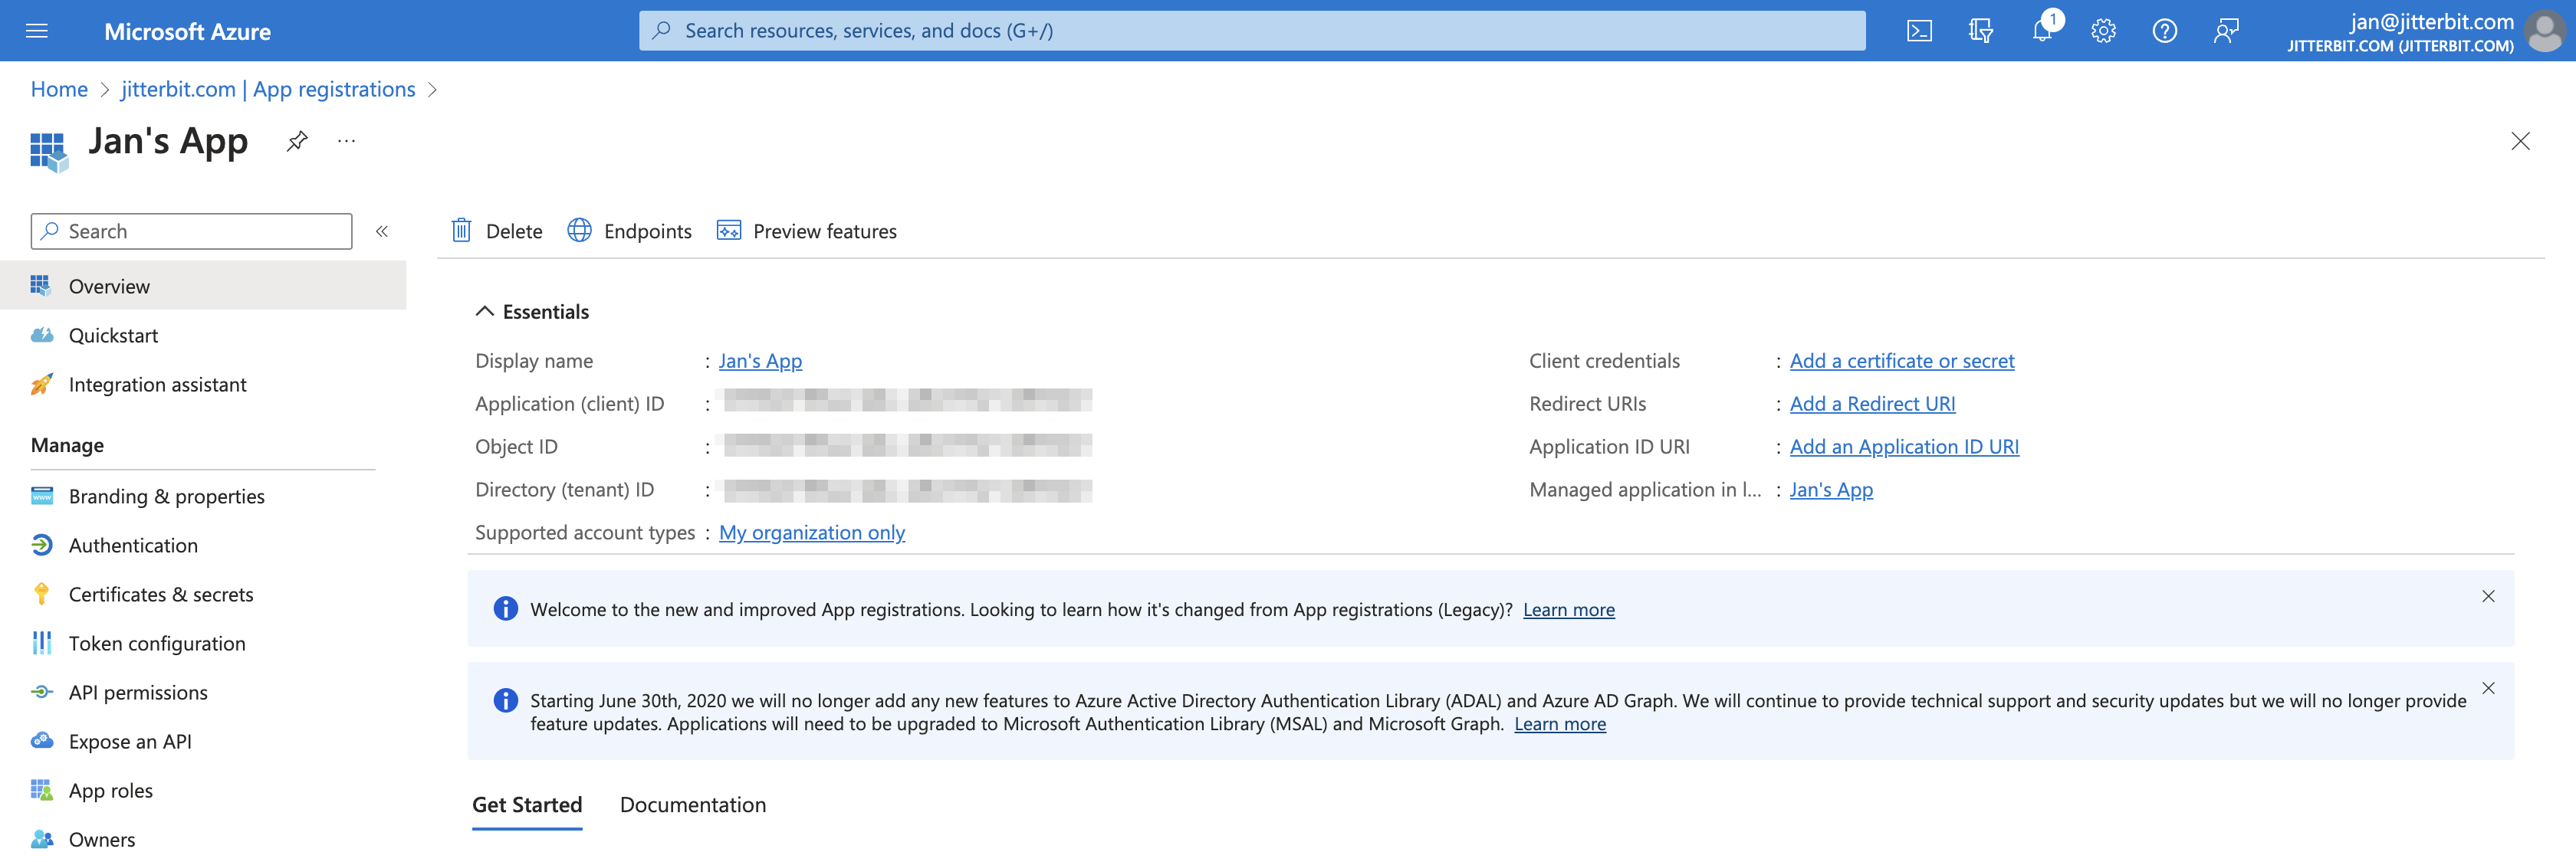
Important
Retain the app registration's Application (client) ID and Directory (tenant) ID to use as
client_idandtenant_idin Verify the app registration and Obtain access tokens for ropc authentication. -
Click Add a certificate or secret.
-
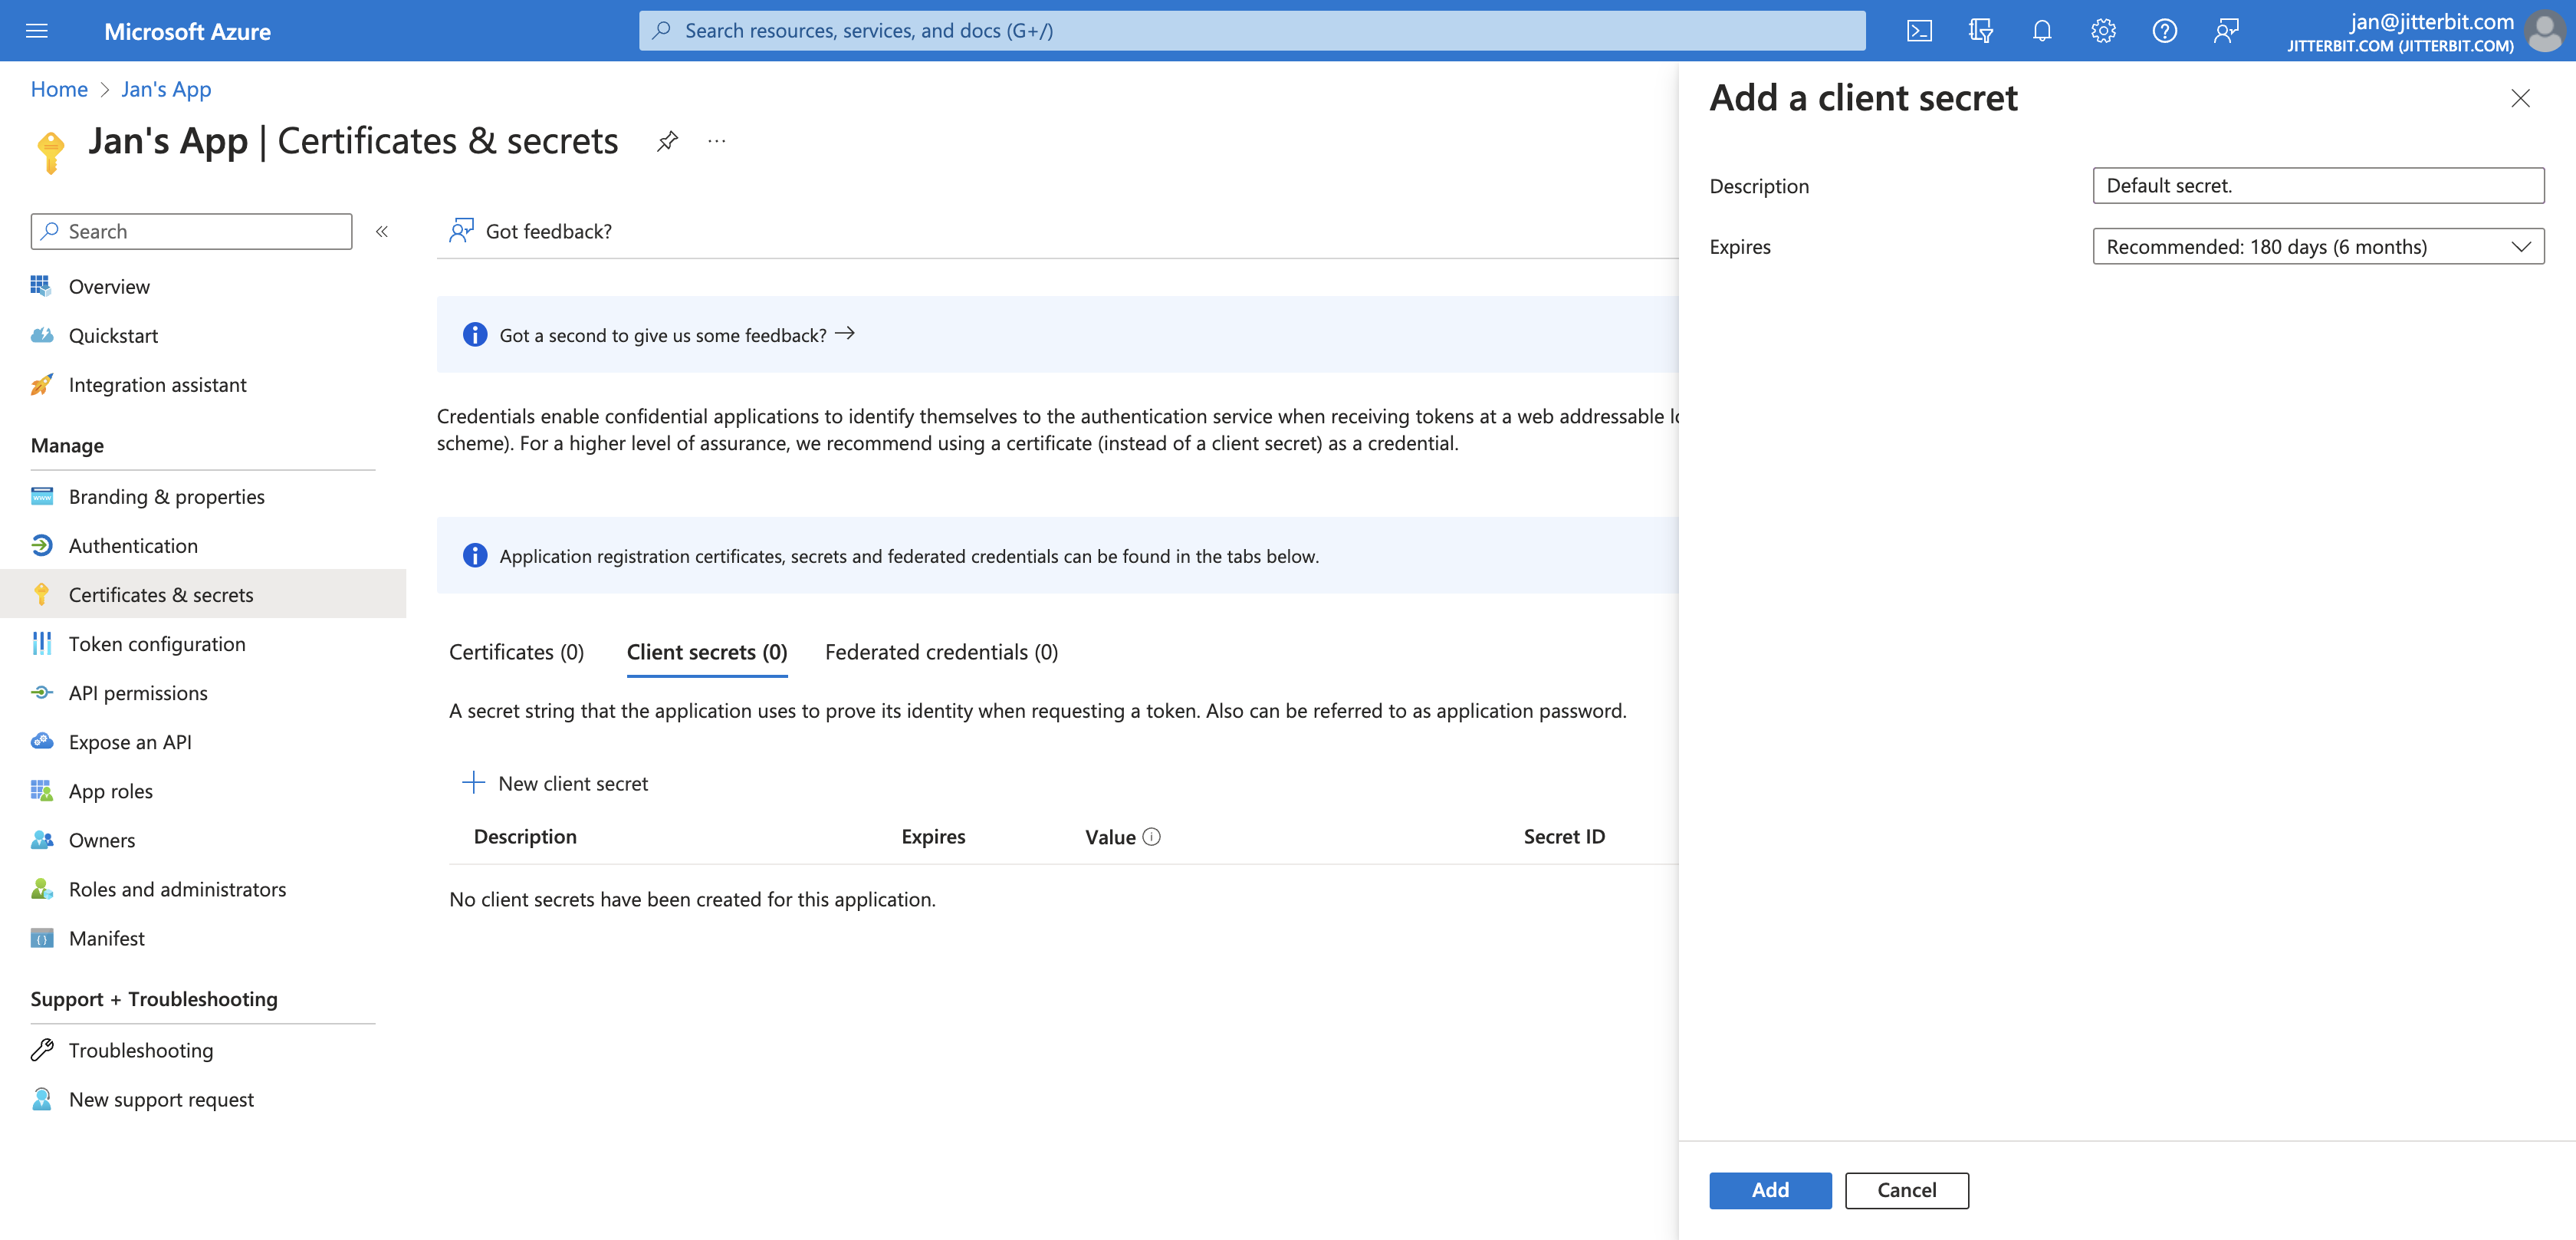
In the Client secrets tab, click New client secret to open the Add a client secret pane. In this pane, enter a description and select an expiration date for the client secret, then set, click Add:
-
The client secret is now visible in the Client secrets tab. Retain the client secret's Value to use as
client_secretin Obtain access tokens for ropc authentication.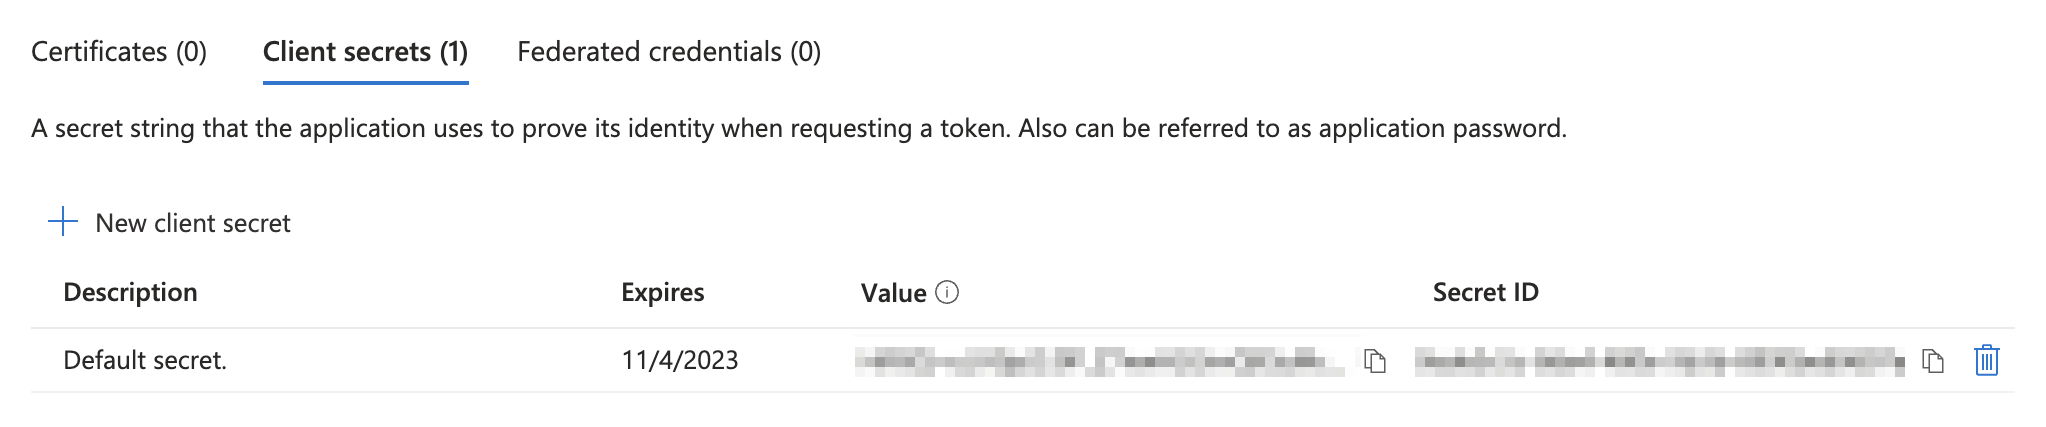
Add required permissions to the app registration
To use the Email connector with a Microsoft 365 OAuth 2.0 connection, your app registration must have these permissions:
- Office 365 exchange online application permissions
- Microsoft graph application permissions
- Microsoft graph delegated permissions
In the Azure portal, navigate to your app registration and click API permissions in the left sidebar:
Important
Depending on your Azure organization's security settings, some permissions will require admin consent to allow.
Office 365 exchange online application permissions
To add Office 365 Exchange Online application permissions, follow these steps:
-
On the API permissions page, click Add a permission.
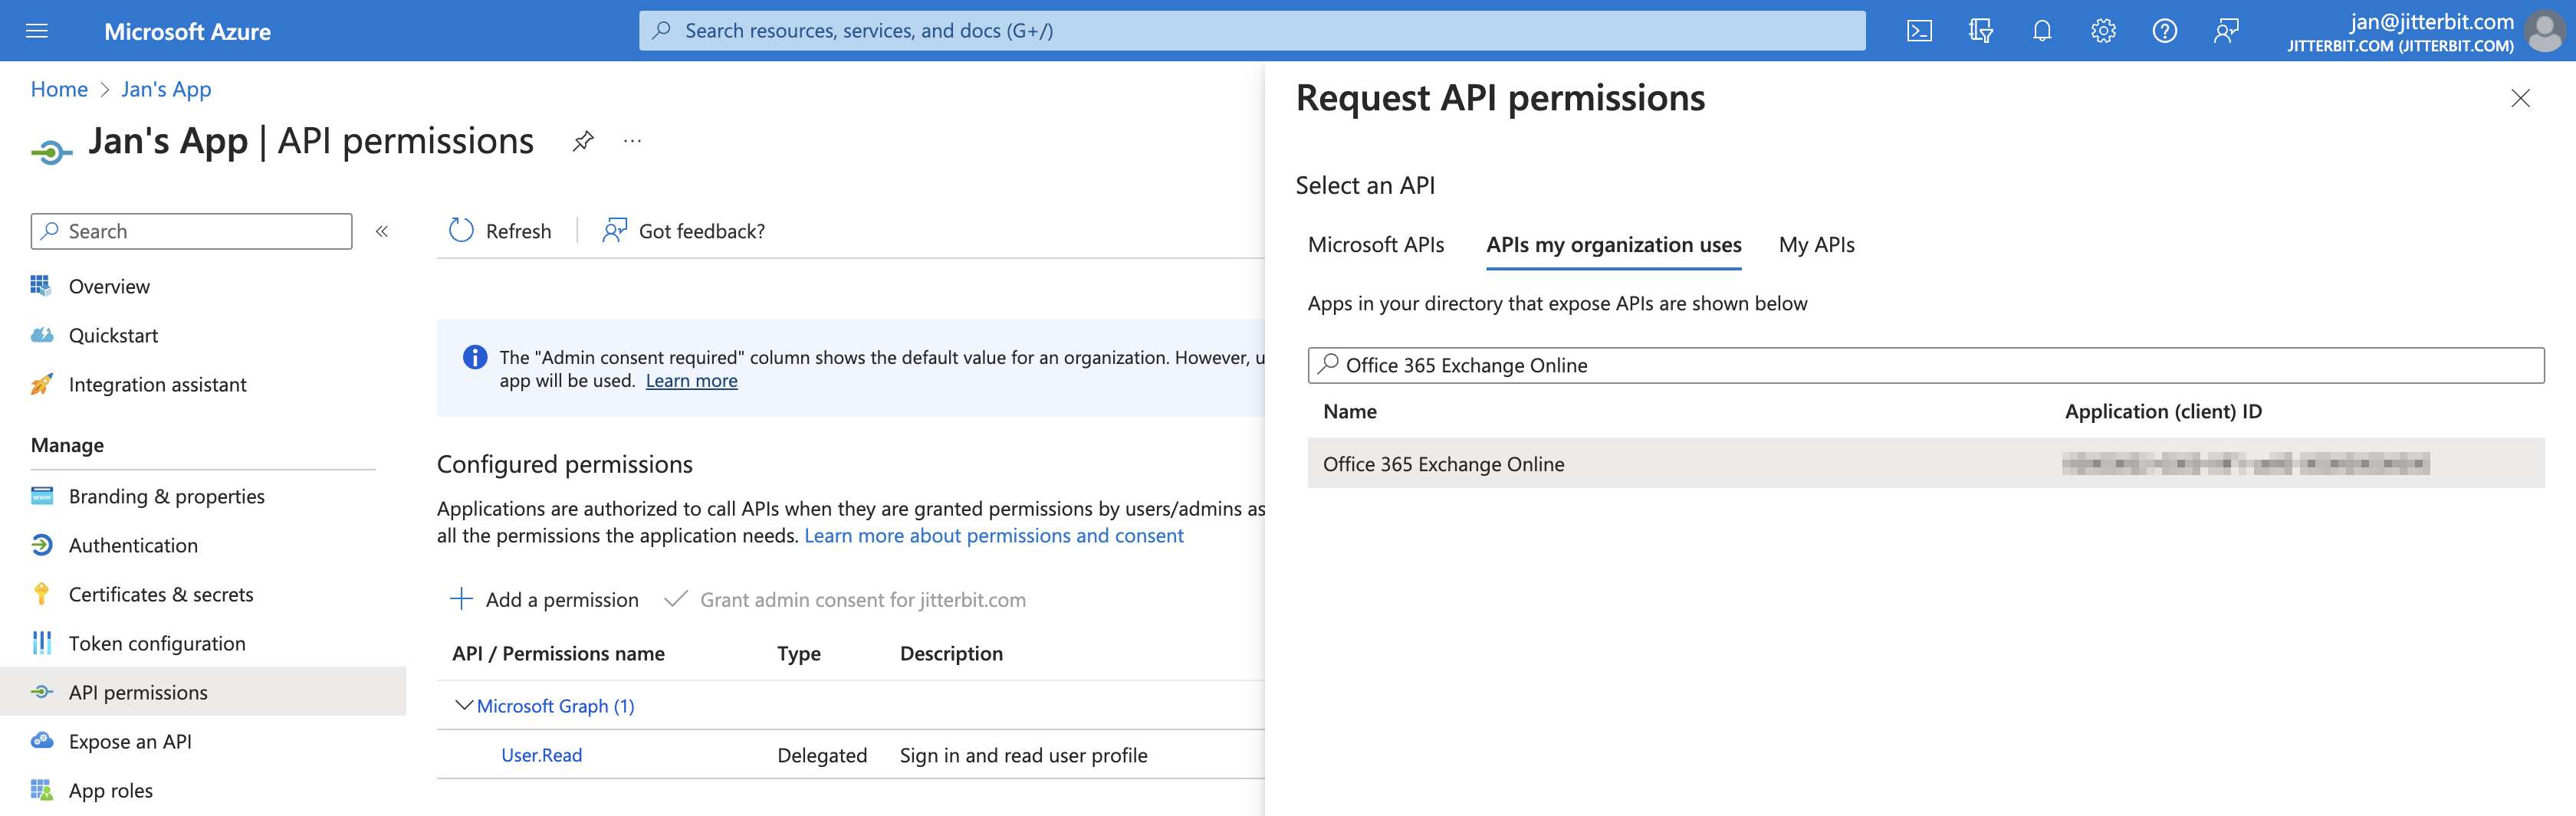
-
In the Request API permissions pane, click the APIs my organization uses tab, search for and click Office 365 Exchange Online:
-
Click Application permissions.
-
For POP access, enable the POP.AccessAsApp permission. For IMAP access, enable the IMAP.AccessAsApp permission.
-
Click Add permissions. The updated app registration's Configured permissions page is shown.
Microsoft graph application permissions
To add Microsoft Graph application permissions, follow these steps:
-
On the API permissions page, click Add a permission.
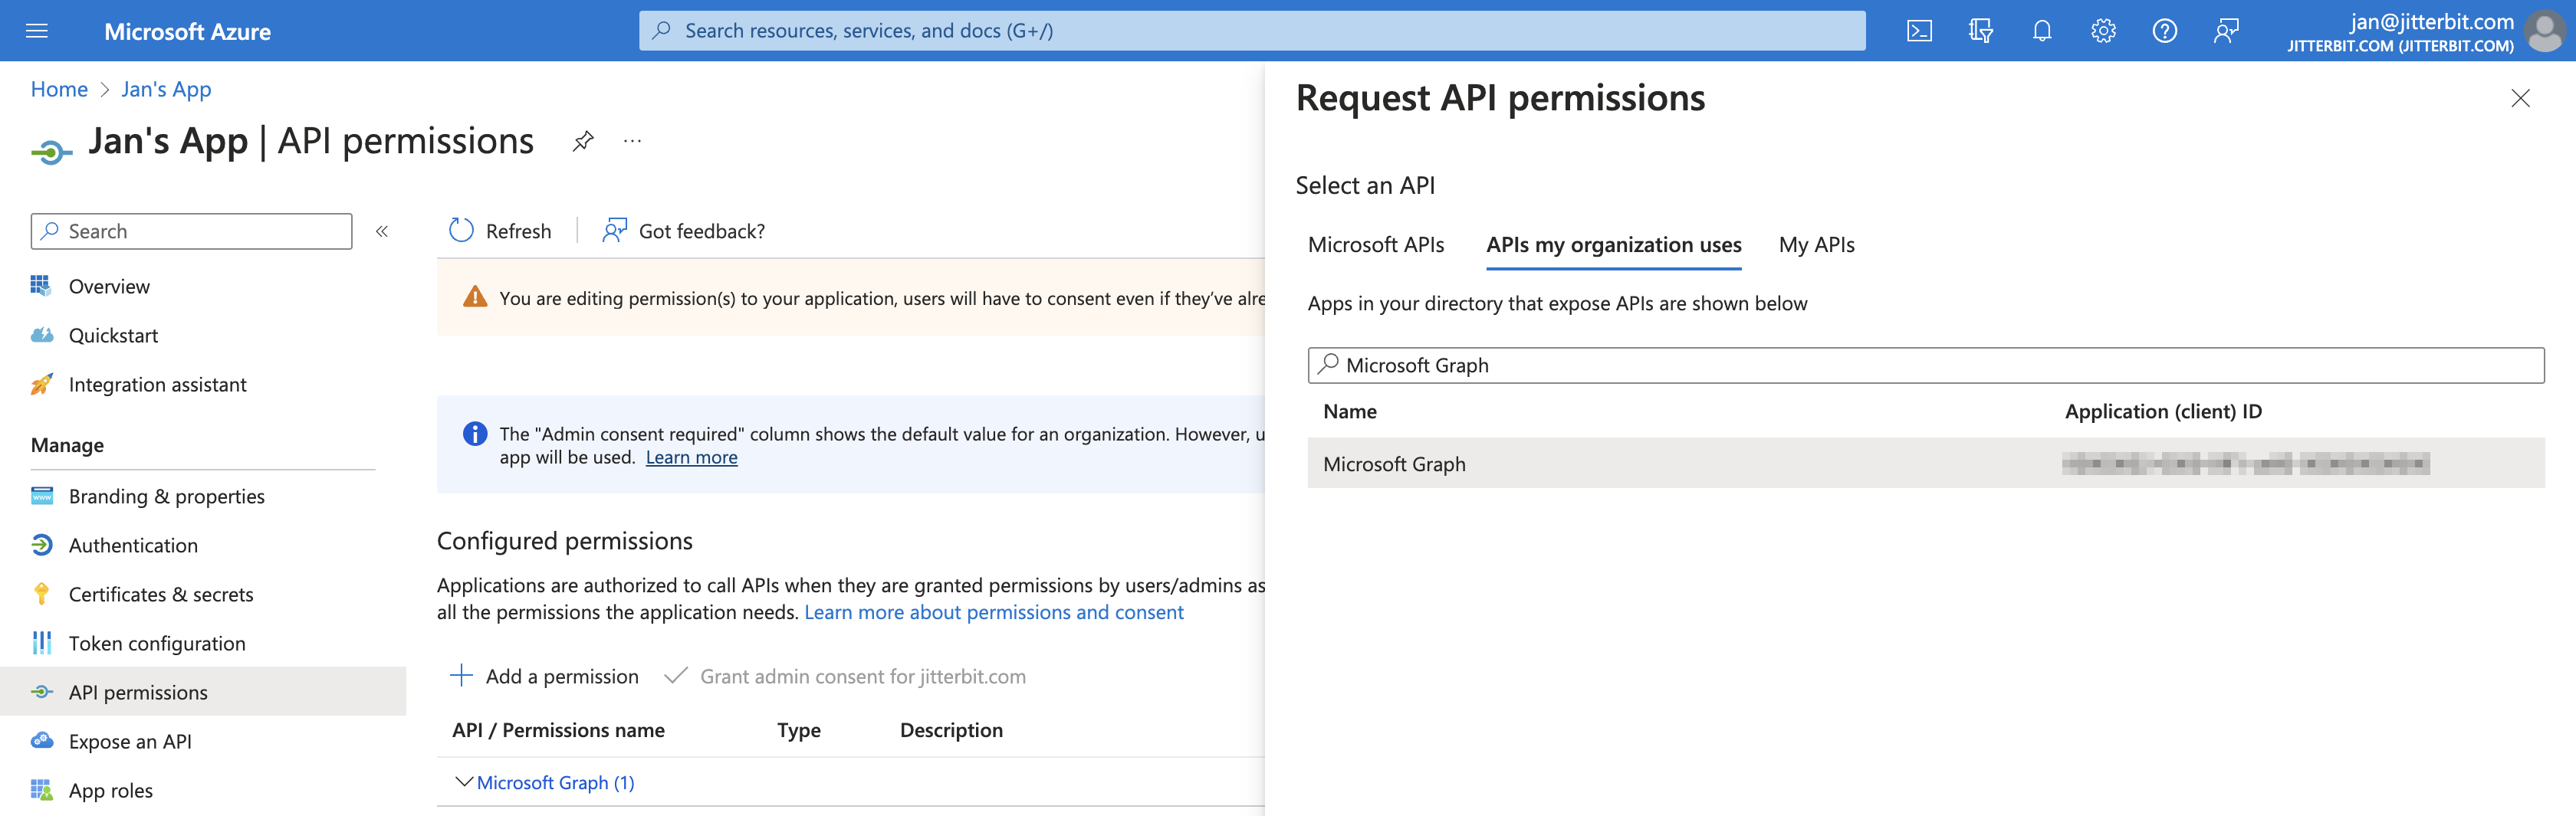
-
In the Request API permissions pane, click the APIs my organization uses tab, search for and click Microsoft Graph:
-
Click Application permissions.
-
Enable the Mail.Send and User.Read.All permissions.
-
Click Add permissions. The updated app registration's Configured permissions page is shown.
Microsoft graph delegated permissions
To add Microsoft Graph delegated permissions, follow these steps:
-
On the API permissions page, click Add a permission.
-
In the Request API permissions pane, click the APIs my organization uses tab, search for and click Microsoft Graph:
-
Click Delegated permissions.
-
Enable the offline_access, IMAP.AccessAsUser.All, and SMTP.Send permissions. User.Read should remain enabled.
-
Click Add permissions. The updated app registration's Configured permissions page is shown. Your app registration now has the required permissions.
Connect the app registration to exchange online
To connect the app registration to Exchange Online, follow these steps:
-
Download and install the EXO2 PowerShell module by going to the Classic Exchange admin center. Click Hybrid and then Configure Exchange PowerShell module.
Important
If you cannot download and install the EXO2 PowerShell module, you cannot complete the Exchange connection.
-
Launch Windows PowerShell and run:
Install-Module -Name ExchangeOnlineManagement -allowprerelease Install-Module Microsoft.Graph -allowprerelease Install-Module -Name AzureAD Install-module AzureADPreview -Verbose import-module AzureADPreview import-module ExchangeOnlineManagement -
Run
Connect-AzureADand enter your login information. -
Run
Connect-ExchangeOnlineand enter your login information. -
Obtain the registered app's service principal information and store it in a variable by running:
$MyApp = Get-AzureADServicePrincipal -SearchString <Registered application name> $MyApp | fl -
Use the stored service principal information to complete the connection:
New-ServicePrincipal -AppId $MyApp.AppId -ServiceId $MyApp.ObjectId -DisplayName "Service Principal for IMAP APP"
Add-MailboxPermission -Identity <Administrator email address> -User $MyApp.ObjectId -AccessRights FullAccess
Verify the app registration
To verify the app registration, follow these steps:
-
Submit a POST request to
https://login.microsoftonline.com/<tenant_id>/oauth2/v2.0/devicecodewhere<client_id>and<tenant_id>are replaced with the Application (client) ID and Directory (tenant) ID you saved while creating your app registration:curl --location --request POST 'https://login.microsoftonline.com/<tenant_id>/oauth2/v2.0/devicecode' \ --header 'Content-Type: application/x-www-form-urlencoded' \ --data-urlencode 'client_id=<client_id>' \ --data-urlencode 'scope=https://outlook.office.com/SMTP.Send https://outlook.office.com/IMAP.AccessAsUser.All'If successful, the response will contain an authorization code.
-
Navigate to
https://login.microsoftonline.com/common/oauth2/deviceauthin your browser and submit the authorization code. The app registration is now verified and you can freely obtain access tokens.
Obtain access tokens for ropc authentication
After completing the previous steps, tokens can be generated for ROPC authentication using a POST request:
curl --location --request POST 'https://login.microsoftonline.com/<tenant_id>/oauth2/v2.0/token' \
--header 'Content-Type: application/x-www-form-urlencoded' \
--data-urlencode 'client_id=<client_id>' \
--data-urlencode 'scope=https://outlook.office.com/IMAP.AccessAsUser.All' \
--data-urlencode 'client_secret=<client_secret>' \
--data-urlencode 'username=<account_username>' \
--data-urlencode 'password=<account_password>' \
--data-urlencode 'grant_type=password'
<client_id>and<tenant_id>are replaced with the Application (client) ID and Directory (tenant) ID you saved while creating your app registration.<client_secret>is replaced with the client secret you saved while creating your app registration.<account_username>and<account_password>are replaced with your Azure login credentials for ROPC authentication.
Note
The grant_type parameter must always be password for ROPC authentication.
If successful, the response will contain an access_token for ROPC authentication.