FTP Write activity
Introduction
An FTP Write activity writes data to an FTP endpoint and is intended to be used as a target to consume data in an operation or to be called in a script. After configuring an FTP connection, you can configure as many FTP activities as you like for each FTP connection.
Create an FTP activity
An instance of an activity is created from a connection using an activity type.
To create an instance of an activity, drag the activity type to the design canvas or copy the activity type and paste it on the design canvas. For details, see Creating an activity instance in Component reuse.
An existing activity can be edited from these locations:
- The design canvas (see Component actions menu in Design canvas).
- The project pane's Components tab (see Component actions menu in Project pane Components tab).
Configure an FTP Write activity
Follow these steps to configure an FTP Write activity:
- Step 1: Enter a name, provide a request schema, and specify settings
- Step 2: Review the data schemas
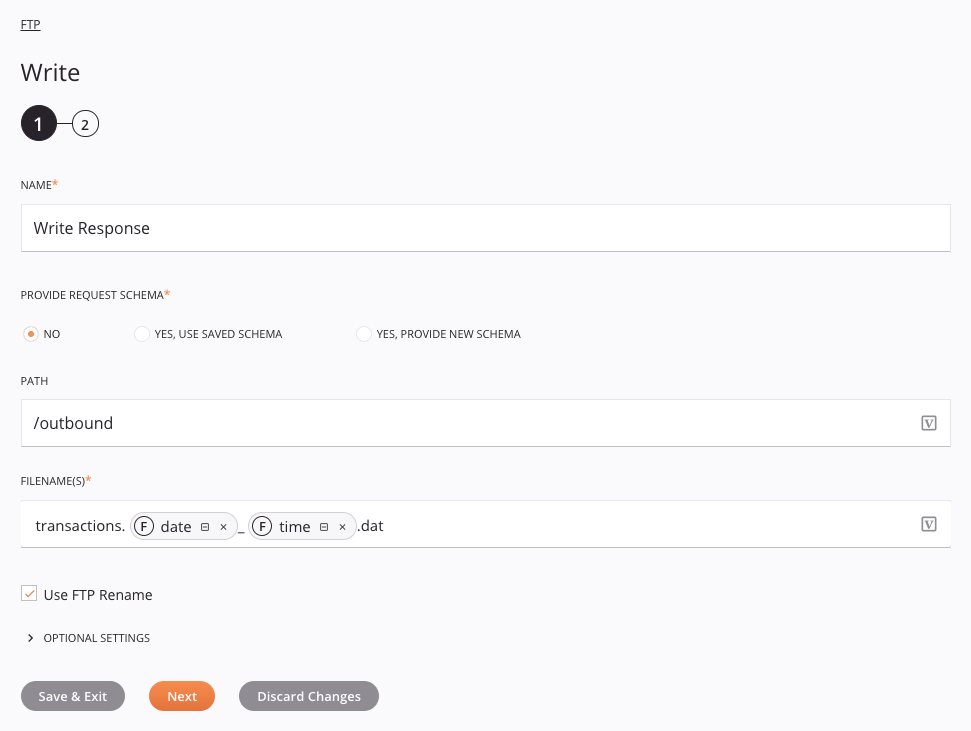
Step 1: Enter a name, provide a request schema, and specify settings
Tip
Fields with a variable icon ![]() support using global variables, project variables, and Jitterbit variables. Begin either by typing an open square bracket
support using global variables, project variables, and Jitterbit variables. Begin either by typing an open square bracket [ into the field or by clicking the variable icon to display a list of the existing variables to choose from.
-
Name: Enter a name to use to identify the FTP Write activity. The name must be unique for each FTP Write activity and must not contain forward slashes (
/) or colons (:). -
Provide Request Schema: The request schema defines the structure of data that is used by the FTP Write activity. Whether a request schema is required depends on if the activity is used as the target of a transformation (see Schema usage). For instructions on completing this section of activity configuration, refer to Schemas defined in an activity.
-
Path: Enter one or more valid paths. A path should point to an existing directory on the FTP server. For example, a single path might be
/outbound. Multiple paths can be specified using comma-separated values. If multiple paths are specified, the same file is written to multiple locations. An example of multiple paths might beuser1\path, user2\path. -
Filename(s): Enter the name of the file(s) that you want to write to within the path(s) entered above. Any of the filename keywords are available to generate unique filenames (for example,
result[date][time].[ext]). If specifying data in ZIP format, see the Compression options described below. -
Use FTP Rename: Selected by default, this option is for files to initially use a temporary file name that is then renamed to the final name. Clear the checkbox if this option causes problems.
-
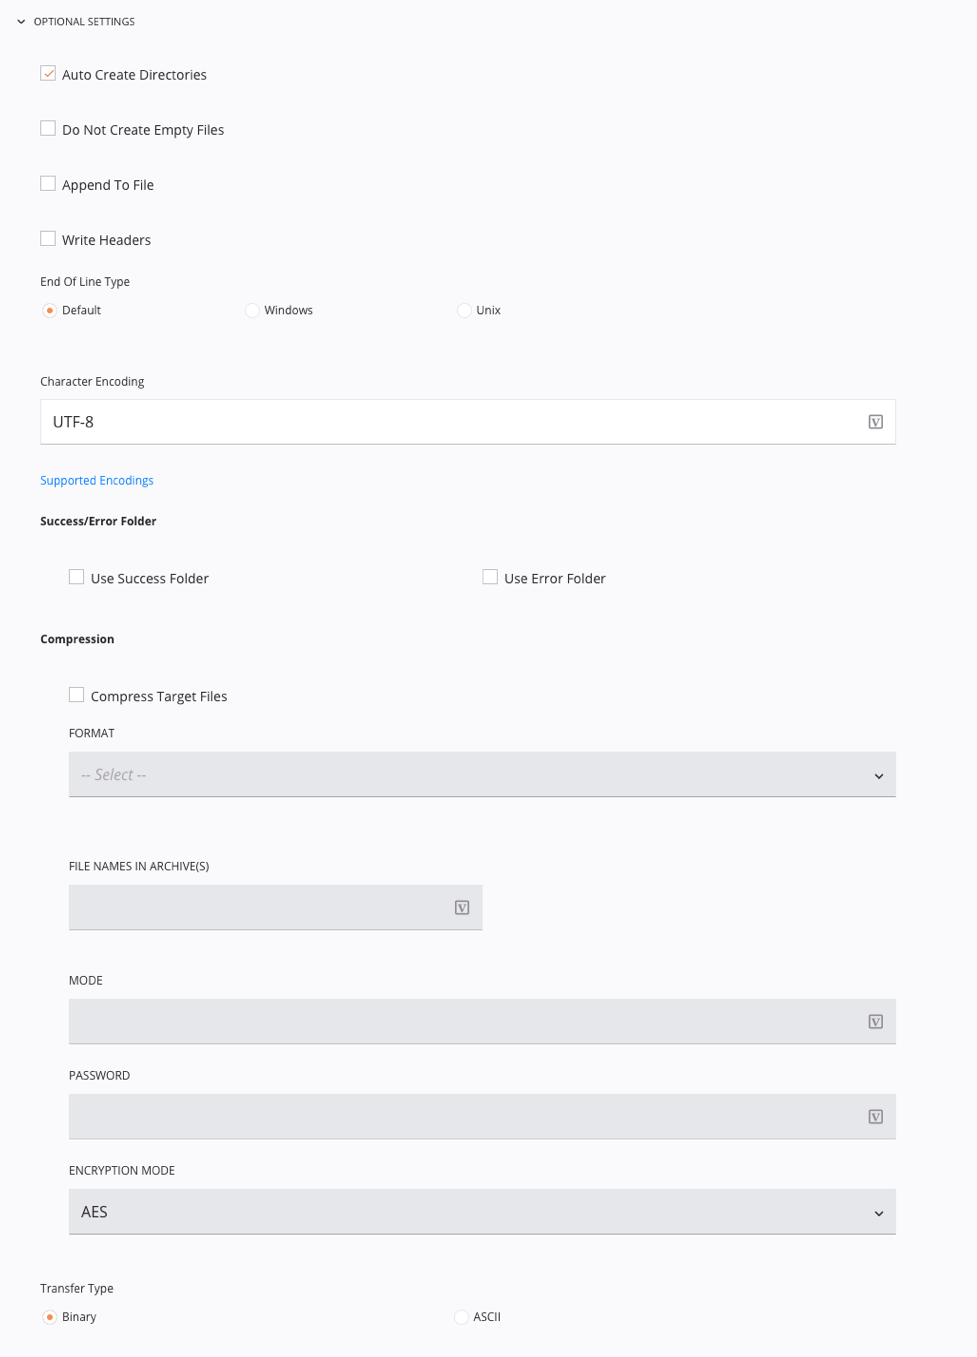
Optional Settings: Click to expand additional optional settings:
-
Auto-create Directories: Keep this checkbox selected to automatically create any directories that do not yet exist in the target path.
Warning
It is a known issue that the auto-creation of directories works inconsistently. Depending on the particular FTP server involved, the directory may not be created. If this option is used, you should confirm that the directory has been created before production use.
-
Do Not Create Empty Files: Select this checkbox to skip creating the target file if there is no target data.
-
Append to File: Select this checkbox to append to existing target file instead of overwriting. Note that SFTP connections do not support the ability to append to files, which is a limitation of SFTP.
-
Write Headers: Select this checkbox if you are using a flat text target and want to write headers (column/field names) to the first line.
-
End-of-line Type: Specify how to write line breaks when writing to a target. Note that end-of-line characters in the data itself are not converted. The options are as follows:
-
Default: Standard end-of-line characters for the platform the agent is running on.
-
Windows: CRLF (ASCII 13 and ASCII 10).
-
Unix: LF (ASCII 10).
-
-
Character Encoding: Specify character encoding to define a specific character encoding for the target file. If you leave the field blank, Harmony tries to detect the encoding. If you want to overwrite the default, you can choose from any of the encoding types listed in Supported character encodings.
-
Success/Error Folder: Available only for use with private agents where local files are enabled, these options are used to archive a copy of all files processed. This can be used in place of the After Processing option to Rename File on the file source to allow you to write to a separate location rather than to a sub-folder in the same location.
-
Use Success Folder: Select this checkbox to write a file to the specified folder after successful processing on the primary target path. If writing a file to multiple paths, the operation is successful only if all paths are successful. If this checkbox is selected, also provide the Success Folder in Absolute Path on the private agent machine.
-
Use Error Folder: Select this checkbox to write a file to the specified folder after unsuccessful processing. If at least one path is unsuccessful, then the file is written to this folder. If this checkbox is selected, also provide the Error Folder in Absolute Path on the private agent machine.
Caution
A file is written only if the failure is due to errors processing the FTP Write activity, such as with insufficient write permissions for the activity. A file is not written if, for example, the FTP connection is unsuccessful, causing the entire operation to fail.
Important
Absolute paths for the success and error folders are located on the private agent, not on the FTP server.
When using filename keywords in these fields, the keywords are not resolved. For a workaround, see Limitation and workaround under Filename keywords. Using asterisks (
*) and other typically unsupported file name characters will cause the operation to fail.The file(s) are named as specified in the Filename(s) field above, with a trailing underscore and a timestamp added. If there is already a file with the same name in that folder, an additional underscore and a counter are added.
For example, if a file named
data.csvis successfully processed, a copy nameddata.csv_2018-01-01_12-00-00-000could be written to the folder specified as the success folder. If such a file already exists from a previous run, a new filedata.csv_2018-01-01_12-00-00-000_1would be added. In a similar fashion, if an error folder is specified, any files that fail are written to a file in the error folder. -
-
Compression: Select the checkbox for Compress Target Files if you want the target data to be compressed. These options become available:
-
Format: Use the dropdown to select the desired compression format. Currently, only ZIP format is supported.
-
File Names in Archive(s): Enter the name of the target file(s) to be compressed within the archive. Any of the filename keywords are available to generate unique filenames. File(s) are automatically written into the archive at the root level.
Tip
To keep the filename(s) in the archive the same as the filename(s) defined in the target, enter
[file].[ext]. -
Mode: By default, the mode Overwrite overwrites the existing archive. This is the only mode available.
-
Password: To encrypt the archive, enter the desired password.
-
Encryption Mode: If a password is supplied, use the dropdown to select between the two available encryption modes: AES and Standard ZIP.
-
-
Transfer Type: If the files are ASCII-based, choose the ASCII transfer type radio button. For all other file types, choose Binary transfer type. Binary is the default and usually works best.
-
-
Save & Exit: If enabled, click to save the configuration for this step and close the activity configuration.
-
Next: Click to temporarily store the configuration for this step and continue to the next step. The configuration will not be saved until you click the Finished button on the last step.
-
Discard Changes: After making changes, click to close the configuration without saving changes made to any step. A message asks you to confirm that you want to discard changes.
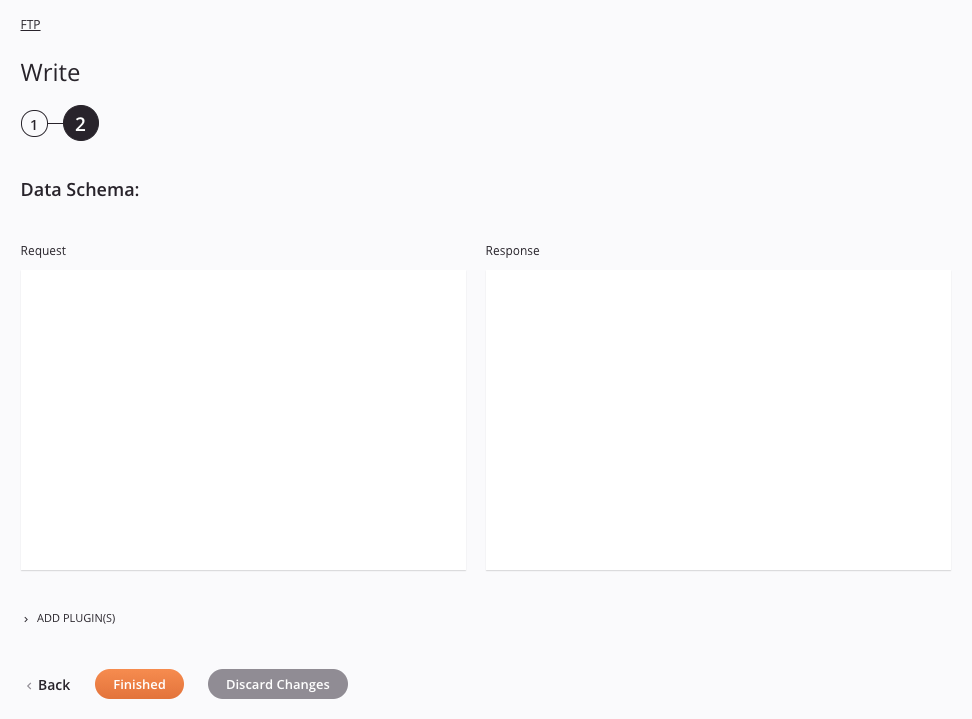
Step 2: Review the data schemas
-
Data Schema: If provided during activity configuration, the request data schema is displayed. If the operation uses a transformation, the data schemas are displayed again later during the transformation mapping process, where you can map to target fields using source objects, scripts, variables, custom values, and more. You can also define schemas directly in a transformation.
-
Add Plugin(s): Plugins are Jitterbit- or user-provided applications that extend Harmony's native capabilities. To apply a plugin to the activity, click to expand this section and select the checkbox next to the plugin to be used. For additional instructions on using plugins, including details on setting any required variables used by the plugin, see Plugins added to an activity.
-
Back: Click to temporarily store the configuration for this step and return to the previous step.
-
Finished: Click to save the configuration for all steps and close the activity configuration.
-
Discard Changes: After making changes, click to close the configuration without saving changes made to any step. A message asks you to confirm that you want to discard changes.
Next steps
After configuring an FTP Write activity, you can use it within an operation or script as described below.
Complete the operation
After configuring an FTP Write activity, complete the configuration of the operation by adding and configuring other activities, transformations, or scripts as operation steps. You can also configure an operation's operation settings, which include the ability to chain operations together that are in the same or different workflows.
Once an FTP Write activity has been created, menu actions for that activity are accessible from the project pane in either the Workflows or the Components tabs, and from the design canvas. See Activity actions menu for details.
FTP Write activities can be used as a target with these operation patterns:
- Archive pattern
- Script pattern
- Transformation pattern
- Two-target archive pattern (as the second target only)
- Two-target HTTP archive pattern (as the second target only)
- Two-transformation pattern (as the second target only)
- Salesforce bulk source pattern
Other patterns are not valid using FTP Write activities. See the validation patterns on the Operation validity page.
When ready, deploy and run the operation and validate behavior by checking the operation logs.
Using FTP activities in scripts
FTP Write activities can also be referenced in a script for use with script functions that use a targetId as a parameter, including these:
Jitterbit Script Functions
ArchiveFileFlushAllFilesFlushFileWriteFile
JavaScript Jitterbit Functions
Jitterbit.WriteFile
For more details on referencing activities in scripts, see Endpoints in Jitterbit Script or Endpoints in JavaScript.