HTTP v2 connection authentication types
Introduction
During configuration of an HTTP v2 connection, once you use the Authentication menu to select the authentication type, additional fields become available to configure, described on this page for each type:
-
API Key: Specify an API key-value pair to send in headers or query parameters.
-
AWS Signature: Specify an AWS access key ID, secret access key, region, service, and session token to send using Amazon Web Services (AWS) Signature Version 2 in headers or query parameters.
-
Basic Auth: Specify a username and password to send in headers.
-
Bearer Token: Specify a bearer token to send in headers.
-
Digest Auth: Specify a username, password, realm, nonce, algorithm, QOP, nonce count, client nonce, and opaque to send in headers.
-
Hawk Authentication: Specify a Hawk authentication ID, authentication key, application-specific information, an app ID, and DLG to send in headers.
-
No Auth: Select to access the service anonymously without authorization.
-
OAuth 2.0: Specify the grant type and provide the OAuth token endpoint, client ID, client secret, and scope to send in headers or the request body.
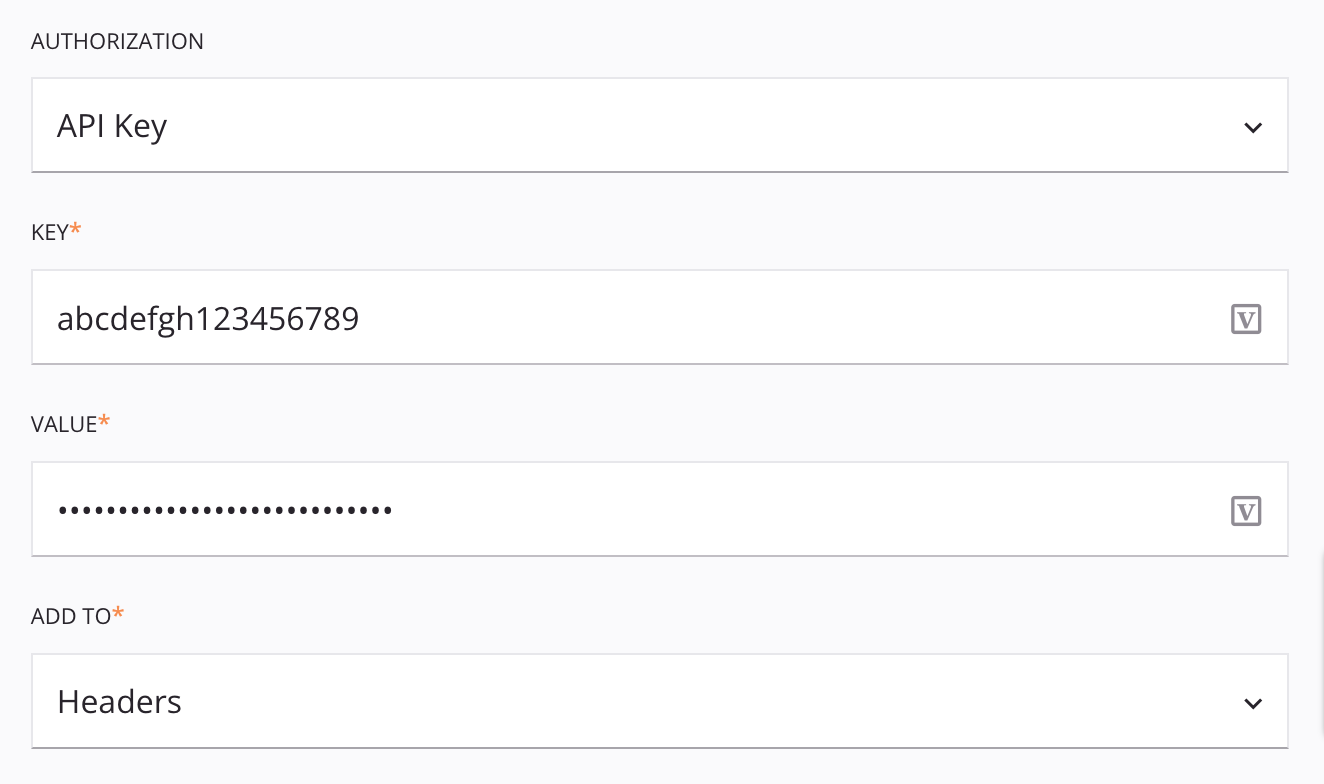
API key
When API Key is selected in the Authorization menu, you provide the API key and value and select whether the key-value pair should be sent in headers or query parameters:
Tip
Fields with a variable icon ![]() support using global variables, project variables, and Jitterbit variables. Begin either by typing an open square bracket
support using global variables, project variables, and Jitterbit variables. Begin either by typing an open square bracket [ into the field or by clicking the variable icon to display a list of the existing variables to choose from.
-
Key: Enter the API key.
-
Value: Enter the value of the API key.
-
Add To: Use the menu to select either Headers or Query Params:
-
Headers: The API key-value pair is sent using the defined request header key.
-
Query Params: The API key-value pair is sent using query string parameters. For example:
GET /endpoint?api_key=abcdefgh123456789
-
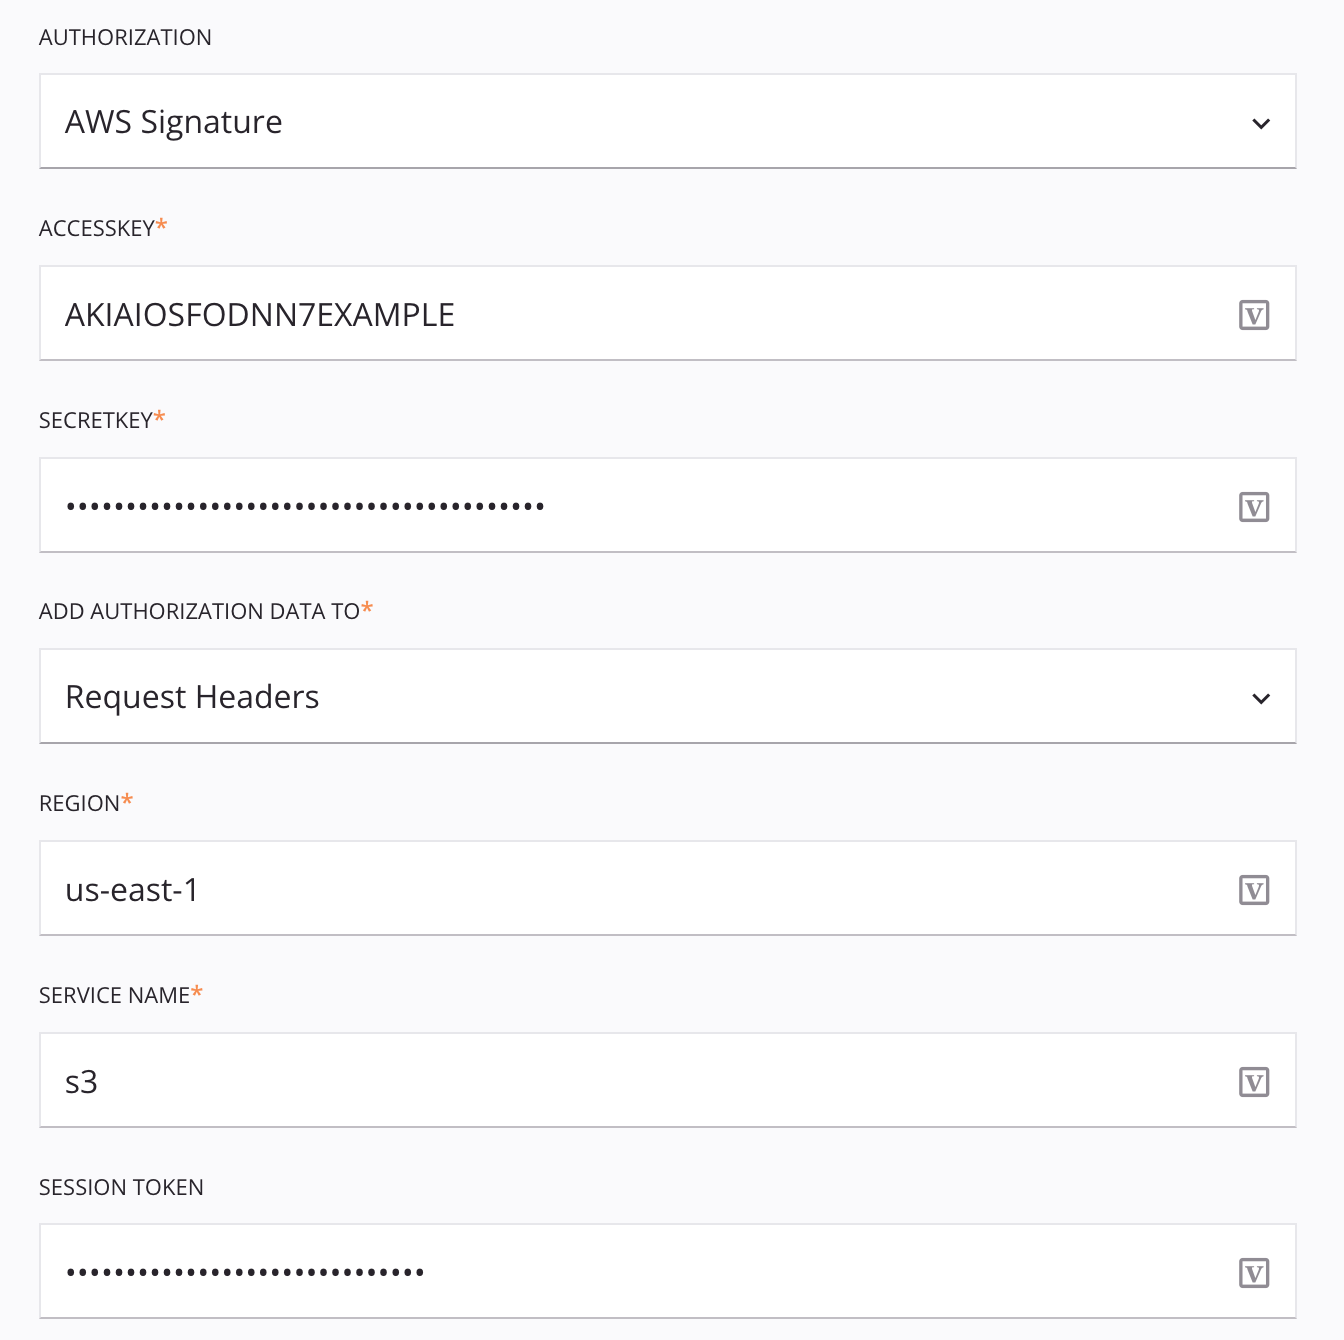
AWS signature
When AWS Signature is selected in the Authorization menu, you provide an AWS access key ID, secret access key, region, service, and session token to send using Amazon Web Services (AWS) Signature Version 2 in headers or query parameters.
Note
Only AWS Signature Version 2 has been confirmed to be supported. AWS Signature Version 4 may be work but has not been tested.
Tip
Fields with a variable icon ![]() support using global variables, project variables, and Jitterbit variables. Begin either by typing an open square bracket
support using global variables, project variables, and Jitterbit variables. Begin either by typing an open square bracket [ into the field or by clicking the variable icon to display a list of the existing variables to choose from.
-
Access Key: Enter the AWS access key ID. For example,
AKIAIOSFODNN7EXAMPLE. -
Secret Key: Enter the AWS secret access key. For example,
wJalrXUtnFEMI/K7MDENG/bPxRfiCYEXAMPLEKEY. -
Add Authorization Data To: Select Request Headers to send the authorization data using the HTTP
Authorizationrequest header. -
Region: Enter the AWS region code. For example,
us-east-1for US East (N. Virginia). -
Service Name: Enter the AWS service namespace (also known as the AWS service prefix) that identifies the AWS product. For example,
s3for Amazon S3. -
Session Token: Enter the AWS session token if signing the request using temporary security credentials. For example,
AQoDYXdzEJr...<remainder of session token>.
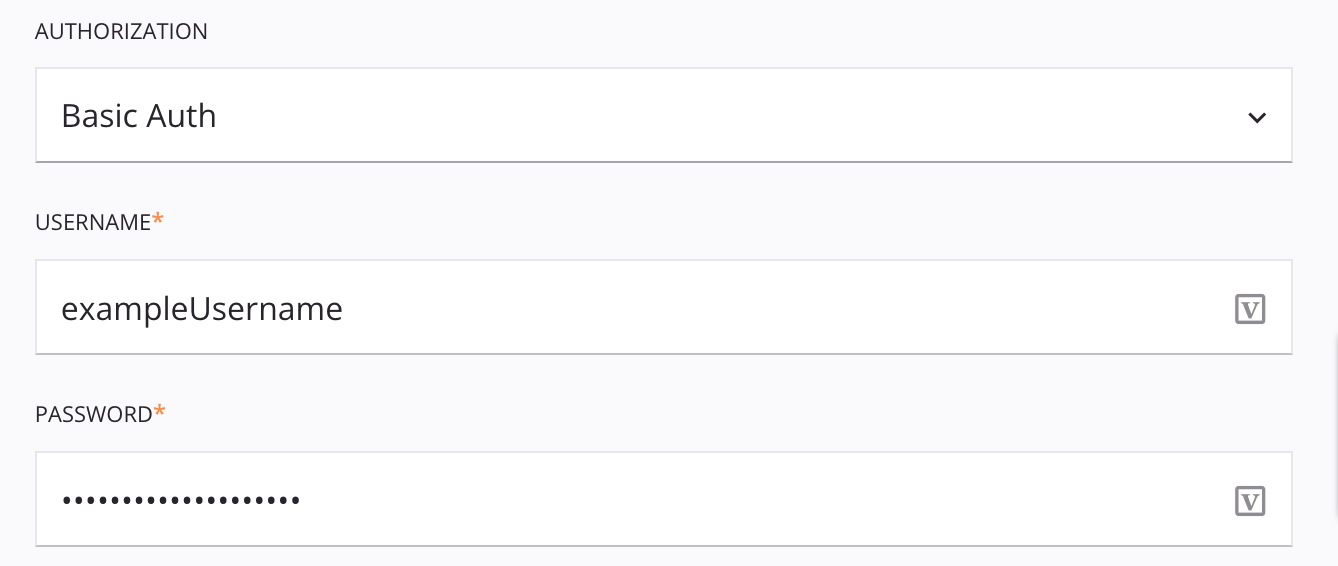
Basic auth
When Basic Auth is selected in the Authorization menu, the specified credentials are sent using the HTTP Authorization request header. The credentials are automatically Base64-encoded.
Tip
Fields with a variable icon ![]() support using global variables, project variables, and Jitterbit variables. Begin either by typing an open square bracket
support using global variables, project variables, and Jitterbit variables. Begin either by typing an open square bracket [ into the field or by clicking the variable icon to display a list of the existing variables to choose from.
-
Username: Enter the username.
-
Password: Enter the password.
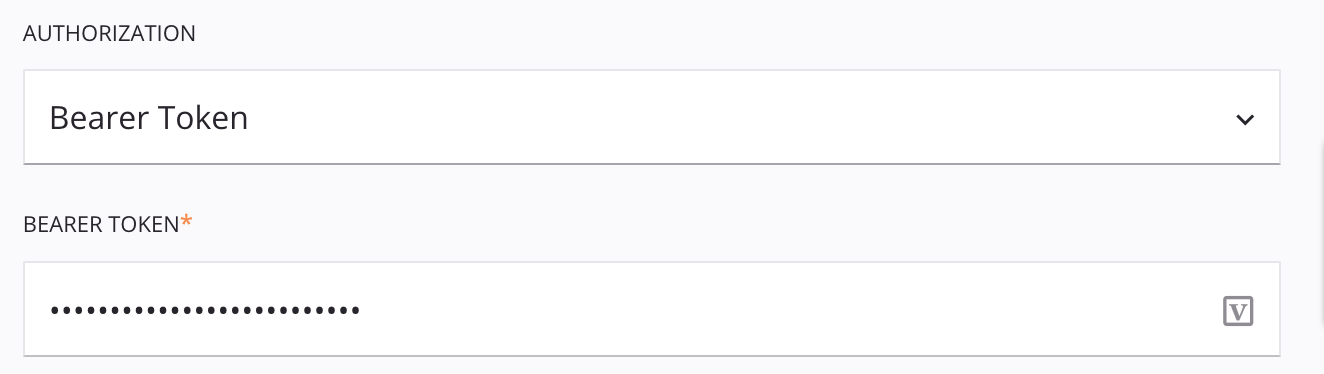
Bearer token
When Bearer Token is selected in the Authorization menu, the specified bearer token is sent using the HTTP Authorization request header.
Tip
Fields with a variable icon ![]() support using global variables, project variables, and Jitterbit variables. Begin either by typing an open square bracket
support using global variables, project variables, and Jitterbit variables. Begin either by typing an open square bracket [ into the field or by clicking the variable icon to display a list of the existing variables to choose from.
- Bearer Token: Enter the bearer token.
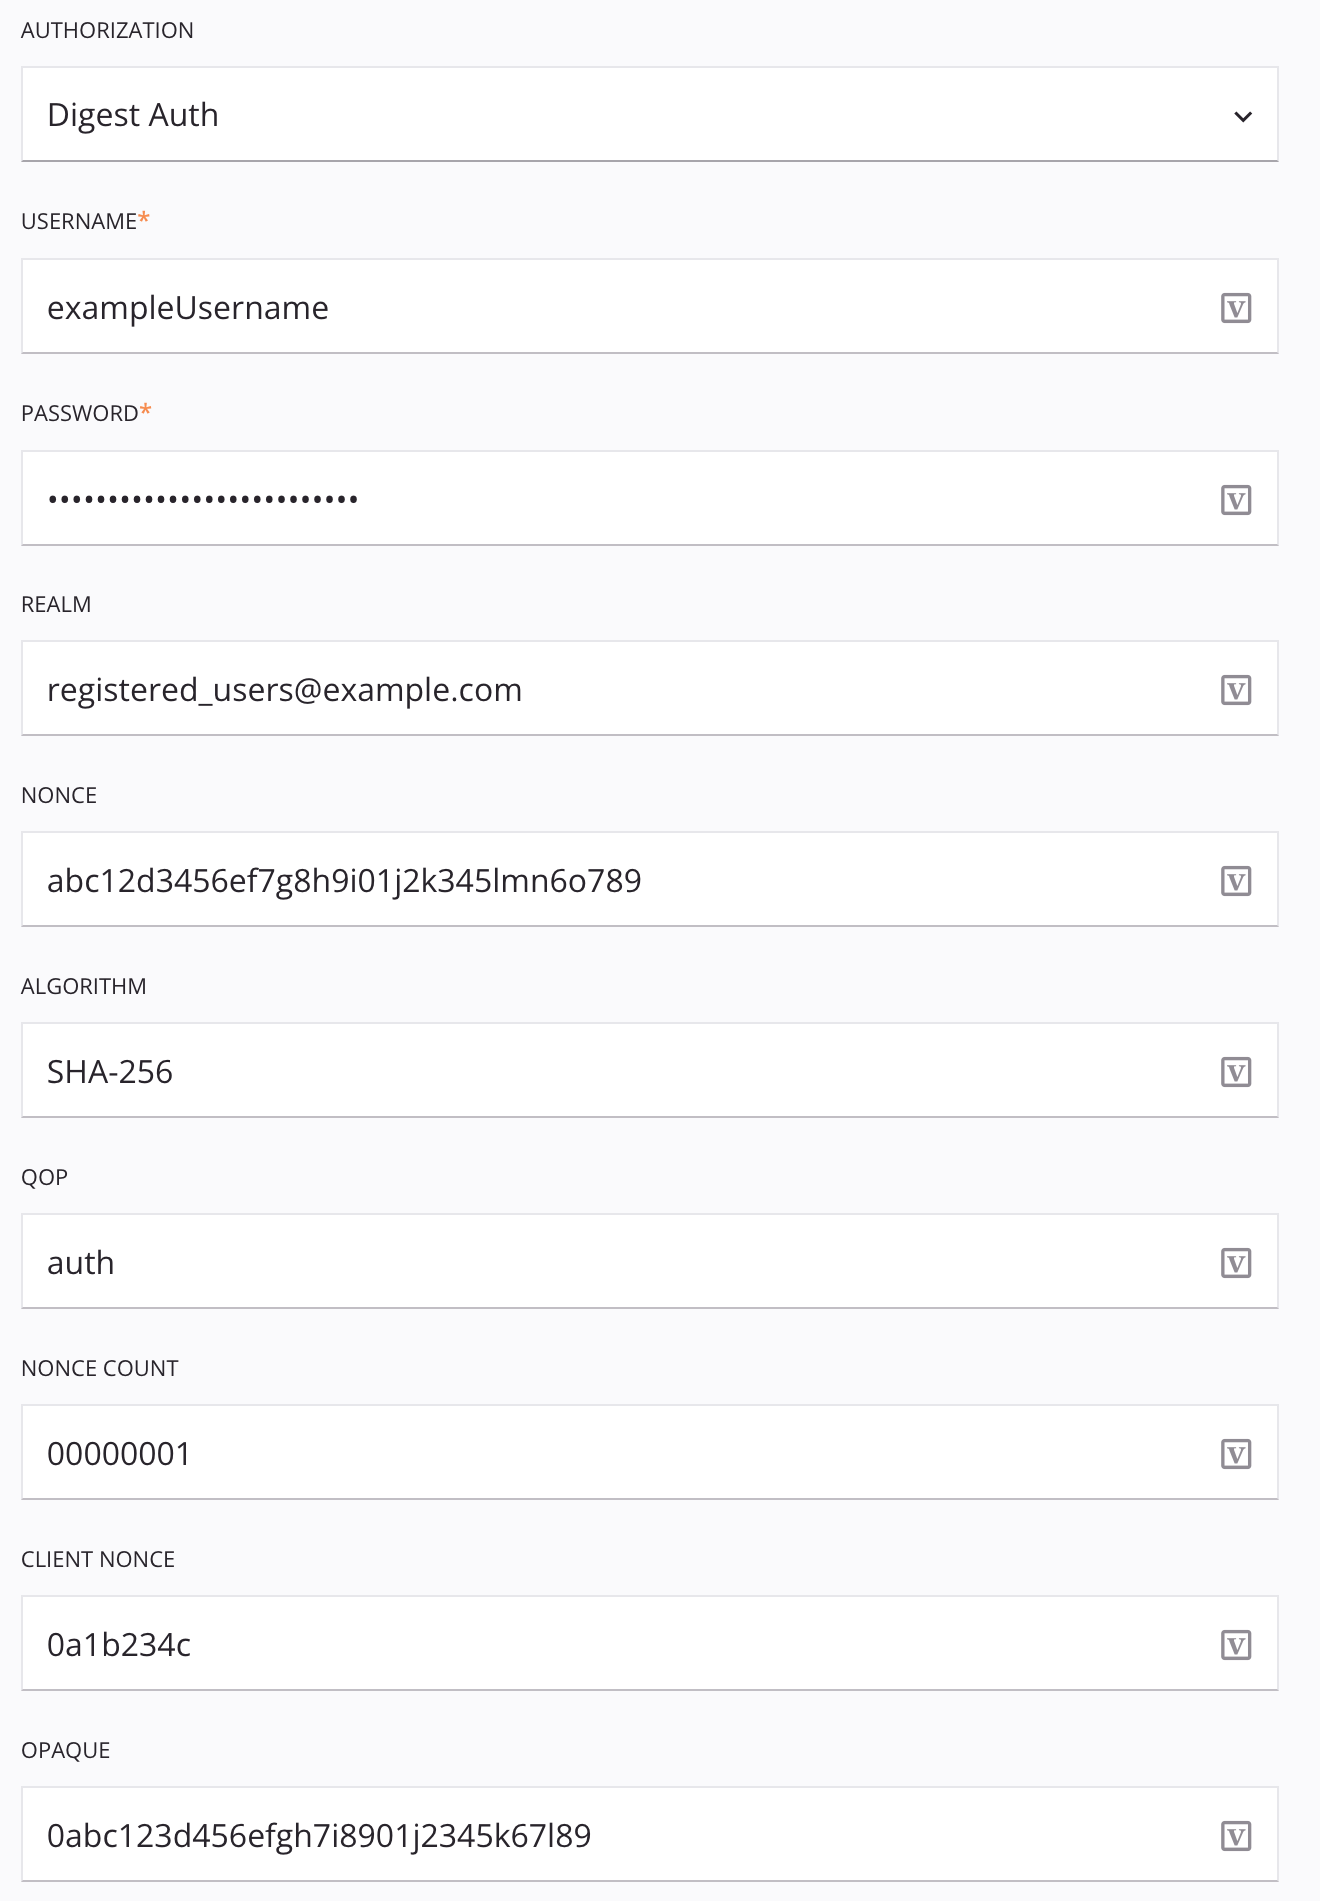
Digest auth
When Digest Auth is selected in the Authorization menu, you provide a username, password, realm, nonce, algorithm, QOP, nonce count, client nonce, and opaque to generate a hash to send to the service through the WWW-Authenticate directive.
Tip
Fields with a variable icon ![]() support using global variables, project variables, and Jitterbit variables. Begin either by typing an open square bracket
support using global variables, project variables, and Jitterbit variables. Begin either by typing an open square bracket [ into the field or by clicking the variable icon to display a list of the existing variables to choose from.
-
Username: Enter the username in the specified realm.
-
Password: Enter the password associated with the username.
-
Realm: Enter the realm associated with the username and password. For example,
registered_users@example.com. -
Nonce: Enter the server nonce.
-
Algorithm: Enter the algorithm used to calculate the digest. These algorithms are supported:
MD5MD5-sessSHA-256SHA-256-sessSHA-512SHA-512-sess
-
QOP: Enter a token indicating a single quality of protection (QOP) applied to the message.
-
Nonce Count: Enter the hexadecimal count of requests sent with the Client Nonce value in this request.
-
Client Nonce: Enter the client nonce, an ASCII-only string value.
-
Opaque: Enter a string of data to be returned from subsequent requests with URIs in the same protection space.
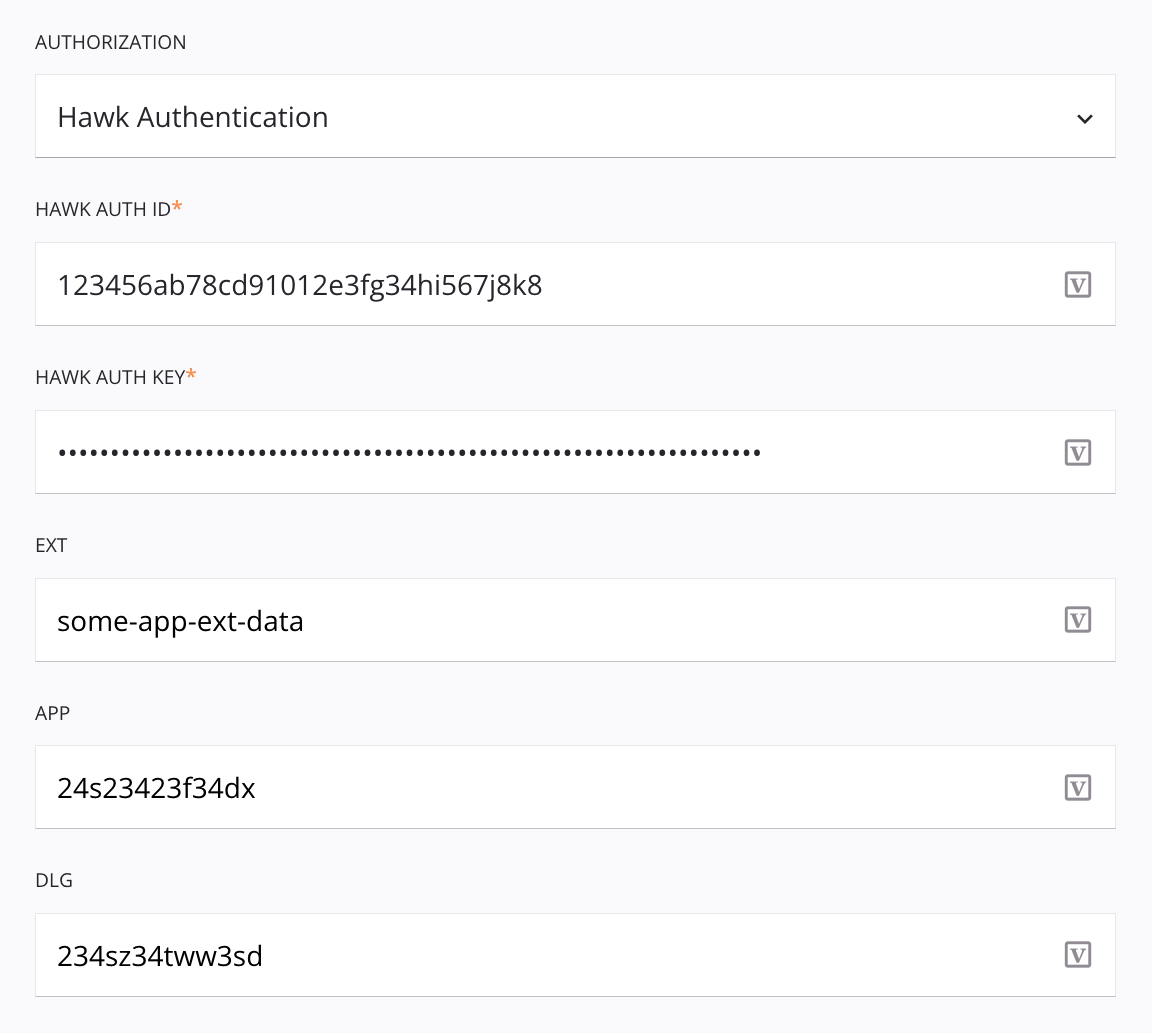
Hawk authentication
When Hawk Authentication is selected in the Authorization menu, you provide the Hawk authentication ID, authentication key, application-specific information, an app ID, and DLG to send in headers:
Tip
Fields with a variable icon ![]() support using global variables, project variables, and Jitterbit variables. Begin either by typing an open square bracket
support using global variables, project variables, and Jitterbit variables. Begin either by typing an open square bracket [ into the field or by clicking the variable icon to display a list of the existing variables to choose from.
-
Hawk Auth ID: Enter the API authentication ID.
-
Hawk Auth Key: Enter the API authentication key.
-
EXT: Enter any application-specific information to be sent with the request.
-
App: Enter the application ID.
-
DLG: If the Hawk Auth ID and Hawk Auth Key are obtained through access delegation, enter the ID of the delegating application.
No auth
When No Auth is selected in the Authorization menu, the connection accesses the service anonymously.

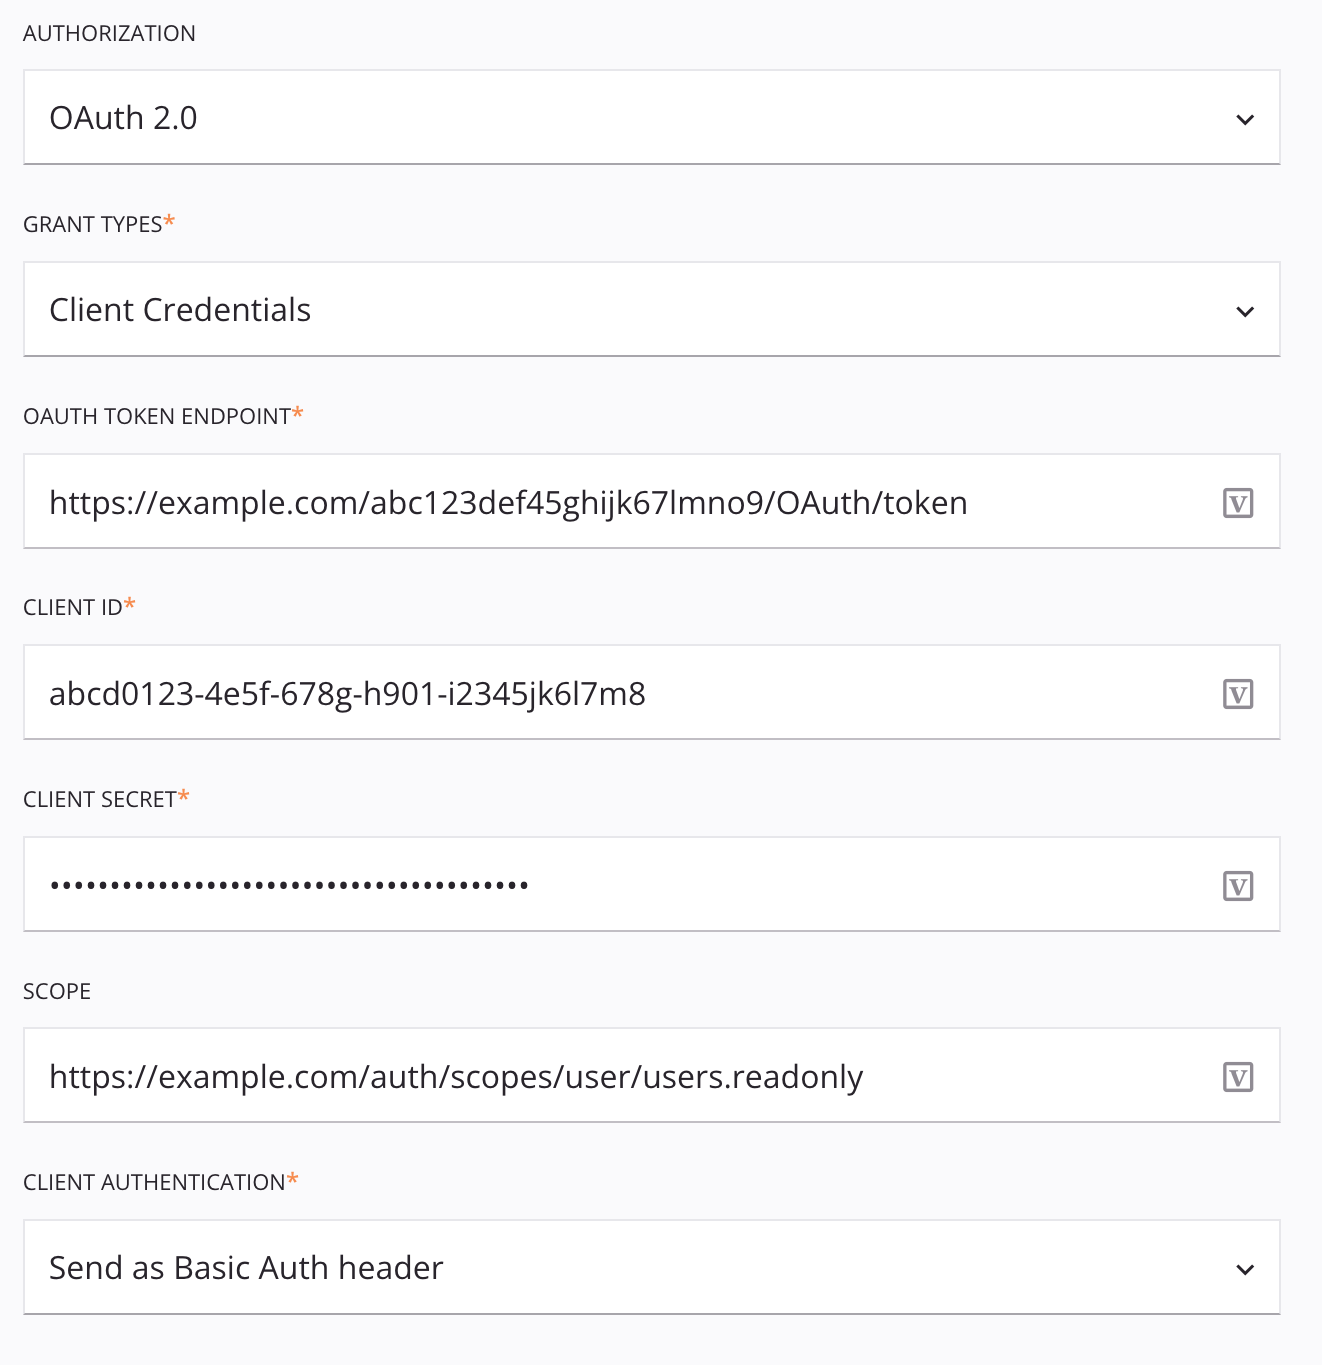
OAuth 2.0
When OAuth 2.0 is selected in the Authorization menu, you select the grant type and provide the OAuth token endpoint, client ID, client secret, and scope to send in headers or the request body. You additionally provide the username and password if using the Password Grant type.
Tip
Fields with a variable icon ![]() support using global variables, project variables, and Jitterbit variables. Begin either by typing an open square bracket
support using global variables, project variables, and Jitterbit variables. Begin either by typing an open square bracket [ into the field or by clicking the variable icon to display a list of the existing variables to choose from.
-
Grant Types: Use the menu to select the grant type to be used, either Client Credentials or Password Grant:
-
Client Credentials: The client credentials grant type.
-
Password Grant: The resource owner password credentials grant type, which uses a user's credentials as an access token. When this type is selected, two additional fields become available to configure below: Username and Password.
-
-
OAuth Token Endpoint: Enter the endpoint in the form of a full URL that ends in
/oauth/tokento be used to generate the token. -
Client ID: Enter the client ID associated with the OAuth service application.
-
Client Secret: Enter the client secret associated with the OAuth service application.
-
Username: When the Password Grant grant type is selected (not shown in the above screenshot), enter the username of the resource owner.
-
Password: When the Password Grant grant type is selected (not shown in the above screenshot), enter the password associated with the username.
-
Scope: Enter a space-delimited list of scope permissions in the format expected by the OAuth service. For example,
users,users.read,users:read,user-list-r,https://example.com/auth/scopes/user/users.readonly,openid profile, etc. -
Client Authentication: Use the menu to select either Send as Basic Auth Header or Send Client Credentials in Body:
-
Send as Basic Auth Header: The authorization data is sent using the HTTP
Authorizationrequest header. -
Send Client Credentials in Body: The authorization data is sent in the body of the request.
-