Microsoft Teams prerequisites
Introduction
As the Microsoft Teams connection will be an application that interfaces with Microsoft, you will need to register an application at Microsoft Azure Active Directory with a specific set of permissions.
The Microsoft Teams connector supports OAuth 2.0 using this Microsoft Azure Active Directory app registration process.
Note that as this application requires more than 30 API permissions, an account with sufficient limits on requested permissions per app must be used.
Additional information on registering applications and granting permissions is available in the Microsoft Graph documentation.
You can create a Microsoft Teams application in the Microsoft Azure Active Directory portal or by using a script, as described in the following sections.
Important
If multi-factor authentication (MFA) is enabled on the Microsoft Azure Active Directory organization, you must exclude the application from conditional access policies (required for a successful connection using the Microsoft Teams connector).
Microsoft Azure app registration steps
After logging in to Microsoft Azure Active Directory, create a new application by clicking App registrations in the left sidebar and then clicking New registration in the menu of tools that appears:
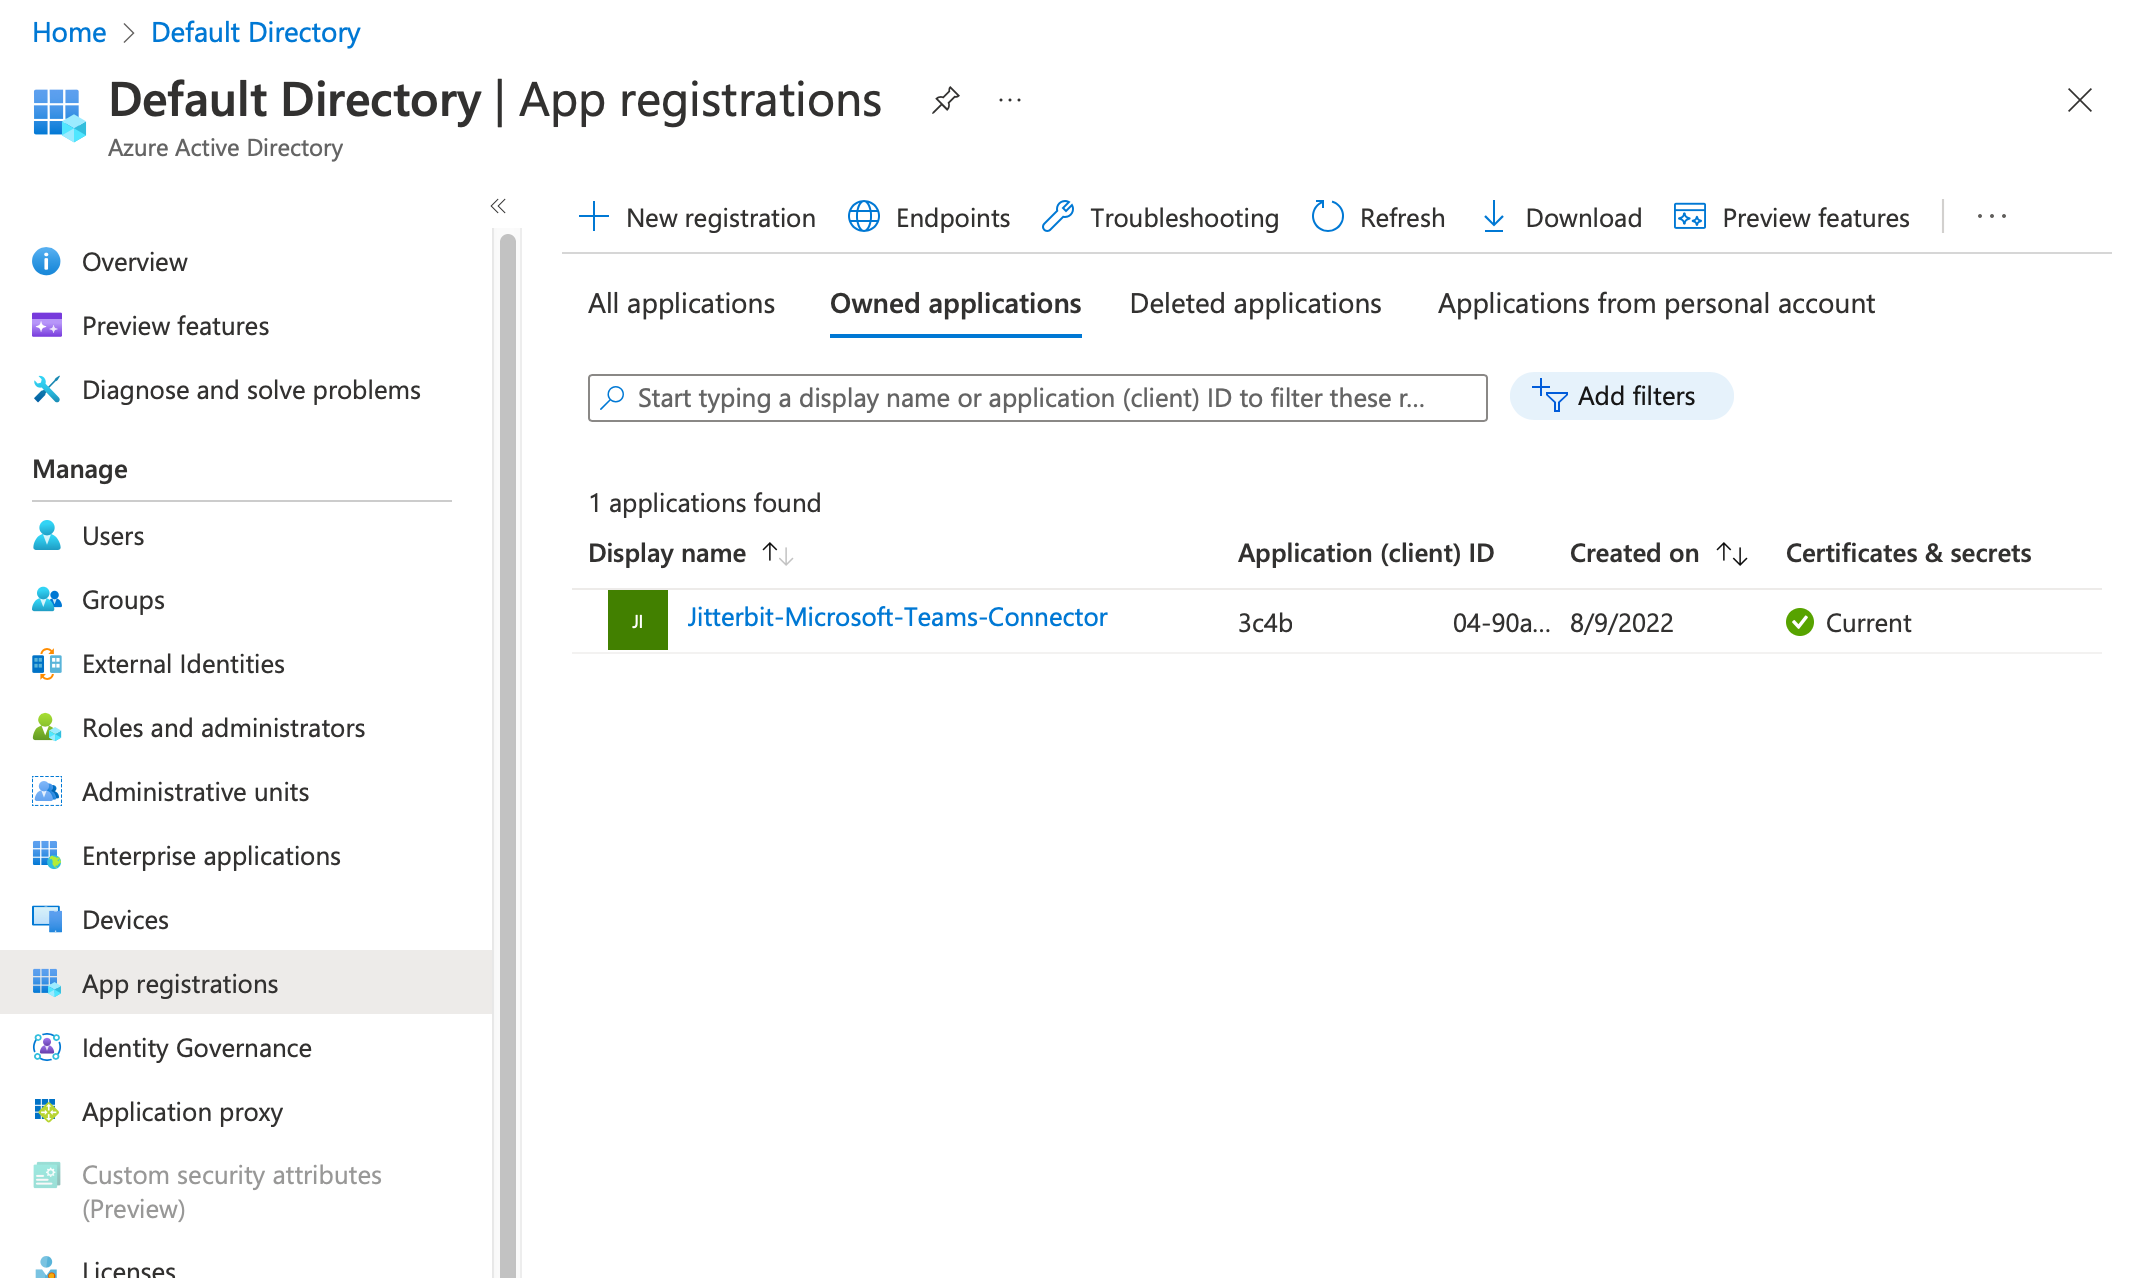
You are taken to a form where you can provide a name for your application. Enter a name (such as Jitterbit-Microsoft-Teams-Connector), accept the default supported account type, and click Register:

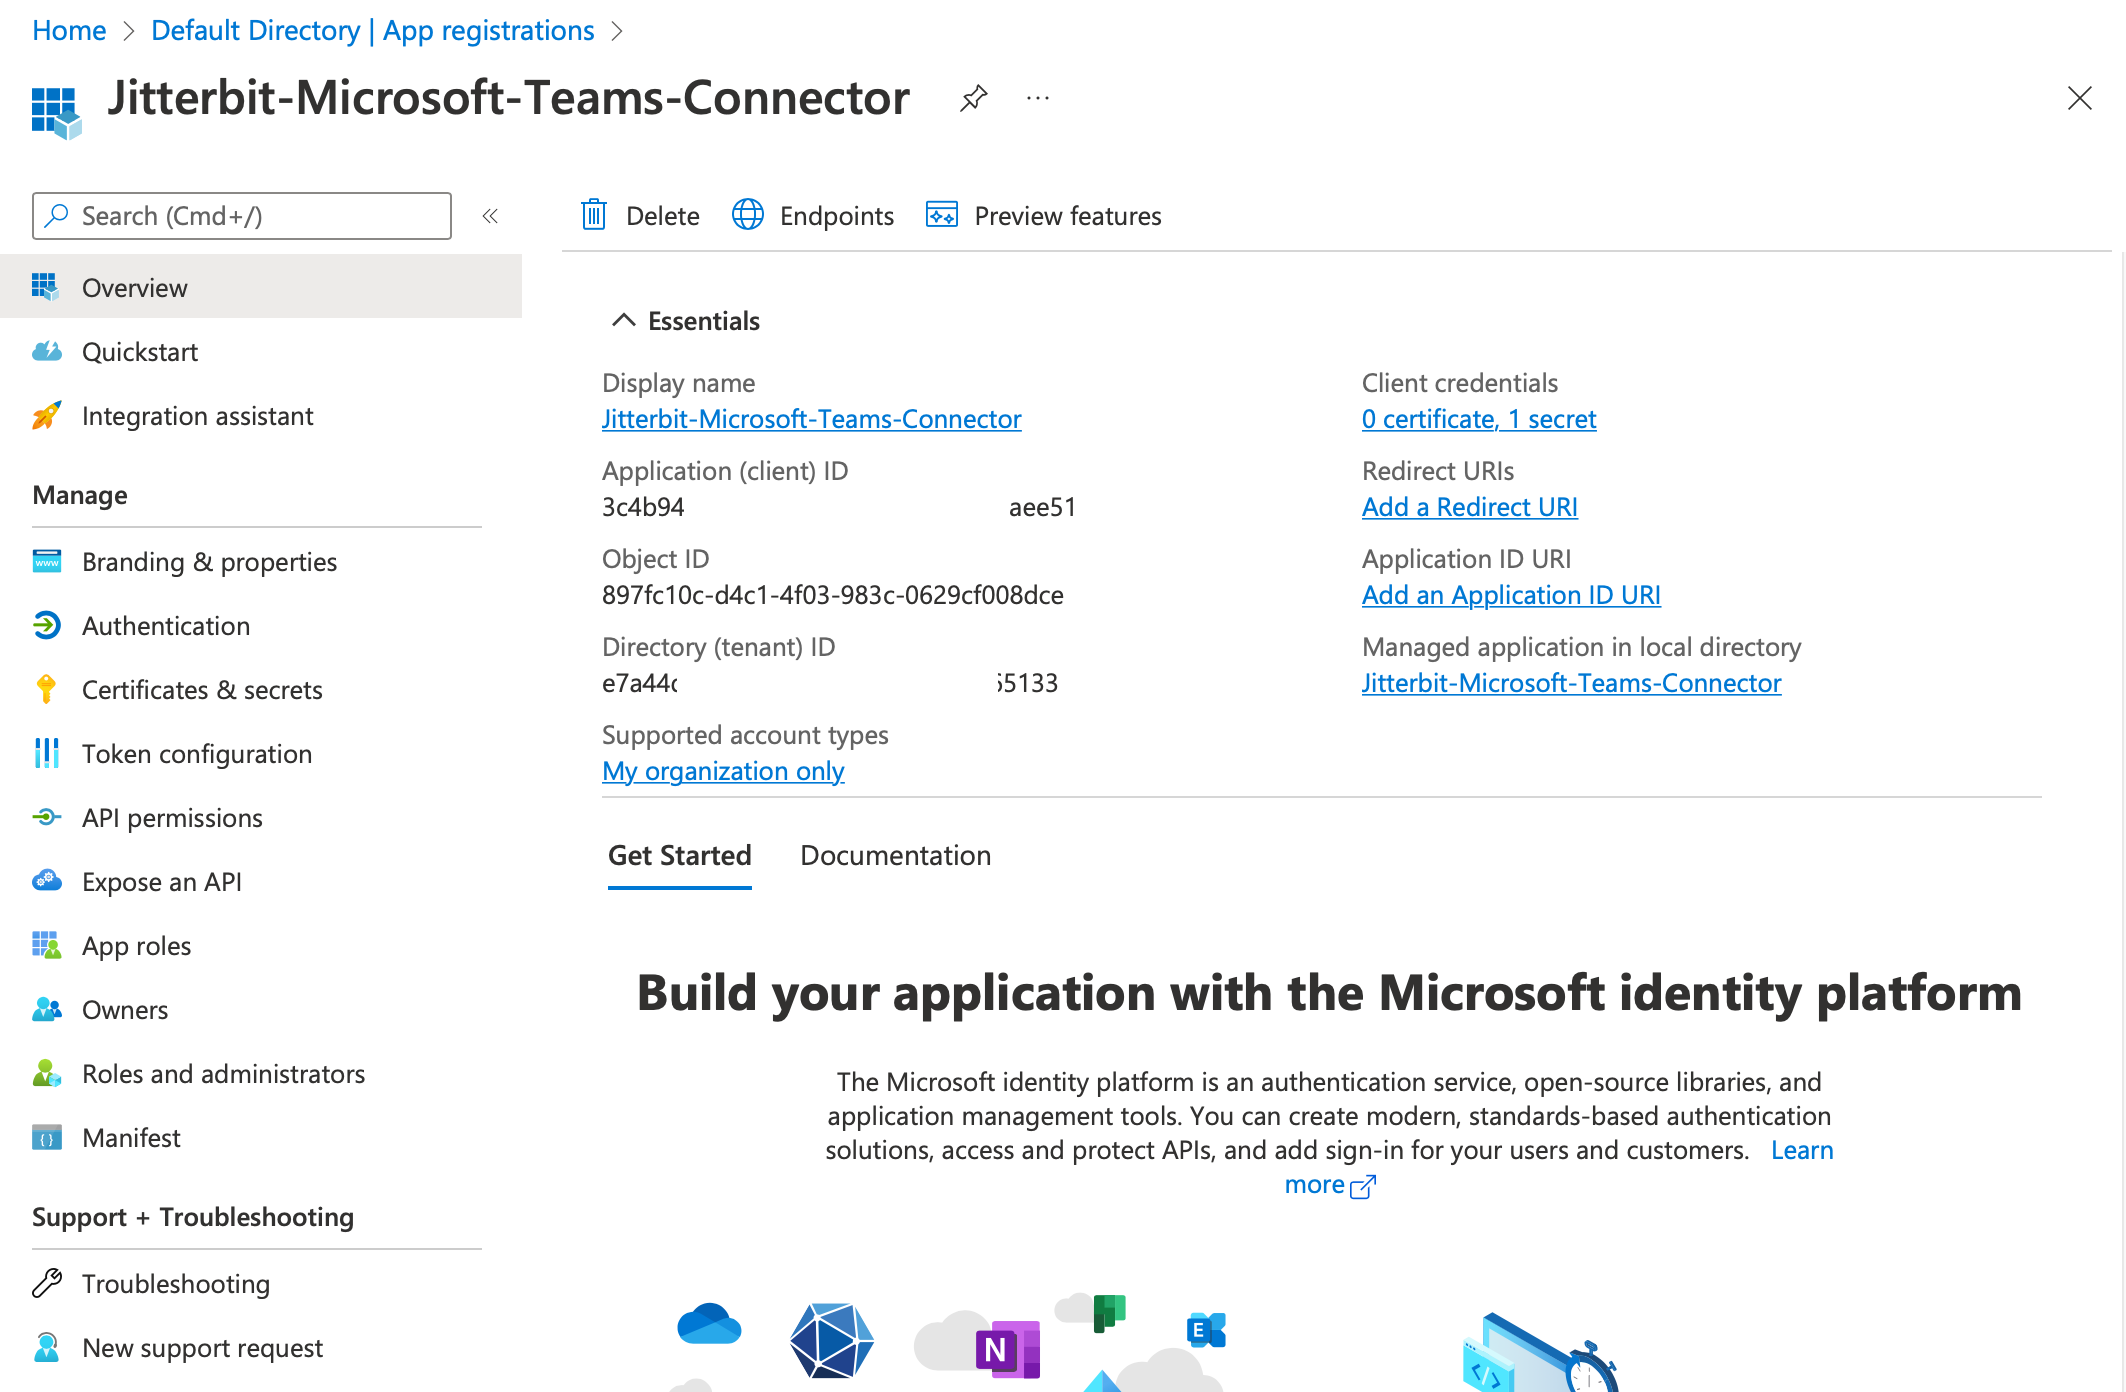
Once the app is created, from that application's Overview page you can obtain its Application (client) ID and Directory (tenant) ID:
Using the link to Certificates & secrets in the left sidebar, you can create a new client secret for the application. From this you can obtain the value of the client secret:
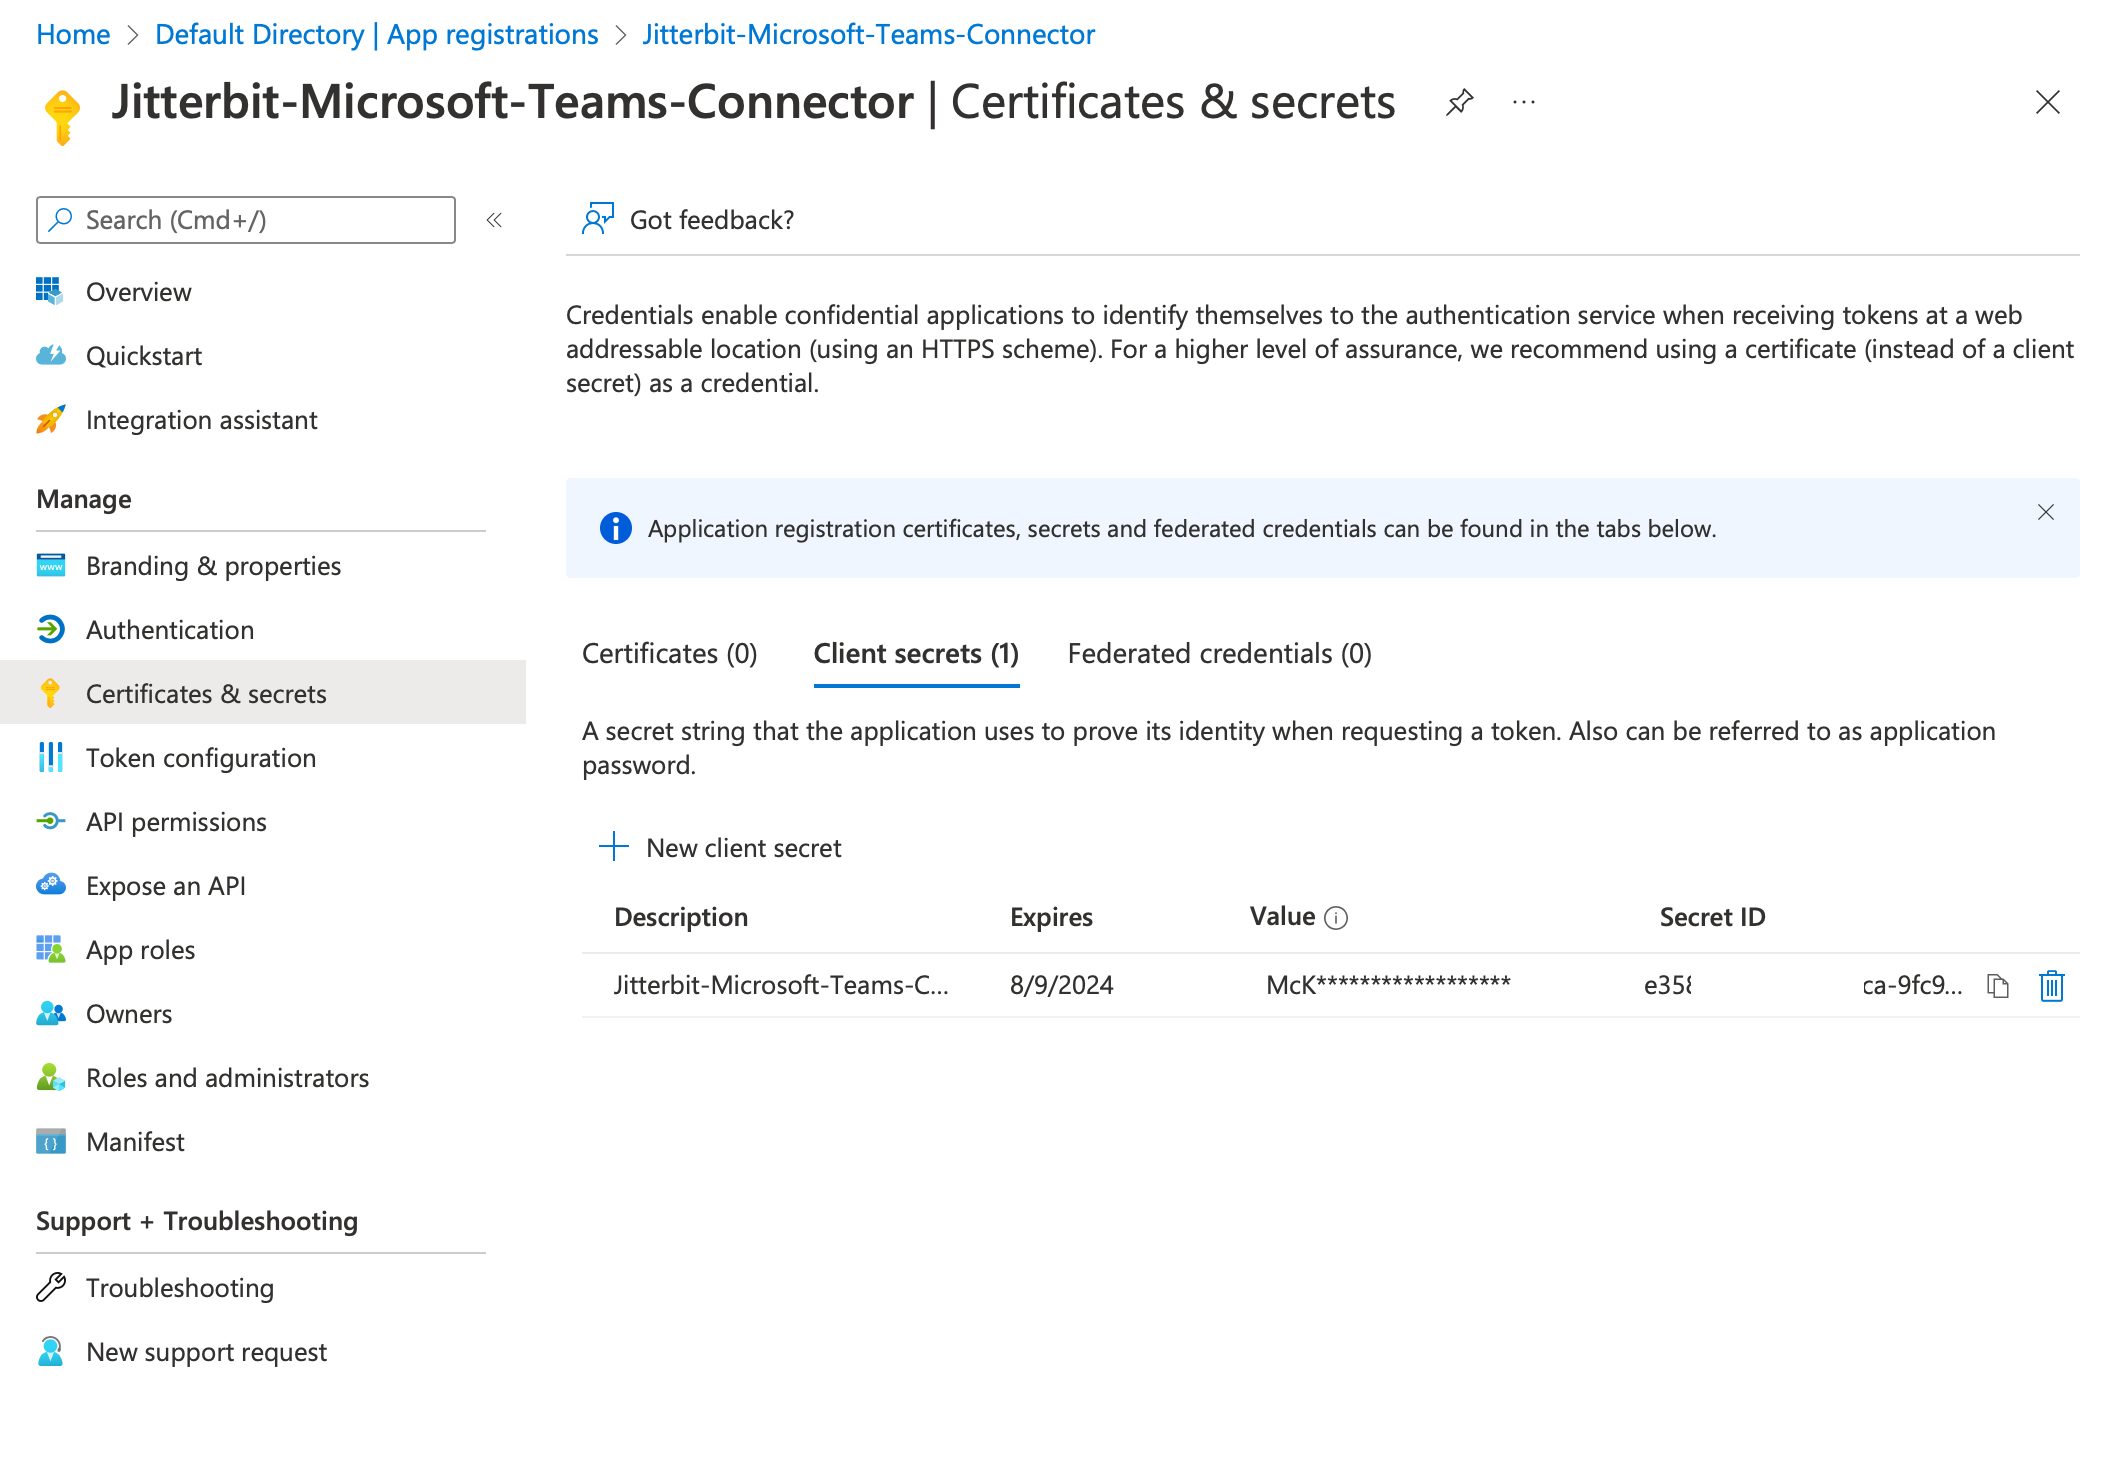
Note
The Value of the client secret is what is used in the connection's Client Secret field. The value is visible only once, when it is created, and should be copied and securely stored. Otherwise you will need to create a new client secret.
Copy these two IDs and the client secret value and store them safely so that you can retrieve them when configuring the connector.
Microsoft graph API permissions
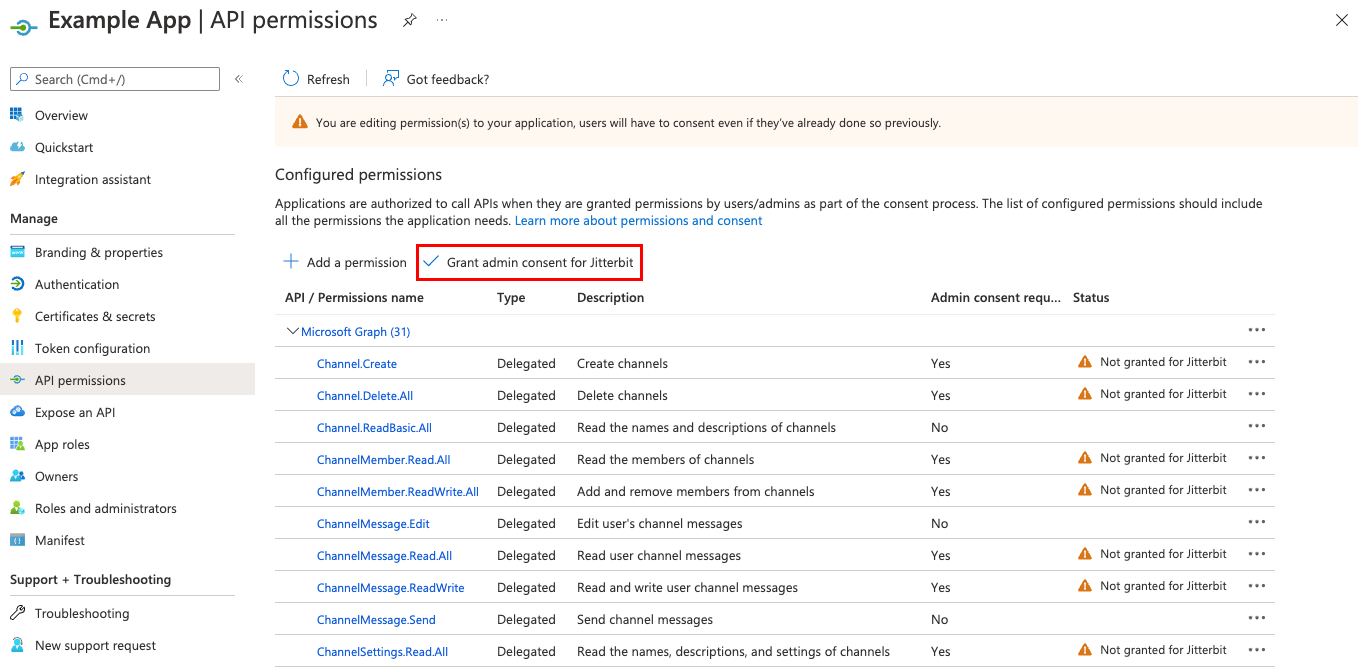
After creating the app, you need to configure the application API permissions.
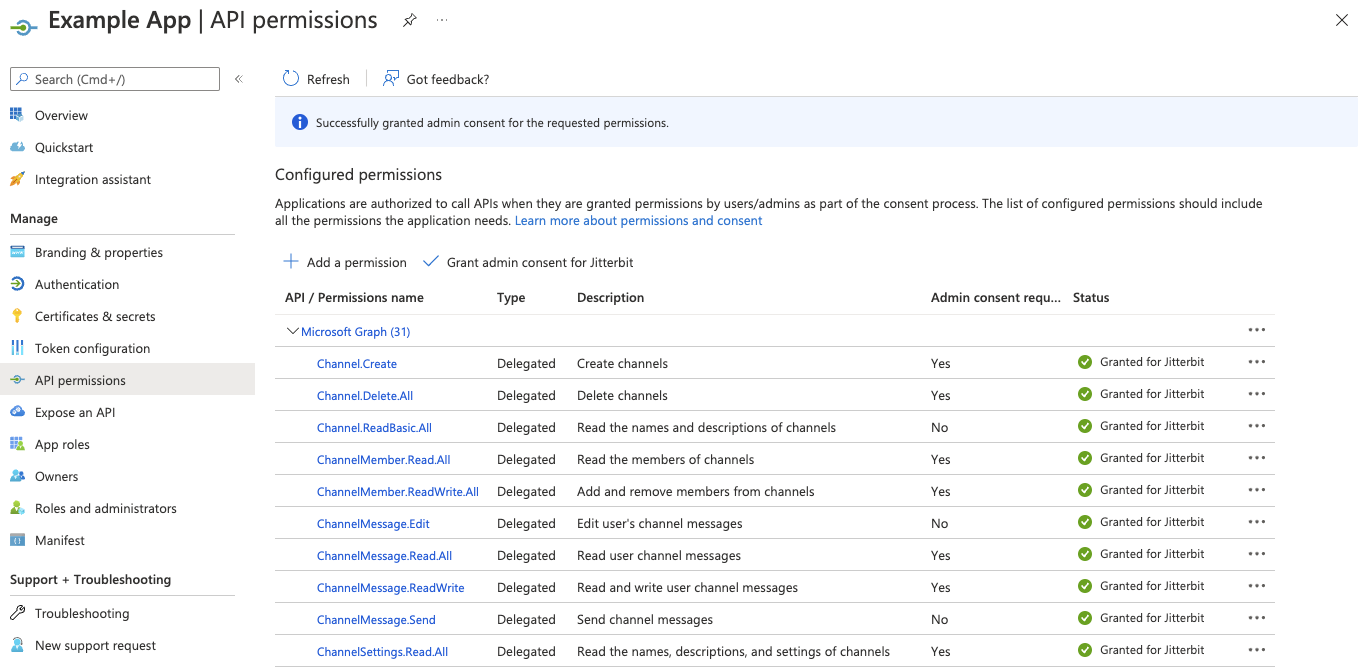
Registered applications are authorized to call APIs only when they are granted permission. The following table lists the minimum set of required Microsoft Graph API permissions. Note that as this list has more than 30 permissions, an account with sufficient limits on requested permissions per app must be used.
To add permissions, click API permissions in the left sidebar of the app registration to view the app's permissions, and then click Add a permission to start the selection of permissions. These permissions are all from the Microsoft Graph API.
| API/Permission Name | Type | Description | Admin Consent Required |
|---|---|---|---|
| Channel.Create | Delegated | Create channels | Yes |
| Channel.Delete.All | Delegated | Delete channels | Yes |
| Channel.ReadBasic.All | Delegated | Read the names and descriptions of channels | No |
| ChannelMember.Read.All | Delegated | Read the members of channels | Yes |
| ChannelMember.ReadWrite.All | Delegated | Add and remove members from channels | Yes |
| ChannelMessage.Edit | Delegated | Edit user's channel messages | Yes |
| ChannelMessage.Read.All | Delegated | Read user channel messages | Yes |
| ChannelMessage.Send | Delegated | Send channel messages | No |
| ChannelSettings.Read.All | Delegated | Read the names, descriptions, and settings of channels | No |
| ChannelSettings.ReadWrite.All | Delegated | Read and write the names, descriptions, and settings of channel | Yes |
| Chat.Create | Delegated | Create chats | No |
| Chat.Read | Delegated | Read user chat messages | No |
| Chat.ReadBasic | Delegated | Read names and members of user chat threads | No |
| Chat.ReadWrite | Delegated | Read and write user chat messages | No |
| ChatMember.Read | Delegated | Read the members of chats | Yes |
| ChatMember.ReadWrite | Delegated | Add and remove members from chats | Yes |
| ChatMessage.Read | Delegated | Read user chat messages | No |
| ChatMessage.Send | Delegated | Send user chat messages | No |
| Directory.AccessAsUser.All | Delegated | Access directory as the signed in user | Yes |
| Directory.Read.All | Delegated | Read directory data | Yes |
| Directory.ReadWrite.All | Delegated | Read and write directory data | Yes |
| Group.Read.All | Delegated | Read all groups | Yes |
| Group.ReadWrite.All | Delegated | Read and write all groups | Yes |
| GroupMember.Read.All | Delegated | Read group memberships | Yes |
| GroupMember.ReadWrite.All | Delegated | Read and write group memberships | Yes |
| Team.Create | Delegated | Create teams | No |
| Team.ReadBasic.All | Delegated | Read the names and descriptions of teams | No |
| TeamSettings.Read.All | Delegated | Read teams' settings | Yes |
| TeamSettings.ReadWrite.All | Delegated | Read and change teams' settings | Yes |
| User.Read | Delegated | Sign in and read user profile | No |
| User.ReadWrite.All | Delegated | Read and write all users' full profiles | Yes |
Once you have added these permissions, click Grant admin consent to complete the registration:
Once completed, each permission should have a green checkmark:
Script to create a Microsoft Teams app
An unsupported PowerShell script is available for use on Windows systems to create an appropriately configured Teams App in Azure AD with the appropriate permissions required to connect using the Jitterbit connector.
Warning
The script is unsupported by Jitterbit. All usage is at your own risk.
- Download the script provided below.
- Review and adjust the script if you would like a different name for the completed app.
- Go to PowerShell. You may need to configure administrator and execution permissions on your system and its shell in order to run the script.
- Execute the script using
./AddTeamsAppPowerShell.v2.ps1. - When prompted, enter your Azure AD admin permissions.
- If successful, a new app will be created in Azure AD named Teams App.
- Create a client secret and copy it with the Application (client) ID and Directory (tenant) ID as described above.
- Grant admin consent as described above.
Download addteamSAPppowershell script
Next steps
With the registration completed and permissions added, you can now configure and test the connection.