Mirakl connection
Introduction
A Mirakl connection, created using the Mirakl connector, establishes access to Mirakl. Once a connection is configured, you can create instances of Mirakl activities associated with that connection to be used either as sources (to provide data in an operation) or as targets (to consume data in an operation).
Create or edit a Mirakl connection
A new Mirakl connection is created using the Mirakl connector from one of these locations:
- The design component palette's Project endpoints and connectors tab (see Design component palette).
- The Global Connections page (see Create a global connection in Global Connections).
An existing Mirakl connection can be edited from these locations:
- The design component palette's Project endpoints and connectors tab (see Design component palette).
- The project pane's Components tab (see Component actions menu in Project pane Components tab).
- The Global Connections page (see Edit a global connection in Global Connections).
Configure a Mirakl connection
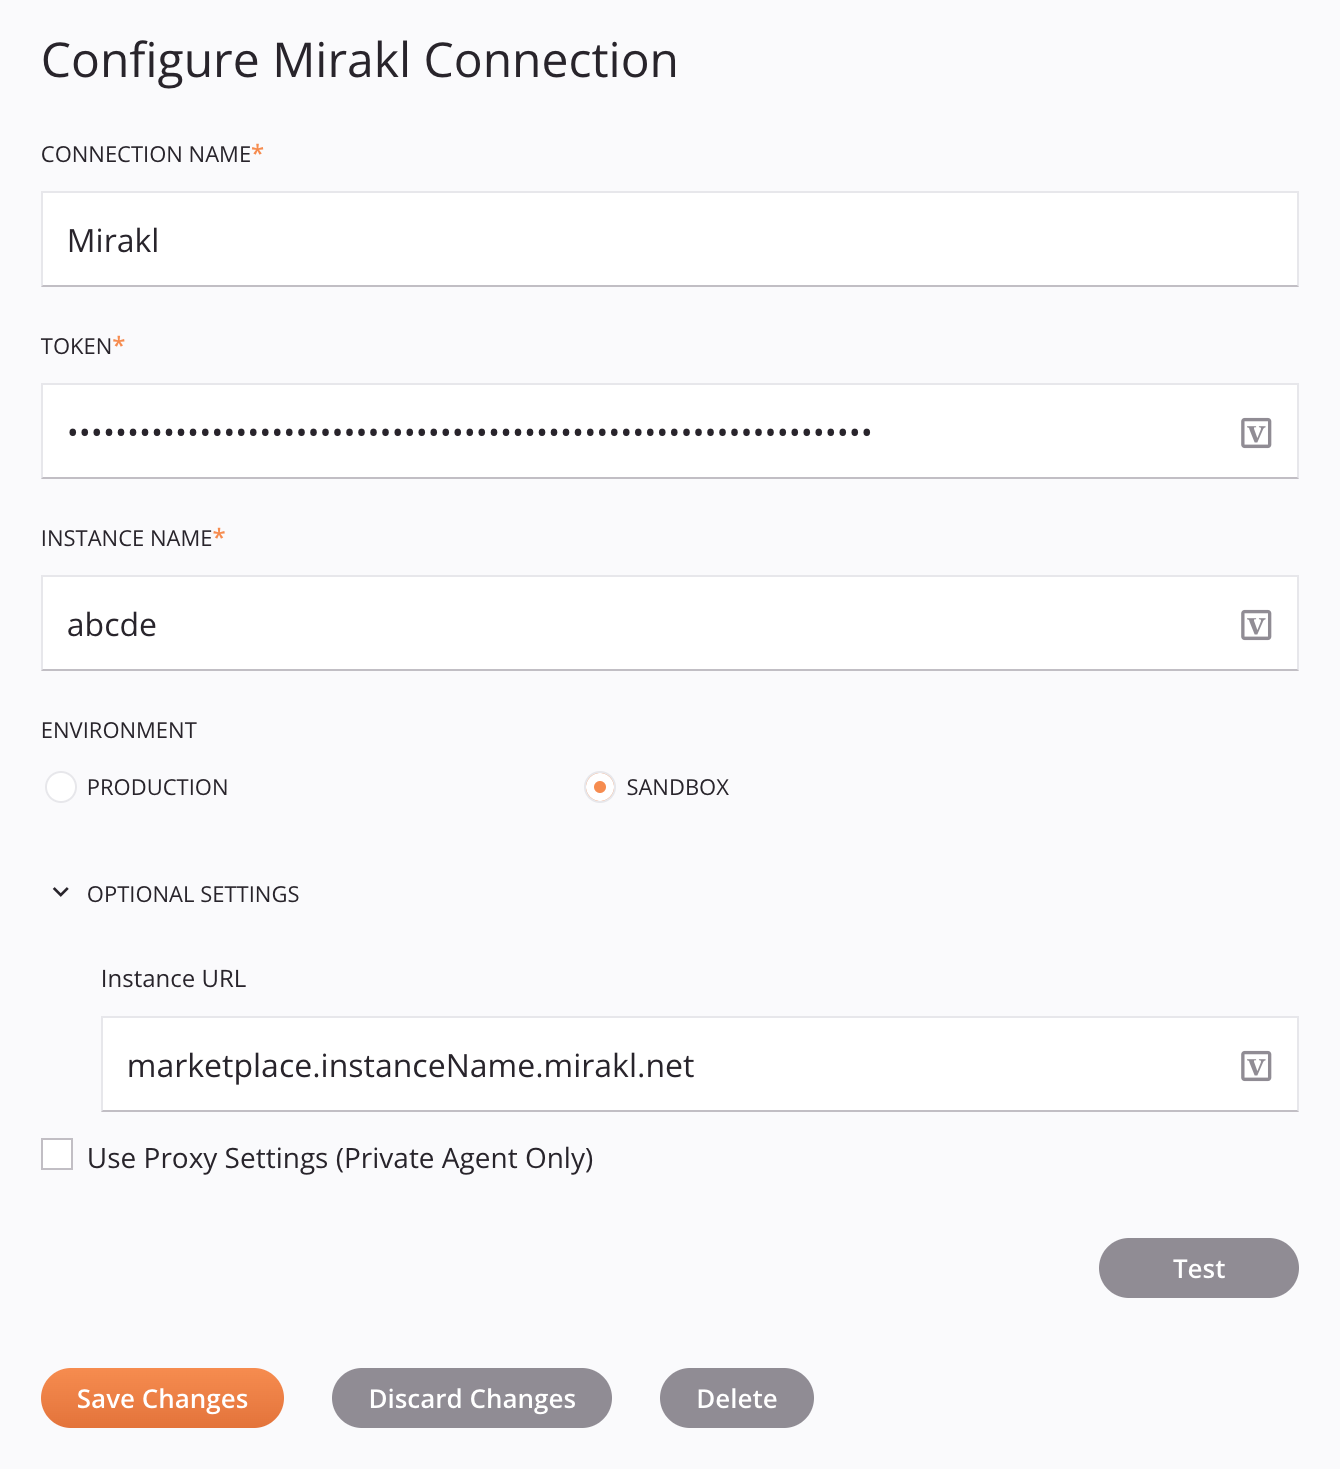
Each user interface element of the Mirakl connection configuration screen is described below.
Note
Fields with a variable icon ![]() support using global variables, project variables, and Jitterbit variables. Begin either by typing an open square bracket
support using global variables, project variables, and Jitterbit variables. Begin either by typing an open square bracket [ into the field or by clicking the variable icon to display a list of the existing variables to choose from.
-
Connection Name: Enter a name to use to identify the connection. The name must be unique for each Mirakl connection and must not contain forward slashes
/or colons:. This name is also used to identify the Mirakl endpoint, which refers to both a specific connection and its activities. -
Token: Enter the authentication token provided by Mirakl.
-
Instance name: Enter the customer name that is used in your Mirakl instance's custom URL in the format of
https://marketplace.{environment}.{customerName}.com.br. -
Environment: Select the environment that corresponds with that used in your Mirakl instance's custom URL:
- Production: Production corresponds with a Mirakl
productionenvironment. - Sandbox: Sandbox corresponds with a Mirakl
preprodenvironment.
- Production: Production corresponds with a Mirakl
-
Optional Settings: Click to expand additional optional settings:
- Instance URL: Enter your Mirakl instance's custom URL.
-
Use Proxy Settings (Private Agent Only): When using a private agent, this setting can be selected to use private agent proxy settings.
-
Test: Click to verify the connection using the provided configuration. When the connection is tested, the latest version of the connector is downloaded by the agent(s) in the agent group associated with the current environment. This connector supports suspending the download of the latest connector version by using the Disable Auto Connector Update organization policy.
-
Save Changes: Click to save and close the connection configuration.
-
Discard Changes: After making changes to a new or existing configuration, click to close the configuration without saving. A message asks you to confirm that you want to discard changes.
-
Delete: After opening an existing connection configuration, click to permanently delete the connection from the project and close the configuration (see Component dependencies, deletion, and removal). A message asks you to confirm that you want to delete the connection.
Next steps
After a Mirakl connection has been created, you place an activity type on the design canvas to create activity instances to be used either as sources (to provide data in an operation) or as targets (to consume data in an operation).
Menu actions for a connection and its activity types are accessible from the project pane and design component palette. For details, see Actions menus in Connector basics.
These activity types are available:
-
Read: Retrieves object data from Mirakl and is intended to be used as a source in an operation.
-
Create: Creates object data in Mirakl and is intended to be used as a target in an operation.
-
Update: Updates object data in Mirakl and is intended to be used as a target in an operation.
-
Delete: Deletes object data from Mirakl and is intended to be used as a target in an operation.