Enable TBA in NetSuite
Introduction
This page summarizes how to enable token-based authentication (TBA) in NetSuite. Once you have enabled TBA in NetSuite, see Gather values for using NetSuite TBA to obtain the values needed for configuring a NetSuite connection in Cloud Studio.
Enable TBA
To enable TBA in NetSuite:
- Log in to the NetSuite instance.
- From the top menu bar, navigate to Setup > Company > Enable Features.
- On the Enable Features screen, go to the SuiteCloud tab.
- Under the SuiteScript section, select Client SuiteScript and Server SuiteScript.
- Under the Manage Authentication section, select Token-Based Authentication.
- Click Save.
Create a new role
If you already have a role with the appropriate permissions configured, you can skip this step.
For those who do not already have an applicable role set up, we recommend installing a customization bundle to add an Administrator-like role. Another option is to create a new role and add permissions individually. Each of these options is covered below.
Install the custom administrator bundle
We recommend using Jitterbit's customization bundle available through NetSuite to add an Administrator-like role. This will help in making sure that Harmony has the most elevated access to items in the NetSuite instance.
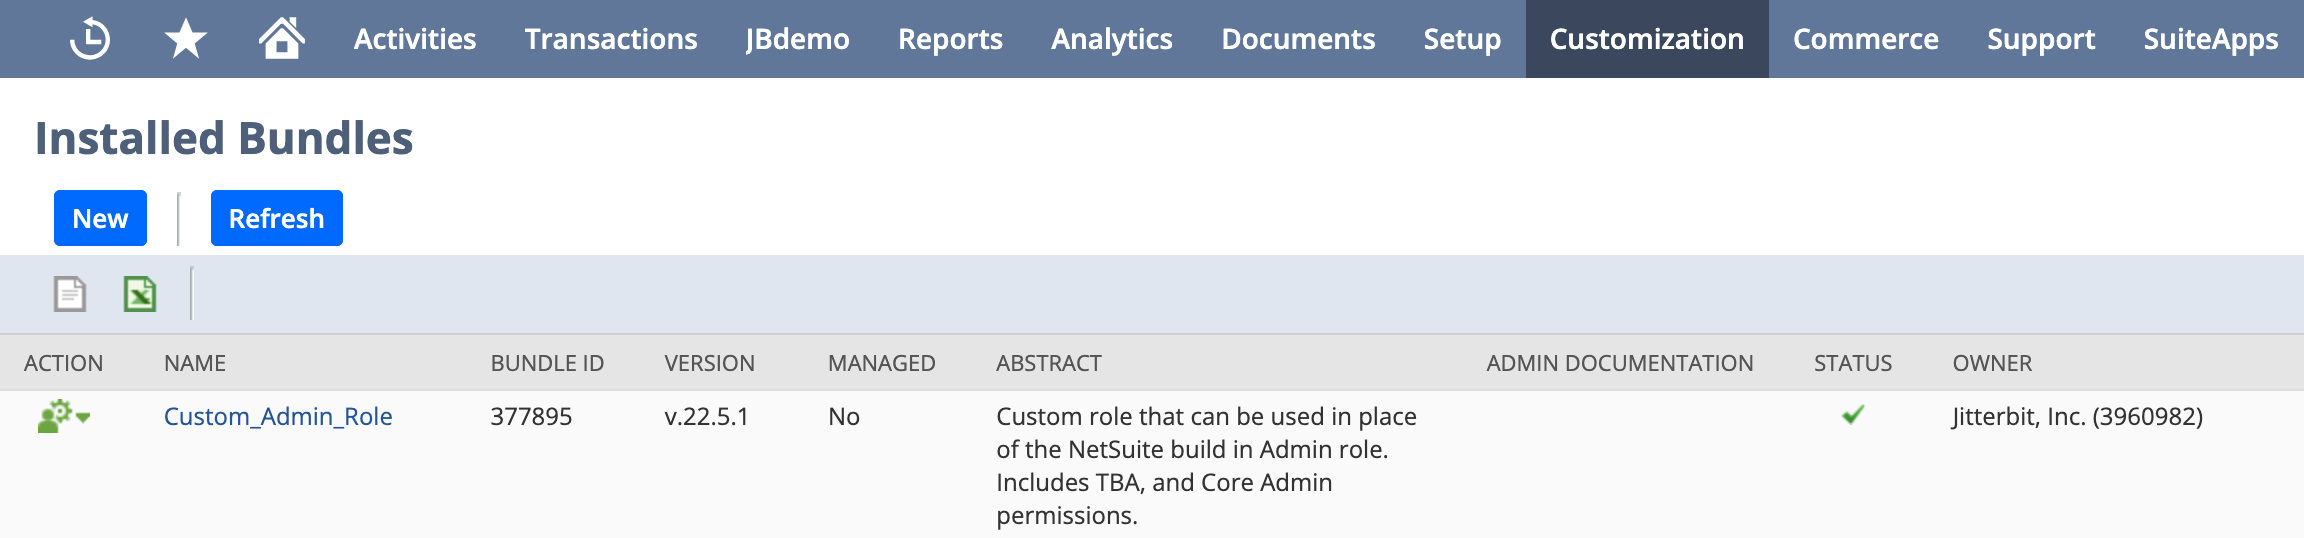
To install the customization bundle, follow the steps described in the NetSuite documentation. You can search for Jitterbit's customization bundle using the name Custom_Admin_Role or the ID 377895. When installation is successful, you will see a green checkmark under Status:
To review or edit the roles added, follow these steps:
-
After installation is successful, from NetSuite's top menu bar, navigate to Setup > Users/Roles > Manage Roles. (Do not click New or Search).
-
On the Manage Roles page, on the row for the Custom Administrator role, click Edit.
-
Navigate to the Permissions tab > Setup subtab to review the permissions granted for the role and make any edits if necessary. At a minimum, add permissions for Access Token Management, User Access Tokens, and Web Services.
Add a new role
An alternative to using the customization bundle is to add a new role and permissions individually. Before doing this, you should know which record types you are using in your Harmony integration, including any custom records, fields, or lists, so that you are able to add the appropriate permissions.
To add a new role:
- From NetSuite's top menu bar, navigate to Setup > Users/Roles > Manage Roles > New.
- On the Role screen, fill out these fields:
- Enter a Name, such as "Jitterbit TBA".
- Select the desired Center Type. This selection depends on what actions you will be taking. If you don't know which one to select, you can keep the default selection as Accounting Center.
-
Near the bottom of the Role screen, navigate to the Permissions tab > Setup subtab. Use the Permission dropdown to select each type of record that you will need access to in Harmony and click Add one at a time. At a minimum, add permissions for:
- Access Token Management
- User Access Tokens
- Web Services
You may also want to add custom fields. For example: - Custom Body Fields - Custom Column Fields - Custom Entity Fields - Custom Event Fields - Custom Fields - Custom Item Fields - Custom Item Number Fields - Custom Lists - Custom Record Types - Custom Transaction Fields - Other Custom Fields - Other Lists 4. Navigate to the Permissions tab > Lists subtab. Use the Permission dropdown to select each type of custom list that you will need access to in Harmony. Use the Level dropdown to select Full for each and click Add one at a time. For example: - Employees - Customers 5. Click Save.
Add a new user to role
To add a new user:
- From NetSuite's top menu bar, navigate to Lists > Employees > Employees > New.
- On the Employee screen, fill out these fields:
- Under Primary Information, enter a Name, such as "Jitterbit" for the first name and "TBA" for the last name.
- Under Email | Phone | Address, provide an Email.
- In the Access section, select Give Access and set the Password and Confirm Password.
- In the Access section under Roles, use the Role dropdown to select the role you created above. Then click Add.
- Click Save.