OpenAI Create Image activity
Introduction
An OpenAI Create Image activity, using its OpenAI connection, creates an image based on a specified prompt in OpenAI and is intended to be used as a target to consume data in an operation.
This activity uses the OpenAI DALL·E model.
Create an OpenAI Create Image activity
An instance of an OpenAI Create Image activity is created from an OpenAI connection using its Create Image activity type.
To create an instance of an activity, drag the activity type to the design canvas or copy the activity type and paste it on the design canvas. For details, see Create an activity instance in Component reuse.
An existing OpenAI Create Image activity can be edited from these locations:
- The design canvas (see Component actions menu in Design canvas).
- The project pane's Components tab (see Component actions menu in Project pane Components tab).
Configure an OpenAI Create Image activity
Follow these steps to configure an OpenAI Create Image activity:
-
Step 1: Enter a name and specify settings
Provide a name for the activity and specify the prompt text and optional settings. -
Step 2: Review the data schemas
Any request or response schemas are displayed.
Step 1: Enter a name and specify settings
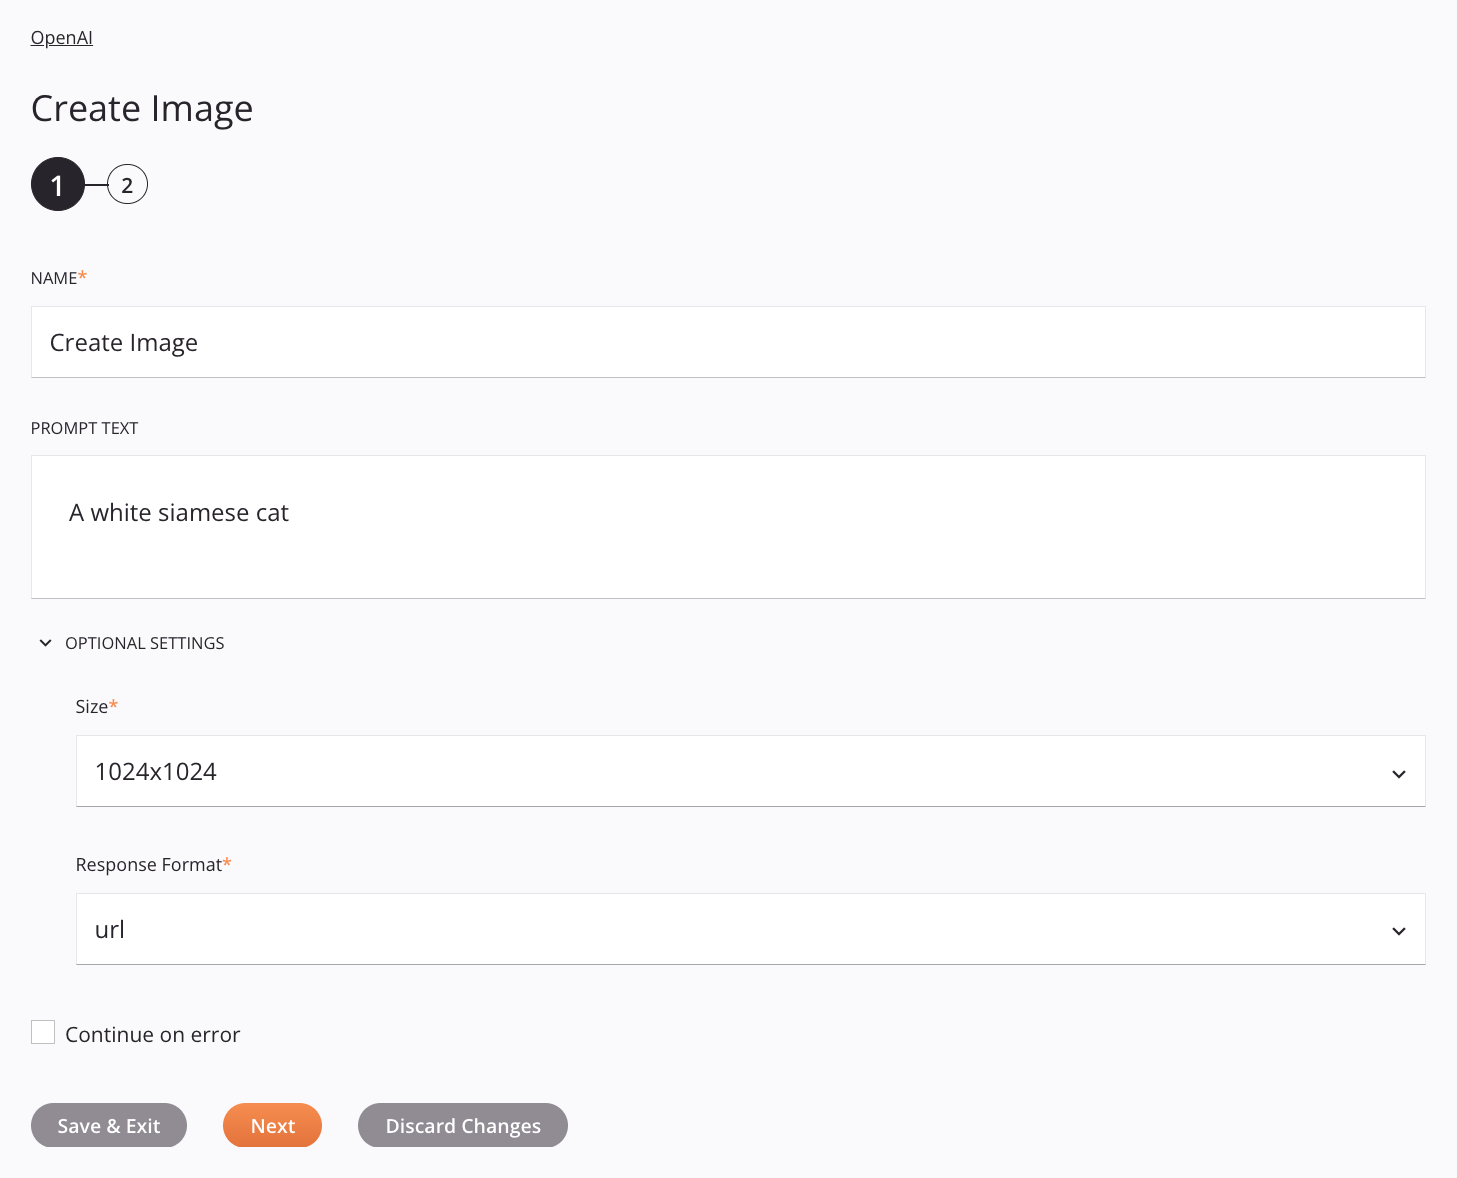
In this step, provide a name for the activity and specify the prompt text and optional settings. Each user interface element of this step is described below.
-
Name: Enter a name to identify the activity. The name must be unique for each OpenAI Create Image activity and must not contain forward slashes
/or colons:. -
Prompt Text: Enter a description of the desired image. The maximum length is 1000 characters.
-
Optional Settings: Click to expand additional optional settings:
-
Size: Use the menu to select the dimensions of the image in pixels, one of 1024x1024, 256x256, or 512x512.
-
Response Format: Use the menu to select the response format, either URL or B64_JSON:
-
URL: Returns a URL of the image.
-
B64_JSON: Returns a JSON file containing the image as a Base64-encoded string.
-
-
-
Continue on Error: Select to continue the activity execution if an error is encountered for a dataset in a batch request. If any errors are encountered, they are written to the operation log.
-
Save & Exit: If enabled, click to save the configuration for this step and close the activity configuration.
-
Next: Click to temporarily store the configuration for this step and continue to the next step. The configuration will not be saved until you click the Finished button on the last step.
-
Discard Changes: After making changes, click to close the configuration without saving changes made to any step. A message asks you to confirm that you want to discard changes.
Step 2: Review the data schemas
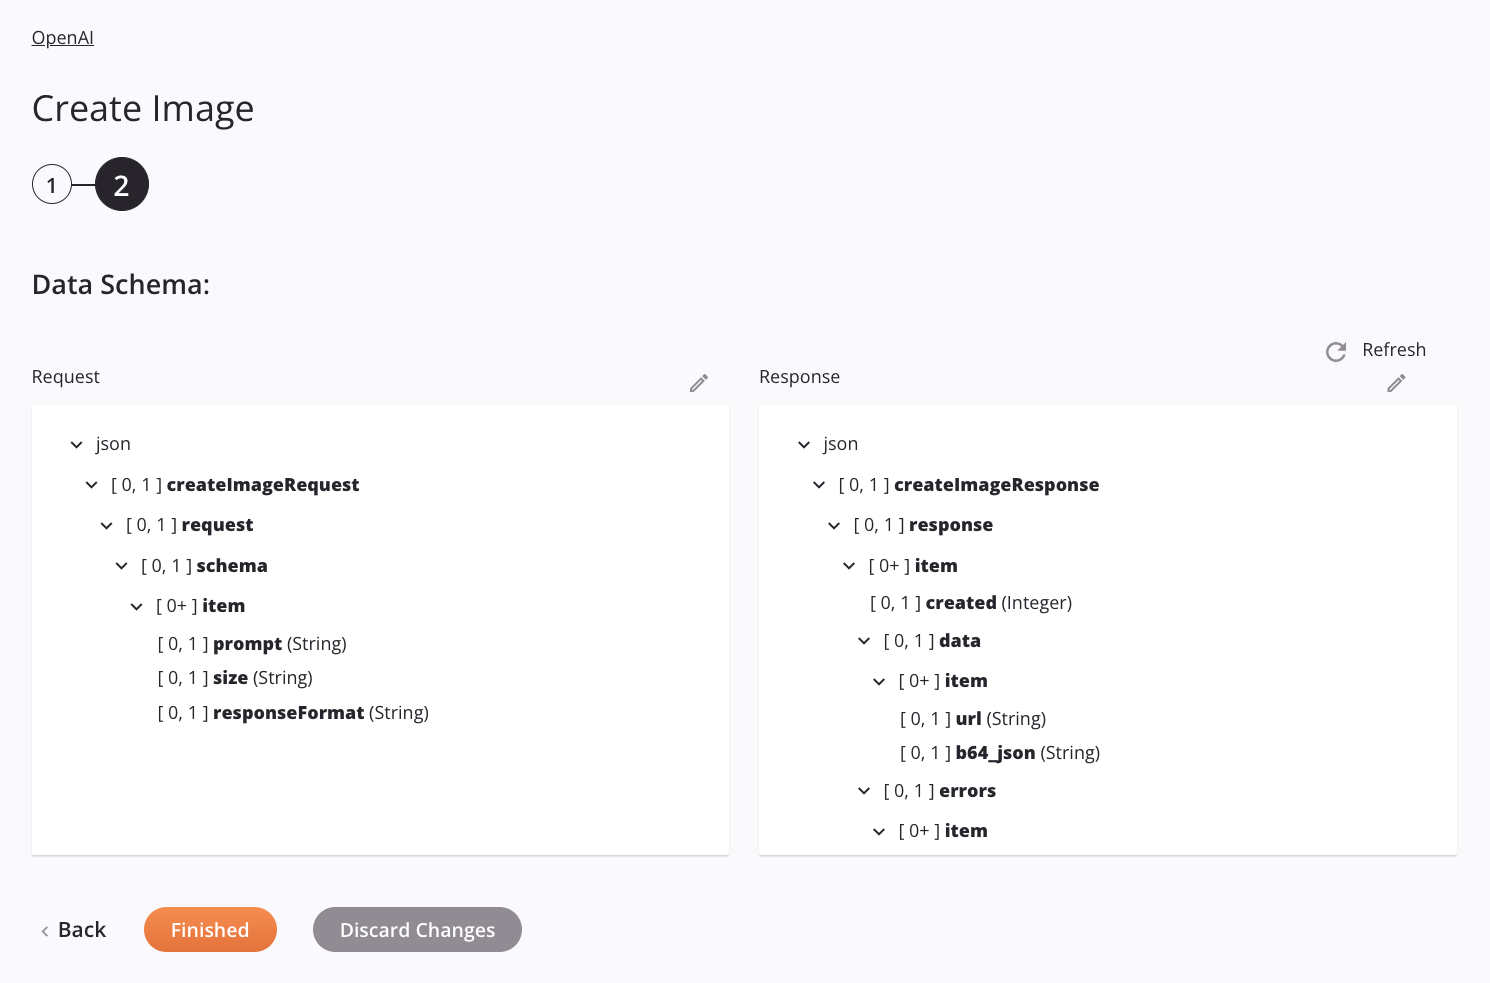
Any request or response schemas are displayed. Each user interface element of this step is described below.
-
Data Schemas: These data schemas are inherited by adjacent transformations and are displayed again during transformation mapping.
Note
Data supplied in a transformation takes precedence over the activity configuration.
The OpenAI connector uses the OpenAI API. Refer to the API documentation for information on the schema nodes and fields.
Important
When data is supplied in a transformation for the Create Image activity, the input for the
responseFormatfield in the request schema must be eitherb64_json(for a JSON file containing the image as a Base64-encoded string to be returned) orurl(for a URL of the image to be returned). Otherwise, the activity will return an error. -
Refresh: Click the refresh icon
 or the word Refresh to regenerate schemas from the OpenAI endpoint. This action also regenerates a schema in other locations throughout the project where the same schema is referenced, such as in an adjacent transformation.
 -
Back: Click to temporarily store the configuration for this step and return to the previous step.
-
Finished: Click to save the configuration for all steps and close the activity configuration.
-
Discard Changes: After making changes, click to close the configuration without saving changes made to any step. A message asks you to confirm that you want to discard changes.
Next steps
After configuring an OpenAI Create Image activity, complete the configuration of the operation by adding and configuring other activities, transformations, or scripts as operation steps. You can also configure the operation settings, which include the ability to chain operations together that are in the same or different workflows.
Menu actions for an activity are accessible from the project pane and the design canvas. For details, see Activity actions menu in Connector basics.
OpenAI Create Image activities can be used as a target with these operation patterns:
- Transformation pattern
- Two-transformation pattern (as the first or second target)
To use the activity with scripting functions, write the data to a temporary location and then use that temporary location in the scripting function.
When ready, deploy and run the operation and validate behavior by checking the operation logs.