ServiceMax Upsert activity
Introduction
A ServiceMax Upsert activity both updates existing data and inserts new data in a ServiceMax endpoint and is intended to be used as a target to consume data in an operation. After configuring a ServiceMax connection, you can configure as many ServiceMax activities as you like for each ServiceMax connection.
The Upsert activity requires the use of an external ID field to (1) insert records if they do not already exist and (2) update records if they already exist. For information on creating an external ID field in ServiceMax, see Creating a ServiceMax custom field / external ID for Jitterbit in ServiceMax. If instead you want to insert new records only, or if you want to update existing records based on the ID of the object in ServiceMax, use a ServiceMax Insert Or Update activity.
During the processing of records for an Upsert activity, if any record fails, no additional changes are processed and all previously processed changes are rolled back. If you want processing to continue when one record fails, consider using a ServiceMax Bulk Upsert activity.
Create a ServiceMax activity
An instance of an activity is created from a connection using an activity type.
To create an instance of an activity, drag the activity type to the design canvas or copy the activity type and paste it on the design canvas. For details, see Creating an activity instance in Component reuse.
An existing activity can be edited from these locations:
- The design canvas (see Component actions menu in Design canvas).
- The project pane's Components tab (see Component actions menu in Project pane Components tab).
Configure a ServiceMax Upsert activity
Follow these steps to configure a ServiceMax Upsert activity:
- Step 1: Enter a name, select an object, and specify settings Provide a name for the activity and select an object to be used when upserting data.
- Step 2: Select the external ID Select an existing ServiceMax field that you want Harmony to use as the external ID to associate records.
- Step 3: Review the data schemas Any request or response schemas generated from the endpoint are displayed.
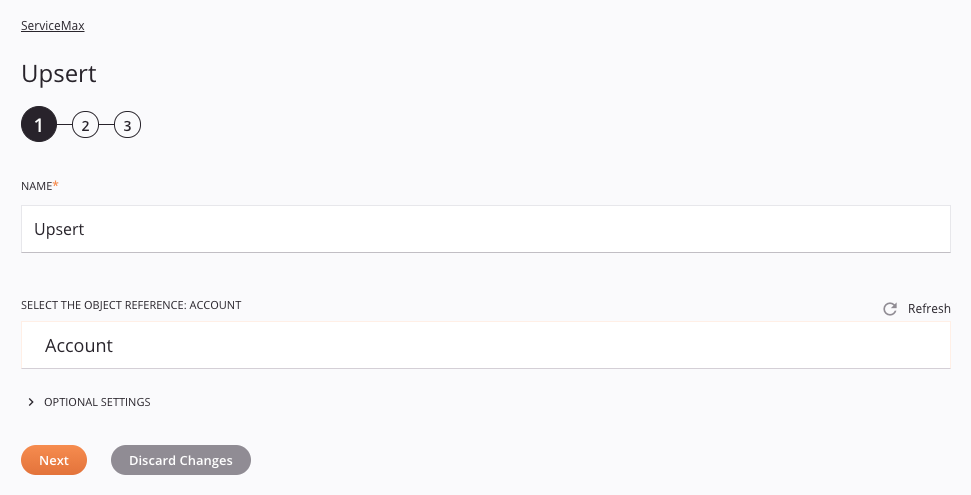
Step 1: Enter a name, select an object, and specify settings
In this step, you provide a name for the activity and select an object to be used when upserting data.
-
Name: Enter a name to use to identify the ServiceMax Upsert activity. The name must be unique for each ServiceMax Upsert activity and must not contain forward slashes (
/) or colons (:). -
eSelect the Object Reference: Use the dropdown to select a ServiceMax standard or custom object to upsert data. Enter any column's value into the search box to filter the list of objects. The search is not case-sensitive.
Note
If the dropdown does not populate with available objects, the ServiceMax connection may not be successful. Ensure you are connected by reopening the connection and retesting the credentials.
-
Refresh: Click the refresh icon
 to reload objects and fields from the ServiceMax endpoint. This may be useful if you have recently added objects or fields to ServiceMax.
 -
Optional Settings: Click to expand additional optional settings:

-
Operation Options: These options apply to an operation that a ServiceMax Upsert activity is used within.
Tip
Additional options can be set in an operation's operation options.
- Insert Null Values: Select the checkbox to allow null values to be inserted or updated. If this option is not selected, if a value being mapped has a null value or is blank (has an empty string), it is not processed.
-
-
Save & Exit: If enabled, click to save the configuration for this step and close the activity configuration.
-
Next: Click to temporarily store the configuration for this step and continue to the next step. The configuration will not be saved until you click the Finished button on the last step.
-
Discard Changes: After making changes, click to close the configuration without saving changes made to any step. A message asks you to confirm that you want to discard changes.
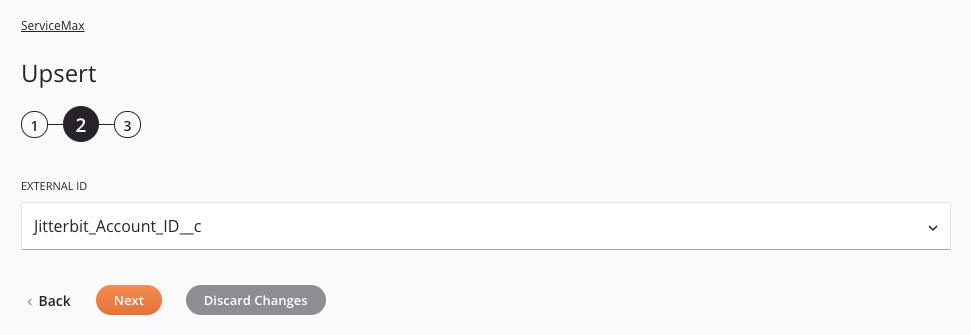
Step 2: Select the external ID
In this step, you select an existing ServiceMax field that you want Harmony to use as the external ID to associate records.
-
External ID: Use the dropdown to select the existing ServiceMax field that you want Harmony to use as the external ID to associate records. For information on creating an external ID field in ServiceMax, see Creating a ServiceMax custom field / external ID for Jitterbit in ServiceMax.
Warning
The field used as the external ID should have a unique value for each record. If you have multiple records with the same external ID value, an error response from ServiceMax will be returned and the upsert will fail for the records with duplicate IDs.
-
Back: Click to temporarily store the configuration for this step and return to the previous step.
-
Next: Click to temporarily store the configuration for this step and continue to the next step. The configuration will not be saved until you click the Finished button on the last step.
-
Discard Changes: After making changes, click to close the configuration without saving changes made to any step. A message asks you to confirm that you want to discard changes.
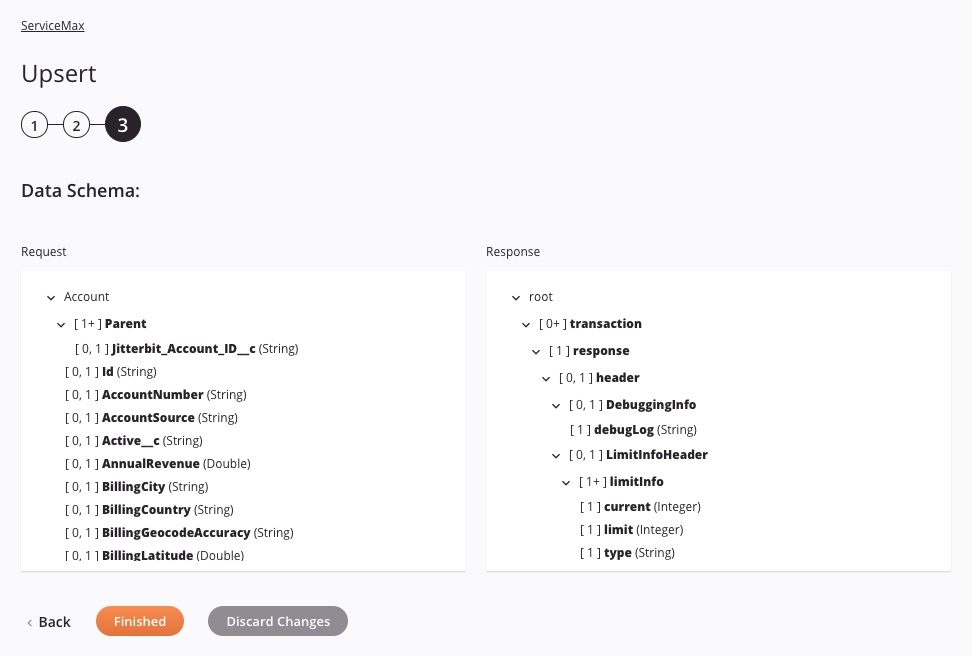
Step 3: Review the data schemas
In this step, any request or response schemas generated from the endpoint are displayed:
-
Data Schema: The request and response data schemas are displayed. If the operation uses a transformation, the data schemas are displayed again later during the transformation mapping process, where you can map to target fields using source objects, scripts, variables, custom values, and more.
The version of Salesforce REST API that is used depends on the Harmony agent version you are using. See Prerequisites and supported API versions for links to documentation on the schema fields.
Note
To refresh a data schema in an existing activity, you must advance through each activity configuration step again, making at least one change (such as adding and removing a character from the end of the name of the activity) to force a refresh of the schema.
-
Back: Click to temporarily store the configuration for this step and return to the previous step.
-
Finished: Click to save the configuration for all steps and close the activity configuration.
-
Discard Changes: After making changes, click to close the configuration without saving changes made to any step. A message asks you to confirm that you want to discard changes.
Next steps
After configuring a ServiceMax Upsert activity, you can use it within an operation as described below. After running an operation containing a ServiceMax activity on a private agent, you can download the operation's success and failure files.
Complete the operation
After configuring a ServiceMax Upsert activity, complete the configuration of the operation by adding and configuring other activities, transformations, or scripts as operation steps. You can also configure an operation's operation settings, which include the ability to chain operations together that are in the same or different workflows.
Once a ServiceMax Upsert activity has been created, menu actions for that activity are accessible from the project pane in either the Workflows or the Components tabs, and from the design canvas. See Activity actions menu for details.
ServiceMax Upsert activities can be used as a target with these operation patterns:
- Transformation pattern
- Two-target archive pattern (as the first target only)
- Two-transformation pattern (as either the first or second target)
Operations that contain a ServiceMax activity can have only one Salesforce activity and cannot also contain any other activities except for those associated with the API, Database, File Share, FTP, HTTP, Local Storage, Temporary Storage, or Variable connectors.
A ServiceMax activity can be used as an operation step in only a single operation. That is, you cannot reference the same activity multiple times within other operations. Instead, you can make a copy of a ServiceMax activity to use elsewhere (see Component reuse).
Other patterns are not valid using ServiceMax Upsert activities. See the validation patterns on the Operation validity page.
Within a transformation, if using the option to mirror a schema provided by a non-bulk ServiceMax activity, then the resulting mirrored schema will automatically be created with an additional root node called records with the child node(s) mirroring the schema. When fields within the child node(s) are mapped to, the node becomes a loop node to allow all records to be looped through (see Loop nodes under Data structures).
Operations that use ServiceMax activities can also have operation actions configured to trigger on a SOAP fault — an error resulting from an incorrect message format, header processing, or incompatibility. Operation actions can be configured to run an operation or send an email after a SOAP fault occurs. For instructions on triggering an action on SOAP fault, refer to Operation actions.
To use the activity with scripting functions, write the data to a temporary location and then use that temporary location in the scripting function.
When ready, deploy and run the operation and validate behavior by checking the operation logs.
View success and failure files
If you are running an operation containing a ServiceMax activity on a private agent, success and failure files are available for download in the Runtime Operations page of the Management Console. Select the relevant operation in the Runtime Operations table and click the Activity Logs tab in the bottom section of the screen to display download links for the files if available:
-
Download Success File: If you are running the operation on a private agent, click the Download link to save the success records as a CSV file.
-
Download Failure File: If you are running the operation on a private agent, click the Download link to save the failure records as a CSV file.
Note
By default, success and failure files are automatically deleted from the private agent after 14 days by the Jitterbit File Cleanup Service. The number of days the files are saved can be changed by editing the [Resultfiles] section in the Jitterbit.conf file. You can also change the success and failure file retention rules by editing the Jitterbit file cleanup service rules for private agents.
Activity log downloads are disabled for cloud agents. If the links are visible, you will receive an error message if you attempt a download.