SOAP connection
Introduction
A SOAP connection is configured using the SOAP connector, establishing access to a SOAP web service. Once a connection is established, you can configure one or more SOAP activities associated with that connection to be used either as a source to provide data to an operation or as a target to consume data in an operation.
Create or edit a SOAP connection
A new SOAP connection is created using the SOAP connector from one of these locations:
- The design component palette's Project endpoints and connectors tab (see Design component palette).
An existing SOAP connection can be edited from these locations:
- The design component palette's Project endpoints and connectors tab (see Design component palette).
- The project pane's Components tab (see Component actions menu in Project pane Components tab).
Configure a SOAP connection
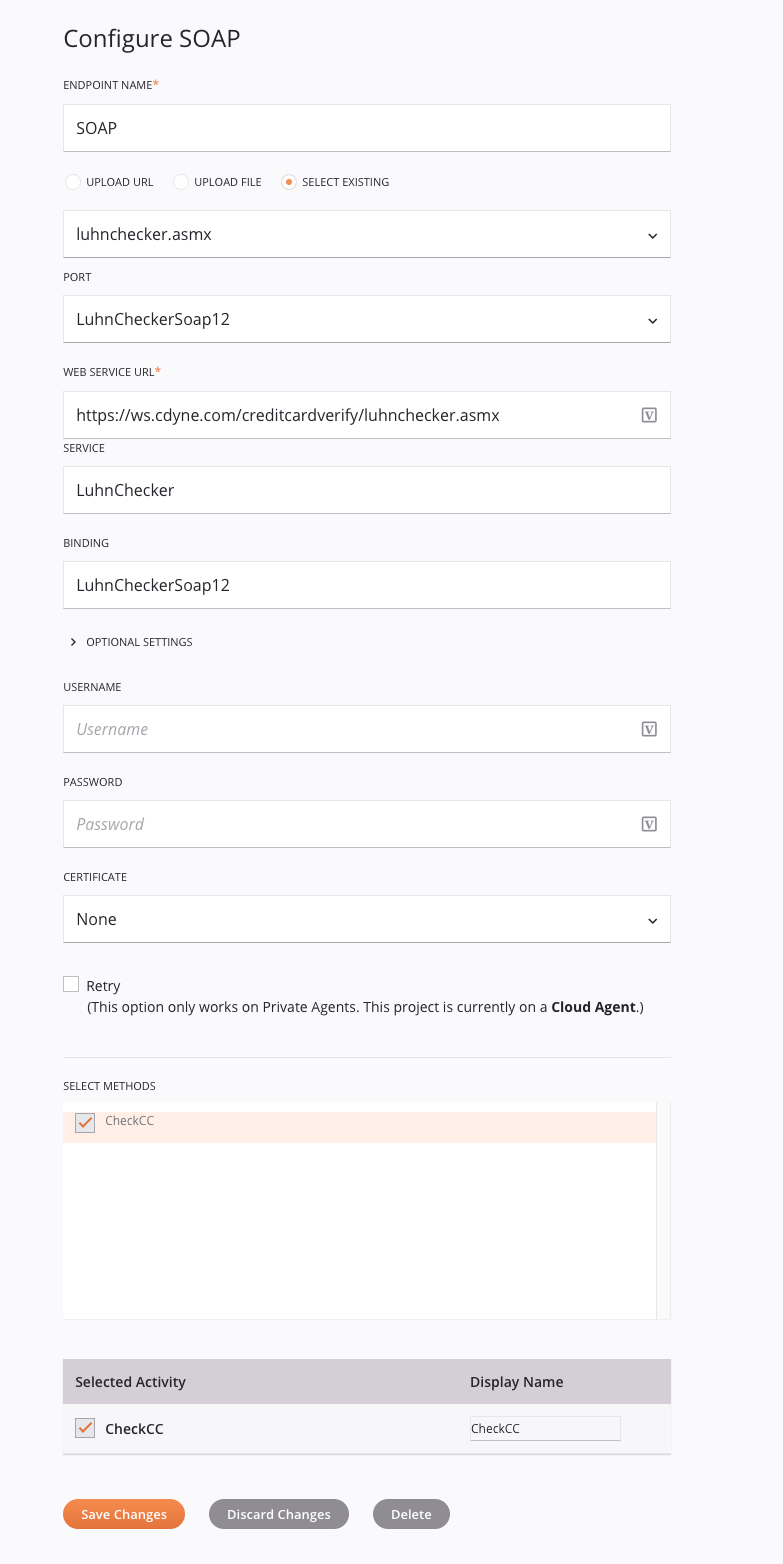
Configuration of a SOAP connection includes these fields:
Tip
Fields with a variable icon ![]() support using global variables, project variables, and Jitterbit variables. Begin either by typing an open square bracket
support using global variables, project variables, and Jitterbit variables. Begin either by typing an open square bracket [ into the field or by clicking the variable icon to display a list of the existing variables to choose from.
-
Endpoint Name: Enter a name used to identify the SOAP connection. The name must be unique for each SOAP connection and must not contain forward slashes (
/) or colons (:). This name is also used to identify the SOAP endpoint, which refers to both a specific connection and its activities. -
Upload URL, Upload File, or Select Existing: Use the radio button to select the source of the WSDL (Web Services Description Language) file to upload or reuse. Files up to 5 MB in size can be uploaded.
-
Upload URL: Enter the URL of the WSDL file into the text box, and then click the Upload button. The URL must be accessible without authentication or you will receive an error. If uploading a WSDL with the same name as an existing WSDL, see Replacing an uploaded WSDL later on this page.
-
Upload File: Use the Browse button to the right to browse to a WSDL or ZIP file. If providing a ZIP file, it must contain a single WSDL file, though it can also contain any XSD files that the WSDL is dependent on. Then click the Upload button. If uploading a WSDL with the same name as an existing WSDL, see Replacing an uploaded WSDL later on this page.
Note
Any
schemaLocationmust be resolved to a local file using a relative reference. This usually means that instead of supplying a tuple such as this:xsi:schemaLocation='http://schemas.xmlsoap.org/wsdl/mime/ http://ws-i.org/profiles/basic/1.1/wsdlmime-2004-08-24.xsd'Instead, you would supply this:
xsi:schemaLocation='http://schemas.xmlsoap.org/wsdl/mime/ wsdlmime-2004-08-24.xsd'In the above example, the XSD file
wsdlmime-2004-08-24.xsdis located either in the same directory or on a path relative to the WSDL being loaded. -
Select Existing: Use the dropdown to select from an existing WSDL file that has previously been used in the current project.
-
-
Port: Use the dropdown to select the appropriate port.
-
Web Service URL: Enter a valid URL for the web service. By default, this field populates with the URL from the WSDL.
-
Service and Binding: By default, these fields autopopulate based on the provided WSDL and port and cannot be edited.
-
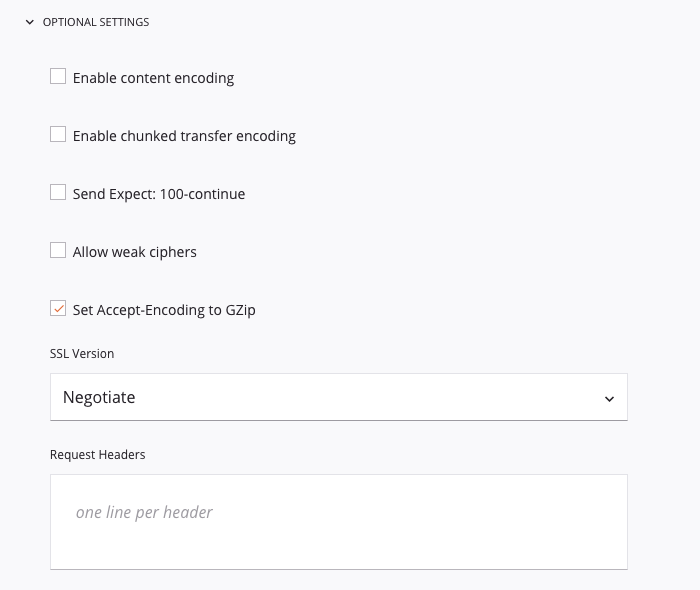
Optional Settings: Click to expand additional optional settings:
-
Enable Content Encoding: If selected, the Accept-Encoding header is sent with the encoding supported by Harmony. Currently Gzip is supported.
-
Enable Chunked Transfer Encoding: If selected, the Transfer-Encoding: chunked header is sent. Use this option if you are transferring large data sets.
-
Send Expect: 100-continue: If selected, the Expect: 100-continue header is sent. With this option, no data is sent until the HTTP server has validated the headers. Use this option if you are sending large amounts of data but don't want to use chunked transfer encoding.
-
Allow Weak Ciphers: Select this checkbox to communicate with HTTP servers that use weak ciphers (DES/3DES and RC4).
-
Set Accept-Encoding to Gzip: Selected by default, this tells the HTTP server that Harmony can accept a Gzip-compressed response. In return, Harmony follows the RFC 1952 standard and automatically decompresses Gzip HTTP responses. If the server does not use Gzip, Harmony sees that the response is not compressed and handles it as usual.
Note
This setting is unrelated to the Gzip connector.
-
SSL Version: Use the dropdown to select a specific SSL version if the HTTP server requires it.
-
Request Headers: Any text entered in this box is sent as an HTTP header. Specify each header on one line unless the header is wrapped according to the HTTP standard. This field also supports using global variables, project variables, and Jitterbit variables by replacing variables in square brackets
[ ]with their values.
-
-
Username and Password: If applicable, enter a username and password that allow access to the WSDL. Leave these fields blank if no username or password is required.
By default, Harmony negotiates with the endpoint to determine which authentication methods are supported and uses the provided credentials against one of the protocols. Harmony supports these HTTP authentication options:
- HTTP Basic
- HTTP Digest
- HTTP Digest with authentication with an IE flavor
-
Certificate: Use the dropdown to select an available certificate to authenticate with the HTTP server. You can manage client-side SSL certificates from the Management Console under Customizations > Client certificates.
-
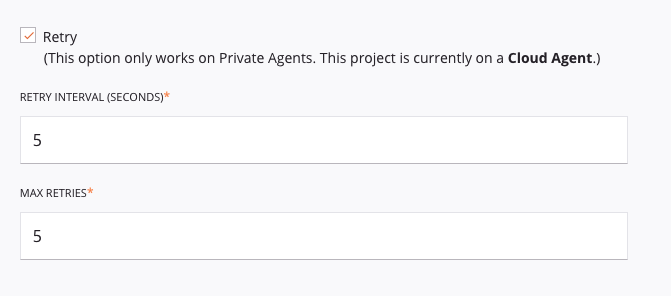
Retry: Functional only when using an environment associated with a private agent group, this setting is used to retry a request when a SOAP endpoint returns one of these status codes:
500,501,502,503, or504.In order for this setting to take effect, private agents must be version 10.29 or later. With earlier agent versions, this setting is ignored.
Select the Retry checkbox to expand additional configuration options:
-
Retry Interval (Seconds): Enter the number of seconds (maximum of 5 seconds) to wait between resending a request to the SOAP endpoint.
-
Max Retries: Enter the number of times (maximum of 5 retries) that a request will be resent to the SOAP endpoint. If the request still fails after the maximum number of retries, an exception with an error message will be returned in the operation log. In addition, the private agent will log each retry in the
jitterbit.loglog file.Each retry is treated as part of the same operation run, where only a single record appears in the operation log. Any operation actions configured to run downstream operations are triggered based on the end status of the operation after retrying up to the maximum number of retries.
Note
These settings override the Jitterbit variables
jitterbit.web_service_call.retry_wait_secondsandjitterbit.web_service_call.number_of_retriesif those variables are set. -
-
Select Methods: Select any methods that you want to be available to use as a source or target in the operation.
Note
Previously selected methods that are currently in use by configured SOAP activities cannot be removed.
-
Selected Activity and Display Name: As you select methods above, they are added to the table below, showing each selected method that will be rendered as an activity block under the SOAP connection in the component palette. To edit a Display Name, click the edit icon
 and enter the desired activity name.
Note
Previously selected activities that are currently configured as a project component cannot be removed.
-
Test: Click to verify the connection using the provided configuration.
-
Save Changes: Click to save and close the connection configuration.
-
Discard Changes: After making changes to a new or existing configuration, click to close the configuration without saving. A message asks you to confirm that you want to discard changes.
-
Delete: After opening an existing connection configuration, click to permanently delete the connection from the project and close the configuration (see Component dependencies, deletion, and removal). A message asks you to confirm that you want to delete the connection.
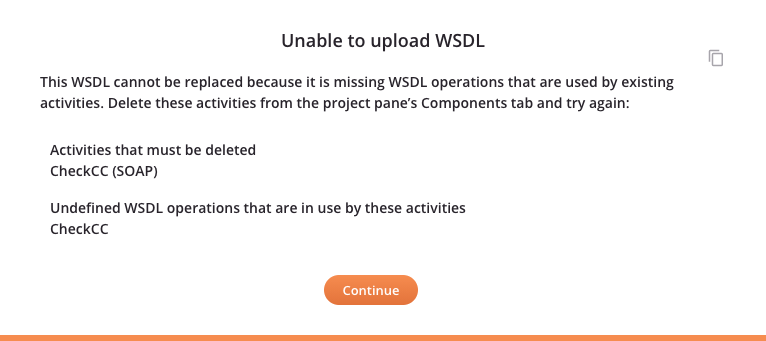
Replacing an uploaded WSDL
If replacing a WSDL by reuploading one with the same name using Upload URL or Upload File, its WSDL operations must be named the same as any that are currently in use by existing activities. If they are not named the same or if in-use WSDL operations are missing from the replacement WSDL, an error message instructs you to delete those activities first:
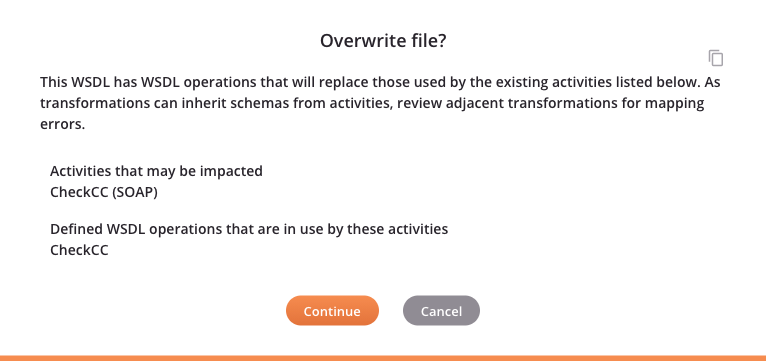
If the WSDL replacement criteria described above are met, a confirmation message lists activities that may be impacted by the replacement of the WSDL to review adjacent transformations for potential mapping errors. On acknowledgment of the message, the WSDL will be replaced in all locations where it is used throughout the project:
Next steps
After a SOAP connection has been created, menu actions for that connection are accessible from the project pane's Components tab. See Connection actions menu for details.
Once configuring a SOAP connection, you can configure one or more SOAP activities associated with that connection to be used either as a source (to provide data within an operation) or as a target (to consume data within an operation).
Use the Show dropdown to filter on Endpoints, and then click the SOAP connection block to display activities that are available to be used with a SOAP connection:
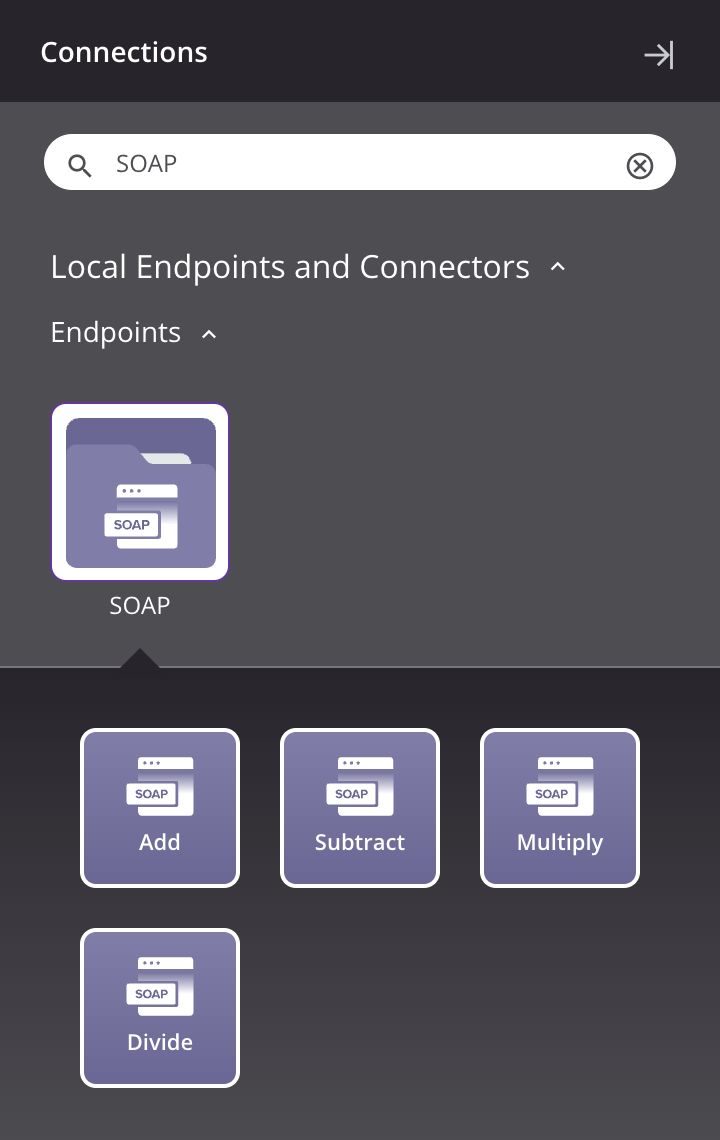
The activities that are displayed correspond with the methods that were selected during configuration of the SOAP connection.
For more information, see SOAP activities.