Email notifications
Introduction
Notifications configured in Cloud Studio are triggered by an operation action or kicked off from a script. Email notifications can be used to automatically send an email on the success or failure of an operation or on the calling of a script.
If instead you want to configure an email notification that triggers when a private agent goes down or your Harmony password is about to expire, see Notifications (Management Console).
For other ways to configure email notifications in Cloud Studio, see Ways to send email.
Create or edit an email notification
Email notifications can be created or edited from the project pane, the operation settings, or a script.
New email notifications are created with the default name New Email. Subsequent new notifications with default names are appended with an incremented number in parentheses.
After creating an email notification or opening an existing email notification to edit, see Configure an email notification later on this page for configuration.
Project pane
A new email notification can be created from the project pane's Components tab using the Create New option on the Emails category (see Components tab actions menu in Project pane Components tab).
An existing notification can be edited from the project pane's Components tab using the View/Edit option on an email notification component (see Component actions menu in Project pane Components tab).
Operation settings
You can also create or edit email notifications from the Actions tab of the operation Settings, which can be accessed from these locations:
- The project pane's Workflows tab (see Component actions menu in Project pane Workflows tab).
- The project pane's Components tab (see Component actions menu in Project pane Components tab).
- The design canvas (see Component actions menu in Design canvas).
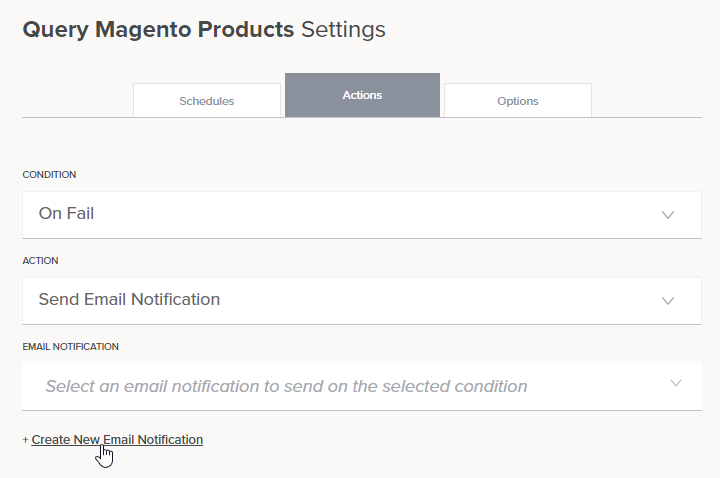
Once the operation Settings screen is open, select the Actions tab. Select the Condition, and for the Action select Send Email Notification. To create a new email notification, click the link to Create New Email Notification to open the email notification configuration screen:
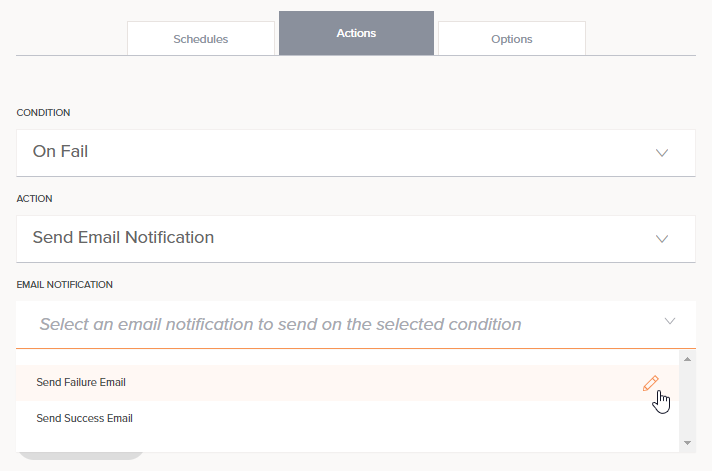
To edit an existing email notification, make sure you have Send Email Notification selected as the Action. Then in the Email Notification dropdown, hover over the existing notification and click the edit icon ![]() to open the email notification configuration screen.
to open the email notification configuration screen.
Script
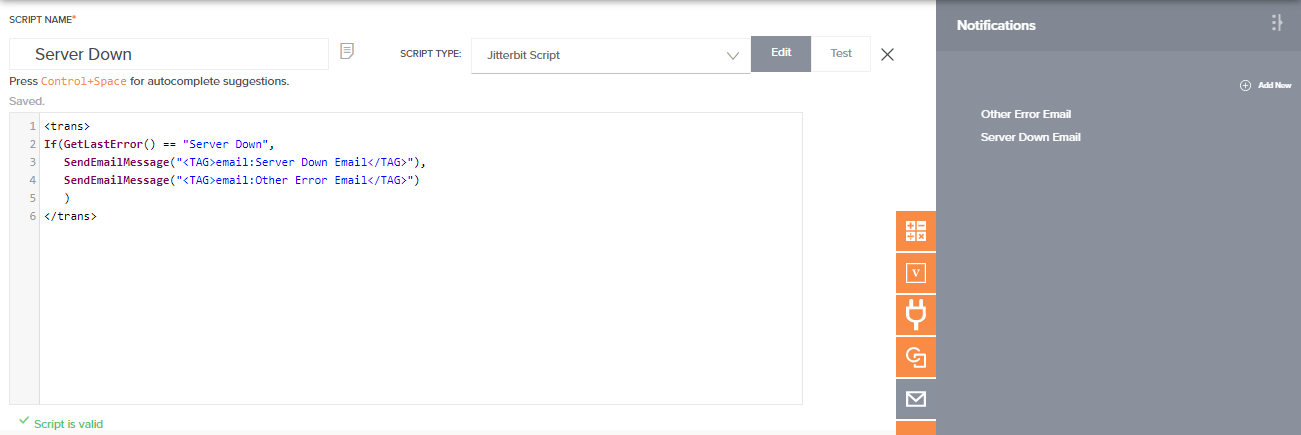
You may want to use a script that can be configured on the operation to include advanced logic for when to send the email notification. For example, to check for a specific code or error state, you might use a script to provide more control over what happens when you have an error.
Within the script editor, open the Notifications tab of the script component palette:
![]()
To create a new email notification, click Add New:

If you already have an email notification you would like to edit, click the existing notification name, such as "Error Email," as shown here:

Email notifications actions menu
After an email notification is created, menu actions for that notification are accessible from the project pane's Components tab (see Component actions menu in Project pane Components tab).
Each of these menu actions is available:
| Menu Item | Description |
|---|---|
| View/Edit opens the email notification configuration screen for you to configure the notification. For details, see Configure an email notification later on this page. | |
| Cut places a copy of the email notification on your clipboard and deletes the original email notification from the project (see Component reuse). | |
| Copy places a copy of the email notification on your clipboard (see Component reuse). | |
| Duplicate creates a new, unreferenced email notification using the same configuration as the original email notification (see Component reuse). | |
| Rename positions the cursor on the email notification name for you to make any edits as necessary. | |
| View Dependencies changes the view in the project pane to display any other parts of the project that the email notification is dependent on (see Component dependencies, deletion, and removal). | |
| Add to Group opens a dialog to create a new custom group or to add the email notification to an existing group (see Component groups). | |
| Delete permanently deletes the email notification (see Component dependencies, deletion, and removal). | |
| Remove removes references to the email notification that are configured with an operation action on the design canvas (see Component dependencies, deletion, and removal). |
Configure an email notification
This section covers the configuration of an email notification. After this is done, you can configure an email to be sent on success or failure of an operation (see Operation actions) or add the notification to a script (see Script types and creation).
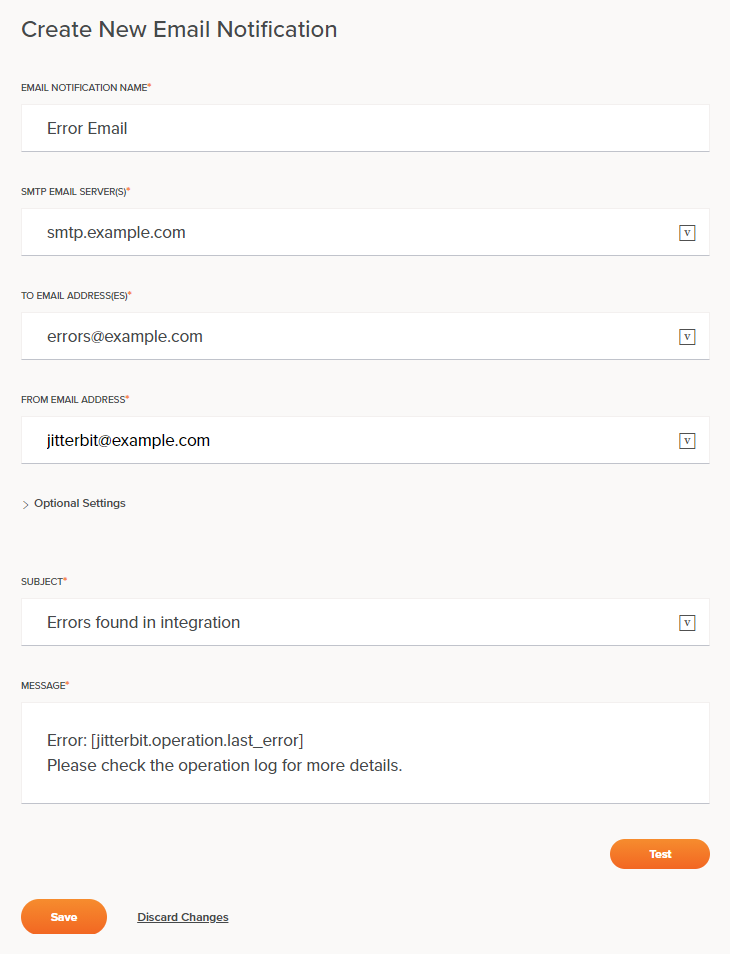
When you create a new or edit an existing email notification, the email notification configuration screen opens:
Tip
Fields with a variable icon ![]() support using global variables, project variables, and Jitterbit variables. Begin typing an open square bracket
support using global variables, project variables, and Jitterbit variables. Begin typing an open square bracket [ into the field or click the variable icon to display existing variables to choose from.
-
Email Notification Name: Enter a name for the email notification. The name must be unique for each email notification and must not contain forward slashes (
/) or colons (:). -
SMTP Email Server(s): Enter at least one SMTP server that you want to use to send the email. If entering multiple SMTP servers, use a comma to separate each one. The servers are tried in the order that they are specified until one is found to accept the message.
-
To Email Address(es): Enter at least one email address to receive the email. If entering multiple recipients, use a comma to separate each one.
Tip
If you don't know who the recipient(s) are until after you have run an operation, you can define and use a global variable. For example, a global variable
[notify_email]could use values returned by the functionDBLookupto look up the email address(es). -
From Email Address: Enter the email address that you want the email to appear from when the recipient(s) read the email.
-
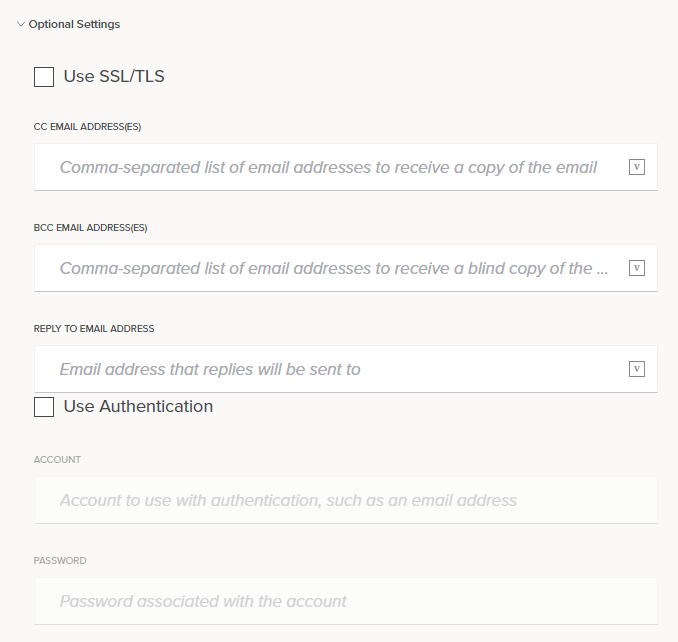
Optional Settings: Click to expand additional optional settings:
-
Use SSL/TLS: Select the checkbox to encrypt the email using SSL/TLS protocol.
-
CC Email Address(es): Enter one or more email addresses to receive a copy of the email. If entering multiple copied recipients, use a comma to separate each one.
-
BCC Email Address(es): Enter one or more email addresses to receive a blind copy of the email. If entering multiple blind-copied recipients, use a comma to separate each one.
-
Reply to Email Address: Enter the email address that you want replies to be sent to by default. This may be useful if you send the email from a common account but want replies to go to a personal email account.
-
Use Authentication: Select the checkbox if the SMTP server requires authentication. On selecting this option, the Account and Password fields below become enabled for you to enter your authentication credentials.

-
-
Subject and Message: Enter the subject and body to use for the email. To use global variables, project variables, or Jitterbit variables in the Message, enter them manually or begin by typing an open square bracket
[into the field to display a list of existing variables to choose from.Note
Filename keywords such as
[date]do not work in the Subject or Message fields if they are not first defined as global variables. To use date and time functions to populate a global variable, you can do so within a script. For example:// This sets the global variable equal to the current date and time $date = Now() // This sets the global variable equal to just the date $date = CVTDate(Now(),"yyyy-mm-dd HH:MM:SS","yyyy-mm-dd")Tip
You can use HTML in the Message. Variables can be used inside HTML tags using square brackets, as demonstrated with the variable
email_addressbelow:<html> <head> <title>Page Title</title> </head> <body> <h1>This Is a Heading</h1> <p>This is a paragraph.</p> <p>[Visit our HTML tutorial.](https://www.example.com/html/message/)</p> <p>Send me an email at [email_address].</p> </body> </html> -
Test: Click to send a test email using the configuration. Sending a test email is recommended to ensure the configuration works properly and as expected. If variables are used in the configuration, you may need to specify a default value to use for testing purposes (see Variables).
-
Save: Click to save and close the email notification configuration.
-
Discard Changes: After making changes, click to close the configuration without saving changes. A message asks you to confirm that you want to discard changes.
Add an email notification to an operation or script
Sending an email notification can be added to an operation as an action to take on success or failure of the operation, or can be added to a script to run using advanced logic on when to send the email. This is configured either from the operation settings or from within a script.
Operation settings
Open the operation settings for an existing operation and select the Actions tab. Then configure the operation action as follows:
- In the first dropdown, select the appropriate condition of the operation that should trigger the action (On Success or On Fail).
- In the second dropdown, select Send Email.
- In the third dropdown, select the configured email notification.
- Click Add Action to add the email notification to the operation.
For a more detailed explanation of options, see Operation actions.
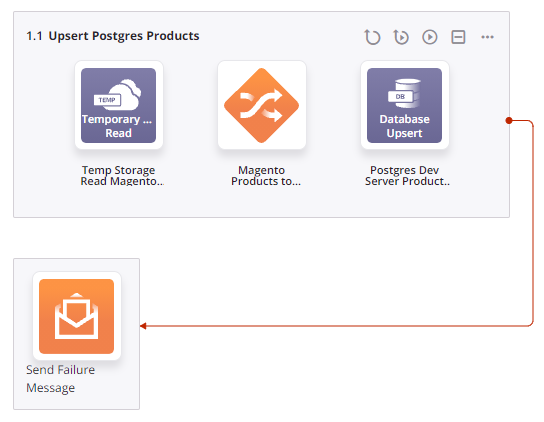
Linked email notifications are displayed directly on the design canvas connected to the operation they are associated with:
Script
Within a script written in Jitterbit Script, open the Notifications tab of the script component palette:
![]()
To add a notification and the function needed to execute it, use the SendEmailMessage function and the notification reference as a function argument. For additional details, see Notifications in Jitterbit Script.
Note
There is no visual representation of the link on the design canvas.