Plugins added to an activity
Introduction
Adding a plugin to an activity is one of two methods for using a plugin, the other being calling a plugin from a script. Plugins that are available to use with the specific activity are listed within the activity configuration screen.
Important
Plugins provided by Jitterbit are deprecated. See Deprecation and support in Plugins.
Initialize global variables
Many plugins require global variables to be initialized prior to executing the plugin. For information on determining whether these values are required, as well as how to set required or optional values, refer to Global variable initialization.
Apply a plugin to an activity
Certain plugins are available to act on configured activities. Plugins are added during activity configuration and can be added only for specific activity types (see various endpoint documentation under Connectors). If you cannot use plugins with a specific activity type, this option is not present in the activity configuration UI.
During activity configuration, the option to apply a plugin is typically available on the last step of configuration. On the step where you review the schema provided for the activity, the option to add certain plugins (if available) is displayed below the schema:
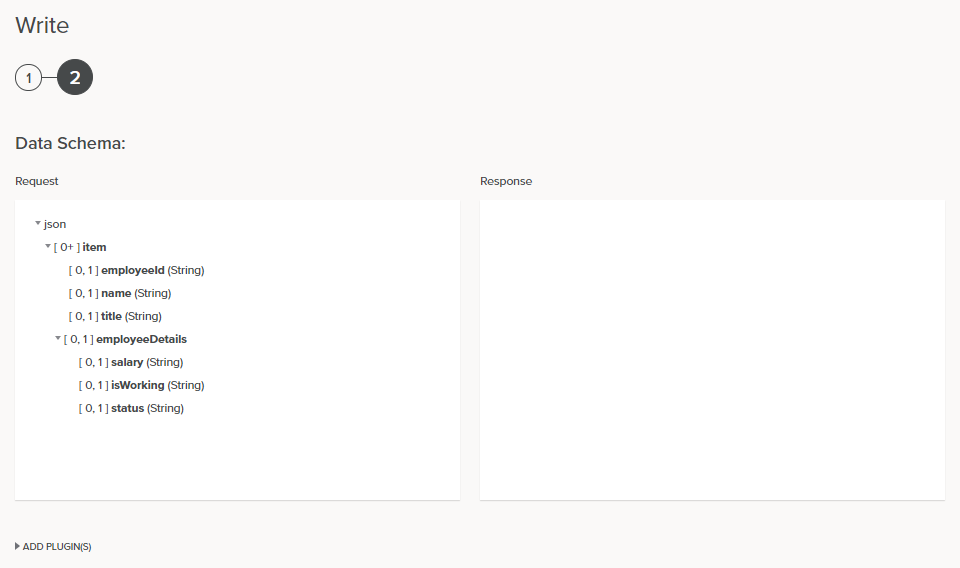
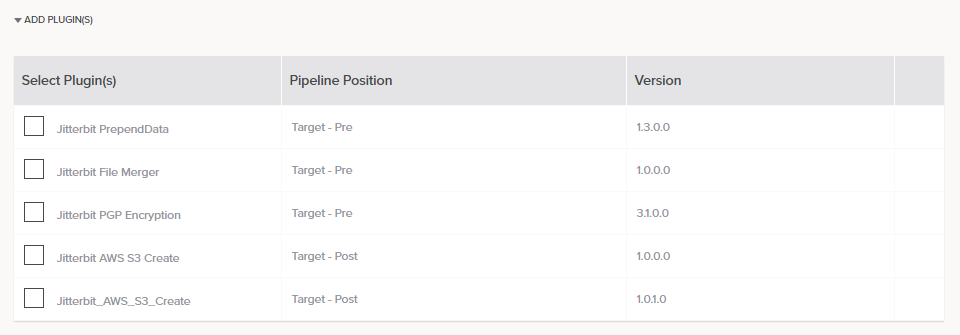
Click Add Plugin(s) to show a list of plugins on the agent that are available to place on the activity:
Note
In order for plugins to appear within Cloud Studio, they must be installed on the agent:
- Cloud agents: If you are using the cloud agent group, a range of Jitterbit-provided plugins is already be installed.
- Private agents: If you are using a private agent group, see Customizations > Plug-ins for instructions on adding plugins.
For a description of each Jitterbit-provided plugin, see Plugins available in Harmony.
The plugins that are available depend on the specific activity type and whether the activity is used as a source or a target in the operation. The pipeline position of "pre" or "post" refers to whether the plugin is executed before the transformation ("pre") or after the transformation ("post"). In addition, the version of the plugin is listed.
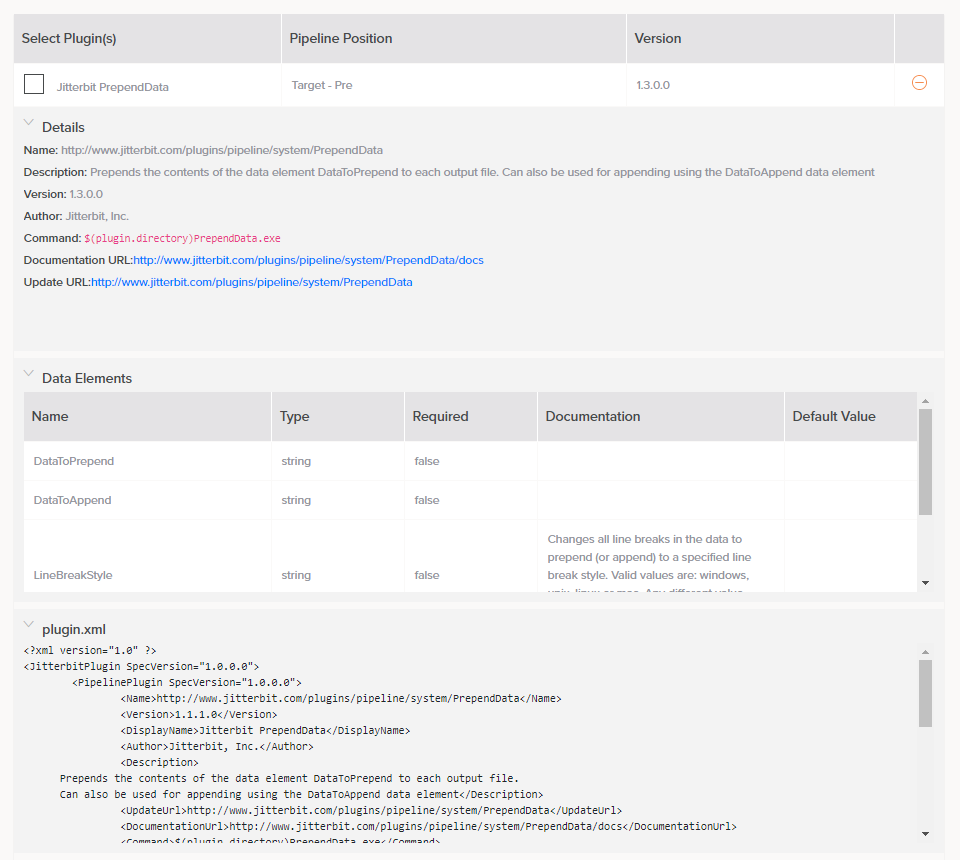
To view details on each available plugin, hover over the column on the far right and click the expand icon ![]() to show more information:
to show more information:
- Details: Summary information about the plugin.
- Data Elements: Global variables used with the plugin, with documentation including whether each variable is required. Variables that are required must be set before running the plugin, as described in Global variable initialization.
- plugin.xml: Click to view the XML manifest file.
To hide the details once open, click the collapse icon ![]() :
:
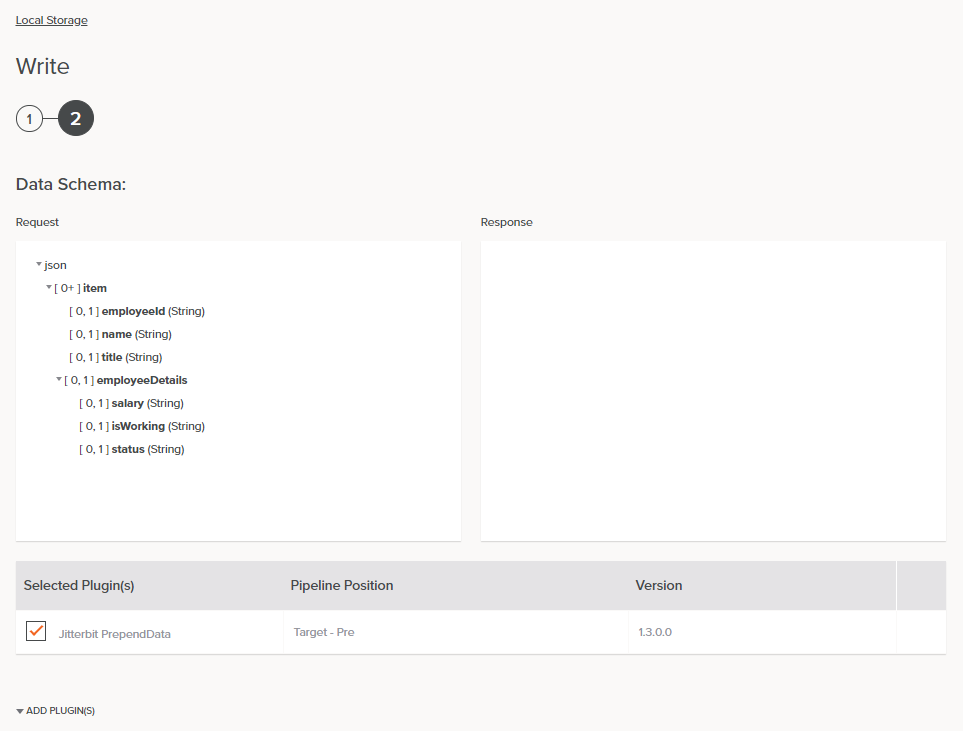
To select a plugin to apply to the activity, select the checkbox associated with the plugin you want to use.
When you select the checkbox, the plugin is removed from the list and appears separately above this list, below the schema:
If you want to add additional plugins, you can do so by repeating the method described above. The plugins appear in the Cloud Studio interface in the same order they will be executed.
Tip
The order in which the plugins are applied is defined by the ExecutionOrder attribute in the plugin XML. Those using private agents can set the order using custom plugins.
To remove a plugin, simply clear the checkbox.
After saving the activity and returning to the design canvas, a plugin icon ![]() appears on the corner of the activity to which it is applied:
appears on the corner of the activity to which it is applied:
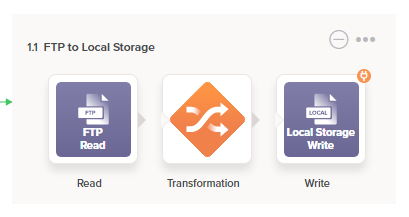
The presence of the plugin icon indicates there are one or more plugins attached to the activity.