Project migration
Introduction
Within a single Harmony organization, you can migrate projects from one Harmony environment to another. Project migration is intended to be used by setting up a migration chain of environments where you propagate design changes by migrating from one environment to the next. For example, you may want to migrate changes from a design environment into a production environment after completing QA and a review.
You can migrate projects regardless of whether they have been deployed.
To move projects between Harmony organizations, see instead Project exports and imports.
Migration chain
A migration chain is a chain of environments that you use to migrate a project, for example through its design stages from initial creation to testing and then to production:
- Create a project in a Development environment.
- Migrate the project from the Development environment to a QA environment and deploy it for testing.
- Make additional design changes to the project in the Development environment as necessary.
- Migrate the revised project from the Development environment to the QA environment and deploy it for testing as necessary.
- Migrate the project from the QA environment to a Production environment and deploy it so that the project is live.
- Repeat steps 3 through 5 as necessary.
A migrated project has a dependency on the project it was migrated from. As such, a project at the start of a migration chain can't be deleted until all projects farther down the chain have first been deleted (see Delete a project in Project creation and configuration). Once a project is migrated, its chain cannot be broken except by deleting projects farther down the chain or by exporting and importing the project (see Project exports and imports). Renaming a migrated project does not break the chain.
We recommend these best practices when designing a migration chain:
- In general, design changes should be made only in the first environment in the chain (in this example: the Development environment). In subsequent environments, we recommend the only further changes be to project variable values, and that these changes be made within the Cloud Studio application in order to be captured in the project history, as project variable value changes made from the Management Console Projects page are not captured in the project history. During migration, you can select whether to migrate all project variable values or only individual selected project variable values (see Migrate All Variable Values and Select Variable Values to Migrate in the next section, Migrate a project).
- The first environment in the chain should be accessible by those who may need to make changes to the project over time. We caution against a single developer designing the project in a personal organization. If these circumstances occur, we recommend first exporting the original project and then importing it into the environment that is to be the start of the chain. Future changes should then be made to the project in the environment that starts the chain.
Migrate a project
During project migration, all project components and project metadata are migrated. The project components and project metadata are a complete replacement of the project components and project metadata in the target environment.
Caution
When migrating a source environment operation without an assigned schedule to a target environment operation with an assigned schedule, the resulting operation in the target environment will not have an assigned schedule.
The Migrate option is accessible from these locations:
- The project toolbar (see Project actions menu in Project toolbar).
- The design canvas (see Deploy/migrate actions menu in Design canvas).
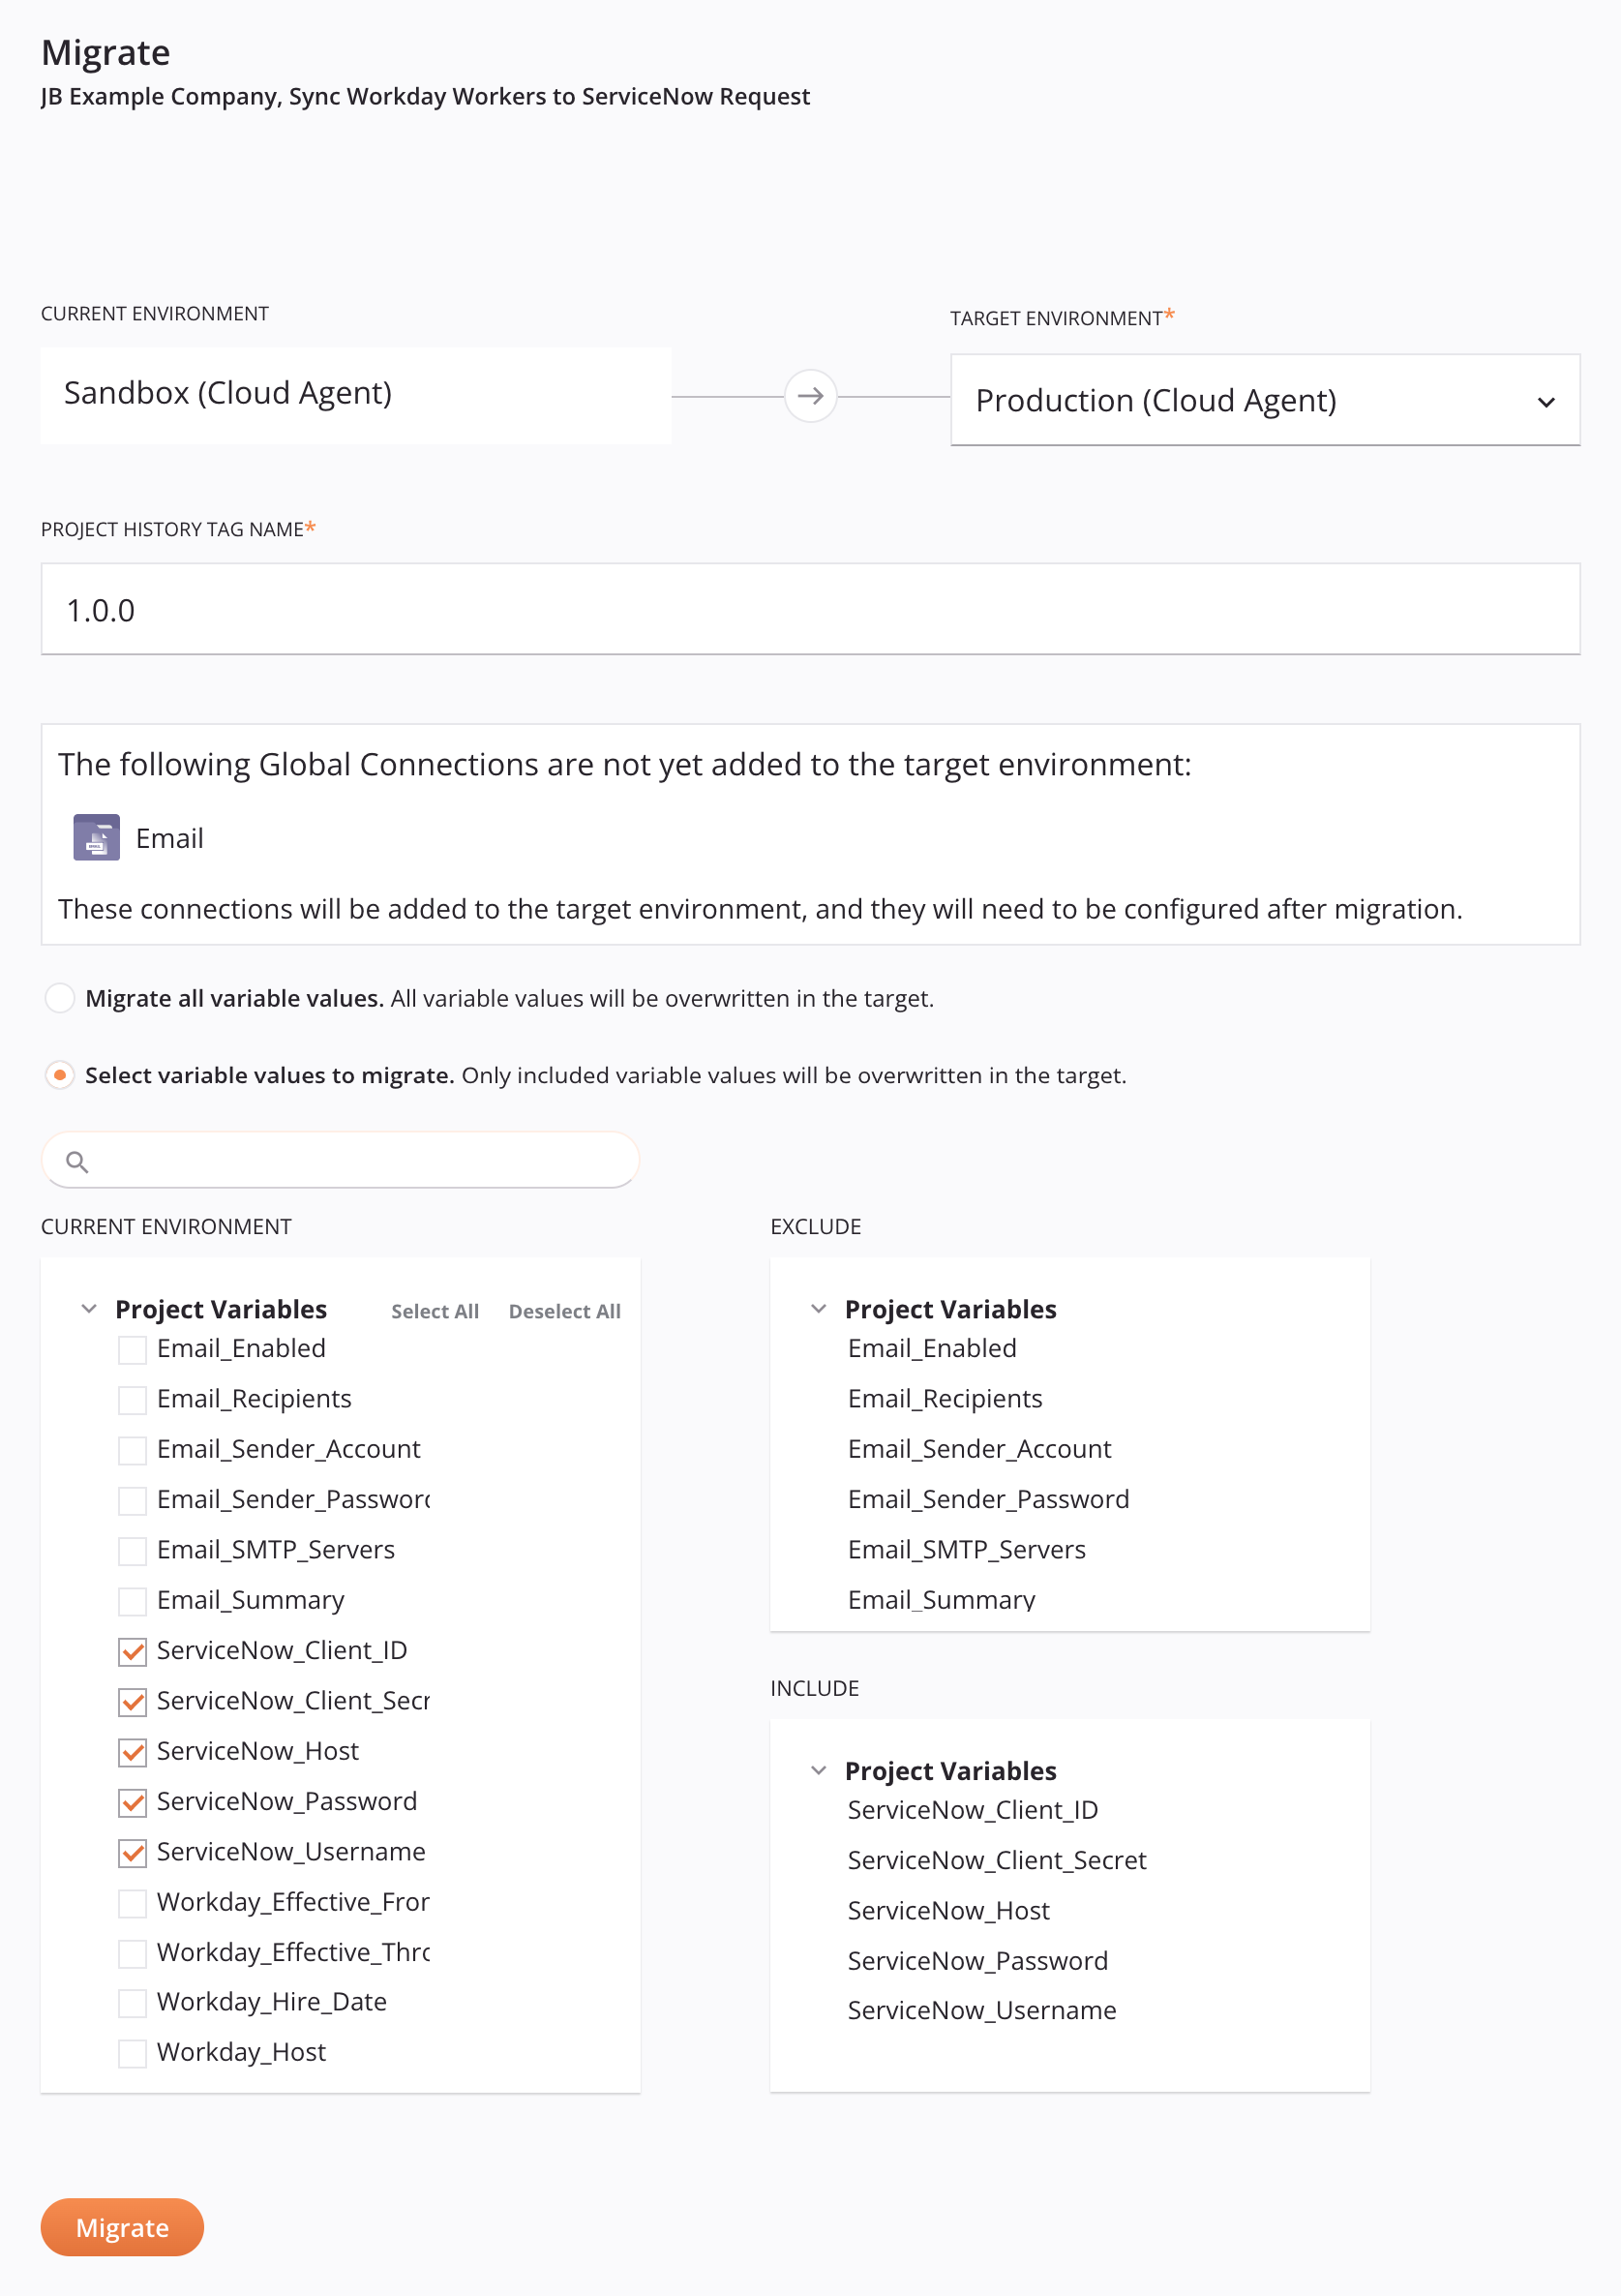
On selecting Migrate, a migration configuration screen opens where you can choose the target environment and whether to migrate the values of individual project variables:
-
Organization and Project: The Harmony organization where the project resides and the name of the project to be migrated, separated by a comma.
-
Current Environment and Target Environment: The current environment where the project resides and the target environment where the project will be migrated to are listed along with their associated agent group type (cloud agent or private agent).
When the project is migrated, the existing project in the current environment will remain unchanged. If the project has already been migrated to the target environment, the target environment project will be overwritten using the selections for project variable values below.
Caution
If the source project uses connectors that are available only on private agents, you can't migrate it to an environment associated with a cloud agent group. These environments still appear in the Target Environment dropdown, but cannot be selected.
-
Project History Tag Name: Enter a tag to be used to label the migrate event. The tag will be displayed as a label on the migrate event and recorded in the deploy details accessible from the project history. Entering a unique tag is recommended but not required.
-
Global Connections: Any global connections used by the project being migrated that have not been added to the target environment are listed. When the project is migrated, the global connection will be added to that environment and will need to be configured after migration.
-
Migrate All Variable Values: Select this option for all project variable values to be migrated. If the project already exists in the target environment, the values of all project variables will be overwritten. The first time a project is migrated, this option is selected by default. Subsequent migrations default to Select Variable Values to Migrate.
-
Select Variable Values to Migrate: Select this option for all project components and project metadata to be migrated, except for the values of project variables listed under Exclude. If the project already exists in the target environment, all project components, including the values of project variables listed under Include, will be overwritten.
When Select Variable Values to Migrate is selected, no project variables are selected for migration by default unless the project already exists in the target environment. When the project has already been migrated, newly added or renamed project variables are selected for migration by default, but variables whose values have been modified are excluded.
- Search: Enter any part of a project variable name to filter the list of project variables in the current environment.
- Current Environment: Select project variables whose values you want to migrate to the target environment. As you select project variables, they are listed under Include. The Select All and Deselect All links can be used to add or clear all project variable selections at once.
- Exclude: Project variables whose values will be excluded from migration. If the project already exists in the target environment and already contains the project variable, its existing value in the target environment will be retained. If the project variable does not already exist, then the project variable component is migrated but is not assigned any value.
- Include: Project variables whose values will be included in migration. If the project already exists in the target environment and already contains the project variable, its existing value in the target environment will be overwritten.
-
Migrate: Click to migrate the project to the selected environment. If the project has already been migrated to the target environment, a message asks you to confirm that you want to migrate, as this will overwrite the existing project in the target environment using the selections for project variable values above:
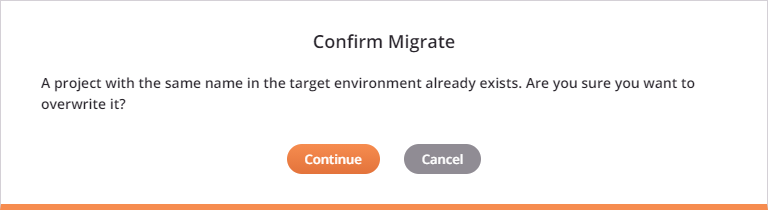
On clicking Continue, if the migration to the target environment is successful, the migrated project opens in the project designer.