Sample file schema
Introduction
If you already have a file available that contains the structure of data you want to use, you can use that sample file to define a schema in a transformation. Once a sample file is uploaded, it becomes a custom schema that you can edit in the schema editor for a custom flat schema or custom hierarchical schema.
This option is similar to providing the schema during configuration of an activity. However, a schema provided during activity configuration cannot be edited once uploaded.
Use a sample file
To be able to define a schema using a sample file in a transformation, first create a transformation.
The Define Schema option is visible only when a transformation is not already inheriting a schema from an adjacent activity or initially adjacent activity that has since been removed. The schemas in such activities take precedence over a schema defined in a transformation.
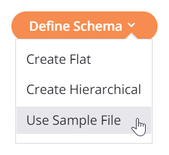
Provided this condition is met, the Define Schema button is displayed in mapping mode on each side of the transformation that does not already have a schema defined in an activity. Click Define Schema on the source or target side of the transformation and select Use Sample File:
Configure a sample file schema
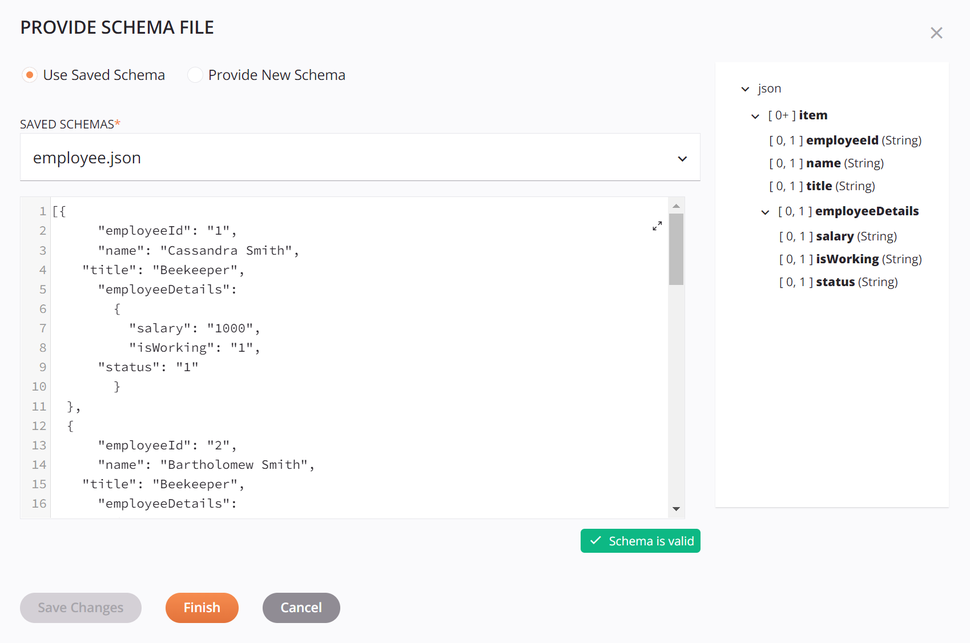
The schema editor opens. In the schema editor, select either Use Saved Schema or Provide New Schema. Each of these options is covered below.
Use saved schema
Choose Use Saved Schema to select an existing schema that has previously been defined in the current project. When this option is selected, these options become available:
-
Saved Schemas: Use the dropdown to select from an existing schema to reuse.
-
View Schema: After an existing uploaded schema is selected, you can view the schema directly within the text area below the dropdown. To view the schema in a larger area, click the popout icon
 (after opening that area, click the return icon to come back to this screen).
Though a saved schema is not editable, this text area can be copied using
Control+C(Windows or Linux) orCommand+C(macOS).This text area is only for the display of existing uploaded schemas and does not display flat, hierarchical, or mirrored custom schemas.
-
Validation: Validation information is provided below the text area and is based on the file extension of the saved schema.
-
Preview Schema: A preview of the schema is displayed on the right. The schema is displayed using the standard interface elements described under Nodes and fields.
-
Save Changes: This button is not usable, as it is not possible to make changes to a saved schema from the schema editor. To make changes to a saved schema, instead use the option Edit Schema available in a schema's actions menu.
-
Finish: Click to save the schema selection and close the schema editor.
-
Cancel: Click to close the schema editor.
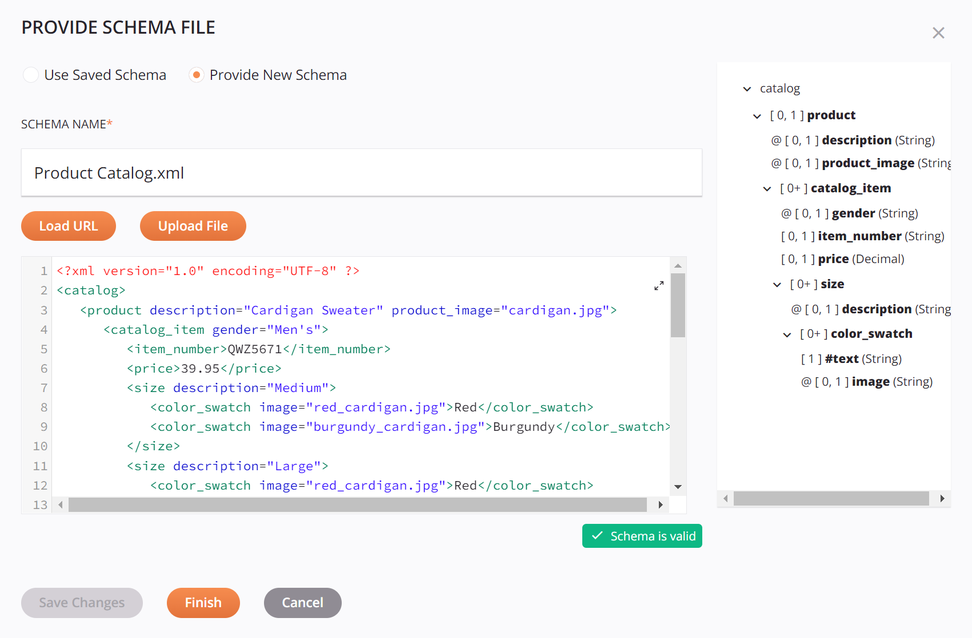
Provide new schema
Choose Provide New Schema to define a new schema by loading one from a URL, uploading a file, or manually entering one into the text area. When this option is selected, these options become available:
-
Schema Name: Enter a name for the schema into the upper text box, including the file extension (
.csv,.json,.xml,.xsd, or.zip). If no file extension is provided, the content is analyzed to autodetect the file type to use for validation. If you are loading the schema from a URL or uploading a file, you can leave this blank, as the name will be populated once the file is loaded. -
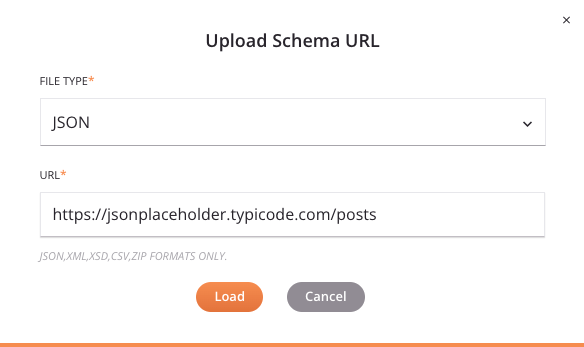
Load URL: Click to open a dialog where you can load a schema from a URL:
-
File Type: Use the dropdown to select from the supported file types, including CSV, JSON, XML, XSD, and ZIP. Take note:
-
XSD: An XSD provided by URL can import/include other XSD URLs by reference.
-
ZIP: A ZIP archive can contain a collection of XSDs, which can import/include each other by reference. Any non-XSD files in the archive are ignored. Multiple directory levels are supported.
-
-
URL: Enter a URL that is accessible without authentication. Files up to 5 MB in size can be uploaded.
-
Load: Click to load the schema from the URL. Note that the file is retrieved only a single time for schema generation. In addition, be aware that some data may be converted during processing as described in Schema processing.
-
Cancel: Click to close the Upload Schema URL dialog without saving.
-
-
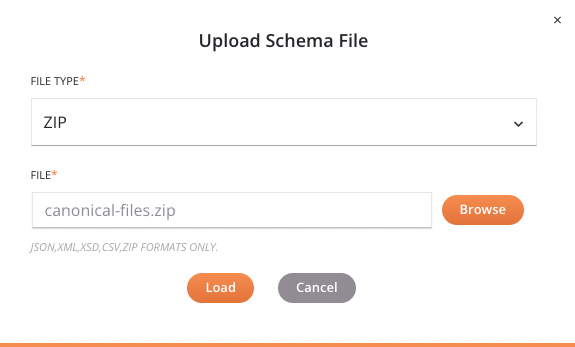
Upload File: Click to open a dialog where you can load a schema from a file that is accessible from the current machine:
-
File Type: Use the dropdown to select from the supported file types, including CSV, JSON, XML, XSD, and ZIP.
Note
A ZIP archive can contain a collection of XSDs, which can import/include each other by reference. Any non-XSD files in the archive are ignored. Multiple directory levels are supported.
-
File: Use the Browse button to the right to browse to a file that has not yet been used in the current project. Files up to 5 MB in size can be uploaded.
-
Load: Click to load the schema from the file. Note that some data may be converted during processing as described in Schema processing.
-
Cancel: Click to close the Upload Schema File dialog without saving.
-
-
View/Edit Schema: If you are not uploading a schema, you can enter one manually into the text area below the Load URL and Upload File buttons. Otherwise, after uploading a schema, you can view or edit the schema directly within that text area.
To view or edit the schema in a larger area, click the popout icon
(after opening that area, click the return icon to come back to this screen).This text area can also be copied using
Control+C(Windows or Linux) orCommand+C(macOS). -
Validation: As you edit a schema, validation information is provided below the text area, with any errors reported one line at a time. That is, after resolving an error on one line, additional syntax errors to resolve may be reported for subsequent lines. Validation is based on the file extension of the provided schema.
-
Preview Schema: A preview of the schema is displayed on the right. After loading a new schema or making edits in the text area on the left, you must first click the Save Changes button for the changes to be reflected in the preview area. The schema is displayed using the standard interface elements described under Nodes and fields.
-
Save Changes: Click to save the schema and refresh the schema preview shown on the right side.
Warning
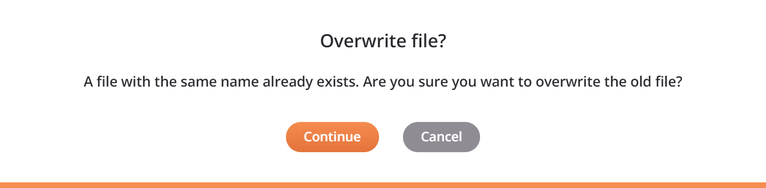
If you try to upload a file with the same name as an existing file already defined in the project, a dialog asks if you want to overwrite the existing file. If you click Continue, the file is replaced with the new file with the same name in all places where it is used in the project. If you don't want to overwrite the file, click Cancel and then manually modify the file so it has a name that is not already being used, then try to save it again.
Note
When uploading an XSD file that contains multiple top-level elements, on clicking Save Changes, you are prompted to select the desired root node. Select the desired element and then click Finish to save:
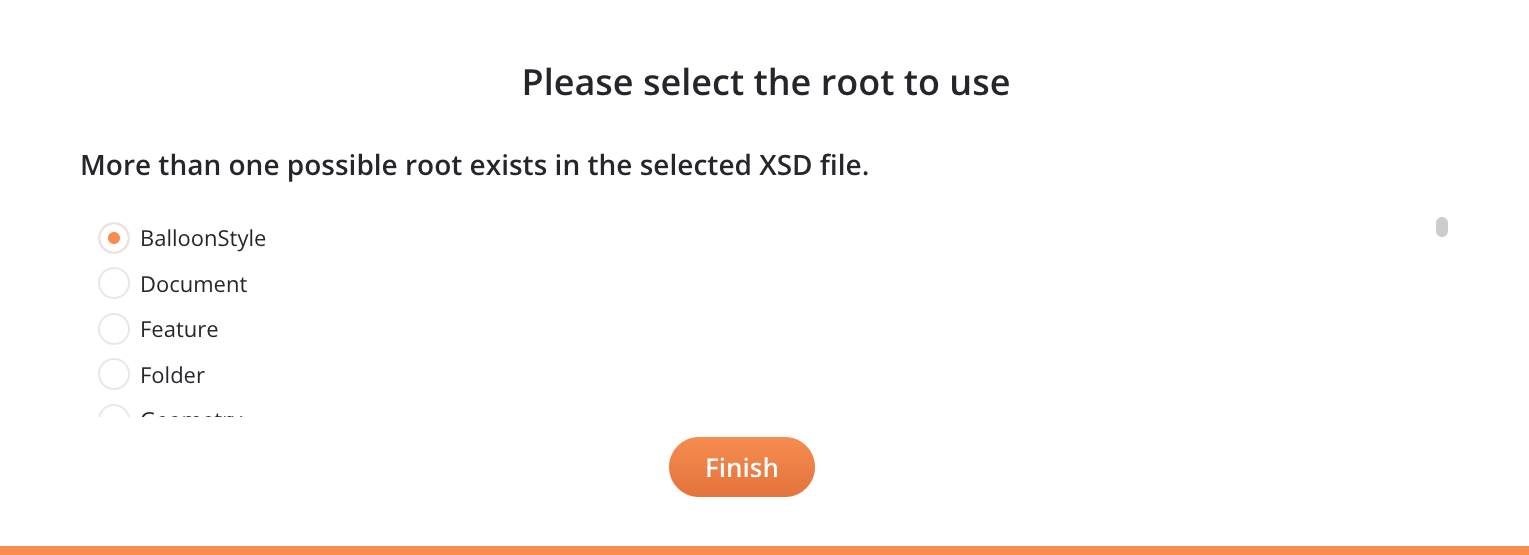
-
Finish: Click to save the schema and close the schema editor.
-
Cancel: Click to close the schema editor.
Note
If you have already used the Save Changes button, changes have already been saved and using Cancel only closes the configuration. Using Cancel without first using Save Changes closes the schema editor without saving.
Schema actions menu
After a schema from the sample file is created, you can access additional menu options that are available for all schemas.
These include Delete, Rename, View Dependencies, Deploy, Configurable Deploy, and Add to Group, as well as Edit Schema and Clear Schema. For details on these actions, see Schema actions menu.
Note
When you edit a schema that was created from a sample file, the configuration screen for a custom flat schema or custom hierarchical schema opens for you to add or edit fields and/or nodes as required.