Project variables
Introduction
Project variables are one of the types of global data elements available in Harmony. The other types of global data elements — global variables, Jitterbit variables, and filename keywords — are also available globally throughout a project. They are set differently, as described in Global variables, Jitterbit variables, and Filename keywords, respectively. However, as all global data elements share the same namespace, their names must be unique when compared against all other global data elements.
Project variables are set before runtime of an operation and are available to use across all components in a project, including scripts, transformations, and endpoints created using connectors. If you change the value of a project variable during operation runtime, the variable is treated as a global variable with the changed value persisting only for the duration of the operation chain. That is, changing a project variable's value at runtime does not update its value for the entire project.
Common uses of project variables include for endpoint credentials, filenames, or variables that can change from environment to environment, or any variable that you want to be able to edit through the Management Console or Citizen Integrator.
When deploying a project variable that has already been deployed in the Harmony cloud, you are presented with options for selecting which project variable values to use. This is covered under Select schedules and project variables in Project deployment.
Display of project variables
Defined project variables are displayed in several places:
- In the project pane, project variables are displayed in the Components tab in the Project Variables category. From here you can see if the project variable is referenced elsewhere in the project and view dependencies.
- In the script editor, project variables are displayed in the component palette on the right, within the Variables tab, in the Project Variables sub-tab. This location provides easy access for inserting project variable references in scripts, including within transformation scripts in script mode.
- In transformation mapping mode, project variables are displayed within the Variables tab on the left, in the Project Variables category. This location provides easy access for inserting project variable references during transformation mapping in mapping mode.
- In endpoint configurations, project variables can be accessed and used in any fields that have a variable icon
 . As an alternative to selecting a project variable, you can manually enter the variable reference using the standard Jitterbit Script square bracket syntax.
Create and update project variables
You create and update project variables from within Cloud Studio, as well as update existing project variables of a deployed project from the Management Console and Citizen Integrator.
These next sections describe how to create a new project variable from different locations in Cloud Studio:
- Project variable list
- Project pane
- Script editor
- Transformation mapping mode
- Endpoint configurations
- Existing project variable configurations
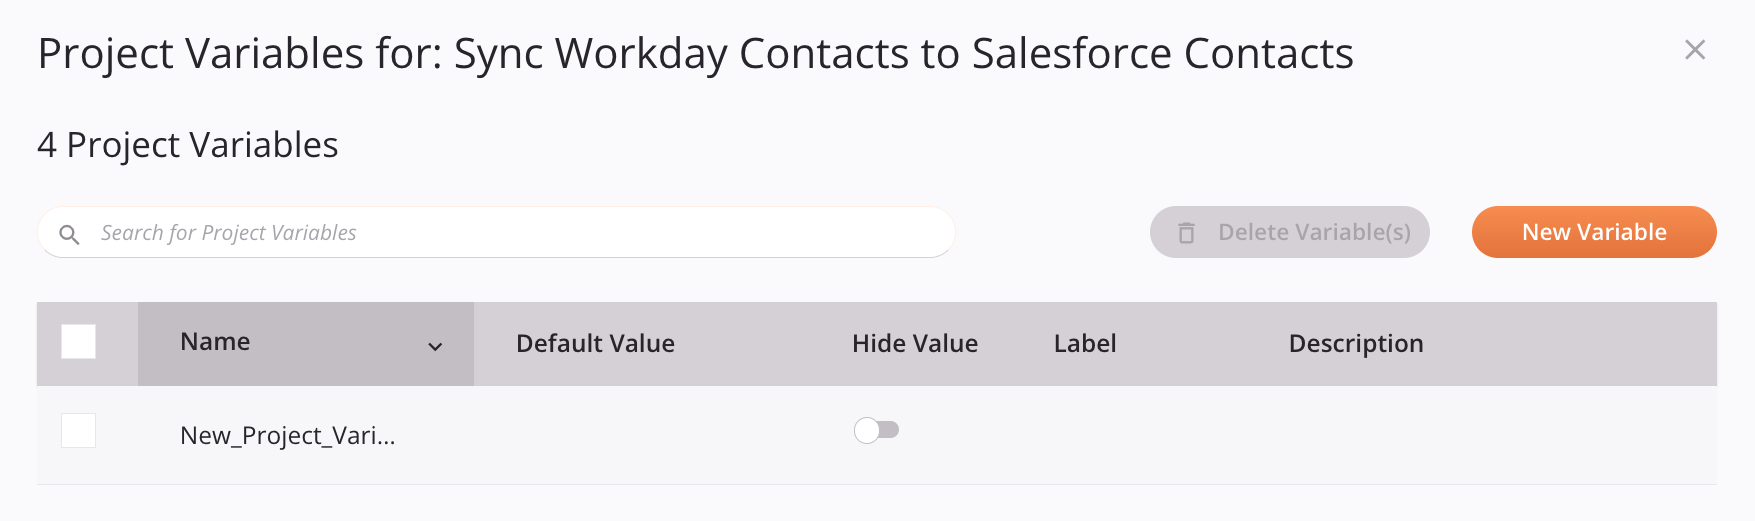
New project variables are created with the default name New_Project_Variable. Subsequent new project variables with default name are appended with an incremented number.
Once a new project variable has been created, you configure it — depending on how it was created — either in list view or individually, as described below in Configure a project variable.
Project variable list
The project variable list screen is a complete list of the project variables created for a project. It includes controls to create new project variables and to edit and delete existing project variables.
The project variables list screen is accessible both from outside and within a project. It is not necessary to open a project in order to access the project variable list. The Project Variables option can be accessed from these locations:
- The Projects page (see Tile view or List view in Projects).
- The project toolbar (see Project actions menu in Project toolbar).
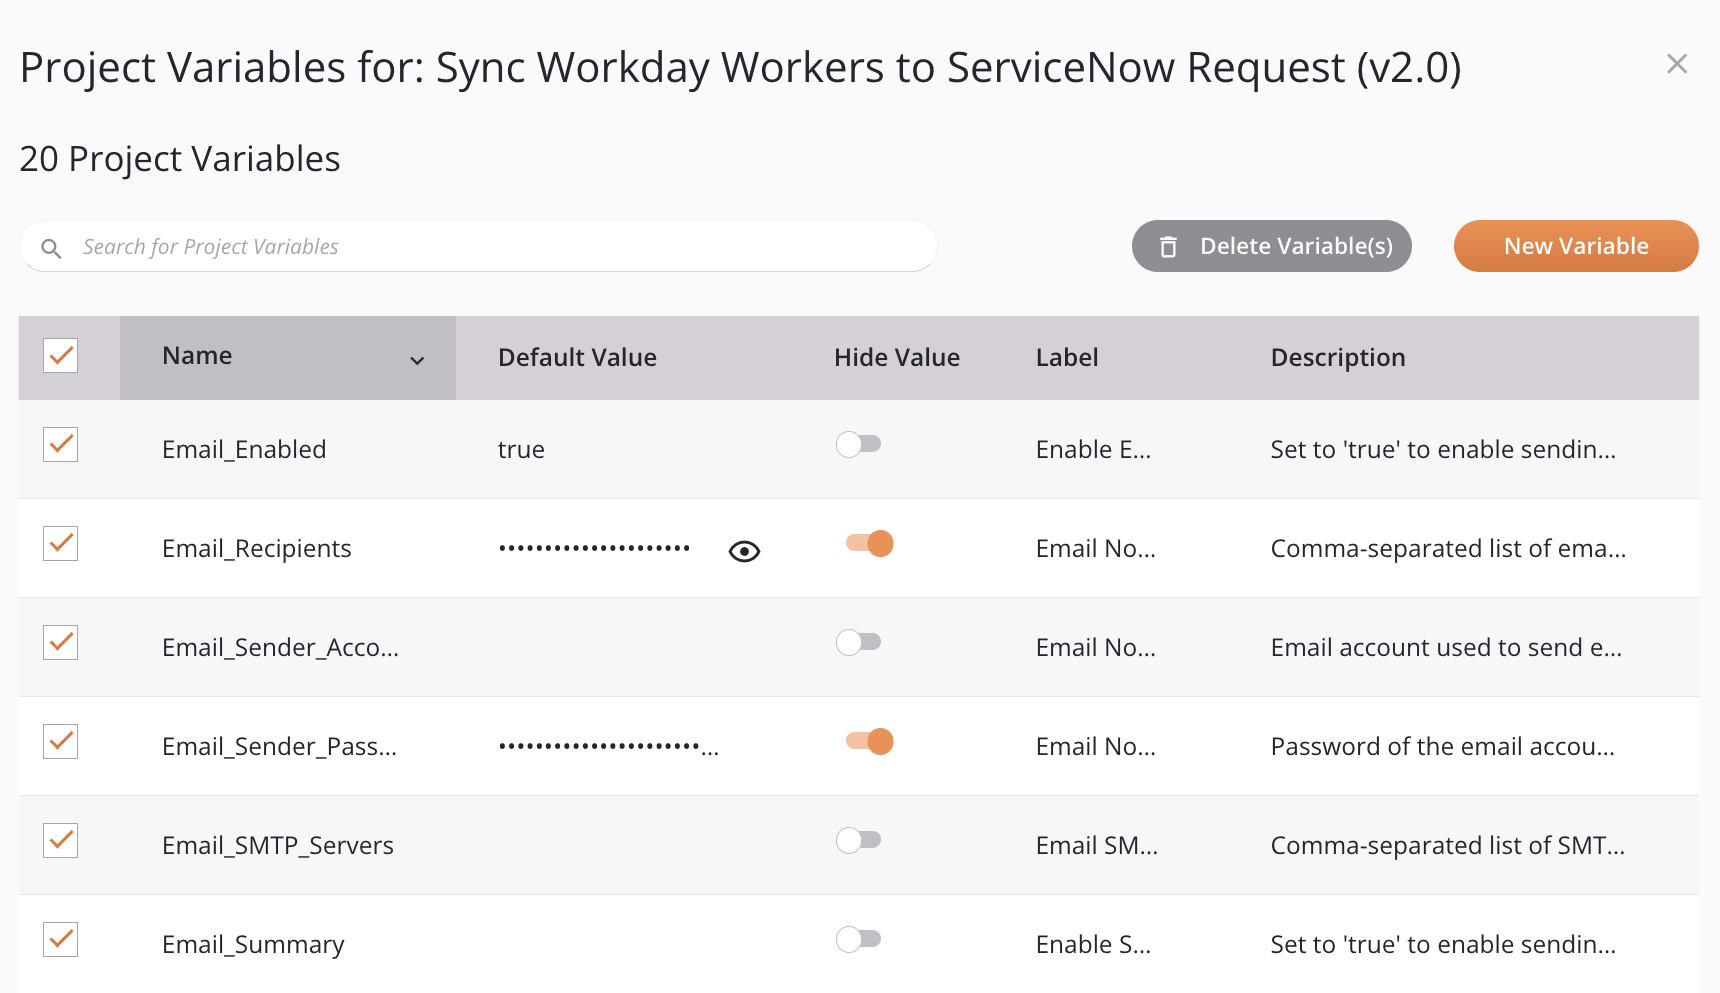
On selecting Project Variables, the project variable list view is displayed:
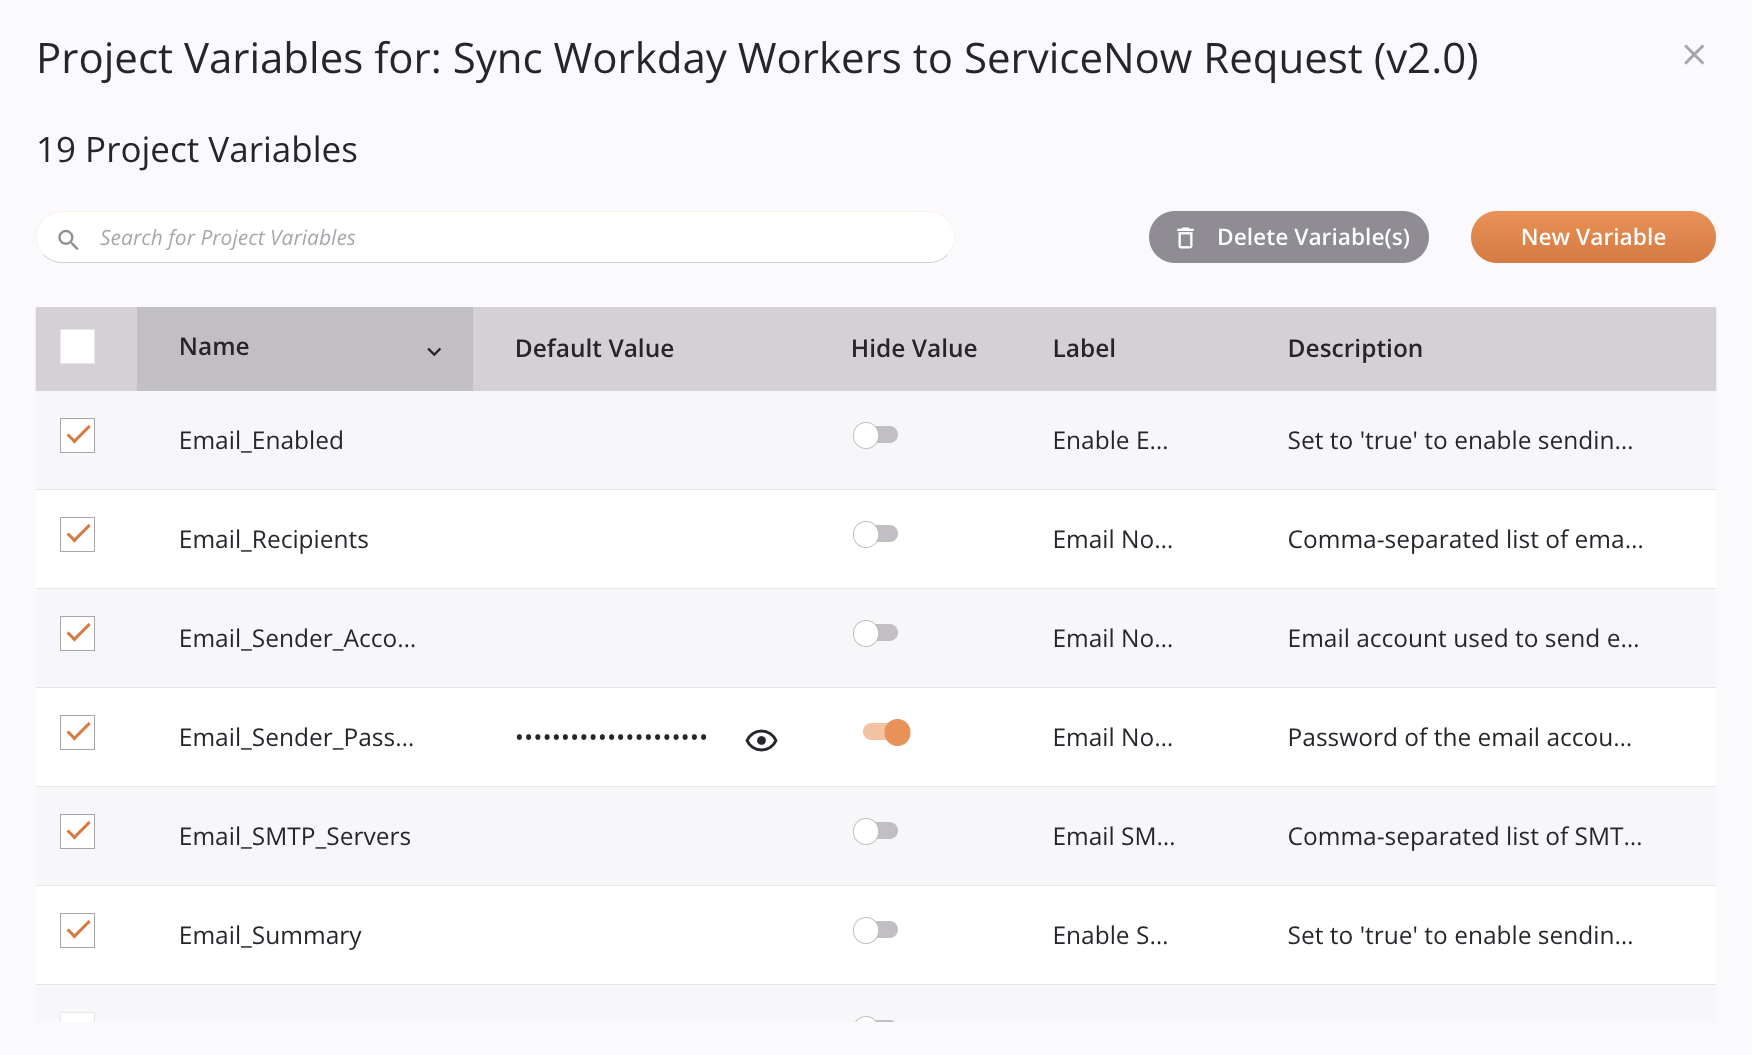
To create a new project variable, click New Variable.
To edit an existing project variable, click within the fields of the project variable table and edit the values inline.
Additional information about searching for, deleting, and configuring project variables from this view is provided in Configure project variables in list view later on this page.
Project pane
A new project variable can be created from the project pane's Components tab using the Create New option on the Project Variables category (see Components tab actions menu in Project pane Components tab).
An existing project variable can be edited from the project pane's Components tab using the View/Edit option on a project variable component (see Component actions menu in Project pane Components tab).
Both of these menu options open the individual project variable configuration screen, as covered under Configure a project variable individually later on this page.
Script editor
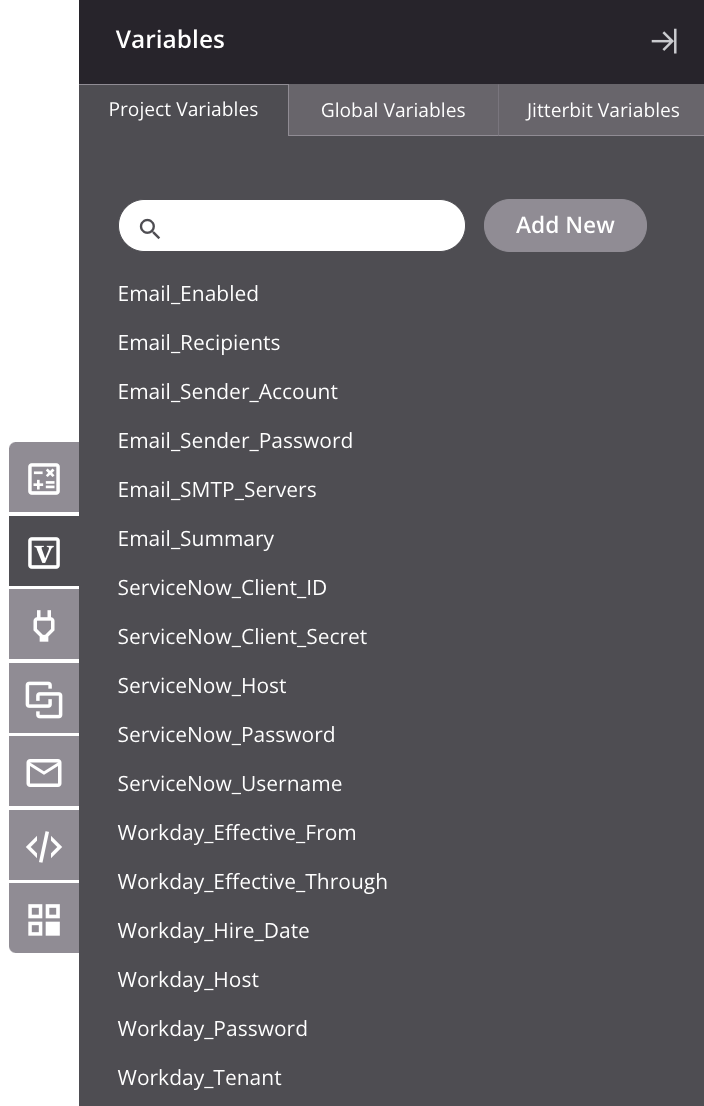
From the script editor, open the Variables tab of the component palette and then go to the Project Variables sub-tab:
-
Add New: Click to create a new project variable.
-
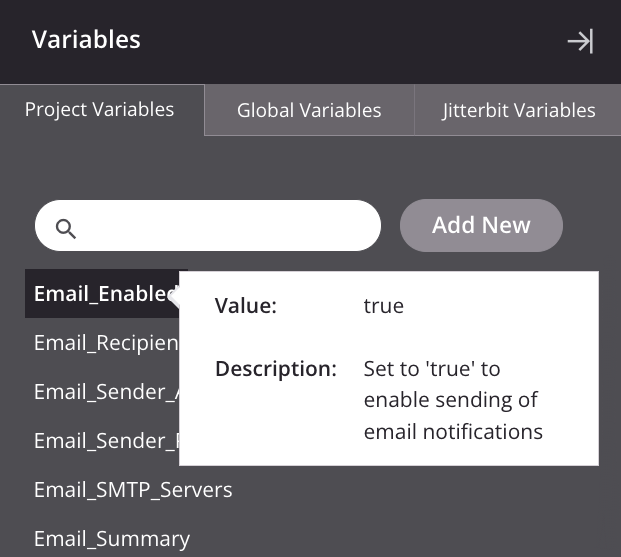
Edit: To edit an existing project variable, hover over the variable name to view additional information and click anywhere on the project variable name or the information popup:
Both of these actions open the individual project variable configuration screen, as covered under Configure a project variable individually later on this page.
Transformation mapping mode
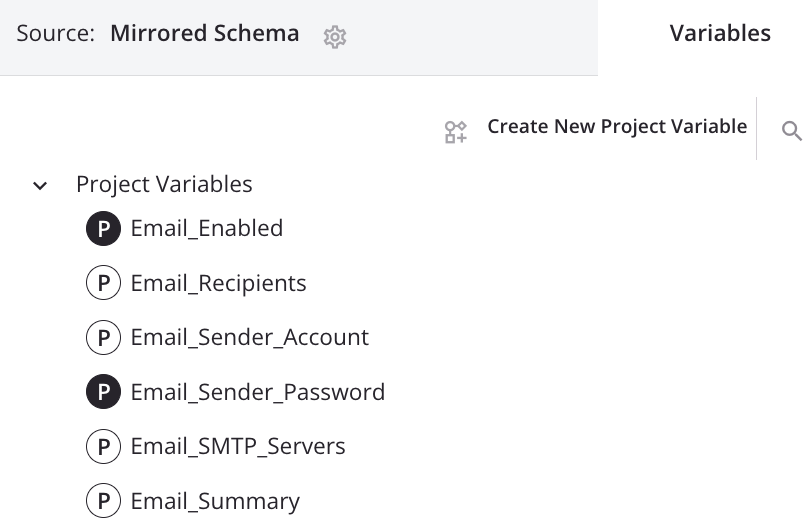
From transformation mapping mode, open the Variables tab on the left and expand the Project Variables category:
-
Create New Project Variable: Click to create a new project variable.
-
Search: To search for a particular variable by name, click the search icon
 and enter a keyword or multiple keywords separated by commas in the search box. The search returns a list of variables having any of the keywords.
 -
Edit: To edit an existing project variable, hover over the variable name and click the edit icon
 :
:
Both the actions of creating a new project variable and editing an existing project variable open the individual project variable configuration screen, as covered under Configure a project variable individually later on this page.
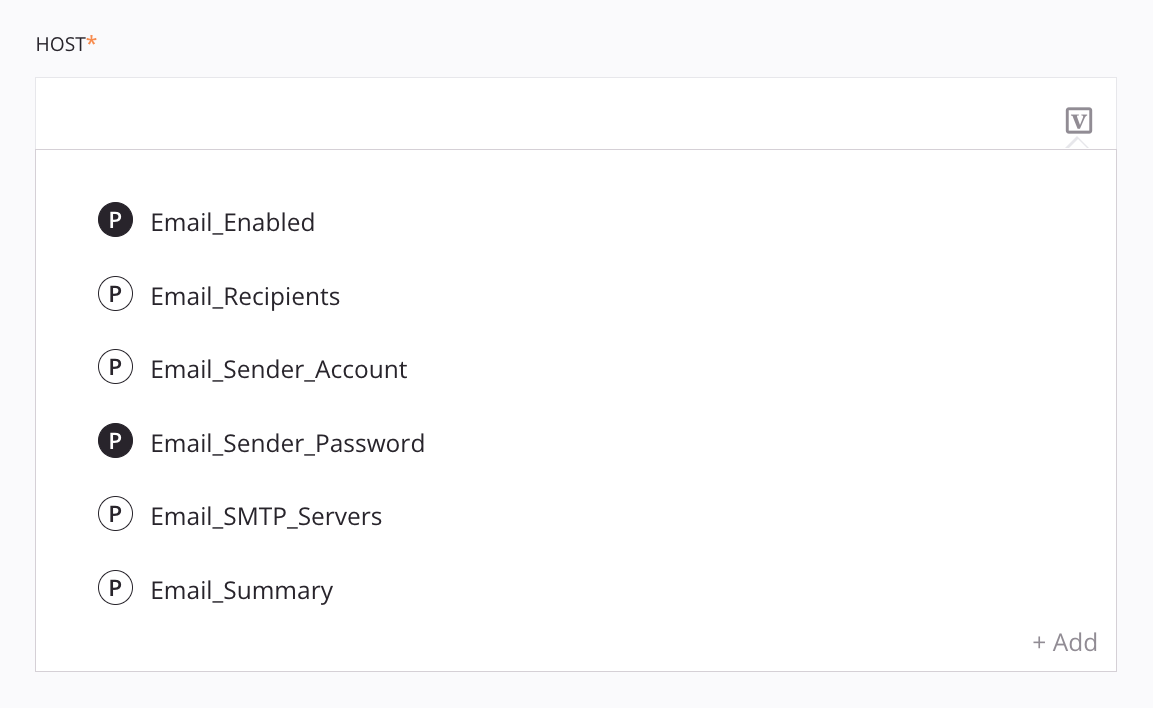
Endpoint configurations
While using a connector to configure an endpoint, in fields that have a variable icon ![]() , click the icon to display a list of existing variables. To create a new project variable, click Add in the lower right corner:
, click the icon to display a list of existing variables. To create a new project variable, click Add in the lower right corner:
-
To edit an existing project variable from this list, hover over the project variable row and click the edit icon
 on the far right.
 -
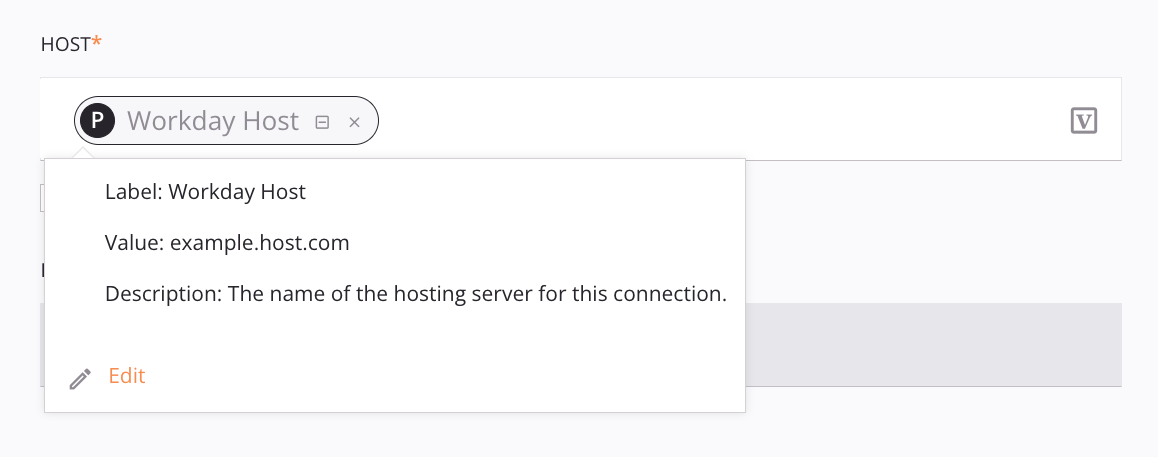
When an existing project variable has already been used within a configuration field, hover over the variable pill to view information about the variable, then click the edit icon or Edit in the lower left:
All of these actions open the individual project variable configuration screen, as covered under Configure a project variable individually later on this page.
Existing project variable configurations
In an individual project variable configuration screen, you can save the current project variable and then enter a new configuration screen to create a new project variable. This feature is useful when creating project variables in bulk.
Within a new project variable configuration screen, configure the variable as described under Configure a project variable individually later on this page, and then click Save & New:

This saves the current project variable and opens another individual project variable configuration screen for creating a new project variable.
Project variable actions menu
After a project variable is created, menu actions for that project variable are accessible from the project pane's Components tab (see Component actions menu in Project pane Components tab).
Each of these menu actions is available:
| Menu Item | Description |
|---|---|
| View/Edit opens the individual project variable configuration screen for you to configure the project variable. For details, see Configure a project variable individually later on this page. | |
| Cut places a copy of the project variable on your clipboard and deletes the original project variable from the project (see Component reuse). | |
| Copy places a copy of the project variable on your clipboard (see Component reuse). | |
| Duplicate creates a new, unreferenced project variable using the same configuration as the original project variable (see Component reuse). | |
| Rename positions the cursor on the project variable name for you to make any edits as necessary. | |
| View Dependencies changes the view in the project pane to display any other parts of the project that the project variable is dependent on (see Component dependencies, deletion, and removal). | |
| Add to Group opens a dialog to create a new custom group or to add the project variable to an existing group (see Component groups). | |
| Delete permanently deletes the project variable (see Component dependencies, deletion, and removal). | |
| Remove is not currently functional. |
Configure a project variable
Once a project variable is created, it is configured in one of two ways:
The list view is used if you are creating or editing project variables from outside the project in the Projects page or if you select Project Variables from the project actions menu. Otherwise, project variables are configured individually.
Configure project variables in list view
Configuring a project variable in the list view is one of two views used for configuring project variables. (The other view is used when configuring an individual project variable, covered under Configure a project variable individually.)
The project variables list screen is accessible both from outside and within a project. It is not necessary to open a project in order to access the project variable list. The Project Variables option can be accessed from these locations:
- The Projects page (see Tile view or List view in Projects).
- The project toolbar (see Project actions menu in Project toolbar).
On selecting Project Variables, the project variable list view is displayed:
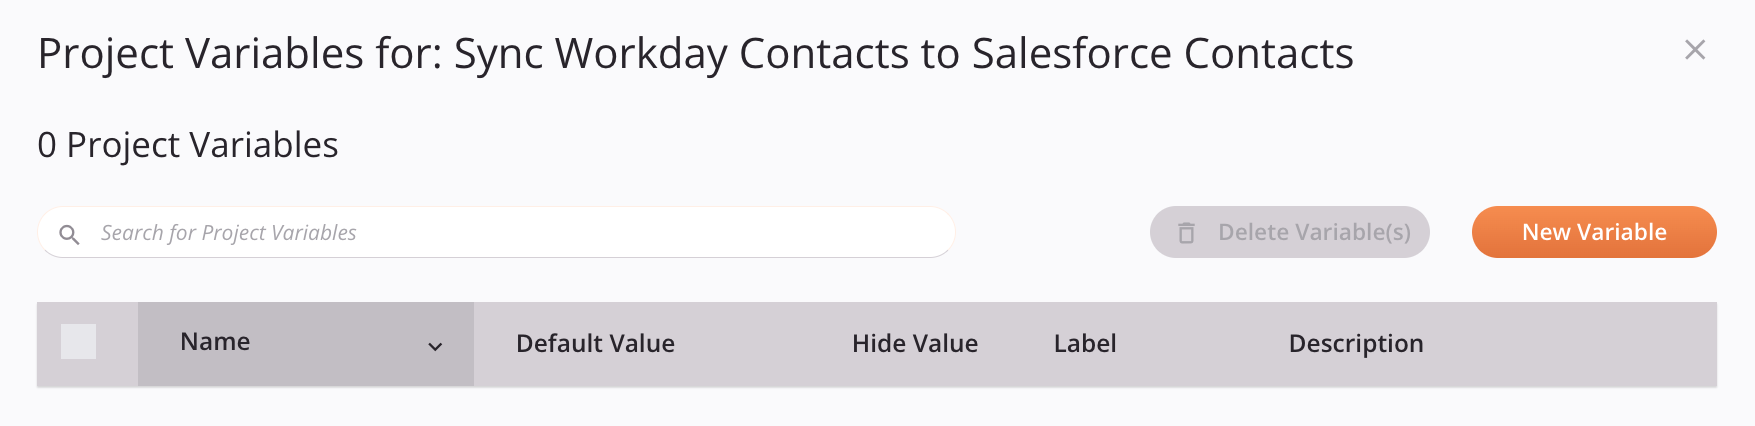
New project variables are created by clicking New Variable.
This adds a new project variable row to the top of the project variable table. If the table already contains project variables, you can add a new project variable row at the bottom of the table by placing the cursor in the last row's variable Description field and then pressing the Tab key.
With either method of creating a new project variable, the cursor is placed in the Name field for you to rename the project variable:
Caution
As all global data elements (global variables, project variables, and Jitterbit variables) share the same namespace, their names must be unique when compared against all other global data elements.
Once you focus out of the fields of the new project variable, the project variable is saved and the New Variable button again becomes active for you to create additional variables. You can change the sort order can be changed by clicking the column header for Name, Default Value, Label, or Description.
Project variables can be configured by clicking or tabbing to each field within the table and editing it inline.
For new project variables, the configuration is saved when you shift focus out of the new project variable row. For existing project variables, the configuration is saved each time you change focus to another field, even within the same project variable row.
To search for a project variable by its Name or Description, enter a single keyword or keyword string into the search box.
Project variable table columns
Each column of the project variable table is described below:
-
Select: The column on the far left can be used to select one, multiple, or all project variables for deletion. After at least one project variable is selected, the Delete Variable(s) button at the top of the table is available for you to permanently delete the project variable (see Component dependencies, deletion, and removal).
-
Name: Enter the name of the project variable. The project variable name must be unique within the project, must not contain spaces, and can be composed from these characters: letters (a-z, A-Z), numbers (0-9), periods, and underscores. Other characters are not recommended and may cause issues. Project variable names are case-insensitive; for example, a variable called
ProjectVaris treated the same asprojectvar. As all global data elements (global variables, project variables, and Jitterbit variables) share the same namespace, their names must be unique when compared against all other global data elements.When creating new project variables, it is a best practice to prefix project variables so that they are easy to look up later. For example, a project variable
org.netsuite.auth.usernameis first prefixed withorg, thennetsuite, etc. to effectively organize it in a list among other project variables. However, if you plan to use the project variables in JavaScript later, we recommend using underscores instead of periods. More information is provided below in Retrieve project variables in scripts or transformations.An existing global variable can be converted into a project variable by entering its name into the Name field. See Convert a global variable to a project variable for details.
-
Default Value: Enter an optional default value to be used as the initial value for the project variable. This value can be modified later through scripting. If you do not want the project variable to have a default value, leave this field blank.
- Show Hidden Value: When Hide Value is enabled, you can click and hold the Show icon
 to show the hidden value. The value is hidden again when the icon is released.
- Show Hidden Value: When Hide Value is enabled, you can click and hold the Show icon
-
Hide Value: Use the slider to toggle on the Hide Value option. Enabling this option hides the default value by replacing it with asterisks in various places throughout the user interface. You may want to use this if the value contains sensitive information that you do not want to be visible on the screen.
Caution
Hiding the value does not prevent the value from being accessible in a script.
-
Label: Enter an optional label to describe the variable. This label appears when you hover over the variable in scripts and in configuration screens.
-
Description: Enter an optional description to provide further details about the variable. This description appears when you hover over the variable in scripts and in configuration screens.
Configure a project variable individually
Configuring a project variable in a dialog is one of two views used for configuring project variables. (The other view is the project variable list view, covered under Configure project variables in list view.)
This view is used when you create or edit a project variable directly from the project pane, inside a script or transformation, or inside an endpoint configuration screen.
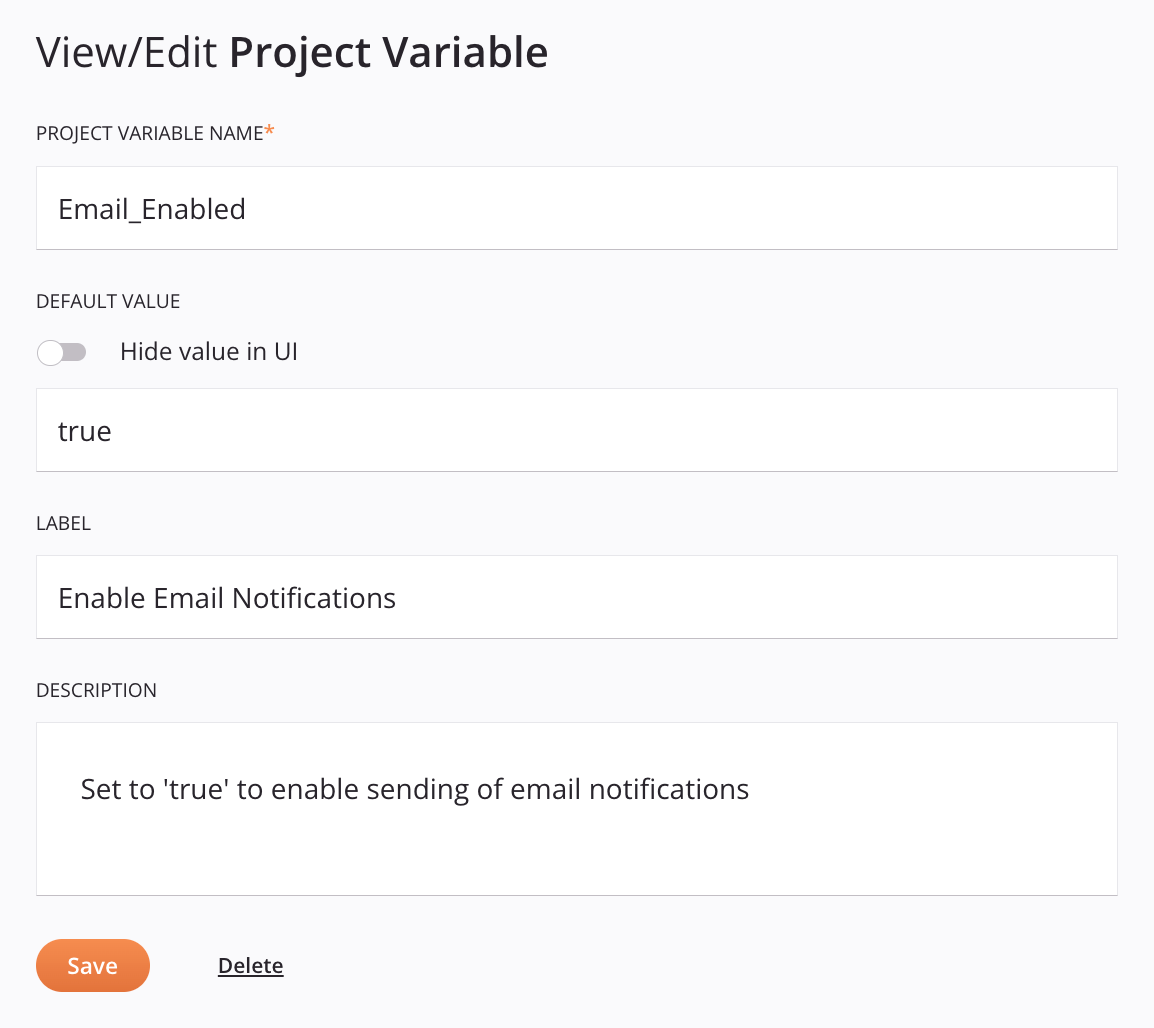
When you create a new or edit an existing project variable individually, the View/Edit Project Variable dialog is displayed:
-
Project Variable Name: Enter the name of the project variable that you want to declare. The project variable name must be unique within the project, must not contain spaces, and can be composed from these characters: letters (a-z, A-Z), numbers (0-9), periods, and underscores. Other characters are not recommended and may cause issues. Project variable names are case-insensitive; for example, a variable called
ProjectVaris treated the same asprojectvar. As all global data elements (global variables, project variables, and Jitterbit variables) share the same namespace, their names must be unique when compared against all other global data elements.When creating new project variables, it is a best practice to prefix project variables so that they are easy to look up later. For example, a project variable
org.netsuite.auth.usernameis first prefixed withorg, thennetsuite, etc. to effectively organize it in a list among other project variables. However, if you plan to use the project variables in JavaScript later, we recommend using underscores instead of periods. More information is provided below in Retrieve project variables in scripts or transformations.An existing global variable can be converted into a project variable by entering its name into the Name field. See Convert a global variable to a project variable for details.
-
Default Value: Enter an optional default value to be used as the initial value for the project variable. This value can be modified later through scripting. If you do not want the project variable to have a default value, leave this field blank.
-
Hide Value in UI: Use the slider to toggle on the Hide Value option. Enabling this option hides the default value by replacing it with asterisks in various places throughout the user interface. You may want to use this if the value contains sensitive information that you do not want to be visible on the screen. After enabling this option, you are prompted to confirm that you want to hide the value:

Caution
Hiding the value does not prevent the value from being accessible in a script.
If you disable this option after enabling it, you are prompted to confirm that you want to remove the current value (as a previously hidden value cannot be unhidden):

After clicking Continue, the cursor is positioned in an empty Default Value field.
-
Label: Enter an optional label to describe the variable. This label appears when you hover over the variable in scripts and in configuration screens.
-
Description: Enter an optional description to provide further details about the variable. This description appears when you hover over the variable in scripts and in configuration screens.
-
Save: Click to save and close the project variable configuration.
-
Save & New: Present only when creating a new project variable, this button may be useful for creating project variables in bulk. Click this button to save the current project variable and open another project variable configuration screen for creating a new project variable.
-
Delete: After opening an existing project variable, click to permanently delete the project variable and close the configuration (see Component dependencies, deletion, and removal).
Retrieve project variables in scripts or transformations
In Cloud Studio, the value of a project variable can be returned using either Jitterbit Script in scripts or transformations, or using JavaScript only in scripts created as a project component.
Jitterbit Script
In scripts and transformations, you can begin with a dollar sign $ or use the Get function to retrieve the value of a project variable.
$: Prefixed with a dollar sign$, the code example$org.netsuite.auth.usernameretrieves the value of the project variable called "org.netsuite.auth.username".Get: Using theGetfunction, the code exampleGet("org.netsuite.auth.username")returns the same value.
In scripts and transformations, existing project variables are displayed in the Variables tab of the script component palette inside the Project Variables sub-tab. See Add a project variable to a script below.
JavaScript
In JavaScript used within scripts within an operation, the syntax used for retrieving the value of a project variable depends on whether the project variable name contains a period.
-
Name does not include a period (recommended): The value of a project variable that does not contain any periods in its name can be retrieved by prefixing with a dollar sign
$.$: Prefixed with a dollar sign$, the code example$org_netsuite_auth_usernameretrieves the value of the project variable called "org_netsuite_auth_username".
-
Name with periods (recommended only for Jitterbit variables and JavaScript object values): A variable that contains a period in its name can be updated or retrieved in JavaScript only with the
Jitterbit.SetVarandJitterbit.GetVarfunctions. As these functions are not intended for user-defined project variables, see the section on Jitterbit variables for more information.
In scripts and transformations, existing project variables are displayed in the Variables tab of the script component palette inside the Project Variables sub-tab. See Add a project variable to a script below.
Warning
The JavaScript Jitterbit.SetVar and Jitterbit.GetVar functions are designed specifically to access the predefined Jitterbit variables. They are not to be used to access user-defined project variables.
In JavaScript, do not mix and match your usage of SetVar (and GetVar) with $-prefixing when setting (and retrieving) a variable. Use only one syntax. Mixing the two different syntaxes for the same variable can cause issues at runtime.
If a JavaScript fails, any changes made to the value of a project variable are lost. Only if the JavaScript successfully completes are modified project variable values available outside the script.
Add a project variable to a script
In either Jitterbit Script or JavaScript used within scripts created within an operation, existing project variables are displayed in the Variables tab of the component palette inside the Project Variables sub-tab:
To add the variable syntax to a script (Jitterbit Script or JavaScript), use one of these methods:
- Drag the variable from the palette to the script to insert the variable syntax.
- Double-click the variable in the palette to insert the variable syntax at your cursor's location within the script.
- Begin typing the variable name and then press
Control+Spaceto display a list of autocomplete suggestions. Select a variable to insert the variable syntax. - Manually enter the variable syntax.
Use project variables in configuration screens
During configuration of certain project components, including endpoint configuration using connectors, you can use project variables in any fields that have a variable icon ![]() . Variables can be used in fields along with other input, including with other variables or keywords.
. Variables can be used in fields along with other input, including with other variables or keywords.
Select a project variable
To access project variables, you can either click the variable icon ![]() or enter an open square bracket
or enter an open square bracket [ to display a list of variables and keywords (if available for the current field).
Within the list, the variable or keyword type is indicated by the icon next to its name:
 for filename keyword
 for global variable
 for project variable
 for Jitterbit variable
The icon's background is solid ![]() if the project variable has a default value specified in the project variable configuration itself, or empty
if the project variable has a default value specified in the project variable configuration itself, or empty ![]() if it does not.
if it does not.
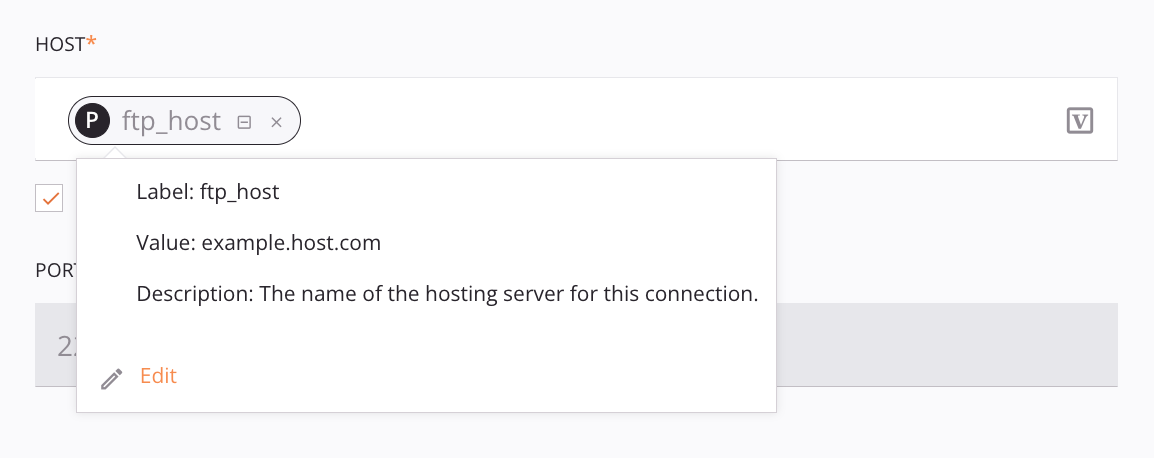
Select a variable to add to the field at the location of your cursor, anywhere in the string. The variable is displayed in a pill format similar to that shown below:

To review information about the variable, hover over the variable pill:
View controls
Once a project variable has been selected, you can toggle between formats or remove the project variable:
-
Collapse: To change the default variable pill format to text format, click the collapse icon
 :
:
To change from a text format back to pill format, change focus off of the field, such as by clicking into another configurable field. The field input automatically returns to the default pill format.
-
Remove: To remove the variable, click the remove icon
 .
.
Project variable how-tos
This section provides information on how to complete specific tasks with project variables.
Convert a global variable to a project variable
To convert an existing global variable to a project variable, enter the name of the existing global variable into a Project Variable Name field. On saving (by shifting focus outside of the row if in list view or by clicking Save if in individual view), you are prompted to confirm that you want to convert the global variable into a project variable:

On clicking Continue, all references to and dependencies of the global variable are transferred to the project variable. This includes references to the former global variable within scripts, which now reference the project variable. Keep in mind that a value for a project variable set in a script during execution of the operation chain overrides the default value specified in the project variable configuration. Clicking Cancel cancels the conversion of the global variable.
Migrate project variables
When you migrate a project, you have the ability to select which project variables will have their values excluded in the target environment.
This allows you to keep project variable values segregated to an environment. For example, you may want to maintain separate project variable values for an endpoint host URL for a Production environment and a separate sandbox endpoint host URL for a QA environment.
You may want to exclude certain project variable values from migration to avoid populating their values on initial migration or to avoid overwriting their values on subsequent migrations.
To exclude project variables from migration, select the option Select Variable Values to Migrate in the project migration screen. When this option is selected, no project variable values are selected for migration by default. If you want to include any project variable values during migration, you can select them individually. For details, see Migrate a project in Project migration.