Upload files to Salesforce with Jitterbit Cloud Data Loader
Introduction
This page describes how to upload files to Salesforce using Data Loader. To demonstrate, we use an example of uploading four local files to a folder within Salesforce.
Begin a new insert
Within the Cloud Data Loader, begin a new Insert operation. There are several ways to start a new Insert:
- In the Getting Started tab, click the Insert button.
- In the Project Explorer under Data Operations, expand Inserts and double-click on New Insert....
- Click the Wizard Wand icon and select Insert.
- Go to File > New > Jitterbit Connect > New Insert.
Enter Salesforce credentials
After beginning a new Insert, you will be brought to the Login screen.

-
Enter your Salesforce credentials.
Note
Your Salesforce credentials will prepopulate if you have already saved the connection details within the Cloud Data Loader.
-
Click Test Salesforce Login to confirm you have a successful connection.
-
Click Next to continue.
Select Salesforce object
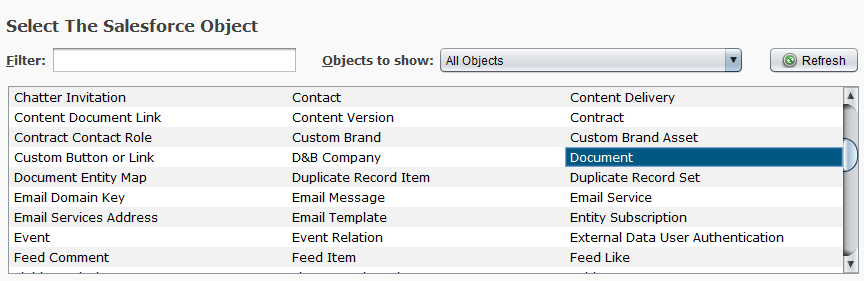
You should now be on the Object screen.

-
Under Select The Salesforce Object, select the type of object within Salesforce that you want to insert. The object may be standard within Salesforce or custom-defined.
Example
In the example, we use the standard Salesforce object Document because we want to upload document files to Salesforce.
-
Click Next to continue.
Set source location
You should now be on the Source screen.

-
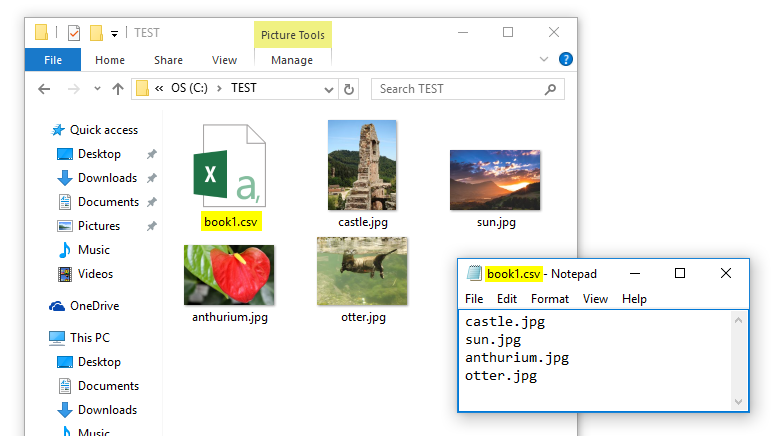
First, you need to create a CSV file that contains a list of "file names" of the files you want uploaded.
Example
In the example, we have four images in a folder called TEST located on the C drive of the local machine. To generate the CSV, we have copied the file names into Notepad and saved the file as book1.csv.
-
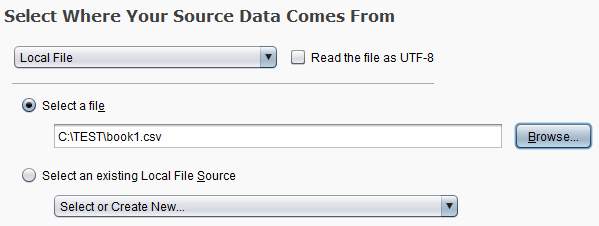
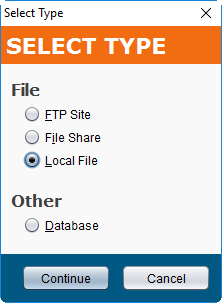
Under Select Where Your Source Data Comes From, specify the location where you saved your CSV file with the names of the files you want to upload.
Example
In the example, we created our CSV file in a folder called TEST located on the C drive of the local machine. So we choose Local File in the dropdown and browse to C:/TEST/book1.csv.
-
Click Next to continue.
-
You may see a prompt showing the contents of the selected file. If correct, click Continue.
Note
This prompt appears only the first time the file is used.
-
Under Select File Type, select the type of source file you created. Here you can specify whether the file has a header, if it's a single-column file, or if the file has multiple columns that are delimited.
Example
In the example, our book1.csv is a single column and does not have a header, so we choose CSV file, without header.
-
Click Next to continue.
Define schedule and options
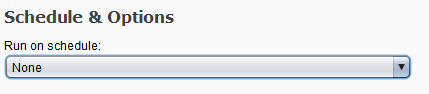
You should now be on the Schedule screen.

-
Under Schedule & Options, use the dropdown to select None for no schedule or Create New... to define schedule parameters.
Example
The example is for a one-time upload, so we will select None.
-
Click Map & Finish to complete the insert setup.
Map fields within the transformation
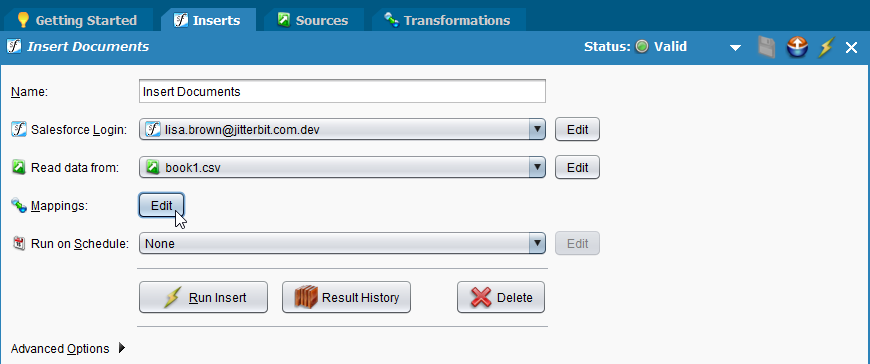
You should now see two tabs: Inserts and Transformations.
- The Inserts tab provides a summary of all the elements you just defined with the Insert Wizard. If you need to change any, you can do so here by clicking Edit next to the line you want to change.
- The Transformations tab shows the mapping of fields from the Source to Target. You will need to configure these before running the insert operation. The mapping process is described below.
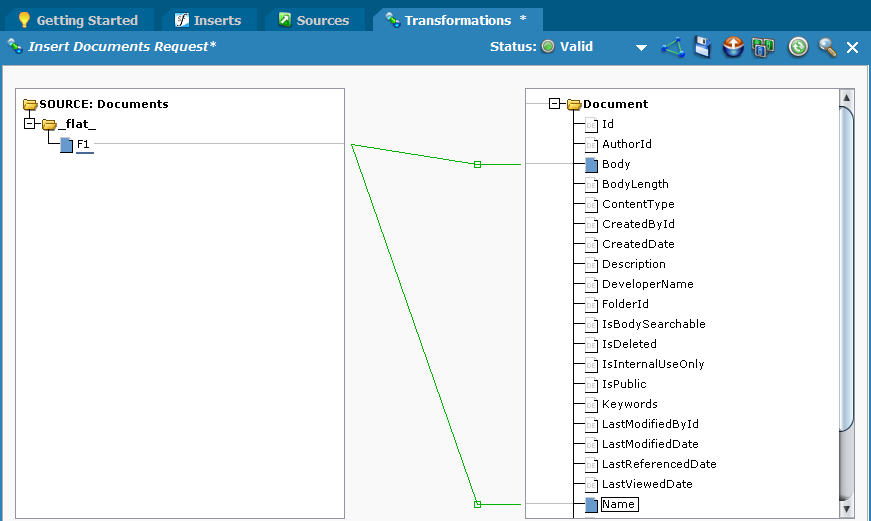
Within the Transformations tab, complete the steps below to map the fields from your Source (left side) to the Target (right side):
-
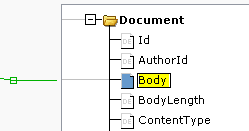
Click and drag the Source side file name field to both the Body field and the Name field in the Target side.
Example
In the example, our Source field is labeled F1 by default. If your source file contained column headers, you should use the field with the name of the file to map to the Target fields Body and Name.
-
Next, you need to define the specific field within Salesforce that you want to upload to.
Example
In the example, we want to upload our files to a Salesforce folder, so we need to define the ID of the specific folder we want to upload to.
-
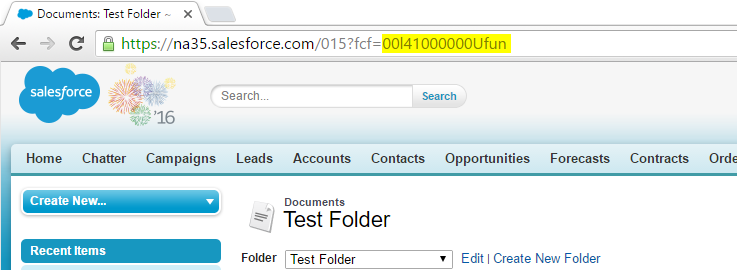
To find the specific folder ID, web browse to your desired target folder within Salesforce. The last 15 characters in the URL is the folder ID.
Note
This is a quick method to find the 15-character short ID. If you ever need the 18-character long ID, a query for finding this is used as an example in Running a Salesforce query in Data Loader.
-
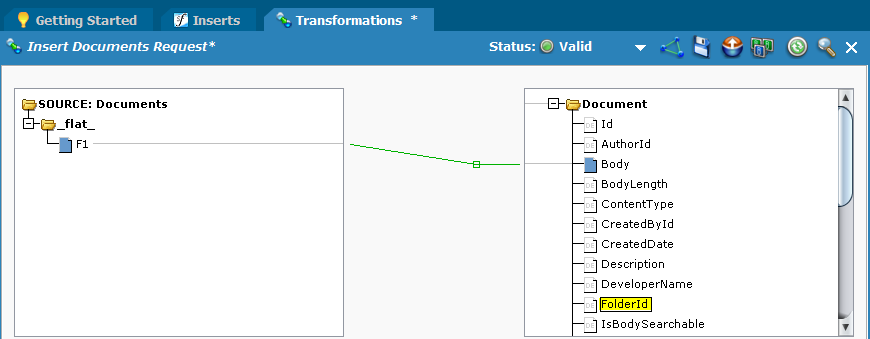
Double-click on the FolderId field on the Target side to open the Formula Builder window.
-
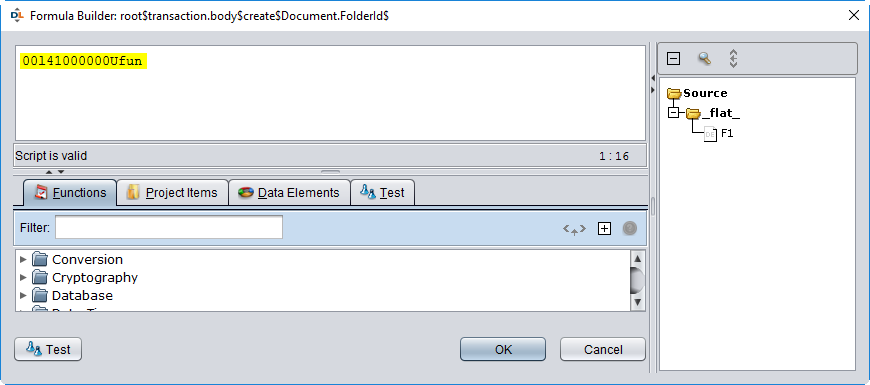
In the Formula Builder, clear the script from the formula box and input the specific folder ID obtained above. Then click OK.
-
-
Optional: If you included other columns in your source CSV file, you should also map or define these fields at this time.
-
When complete, click Finish to save the Transformation.
Define source of the upload
Next, you will need to define where the files you want to upload are located. To do this, you need to create a new Connection.
-
In the Project Explorer under Connections, right-click on Sources and select New Source.
-
In the popup, select the type of location where the files you want to upload are, then click Continue.
Example
In the example, we chose Local File because the files are on the local machine.
-
Name your source and fill out the fields for your source location.
Example
In the example, we've specified the local file path where our files are located. In the Get Files box, we've used wildcards in order to get all files in the source location.

Adjust mapping to include source
With the source of the files now defined, there are some adjustments to make within the mapping.
-
Go to the Inserts tab or reopen the tab by double-clicking your insert in the Project Explorer. Next to Mappings, click the Edit button.
-
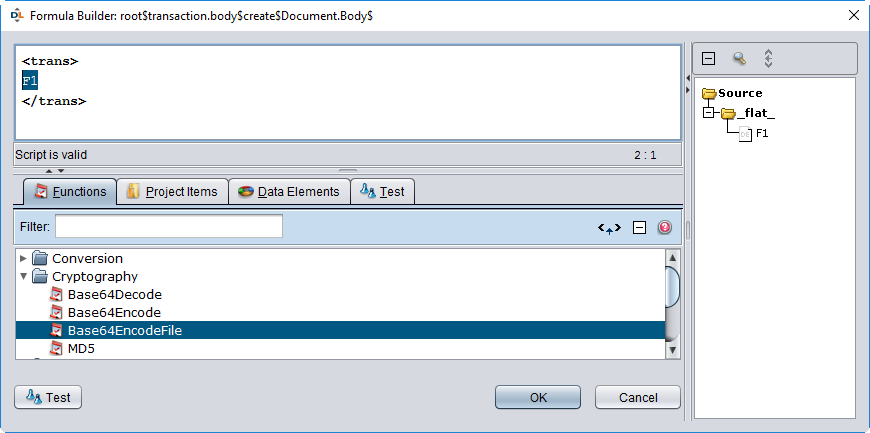
Double-click on the Body field on the Target side to open the Formula Builder.
-
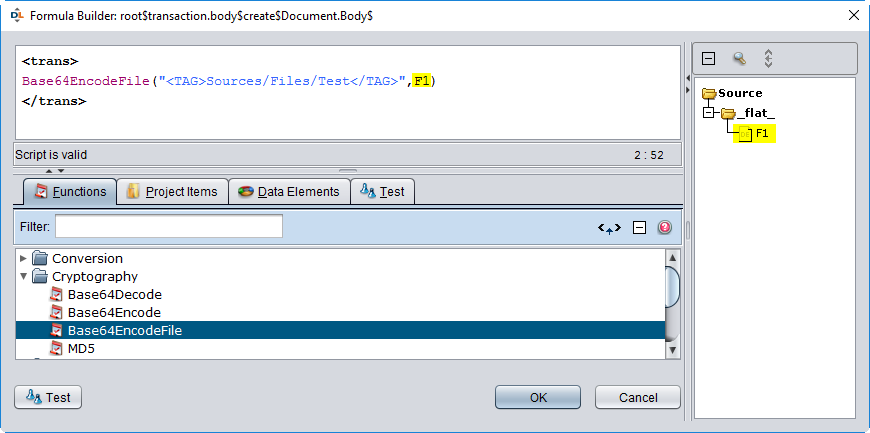
Highlight the data inside the \<trans> and \</trans>. Then within the Functions tab below, expand Cryptography and double-click on Base64EncodeFile.
Note
Base64EncodeFile allows us to take binary data and convert it to ASCII for submission to Salesforce.
-
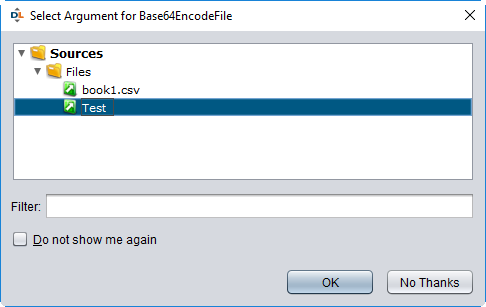
In the popup window, select the Source you defined with the location of the files you want to upload and click OK.
Example
In the example, we named our Source "Test," so this is the one we choose. This is not the CSV file with the names of the files.
-
The script should now display the specific Source you defined. Now highlight the "..." within the script and double-click the field where the file name is located. Then click OK.
Example
In the example, the default name was F1, so this is the field we use.
Run the operation
The Insert operation should now be fully set up and ready to run.
-
Return to the Inserts tab and click Run Insert.

-
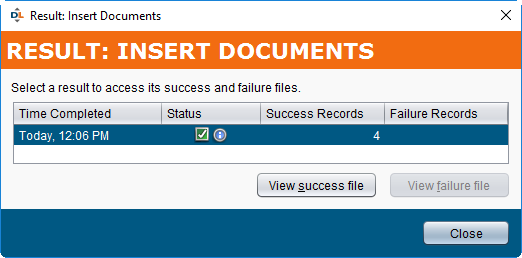
If the operation is successful, you should see a popup summarizing the results. You can click View success file to see more detail.
-
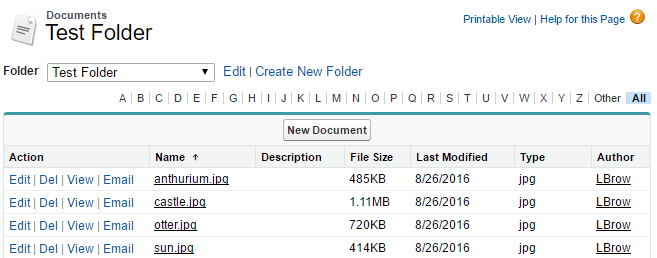
You can also browse to the target Salesforce folder to see the files you have uploaded.
For additional support, go to Jitterbit Community for Cloud Data Loader.