Design Studio quick start guide
Introduction
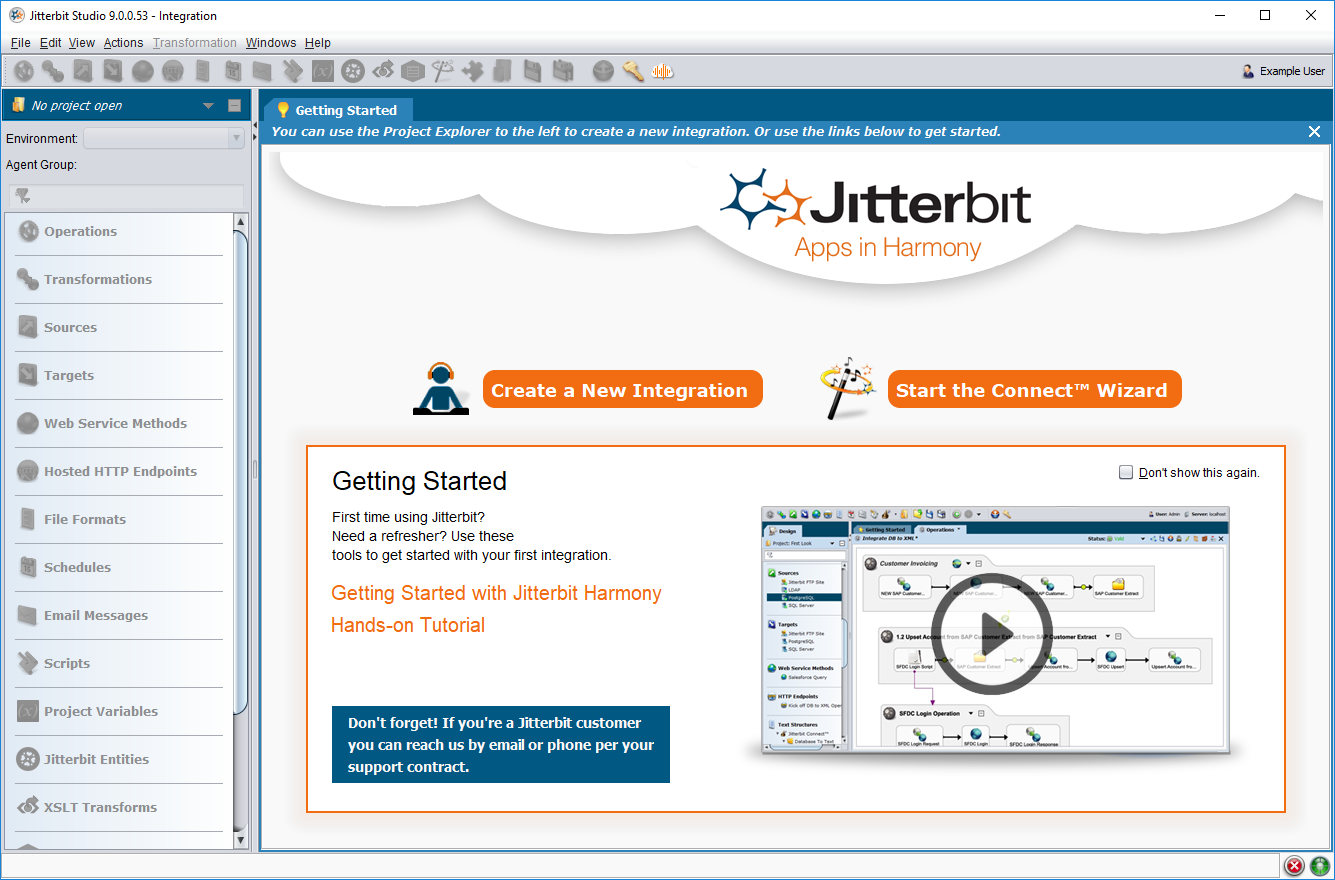
This guide is intended for new users of Design Studio, Jitterbit's desktop application where you can design, test, and deploy integration projects. This guide walks you through designing your first Design Studio project.
If you are not using Design Studio and are instead using Cloud Studio, our web-based project design application, see the Cloud Studio quick start guide. Contact your Customer Success Manager to determine which Studio application best suits your needs for new projects, or to schedule a Readiness Assessment Check for moving existing Design Studio projects to Cloud Studio.
For this guide, we start with the process of importing an existing project and running operations. Then we show how to design a project from scratch, including creating a project and configuring two of the same operations already provided in the sample project.
To follow along, download the sample project Starter Pack Jitterpak (.JPK).
Note
Completing the walkthrough steps requires a Salesforce account. We recommend using a Salesforce sandbox instance or signing up for a free Developer Edition.
The two parts of this walkthrough cover these tasks in Design Studio:
Part 1: Get started with a sample project
This part covers importing a Jitterpak, checking for existing data in Salesforce, and then upserting customer data from a variety of different sources (CSV, JSON, database, XML) to Salesforce. After each upsert, we can check Salesforce to see that data has been created.
Import a Jitterpak
Import the sample project Starter Pack Jitterpak (.JPK).
-
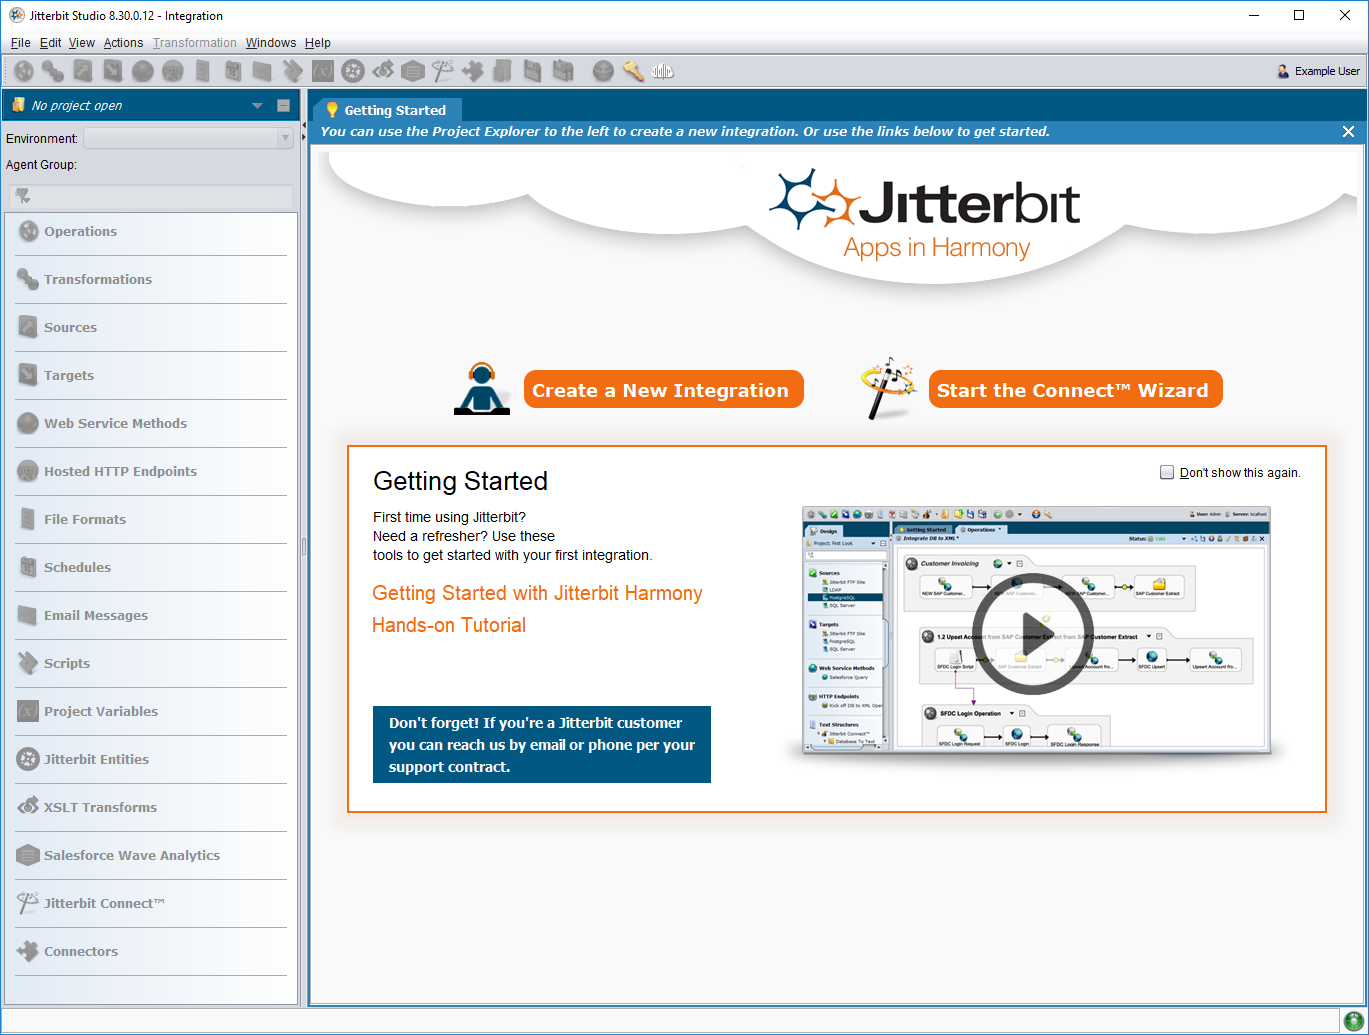
Open the Design Studio application.
-
Import the example project Starter Pack Jitterpak (.JPK). To do this:
-
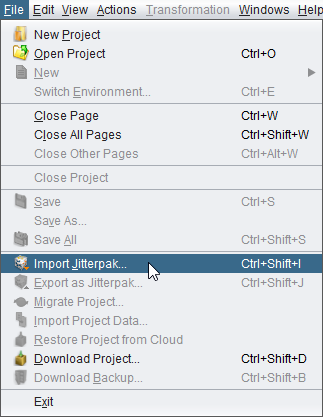
Go to File > Import Jitterpak:
-
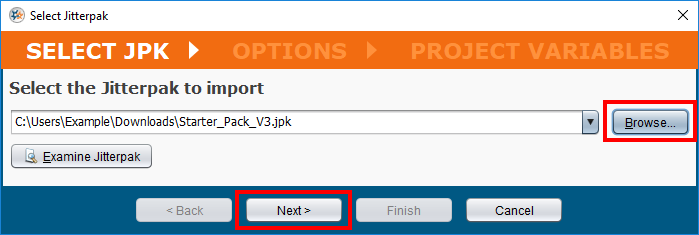
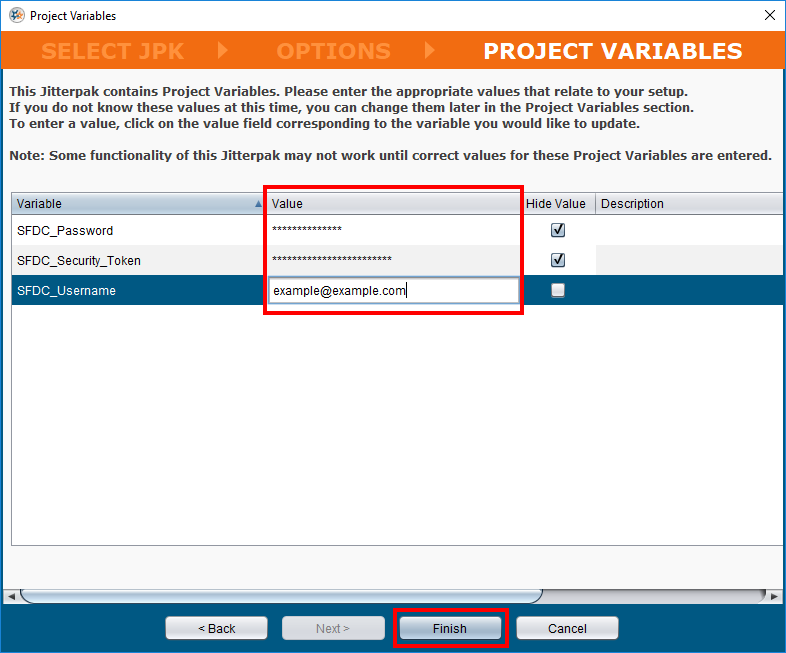
In the Select Jitterpak window, complete each step as follows:
-
Select JPK: Browse to or enter the location of the Jitterpak. Then click Next.
-
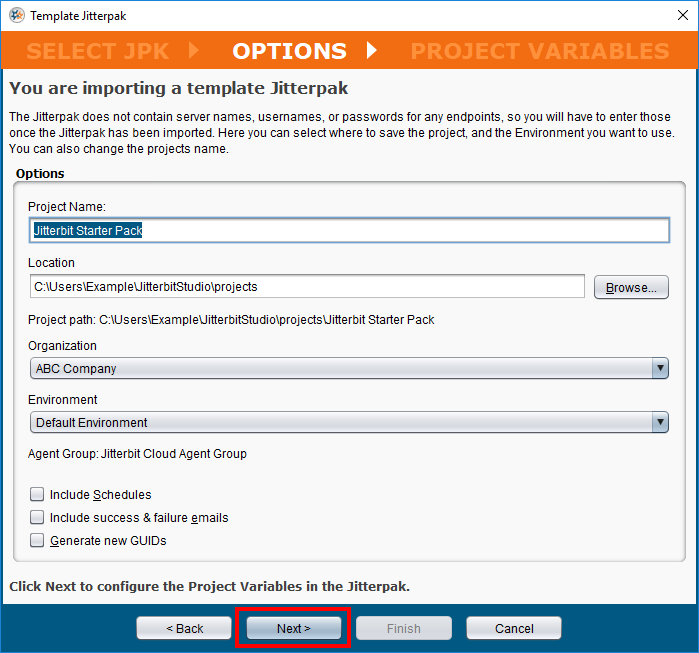
Options: To accept all defaults, click Next.
-
Project Variables: Provide credentials for your Salesforce account by replacing the Value for each of the Variables. Then click Finish.
-
-
-
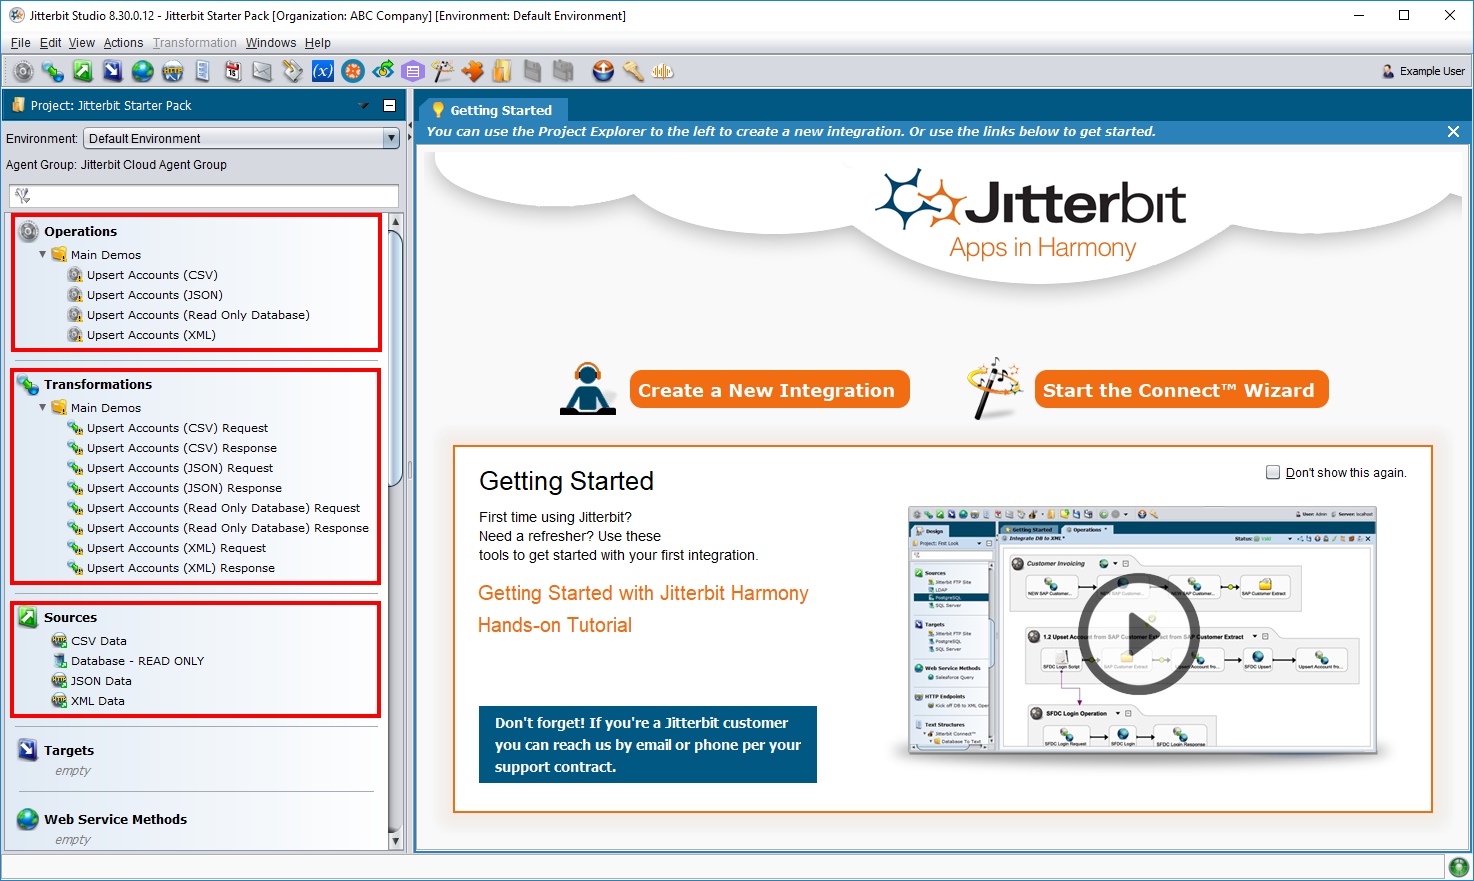
Check that project items have been imported.
In the left panel of Design Studio, you should see project items under the headings for Operations, Transformations, Sources, Web Service Methods, File Formats, Project Variables, and Jitterbit Connect > Salesforce.
Check existing data
Check for the presence of existing accounts created today in Salesforce.
-
Log in to your Salesforce instance (outside of Design Studio).
-
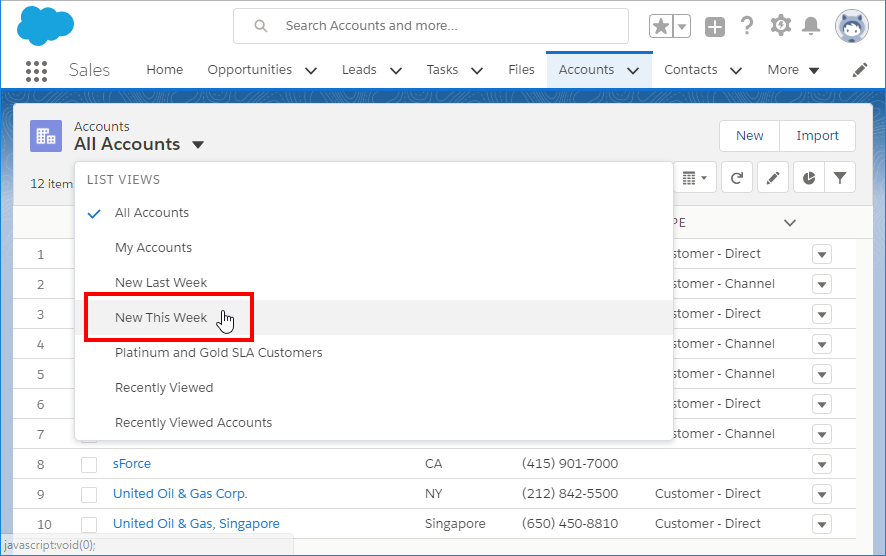
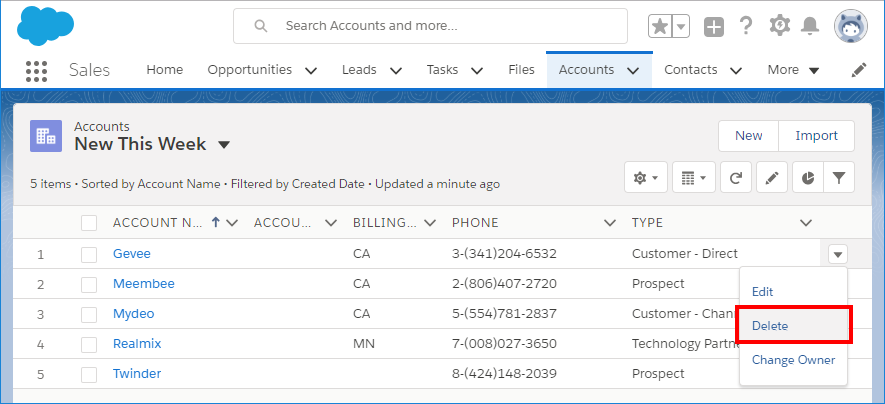
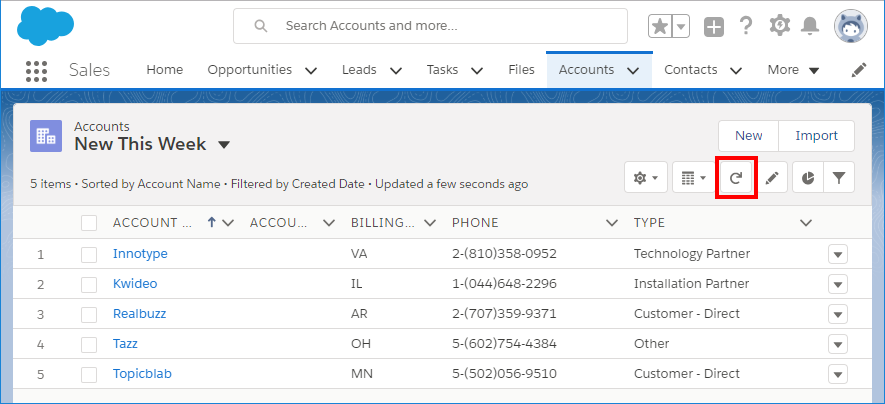
Go to the Accounts object and access the view New This Week (in the Lightning Experience) or Accounts New Today.
-
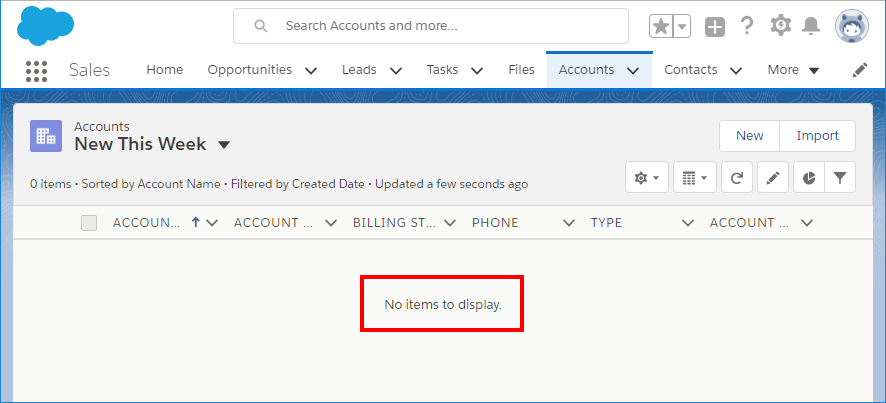
No records should be returned. Leave this screen open to return to later in this process.
Execute operations and check new data
The operations included with the imported Jitterpak are used to upsert customer data from a variety of different sources to a Salesforce instance. Sources include CSV, JSON, database, and XML. After each upsert, you can also check Salesforce to see that data has been created.
Upsert CSV to Salesforce
This operation upserts customer data from a CSV file to Salesforce to create new account records in Salesforce. To run this operation and check if it was successful:
-
In the left panel, double-click on the operation called "Upsert Accounts (CSV)" to open it in the design workspace.
-
Click on the lightning bolt icon
 in the upper right to execute the operation.
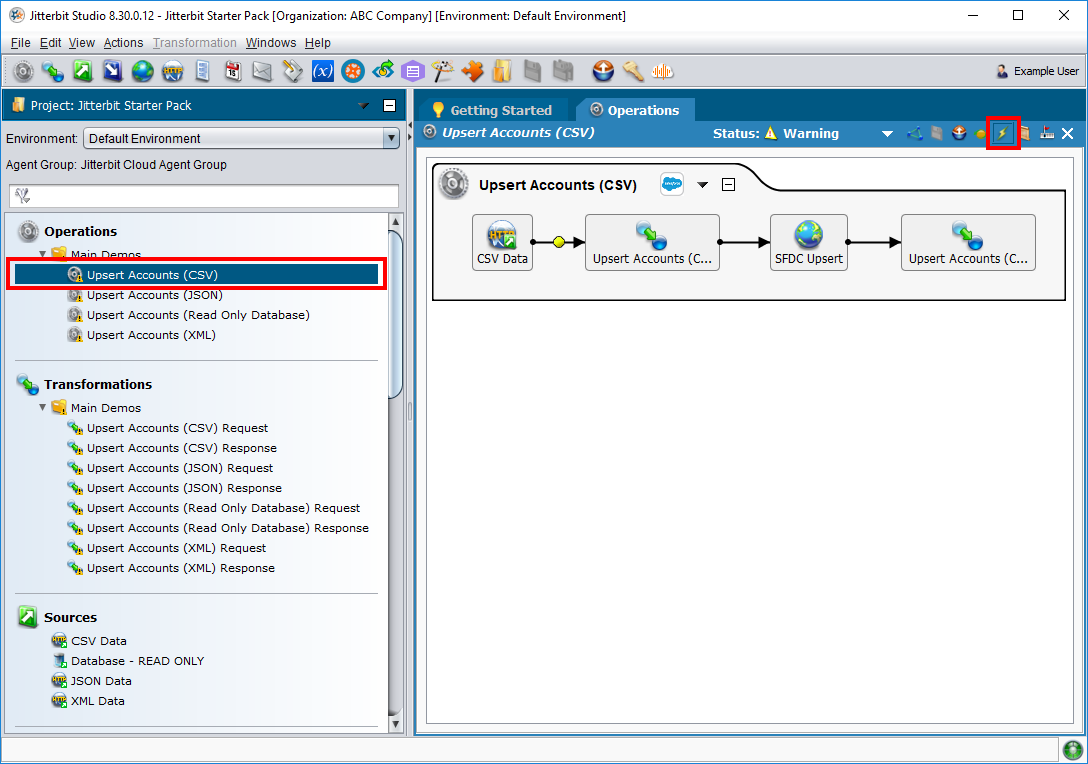
-
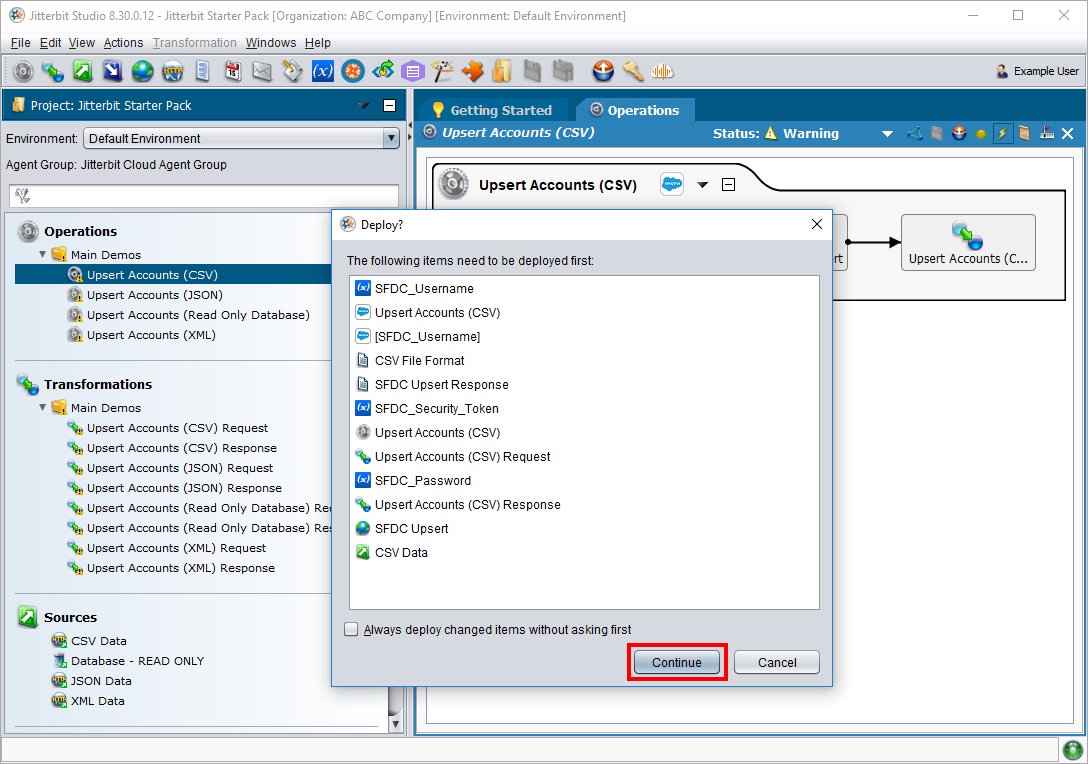
If prompted, click Continue to deploy project items required for the operation to execute.
-
Check the Status of the operation at the bottom of the design workspace. Double-click the status icons
 to show the operation log message, which should indicate that the operation completed successfully with information.
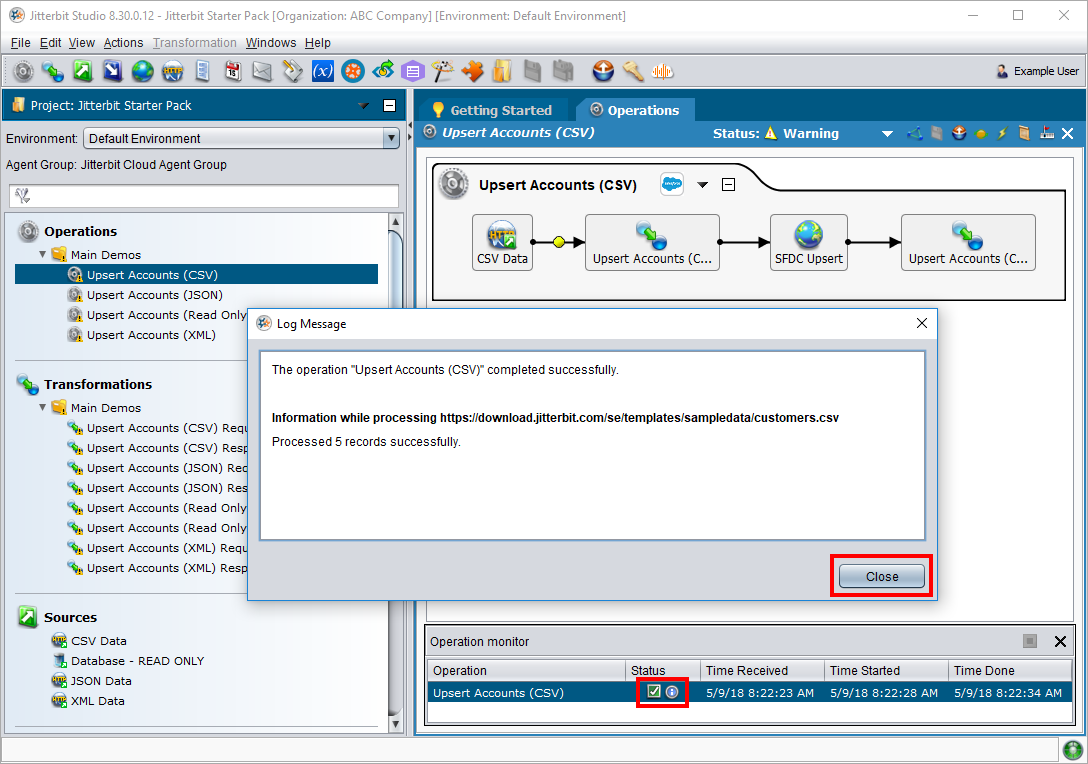
-
Check Salesforce to see that data has been created, then delete the newly created data. To do this:
-
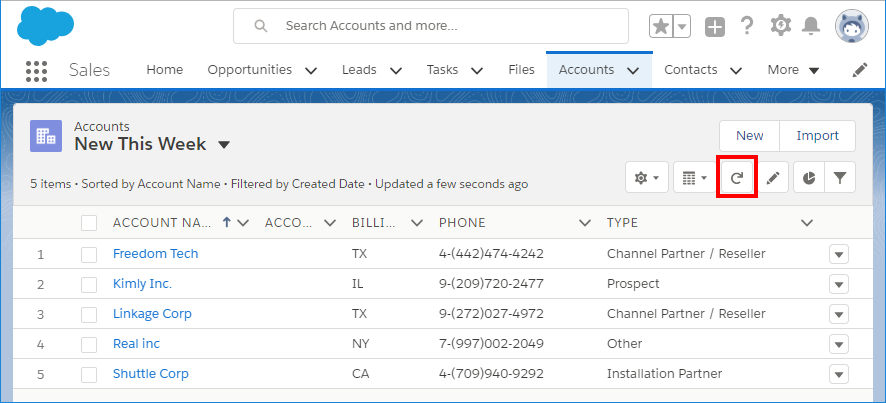
Refresh the Salesforce view left open from the previous step Check existing data. Five records should be returned (uploaded from the CSV file).
-
Delete the new records to clean up your Salesforce instance to its pre-existing state. If continuing to the next step in this guide, leave this screen open to return to later.

-
Upsert JSON to Salesforce
This operation upserts customer data from a JSON file to Salesforce to create new account records in Salesforce. To run this operation and check if it was successful:
-
In the left panel, double-click on the operation called "Upsert Accounts (JSON)" to open it in the design workspace.
-
Click on the lightning bolt icon
in the upper right to execute the operation.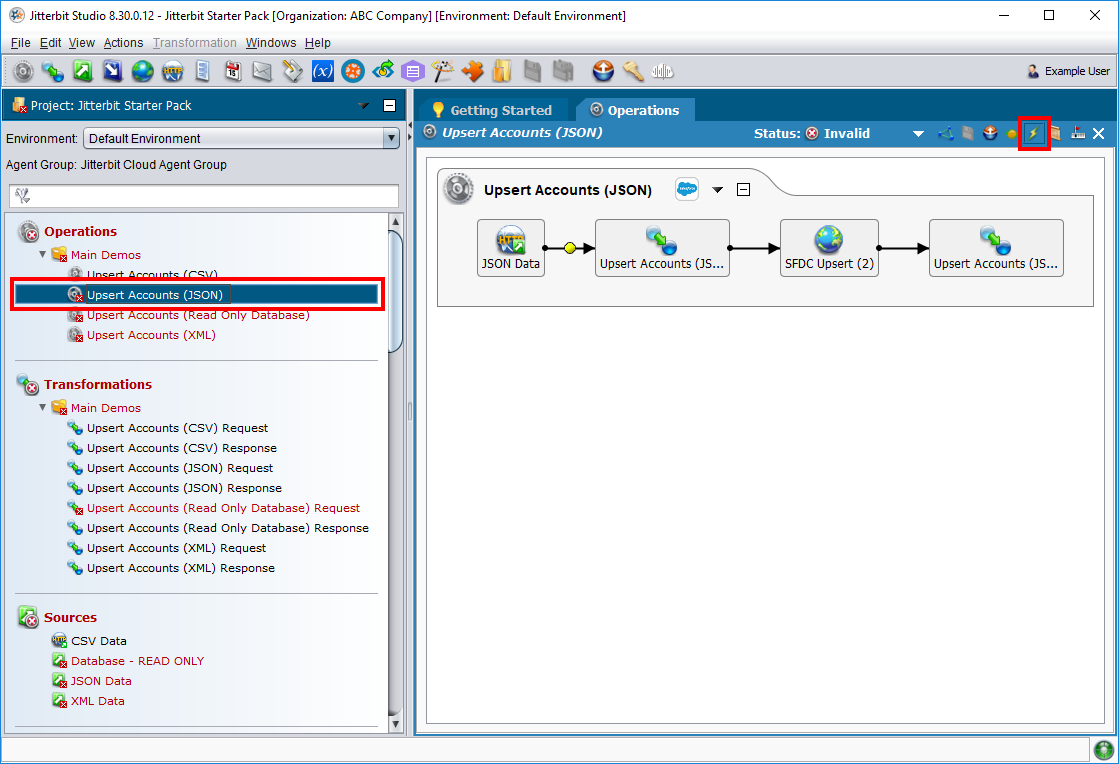
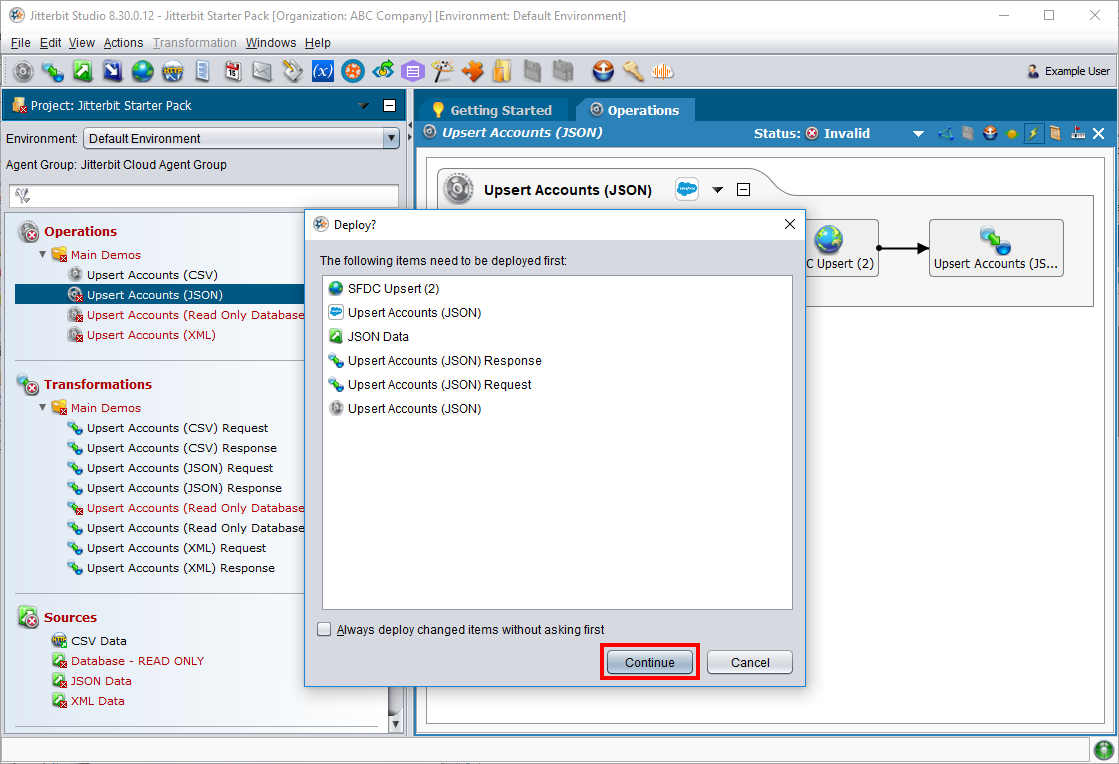
-
If prompted, click Continue to deploy project items required for the operation to execute.
-
Check the Status of the operation at the bottom of the design workspace. Double-click the status icon
 to show the operation log message, which should indicate that the operation completed successfully.
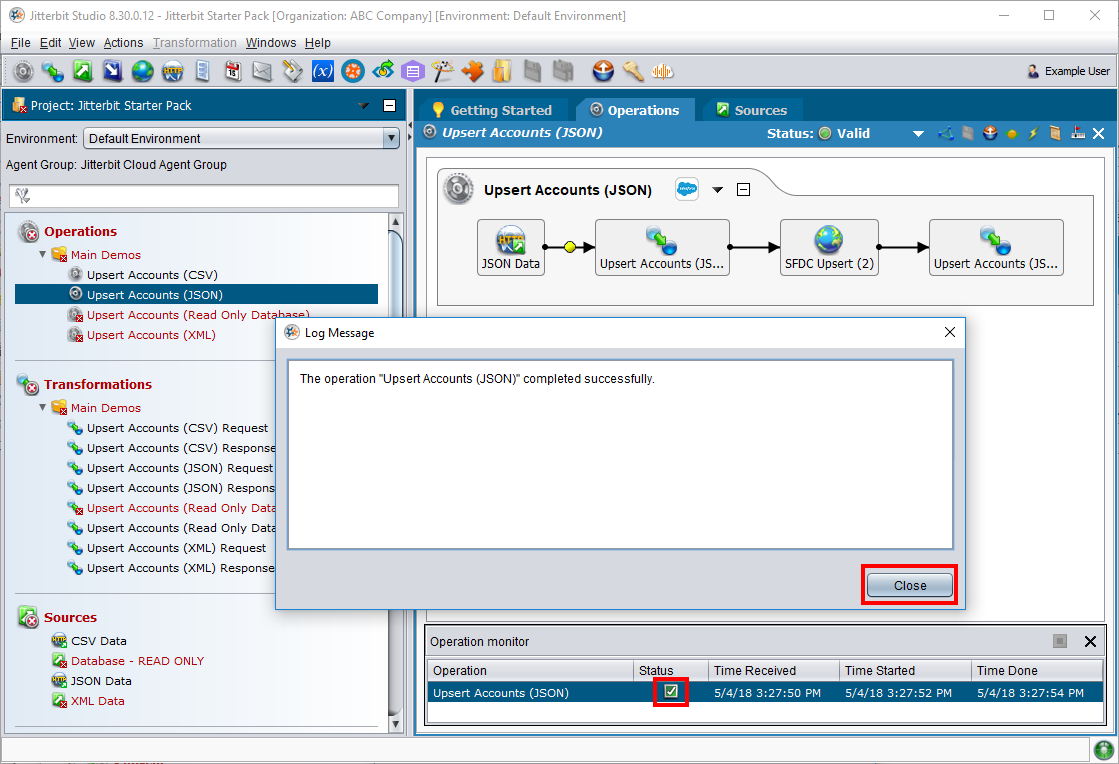
-
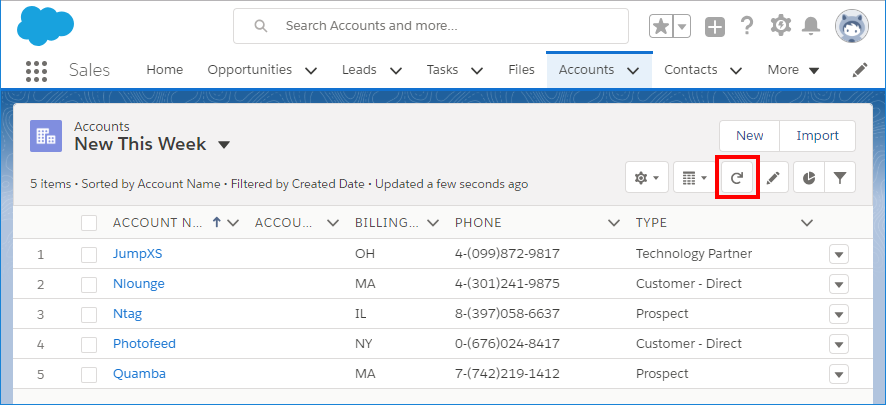
Check Salesforce to see that data has been created, then delete the newly created data. To do this:
-
Refresh the Salesforce view left open from the previous step. Five records should be returned (uploaded from the JSON file).
-
Delete the new records to clean up your Salesforce instance to its pre-existing state. If continuing to the next step in this guide, leave this screen open to return to later.

-
Upsert database to Salesforce
This operation upserts customer data from a database to Salesforce to create new account records in Salesforce. To run this operation and check if it was successful:
-
In the left panel, double-click on the operation called "Upsert Accounts (Read-Only Database)" to open it in the design workspace.
-
Click on the lightning bolt icon
in the upper right to execute the operation.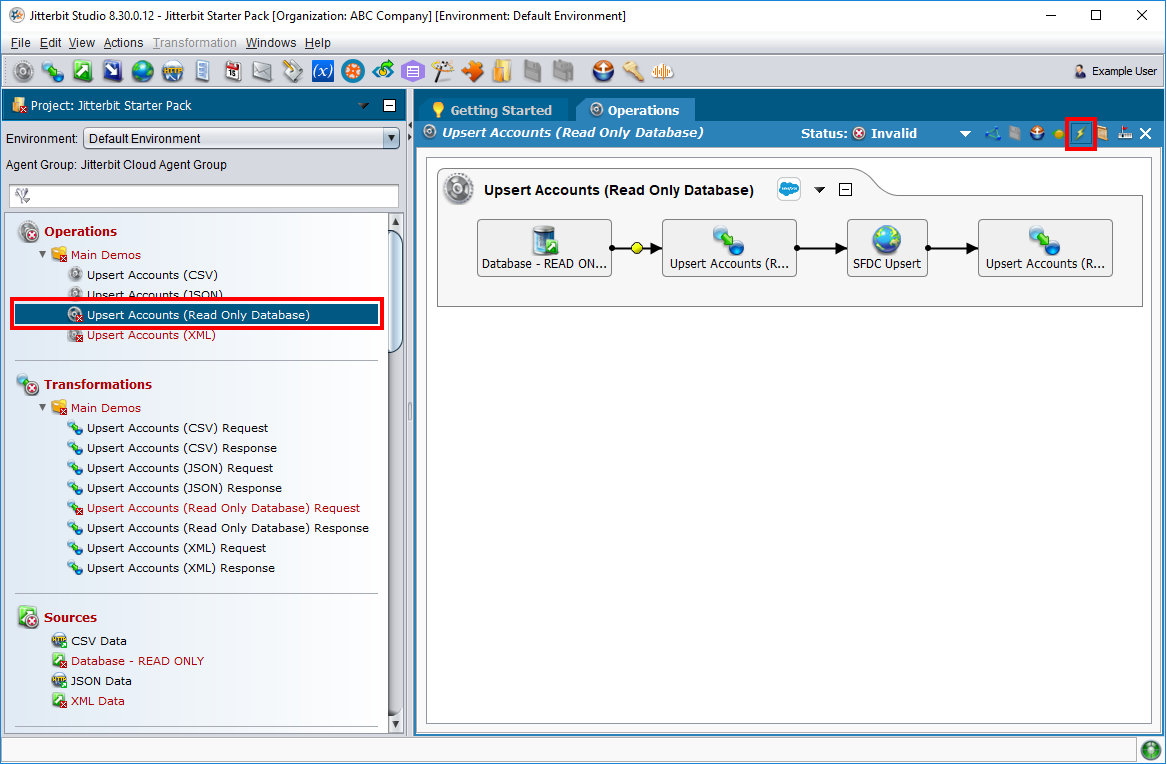
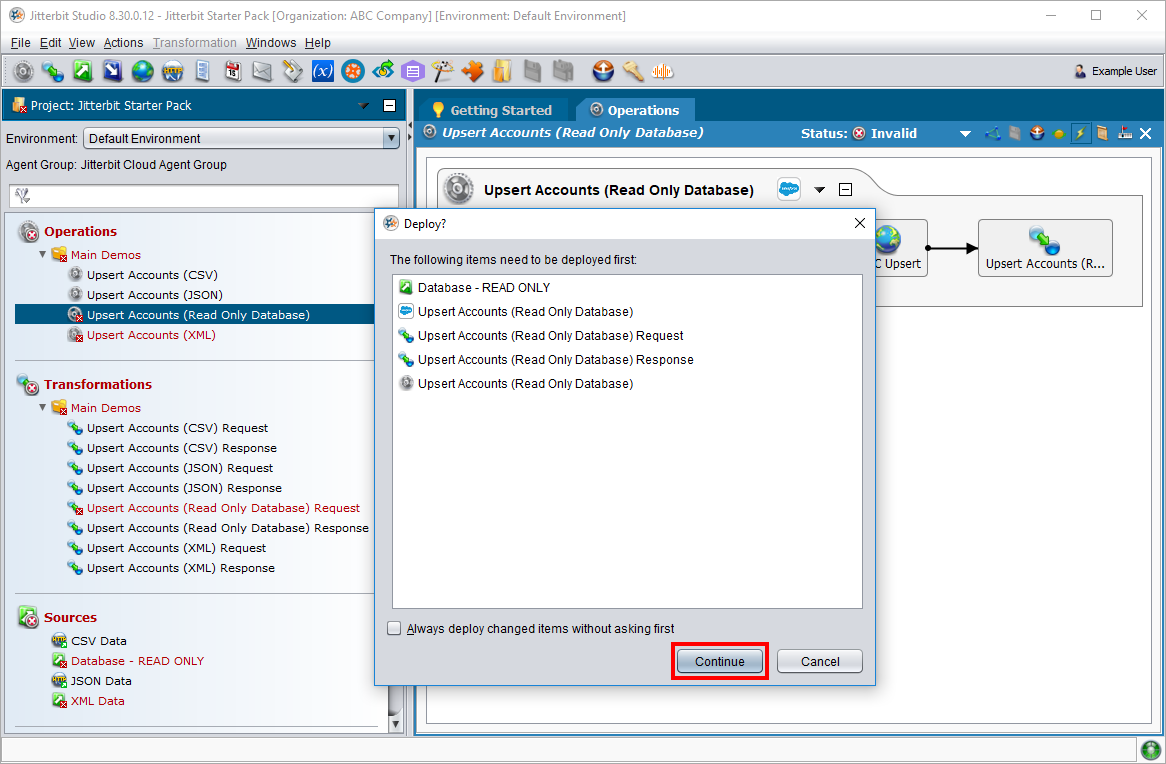
-
If prompted, click Continue to deploy project items required for the operation to execute.
-
Check the Status of the operation at the bottom of the design workspace. Double-click the status icons
to show the operation log message, which should indicate that the operation completed successfully with information.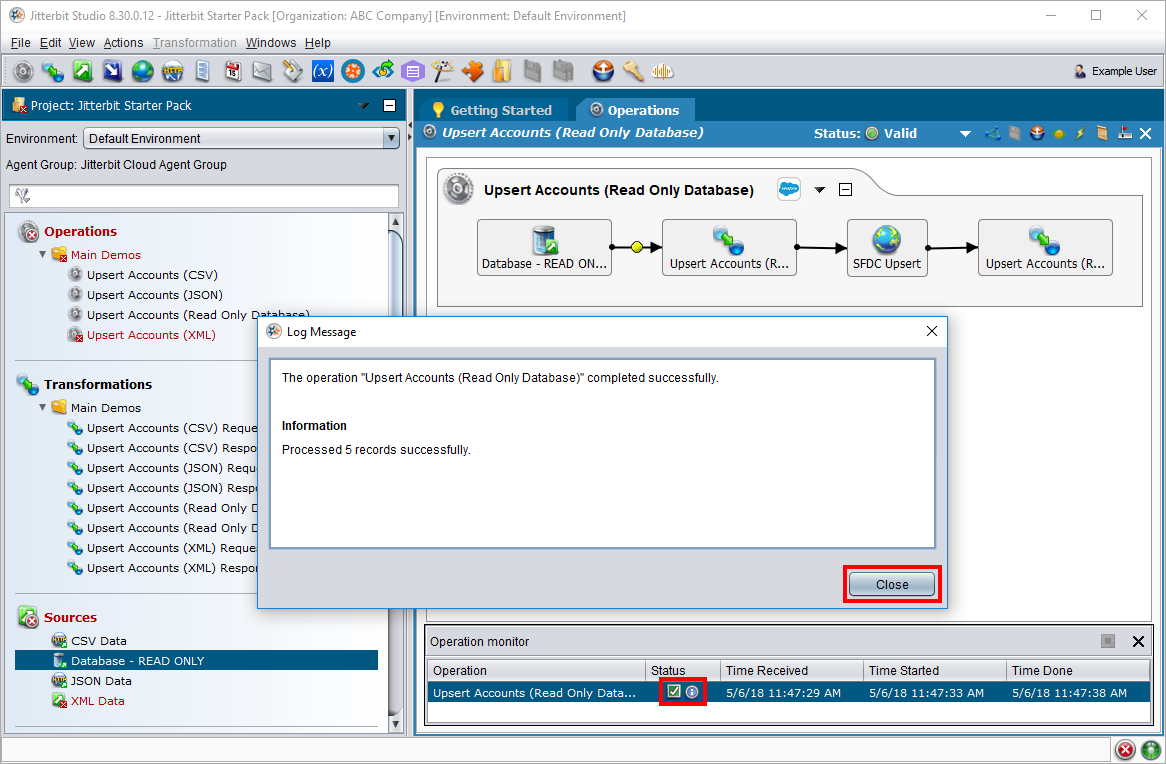
-
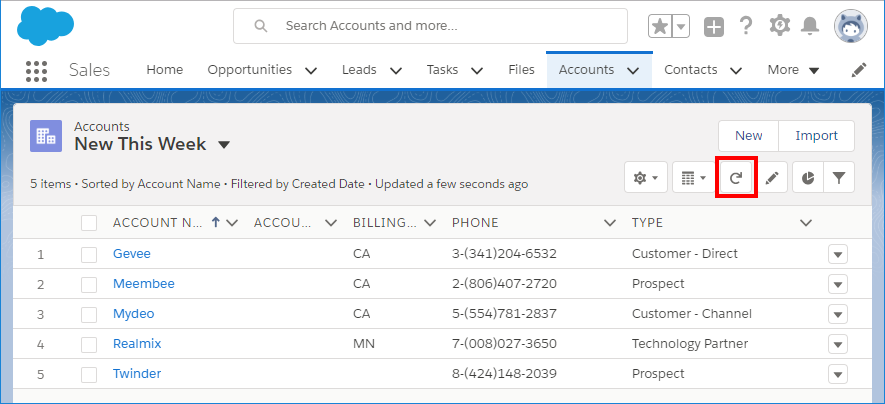
Check Salesforce to see that data has been created, then delete the newly created data. To do this:
-
Refresh the Salesforce view left open from the previous step. Five records should be returned (uploaded from the database).
-
Delete the new records to clean up your Salesforce instance to its pre-existing state. If continuing to the next step in this guide, leave this screen open to return to later.
-
Upsert XML to Salesforce
This operation upserts customer data from an XML file to Salesforce to create new account records in Salesforce. To run this operation and check if it was successful:
-
In the left panel, double-click on the operation called "Upsert Accounts (XML)" to open it in the design workspace.
-
Click on the lightning bolt icon
in the upper right to execute the operation.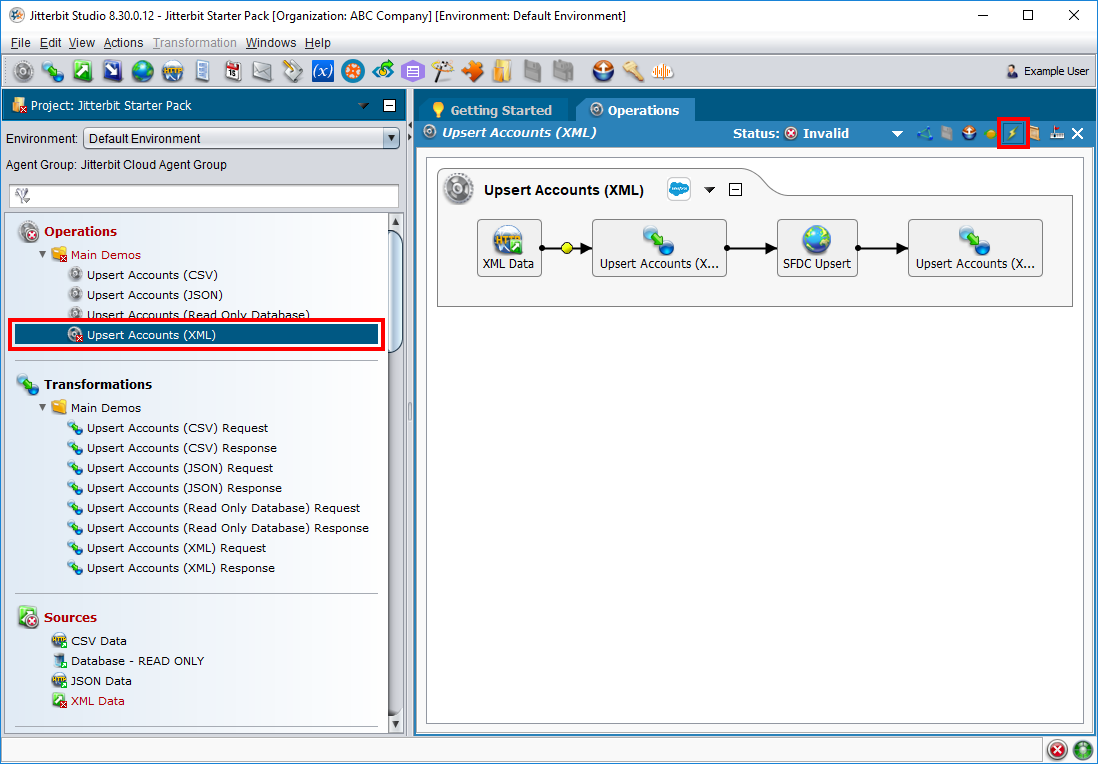
-
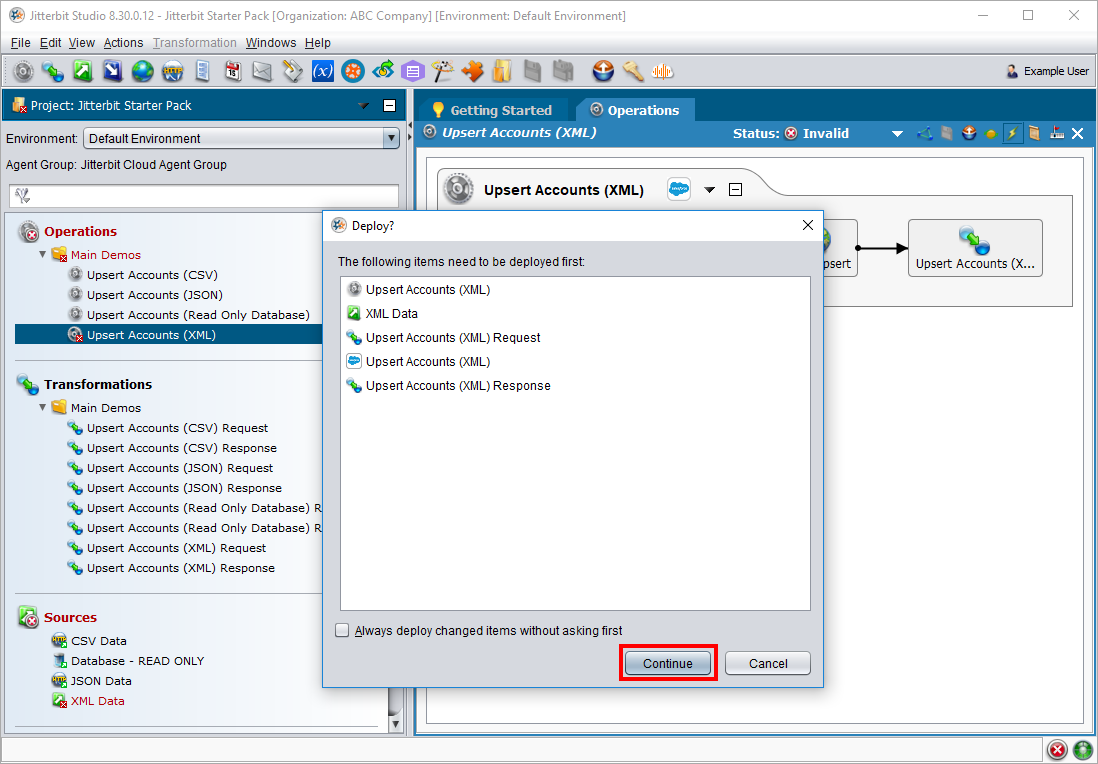
If prompted, click Continue to deploy project items required for the operation to execute.
-
Check the Status of the operation at the bottom of the design workspace. Double-click the status icon
to show the operation log message, which should indicate that the operation completed successfully.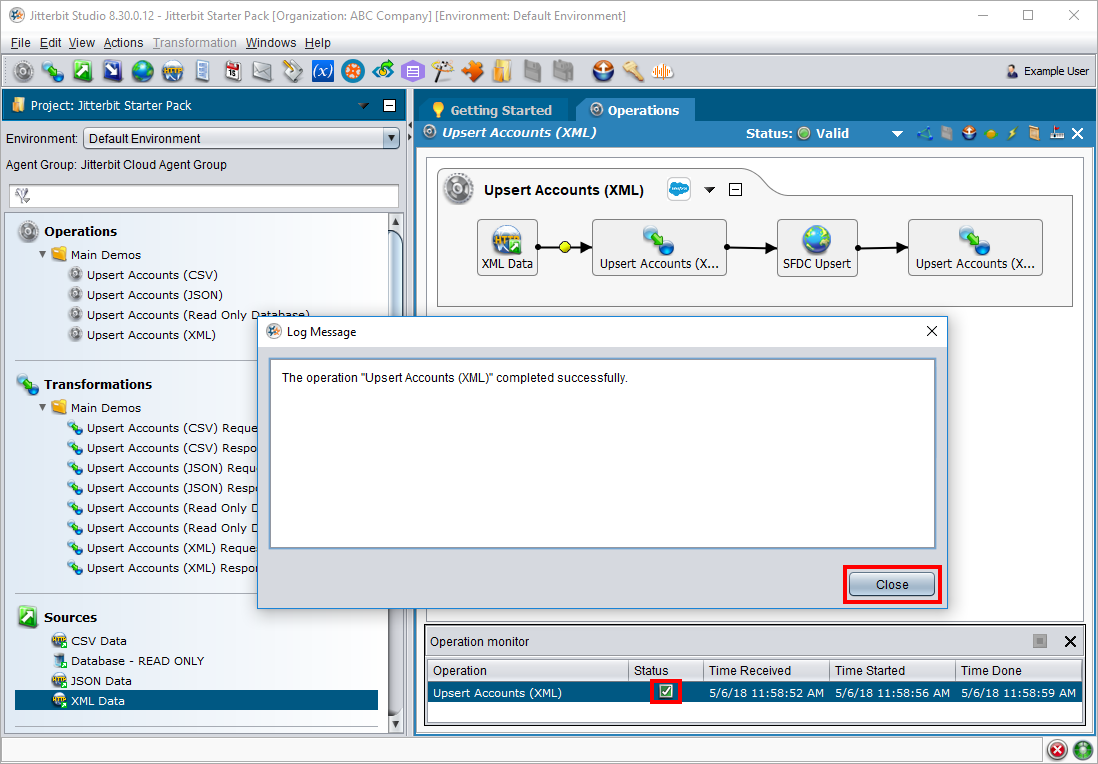
-
Check Salesforce to see that data has been created, then delete the newly created data. To do this:
-
Refresh the Salesforce view left open from the previous step. Five records should be returned (uploaded from the XML file).
-
Delete the new records to clean up your Salesforce instance to its pre-existing state. If continuing to the next step in this guide, leave this screen open to return to later.

-
Tips
Learn more about the operations you have just executed by taking a look at how the transformation and project variables work.
Transformations
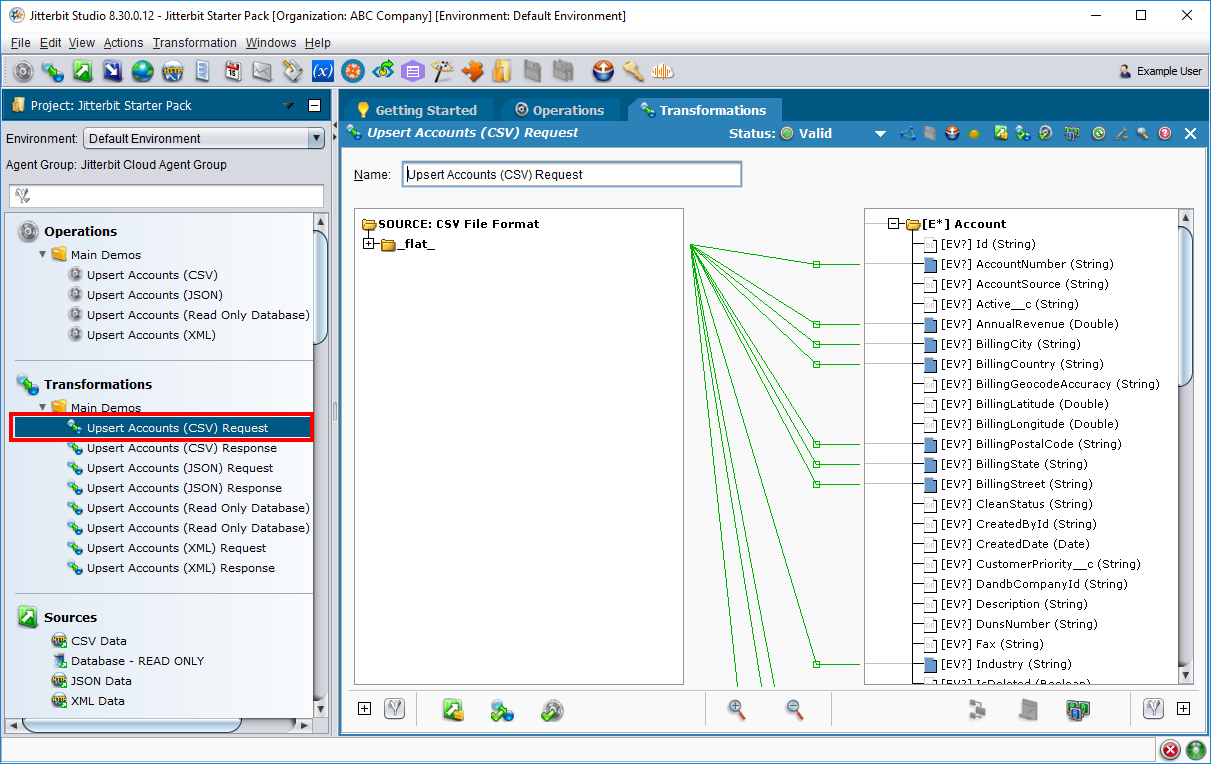
Double-click on the transformation called "Upsert Accounts (CSV) Request" to open it in the design workspace. Within the transformation, the left side represents the structure of the source, and the right side represents the structure of the target. The source fields listed here, ID, Company, Street, City, State, Country, Phone, Zipcode, Industry, Type, and Annual_Revenue, are mapped from the CSV file to fields within the target Account object in Salesforce.
Project variables
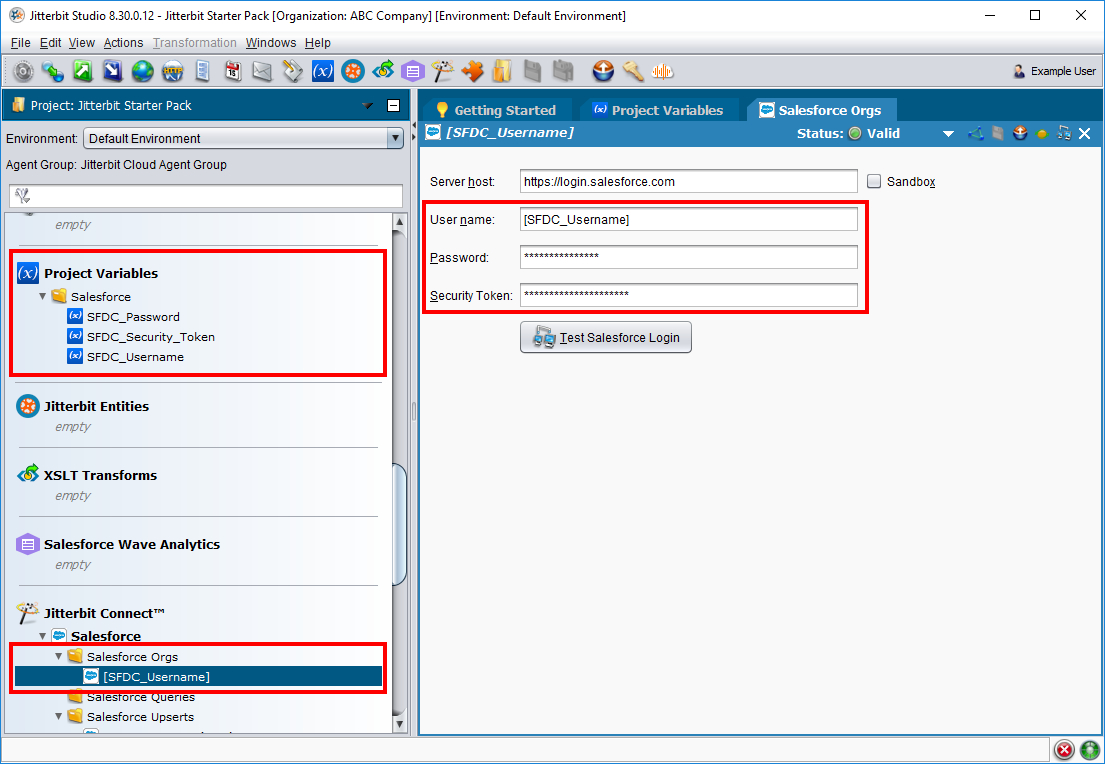
During importing of the sample Jitterpak, there were three project variables set as part of your project: SFDC_Username, SFDC_Password, and SFDC_Security_Token. These project variables allow the credentials of the Salesforce org included within this Jitterpak to be changed without changing the configuration of the Salesforce org itself.
If you or another user has changes to these credentials in the future, you can change them by updating the value of the project variable under the Project Variables section in the left panel. The values will automatically take effect under Jitterbit Connect > Salesforce > Salesforce Orgs in your org.
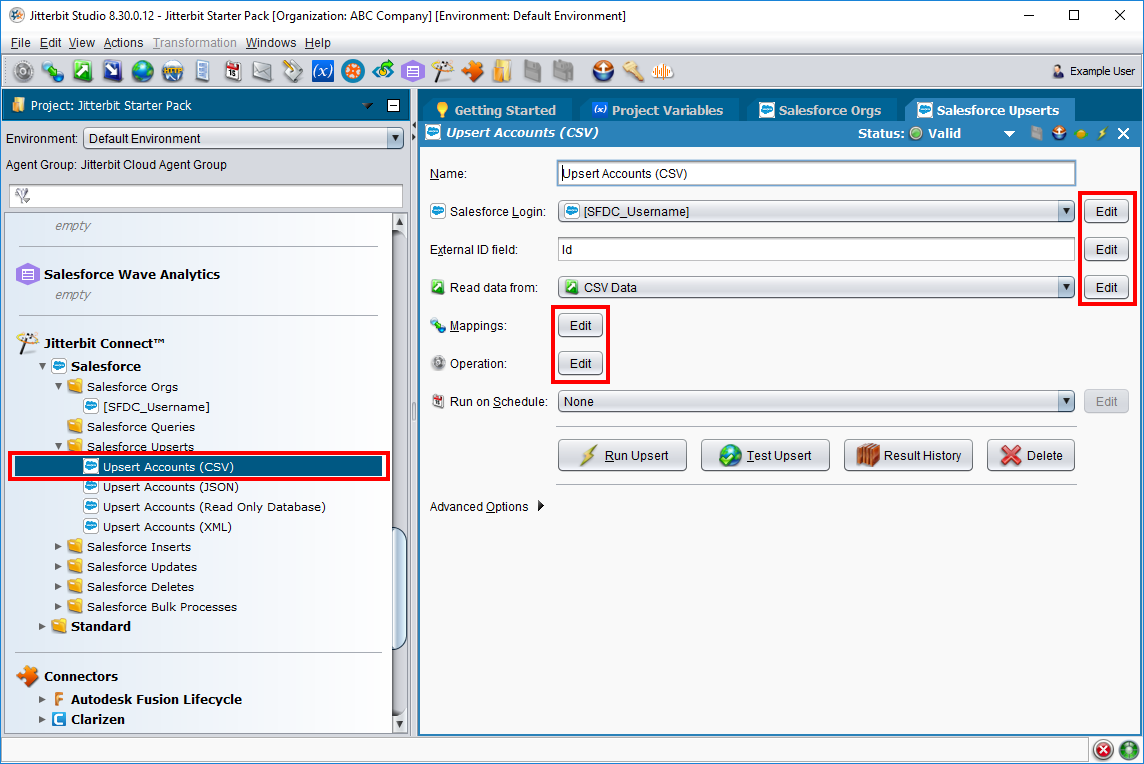
Another place within the sample project where the Salesforce org is used is within the upsert operations themselves. Under Jitterbit Connect > Salesforce > Salesforce Upserts for each operation, you can see and edit all the parameters used to configure the operation.
Part 2: Design a new project
The previous part showed how to import and run operations using Design Studio. This part covers how to create a project and configure two of the same operations already provided in the sample project: (1) upserting customer data from a database to Salesforce, and (2) upserting customer data from a JSON file to Salesforce.
Create a project
First, create a new project using Design Studio.
-
Open the Design Studio application.
-
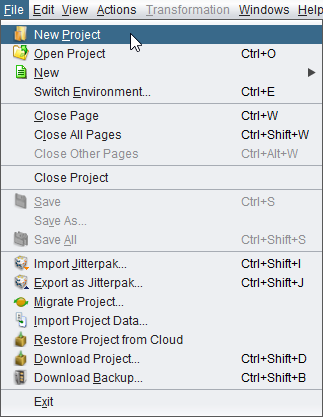
Go to File > New Project:
-
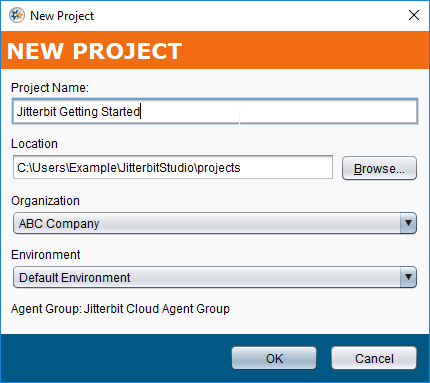
In the New Project window, in the Project Name field, enter "Jitterbit Get Started." You can leave the other fields as defaults.
-
Click OK to create your project and open the design workspace.
Create operations
After your new project is created, these steps show how to create sample operations for upserting customer data from a database to Salesforce, and upserting customer data from a JSON file to Salesforce.
Upsert database to Salesforce
This operation upserts customer data from a database to Salesforce to create new account records in Salesforce. To create this operation:
-
Define the source of the data. To do this:
-
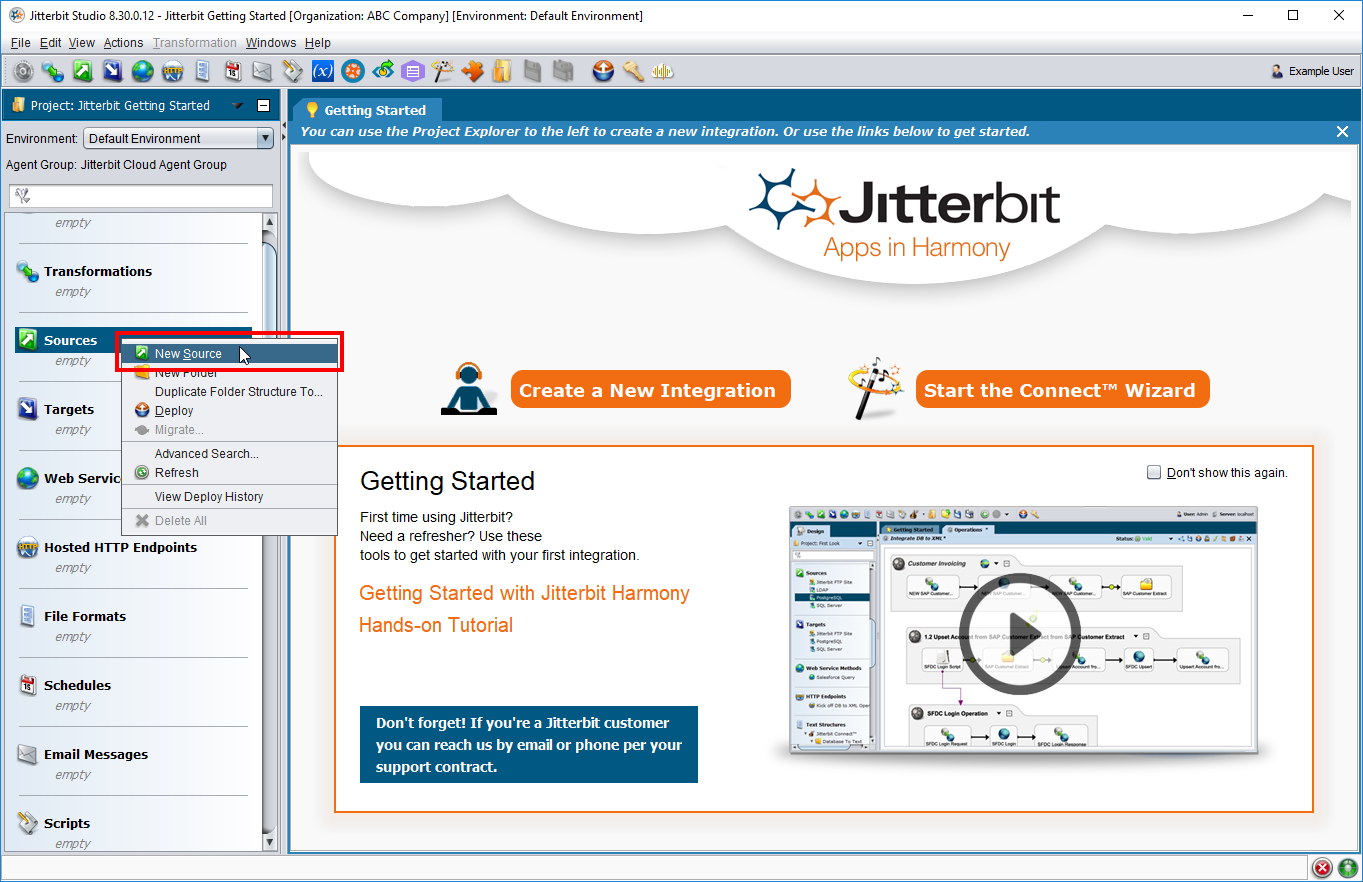
In the left panel, right-click on Sources and select New Source.
-
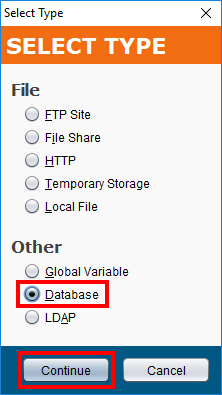
In the Select Type window, select Database. Then click Continue.
-
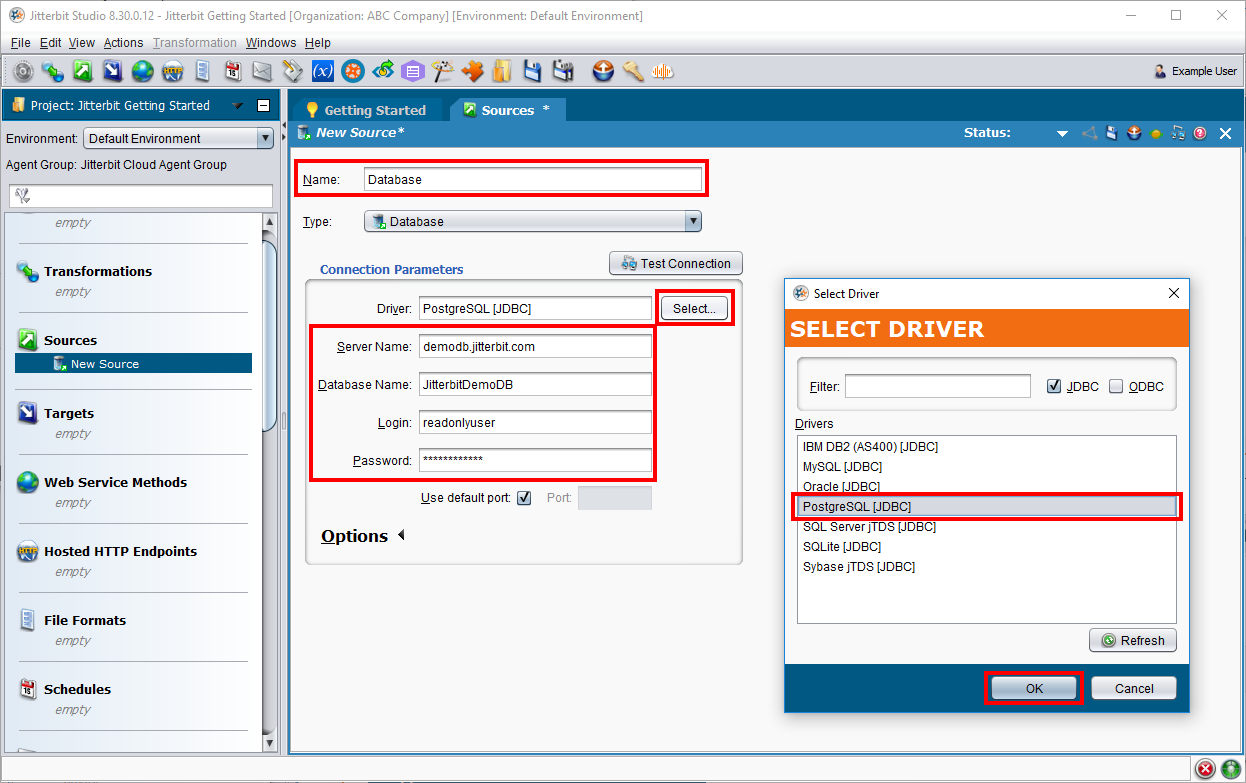
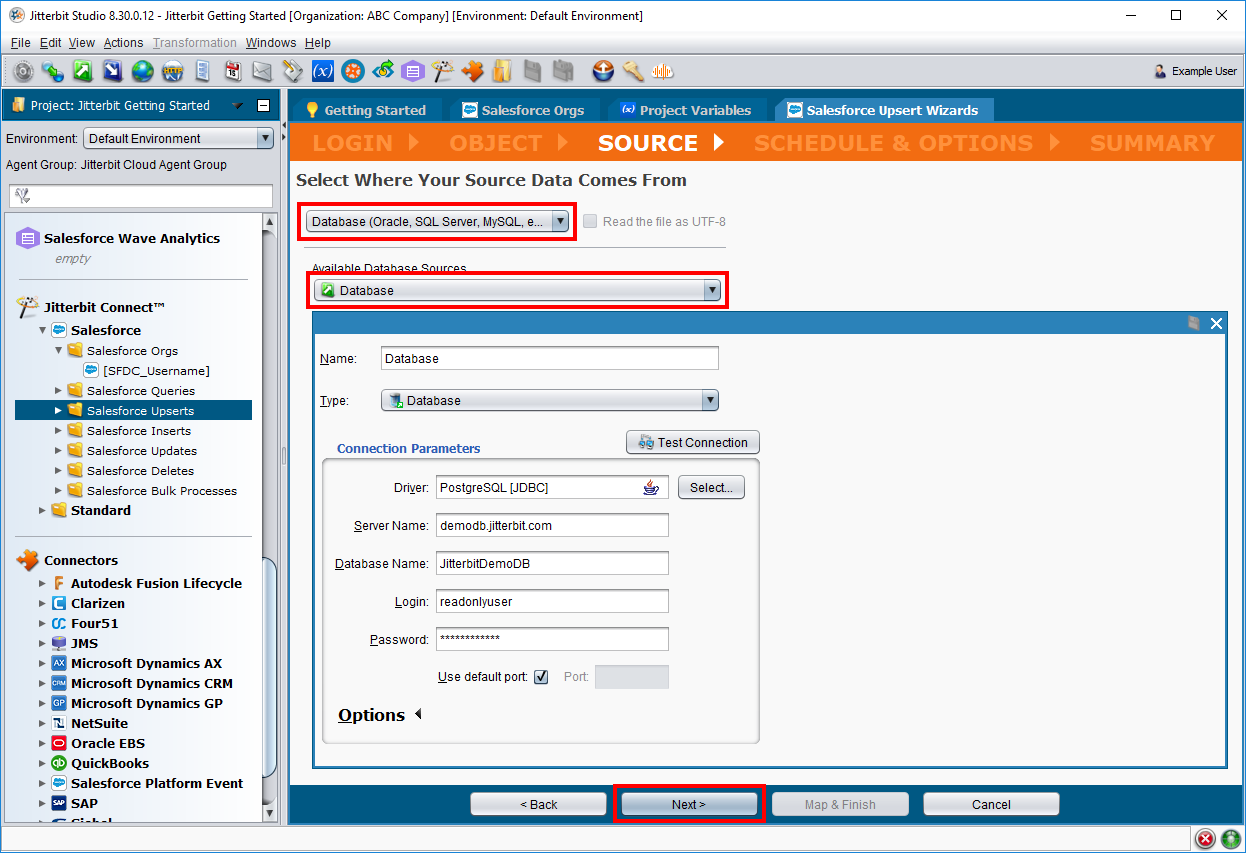
Fill out the New Source configuration screen as follows, using information from a PostgreSQL database hosted by Jitterbit:
- Name: Enter Database.
- Connection Parameters
- Driver: Click the Select button to open the Select Driver window. In this window, select the PostgreSQL [JDBC] driver, then click OK to continue.
- Server Name: Enter demodb.jitterbit.com.
- Database Name: Enter JitterbitDemoDB.
- Login: Enter readonlyuser.
- Password: Enter readonlyuser.
-
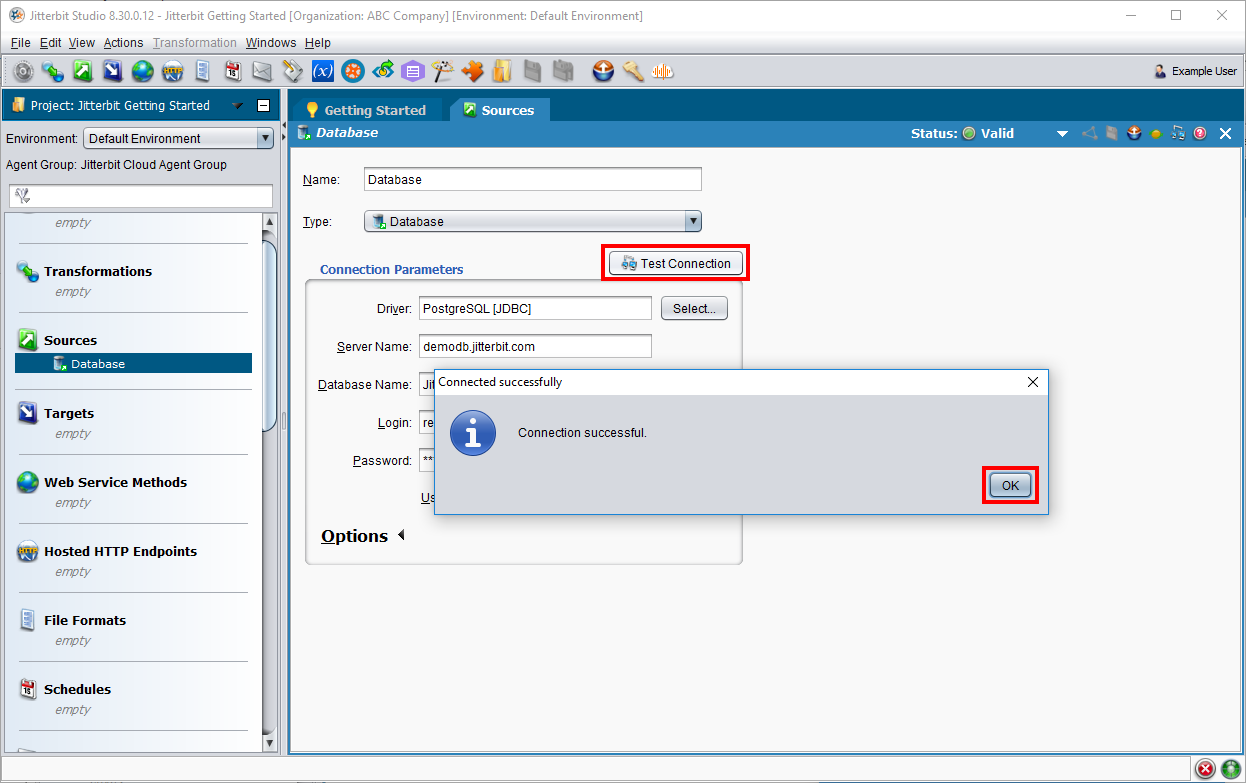
In the same New Source configuration screen, next to Connection Parameters, click Test Connection to verify that Jitterbit can connect to the database. Then click OK to continue.
-
-
Create the connection to Salesforce. To do this:
-
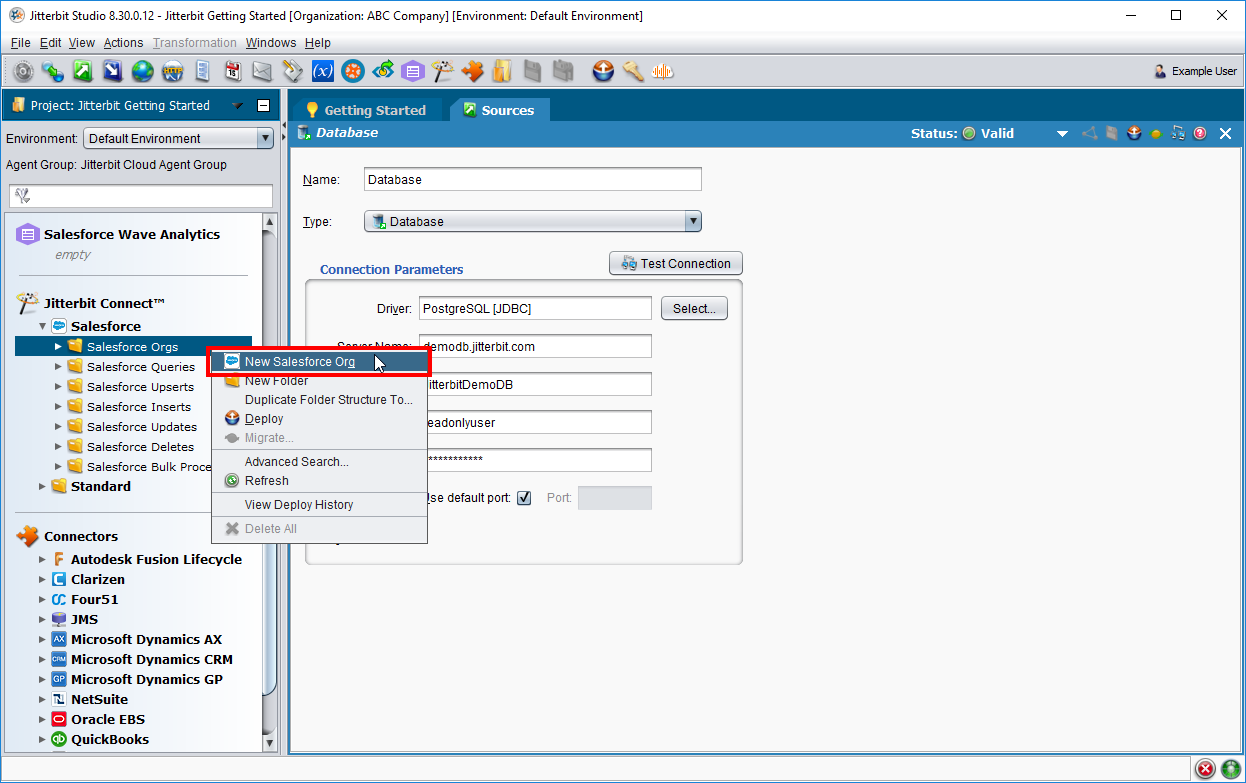
In the left panel, under Jitterbit Connect > Salesforce, right-click on Salesforce Orgs and select New Salesforce Org.
-
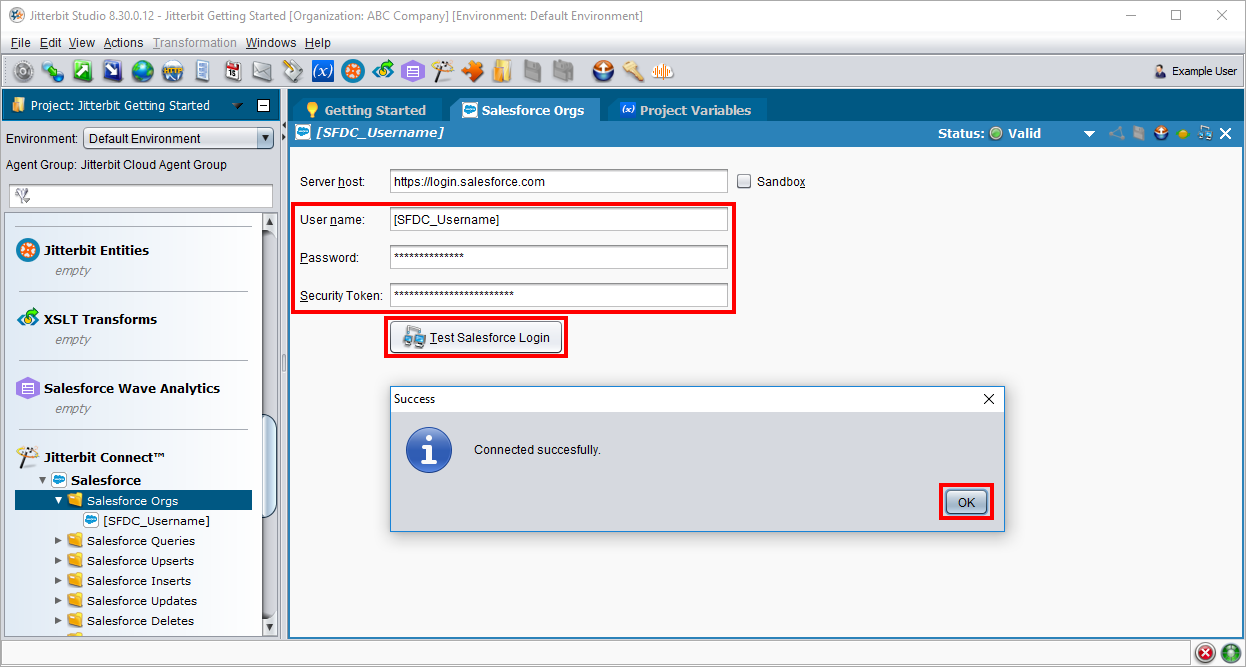
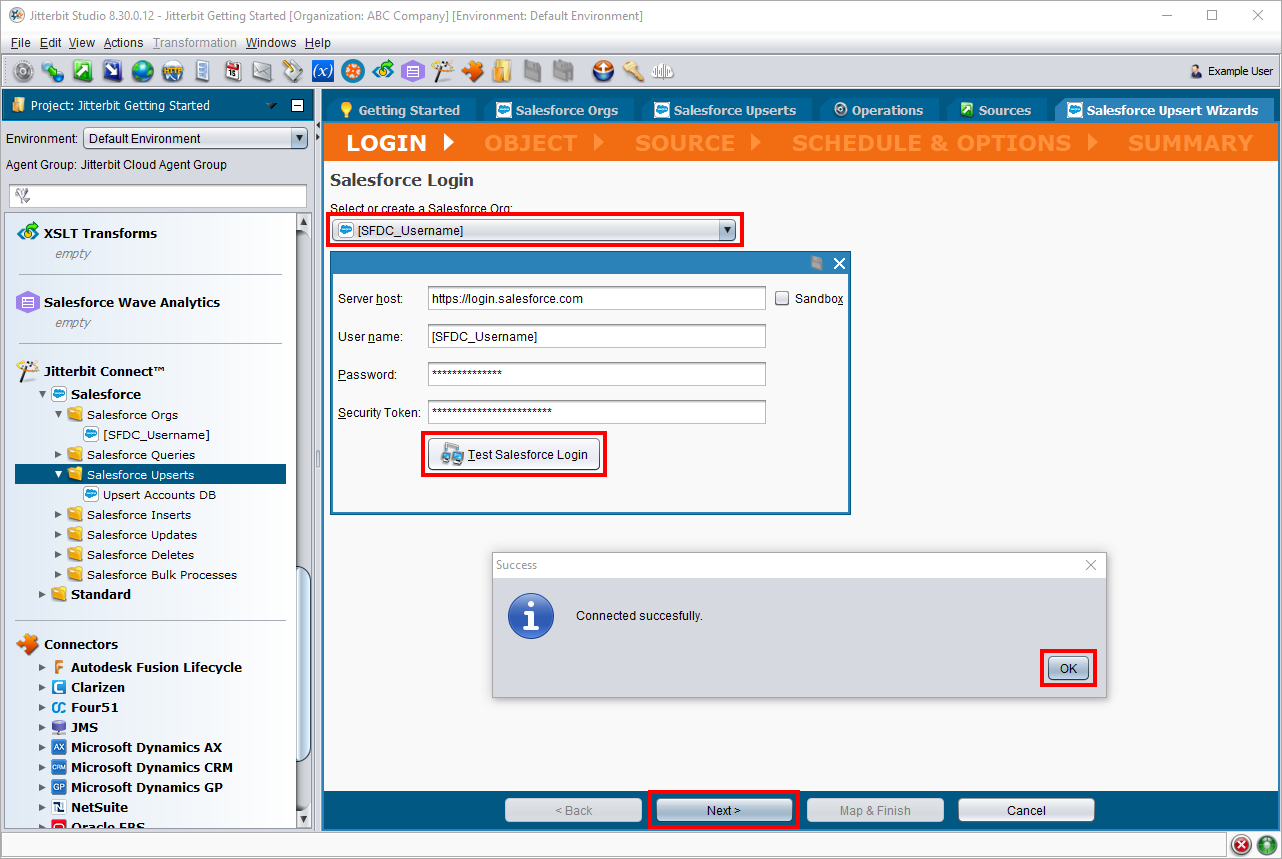
In the New Salesforce Org configuration screen, enter the User name, Password, and Security Token for your Salesforce instance. Then click Test Salesforce Login to verify that Jitterbit can connect to the Salesforce instance. Then click OK to continue.
-
-
Create the Salesforce upsert using the defined source and configured Salesforce connection. To do this:
-
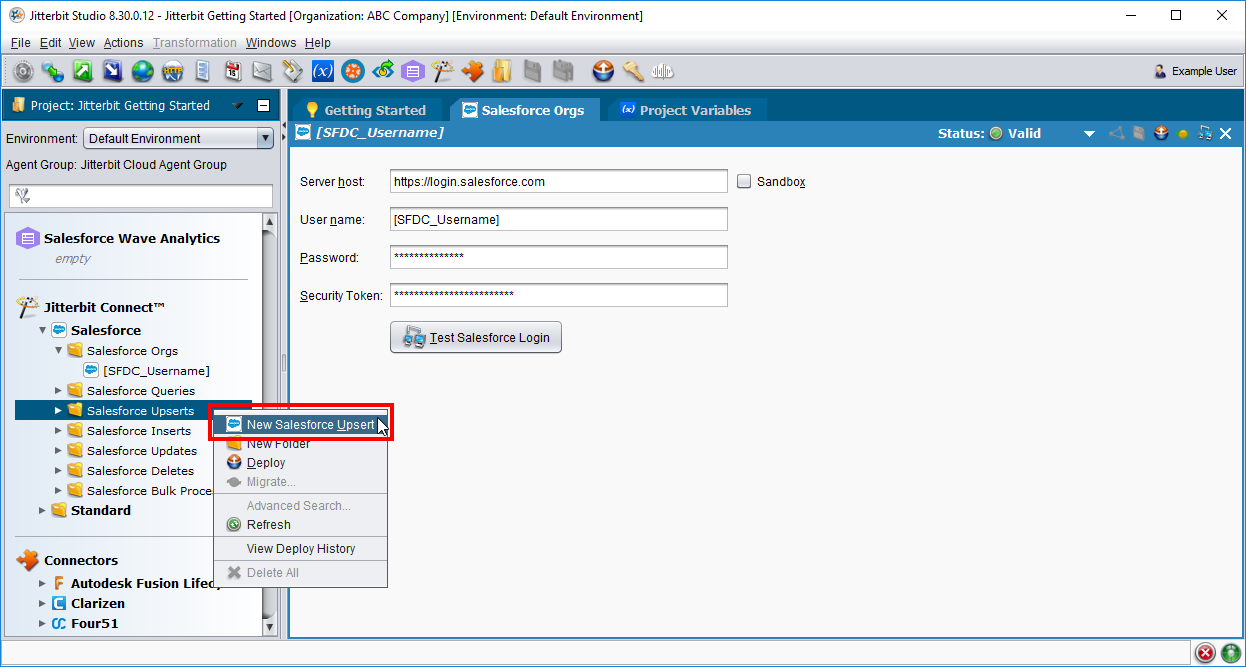
In the left panel, under Jitterbit Connect > Salesforce, right-click on Salesforce Upserts and select New Salesforce Upsert.
-
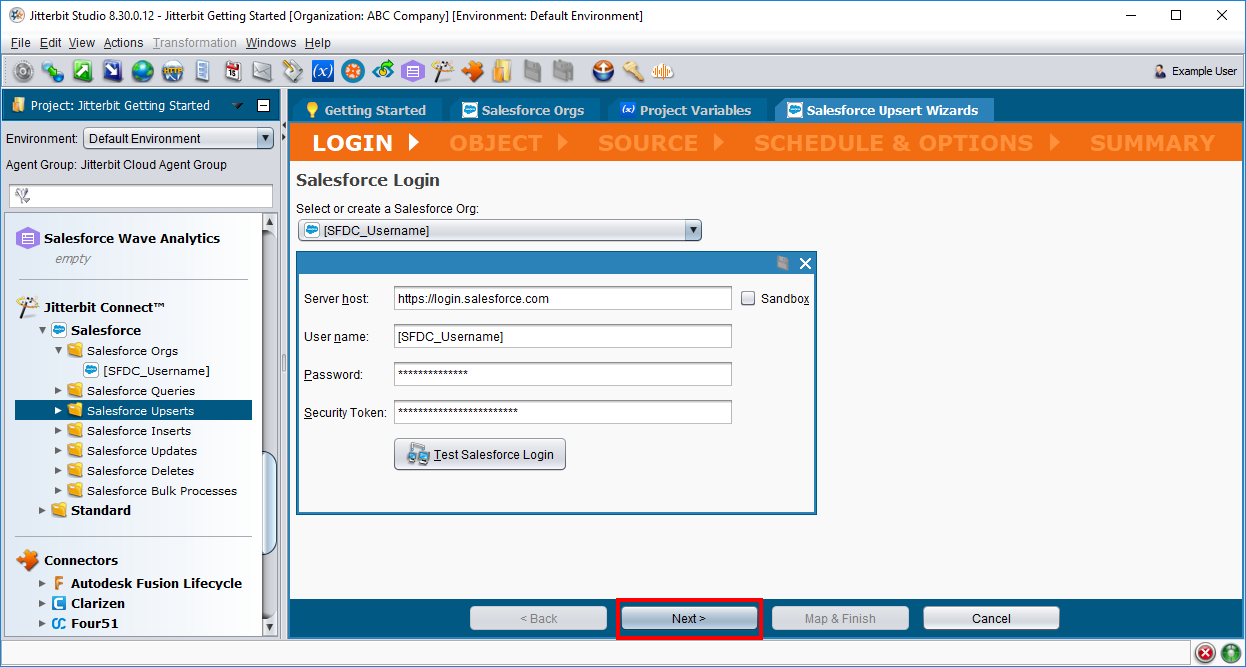
On the Login step, use the dropdown to select the Salesforce org you just configured. Then click Next to continue.
-
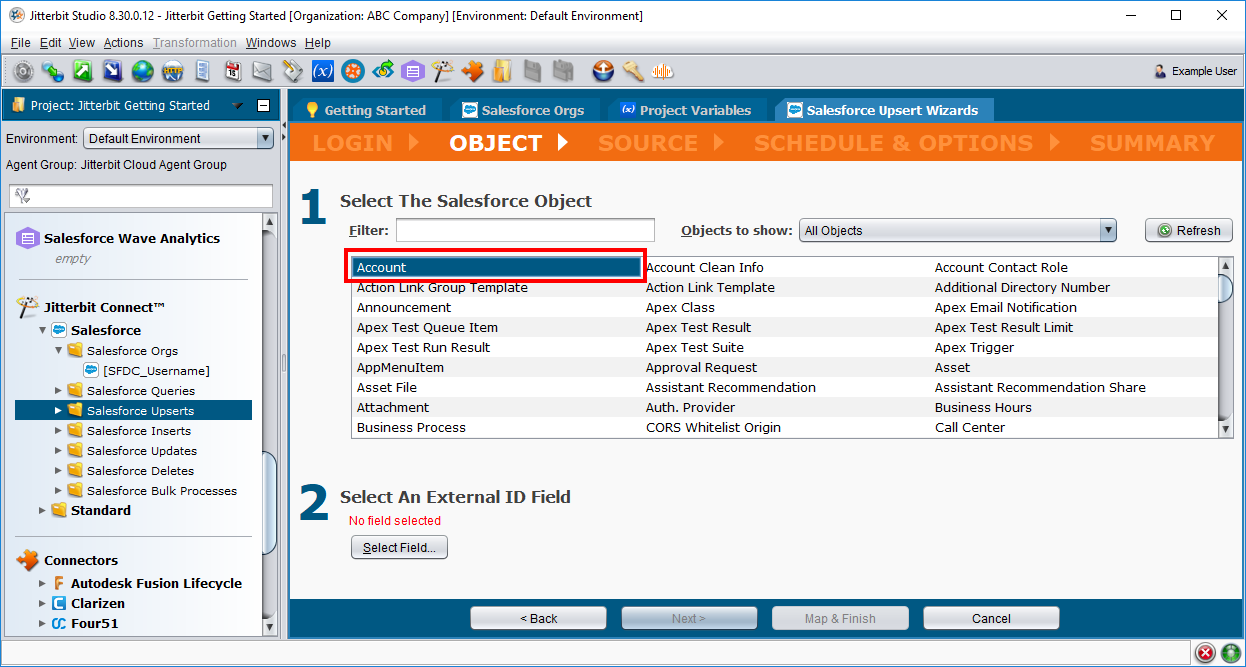
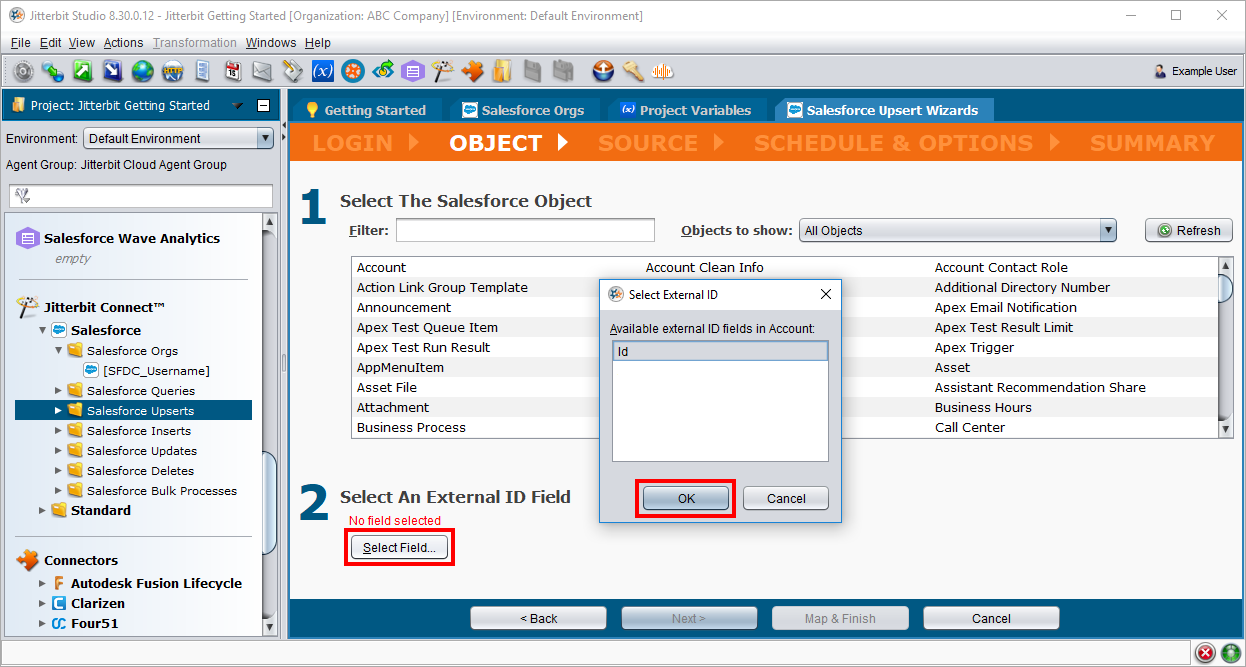
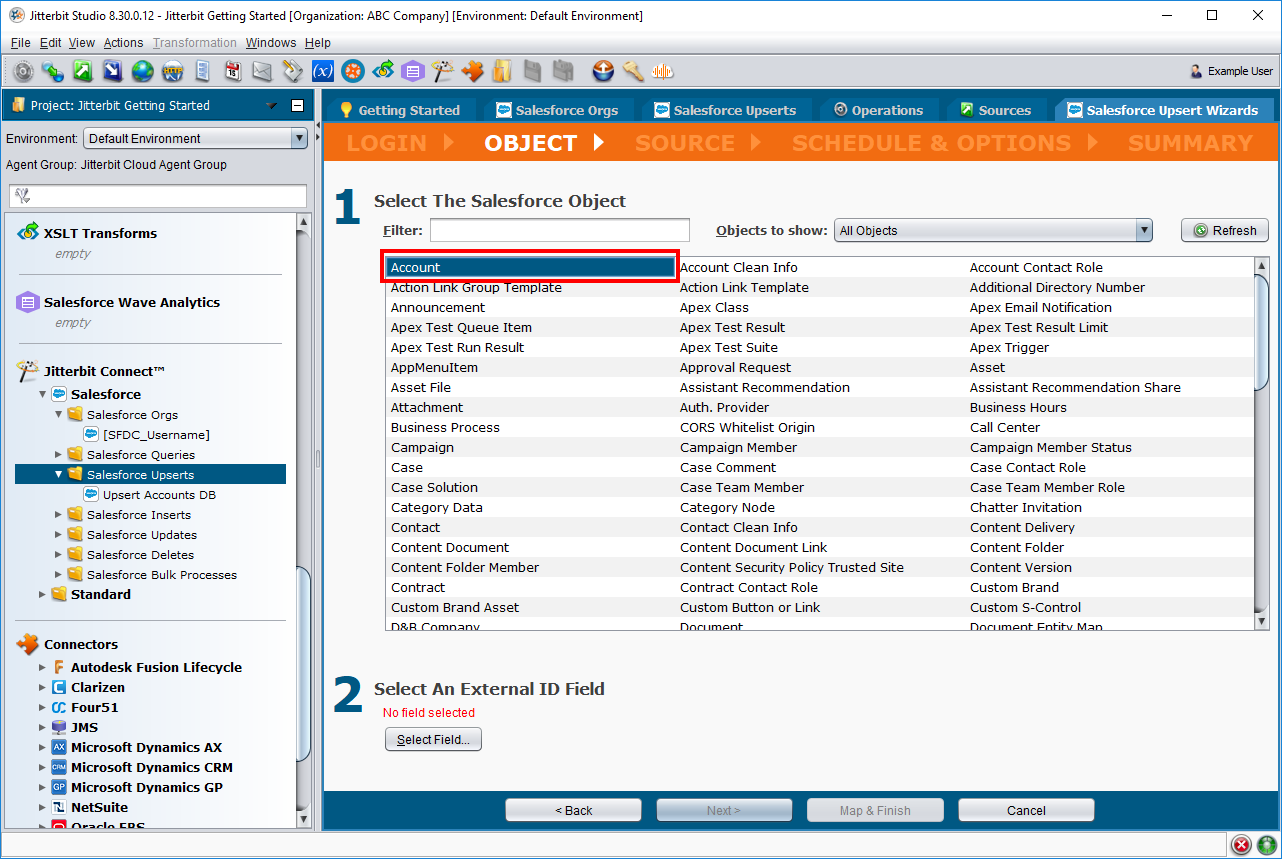
On the Object step, you can see all of the Salesforce objects available to the account, including any custom objects. This step has two parts:
-
Under Select the Salesforce Object, click on Account to select this object.
-
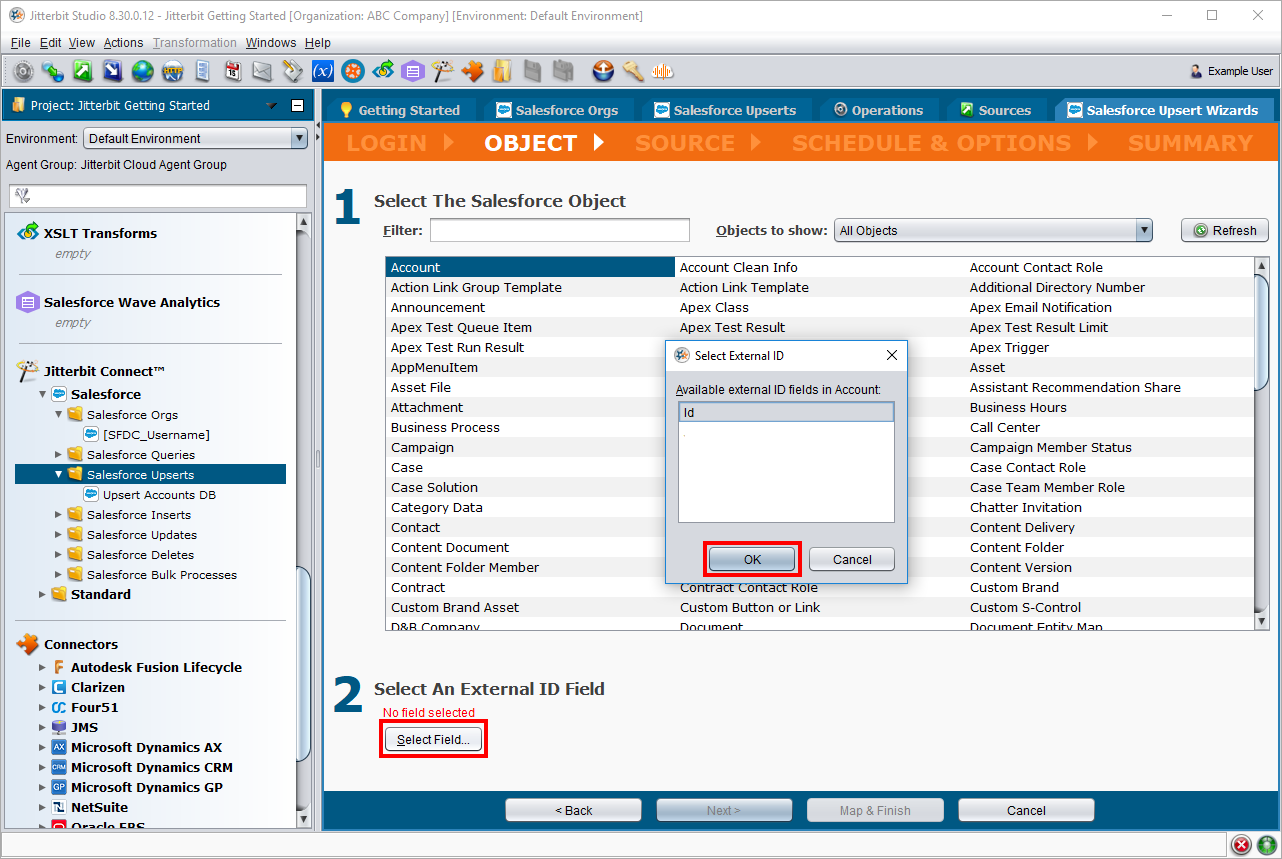
Under Select an External ID Field, click the button Select Field and from the popup window select the "Id" field. Click OK. Then click Next to continue.
-
-
On the Source step, select the database source that you have already configured. To do this:
-
Use the first dropdown to select Database (Oracle, SQL Server, MySQL, etc.) and the second dropdown to select the database source that you have already configured. Click Next to continue.
-
On the next screen, you have the option to provide a SQL statement. For this exercise, skip this step by clicking Next to continue.

-
On the next screen, click Download List of Tables to list available tables and views within the database source. Under Available Tables on the left, select the
customerstable and click the right arrow to move the table under Selected Tables on the right. Click Next to continue.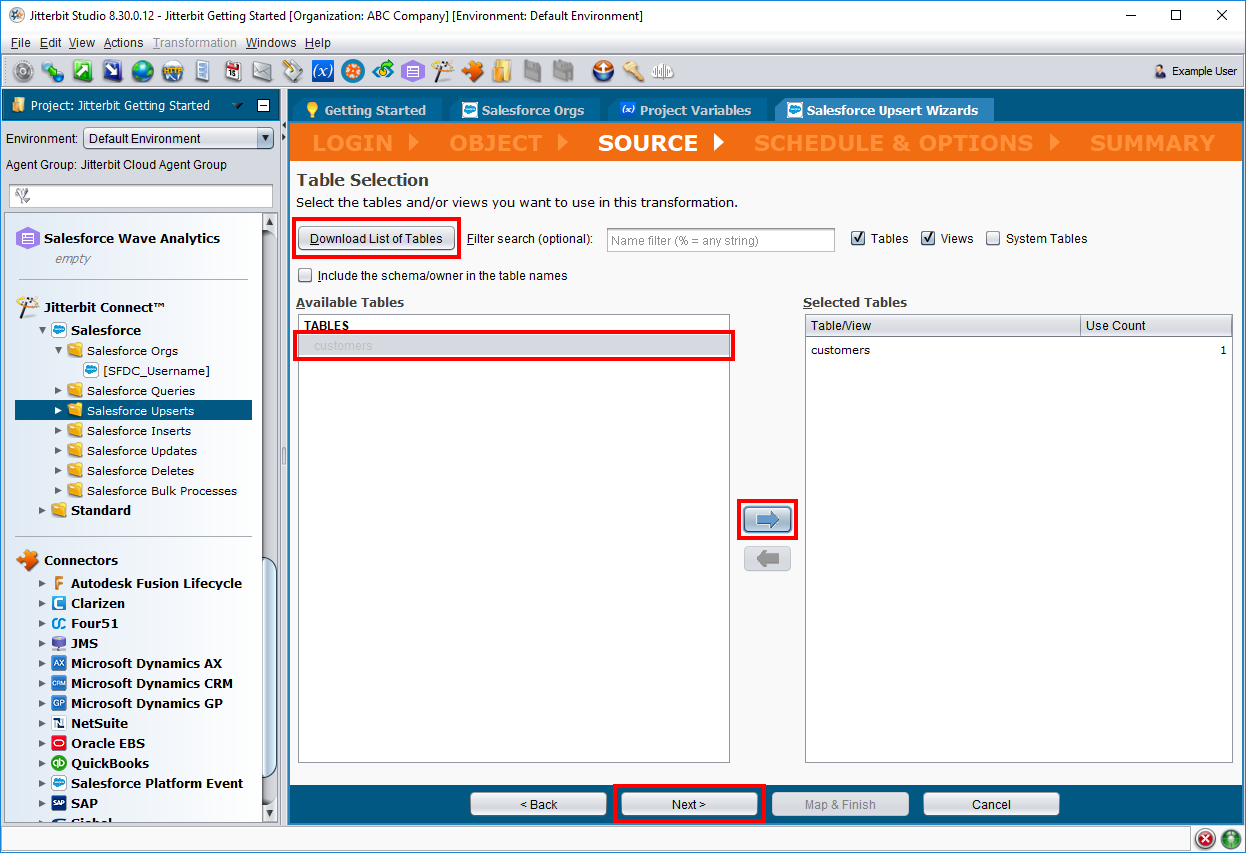
-
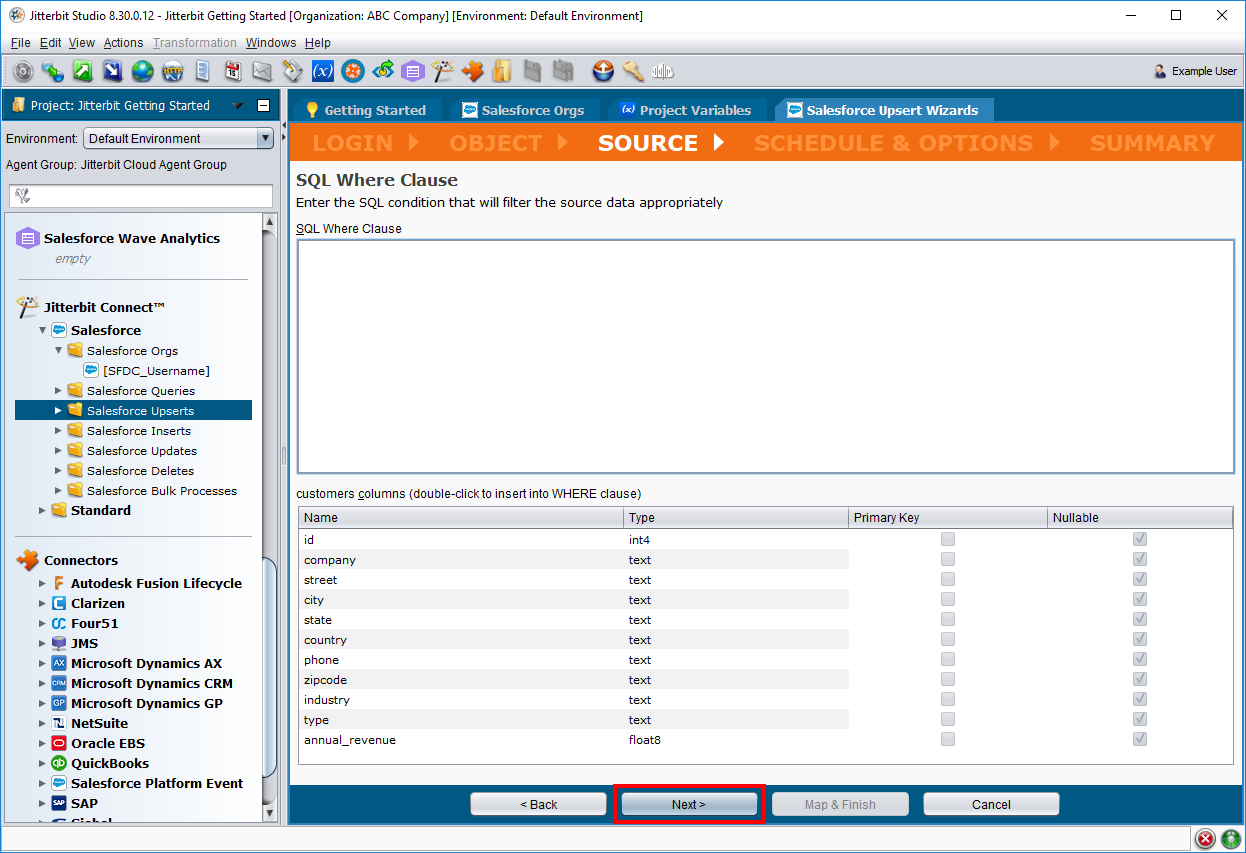
On the next screen, you have the option to add a WHERE clause. For this exercise we will leave this blank. Click Next to continue.
-
-
On the Schedule & Options step, you can schedule operations to run at intervals when you specify. For this exercise we will skip adding a schedule. Click Next to continue.
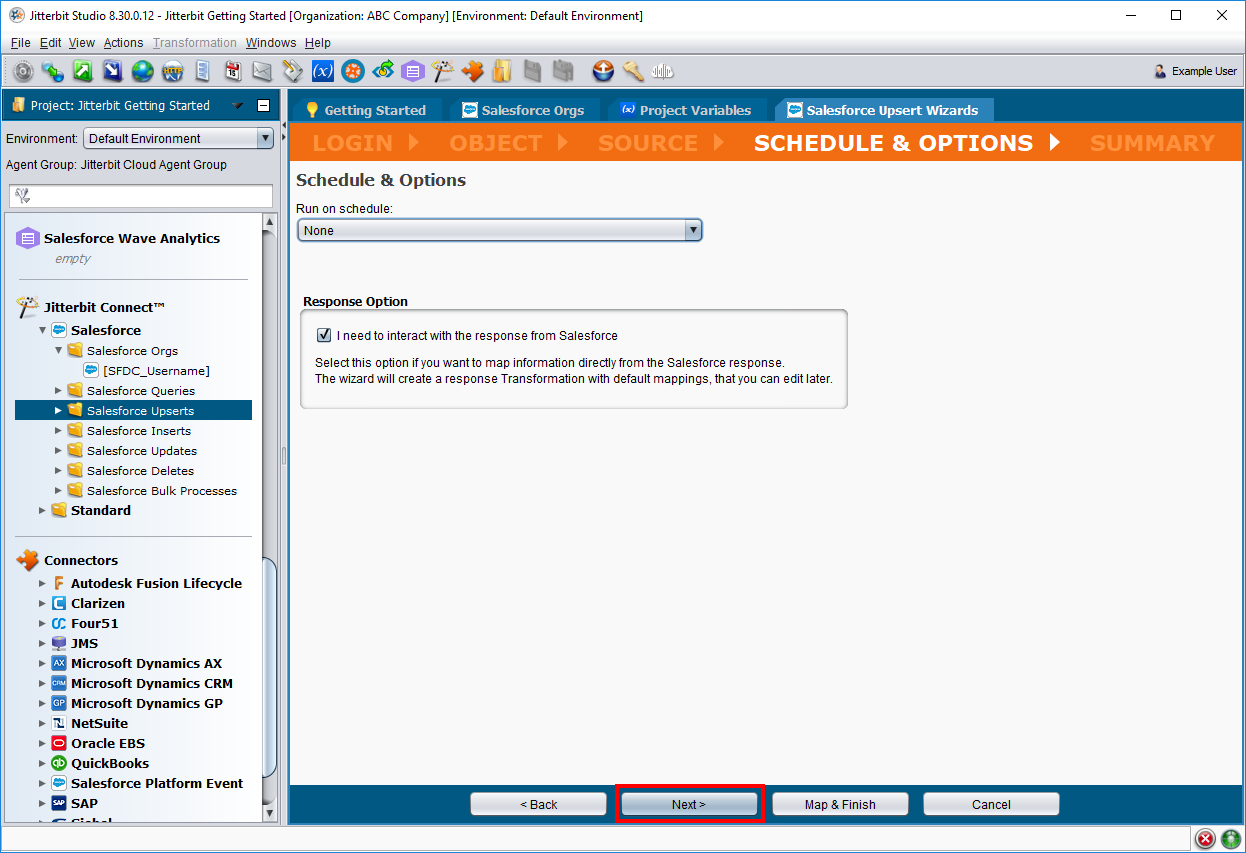
-
On the Summary step, enter "Upsert Accounts DB" as the name to use for this operation. Then click Map & Finish.
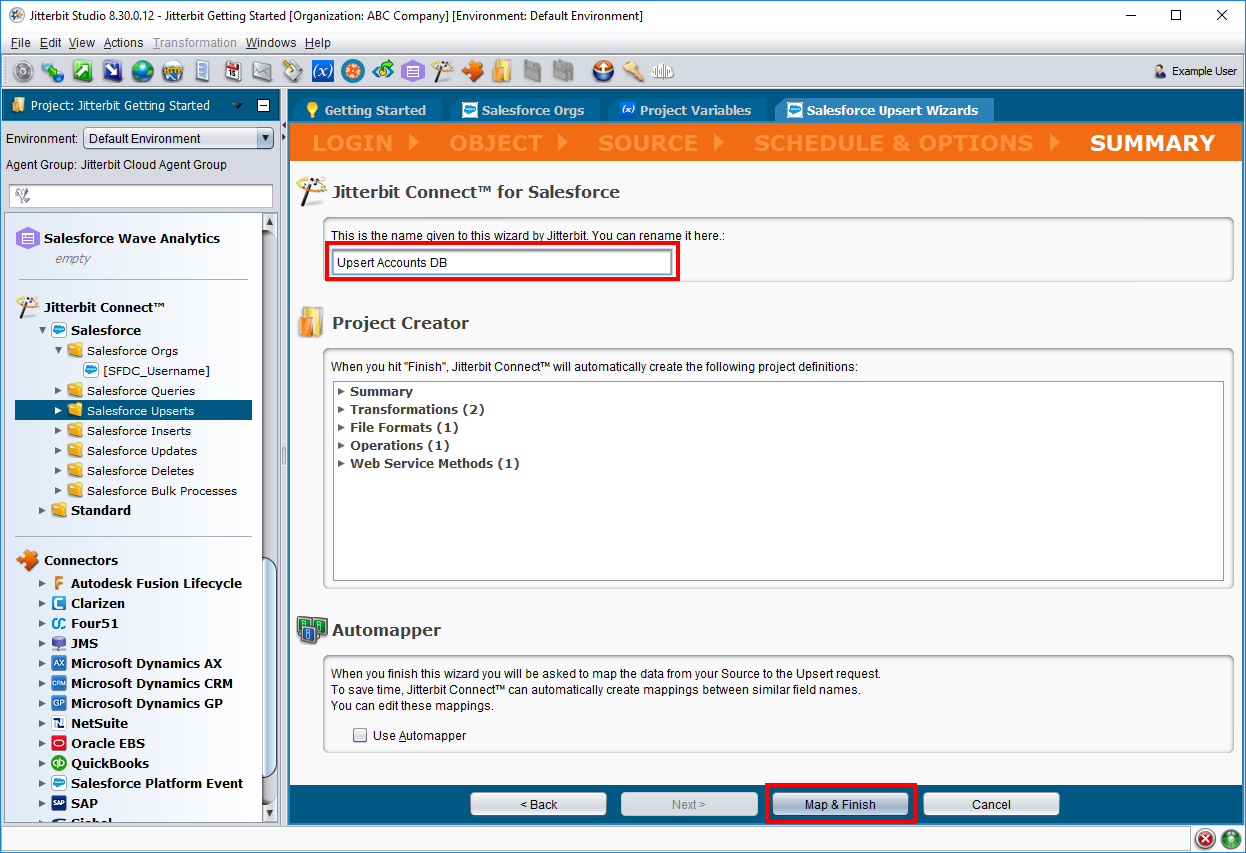
-
-
Configure the transformation. On the left side of the transformation are the source fields from the database, and on the right side are the target fields from Salesforce.
To configure the transformation, map source fields to target fields by individually dragging each source field and dropping it on top of the corresponding target field as follows. When the mapping is complete, click Finish to continue.
Source Target IDAccount NumberCompanyNameStreetBilling StreetCityBilling CityStateBilling StateCountryBilling CountryPhonePhoneZipcodeBilling Postal CodeIndustryIndustryTypeTypeAnnual RevenueAnnual Revenue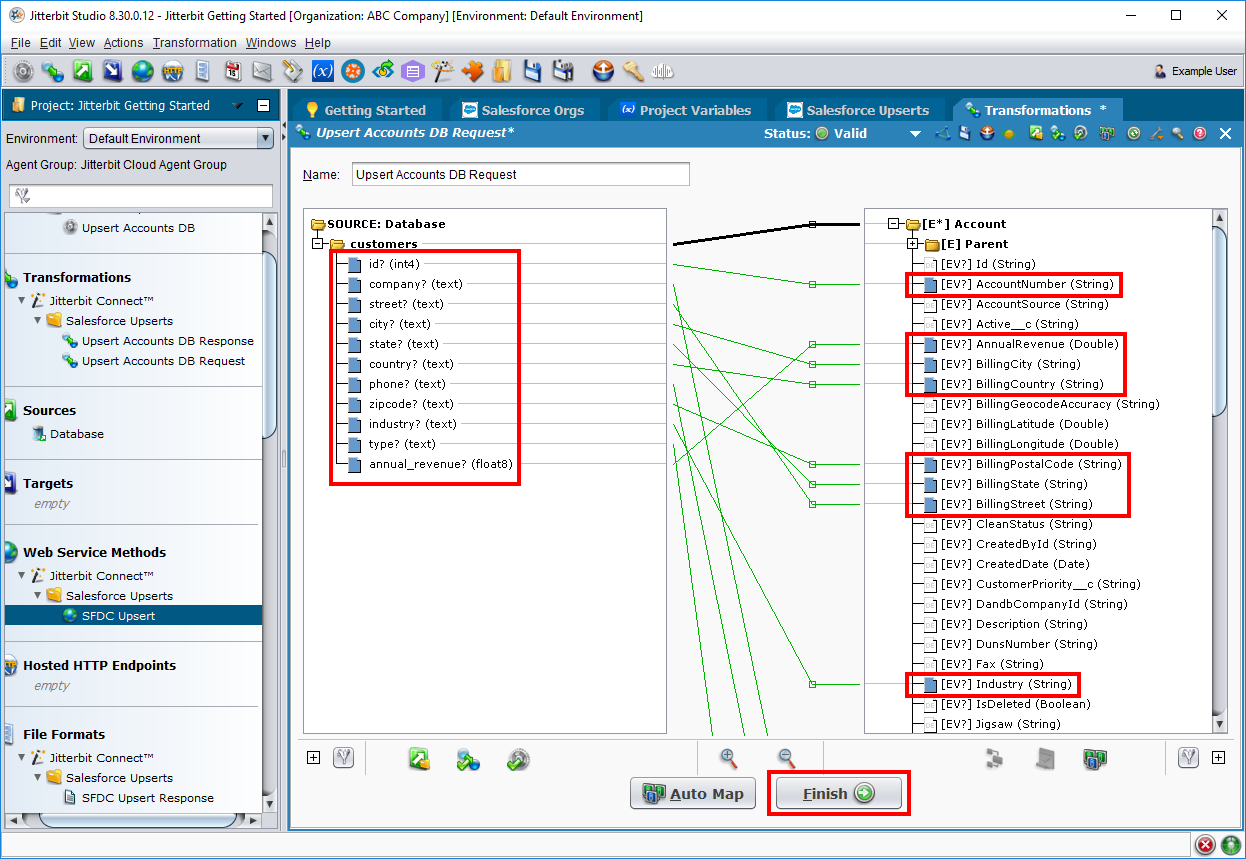
-
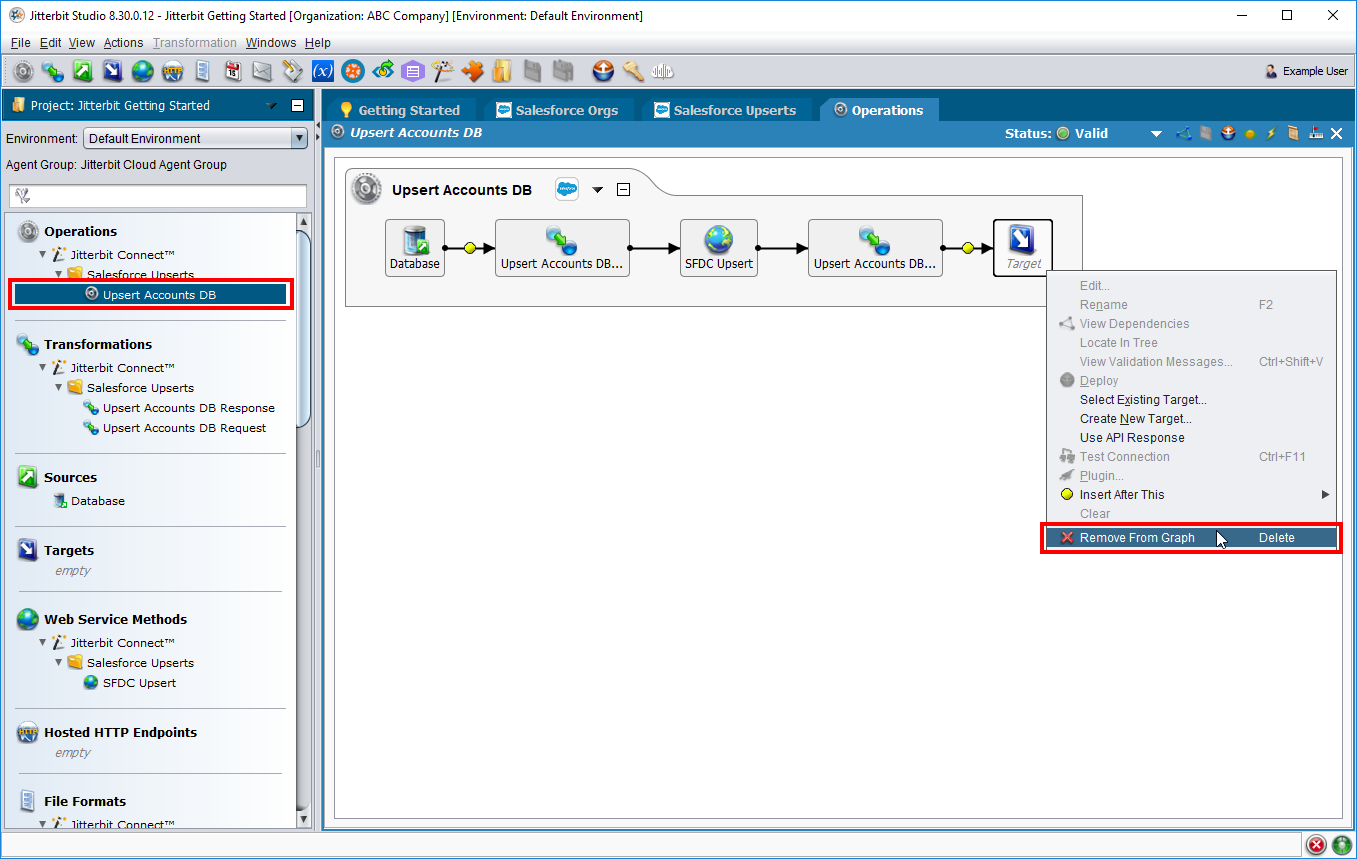
In the left pane, double-click on the operation "Upsert Accounts DB" to display the operation within the design workspace. For this example, the target placeholder is not used within the operation, so we can remove it. On the operation graph, right-click the Target icon and select Remove From Graph.
-
In the icon menu bar, click the save all icon
 to save all project items. Then click the deploy icon to deploy the project.
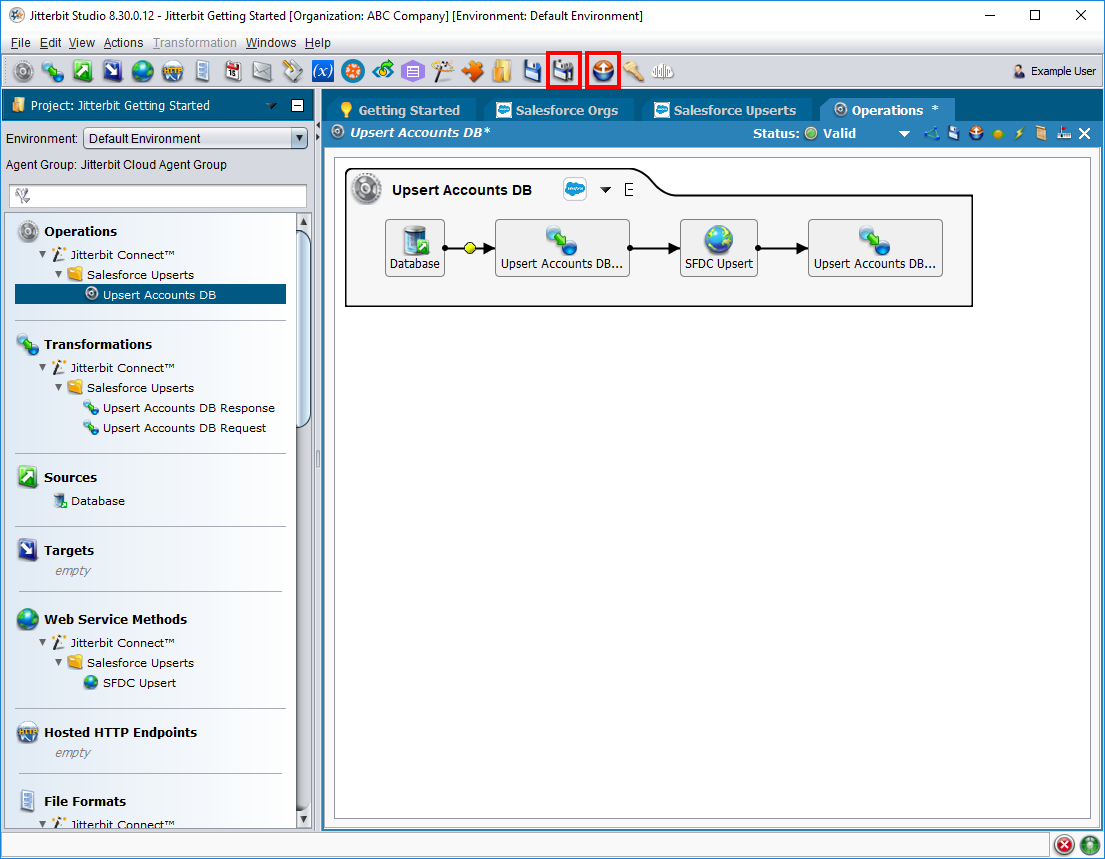
-
Congratulations! You have now created the same "Upsert Accounts (Read-Only Database)" operation that was provided in Part 1: Get started with a sample project. Refer to the steps under Execute operations to run the operation, check status, and see the new records in Salesforce.
Upsert JSON to Salesforce
This operation upserts customer data from a JSON file to Salesforce to create new account records in Salesforce. To create this operation:
-
Define the source of the data. To do this:
-
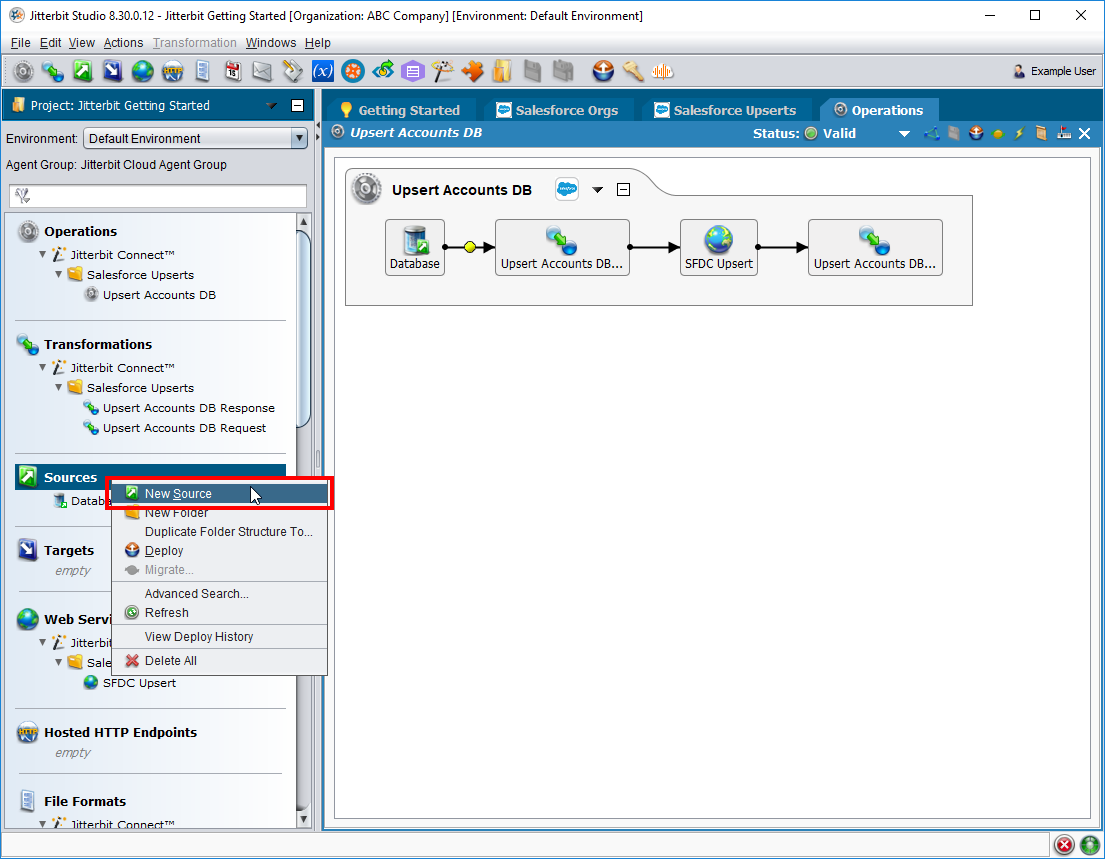
In the left panel, right-click on Sources and select New Source.
-
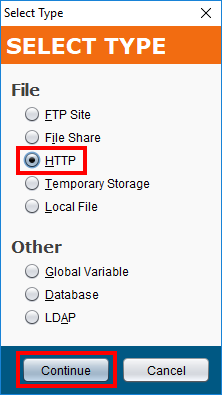
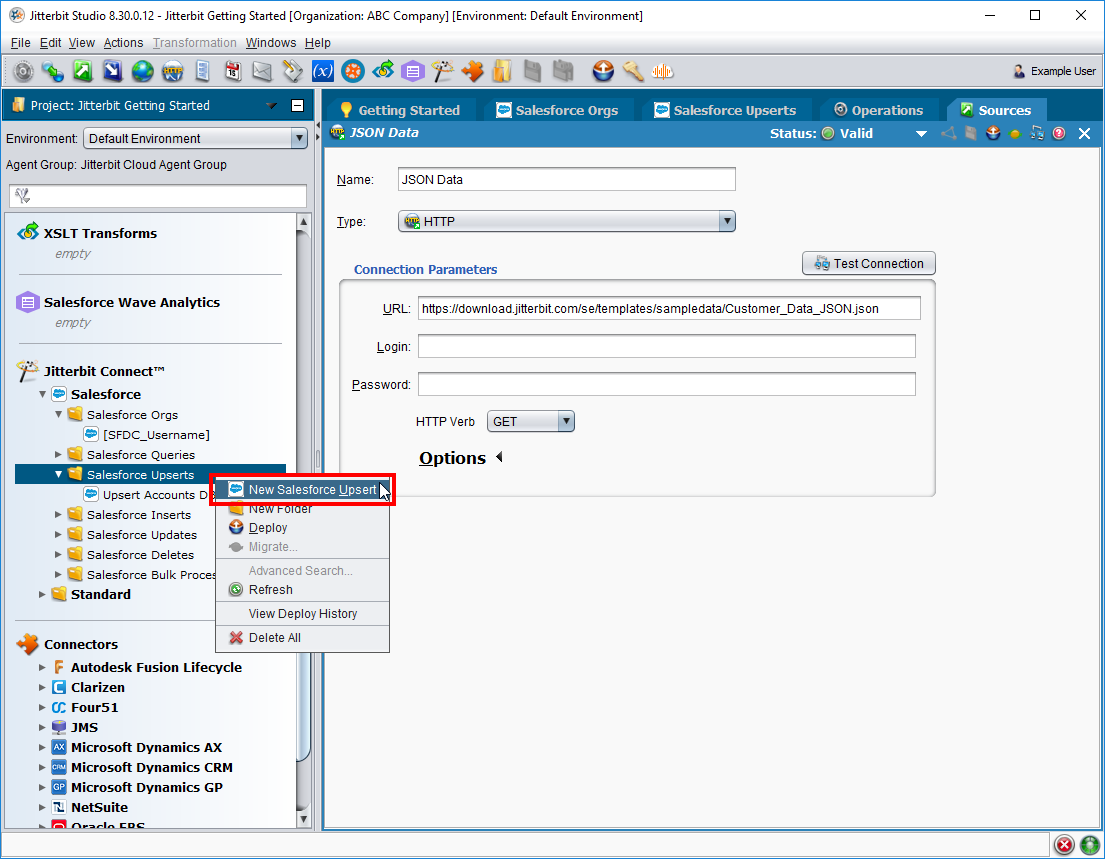
In the Select Type window, select HTTP, where the JSON file provided for this walkthrough resides. Then click Continue.
-
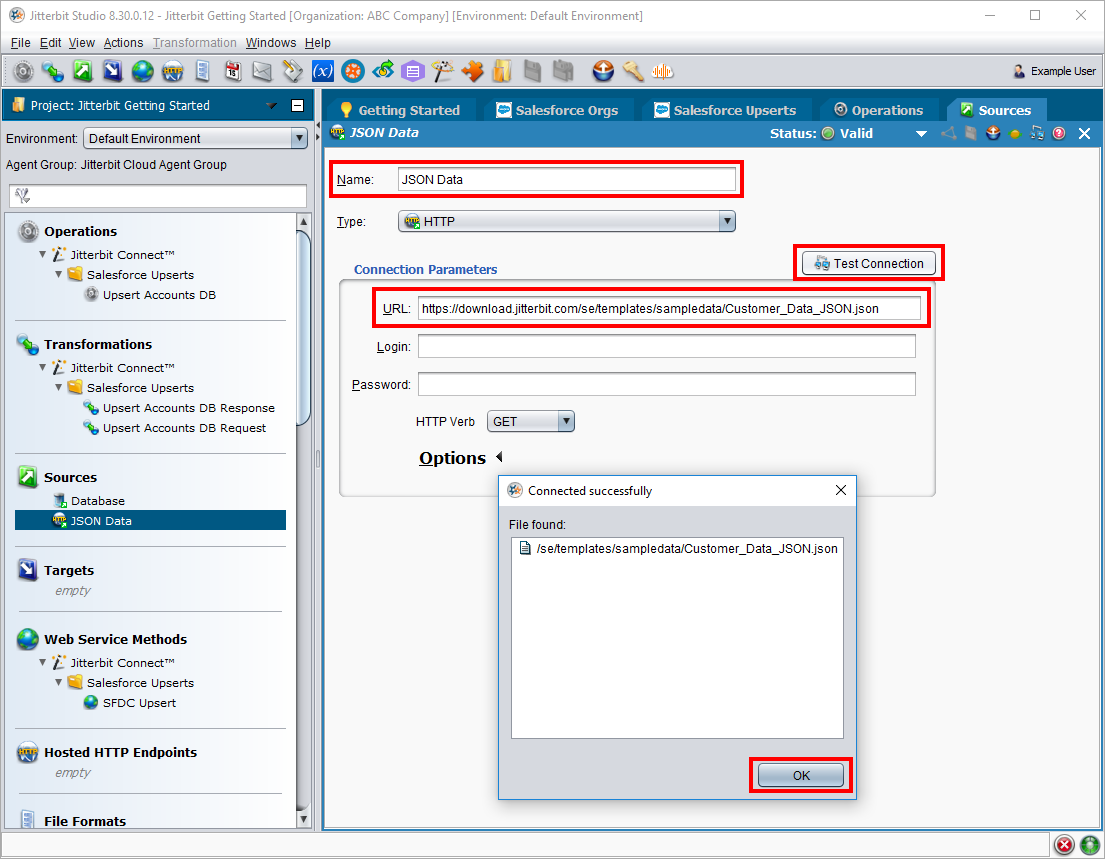
Fill out the New Source configuration screen as follows:
- Name: Enter JSON Data.
- Connection Parameters
- URL: Enter
https://download.jitterbit.com/se/templates/sampledata/Customer_Data_JSON.json. - Test Connection: Click this button to verify that Jitterbit can connect to the URL. Then click OK to continue.
- URL: Enter
-
-
If you have not done so already, create the connection to Salesforce as covered in the previous operation creation walkthrough. See step 2 under Upsert database to Salesforce for instructions.
-
Create the Salesforce upsert using the defined source and configured Salesforce connection. To do this:
-
In the left panel, under Jitterbit Connect > Salesforce, right-click on Salesforce Upserts and select New Salesforce Upsert.
-
On the Login step, use the dropdown to select your Salesforce org. Click Test Salesforce Login to verify your connection. Click OK. Then click Next to continue.
-
On the Object step, you can see all of the Salesforce objects available to the account, including any custom objects. This step has two parts:
-
Under Select the Salesforce Object, click on Account to select this object.
-
Under Select an External ID Field, click the button Select Field and from the popup window select the "Id" field. Click OK. Then click Next to continue.
-
-
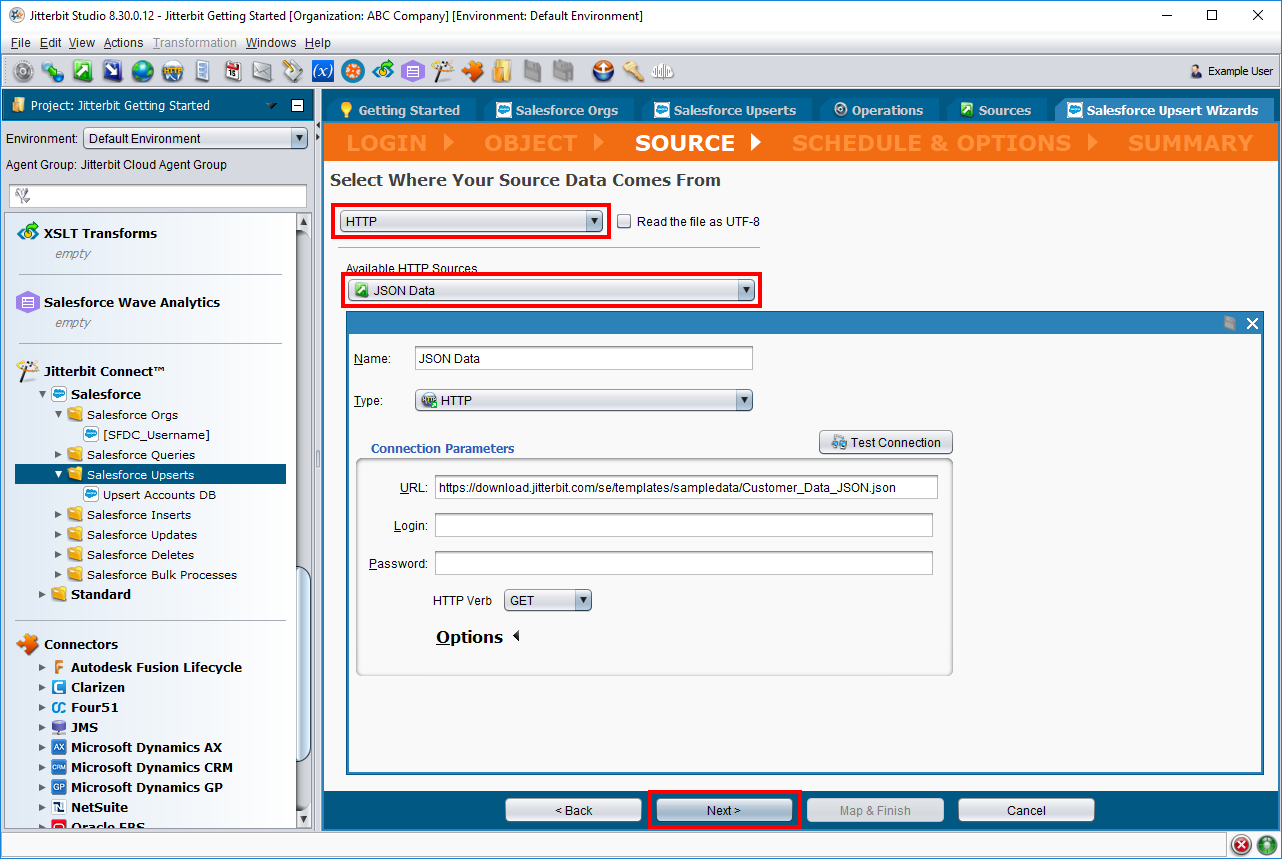
On the Source step, use the first dropdown to select HTTP and the second dropdown to select the HTTP source that you have already configured. Click Next to continue.
-
On the next screen, select JSON as the file type. Click Next to continue.

-
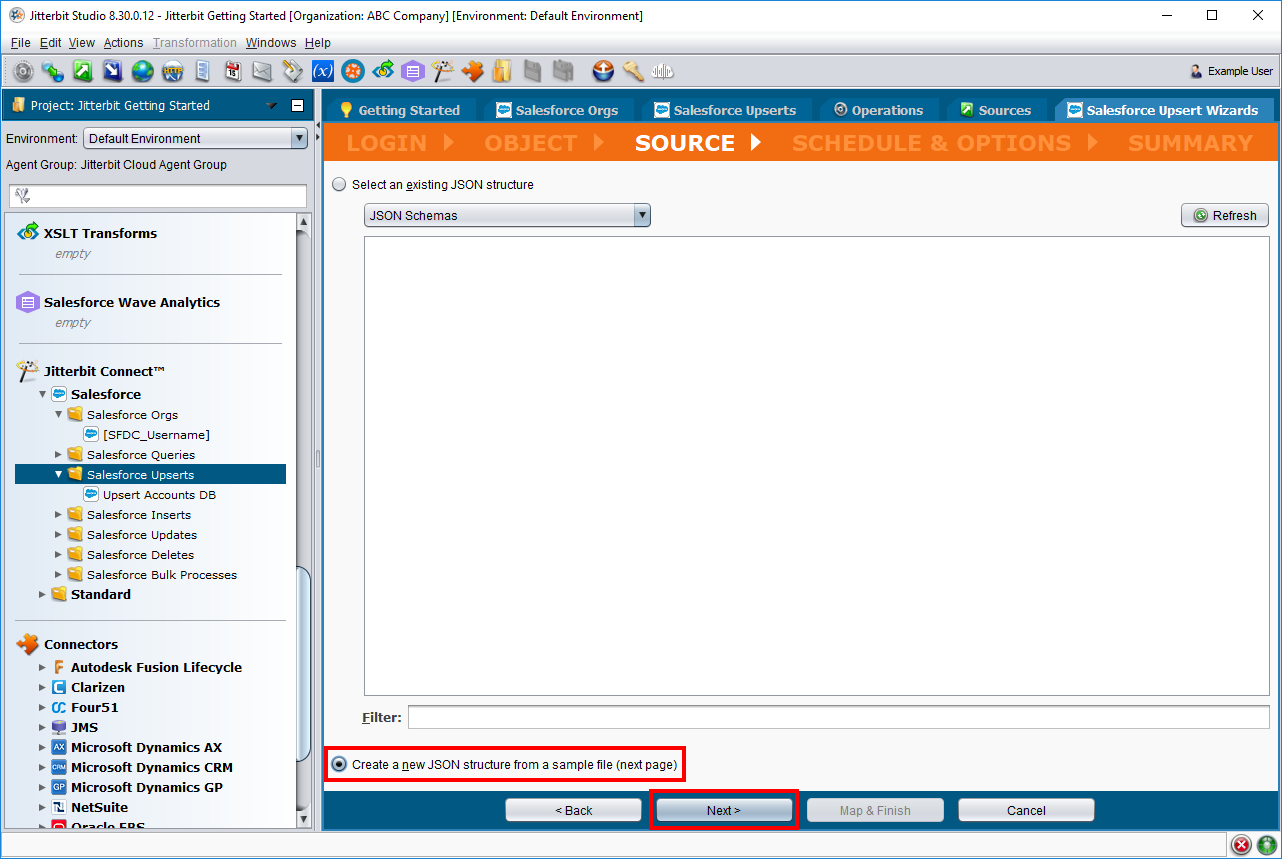
On the next screen, if you already have a file schema, you can select it here. For this exercise, select Create a new JSON structure from a sample file (next page). Click Next to continue.
-
On the next screen, complete the steps as follows:
-
Under Select a Sample File, select URL to a remote JSON file and enter the same URL as that for your HTTP source:
https://download.jitterbit.com/se/templates/sampledata/Customer_Data_JSON.json.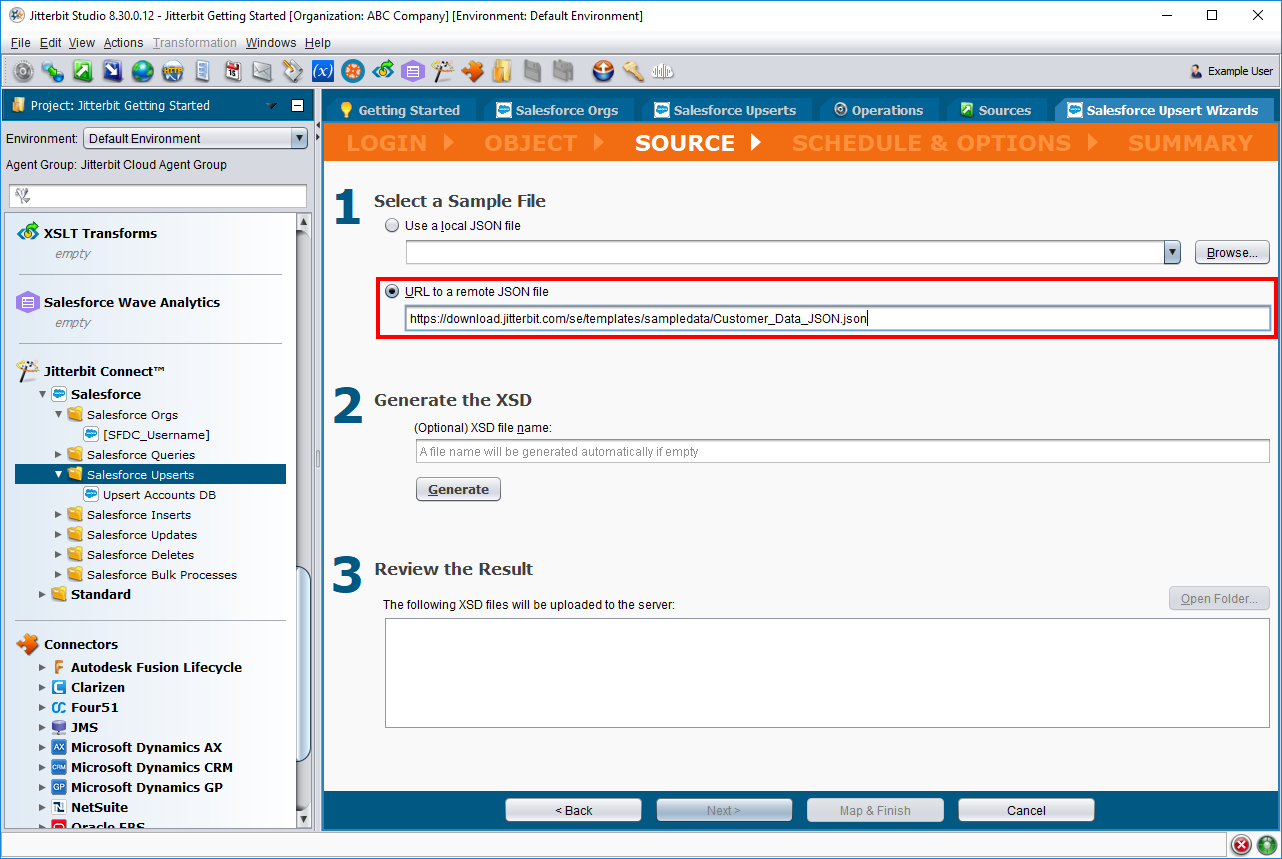
-
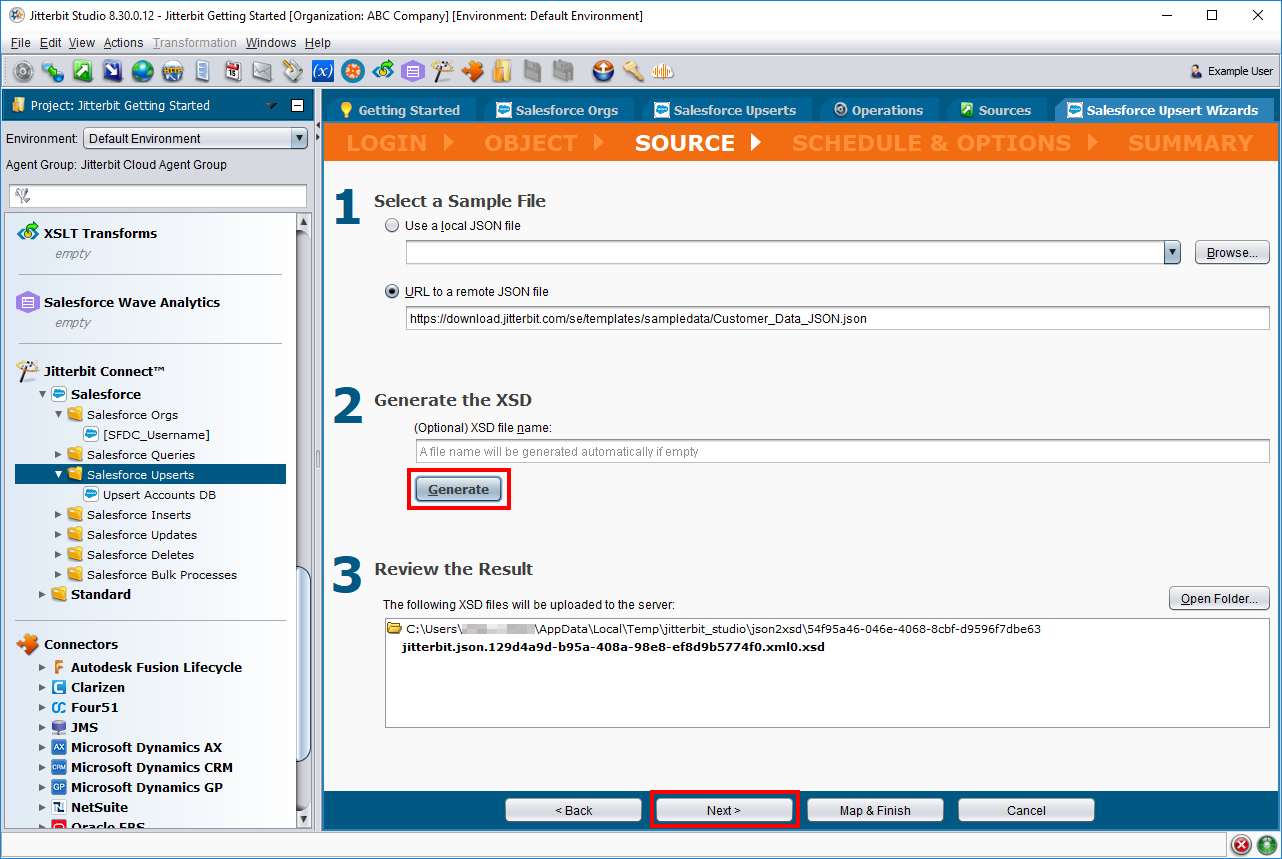
Under Generate the XSD, click Generate to generate the structure. Then click Next to continue.
-
-
On the Schedule & Options step, you can schedule operations to run when you specify. For this exercise we will skip adding a schedule. Click Next to continue.
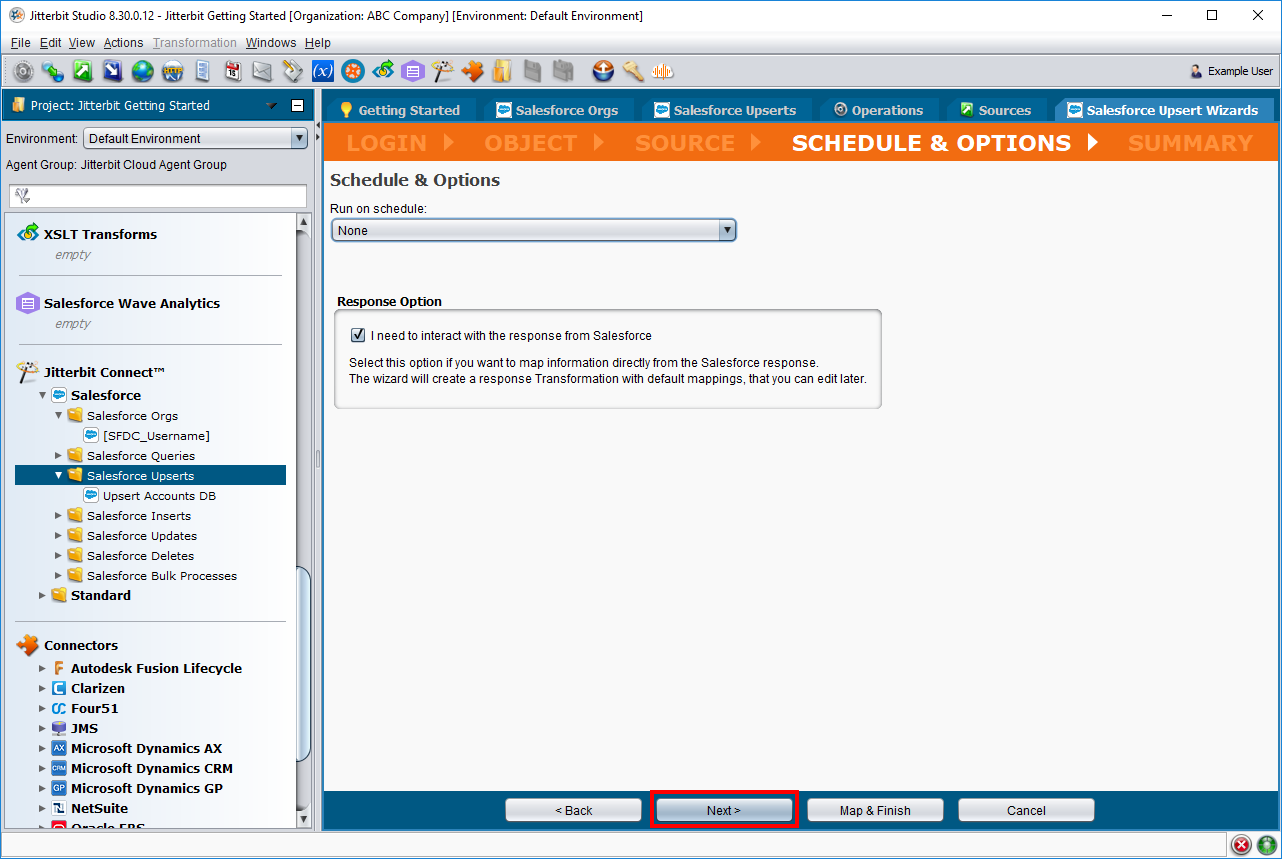
-
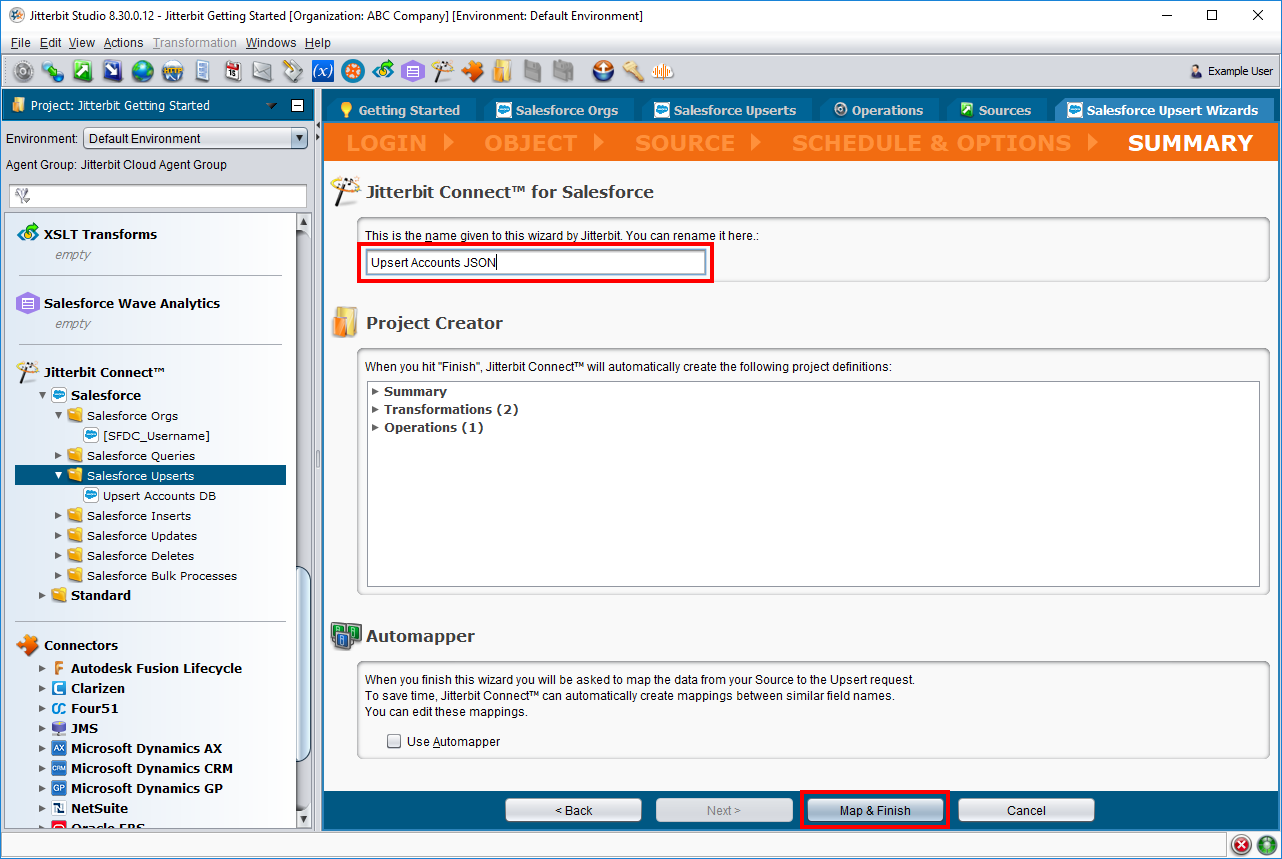
On the Summary step, enter "Upsert Accounts JSON" as the name to use for this operation. Then click Map & Finish.
-
-
Configure the transformation. On the left side of the transformation are the source fields from the JSON file, and on the right side are the target fields from Salesforce.
To configure the transformation, map source fields to target fields by individually dragging each source field and dropping it on top of the corresponding target field as follows. When the mapping is complete, click Finish to continue.
Source Target IDAccount NumberCompanyNameStreetBilling StreetCityBilling CityStateBilling StateCountryBilling CountryPhonePhoneZipcodeBilling Postal CodeIndustryIndustryTypeTypeAnnual RevenueAnnual Revenue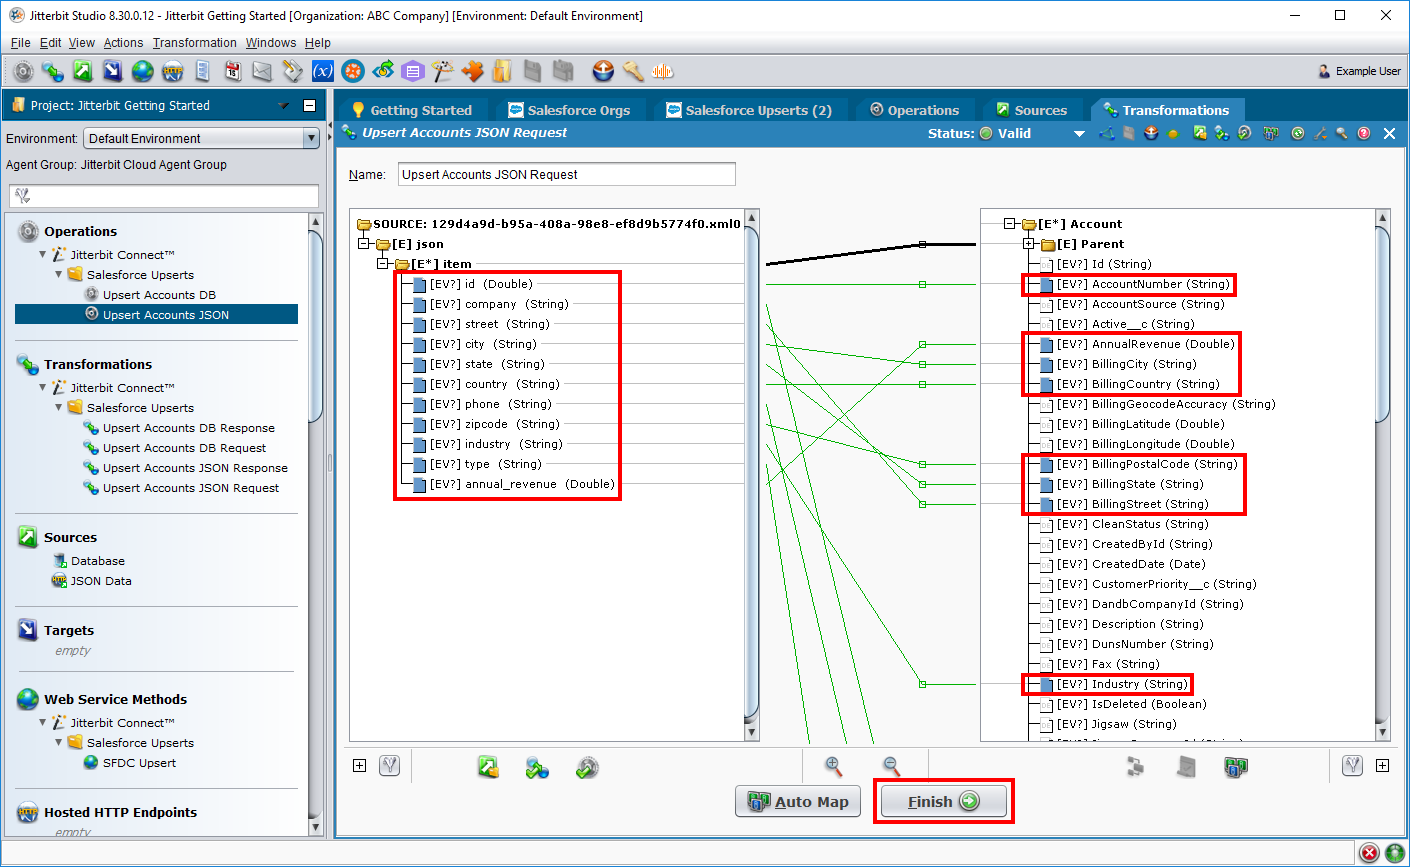
-
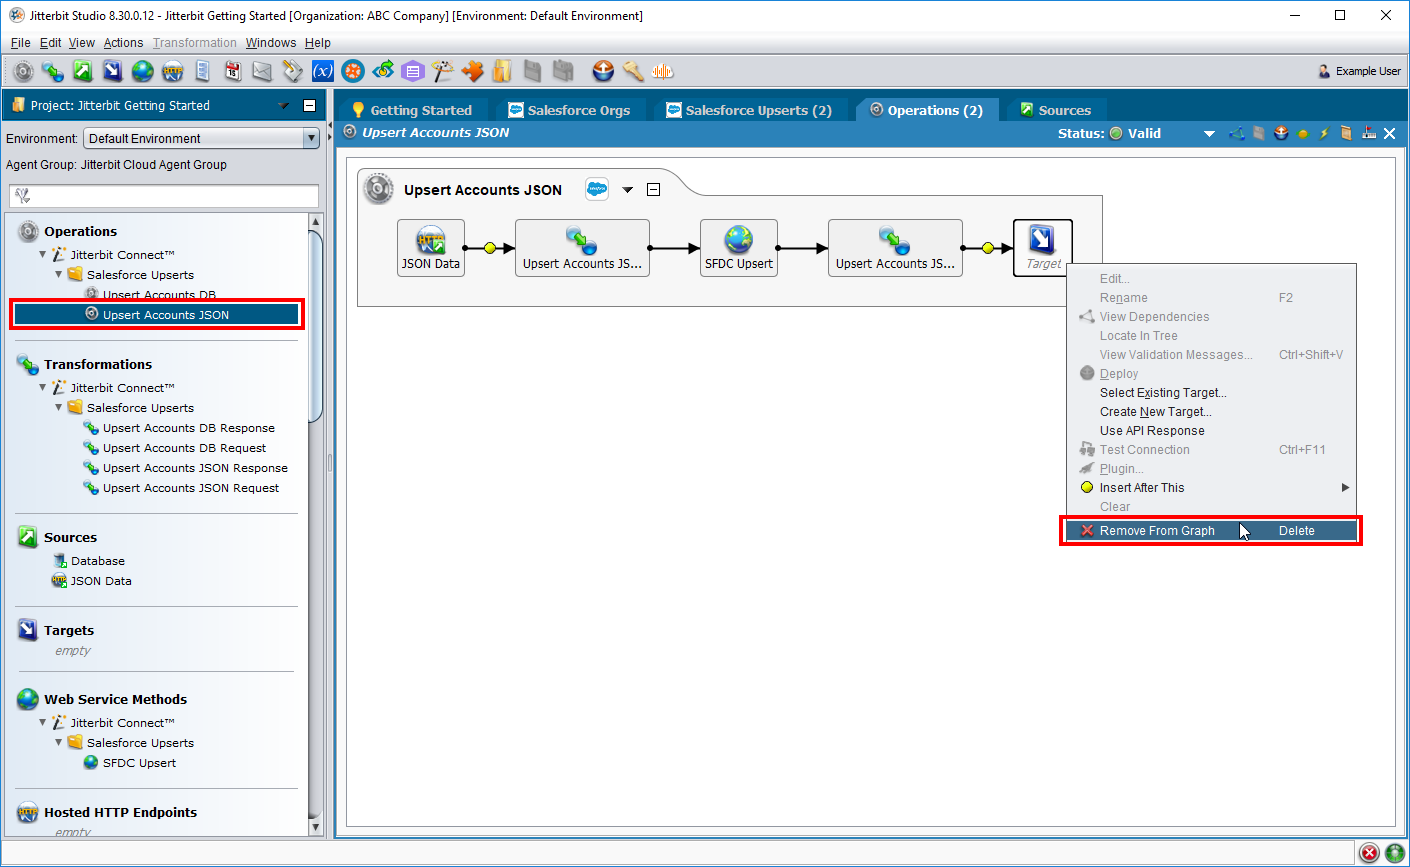
In the left pane, double-click on the operation "Upsert Accounts JSON" to display the operation within the design workspace. For this example, the target placeholder is not used within the operation, so we can remove it. On the operation graph, right-click the Target icon and select Remove From Graph.
-
In the icon menu bar, click the save all icon
to save all project items. Then click the deploy icon to deploy the project.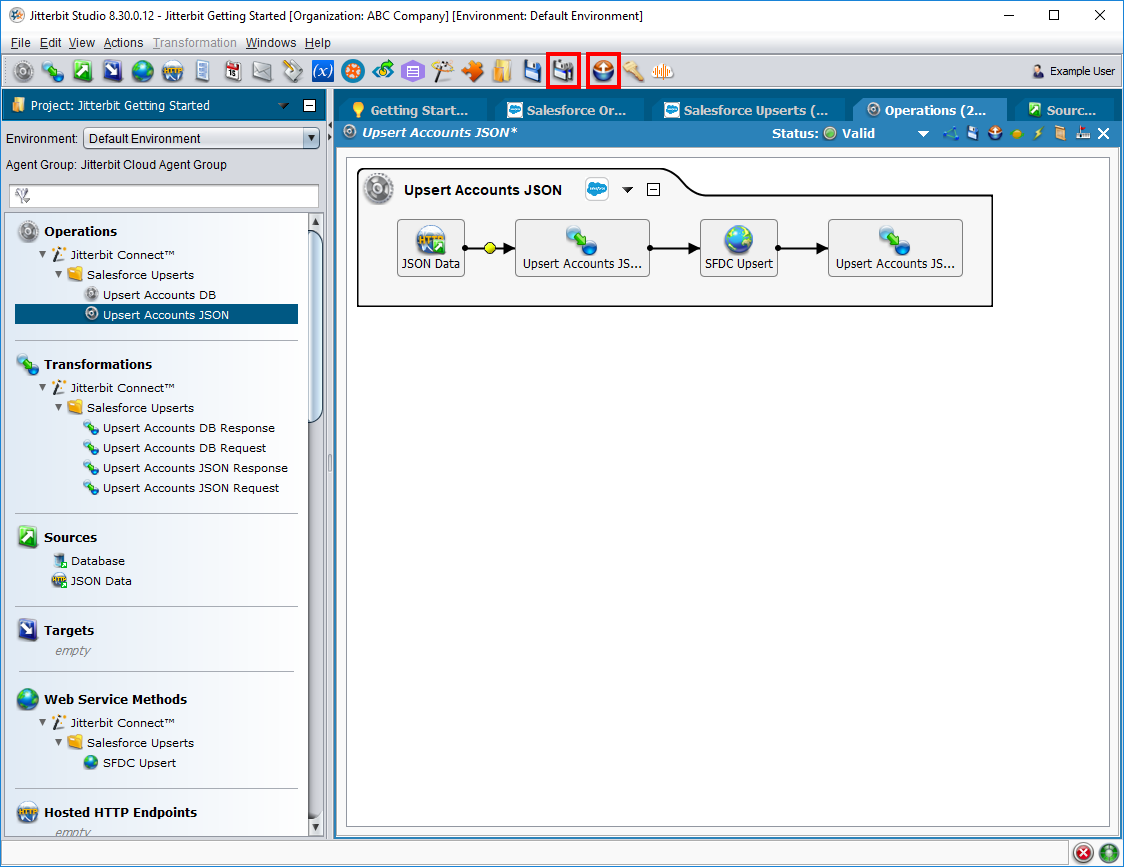
-
Congratulations! You have now created the same "Upsert Accounts (JSON)" operation that was provided in Part 1: Get started with a sample project. Refer to the steps under Execute operations to run the operation, check status, and see the new records in Salesforce.