Configure outbound messages with hosted HTTP endpoints in Jitterbit Design Studio
Introduction
This integration design pattern sets up a Salesforce workflow rule that sends an outbound message to a Hosted HTTP Endpoint when an object changes (in this example, the Account object). A Design Studio project processes the Salesforce outbound message, maps the object's data, and saves it to a database. Hosted HTTP Endpoints can be used only with private agents.
Note
Using Hosted HTTP Endpoints is not recommended. The recommended integration design pattern for both Private and cloud agents is described in Configuring outbound messages with an API Manager API.
To set up this pattern, follow these sections in order:
- Part 1: In Design Studio, create a new operation and copy its hosted web service URL.
- Part 2: In Salesforce, set up a workflow rule to send an outbound message to the web service URL when an object changes, and download the WSDL file that defines the message.
- Part 3: In Design Studio, expand the new operation to receive and acknowledge the Salesforce outbound message, and map and store the changed values in a database.
- Part 4: Return to Salesforce to activate the outbound message, then test the completed integration design pattern.
Part 1: Design Studio web service endpoint URL
-
Create a new Design Studio project.
-
In the project items list on the left, right-click on Operations, then select New Operation.
- In the Select Type dialog, select Hosted Web Service, then click Continue.
- In the New Operation window, set the new operation name to Accept Salesforce Request.
- Click the down arrow next to the operation name, then select View Hosted Web Service URL.
-
In the Hosted Web Service URL dialog, in the Server field, enter the hostname or IP address where your private agent is running (
123.456.789.001in this example).
Note
If the agent is running behind a firewall, you must set up a publicly accessible tunnel or proxy, and open HTTP port 46908 (or 46909 for HTTPS).
-
Click Copy to Clipboard to save the URL for Part 2, then click Close.
-
In the New Operation window, click Save.
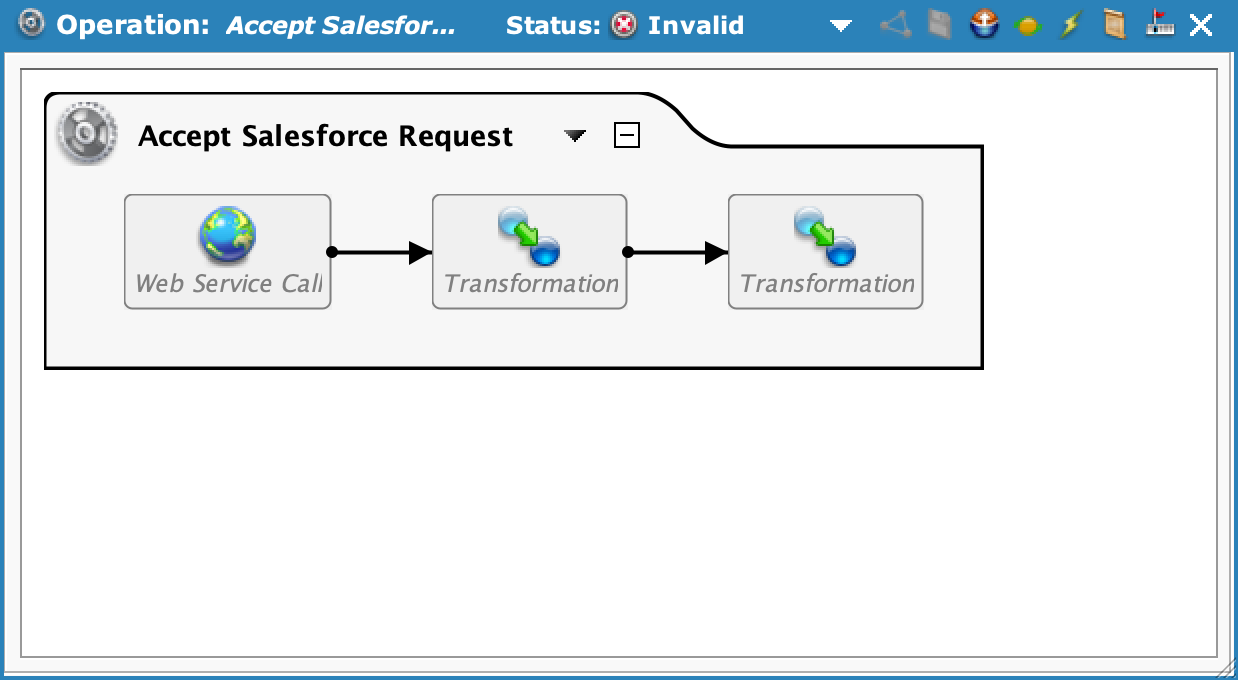
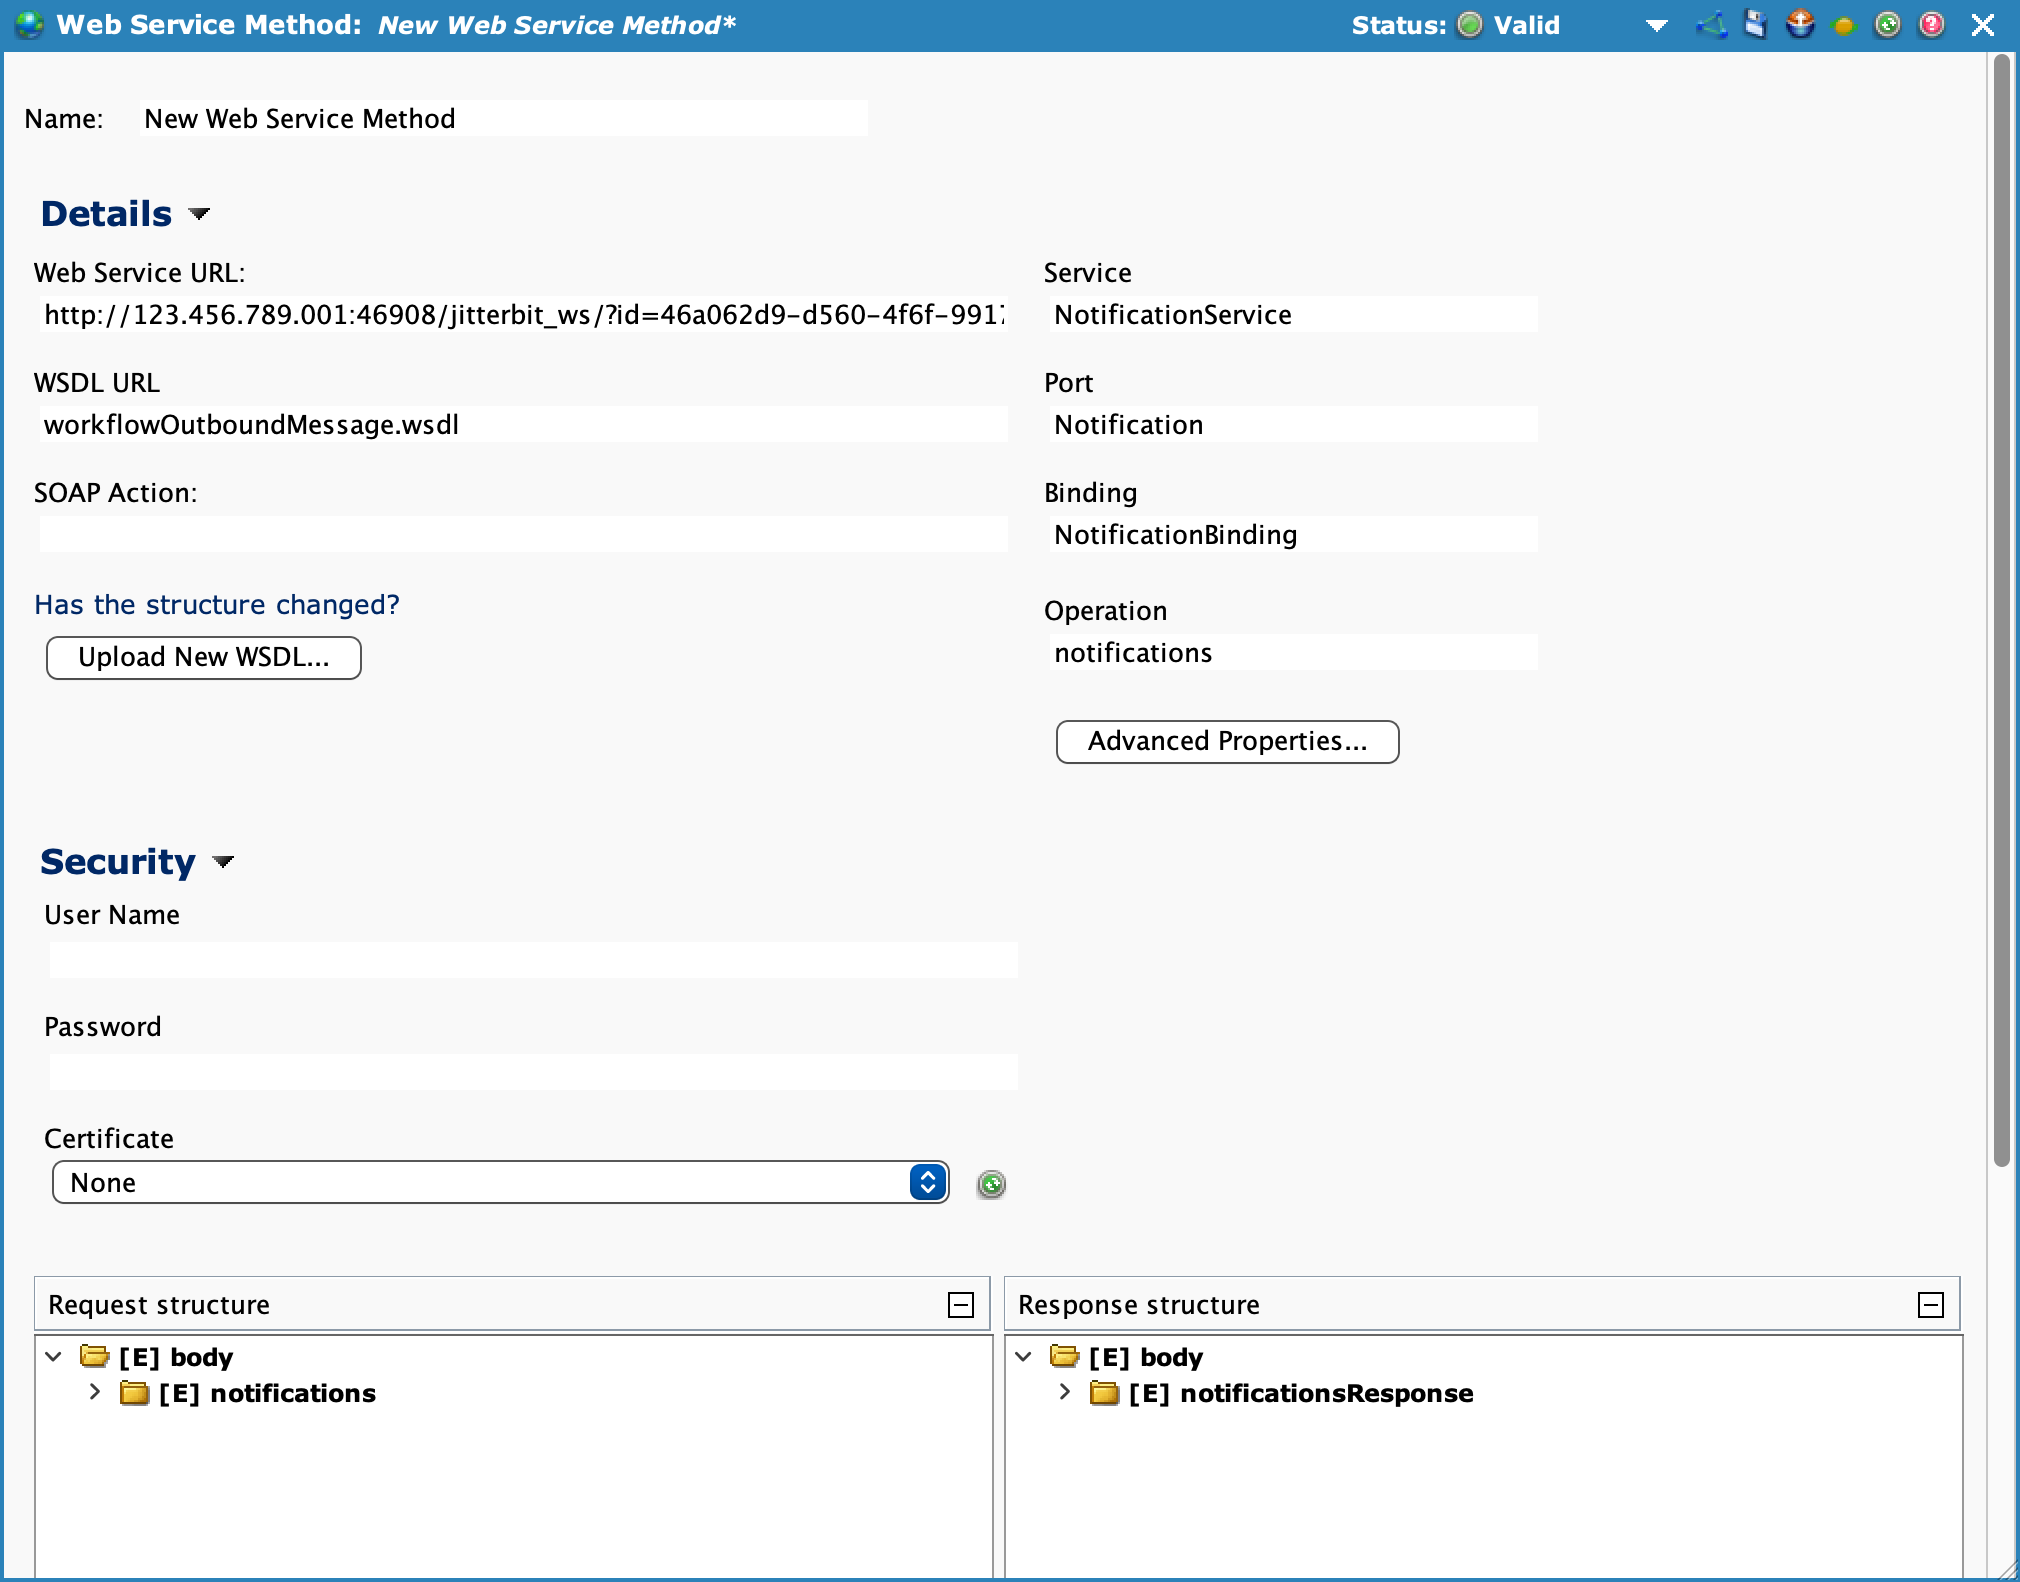
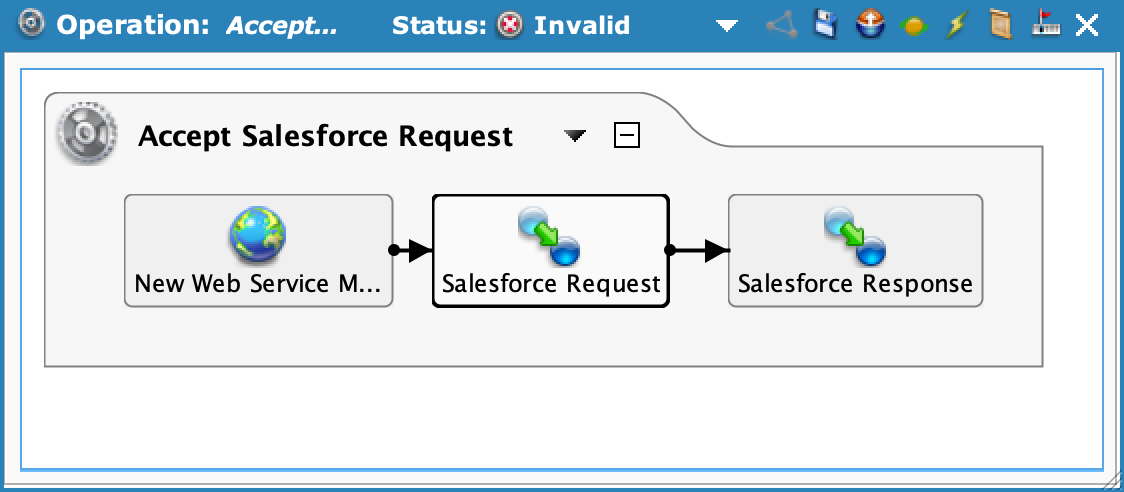
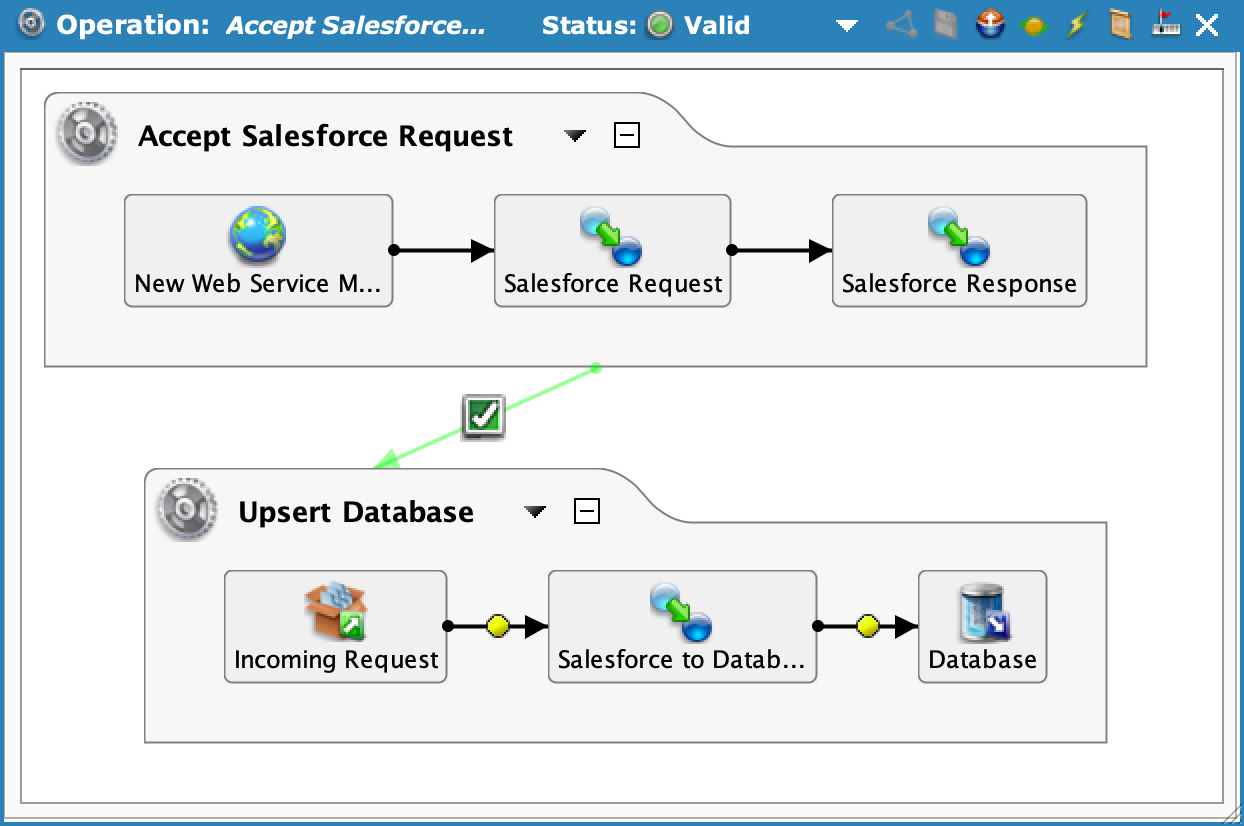
The incomplete Accept Salesforce Request operation:
Part 2: Set up a Salesforce workflow rule and download the WSDL file
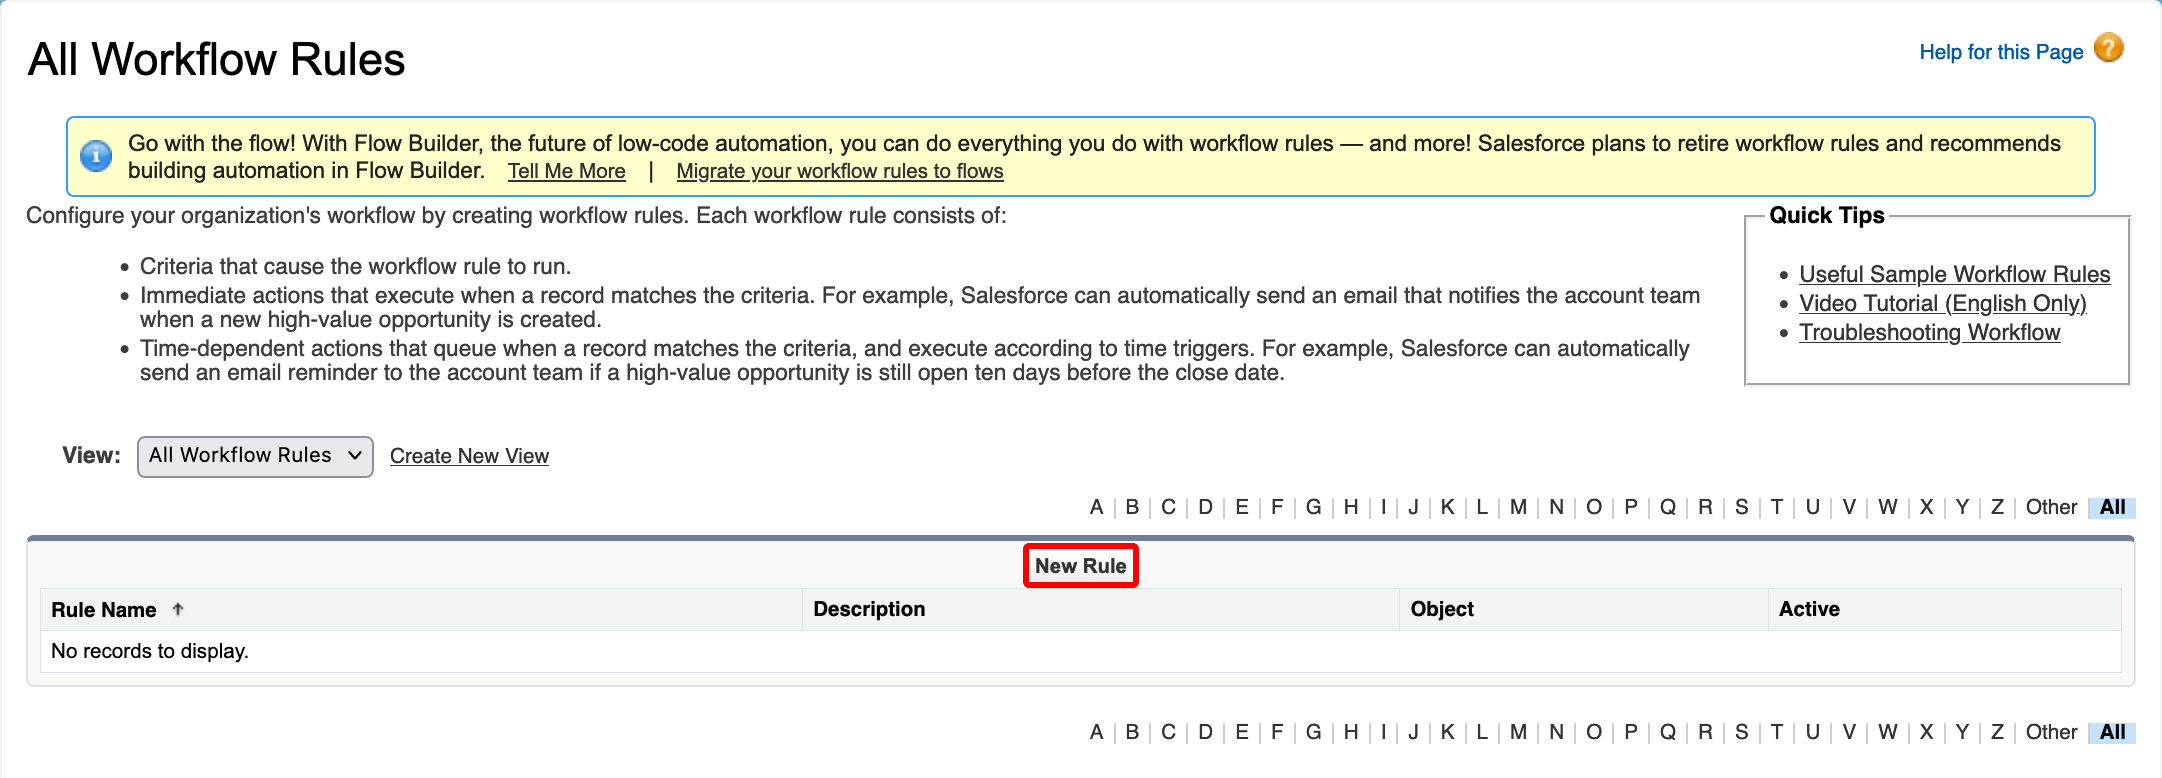
- In Salesforce, select Setup > Platform Tools > Process Automation > Workflow Rules.
-
On the Workflow Rules page, click the New Rule button (highlighted in the image below). If a Try It in Flow Builder dialog opens, click Continue with Workflow Rules.
-
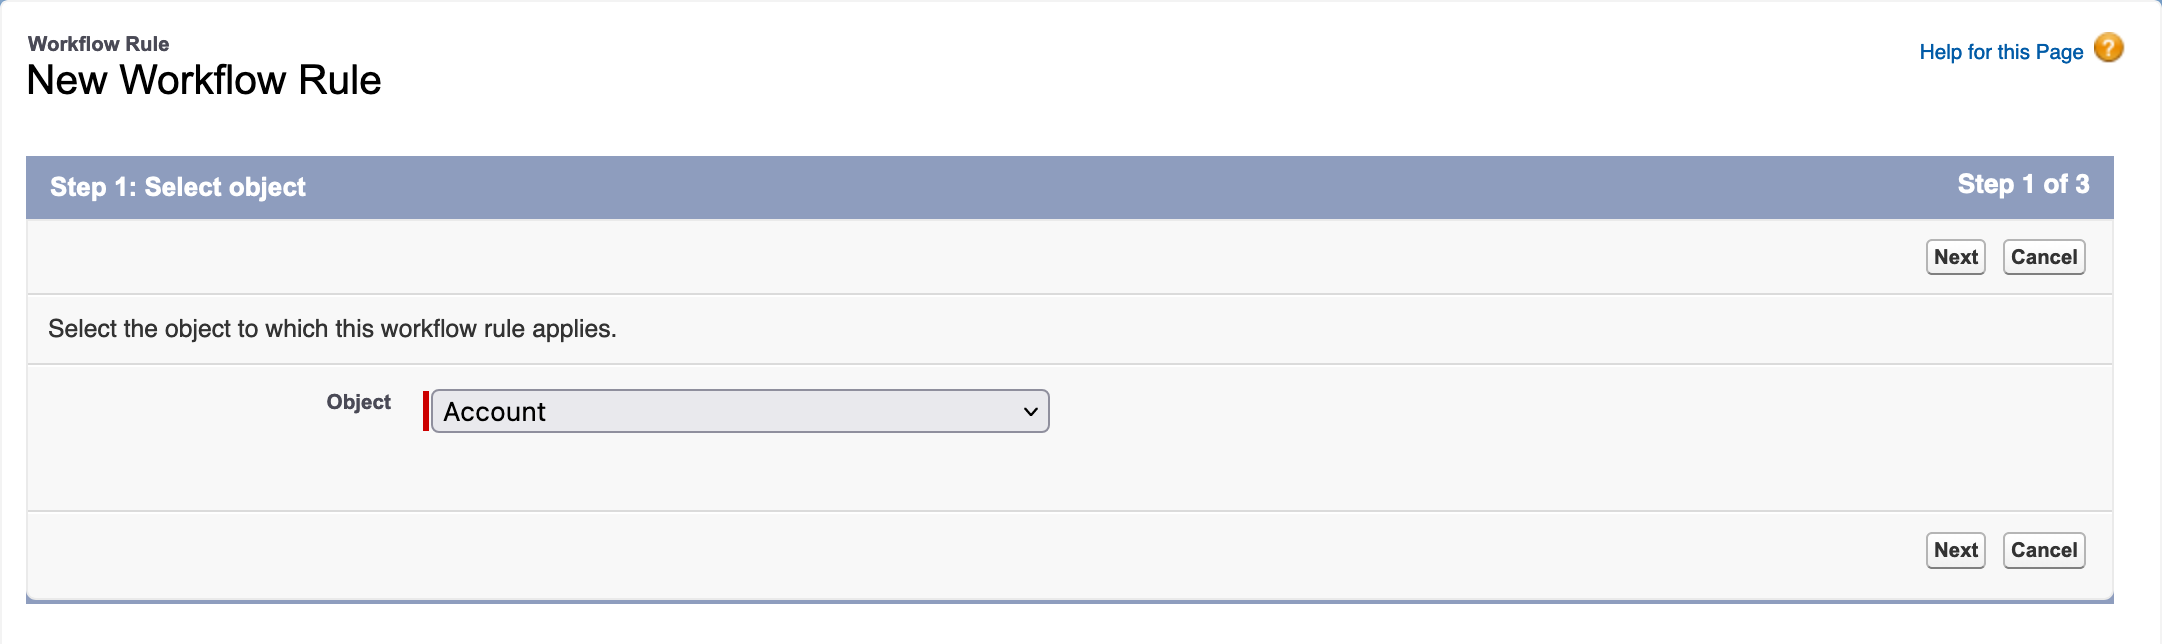
On the New Workflow Rule page, click the Object menu, select Account, then click Next.
-
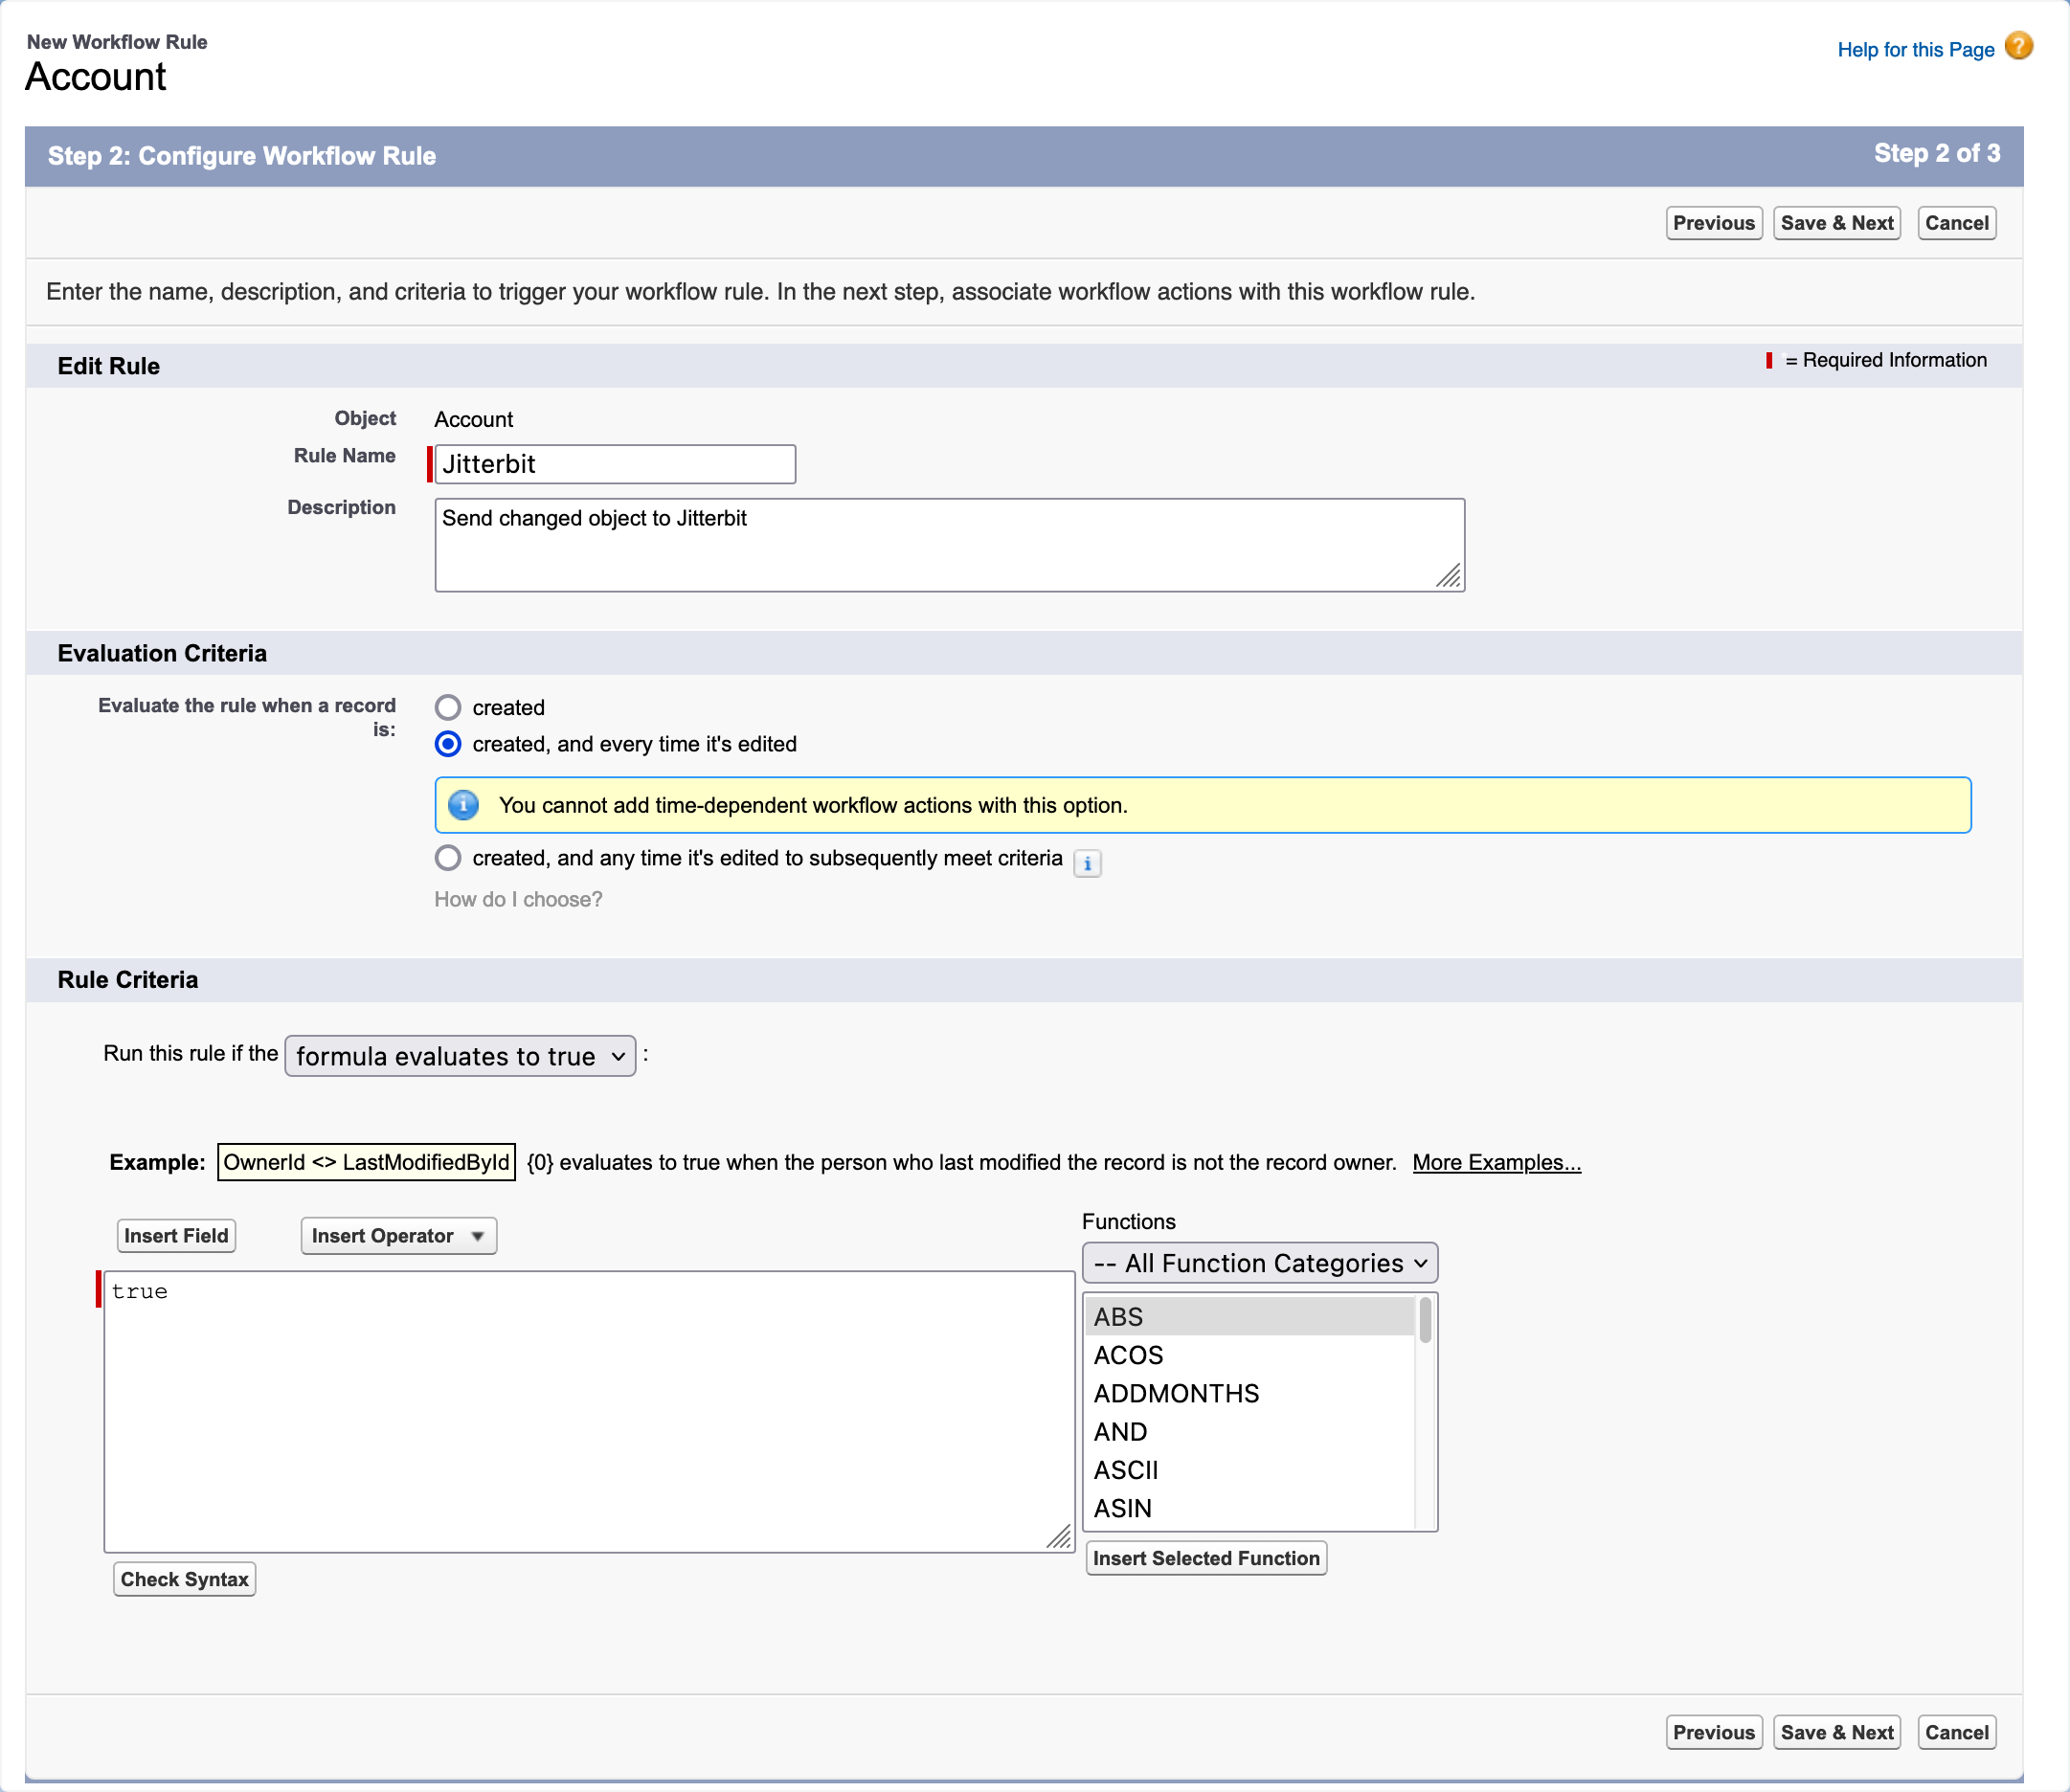
On the Account page, enter values for the following, then click Save & Next:
- Rule Name: Your choice of name.
- Description: (Optional) A description for this rule.
- Evaluation Criteria: Created, and Every Time It's Edited.
- Rule Criteria: Click Run This Rule If the, then select Formula Evaluates to True.
- In the formula field, enter true.
-
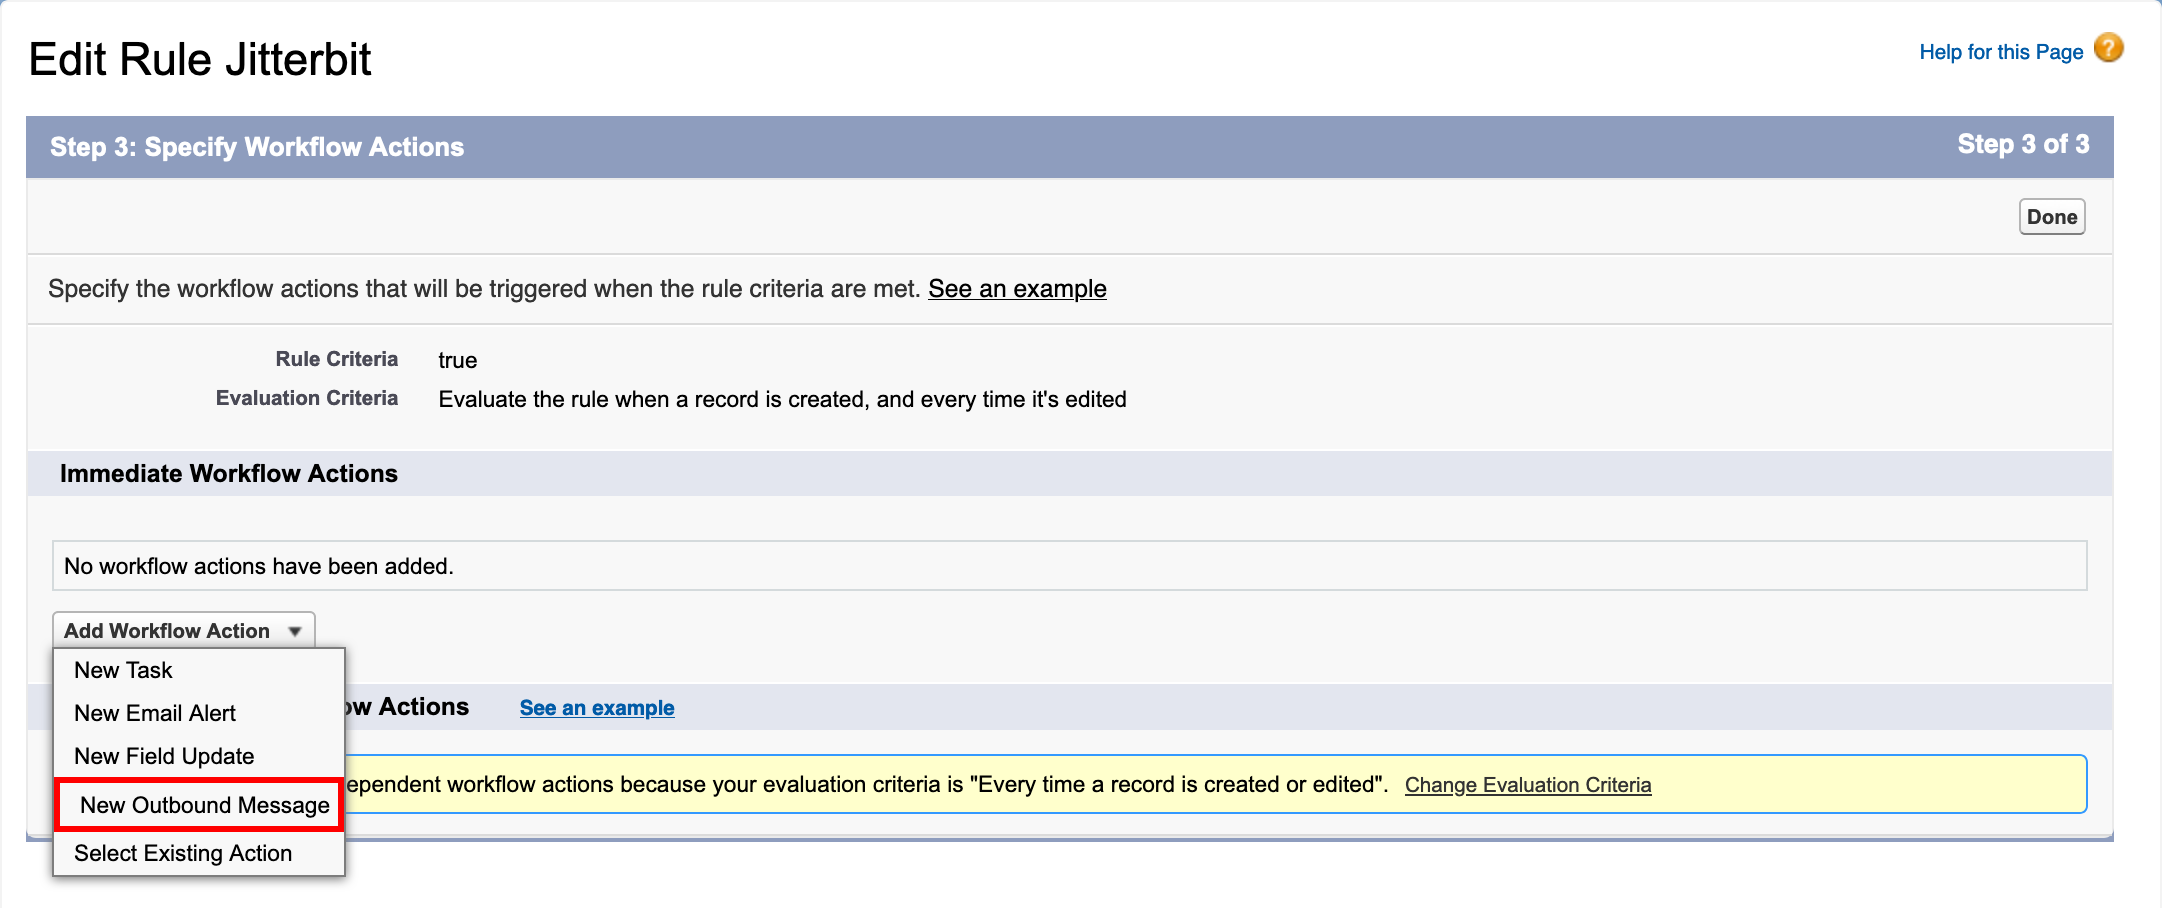
On the Edit Rule page, click Add Workflow Action, then select New Outbound Message (highlighted in the image below).
-
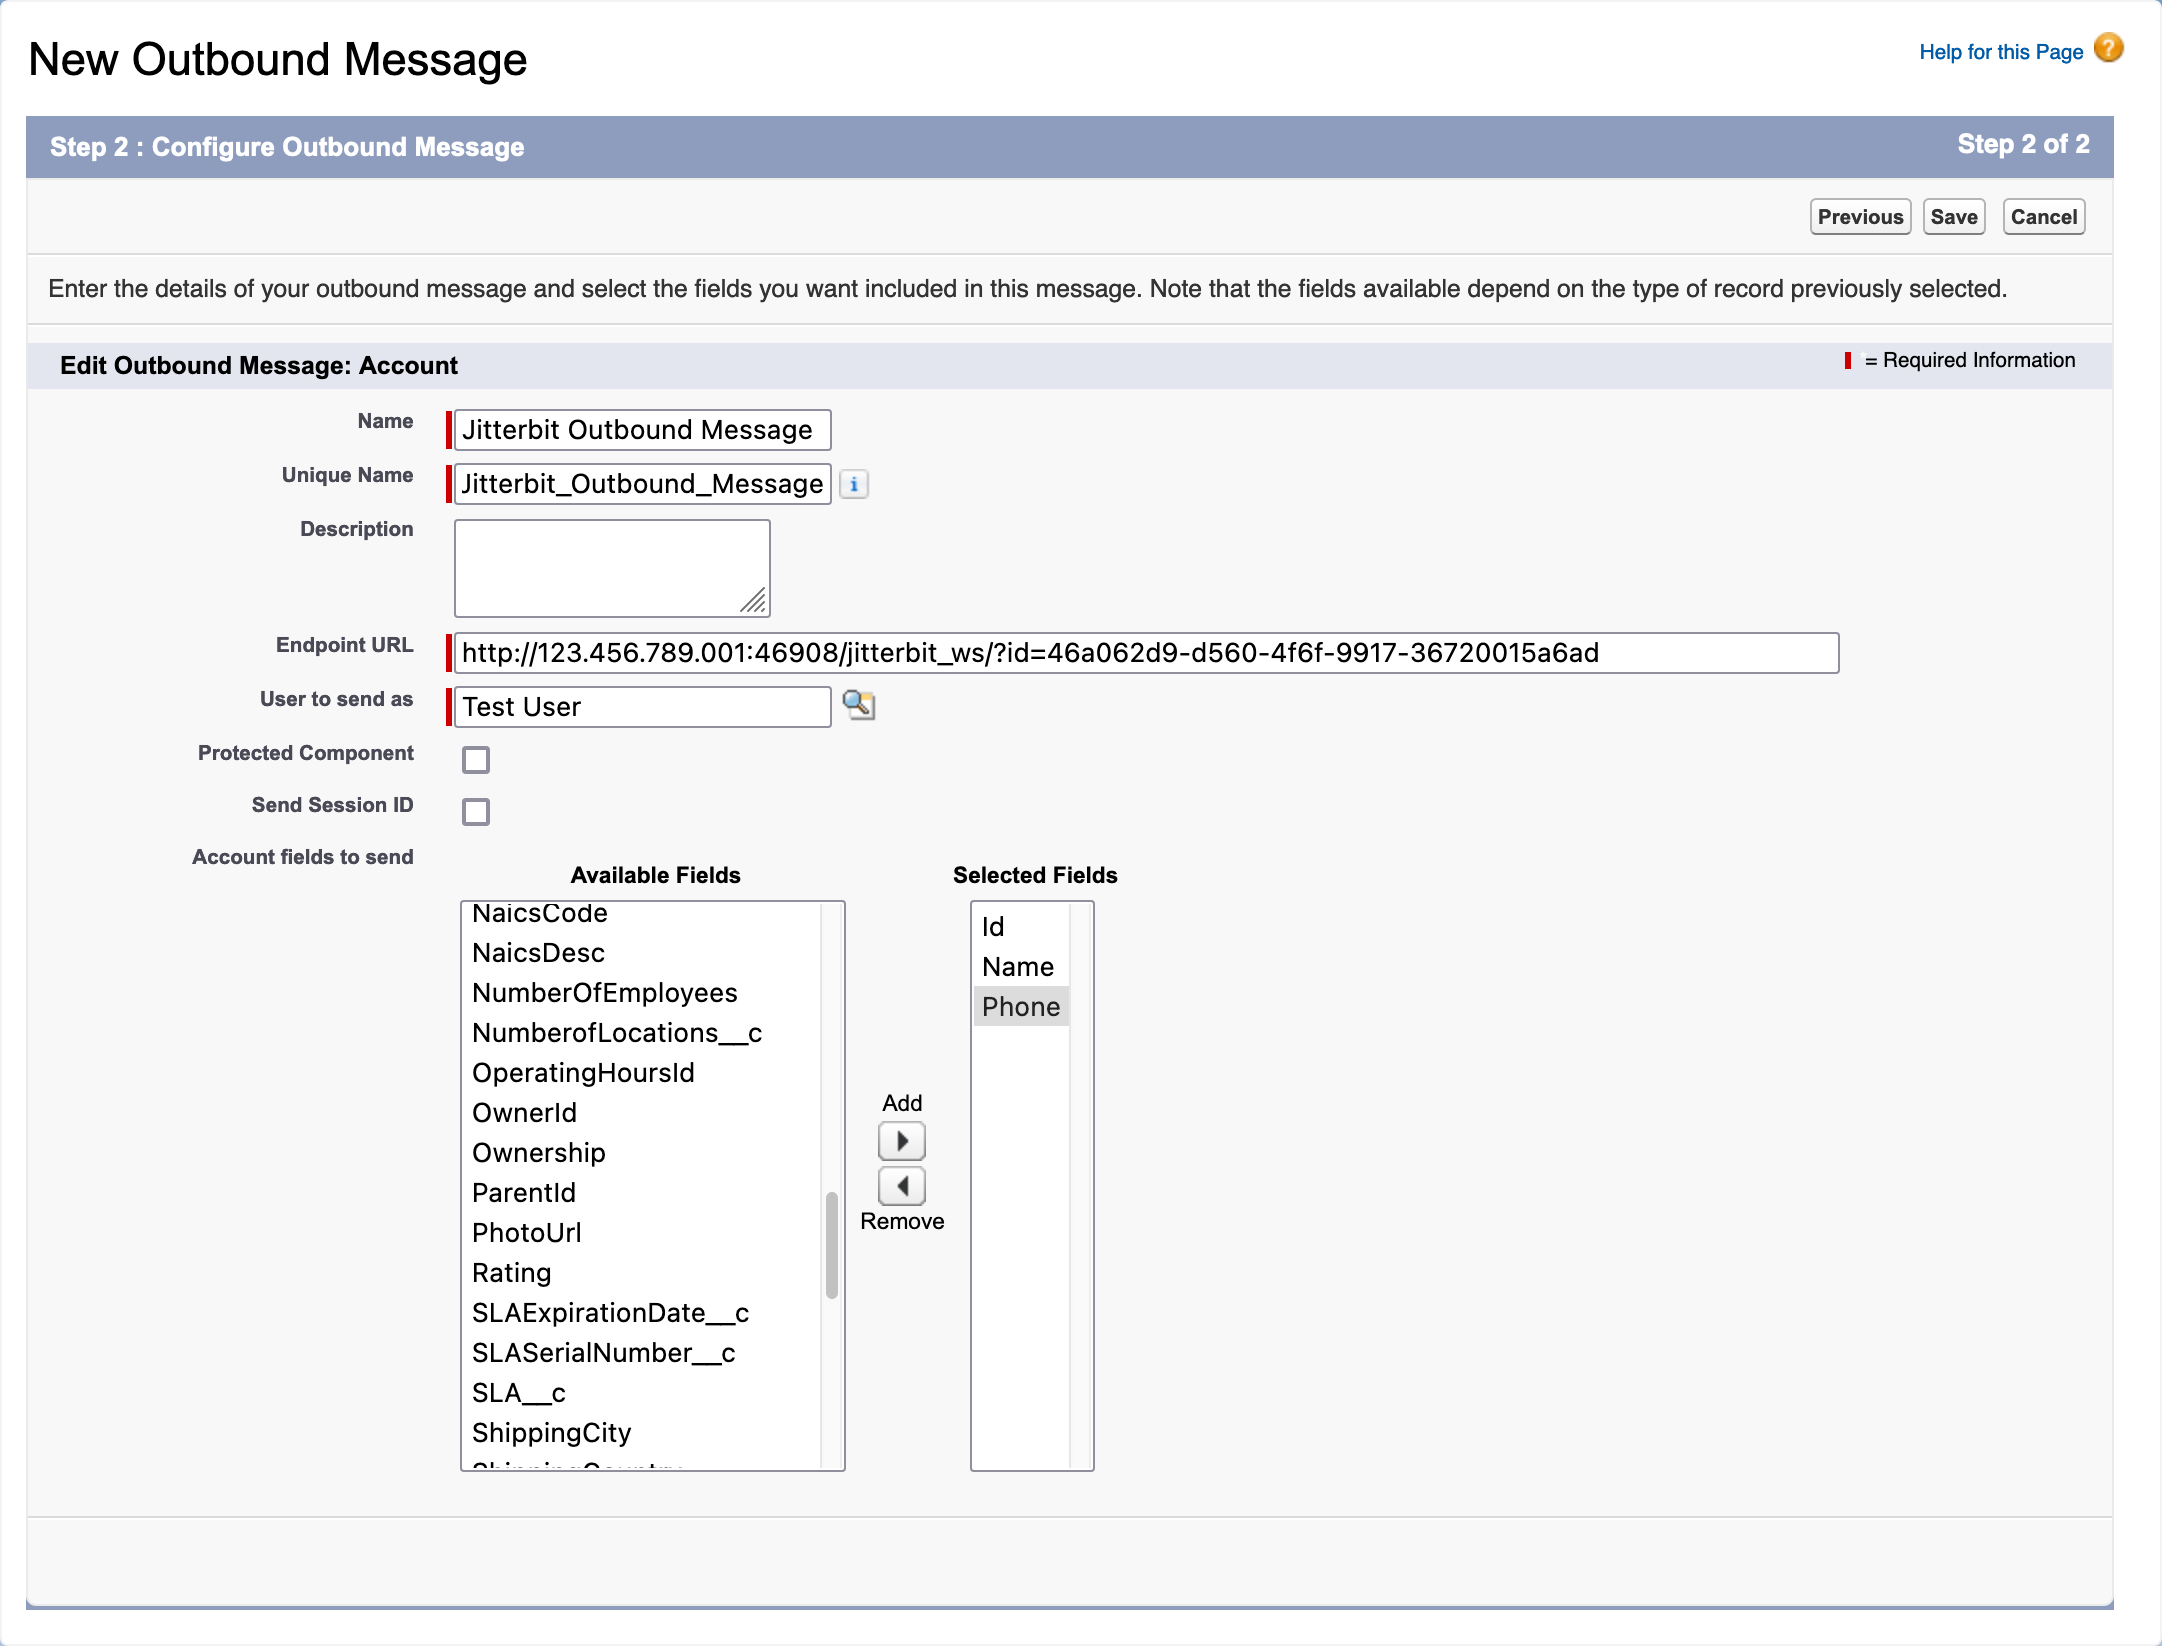
On the New Outbound Message page, enter values for the following, then click Save:
- Name: Your choice of name.
- Unique Name: This name is automatically generated based on the value for Name and the field's naming rules.
- Description: (Optional) A description for this outbound message.
- Endpoint URL: Paste the hosted web service URL copied in Part 1.
- User to Send As: Enter the user that sends the outbound message. The value defaults to your Salesforce username.
- Protected Component: Not selected.
- Send Session ID: Not selected.
- Account Fields to Send: Select the object fields to send. In this example, only Name and Phone are selected. The Id field is selected automatically, because it is the key field for the object.
-
On the Edit Rule page, click Done.
-
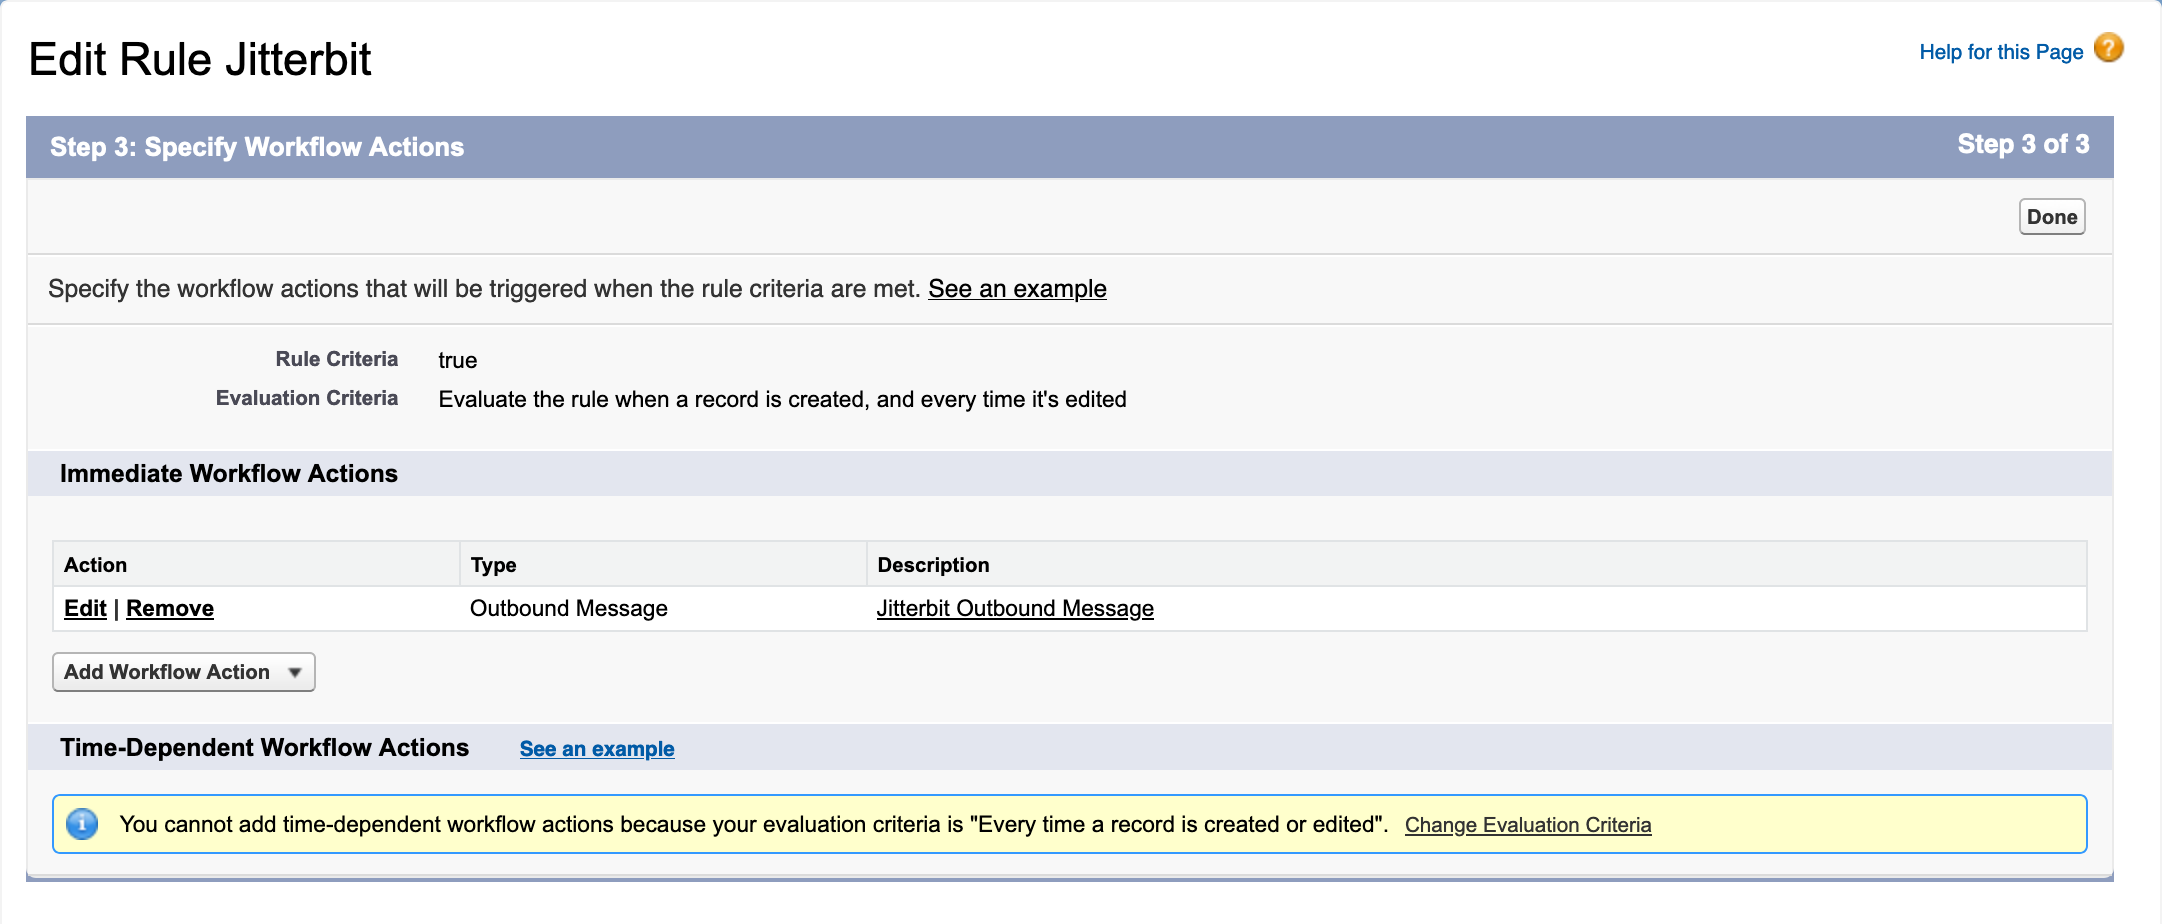
On the Workflow Rule page, in the Immediate Workflow Actions section, click the description link for the outbound message (highlighted in the image below).
-
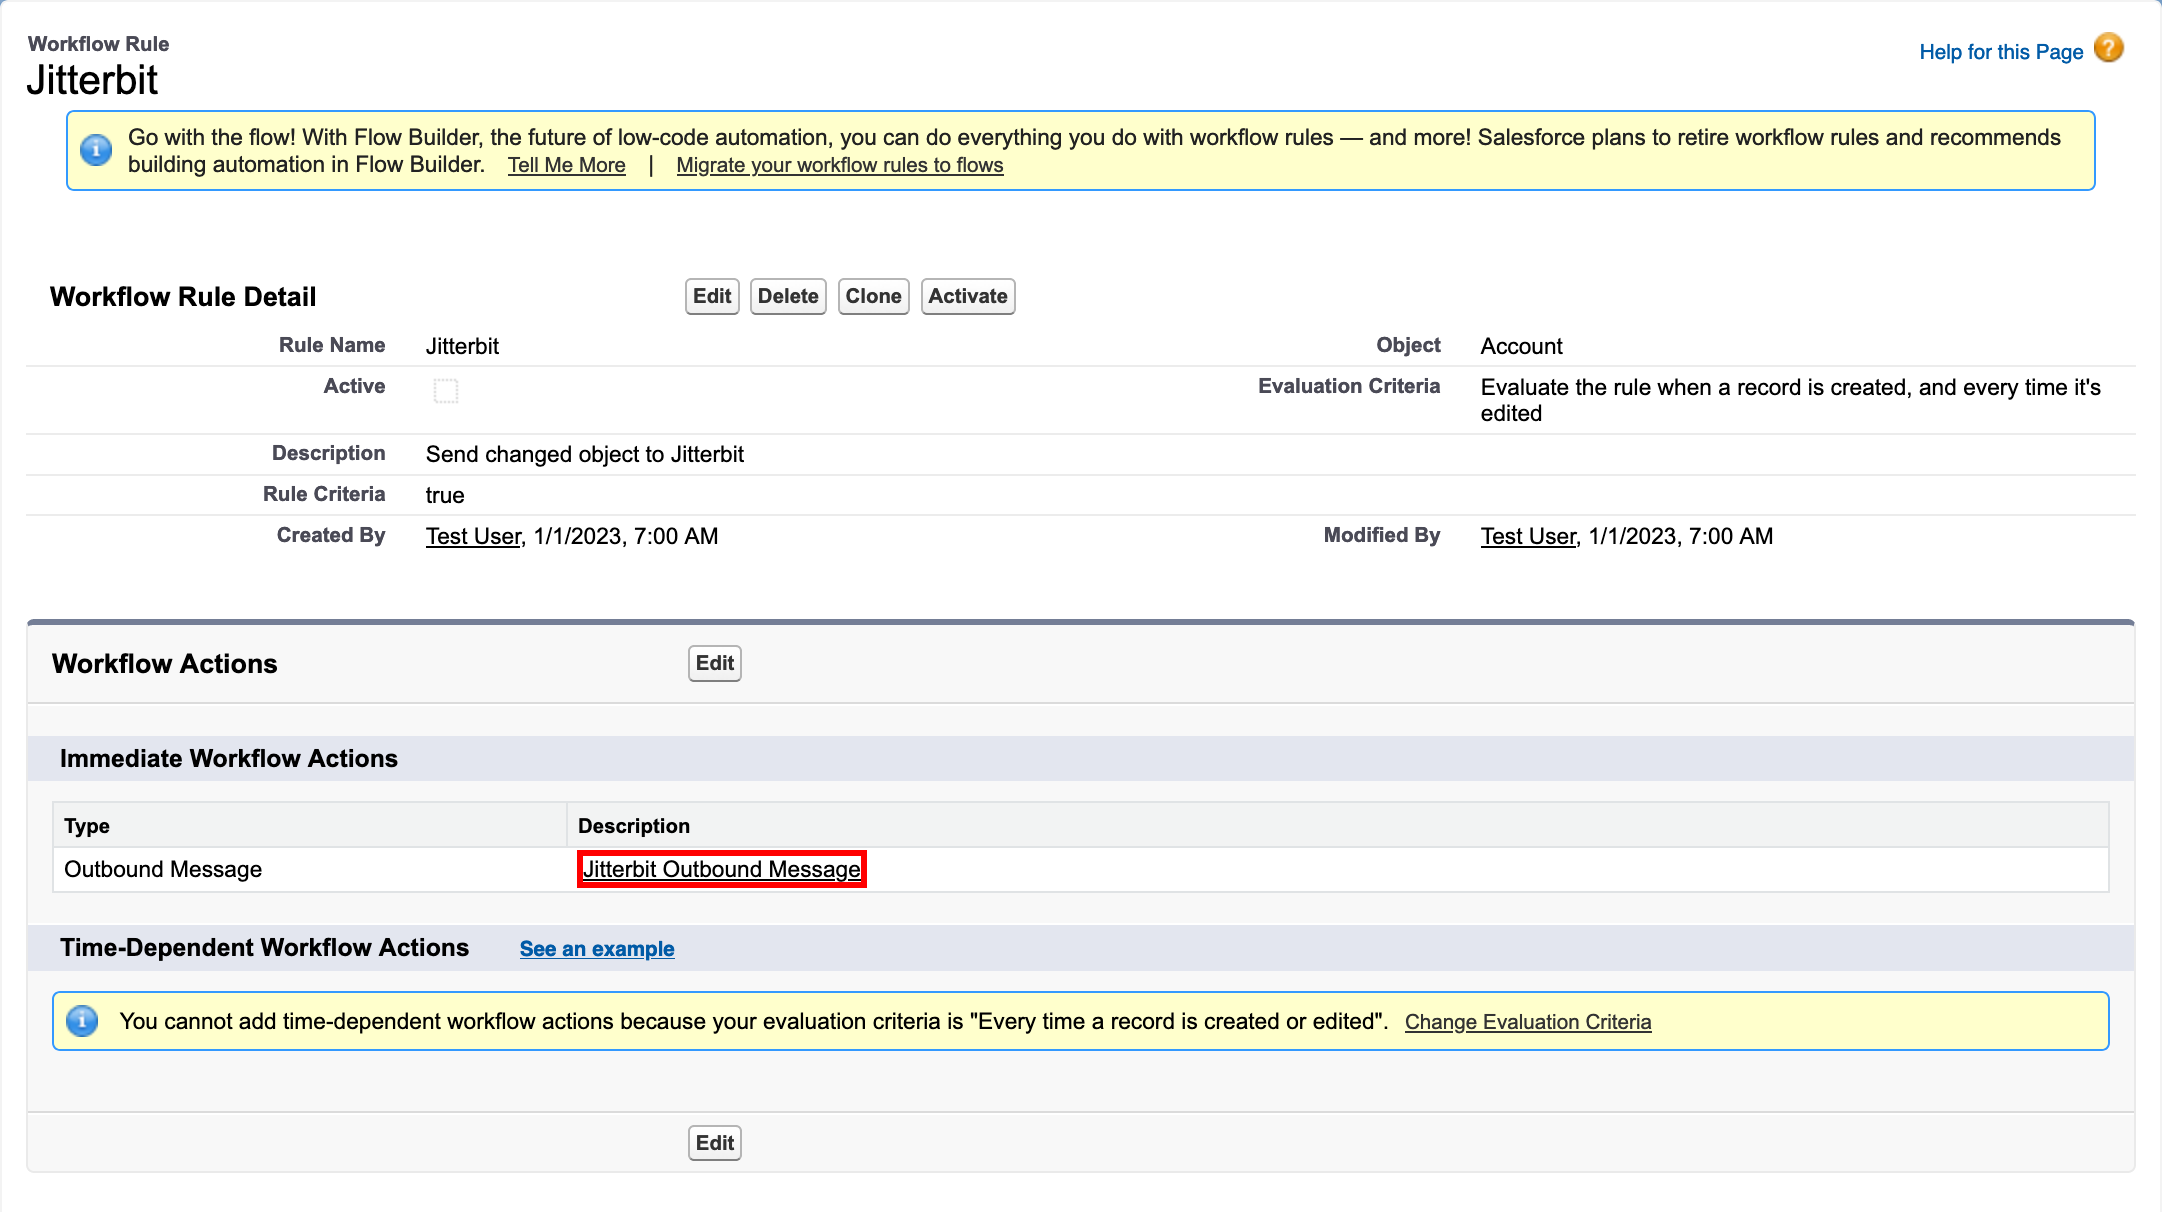
In the message's Workflow Outbound Message Detail page, click the link Click for WSDL in the row labeled Endpoint WSDL (highlighted in the image below).
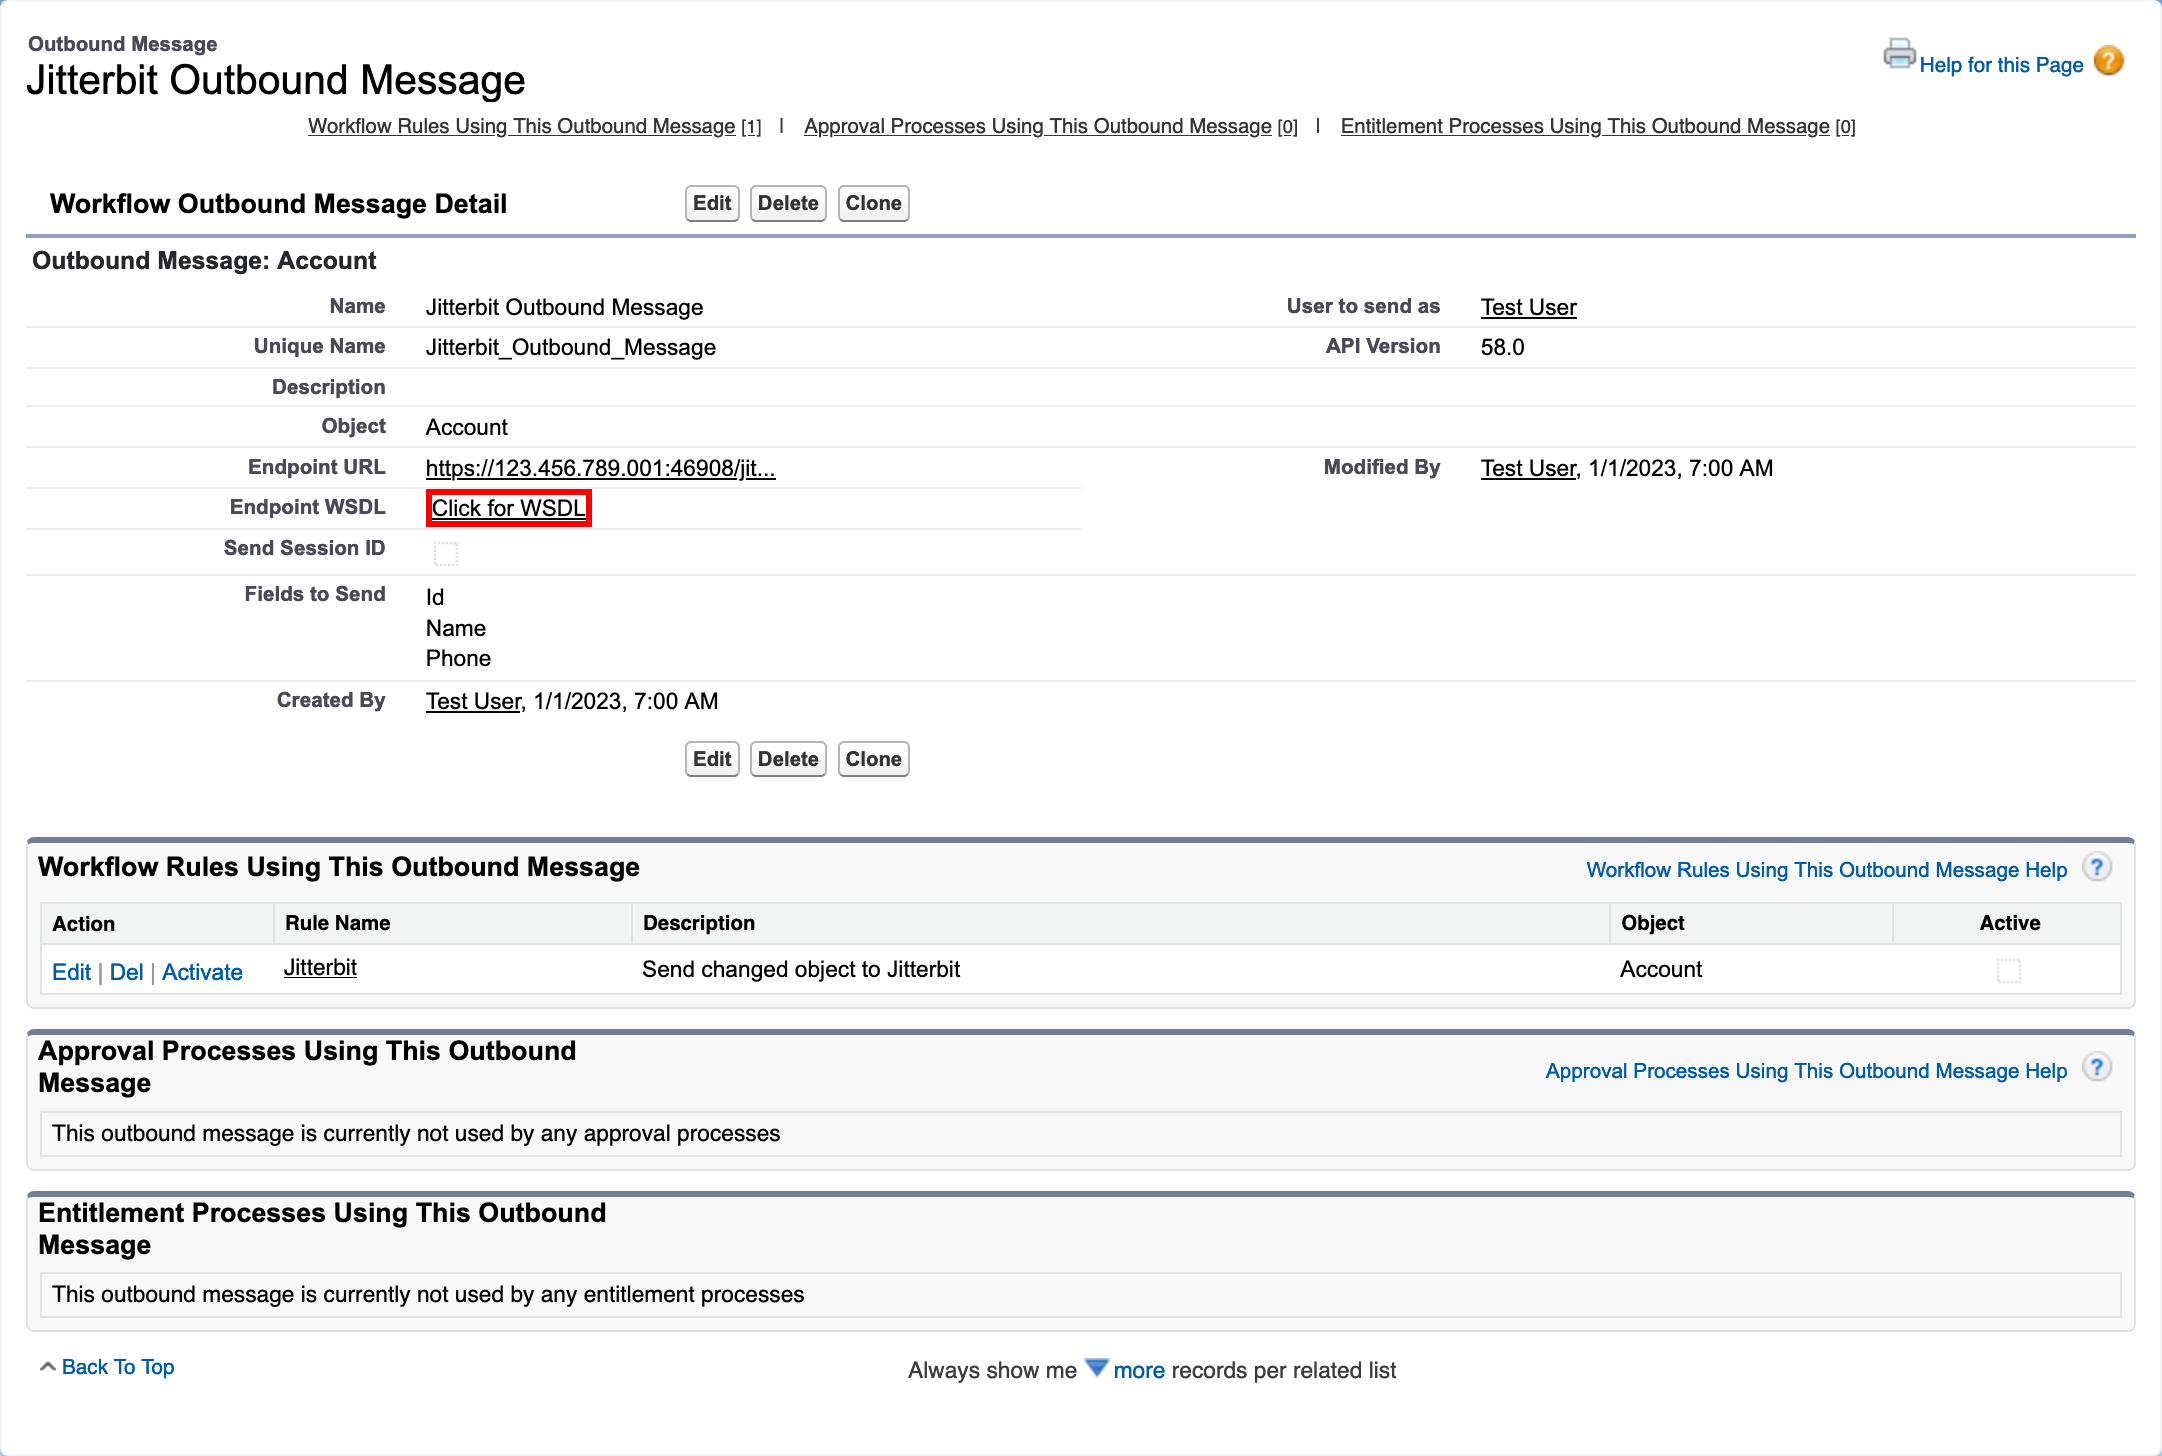
-
An XML file opens in a new browser window. Save the file with a
.wsdlextension. Depending on your operating system, you may have to change the file's extension from.xmlto.wsdlafter downloading.
Part 3: Design Studio operations
Define a web service method
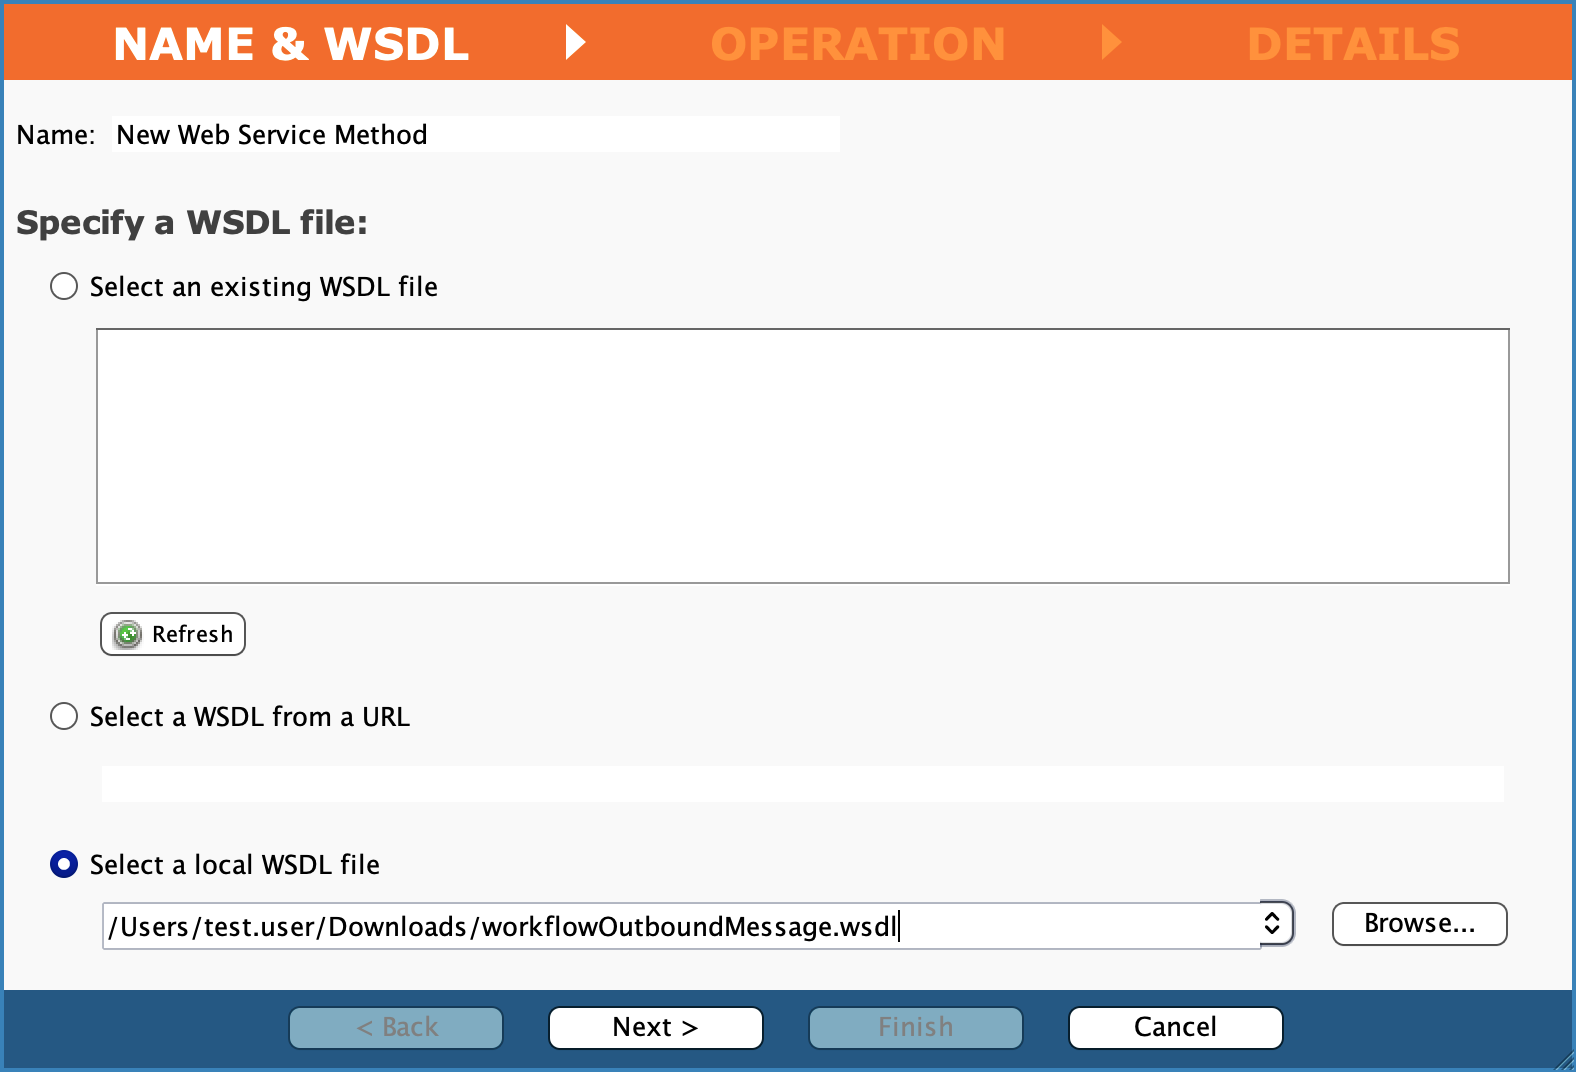
- In the Design Studio project started in Part 1, in the project items on the left, right-click on Web Service Methods and select New web service method.
-
In the New Web Service Method window, select Select a Local WSDL File, click Browse, select the WSDL file previously downloaded, then click Next > and wait for file validation.
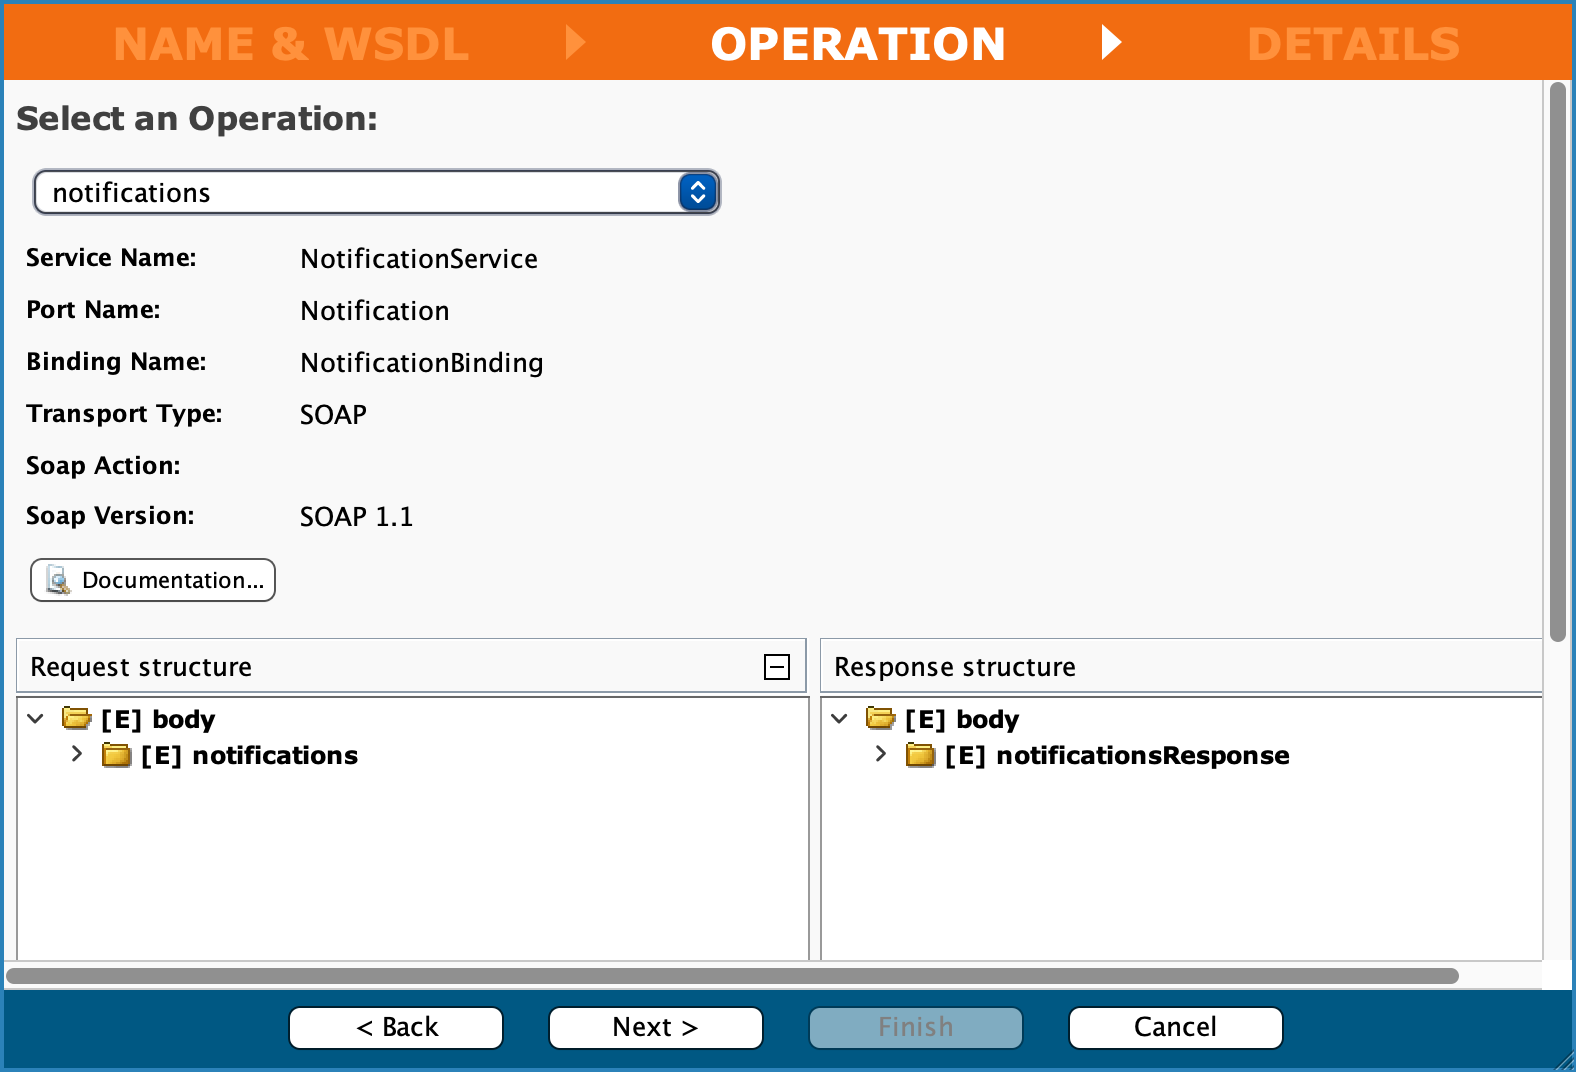
-
In the Operation step, click Next >.
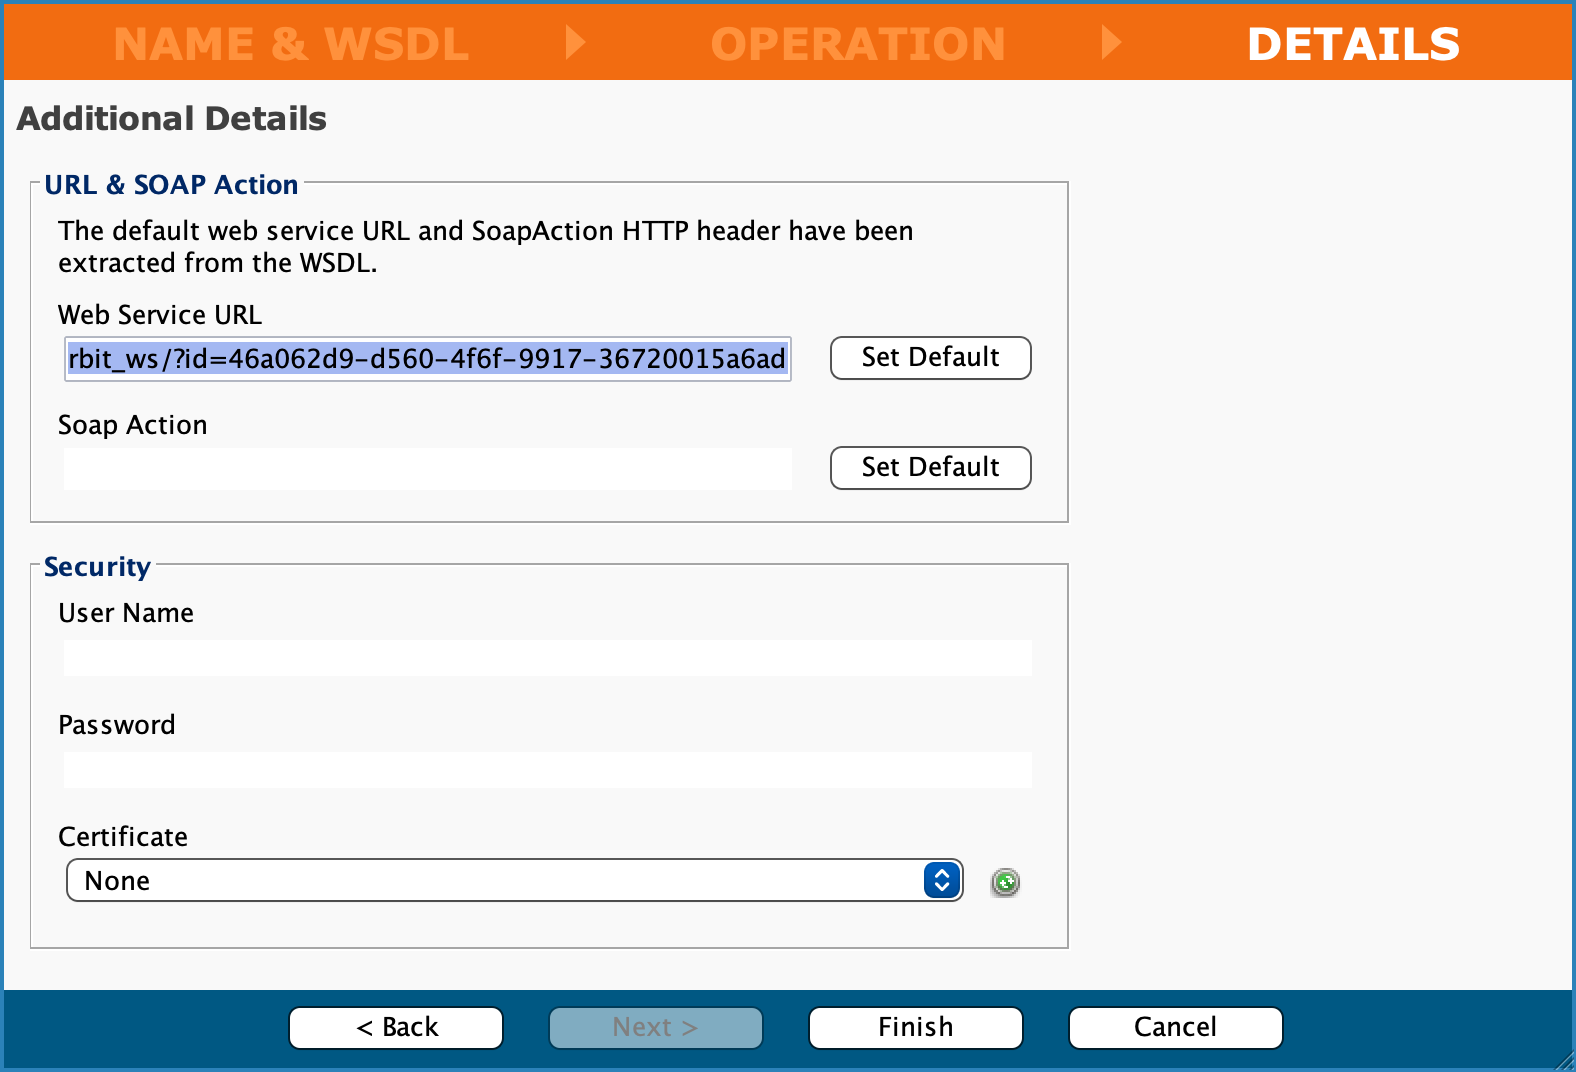
-
In the Details step, click Finish.
-
Close the New Web Service Method window.
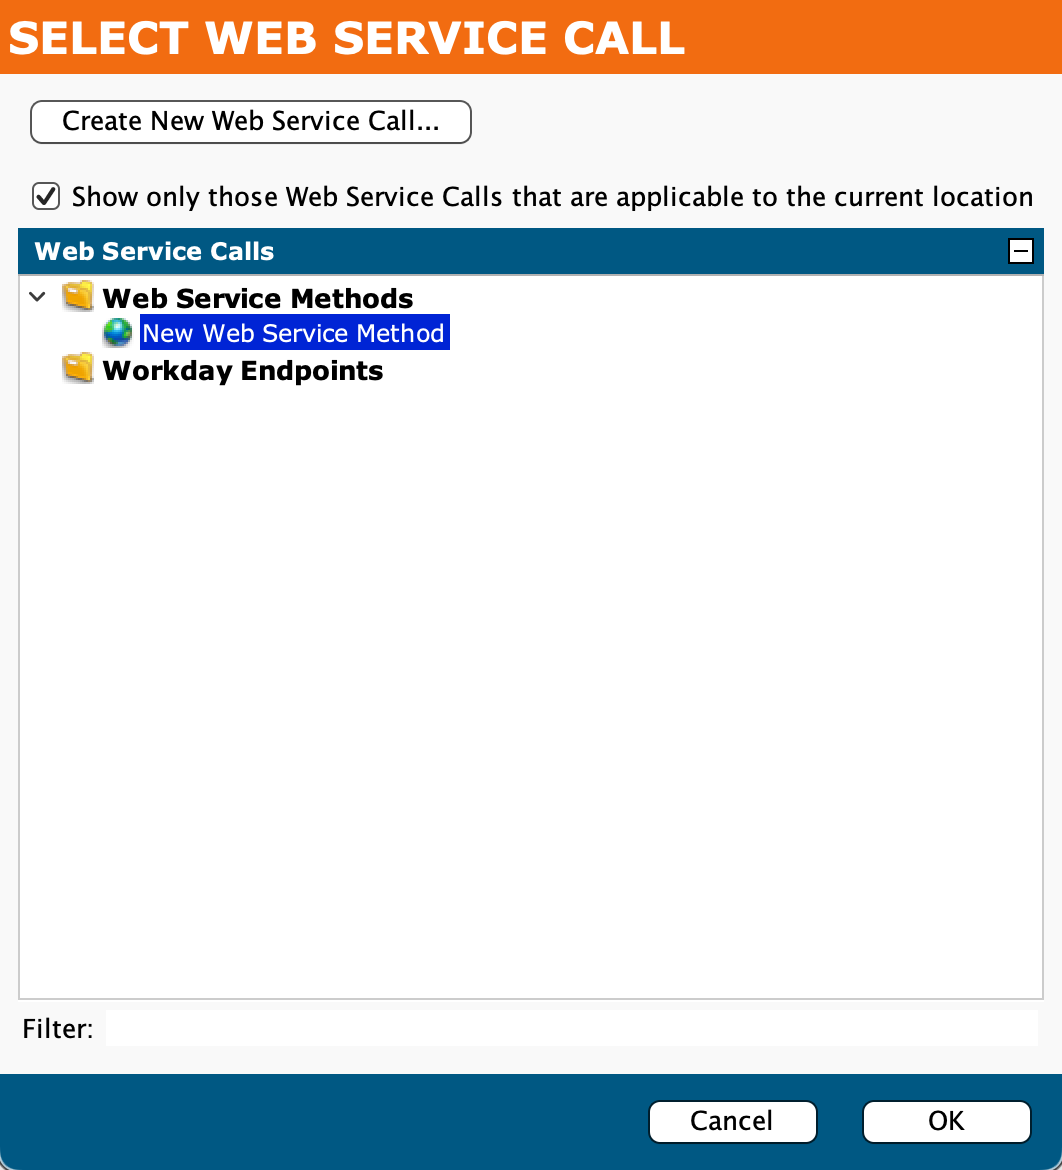
Define a web service call
- In the Accept Salesforce Request operation window, double-click the Web Service Call activity.
-
In the Select Web Service Call dialog, select New Web Service Method, then click OK.
-
Double-click the end transformation activity, then click Create New Transformation.
-
In the New Transformation window, set values for the following, then click Finish:
- Name: Salesforce Response.
- Source: (None)
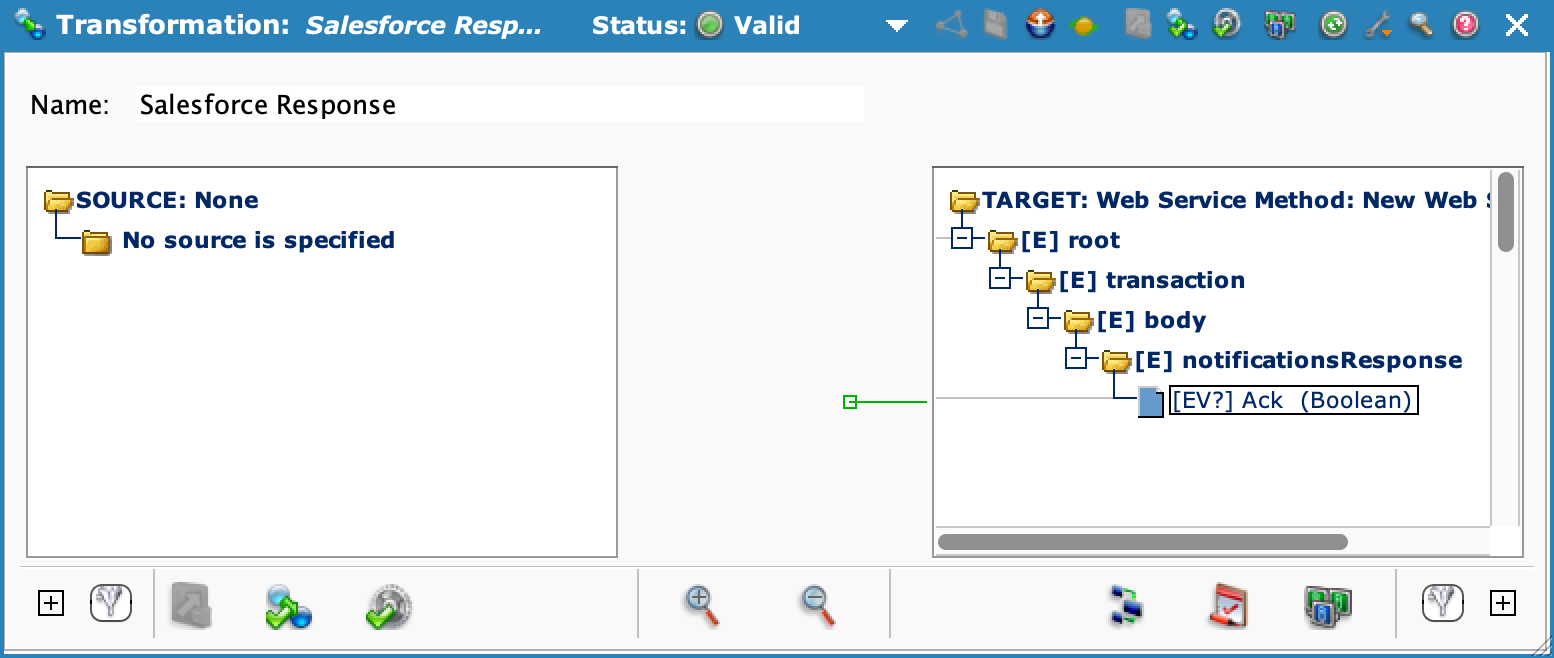
-
In The Salesforce Response transformation window, expand all target nodes until the element
[EV?] Ack (Boolean)is visible, then double-click it.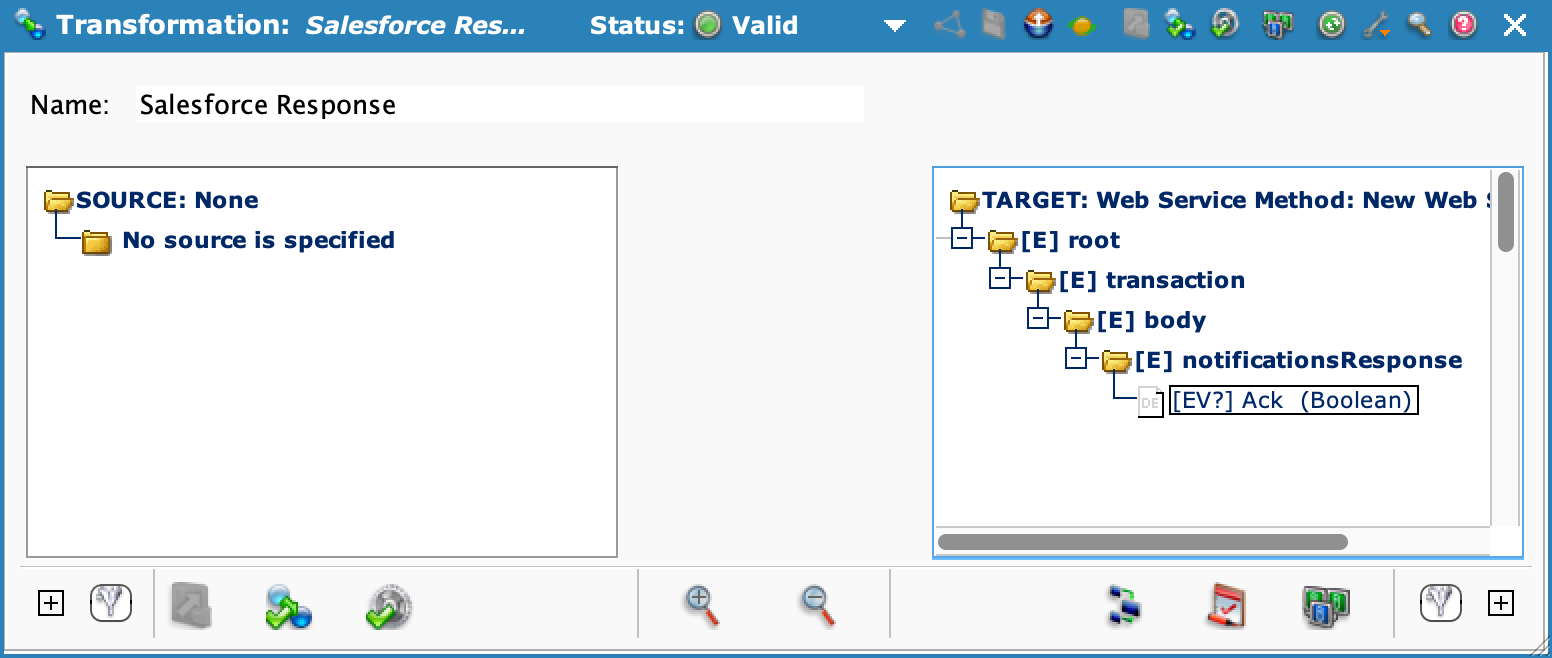
-
In the Formula Builder window, edit the script to match the following, then click OK to close the script editor:
<trans>
true
</trans>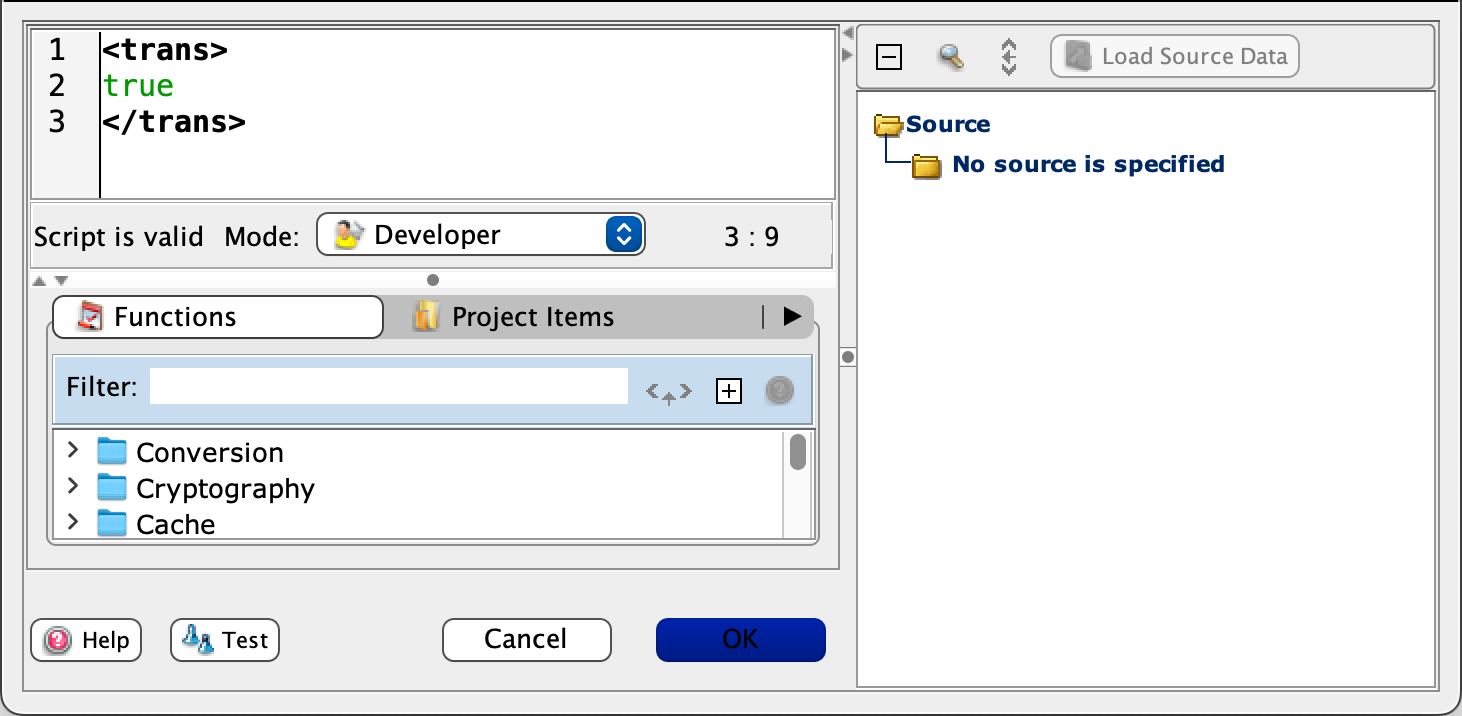
-
In the Salesforce Response transformation window, click Save, then close the window.
-
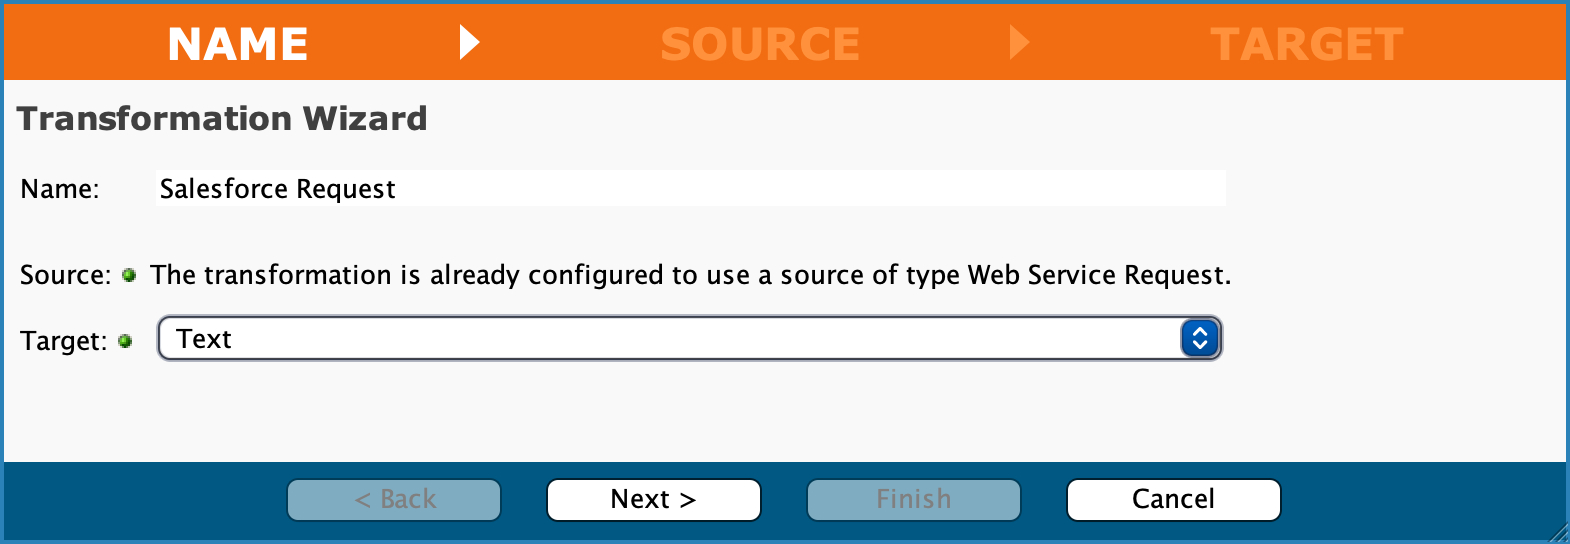
Double-click the middle transformation activity, then click Create New Transformation.
-
In the New Transformation window, set values for the following, then click Next >:
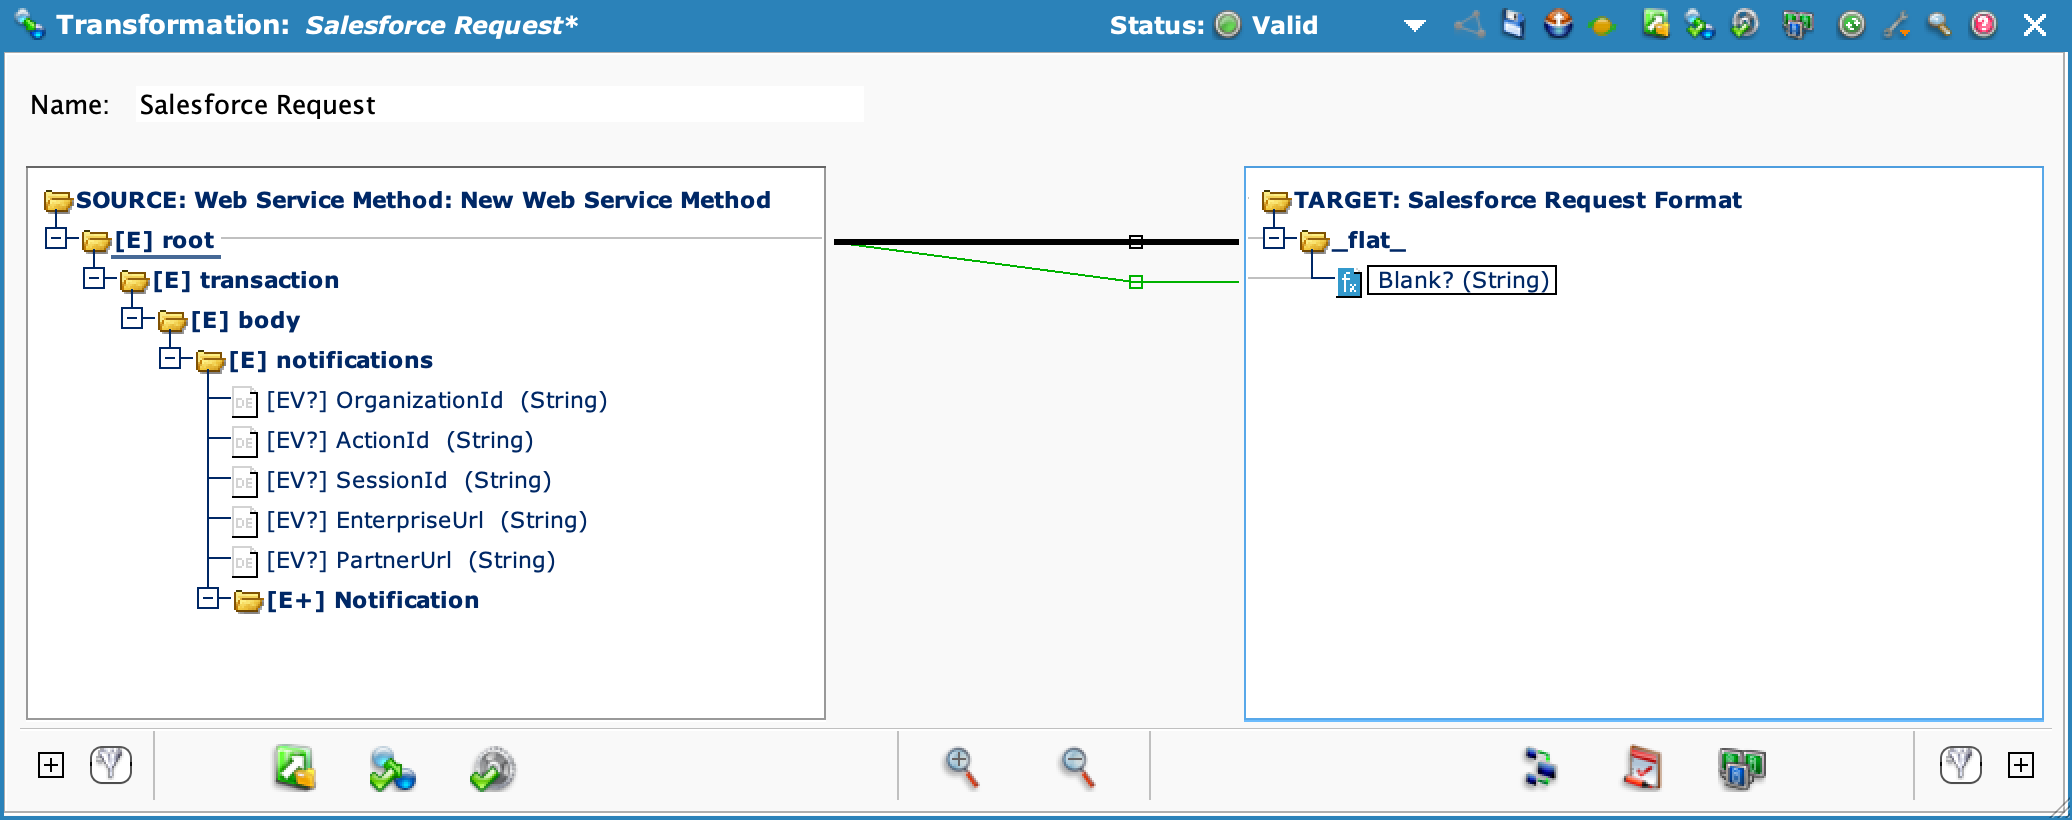
- Name: Salesforce Request
- Target: Text
-
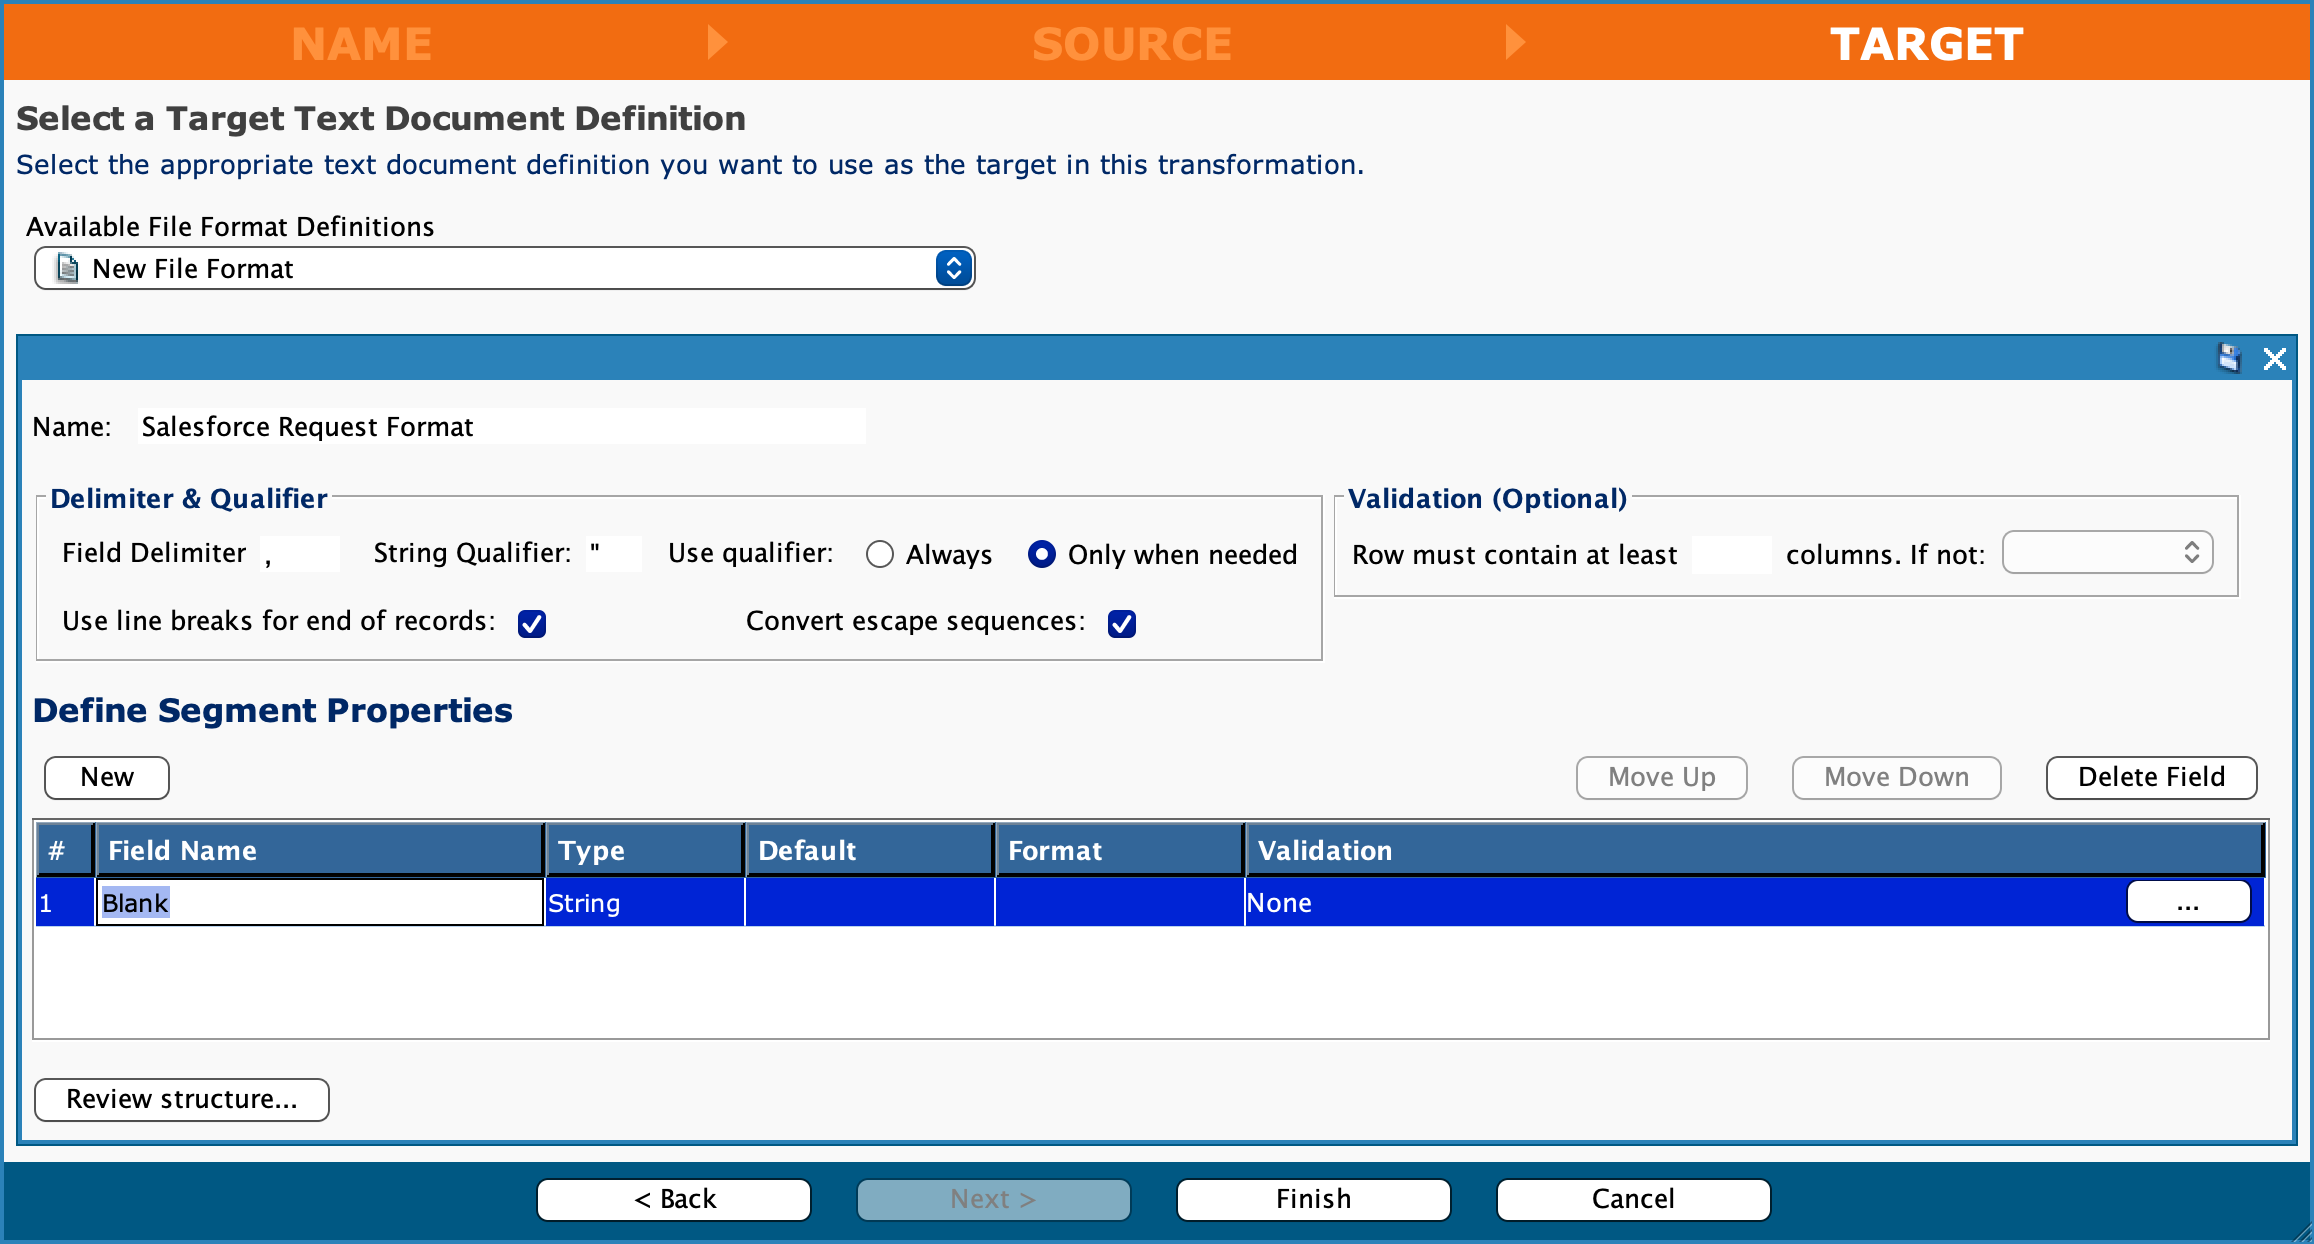
In the Target step, click Available File Format Definitions, then select Create New.
-
Set values for the following, then click Create Manually.
- Name: Salesforce Request Format
- Select Document Type: Simple Text Document
- Select Document Format: Character Delimited

-
In the Define Segment Properties section, click the New button to create a new field.
-
In Field Name, enter Blank, then click Finish.
-
Close the Salesforce Request transformation window.
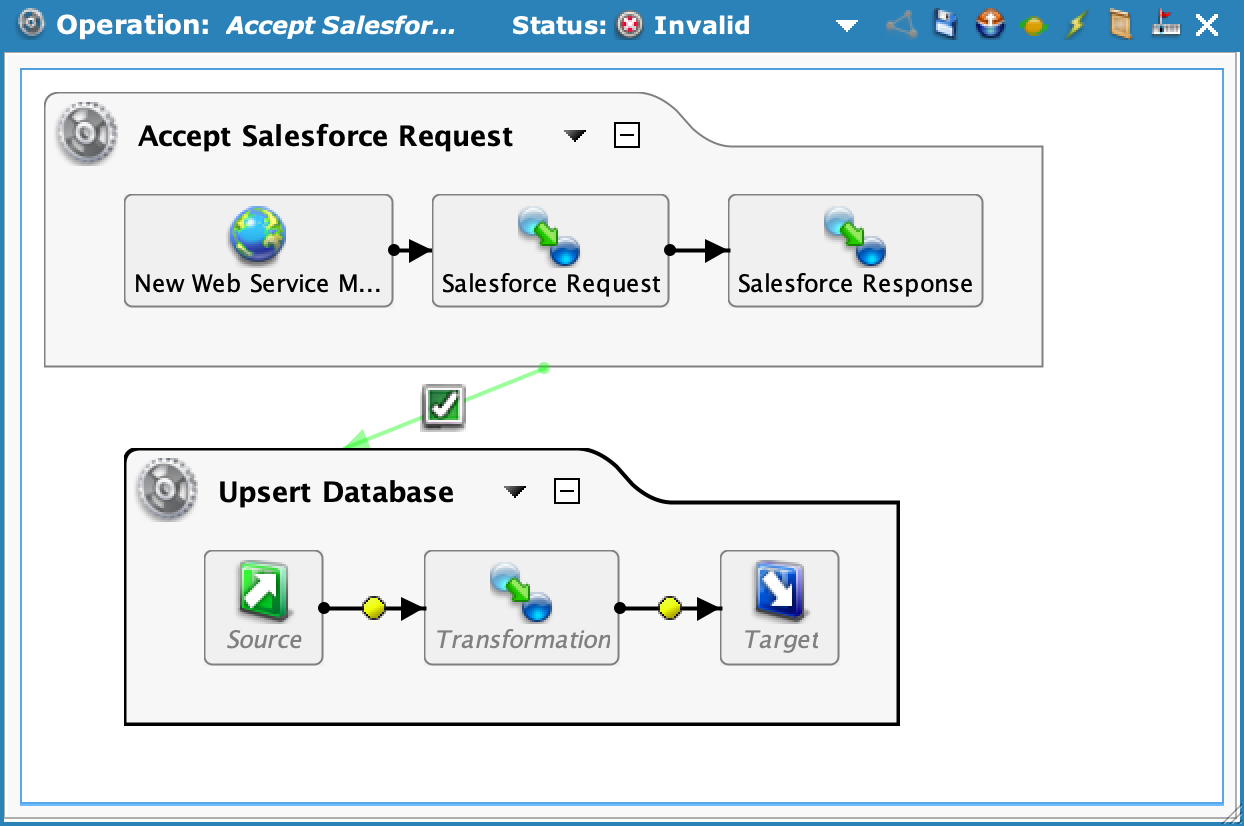
The incomplete Accept Salesforce Request operation:
Define the 'Incoming Request' source
- In the project items list on the left, right-click on Sources, then select New Source.
-
In the Select Type dialog, select Temporary Storage, then click Continue.
-
In the New Source window, enter values for the following:
- Name: Incoming Request
- Get Files:
IncomingRequest[fileGUID].xml
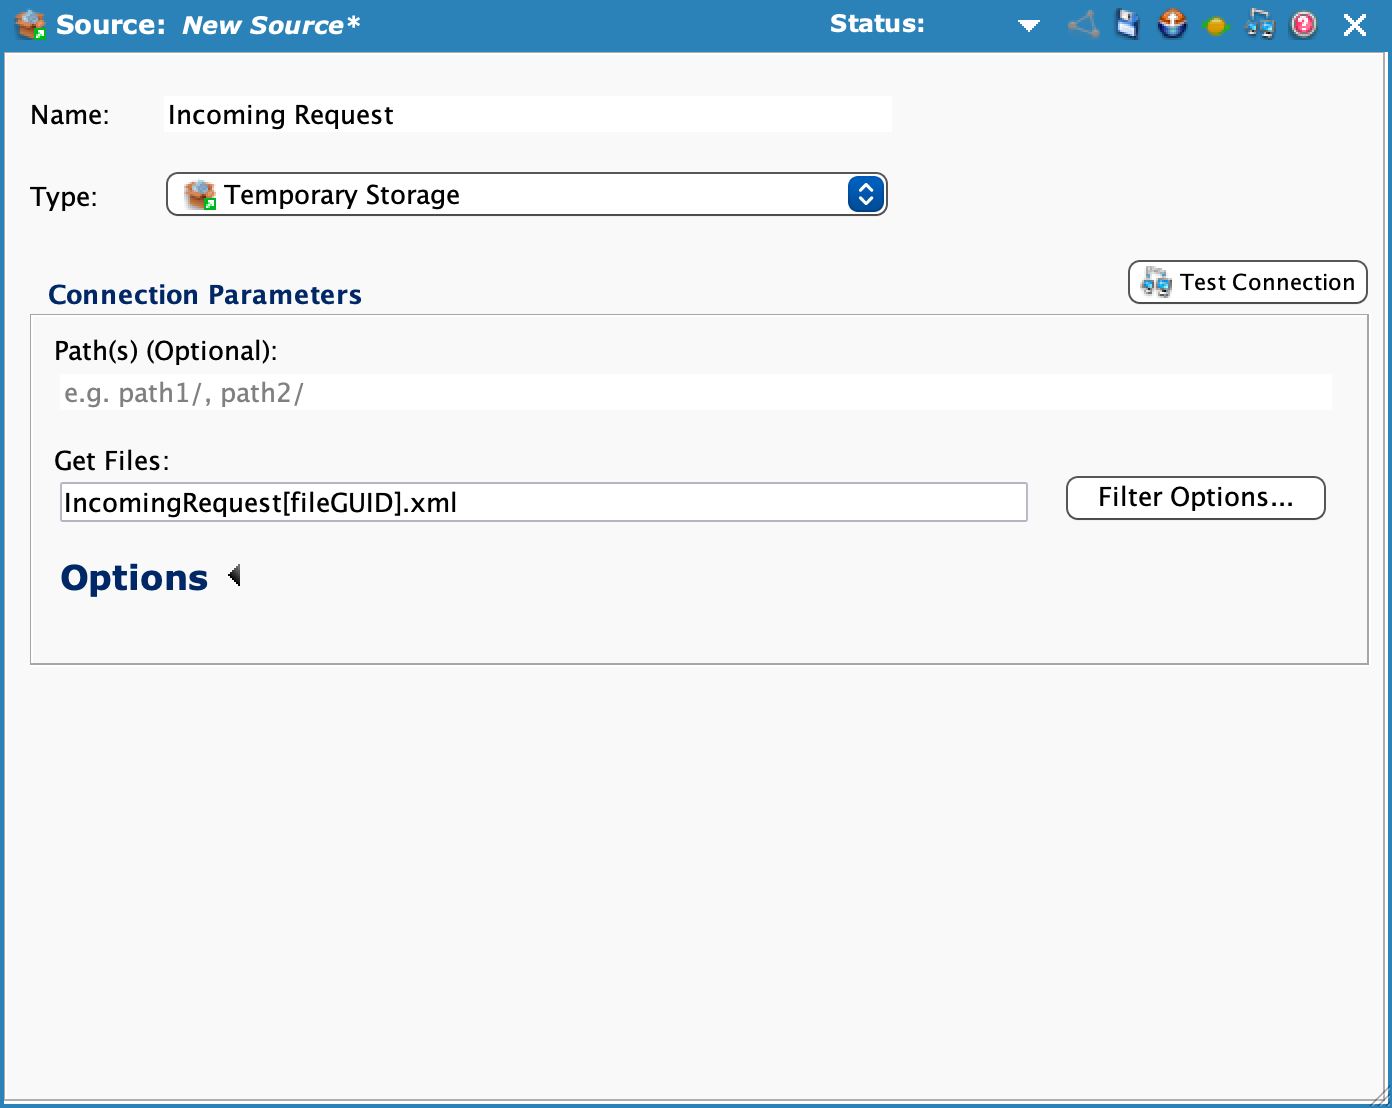
-
Click Save, then close the window.
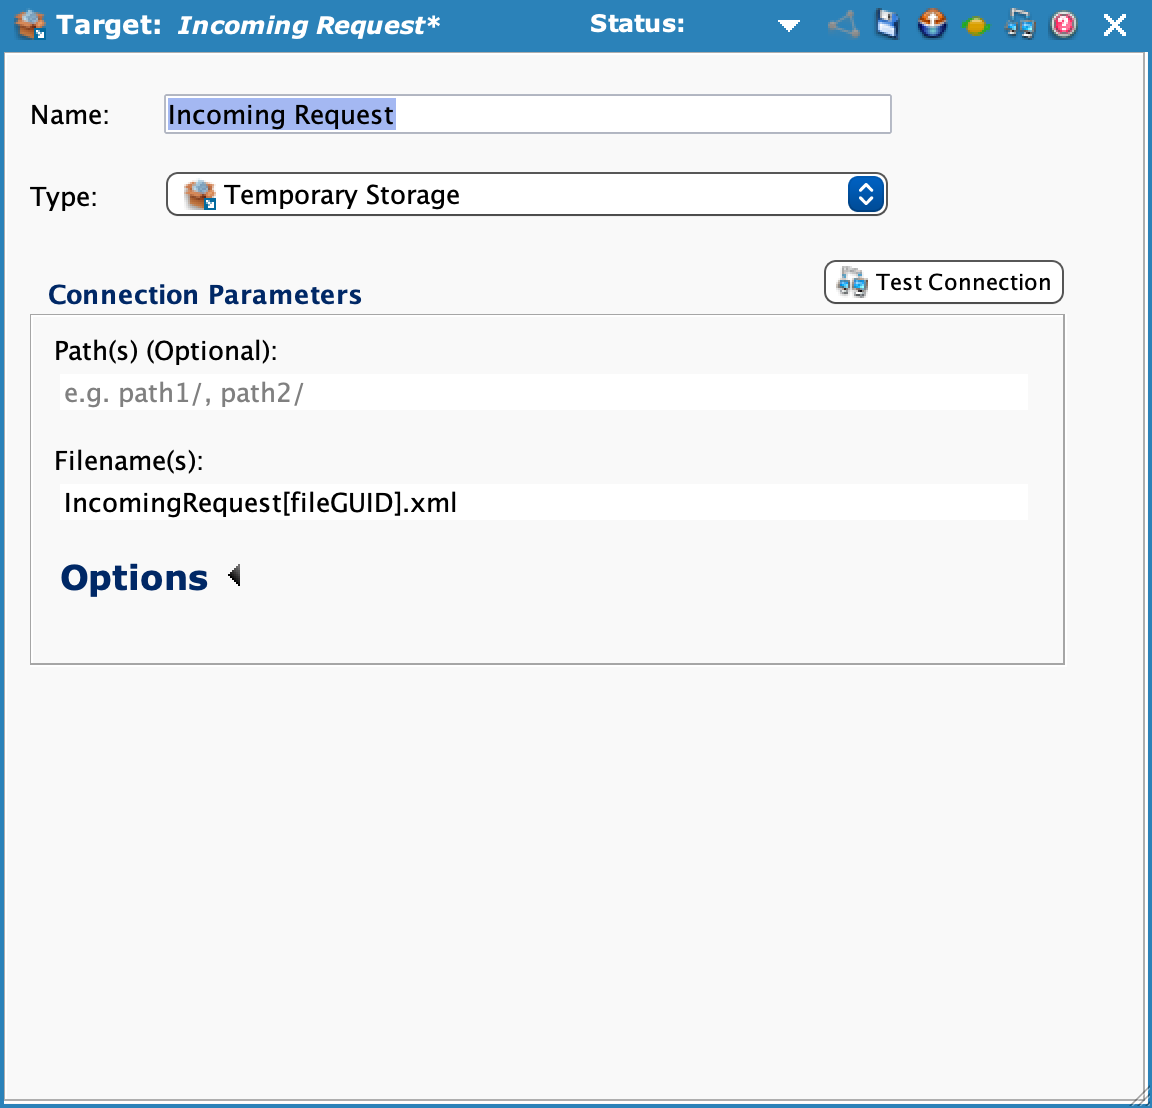
- In the project items list on the left, right-click on the new Incoming Request source, then select Copy to New Target.
-
In the Incoming Request target window, click Save, then close the window.
-
In the Accept Salesforce Request operation window, double-click the Salesforce Request transformation.
-
In the Salesforce Request transformation window, double-click the Blank field in the target tree.
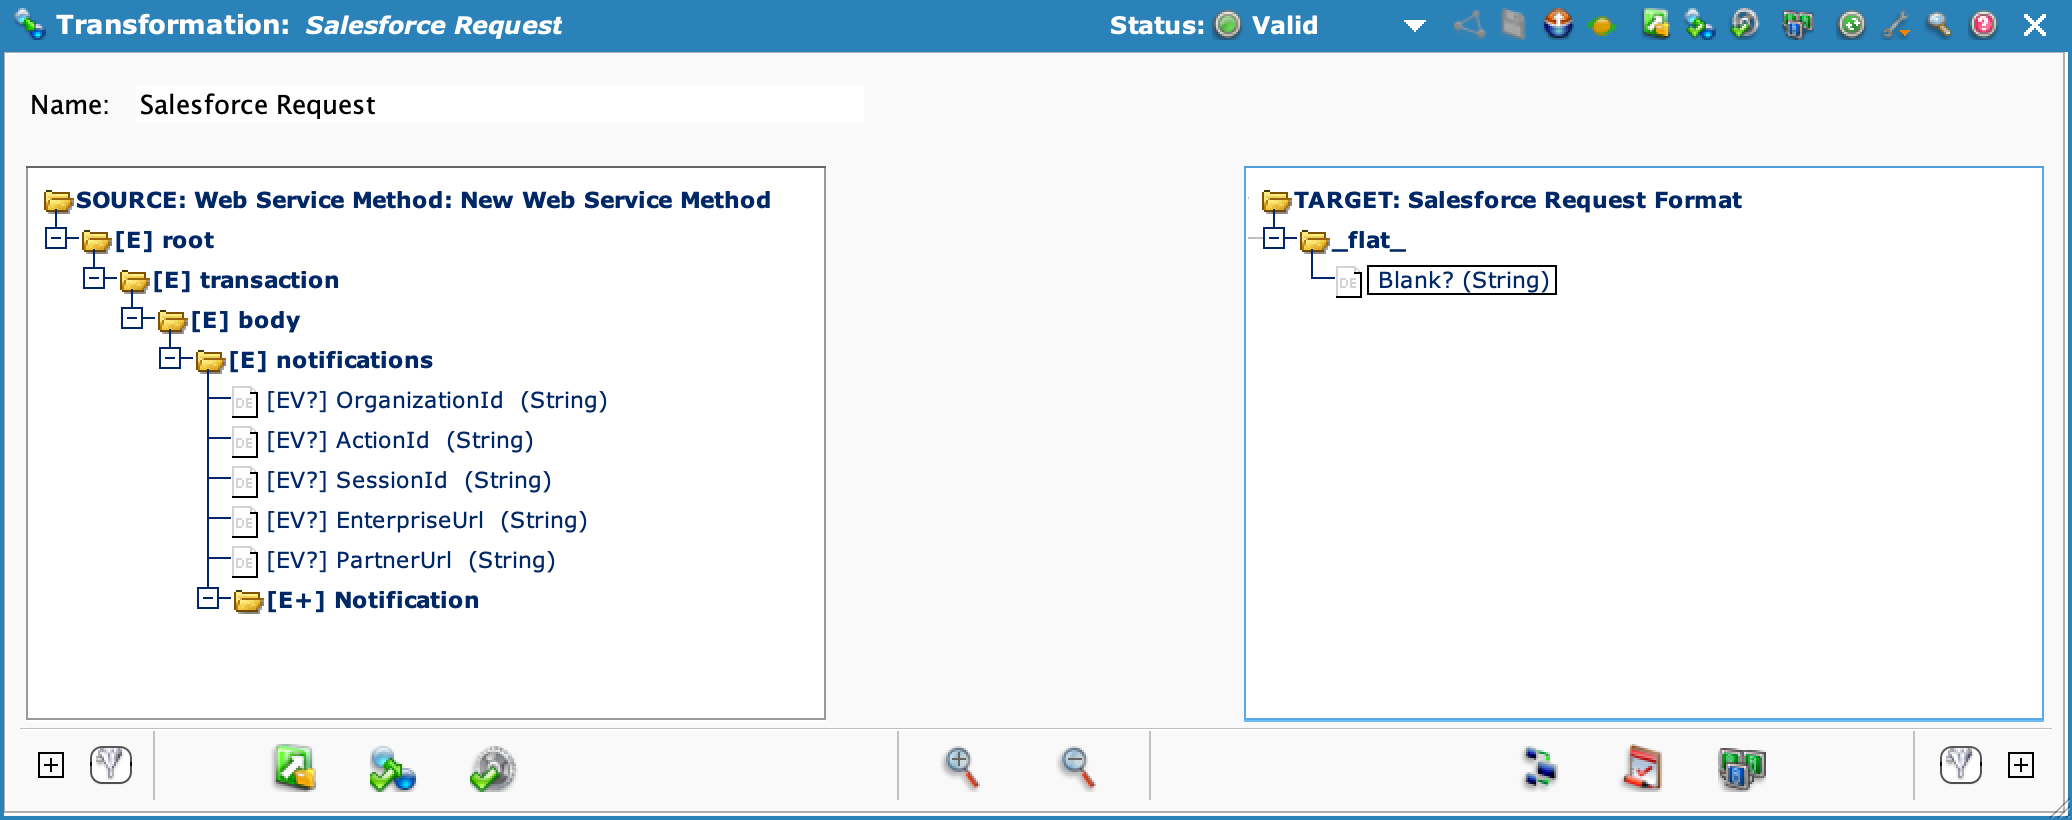
-
In the Formula Builder window, edit the formula to match the following, then click OK to close the script editor:
<trans>
$fileGUID=GUID();
WriteFile("<TAG>Targets/Incoming Request</TAG>", GetXmlString([root$], true]));
</trans>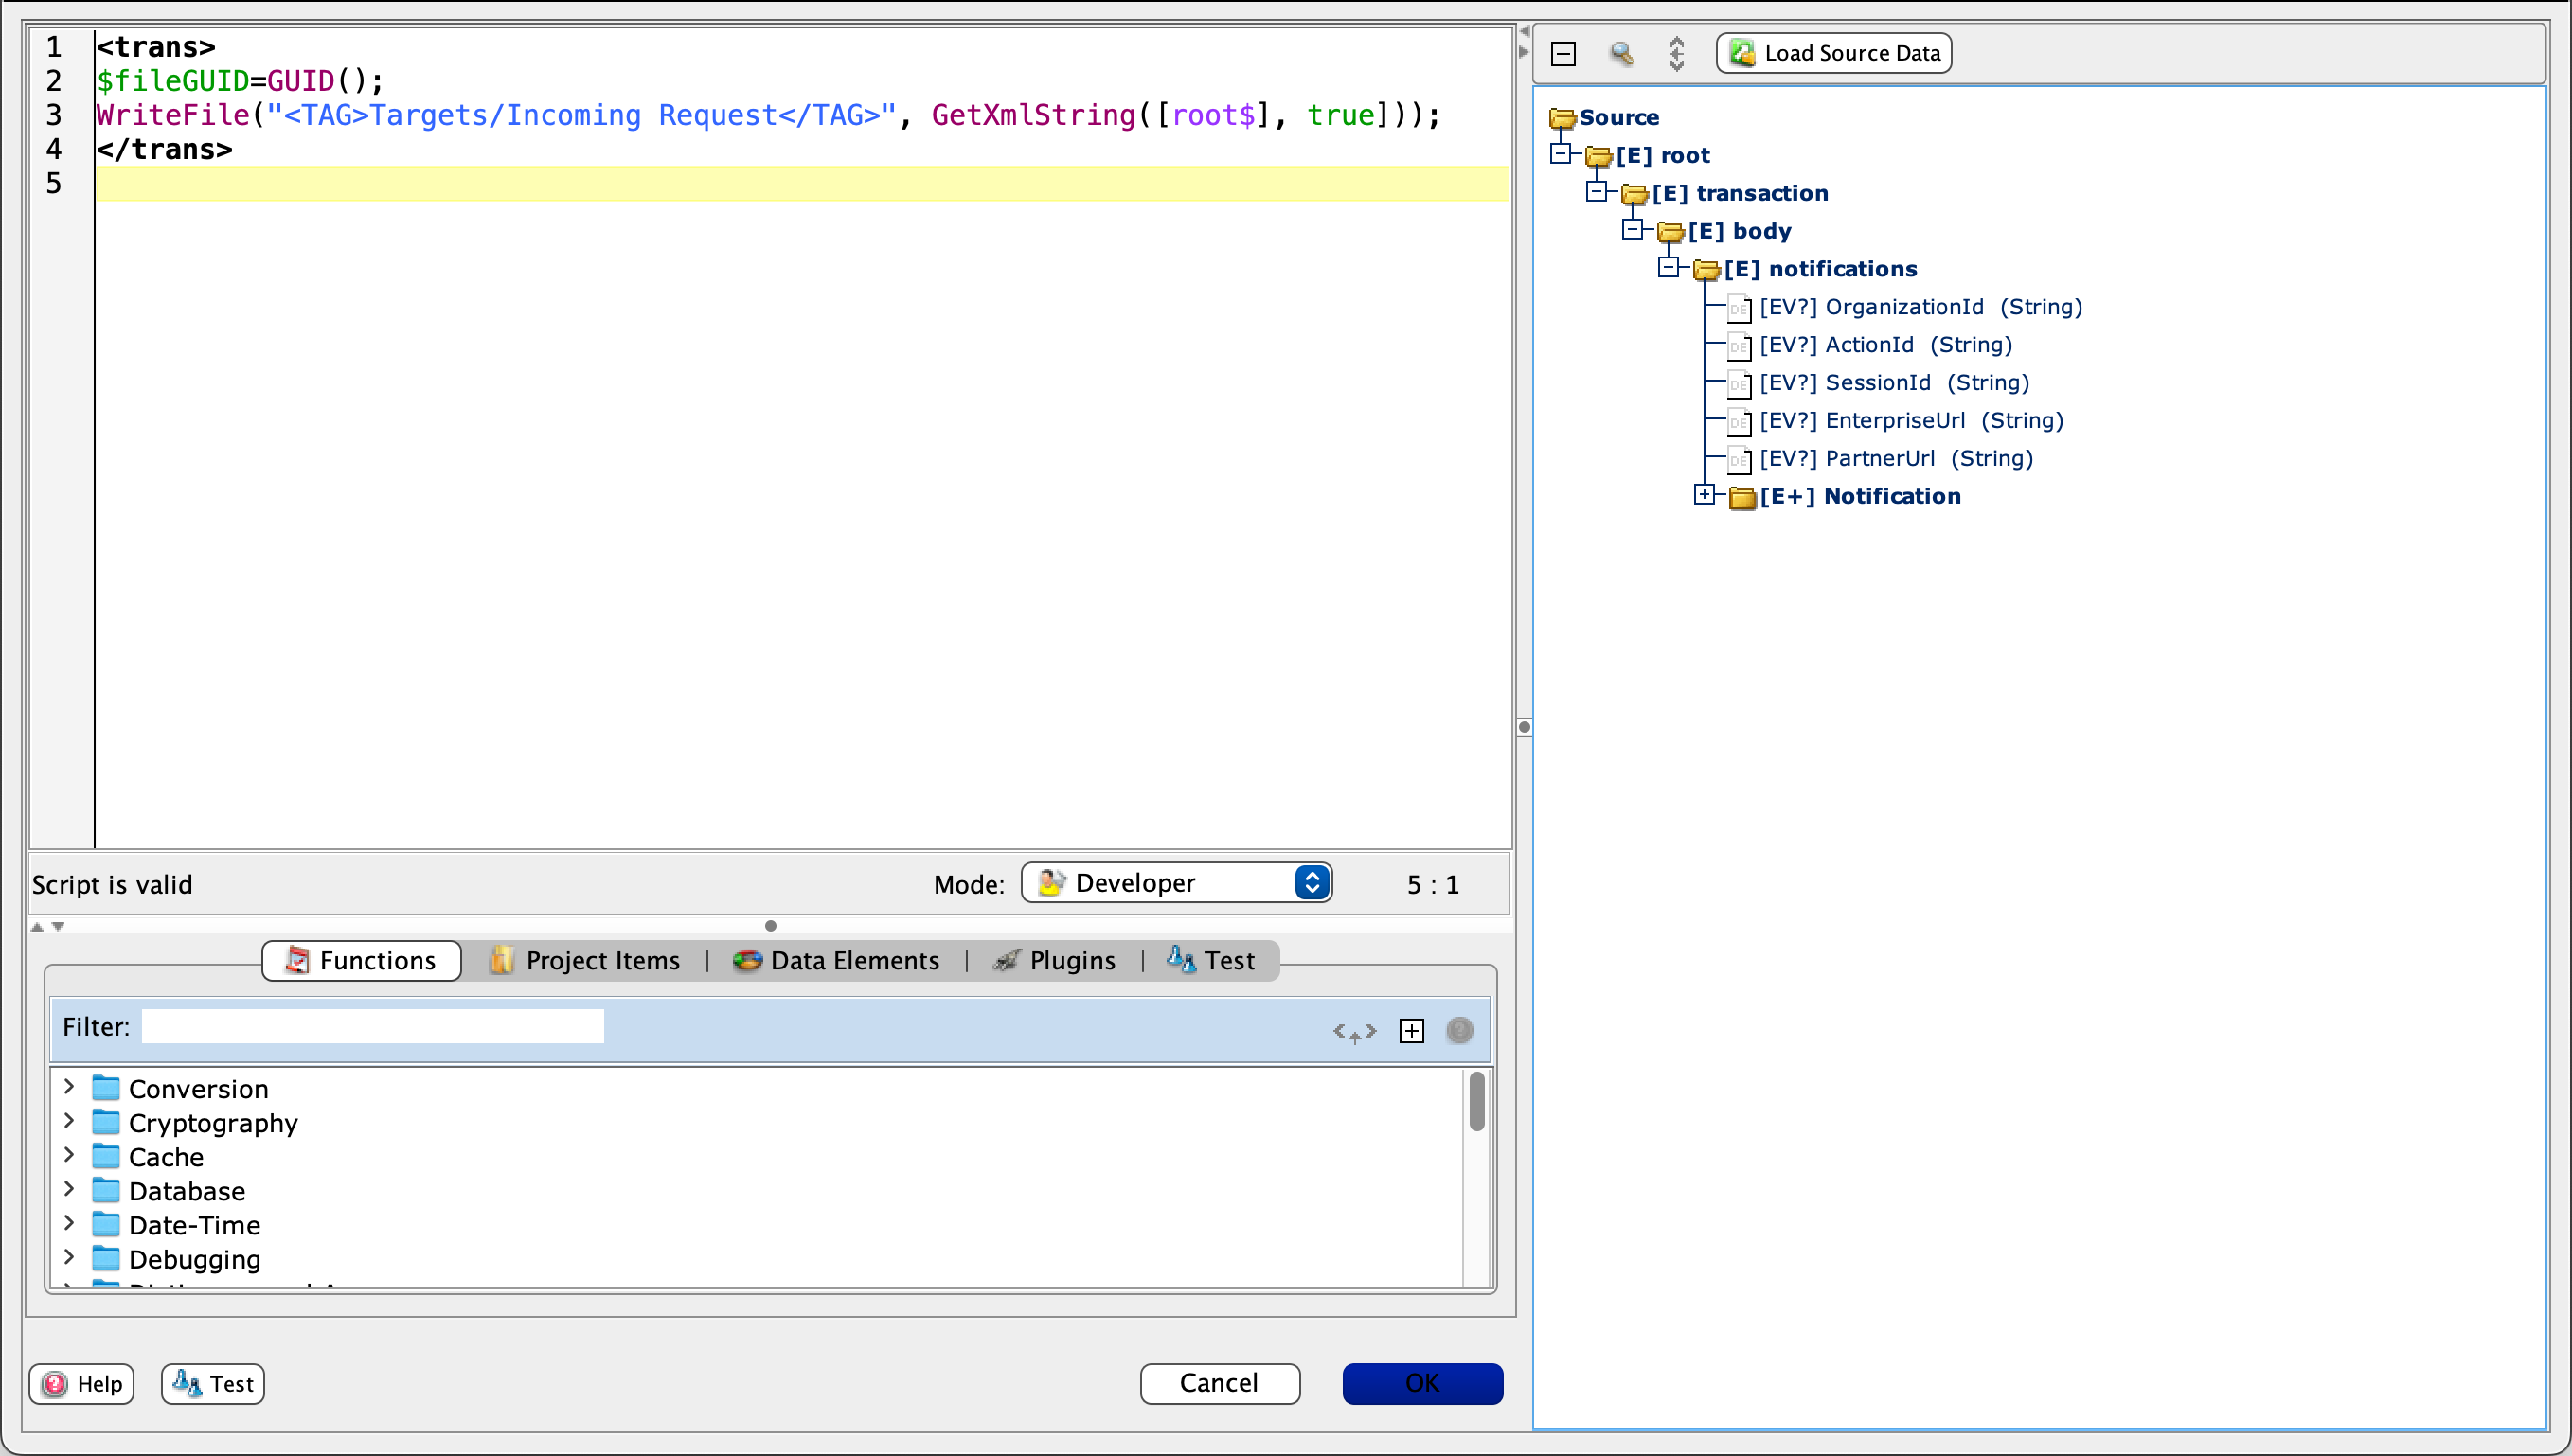
-
In the Salesforce Request transformation window, click Save, then close the window.
Create the 'Upsert Database' operation
- In the Accept Salesforce Request operation window, select the down arrow next to the operation name, then select On Success > Operation > Create New Operation.
-
In the Select Type dialog, select Transformation, then click Continue.
-
Set the new operation's name to Upsert Database.
-
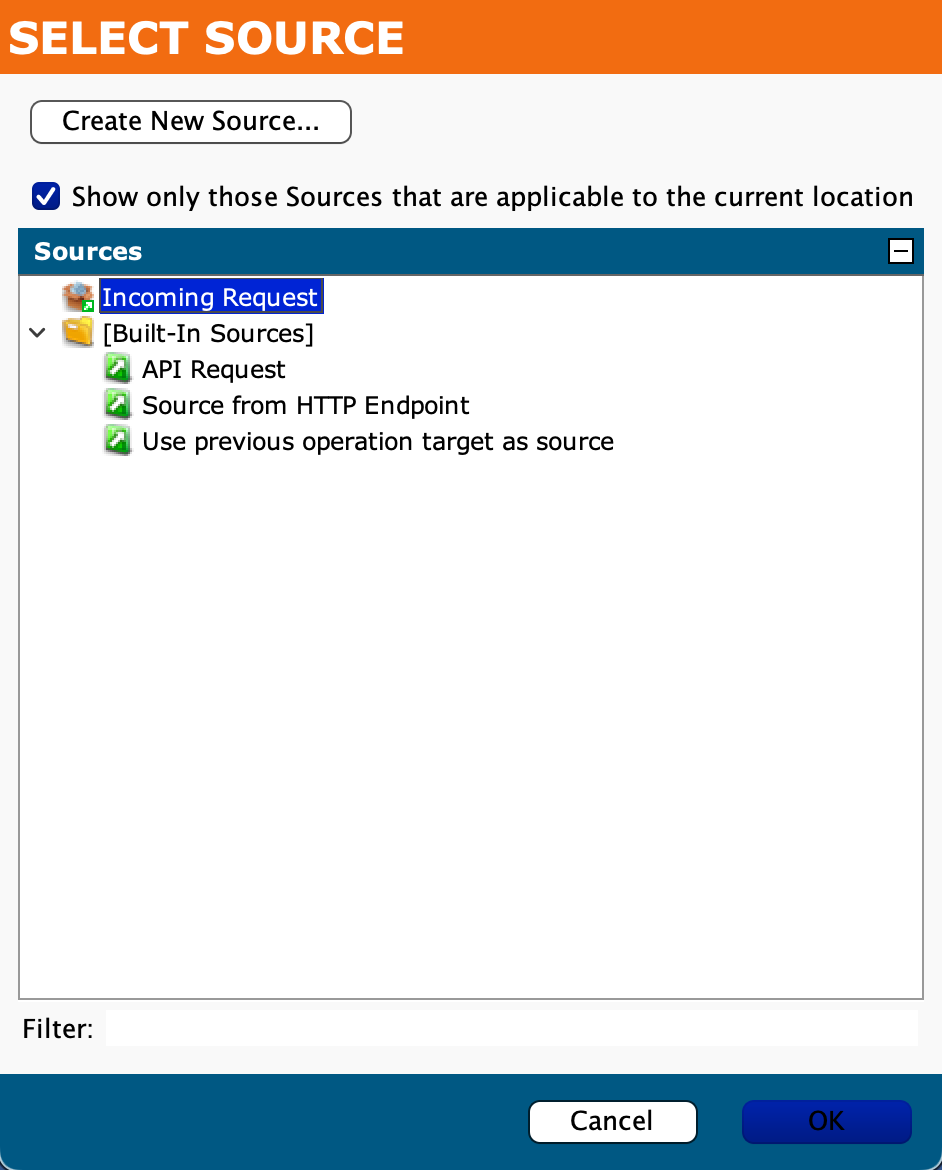
In the Upsert Database operation, double-click Source.
-
In the Select Source window, select Incoming Request, then click OK.
-
In the Upsert Database operation, double-click Target.
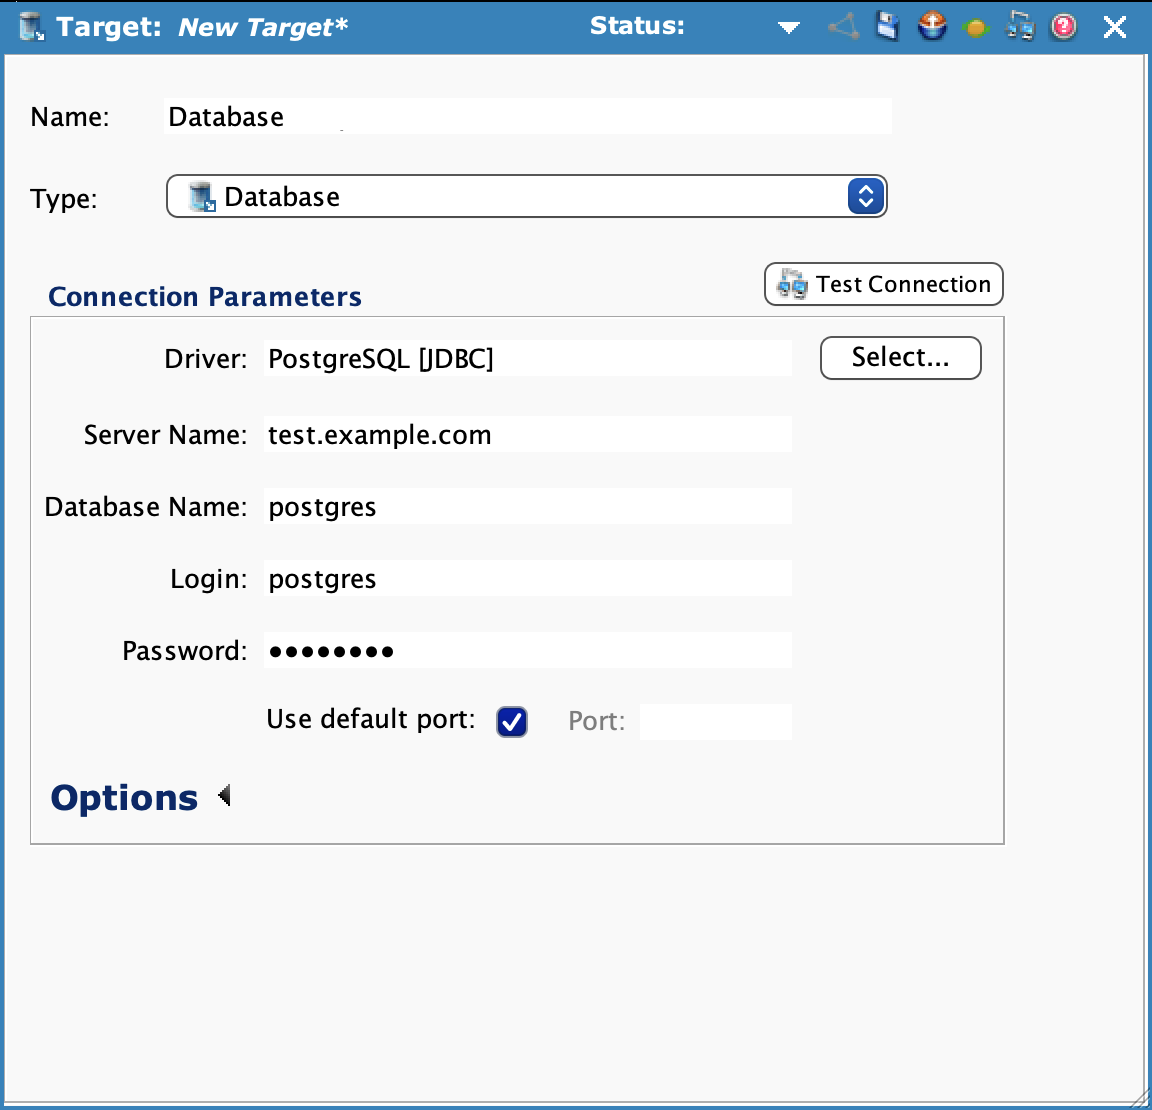
- In the Select Target window, click Create New Target.
-
In the New Target window, set values for the following, click Test Connection, then close the Database window:
- Name: Database
- Type: Database
- Connection Parameters: Set the parameters for your database. (A connection to a PostgreSQL server is shown in this example.)
-
In the Upsert Database operation, double-click Transformation.
- In the Select Transformation window, select Create New Transformation.
-
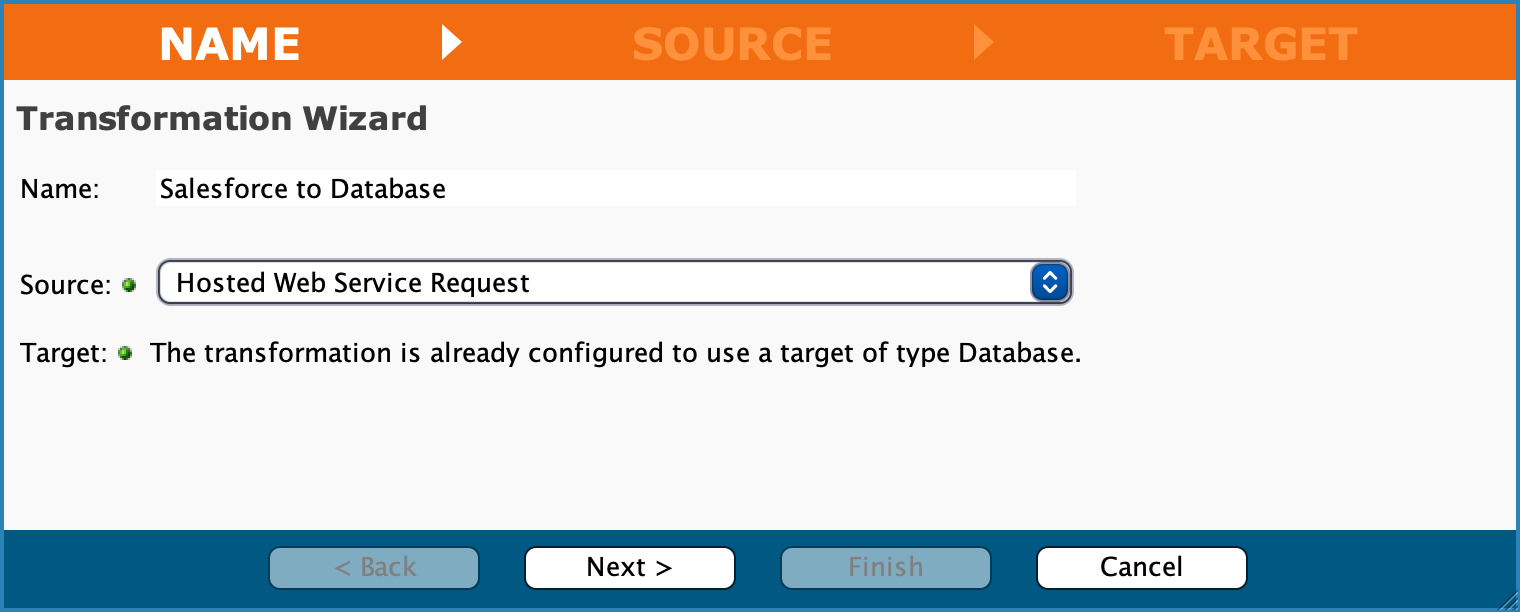
In the New Transformation window, enter values for the following, then click Next >:
- Name: Salesforce to Database
- Source: Hosted Web Service Request
-
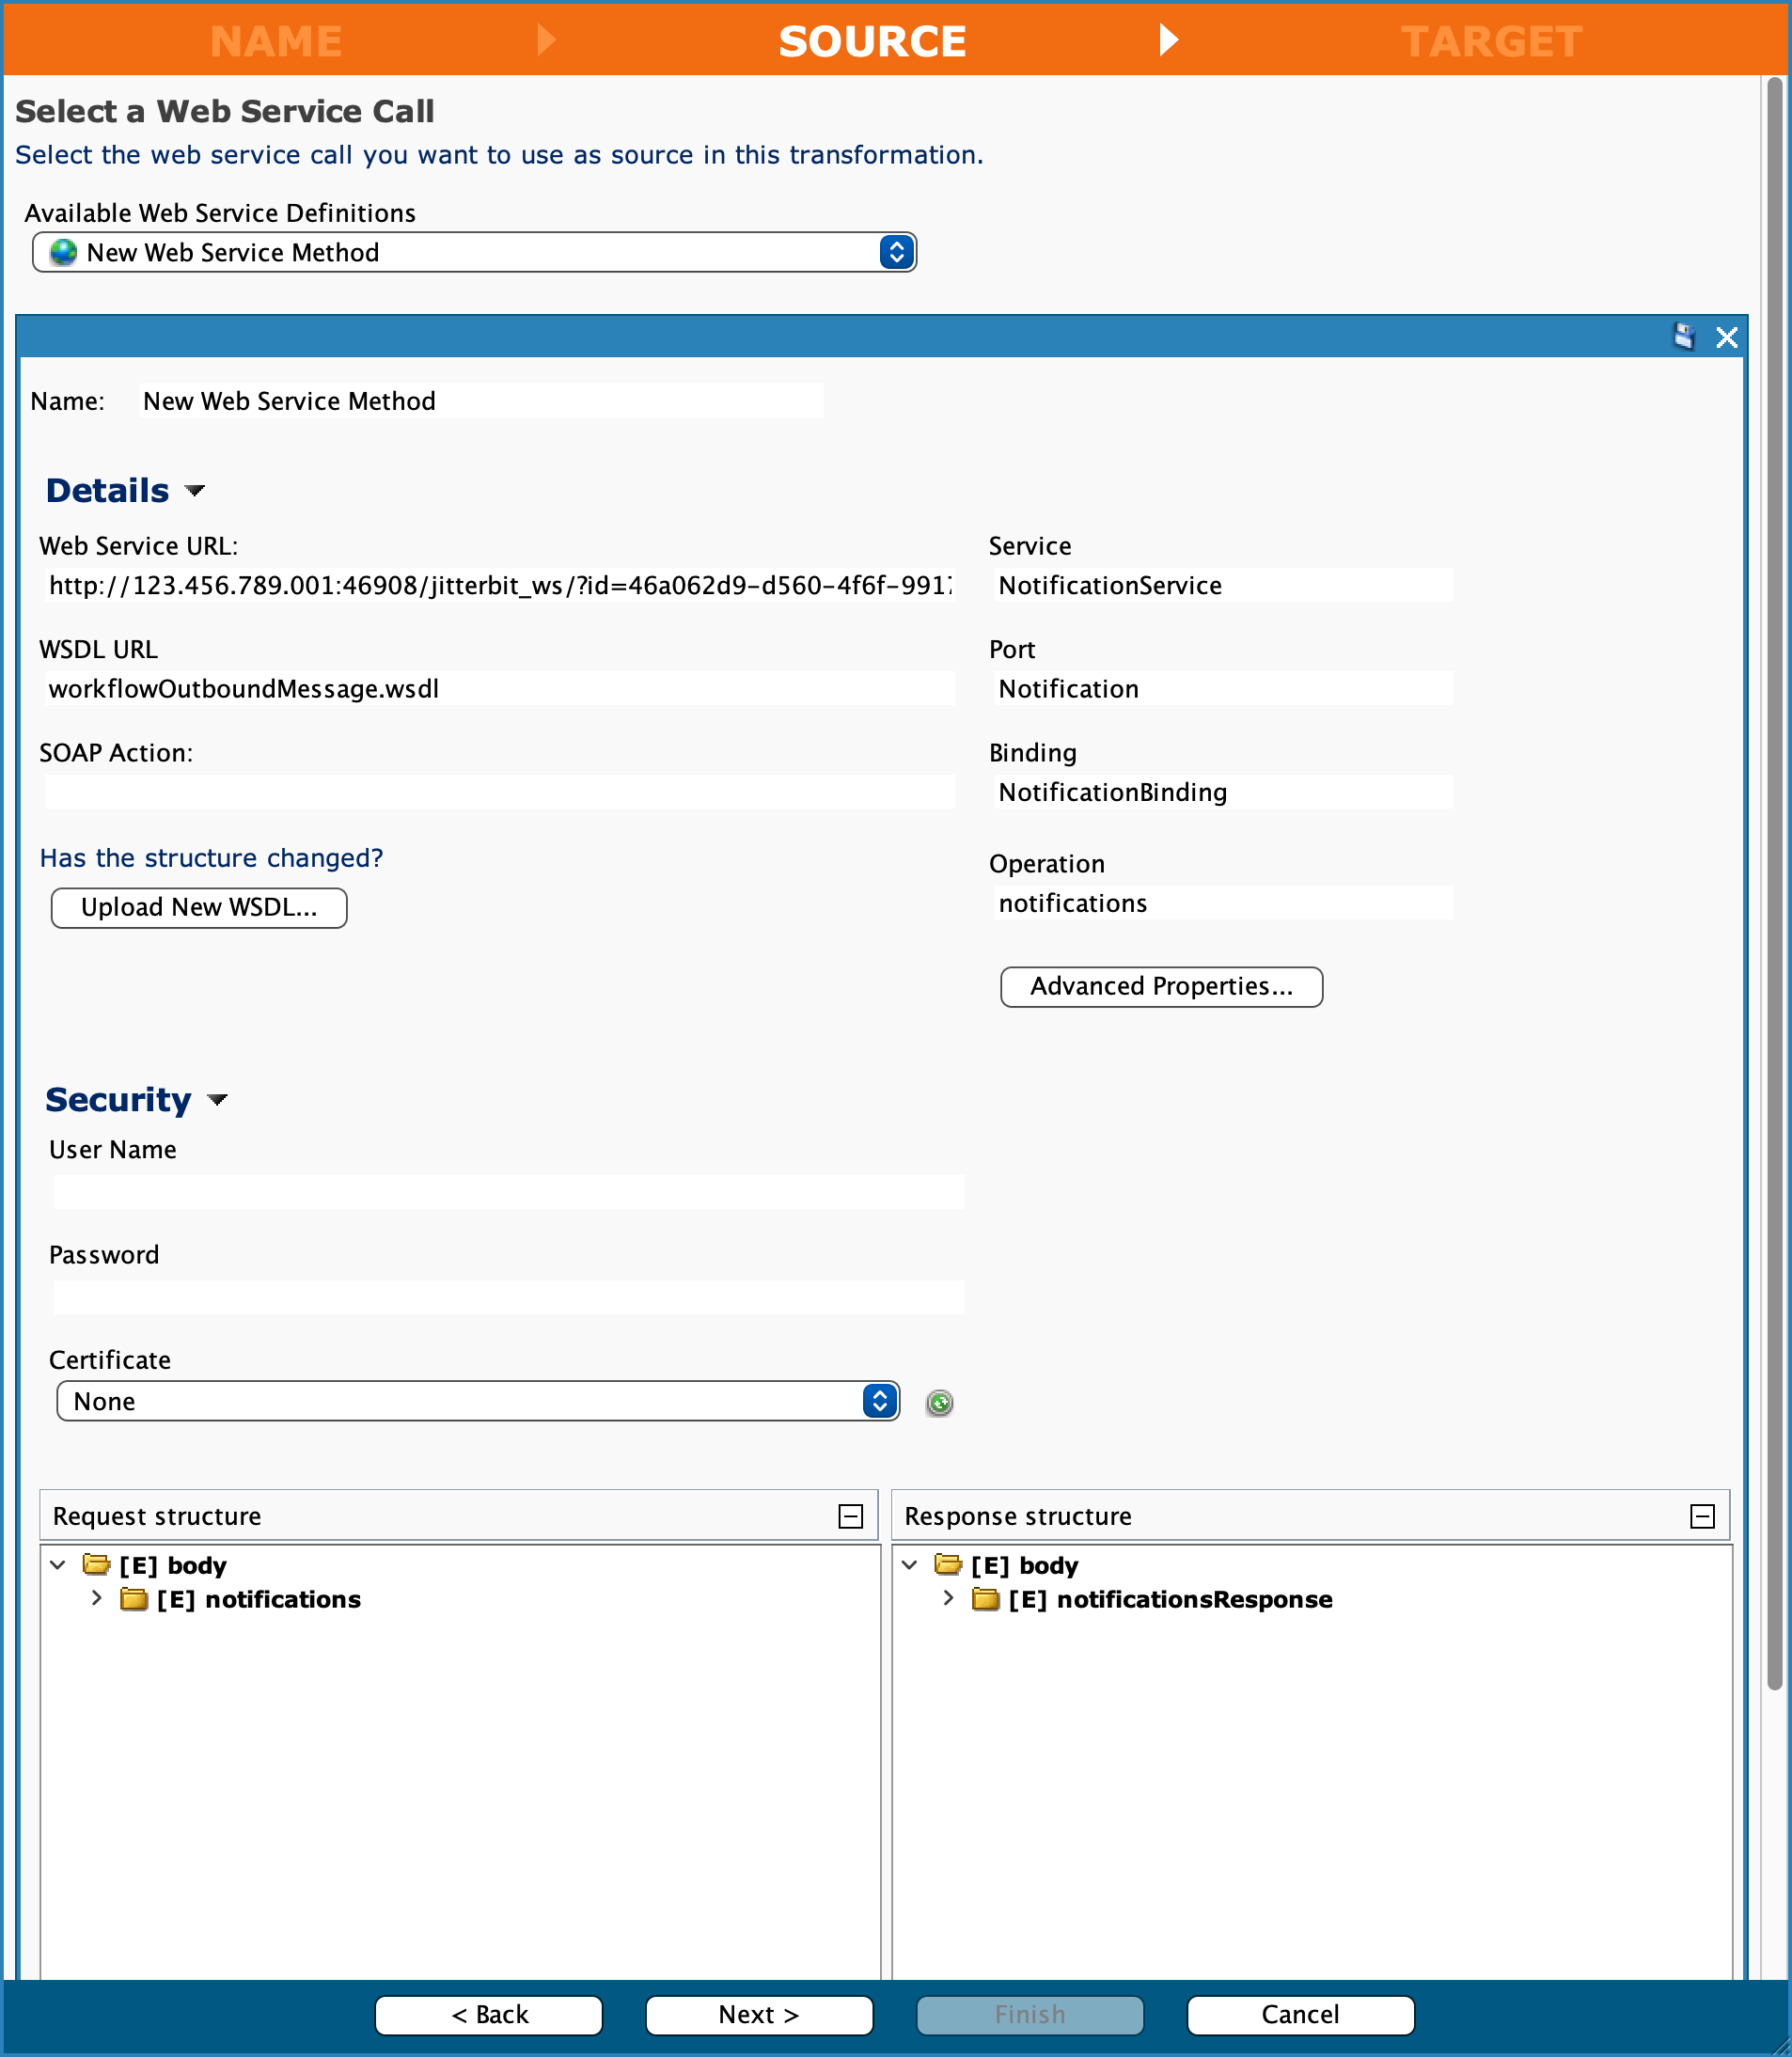
In the Source step, click Next >.
-
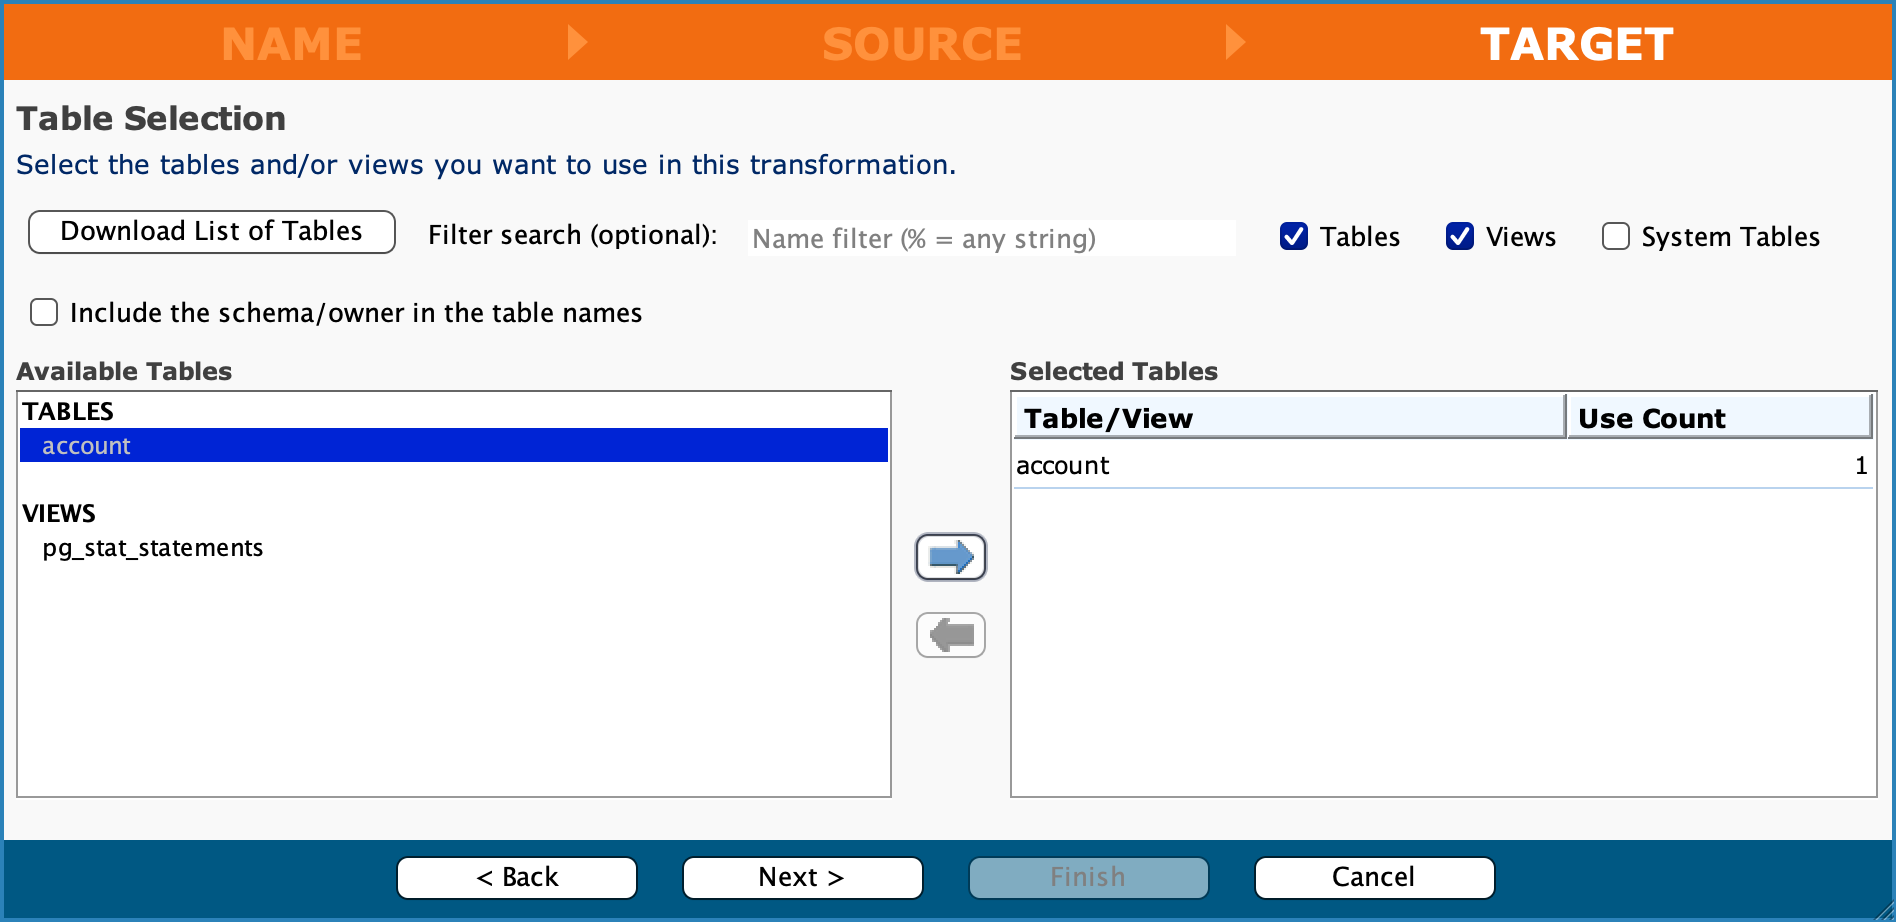
In the TARGET step, click Download List of Tables. Select the target database table, click the right arrow to move it to the Selected Tables list, then click Next >.
-
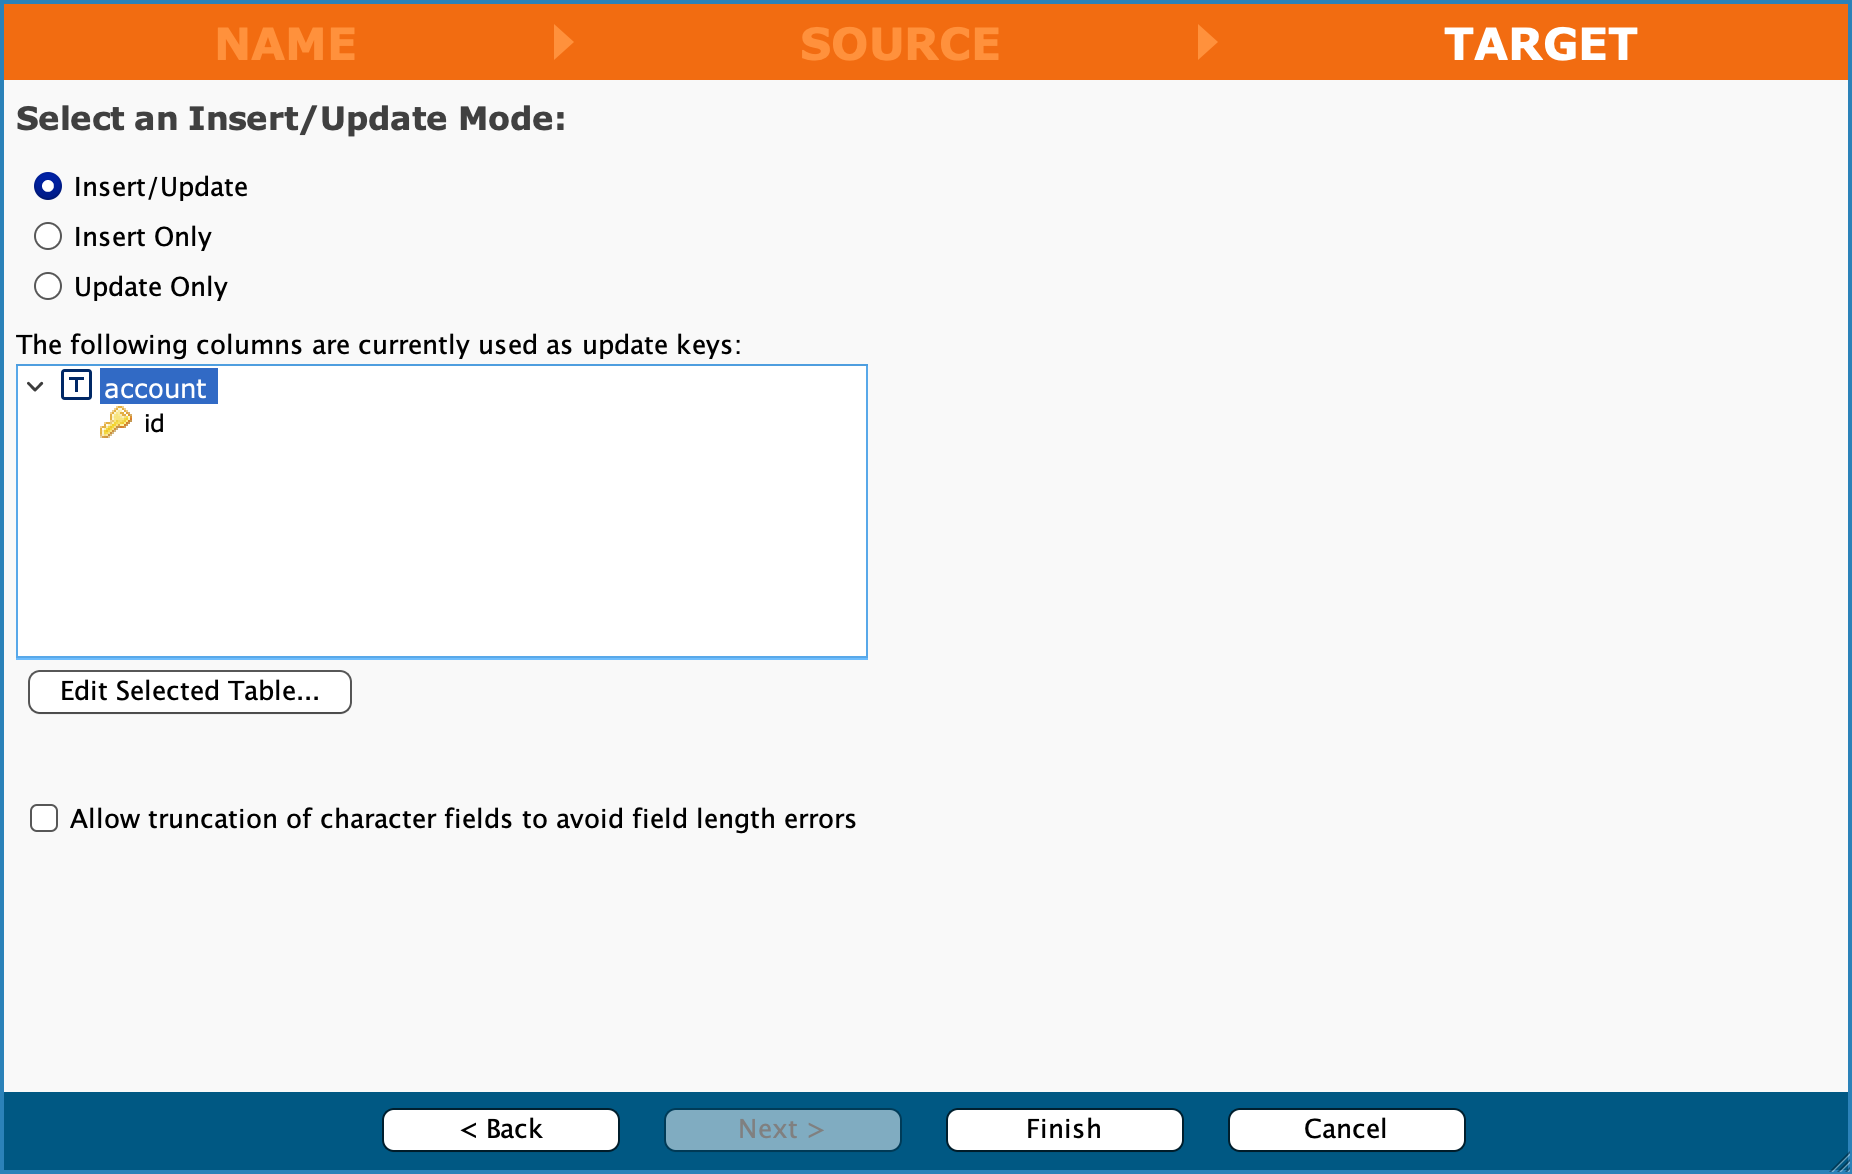
In the Target step, click Finish.
-
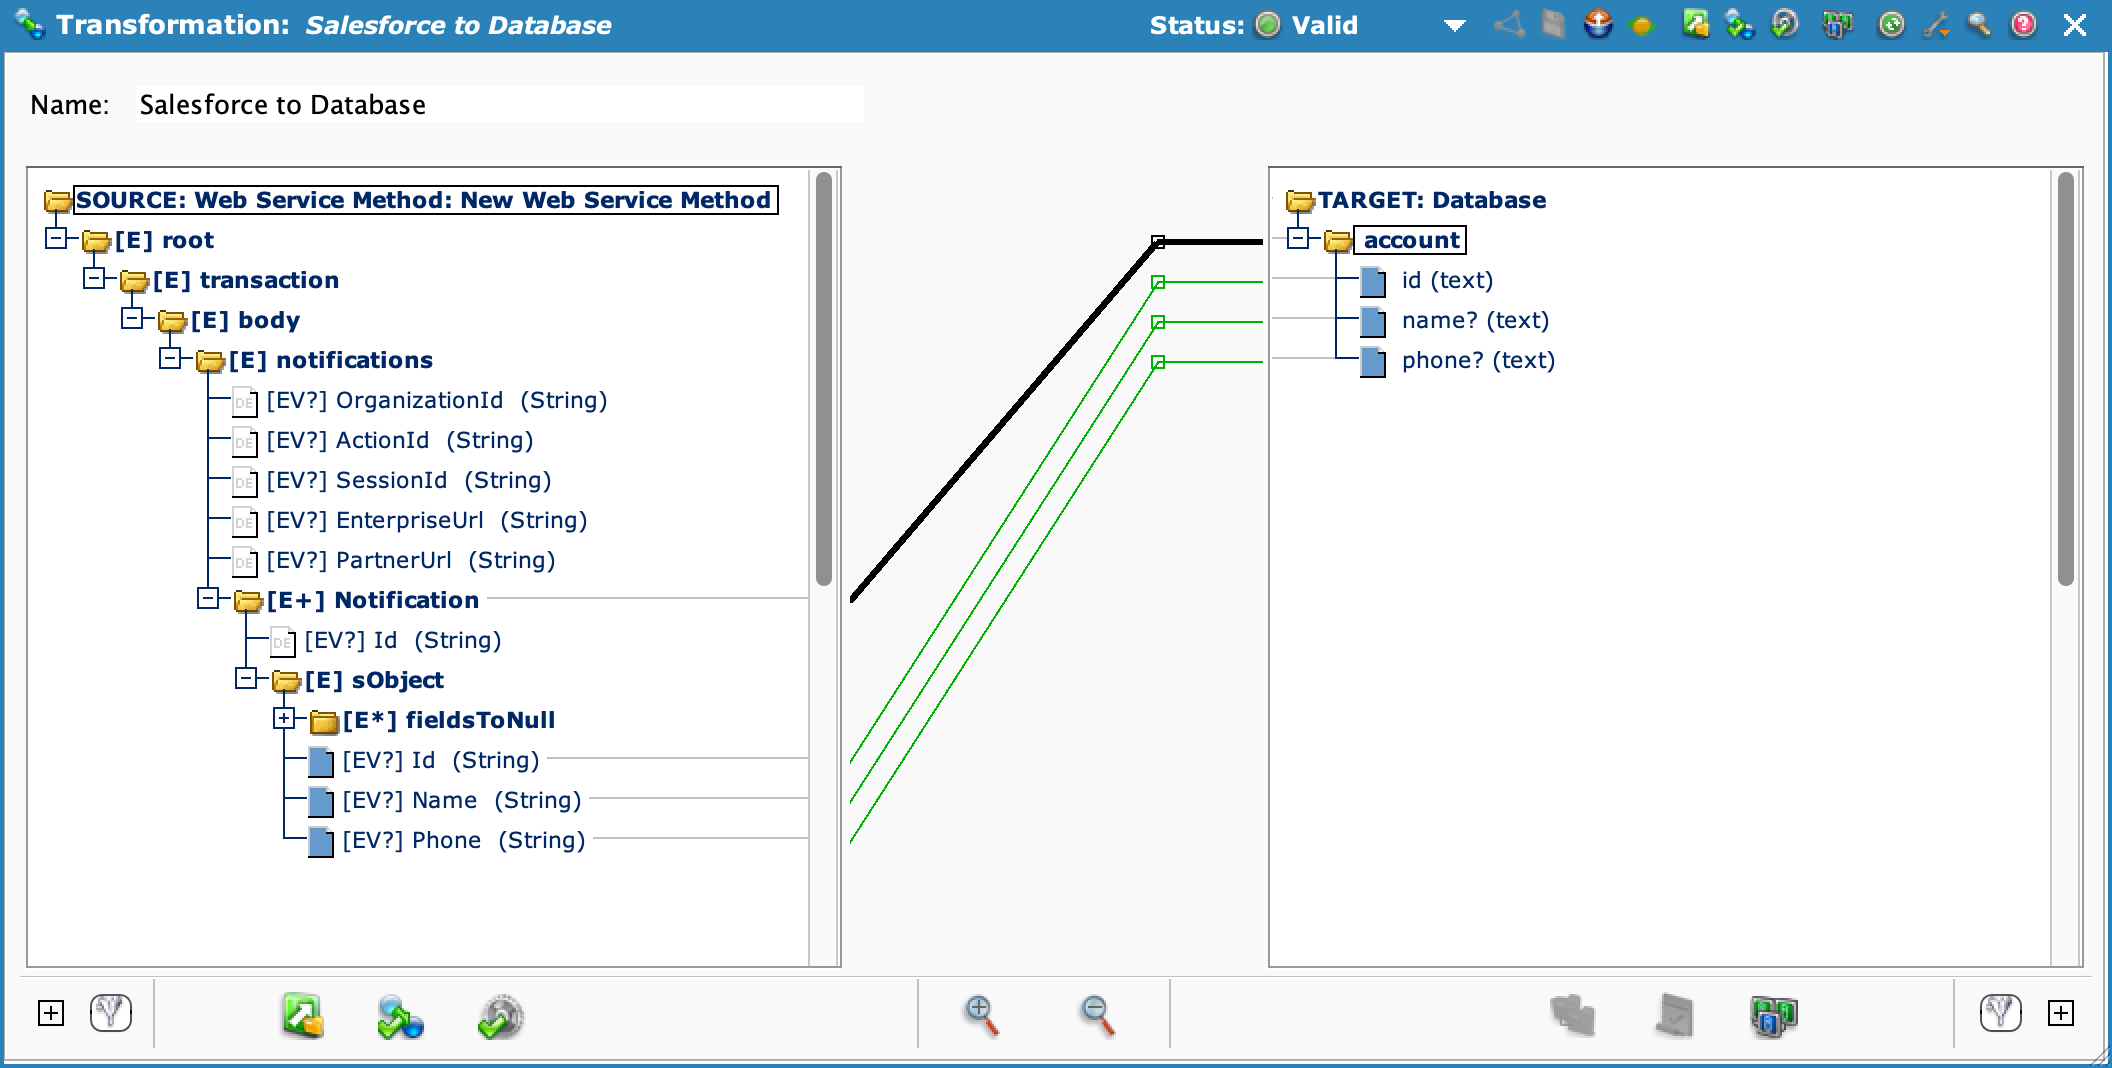
In the Salesforce to Database transformation window, expand source and target trees, map fields by dragging and dropping, then click Save and close the transformation window.
-
In the Accept Salesforce Request operation window, click Save.
-
From the main menu, select Actions > Deploy. In the Deploy dialog, under Select a Deploy Type, select Everything, then click Deploy.
Part 4: Update Salesforce endpoint URL and activate
- In Salesforce, select Setup > Platform Tools > Process Automation > Workflow Rules.
-
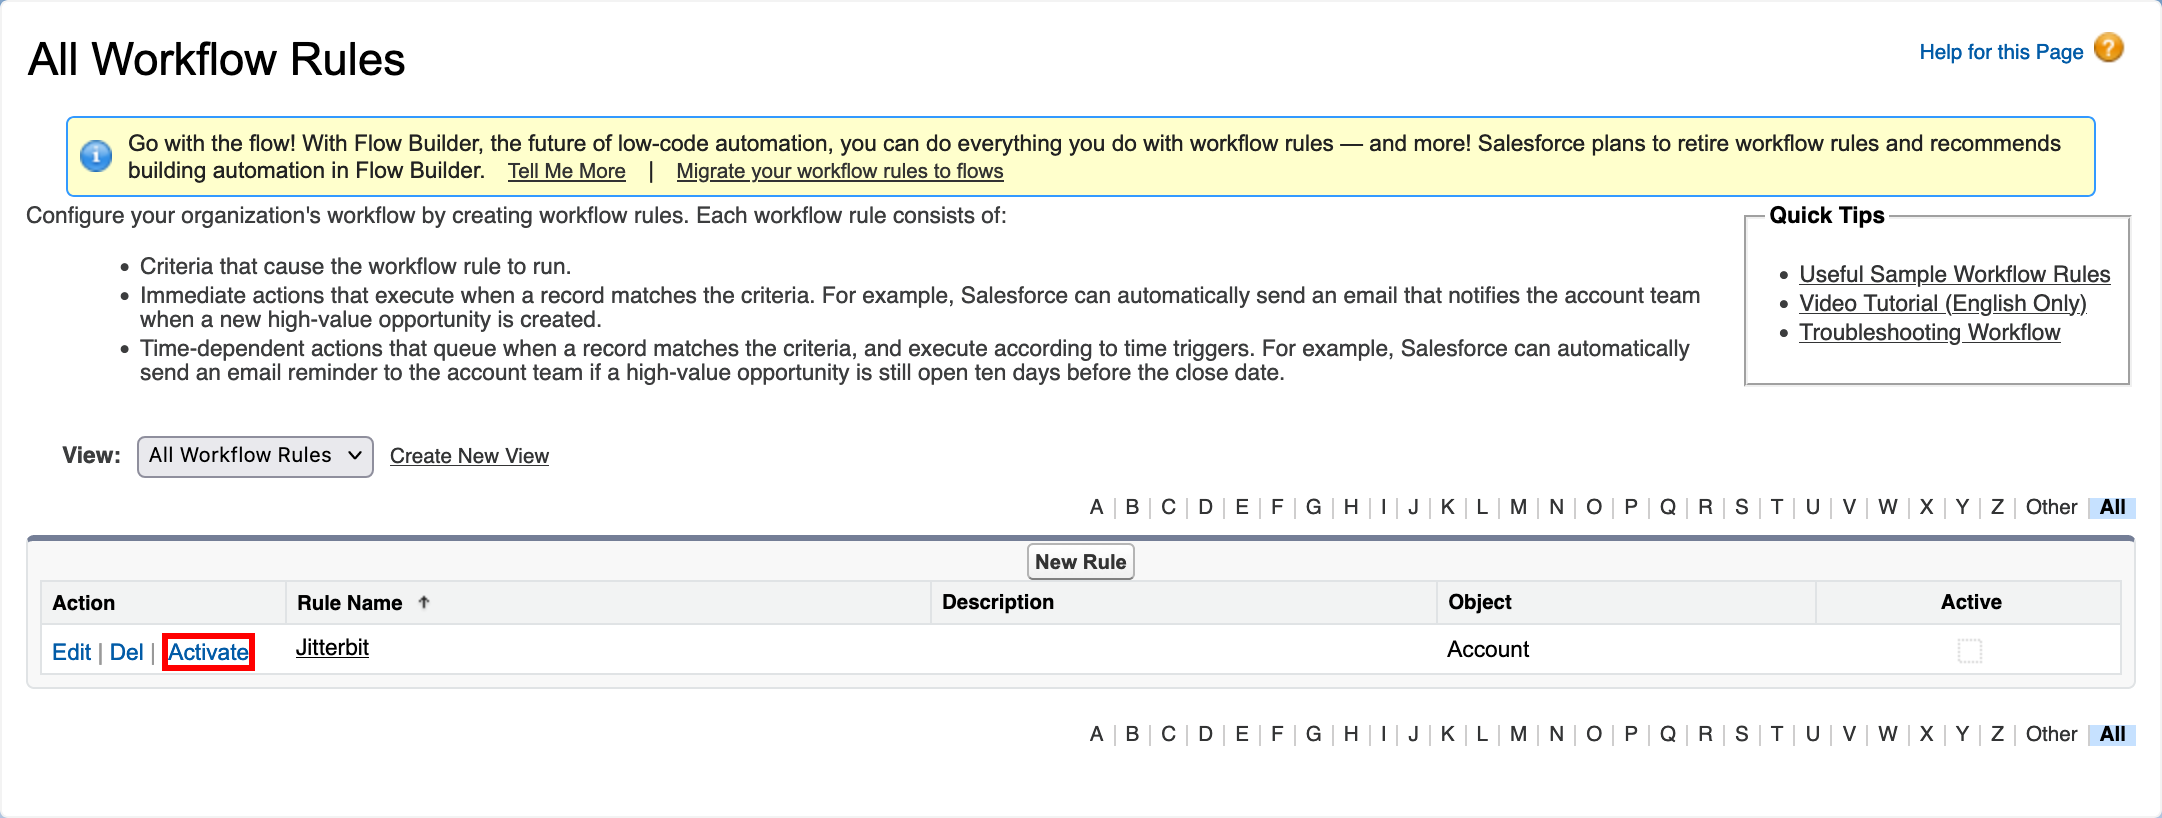
On the All Workflow Rules page, click Activate for your outbound message (highlighted in the image below).
Test the integration
To test this integration design pattern, follow these steps:
- In Salesforce, open the Service app, and select the Accounts tab.
- Edit an account contact, then save it.
- Log into your database and query the target table.