MongoDB in Jitterbit Design Studio
Note
To obtain this Jitterpak, contact Jitterbit support. The Jitterpak is unsupported and is to be used only for reference with Design Studio.
Introduction
For the purpose of this article, it is assumed that you have already obtained, installed, and started an instance of a MongoDB server. In addition, once you have defined your data model and its structure, you should create a JSON copy of the structure that can be used to reverse engineer an XSD file. This will be shown later in this document.
System requirement
You will need to obtain either a JDBC or ODBC driver that has been specifically written for MongoDB. It is recommended that you obtain a free trial for the driver and perform testing prior to making a final purchase.
Setup
How to connect to a MongoDB instance using Jitterbit
Install the driver on the device that will be used to host your private agent. If you have installed an ODBC driver, then that driver should display within Jitterbit Studio as a possible selection when choosing to create either a Source or Target which makes use of a database. This image shows a new Source that was created using an ODBC driver:
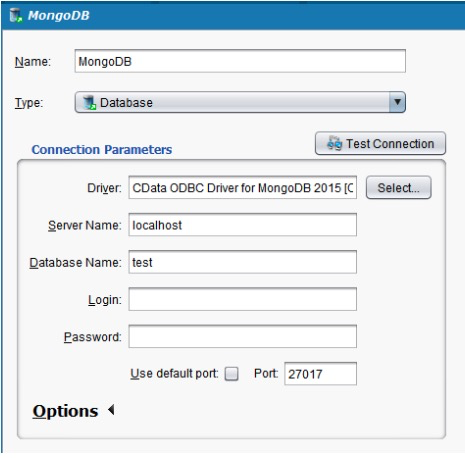
It should be mentioned that not all drivers will offer the same functionality within Jitterbit Studio and as such you are encouraged to perform your own testing prior to choosing which driver you will want to use.
If you have installed a JDBC driver then you should refer to the documentation for that driver to obtain the Class and Subprotocol. You will want to make note of where you have installed the JDBC driver as you will need to copy the newly installed JAR file (and likely a license file) to a location that is known and used by the Jitterbit Tomcat server.
Locate the folder on your system where the JdbcDrivers.conf file is located. For Windows, this is C:\Program Files (x86)\Jitterbit Agent. Open the JdbcDrivers.conf file and follow the directions within the file that describe how "To register a new JDBC driver with Jitterbit".
In the example of installing a JDBC driver in a Windows OS, this information was added to the JdbcDrivers.conf file:
<Driver>
<Name>MongoDB</Name>
<Class>cdata.jdbc.mongodb.MongoDBDriver</Class>
<Subprotocol>jdbc:mongodb</Subprotocol>
</Driver>
Once installed, restart the Tomcat Server as this will allow the newly-installed JDBC driver to show as a possible selection when setting up a new database Source or Target. Here is an image of how the connection string was manually created for the MongoDB instance:
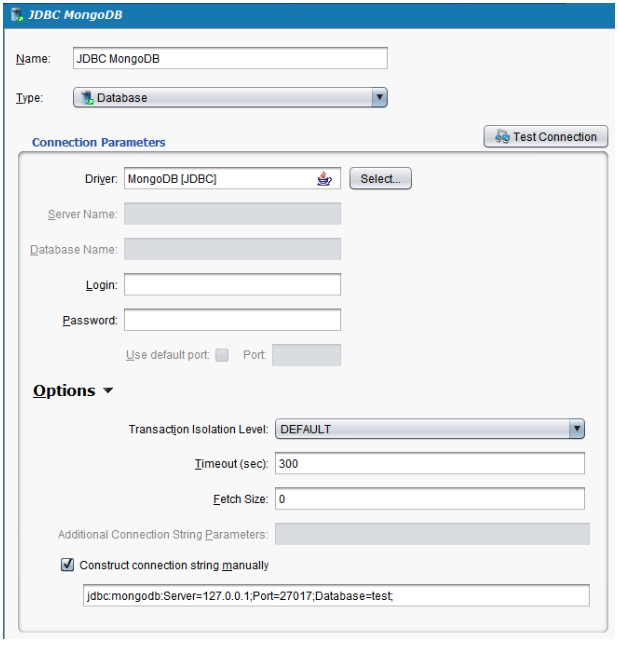
As previously stated, not all drivers will offer the same functionality so it is important to perform your own testing prior to making your choice. The remaining documentation was performed using a JDBC driver that allows SQL statements to be written against a MongoDB instance.
The next step is to be able to write data from one data source to your MongoDB instance. In the specific scenario shown here, a simple table using a PostgreSQL database was created. It could then populate several rows of data to be used to write the MongoDB collection that had previously been created.
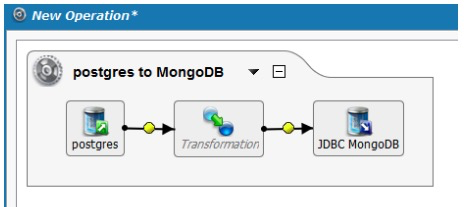
Within Jitterbit Studio, a new Project was created called MongoDB for testing purposes. Then create a new Transformation Type Operation that will use the PostgreSQL database as the Source and the MongoDB instance as the Target. The following image illustrates the result prior to setting up the accompanying transformation.
Select the Transformation and chose a new Transformation from the menu. This will start the Transformation Wizard. If the Source and Target are already created you will only need to name the new Transformation.

Then click "Next" within the Transformation Wizard.
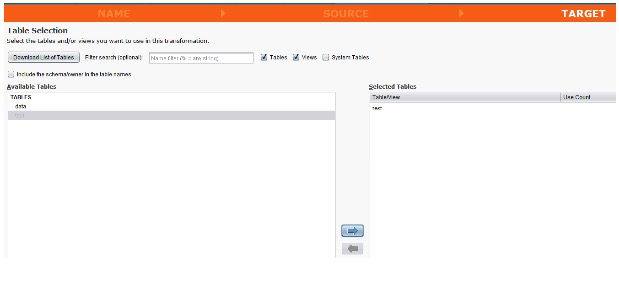
To see a list of tables that may be used from within your Source definition click the "Download List of Tables" button. Select your Source table and click the name in order to move your table to the Selected Tables view. Once your Source tables have been selected you may then click Next within the Transformation Wizard. Choose any required values that are appropriate for your integration and progress through the Transformation Wizard until you are presented with the TARGET screen. If you have already designated the Target as the MongoDB instance you can download the list of tables (collections) that have been set up. Within the MongoDB instance click on the "Download List of Tables" button. In this example there are two collections that were previously added to my MongoDB instance called data and test. Select the table (collection) that is needed for your specific integration purpose and move that selection to the Selected Tables view.
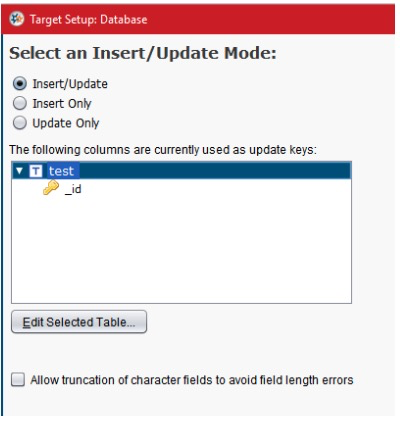
In this example, Insert/Update was selected. This is possible once the Target destination has defined a Primary Key for the underlying MongoDB instance collection that is being used. You may determine your Primary Key by clicking the "Edit Selected Table…" button and then selecting the field that is to be used as the Primary Key.
When finished, click the "Finish" button to exit the Transformation Wizard.
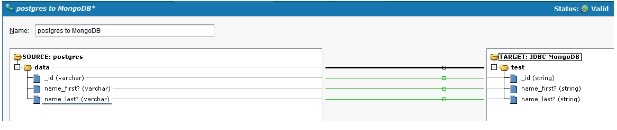
Upon exiting the Transformation Wizard you will be presented with the underlying structure of your Source and Target data. In this case it is a very simple PostgreSQL table as the Source and an equally simple MongoDB collection structure. However, it is important to note that the actual MongoDB structure has been made to appear flattened within the Transformation Target. As you will see the actual data that has been inserted into this MongoDB instance, that structure contains data in a more hierarchical structure that what one may perceive if simply looking at the Transformation Target. The next step is to simply complete any mapping that is necessary.
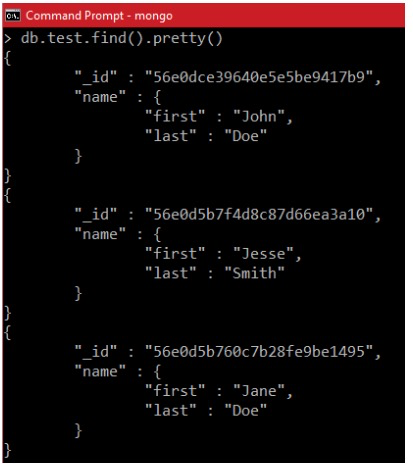
When you have finished mapping your data from the Source to the Target, save your changes and close the Transformation. You should now be able to run your Operation which will insert the data from your Source to your Target. Below is an image which shows the result of running the Operation and successfully inserted the PostgreSQL data into this MongoDB collection.
This document is intended as a simple example of using Jitterbit to connect to an instance of a MongoDB and to then insert data from a Source to your Target. In most cases, an Integration may need to perform all aspects of a CRUD operation and as such you should continue to set up new Operations that allow you to perform all of the necessary operations that are needed for your specific implementation.