Four51 connector endpoint
Before you can create Four51 operations in Jitterbit, you must configure at least one Four51 endpoint.
Each endpoint represents the API URL, authorization URL, application ID, and login credentials for a specific user within Four51. Creating the endpoint allows Jitterbit to access the OrderCloud API to perform the requested operations. You must create at least one Four51 endpoint in order to use the other activities available in the Four51 Connector.
Note
Before getting started, make sure you meet the requirements in Four51 connector prerequisites.
Create an endpoint
Note
If you are not already familiar with Jitterbit, see Get started or Design Studio for detailed information on how to use the product.
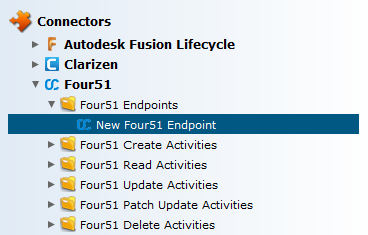
Within your project within Jitterbit Studio, there are several ways to create a new Four51 endpoint:
- Go to File > New > Connectors > New Four51 Endpoint.
- In the tree on the left under Connectors, right-click on the Four51 category, then select New Four51 Endpoint.
- In the tree on the left under Connectors, double-click on the Four51 category, then right-click on Four51 Endpoints and select New Four51 Endpoint.
- In the top toolbar, click the connector icon (orange jigsaw piece)
 . In the popup, select Four51, then select Four51 Endpoint.
Configure an endpoint
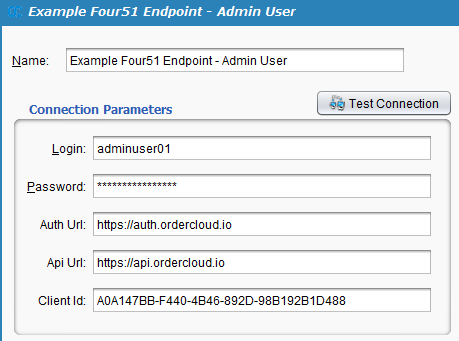
After you have created a new Four51 endpoint, the configuration screen will open in the main view of Studio. You can get back to the configuration screen at any time by double-clicking on the endpoint that now appears in the tree on the left under Connectors > Four51 > Four51 Endpoints.
In the configuration screen, enter the connection information for your new Four51 endpoint. An example is provided below. Each configurable option is explained as follows.
-
Name: Enter an appropriate name for your new Four51 endpoint. If you are creating endpoints for multiple Four51 users, it is a good idea to distinguish them here by name.
-
Login: Enter the username of the Four51 user you wish to create the endpoint for. Note that this is not the account information you use to log in to the OrderCloud Dev Center, but is a user that has been created within the OrderCloud API and assigned a Security Profile that defines what interactions are available for the specific user.
Note
More information about Users and security profiles and how to create them is provided within Four51 connector prerequisites.
-
Password: Enter the password associated with the Four51 user entered above.
-
Auth Url: Enter the URL used for authorization with the OrderCloud API. This URL is currently
https://auth.ordercloud.io. -
Api Url: Enter the OrderCloud API URL. This URL is currently
https://api.ordercloud.io. -
Client ID: Enter the client ID of the Seller Application. This ID can be found from the OrderCloud.io Dashboard.
Note
More information about the Client ID is provided within Four51 connector prerequisites.
-
Test Connection: Click the Test Connection button to verify the connection to your Four51 endpoint. A message will indicate if the connection is successful. If the connection is not successful, double-check the values you provided on this screen.
You can now proceed with setting up other activities through the Four51 Connector that use your Four51 endpoint.