Microsoft Dynamics CRM connector Query in Jitterbit Design Studio
Introduction
A Microsoft Dynamics CRM Query activity, using its Microsoft Dynamics CRM endpoint, queries an object in Microsoft Dynamics CRM and is intended to be used as a source in an operation.
Creating a Microsoft Dynamics CRM Query activity
An instance of a Microsoft Dynamics CRM Query activity is created from a Microsoft Dynamics CRM endpoint using its Query activity type.
To create an instance of an activity, follow one of these options:
- Navigate to File > New > Connectors > New MS CRM Query.
- In the tree on the left under Connectors, expand Microsoft Dynamics CRM, then right-click on MS CRM Queries and select New MS CRM Query.
- In the top toolbar, click the connectors icon. In the dialog, select Microsoft Dynamics CRM, then select MS CRM Query.
Configuring a Microsoft Dynamics CRM Query activity
Follow these steps to configure a Microsoft Dynamics CRM Query activity:
-
Step 1: Select or create an endpoint
Select or create a Microsoft Dynamics CRM endpoint. -
Step 2: Select an object
Select the object to be queried and select a query building option. -
Step 3: Build the query
Create the query statement or download the query statement from your Microsoft Dynamics CRM instance. -
Step 4: Review the data structures
Any request or response structures generated from the endpoint are displayed.
Step 1: Select or create an endpoint
In this step, select or create an endpoint from the Available MS CRM Endpoints dropdown:
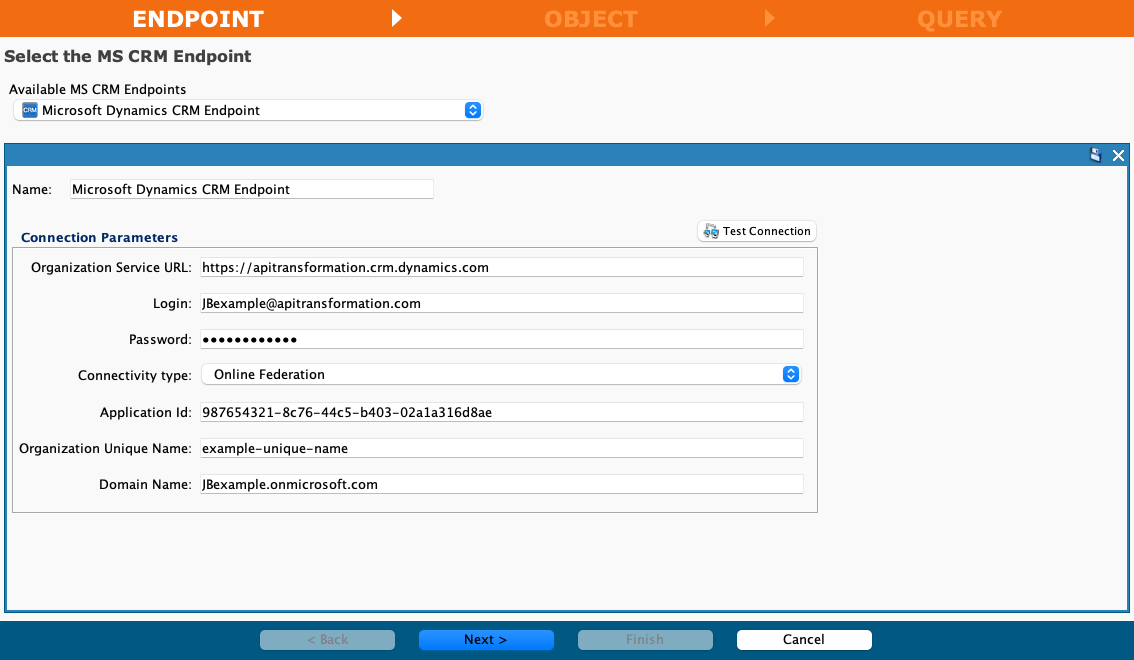
- Name: After selecting an existing endpoint, you can change the name of the endpoint here.
- Connection Parameters: After selecting an existing endpoint, its connection parameters are displayed and you can change these parameters here. For more information on each connection parameter, see Microsoft Dynamics CRM connector endpoint.
- Next: Click to navigate to the next screen.
- Cancel: Click to close the activity configuration without saving.
Step 2: Select an object
In this step, select the object to be queried and select a query building option.
Selecting an object
Select the object to be queried:
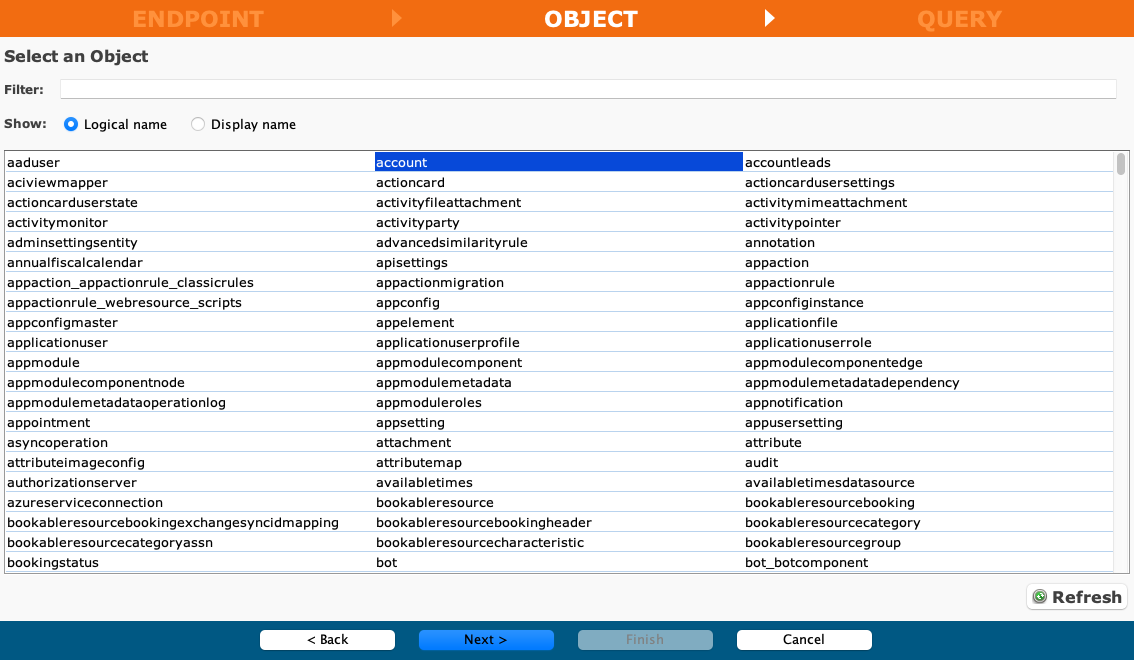
- Filter: Enter any part of the object name into the search box to filter the list of objects. The search is not case-sensitive. If objects are already displayed within the table, the table results are filtered in real time with each keystroke. To reload objects from the endpoint when searching, enter search criteria and then refresh, as described below.
- Show: Select one of Logical Name or Display Name to change the display of the object names.
- Selecting an Object: Within the table, click anywhere on a row to select an object. Only one object can be selected. The selected object is highlighted in blue.
-
Refresh: Click to reload objects from the Microsoft Dynamics CRM endpoint. This may be useful if objects have been added to Microsoft Dynamics CRM. This action refreshes all metadata used to build the table of objects displayed in the configuration.
Note
If the list isn't being populated with recently added objects or if recently removed ones are still being shown, follow these steps to clear the cached values and make the list populate correctly:
-
In your local machine, follow the path
C:\Users\<username>\JitterbitStudio\cache\7.1\ConnectorObjectCache\MSCrm. -
Delete the existing files found there.
-
Click the Refresh button again.
-
-
Back: Click to return to the previous step.
- Next: Click to continue to the next screen.
- Cancel: Click to close the activity configuration without saving.
Selecting a query building option
Select the Query Building Option appropriate for your situation:
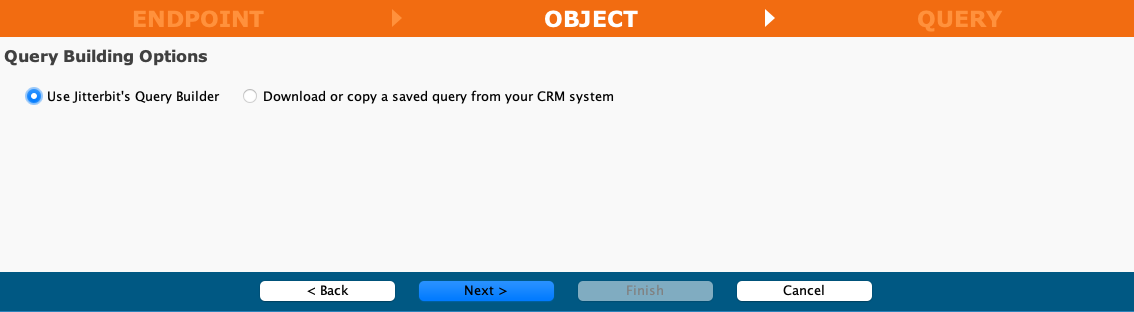
- Use Jitterbit's Query Builder: Select to use Jitterbit's query builder, where you can create a query statement, either automatically by selecting fields and specifying conditions, or manually by directly entering a query statement. For more information, see Use Jitterbit's query builder below.
- Download or Copy a Saved Query from Your CRM System: Select to download or copy a previously saved query from your Microsoft Dynamics CRM instance.
- Back: Click to return to the previous step.
- Next: Click to continue to the next screen.
- Cancel: Click to close the activity configuration without saving.
Step 3: Build the query
In this step, create the query statement or download the query statement from your Microsoft Dynamics CRM instance.
The interface used in this step of the configuration of a Microsoft Dynamics CRM Query activity depends on the Query Building Options selected in Step 2: Select an object:
-
Use Jitterbit's query builder: This option will populate a list of existing buckets to choose from.
-
Download or copy a saved query from your CRM system: For this option, you will manually enter the name of the Amazon S3 bucket.
Use Jitterbit's query builder
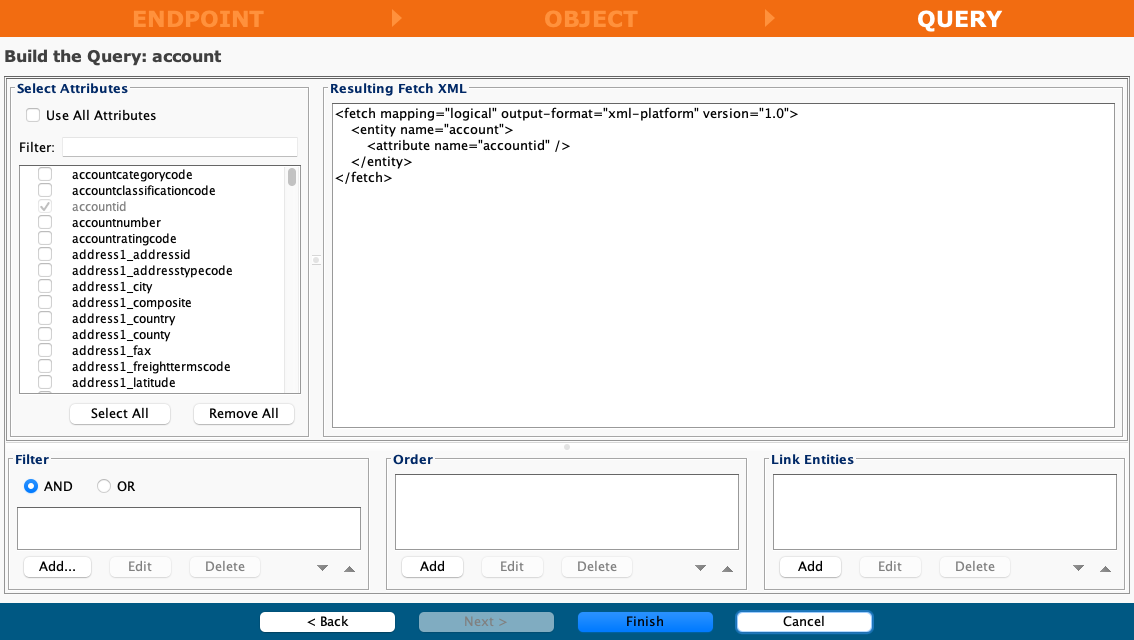
If Use Jitterbit's Query Builder is selected for Query Building Options, this interface is presented:
-
Select Attributes: This section displays attributes available in the Microsoft Dynamics CRM endpoint:
- Use All Attributes: Select query all attributes in the populated list.
- Filter: Enter any part of the attribute name into the search box to filter the list of attributes. The search is not case-sensitive. If attributes are already displayed within the table, the table results are filtered in real time with each keystroke.
- Select All: Click to select all attributes for the query.
- Remove All: Click to deselect any previously selected attributes for the query.
-
Resulting Fetch XML:** As you select fields, the query statement in the Resulting Fetch XML text box autopopulates with the object, selected attributes, and conditions.
-
Filter: Adds conditions to further filter the query. Within the Filter section, to select the appropriate operators, one of AND or OR:
-
AND: Select for queries that require both left and right expressions to be
true. -
OR: Select for queries that require either left or right expression to be
true. -
Add: Click to add a condition. After clicking Add, a dialog appears:
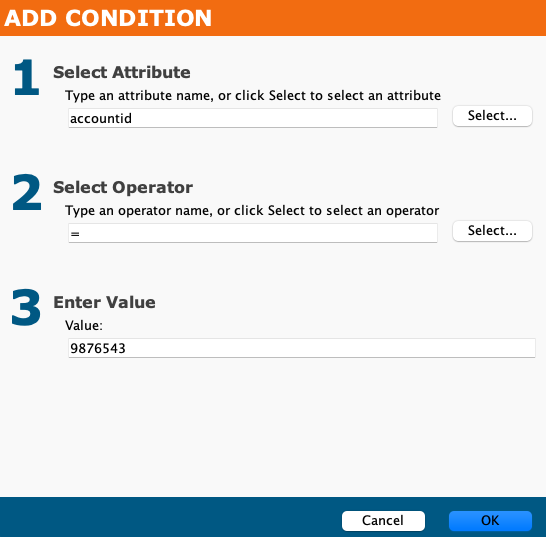
- Select Attribute: Enter any part of the attribute name into the search box to populate the list of applicable attributes. The results are filtered in real time with each keystroke. Alternatively, click Select to choose from a populated list of available attributes.
- Select Operator: Enter any part of the operator into the search box to populate the list of applicable operators. The results are filtered in real time with each keystroke. Alternatively, click Select to choose from a populated list of available operators.
- Enter Value: Enter the desired value to use with the previous selections.
- Cancel: Click to close the dialog without saving the condition.
- Ok: Click to close the dialog and to save the condition.
-
Edit: Select a previously created condition and click Edit to modify the selections for the condition.
-
Delete: Select a previously created condition and click Delete to remove the condition from the query.
-
-
Order: Adds orders to to filter the response:
-
Add: Click to add an order to an attribute. After clicking Add, a dialog appears:
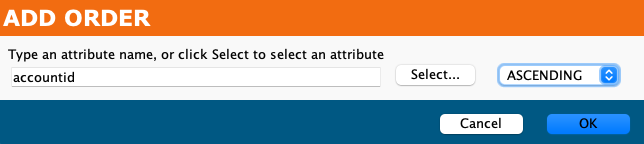
- Search: Enter any part of the attribute name into the search box to populate the list of applicable attributes. The results are filtered in real time with each keystroke.
- Select: Click to choose an attribute from a populated list of available attributes.
- Dropdown: Use the dropdown to select the order for the attribute, one of Ascending or Descending.
-
Edit: Select a previously created order and click Edit to modify the selections for the order.
- Delete: Select a previously created order and click Delete to remove the order from the query.
-
-
Link Entities: Adds an entity relationship to the query:
- Add: Click to add an entity relationship to the query.
- Edit: Select a previously linked entity and click Edit to modify the selections for the linked entities.
- Delete: Select a previously linked entity and click Delete to remove the linked entities from the query.
-
Back: Click to return to the previous step.
- Finish: Click to review the data structures and to complete the activity configuration.
- Cancel: Click to close the activity configuration without saving.
Download or copy a saved query from your CRM system
If Download or Copy a Saved Query from Your CRM System is selected for Query Building Options, this interface is presented:
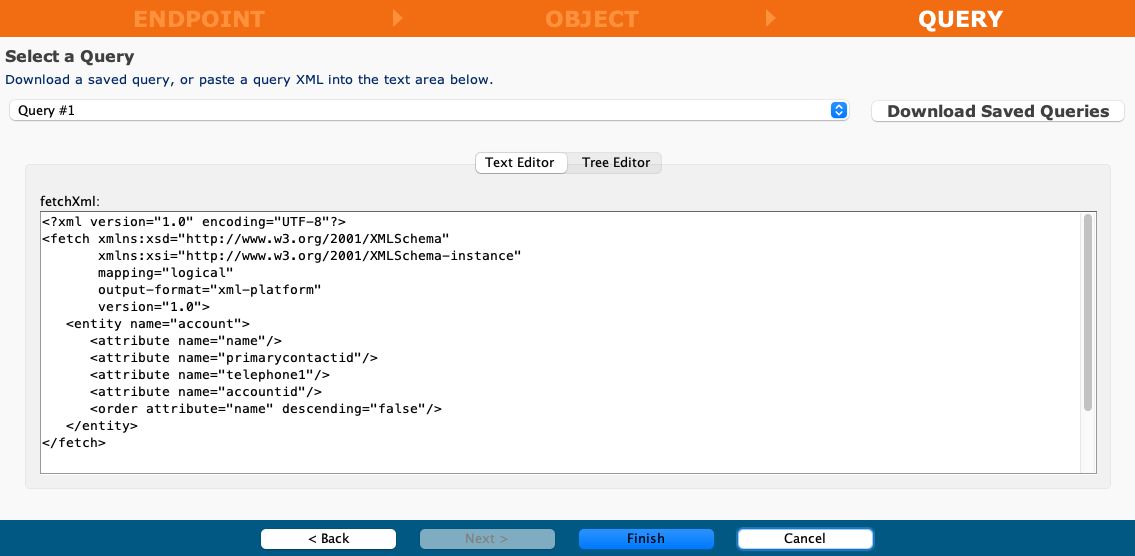
- Select a Query: Use the dropdown to select a saved query from the Microsoft Dynamics CRM instance.
- Download Saved Queries: Click to download saved queries from from the Microsoft Dynamics CRM instance.
- Text Editor: You can create a query statement manually by directly entering or pasting a query XML statement into the text editor.
- Tree Editor: Select a condition value in the Tree Editor to edit the value:
- Edit Condition Value: Enter the desired condition value.
- Apply: Click to apply the condition value to the query statement.
- Back: Click to return to the previous step.
- Finish: Click to review the data structures and to complete the activity configuration.
- Cancel: Click to close the activity configuration without saving.
Step 4: Review the data structures
Any request or response structures generated from the endpoint are displayed. Each user interface element of this step is described below.
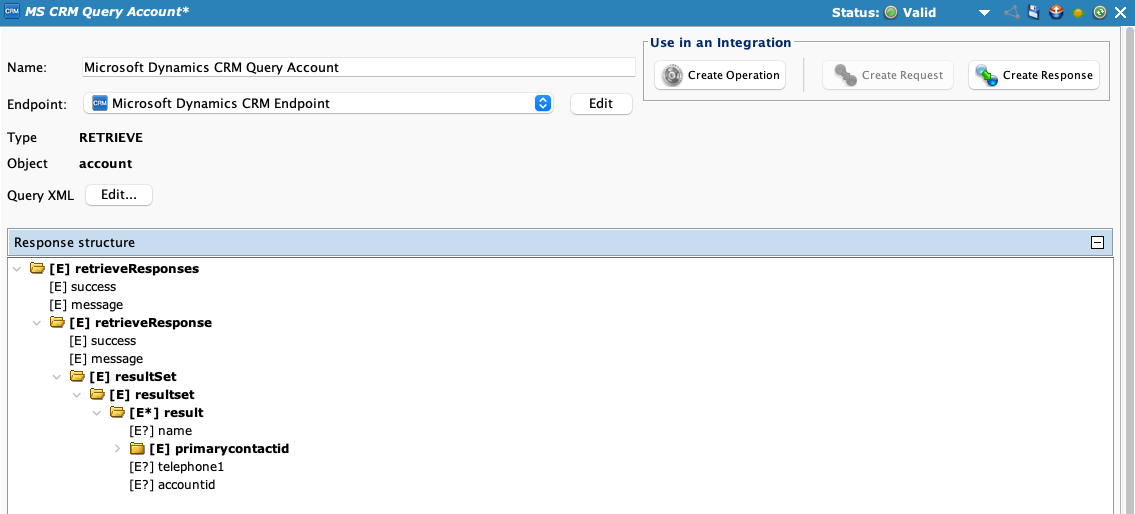
- Name: Enter a name to identify the activity. The name must be unique for each Microsoft Dynamics CRM Query activity.
- Endpoint: Select or create a new endpoint to be used for the Query activity.
- Edit: Click to edit the selected Microsoft Dynamics CRM connector endpoint.
- Type: The activity type is displayed here.
- Object: The previously selected object from Step 2: Select an object is displayed here.
- Query XML: Click Edit to modify the previously configure query XML.
- Use in an Integration: Select one of Create Operation, Create Request, or Create Response.
- Create Operation: Click to create an operation using the configured Query activity.
- Create Request: Click to navigate to the Transformation wizard screen, where you can configure a request transformation for the configured Query activity.
- Create Response: Click to navigate to the Transformation wizard screen, where you can configure a response transformation for the configured Query activity.
Next steps
For information on using configured activities in an operation, see these resources: