Set up Microsoft Dynamics GP
The purpose of this document is to outline the steps to setup the Jitterbit Microsoft Dynamics GP connector along with the prerequisites.
Note
- If you are running Microsoft Dynamics GP 2013, 2015, or 2016, the Jitterbit Microsoft Dynamics GP Connector 2010 is compatible.
- The Microsoft Dynamics GP connector is compatible only with the Windows operating system.
Microsoft Dynamics GP connector background
The GP Connector installer is separate from the Jitterbit application. You can obtain the installation files from the Harmony Management Console at https://login.jitterbit.com.
The connector layer is an interface between Jitterbit and Microsoft Dynamics GP. It is implemented through a RESTful WCF service, which is hosted by an independent Windows service.
Pre-installation steps
Before installing the Microsoft Dynamic GP Connector, you must install and configure the Microsoft eConnect SDK for Microsoft Dynamics.
- Determine the version of Microsoft Dynamics GP you have installed.
- Go to the Microsoft Dynamic GP site at https://docs.microsoft.com/en-us/dynamics-gp/ for prerequisites, instructions, and procedures for installing and configuring eConnect.
- The eConnect download files are available from Microsoft CustomerSource at https://learn.microsoft.com/en-us/dynamics-gp/installation/developer-tools. You will need a Microsoft CustomerSource account to download these files.
Download the GP Connector Installation File
- Log in to the Harmony at https://login.jitterbit.com/jitterbit-cloud-mgmt-console/login/loginform.
- Click on Menu in the upper left corner of the screen.
- Select Downloads from the drop-down menu. The Jitterbit Connectors installer downloads are listed at the bottom of the page.
- Click on Microsoft Dynamics GP 2010 in the list.
- Click on the link in the Download Installer column to start downloading the installer.
Manual steps to install and configure Jitterbit GP REST connector
- Copy the Installers provided to the server where eConnect is installed.
- Execute the setup.exe provided with the msi. This will install the required REST service.
- For Dynamics GP 10 Connector, in the custom setup page, provide paths of the eConnect Incoming XSD Individual Schemas folder and eConnect Schema file.
- For Dynamics GP 2010 Connector, in the custom setup page, provide paths of the eConnect Incoming XSD Individual Schemas folder.
- Use the services console (
services.msc) to change the service logon user to a valid domain user having access to the GP environment. In the service console, it will be visible as "Jitterbit Dynamics GP 2010 REST Connector Service." - Go to the Service Install Folder and Locate this config file:
Jitterbit.Connectors.Dynamics.GP2010.Host.exe.config - Open this File in a text editor with admin privileges.
-
This file is an XML configuration file. Locate this XML Element in the config file and adjust its values:
<appSettings> <add key="SuppressIPCheck" value="true"/> <add key="eConnectSchemaFolder" value="eConnect Schemas"/> <add key="SchemaMasterInformationXmlFile" value="Support\SpecificSchema.xml"/> </appSettings>- eConnectSchemaFolder
eConnectSchemaFolderis the absolute path of the folder containing eConnect Schema documents.- The following assumes that eConnect is installed in its default location (see Pre-installation steps above). Normally, the folder and files can be found at these paths if you didn't change the installation path of the eConnect:
- Incoming XSD Individual Schemas Folder path:
C:\Program Files (x86)\Microsoft Dynamics\eConnect <version>\XML Sample Documents\Incoming XSD Individual Schemas - eConnect schema file:
C:\Program Files (x86)\Common Files\microsoft shared\eConnect <version>\XML Sample Documents\Incoming XSD Schemas\eConnect.xsd - This key value should point to the folder under eConnect installation, which contains all the individual schemas.
- SchemaMasterInformationXmlFile
- This is the absolute path of the
SpecificSchema.xmlfile under the service installation folder.
- This is the absolute path of the
- eConnectSchemaFolder
-
Start the service.
Check to make sure GP is configured properly
After installation, check whether the following URL can be viewed in a browser: http://localhost:8001/GP/Help
This will show you the operations available in the connector service. If you do not see the list of operations, this usually indicates that the windows service hosting the connector is not started.
Begin Jitterbit project
Once you have completed the steps outlined above, you can Connect to the Microsoft GP Application using Jitterbit.
- Log in to the Jitterbit Design Studio.
- Start a New Project.
- Open Connectors and you should see Microsoft GP listed.
Jitterbit Microsoft GP connector
-
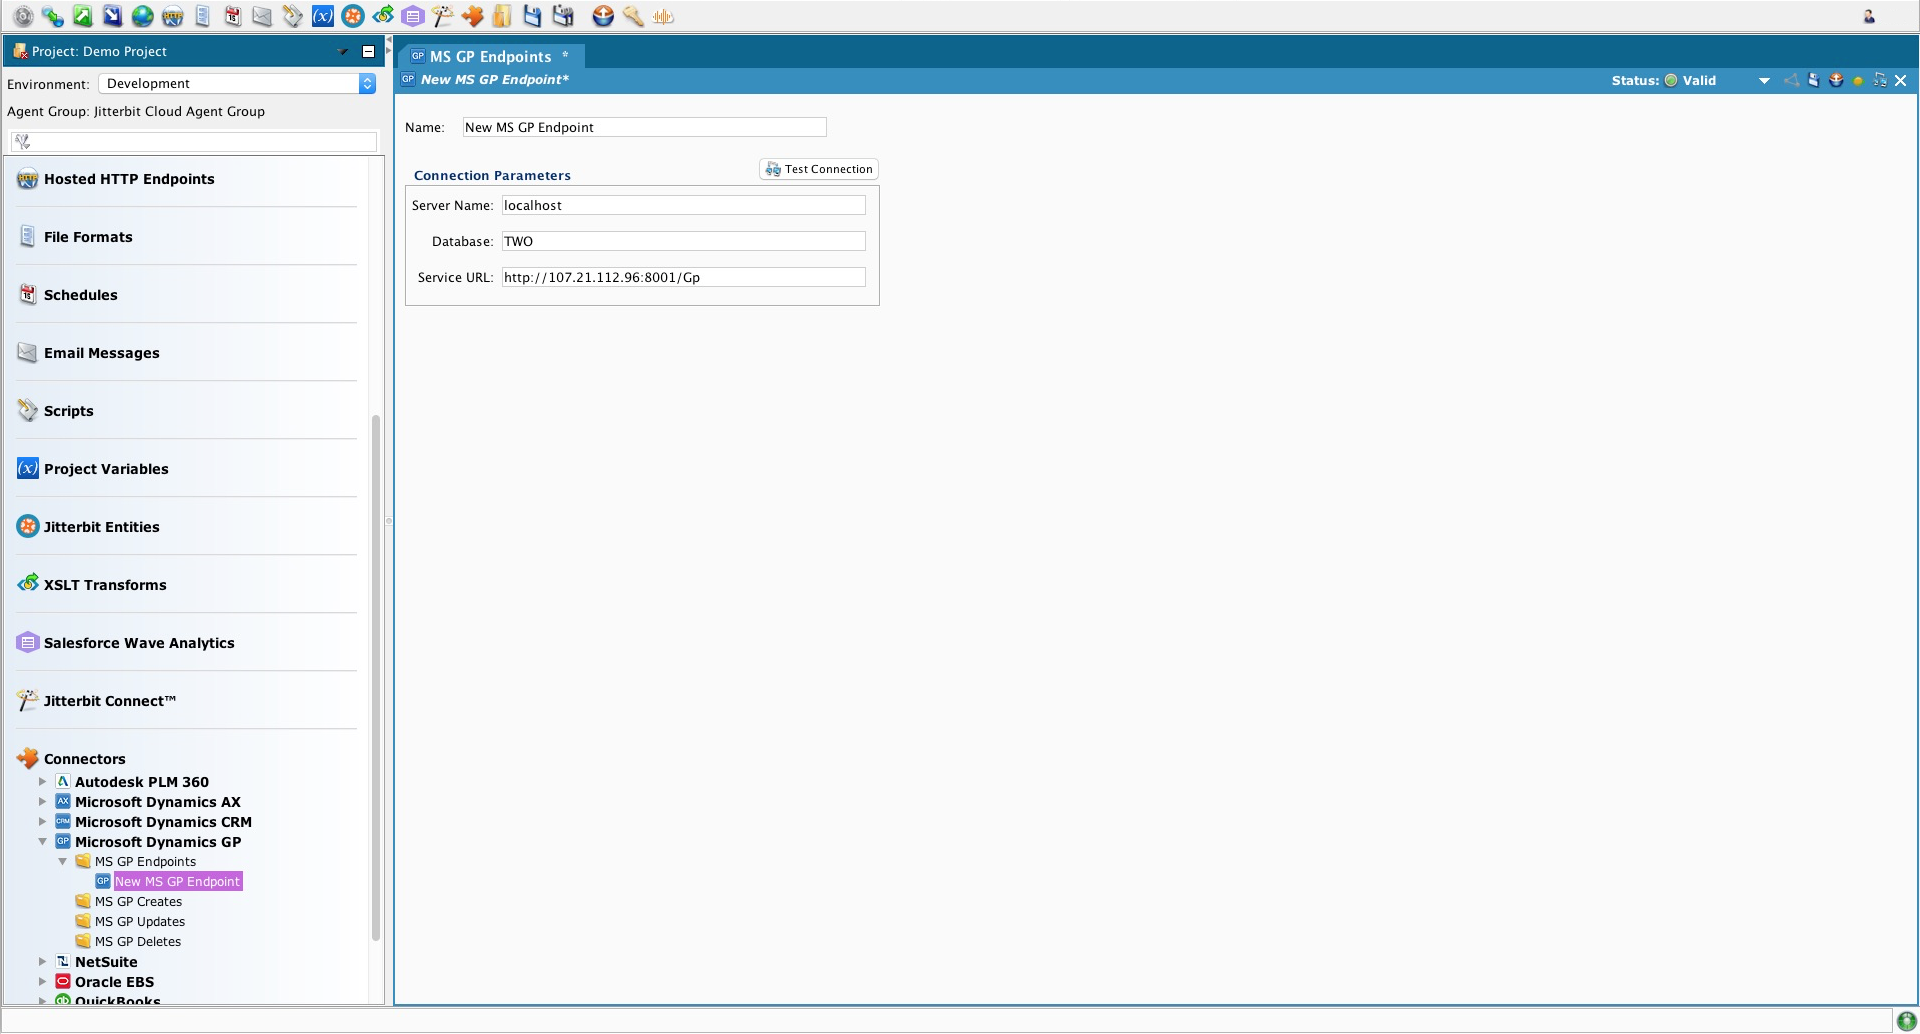
Right-click on Microsoft GP Endpoints and Select New Microsoft GP End Point. This should open a dialog in which you can Enter the Connection Information for your Microsoft GP system.
-
Enter the Values for your Microsoft GP system and then Click the Test Connection Button.
Jitterbit Microsoft GP DB connection
The database connection must use Windows Authentication (Windows Integrated Security). The security must be correctly set up for logging on to the REST Service. You can test the connection with exact credentials using SQL Management Studio.
Adding Jitterbit Custom SQL Views to GP
The Jitterbit Dynamics GP Connector is used to Create, Update, and Delete records in GP.
-
To search for data in GP, you first need to create a Source in the Jitterbit project that connects to the GP database. For additional information on creating a database source, go to Creating a source using a database.
-
Jitterbit has created SQL custom views into GP for common GP objects which will help when querying data from GP.
- To include the views in the GP database, download the views at Jitterbit GP 2010 Connector – Views.zip
- Uncompress the zip file.
- Run the script Jitterbit GP 2010 Connector - Views.sql in the GP database using SQL Server Management Studio.
Note
The eConnect COM+ connector is required to utilize the Microsoft GP Web Services interface. This connector does not stay connected to the Microsoft Dynamics GP application. Should your first operation flow in Jitterbit fail, you will need to re-run it as that will "wake up" the eConnect connection and allow access to the Microsoft Dynamics application.