QuickBooks connector OAuth 2.0 create an endpoint
Note
QuickBooks Connector OAuth 2.0 is supported on a Harmony private agent group. The connector is not supported on Harmony cloud agent groups.
Before beginning the steps on this page, you should have already completed these setup activities to allow Harmony access to your QuickBooks Online instance:
- QuickBooks connector OAuth 2.0 create QuickBooks app
- Install Jitterbit Design Studio on Windows or Install Jitterbit Design Studio on macOS
- Install a Harmony Windows agent or Install a Harmony Linux agent
At this point, you should have all the information you need to start working in Harmony. This page describes how to use the Harmony QuickBooks Connector to create an endpoint within Harmony Design Studio.
Note
If you are not already familiar with Harmony, you can visit Design Studio quick start guide for detailed information on how to use the product. For the purpose of this documentation, simple examples are used as a demonstration.
Testing endpoint
- Open the Design Studio application, version 8.29.2 or later. Sign in using the credentials created when you joined your Organization during the signup process through the Harmony website.
-
The Getting Started screen should display, where you may choose to do a variety of tasks. For the purpose of this walk through, we will create a new project. In the bottom tab portion of the Getting Started screen, click on New Project.
- Choose an appropriate name for your new project and then select other settings that are appropriate for your Organization. For purposes of this example we will call our project "QuickBooks New OAuth 2."
- If this is the first time that you have used Design Studio you may accept all of the default values.
- If you have used Design Studio previously, then you may want to change the selected settings as appropriate.
-
Click the Create button.

-
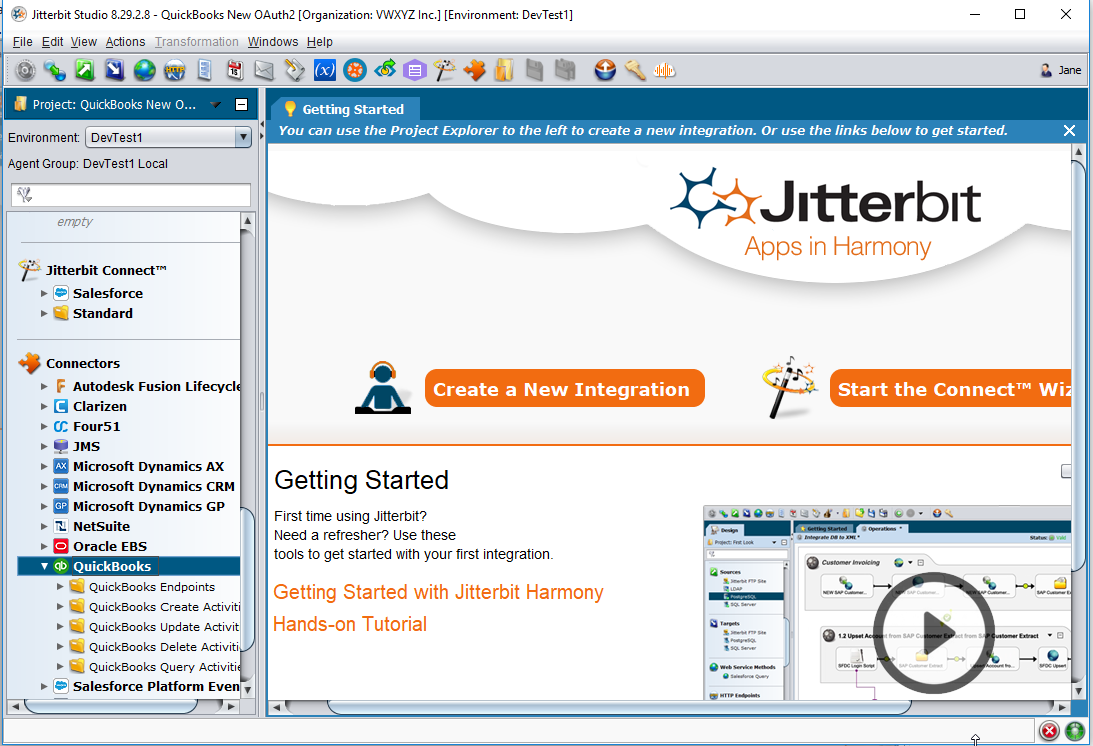
Once your new project has been created, your screen should be similar to the image shown below. The far left-hand side of the Design Studio shows the different parts of your integration: Operations, Transformations, etc. On the left-hand side, scroll down until you see the Connectors category. Double-click the QuickBooks Connector so that the underlying activities are visible.
-
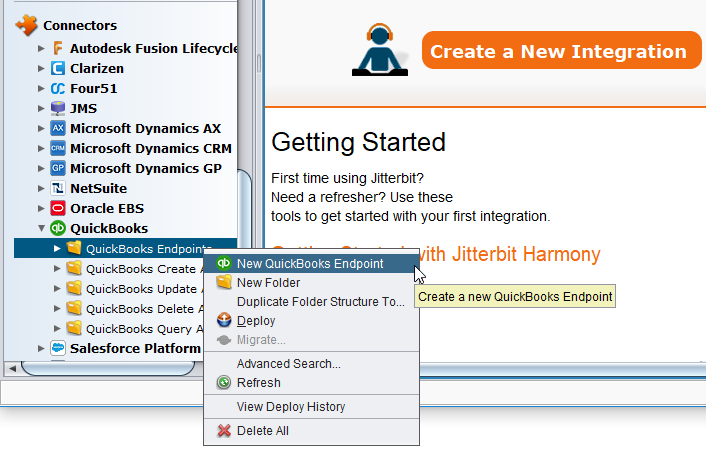
Then right-click on QuickBooks Endpoints as seen in the image below and select New QuickBooks Endpoint from the list.
-
On the right-hand side of the screen, you should see a new tab in your workspace called QuickBooks Endpoints. This is where you will set up the ability to connect Harmony to your QuickBooks sandbox instance using the values that were obtained previously in this documentation.
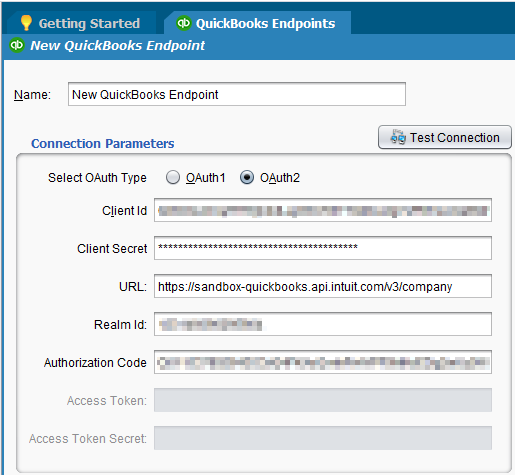
- Enter an appropriate name for the endpoint in the Name field. For purposes of this example we will call our endpoint "New QuickBooks Endpoint."
- Select the OAuth2 radio button. The tab will now display the specific data fields required to create a QuickBooks OAuth 2.0 endpoint.
- Realm ID: The Realm ID is generated within the QuickBooks OAuth 2.0 Playground as described in QuickBooks connector OAuth 2.0 - create QuickBooks app.
- Return to the open browser window displaying the OAuth 2.0 Playground page.
- Copy the Realm ID from the browser window and paste into the Realm ID field within the New QuickBooks Endpoint tab in Design Studio as shown in the image above.
- *Authorization Code: *The Authorization Code is generated within the QuickBooks OAuth 2.0 Playground as described in QuickBooks connector OAuth 2.0 - create QuickBooks app.
- Return to the open browser window displaying the OAuth 2.0 Playground page.
- Copy the Authorization Code from the browser window and paste into the Authorization Code field within the New QuickBooks Endpoint tab in Design Studio as shown in the image above.
- Client ID: The client ID is generated during the creation of the QuickBooks app as described in QuickBooks connector OAuth 2.0 - create QuickBooks app.
- Return to the open browser window displaying the OAuth 2.0 Playground page.
- In the menu at the top of the page, click My Apps.
- Select the app you created during the testing and development stage specifically to set up the Harmony QuickBooks Connector.
- Click the Keys tab.
- The Development Keys display at the top of the page.
- Click the Copy button to the right of the Client ID within the Keys tab and paste into the Client ID field within the New QuickBooks Endpoint tab in Design Studio as shown in the image above.
- Client Secret: The client secret is generated during the creation of the QuickBooks app as described in QuickBooks connector OAuth 2.0 - create QuickBooks app.
- Return to the open browser window displaying the Development Keys.
- Click the Copy button to the right of the Client Secret within the Keys tab and paste into the Client Secret field within the New QuickBooks Endpoint tab in Design Studio as shown in the image above.
- URL: This value is the URL of either the QuickBooks sandbox environment or the QuickBooks production environment, depending on which you are using. It can be copied and pasted into your URL text field as shown in the image above:
- Sandbox Environment: https://sandbox-quickbooks.api.intuit.com/v3/company
- Once all of the necessary values have been supplied, click the Save** icon in the toolbar in Design Studio.
- The connection should be tested to verify that everything is set up correctly. To do so, click the Test Connection button. The following popup should be displayed once Harmony has successfully connected to QuickBooks.
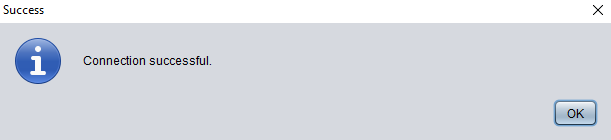
- The above message confirms that the newly created sandbox connection is valid and is working. If the connection is not successful, the provided values should be double checked to ensure that there are no additional spaces, or a value was not fully copied and pasted into one of the connection properties.
Configuring the connection to QuickBooks sandbox on multiple agents
If your private agent group contains more than one private agent, complete these steps:
- QuickBooks creates this file when the connection is successful: "C:\ProgramData\qbdata\qbdata.properties". This file is created on only one of the private agents in the agent group, but the file is necessary for QuickBooks to communicate with each agent.
- Search each private agent within the agent group to determine on which agent the "qbdata.properties" file resides.
- Copy the entire "\qbdata" folder into the "c:\ProgramData" folder on each of the remaining agents within the agent group. This allows every agent within the agent group to communicate with QuickBooks.
Next Step: Once your Harmony endpoint has successfully connected to your QuickBooks sandbox instance, your next step is to create the appropriate activities to integrate your QuickBooks Online instance with other programs and applications.
QuickBooks connector - query activities
QuickBooks connector - create activities
QuickBooks connector - update activities
QuickBooks connector - delete activities
Production endpoint
When you are ready to bring your integration to a production environment, follow the steps below to create a production endpoint in Design Studio.
- Open the Design Studio application, version 8.29.2 or later. Select an existing QuickBooks project in the Recent Projects tab and click on the Open button, or click on the New Project tab and create a new project.
- On the left-hand side of the Design Studio, scroll down until you see the Connectors category. Double-click the QuickBooks Connector so that the underlying activities are visible.
- Right-click on QuickBooks Endpoints and select New QuickBooks Endpoint from the list.
- On the right-hand side of the screen, you should see a new tab in your workspace called QuickBooks Endpoints. This is where you will set up the ability to connect Harmony to your production QuickBooks instance using the values that were obtained previously in this documentation.
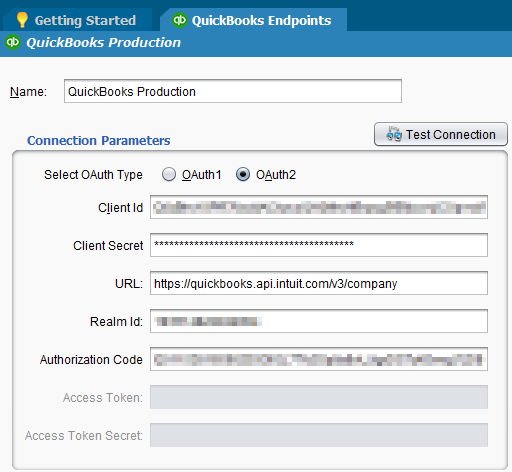
- Enter an appropriate name for the endpoint in the Name field. For purposes of this example we will call our endpoint "QuickBooks Production."
- Select the** OAuth2** radio button. The tab will now display the specific data fields required to create a QuickBooks OAuth 2.0 endpoint.
- Realm ID: The Realm ID is generated within the QuickBooks OAuth 2.0 Playground as described in QuickBooks connector OAuth 2.0 - create QuickBooks app.
- Return to the open browser window displaying the OAuth 2.0 Playground page.
- Copy the Realm ID from the browser window and paste into the Realm ID field within the QuickBooks Endpoint tab in Design Studio as shown in the image above.
- Authorization Code: The Authorization Code is generated within the QuickBooks OAuth 2.0 Playground as described in QuickBooks connector OAuth 2.0 - create QuickBooks app.
- Return to the open browser window displaying the OAuth 2.0 Playground page.
- Copy the Authorization Code from the browser window and paste into the Authorization Code field within the QuickBooks Endpoint tab in Design Studio as shown in the image above.
- Client ID: The client ID is generated during the creation of the QuickBooks app as described in QuickBooks connector OAuth 2.0 - create QuickBooks app.
- Return to the open browser window displaying the OAuth 2.0 Playground page.
- In the menu at the top of the page, click My Apps.
- Select the app you created during the testing and development stage specifically to set up the Harmony QuickBooks Connector.
- Click the Keys tab.
- Scroll down to the Production Keys section.
- Click the Show button to the right of the Client ID within the Keys tab. The client ID is displayed.
- Click the Copy button to the right of the Client ID and paste into the Client ID field within the QuickBooks Endpoint tab in Design Studio as shown in the image above.
- Client Secret: The client secret is generated during the creation of the QuickBooks app as described in QuickBooks connector OAuth 2.0 - create QuickBooks app.
- Return to the open browser window displaying the Production Keys section.
- Click the Show button to the right of the Client Secret within the Keys tab. The client secret is displayed.
- Click the Copy button to the right of the Client Secret and paste into the Client Secret field within the QuickBooks Endpoint tab in Design Studio as shown in the image above.
- URL: This value is the URL of either the QuickBooks sandbox environment or the QuickBooks production environment, depending on which you are using. It can be copied and pasted into your URL text field as shown in the image above:
- Production Environment: https://quickbooks.api.intuit.com/v3/company
- Once all of the necessary values have been supplied, click the Save** icon in the toolbar in Design Studio.
- The connection should be tested to verify that everything is set up correctly. To do so, click the Test Connection button. The following popup should be displayed once Harmony has successfully connected to QuickBooks.
- The above message confirms that the newly created production connection is valid and is working. If the connection is not successful, the provided values should be double checked to ensure that there are no additional spaces, or a value was not fully copied and pasted into one of the connection properties.
Configuring the connection to QuickBooks production on multiple agents
If your private agent group contains more than one private agent, complete these steps:
- QuickBooks creates this file when the connection is successful: "C:\ProgramData\qbdata\qbdata.properties". This file is created on only one of the private agents in the agent group, but the file is necessary for QuickBooks to communicate with each agent.
- Search each private agent within the agent group to determine on which agent the "qbdata.properties" file resides.
- Copy the entire "\qbdata" folder into the "c:\ProgramData" folder on each of the remaining agents within the agent group. This allows every agent within the agent group to communicate with QuickBooks.
Tip
Next Step: Once your Harmony endpoint has successfully connected to your QuickBooks production instance, your next step is to create the appropriate activities to integrate your QuickBooks Online instance with other programs and applications.
QuickBooks connector - query activities
QuickBooks connector - create activities