Workday connector endpoint in Jitterbit Design Studio
Introduction
Before you can create Workday operations in Jitterbit, you must configure at least one Workday endpoint.
Each endpoint represents one WSDL and one associated Operation for a specific Workday account. Creating the endpoint allows Jitterbit to access the account to perform the requested operations.
Create and configure an endpoint
-
Within your project in Jitterbit Design Studio, there are several ways to start a new Workday endpoint:
- Go to File > New > Connectors > New Workday Endpoint.
- In the tree on the left, right-click on the Operations category, then select New Operation.
- In the tree on the left under Connectors, double-click on the Workday category, then right-click on Workday Endpoints and select New Workday Endpoint.
-
In the top toolbar, click the connector icon (orange jigsaw piece)
 . In the popup, select Workday, then select Workday Endpoint.
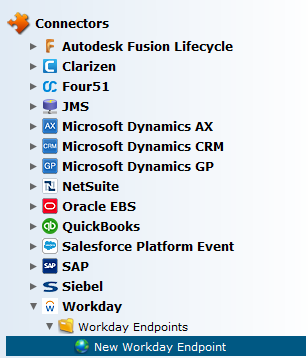
-
The Workday Endpoint Wizard will open in the main view of Design Studio. The wizard walks you through three steps to create the endpoint. At any point in the process you can navigate between the steps by selecting Back and Next at the bottom of the screen, or you can select Cancel to exit the wizard at any point. Select the Finish button when all configurations are complete.
-
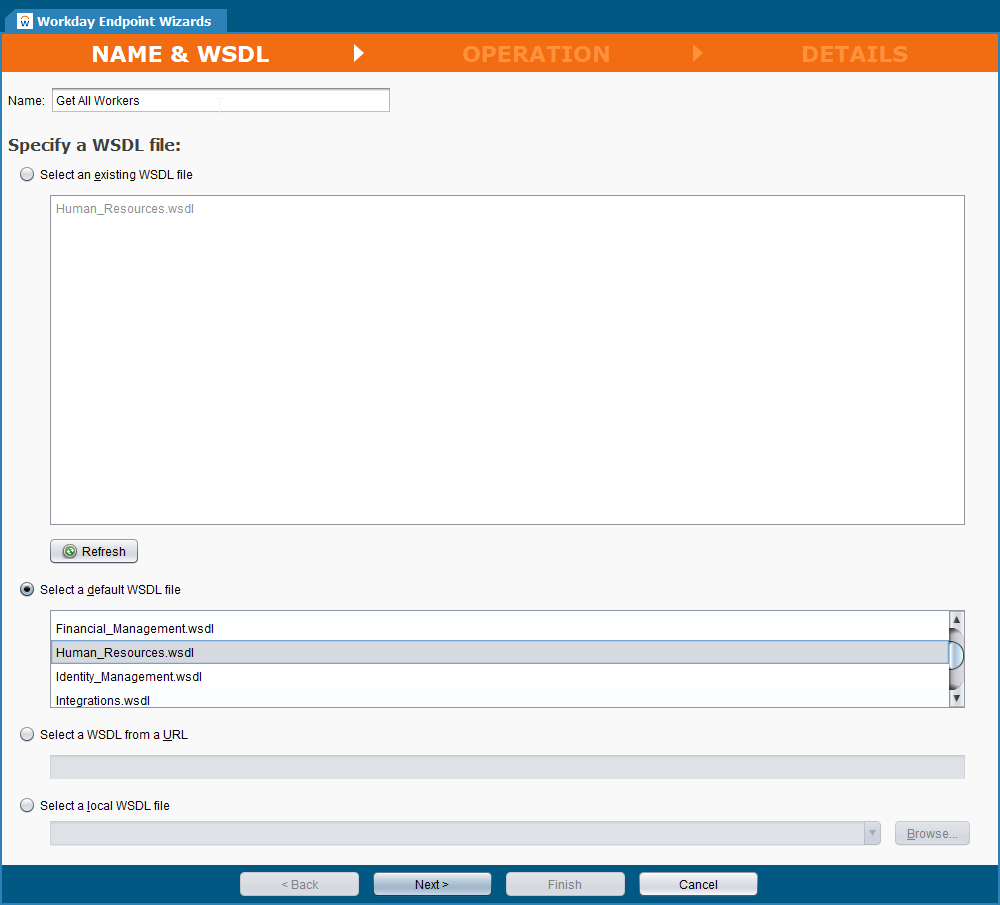
Within the Name & WSDL step in the wizard you will provide a name for your endpoint and select the appropriate Workday WSDL.
- Name: If you are creating endpoints for multiple WSDL and operation combinations, it is a good idea to distinguish each of them here by name.
- Select an Existing WSDL file: Click the radio button to select an existing WSDL file. Once a WSDL has been used to create an endpoint, it will become available to select in the list of existing WSDLs.
- Select a default WSDL file: Click the radio button to select a WSDL from the full set of Workday v29 WDSLs.
- Select a WSDL from a URL: To use a custom WSDL, select the radio button and copy the URL into this field.
- Select a local WSDL file: Select the radio button to activate the Browse button to search for a custom WSDL.
- Click Next to move to the Operation step.
-
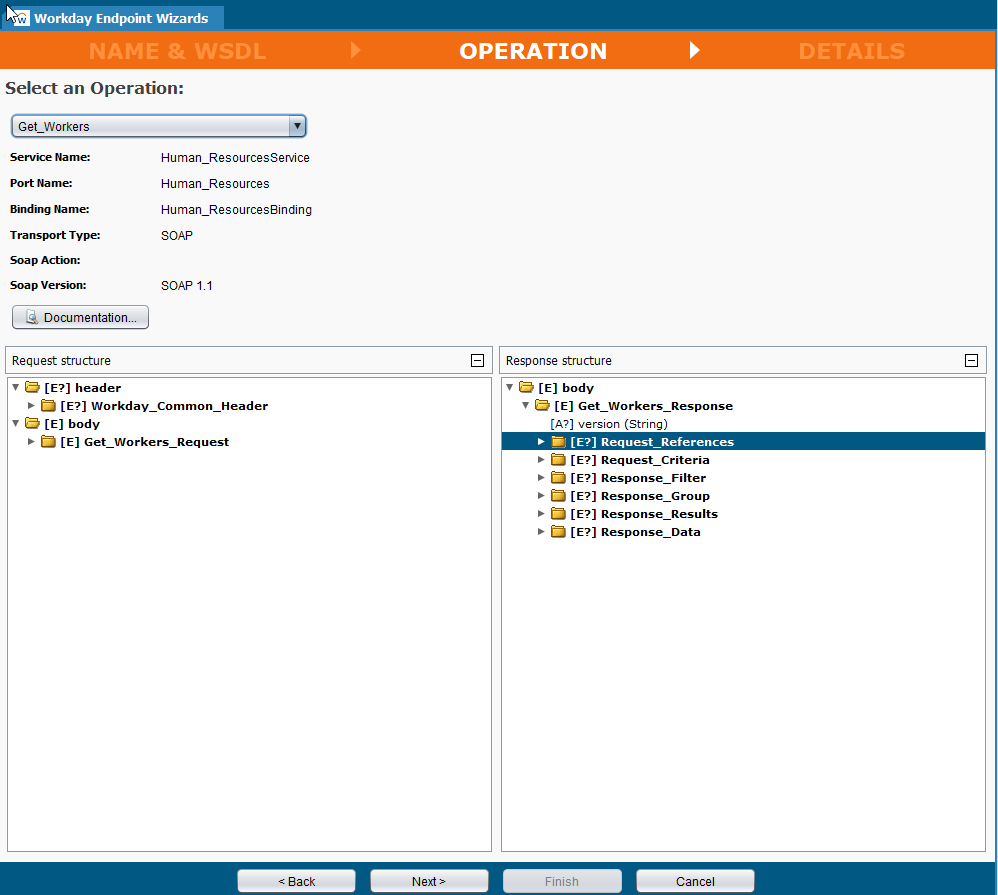
Within the Operation step in the wizard you will select the desired Workday Operation. The Workday Operation defines how to interact with your Workday account. Each endpoint consists of a combination of one WSDL and one operation.
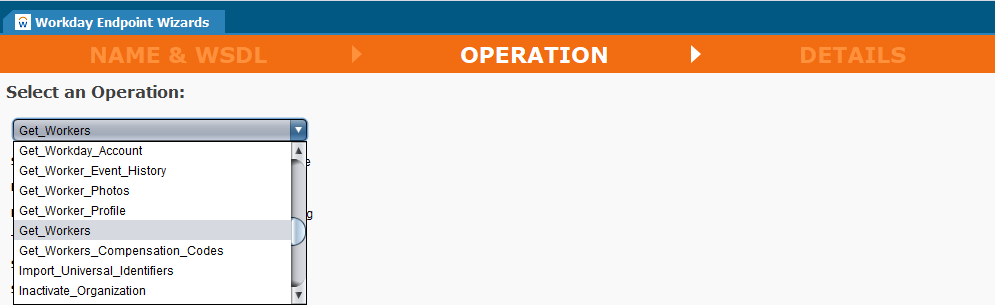
- Select the desired Operation in the dropdown list.
- Once selected, additional information derived from the WSDL displays.
-
In the bottom portion of the Operation step, the request and response structures dictated by the WSDL and Operation are displayed in a hierarchical tree format.
-
Within the Details step of the wizard, the Web Service URL defaults to the name of the selected WSDL.
Note
The default WSDL URL will need to be replaced with the Workday Domain Services URL for your specific company Org. The operation will fail to run successfully until the correct company URL is copied into the Web Service URL field.
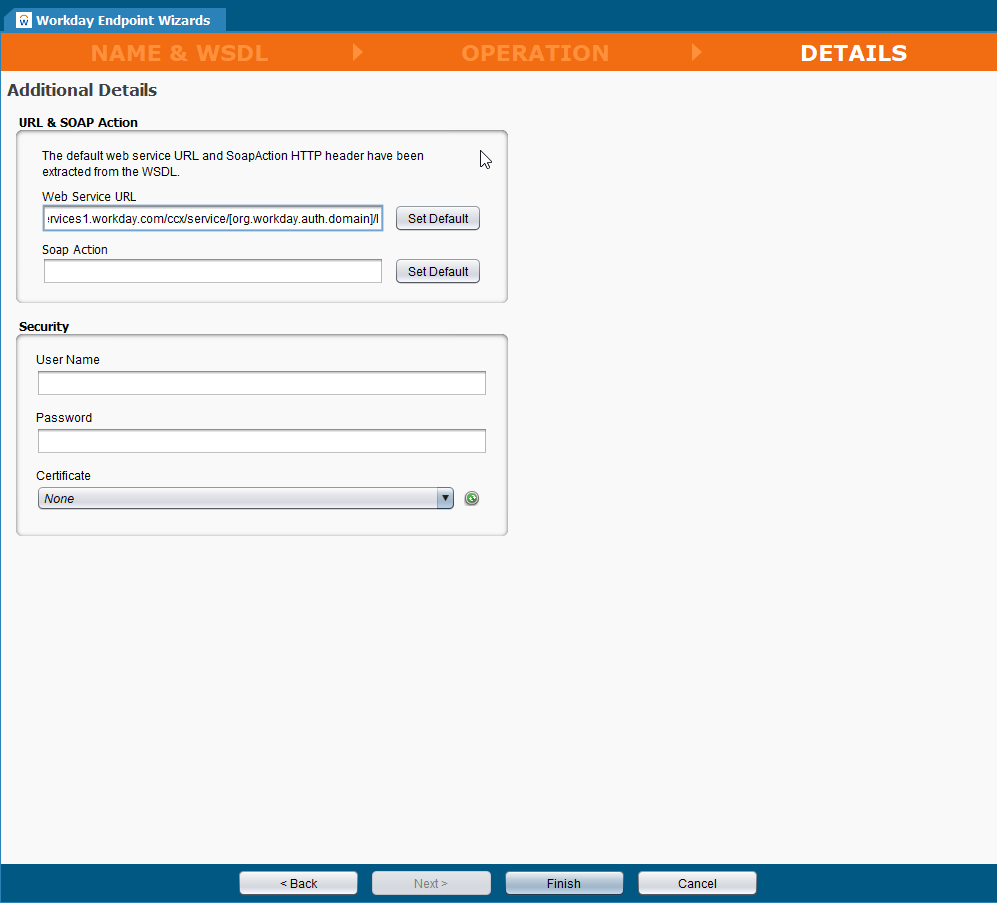
- Web Service URL: This field defaults to the name of the WSDL that has been selected. To run the operation in Jitterbit, this field needs to be populated with the Workday Domain Services URL for your specific company Org. The URL for the Human_Resources WSDL will follow this pattern, using a Jitterbit project variable containing your company Org:
https://wd2-impl-services1.workday.com/ccx/service/[org.workday.auth.domain]/Human_Resources/v29.0 - SOAP Action: The default value is derived from the WSDL you have selected for the endpoint.
- User Name and Password: The user name and password are passed into the OASIS Web Service Security plugin in a script, and do not need to be populated in this screen.
- Certificates: Select the green radio button to the right of the dropdown to download the current list of available certificates from Harmony.
- Click Finish when completed and the summary page will display. The Workday Endpoint is now available in the Design Studio tree on the left side of the screen under Workday.
- Web Service URL: This field defaults to the name of the WSDL that has been selected. To run the operation in Jitterbit, this field needs to be populated with the Workday Domain Services URL for your specific company Org. The URL for the Human_Resources WSDL will follow this pattern, using a Jitterbit project variable containing your company Org:
-
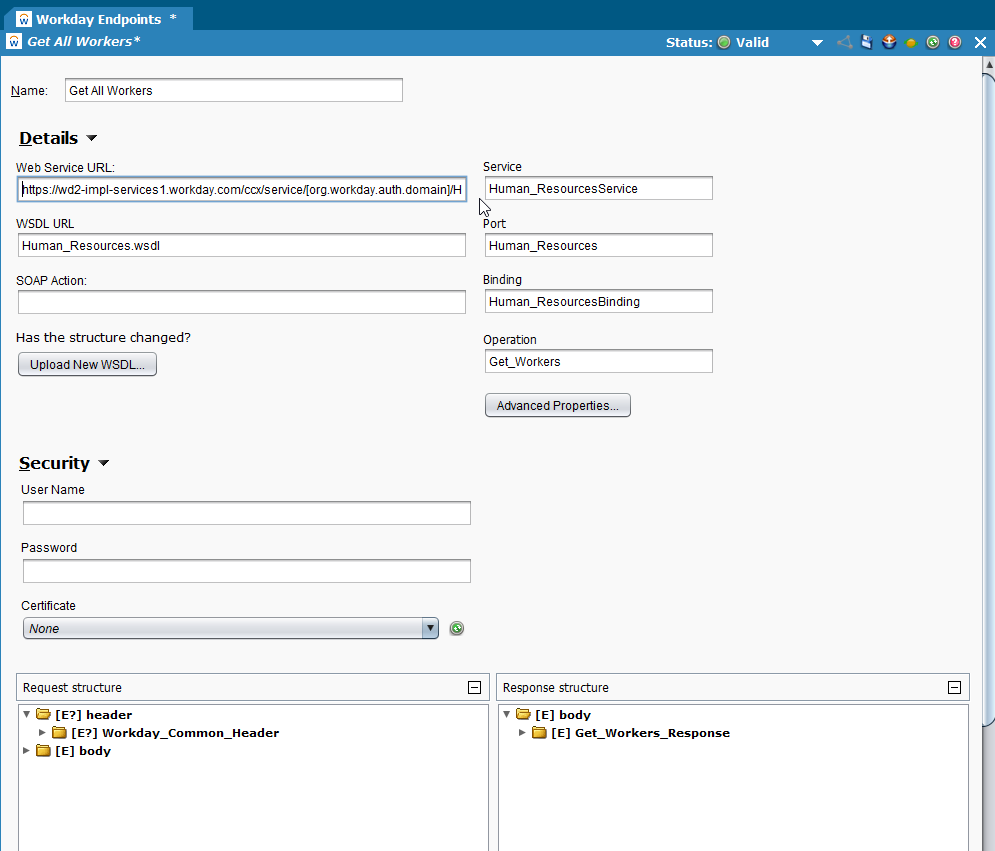
The endpoint is available to drag and drop into a Jitterbit operation. You can also make changes to the endpoint by right-clicking on the endpoint and selecting Open.
-
Upload New WSDL: If the WSDL has been updated or customized, you can upload the new version to the endpoint.
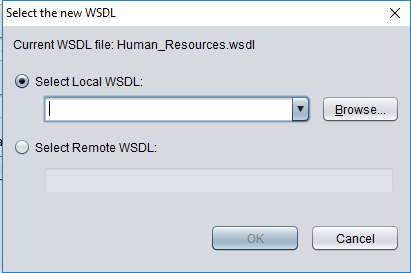
- Select Local WSDL: Select the radio button to activate the Browse button. Browse to and select the new WSDL. Click OK to upload.
- Select Remote WSDL: Select the radio button and copy the URL for the WSDL into this field. Click OK to upload.
Create a Jitterbit operation
Jitterbit operations are used to collect all the information needed to define exactly what a particular integration process does and when it should start. The Workday endpoint will be incorporated into a Jitterbit operation.
-
Within your project in Jitterbit Design Studio, there are several ways to start a new Jitterbit operation:
- Go to File > New > New Operation.
- In the tree on the left, right-click on the Operations category, then select New Operation.
-
In the top toolbar, click the Operation gear icon.
-
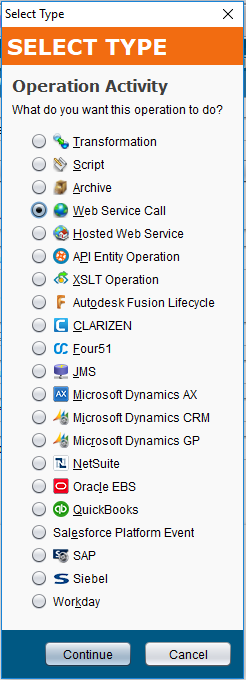
Select Web Service Call in the popup and select Continue to create the operation.

-
In the tree on the left under Workday, click on the Workday Endpoint, drag the endpoint into your Jitterbit operation and drop it on the Web Service Call object in the center of the operation. The object is renamed to your Workday endpoint and inherits the endpoint settings.
Apply the OASIS Web Service Security plugin
The Oasis Web Service Security plugin appends a WSS (http://www.oasis-open.org/committees/tc_home.php?wg_abbrev=wss) security header to a web service request. The header includes a UserNameToken element. Optionally, the header will also include a Timestamp element.
Tip
See OASIS Web Service Security for the list of data elements and configurable options.
-
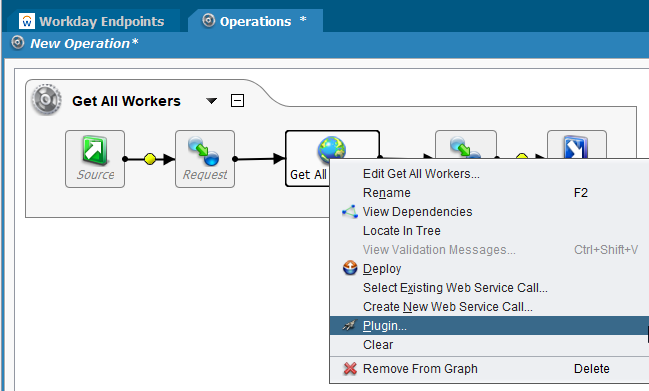
Right-click on the Workday endpoint (the center object) in the operation and select Plugin.
-
Select Version 1.2.0.0 of OASIS Web Service Security in the bottom section of the popup.

- Click on Assign and click on Apply.
- Click OK.
Create project variables
The web service credentials are passed to the appropriate plugin data elements using project variables within a script.
Tip
Please see Project variables for in depth documentation about creating, configuring and using project variables.
-
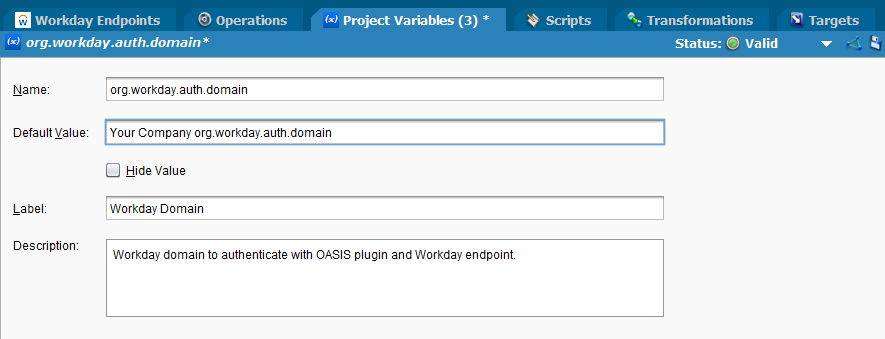
In the tree on the left, right-click on the Project Variables category, then select New Project Variable.
- Name: The name field is used for the actual variable name that you want to declare. The name field cannot be left empty and must not contain spaces.
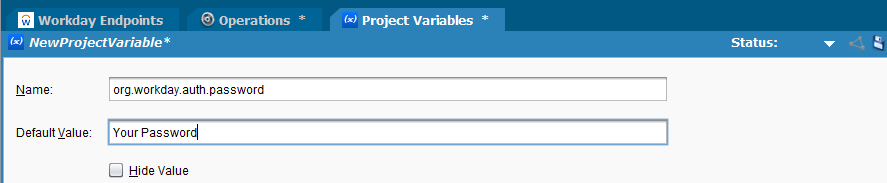
- Default_Value: Enter a default value for the project variable. In this example, the default value is your company org.workday.auth.domain.
- Hide Value: Click the checkbox to mask the default value of the credentials. This is recommended if you are using a project variable for a password, token, etc.
- Label: Enter a label to describe the variable name if desired.
- Description: Enter a description to provide further details about the variable if desired.
-
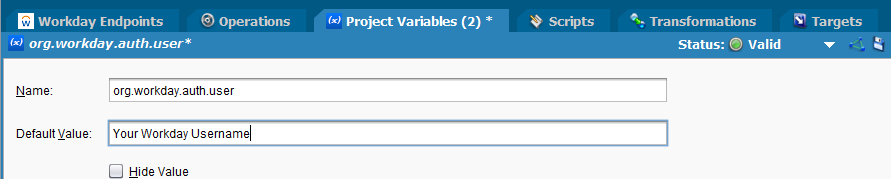
Follow the instructions in Step #1 above to create a second project variable. The default value in this example is your Workday username.
-
Follow instructions in Step #1 above to create a third project variable. The default value in this example is your Workday password.
Create a script
The web service credentials assigned to the project variables created in the previous section are passed to the appropriate plugin data elements using a script.
Tip
Please see Creating a script for in depth documentation about creating and using scripts.
-
In the tree on the left, right-click on the Scripts category, then select New Script.
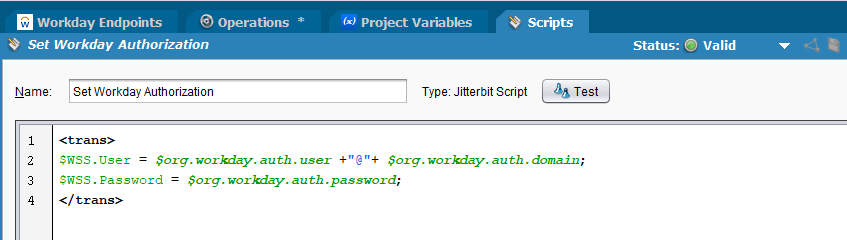
- The first line in the script concatenates two project variables (the org.workday.auth.user and the org.workday.auth.domain) and assigns the resulting string to the $WSS.User data element in the OASIS plugin.
- The second line in the script assigns the org.workday.auth.password to the $WSS.Password data element in the OASIS plugin.
- Click on Test to verify the script is valid and click on Save.
-
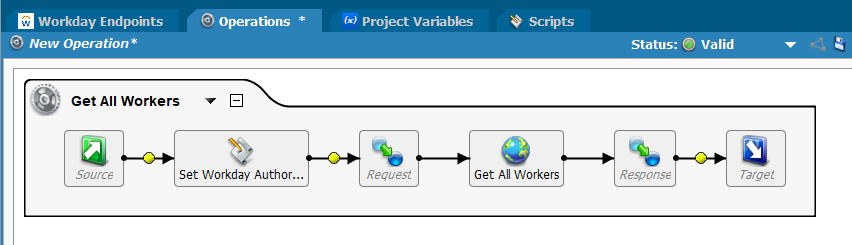
In the tree on the left under Scripts, click on the Set Workday Authorization script, drag the script up to the operation. Once the yellow ball between objects turns green, drop the script between the Source and the Request on the left side of the operation.
Creating a request and a response
This example uses a very simple Request transformation to identify the data to retrieve using the Workday Human_Resources WSDL.
Tip
It may be helpful to utilize Workday's API documentation and test the APIs in Workday Studio to help you build the initial request for the SOAP call.
-
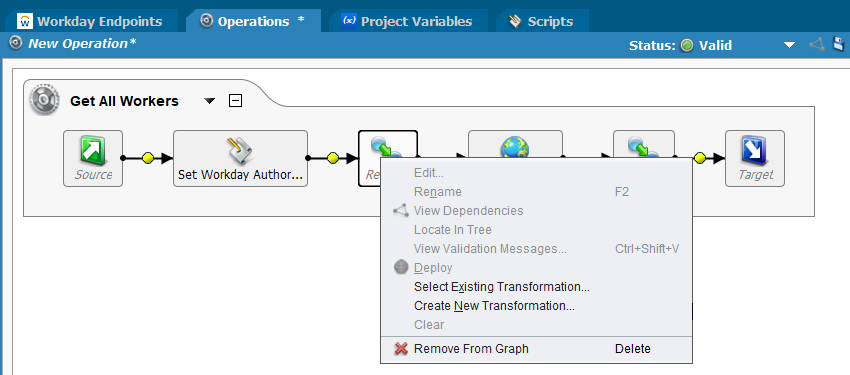
Within the operation, right-click on the Request Object and select Create New Transformation.
-
The Transformation Wizard displays allowing you to provide a name for the transformation and select the source type.
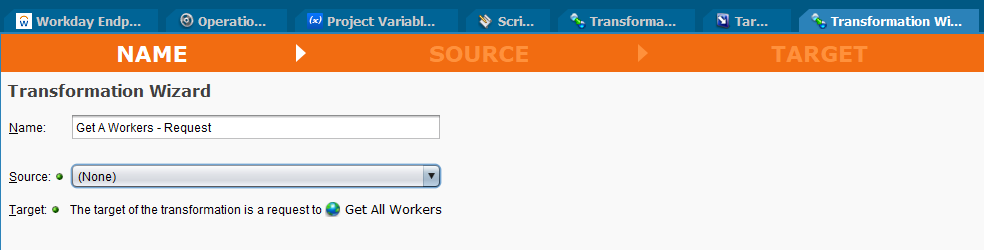
- Name: Provide a name for the request transformation.
- Source: Select None from the dropdown list.
- Select Finish.
-
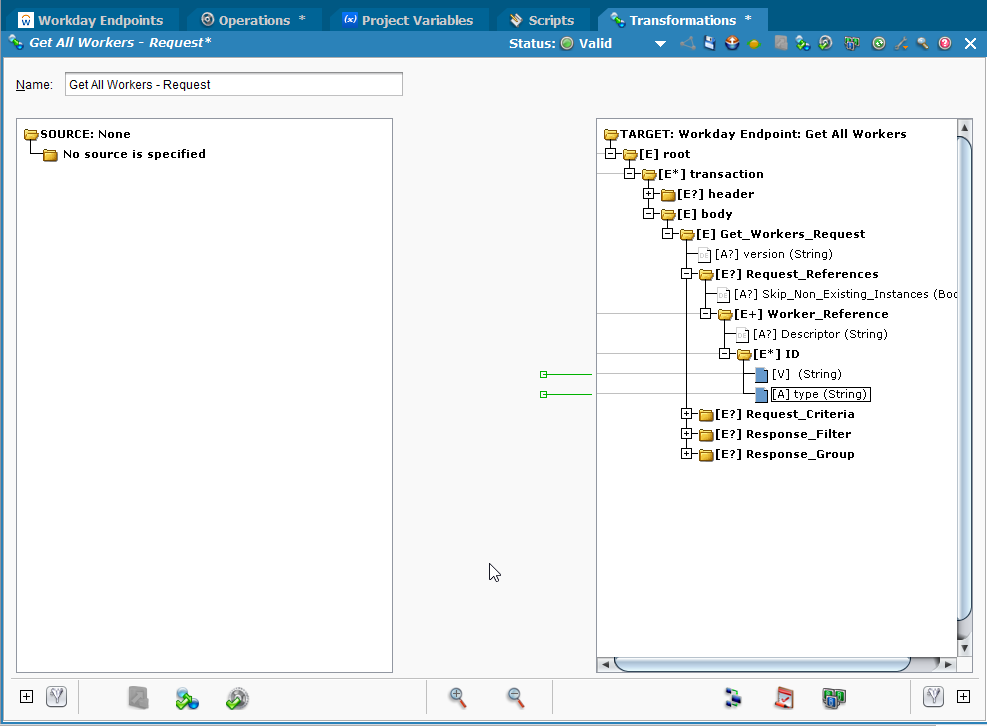
The transformation displays the request structures dictated by the WSDL and Operation in a hierarchical tree format.
-
Expand the request structure and double-click on the (String) field in the ID node.

- This opens the Formula Builder and allows you to write a script to request a single value.
- In this example, the request will look for the Worker_Reference ID number 10013.
- Click OK at the bottom of the screen to return to the transformation.
-
Double-click on the type (String) field in the ID node.

- Enter "Employee_ID" in the script. In this example the ID type is Employee_ID.
- Click OK at the bottom of the screen to return to the transformation.
-
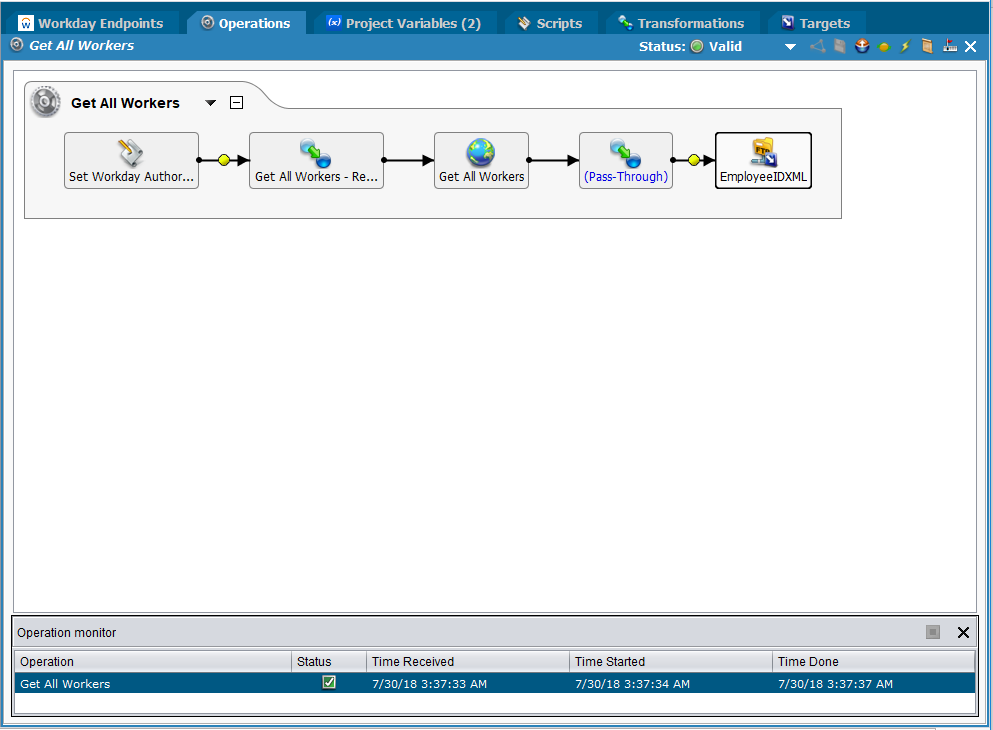
Return to the Operations tab.
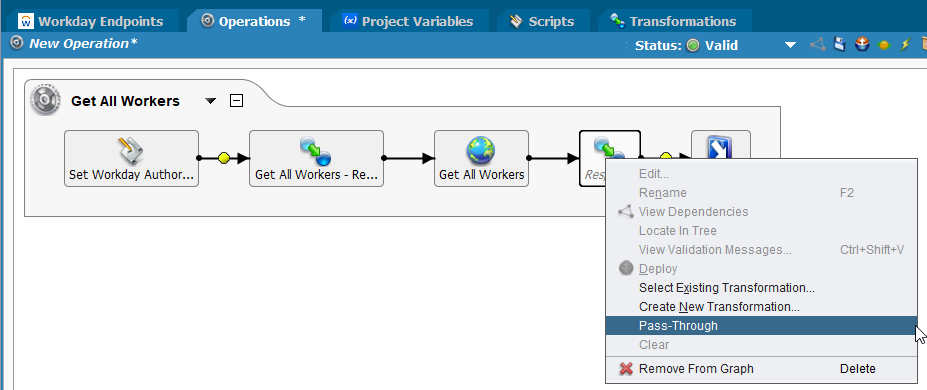
- Right-click on the Response object in the operation and select Pass-Through in the popup.
- In this example the data will not be specifically mapped to another file structure and values will not be modified or formatted. The data will be passed directly from the web service to an XML file.
-
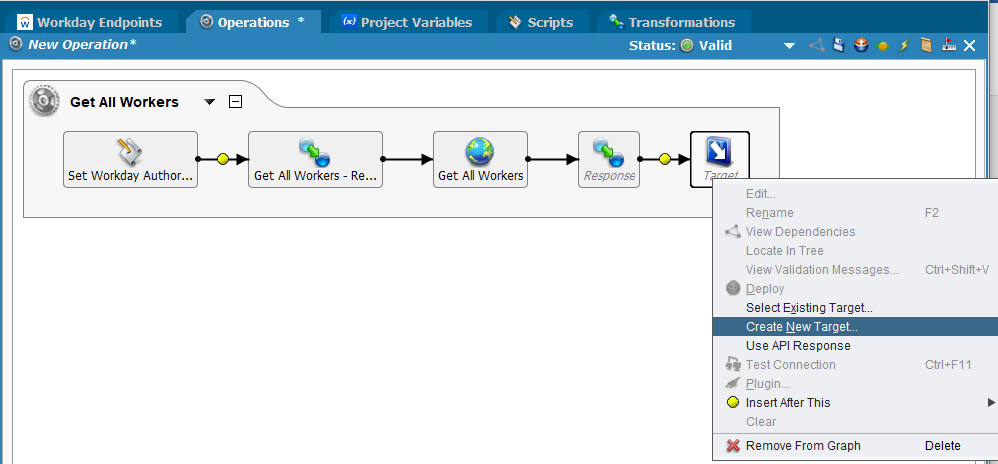
Right-click on the Target object in the operation. Select Create New Target in the popup.
-
In this example the data is sent to an XML file on an FTP Site.
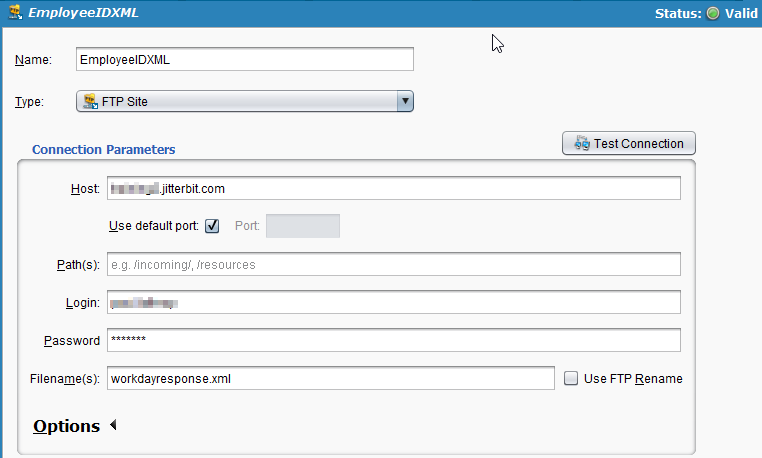
- Name: Provide a name for the response file type.
- Type: Select FTP Site from the dropdown.
- Host: Provide the FTP URL.
- Login: Provide the FTP login.
- Password: Provide the FTP password.
- Filename: Provide a name for the XML file. Uncheck the Use FTP Rename option.
-
The operation is now complete and ready to be tested.
-
From the Operations tab, click on the Save icon in the upper right corner.
-
From the Operations tab, click the deploy
 icon and deploy the entire project to the cloud.
 -
Click on the Lightning
 icon in upper right corner to execute the project.
 -
The Status, Time Received, Time Started and Time Done displays in the Operation Monitor at the bottom of the screen.
-
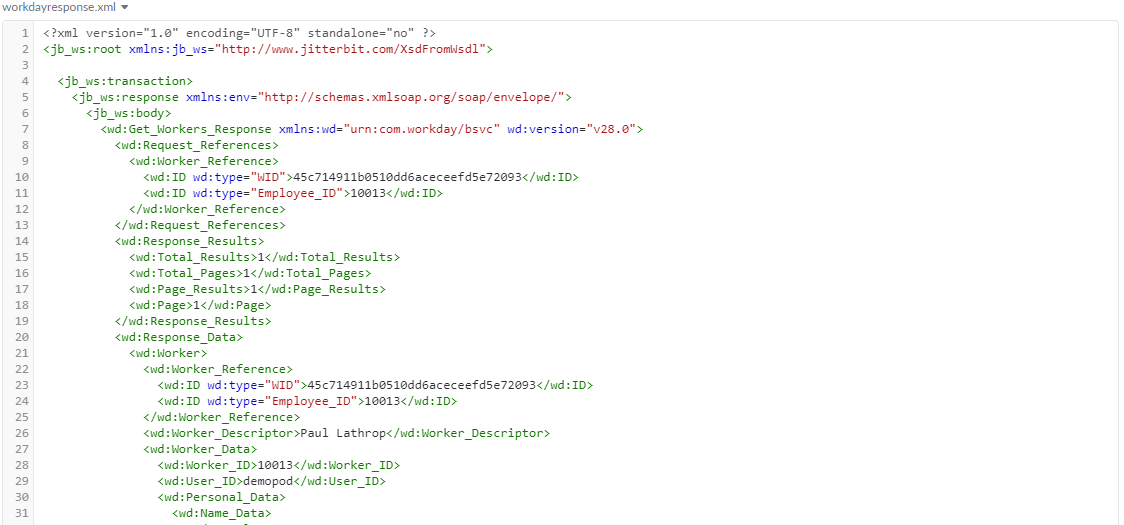
-
The example completed successfully. The XML file contains the worker data for the one worker ID that was retrieved from the WSDL.