Create custom fields in Salesforce
-
Login to Salesforce with your credentials
-
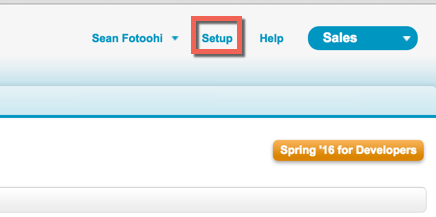
Click on Setup on top right-hand corner
-
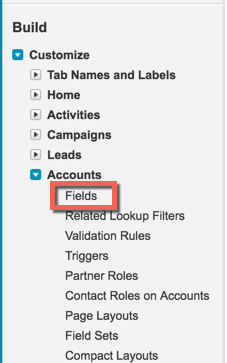
From the menu on the left, navigate to: Build -> Customize -> Accounts -> Fields
-
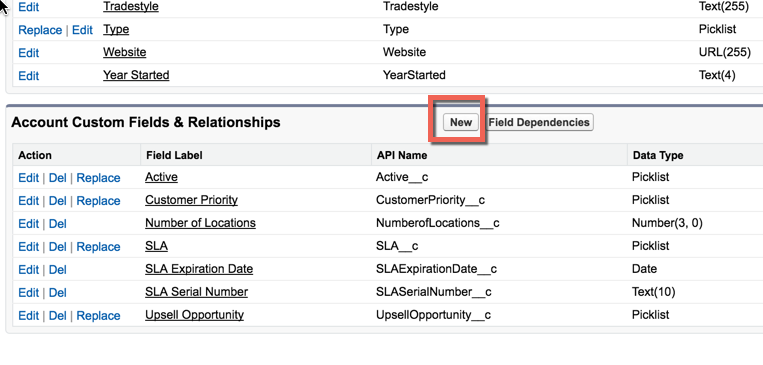
Scroll down to the bottom of the page and Click on New button in the Account Custom Fields & Relationships
-
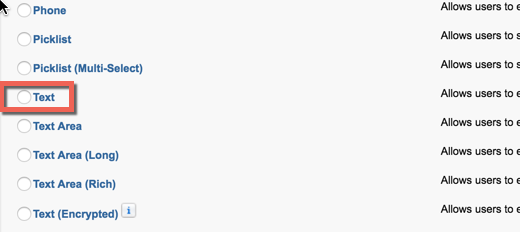
Choose Text as the Data Type and Click Next
-
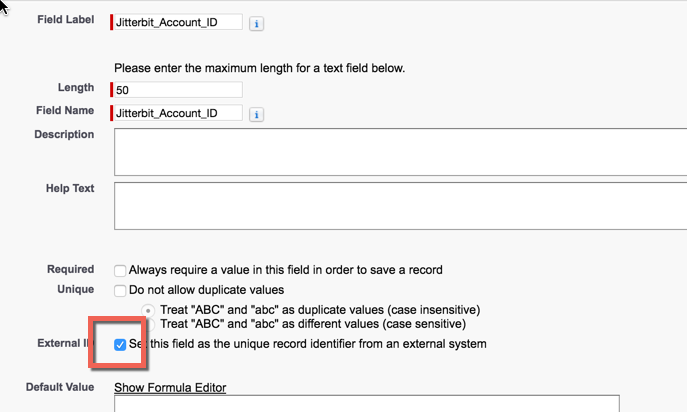
Enter the following information for details of this custom field and Click Next:
- Field Label: Jitterbit_Account_ID
- Length: 50
- Field Name: Jitterbit_Account_ID
- External ID: Checked (Very Important)
-
Accept the default for field-level security and Click Next
- Accept the default for page payouts and Click Save
- Once you are back on the Account Fields, verify that you see the newly created custom field. Your custom field should look like this:

- It is important that under Data Type column, you see (External ID) for this field.
- You are done.