Salesforce bulk process wizard in Jitterbit Design Studio
Overview
This page describes the elements of the Bulk Process Wizard that are common to all Bulk Process actions.
With the Bulk Process Wizard, you can process a large number of records in a Query, Upsert, Insert, Update, Delete, or Hard Delete action. If you need to load or export a large volume of records, and you do not need to transform any of the fields, we recommend using a Bulk Process operation, which is faster and scales better than conventional Update or Upsert operations.
A Bulk Process supports these data types:
- Base-64
- Boolean
- Date formats
- Double
- Integer
- Salesforce ID
- String
Note
Bulk Process only supports flat file sources with a header. Databases are not supported.
The process for the Upsert Bulk Process action is slightly different than the process for Query, insert, update, delete, or hard deleteBulk Process actions. The Upsert Bulk Process action requires you to select an external ID field for the selected Salesforce object. Query, Insert, Update, Delete, and Hard Delete Bulk Process actions do not require an external ID field and do not include this step.
For the next steps in the Salesforce Bulk Process Wizard, see the appropriate page for the Bulk Process action that was chosen on the Bulk Process Action screen:
- Salesforce bulk process wizard for upsert action
- Salesforce bulk process wizard for query, insert, update, delete, or hard delete actions
Note
When opening an existing project that uses a previous Salesforce API version, you will be prompted to upgrade to the latest supported Salesforce API version. (An upgrade to a higher version implicitly includes all the features and objects of prior versions.)
The version of Salesforce REST API that is available depends on the Jitterbit agent and Design Studio version you are using. See Prerequisites and supported API versions for more information.
Start the wizard
The following steps describe how to start the Salesforce Bulk Process Wizard:
-
Open a new project in Jitterbit Design Studio. For more information, see Creating a new project.
-
Click the
 button in the main toolbar at the top of the screen to display the Jitterbit Connect dialog:
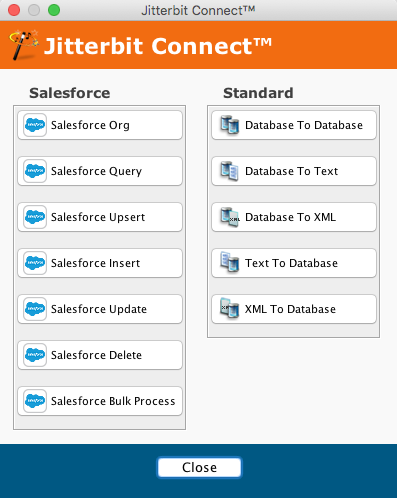
-
To start the wizard, click the Salesforce Bulk Process button in the Jitterbit Connect dialog.
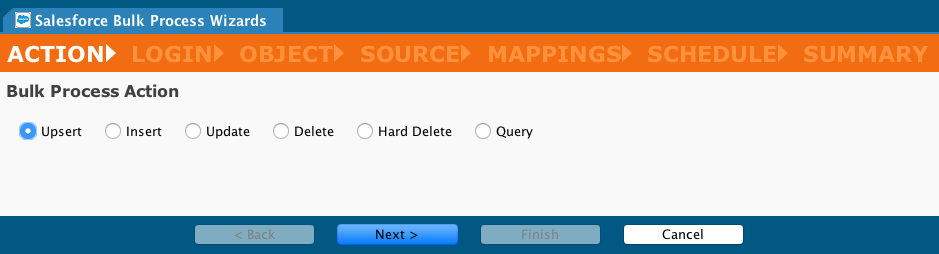
Select the bulk process action
Select the Bulk Process action from the radio buttons: Upsert, Insert, Update, Delete, Hard Delete or Query. As only one of these actions can be selected for each Bulk Process Wizard, create additional Bulk Process actions as needed.
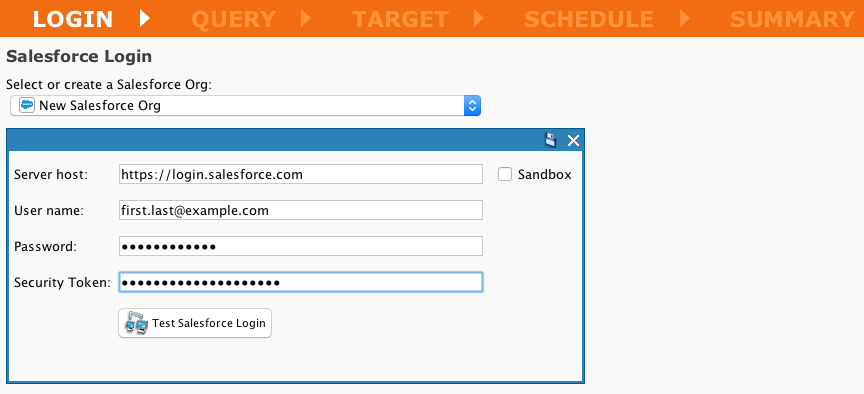
Enter the Salesforce login information
If you have already created a Salesforce org login, connection details will appear on the Salesforce Login screen. It is considered best practice to click the Test Salesforce Login button to check the connection. If you have not yet created a Salesforce login, or you need to use different credentials, select Create New from the dropdown menu.
Note
Any changes you make in this page of the wizard will be automatically saved to the Salesforce Org shown on the page. See the Salesforce org page for details.
On the Salesforce Login screen, click Next to move to the next screen. (If required, you can click the Back button to return to the previous screen.)
Next steps
For the next steps in the Salesforce Bulk Process Wizard, see the appropriate page for the Bulk Process action that was chosen on the Bulk Process Action screen: