Create a Jitterbit entity
Introduction
This page describes how to create and edit a Jitterbit entity. A Jitterbit entity is used to create an OData service. The entity defines a database or SAP endpoint, tables, and fields that will provide the data to an OData service.
Tip
- You must be using Design Studio (not Cloud Studio) to create a Jitterbit Entity.
- Jitterbit Entities reside within a project. Before you can create a Jitterbit Entity, you will need to follow the instructions to Create a new project in Design Studio.
- A project may contain multiple Jitterbit Entities.
Create a Jitterbit entity
-
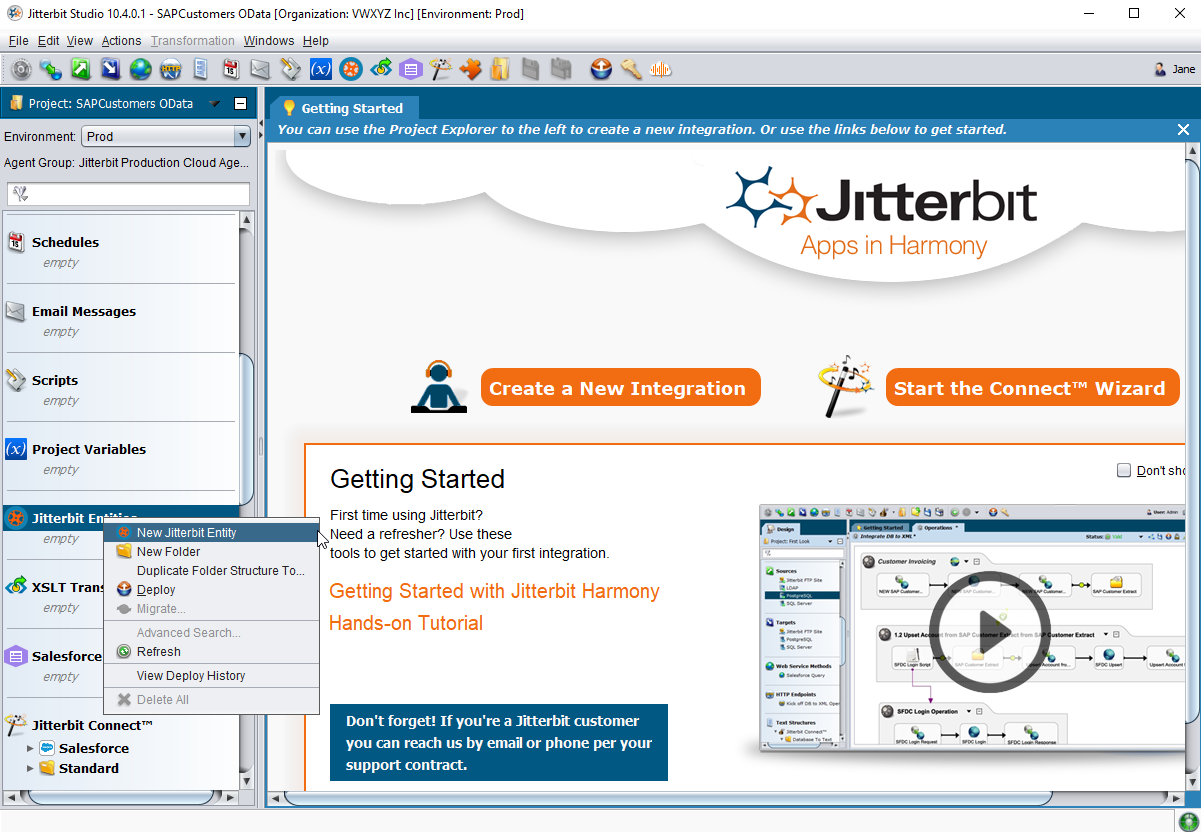
Open your project in the Design Studio application. The Getting Started screen should display similar to the image below:
-
The panel on the left side of the Design Studio lists the project items you will use to create your integration, such as Operations, Transformations, Scripts, etc. Scroll down within the panel to Jitterbit Entities.
-
Right-click on Jitterbit Entities and select New Jitterbit Entity from the dropdown menu.
-
-
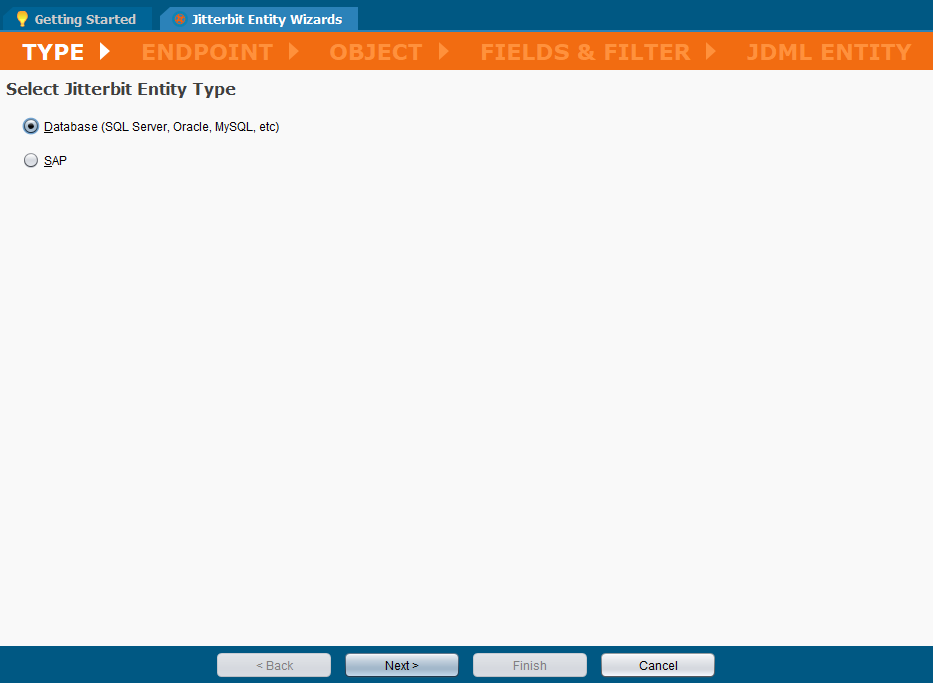
Selecting New Jitterbit Entity launches the Type screen within the Jitterbit Entity Wizard:
-
Select Jitterbit Entity Type:
- Database: Select Database if the data you want to access is stored in a database such as SQL Server, Oracle, MySQL, etc.
- SAP: Select SAP if the data you want to access is stored within an SAP system.
-
Click Next at the bottom of the screen to continue. While working in the Jitterbit Entity Wizard, click Back on any step to return to the previous step to make changes or click Cancel to exit the wizard without saving the entity.
-
-
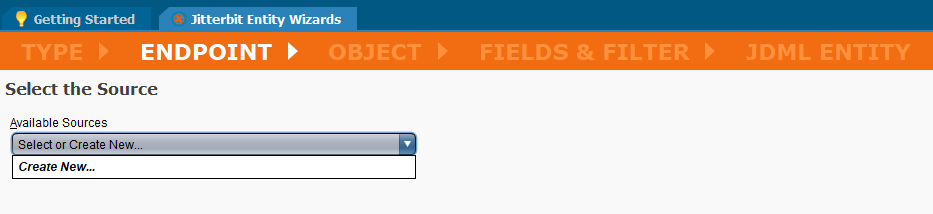
The Endpoint screen within the Jitterbit Entity Wizard should display as shown below. This screen provides the option to select an existing endpoint or create a new endpoint for the entity. The screens and steps to create a new endpoint are different depending on your selection of database or SAP as the type of entity. Step 3.a. outlines the instructions to configure a database endpoint. Scroll down to step 3.b. for the instructions to configure an SAP endpoint.
-
Database Entity: If you selected database as the type of entity, the wizard should display the Select Source screen.
-
Available Sources: Click Select or Create New to display the list of database sources available within your project.
- Select an existing database source from the dropdown list if it is available.
- Select Create New if the required database source is not available in the project.
-
Selecting an existing database source should display the same screen as shown below, but with the Connection Parameters fields already completed. In that case, click Next at the bottom of the screen to continue to the Object screen within the wizard. Scroll down to step 4 to continue configuring the entity.
-
Selecting Create New should display the fields to create a new database source as shown in the image below. In this case, follow the steps outlined below the image.
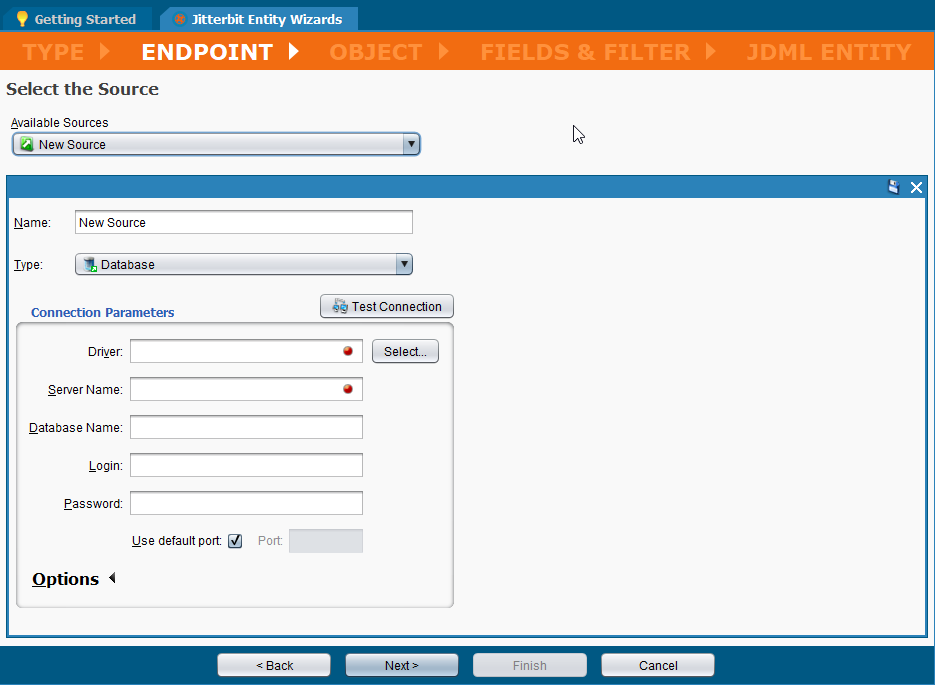
- Name: Enter an appropriate name for the endpoint in the Name field. The default is New Source.
- Type: The type is automatically selected as Database based on your selection in the previous step.
- Connection Parameters: The instructions to configure a database source are outlined in Database source. Additional references are also available in Sources and targets.
- Once the database source is configured, click Next at the bottom of the screen to continue to the Object screen within the wizard. Scroll down to step 4 to continue configuring the entity.
-
-
SAP Entity: If you selected SAP as the type of entity, the wizard should display the Select the SAP Endpoint screen.
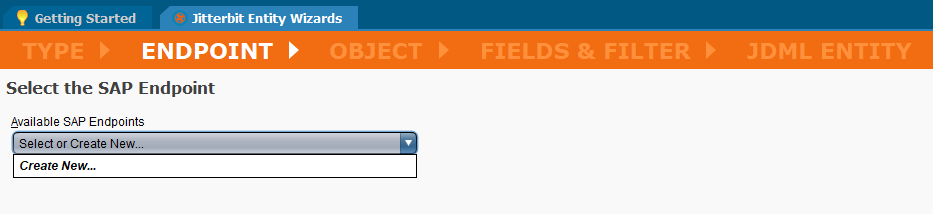
- Available SAP Endpoints: Click on Select or Create New to display the list of SAP endpoints available within your project.
- Select an existing SAP endpoint from the dropdown list if it is available.
- Select Create New if the required SAP endpoint is not available in the project.
- Selecting an existing SAP source should display the same screen as shown below with the Connection Parameters fields already completed. In that case, click Next at the bottom of the screen to continue to the Object screen within the wizard. Scroll down to step 4 to continue configuring the entity.
-
Selecting Create New should display the fields to create a new SAP endpoint as shown in the image below. In this case, follow the steps outlined below the image.
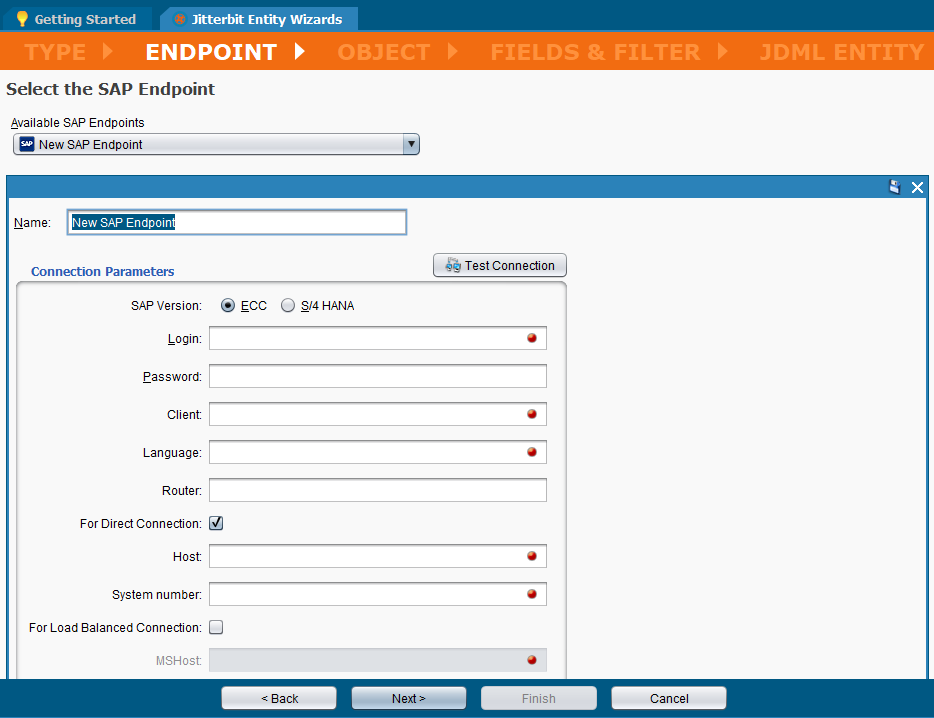
- Name: Enter an appropriate name in the Name field. The default is New SAP Endpoint.
- Connection Parameters: The instructions to configure an SAP endpoint are outlined in SAP connector endpoint
- Once the SAP endpoint is configured, click Next at the bottom of the screen to continue.
- Available SAP Endpoints: Click on Select or Create New to display the list of SAP endpoints available within your project.
-
-
Once the database source or SAP endpoint has been configured, selecting Next should display the Object screen within the Jitterbit Entity Wizard. This step allows you to select specific tables in your database or SAP endpoint:
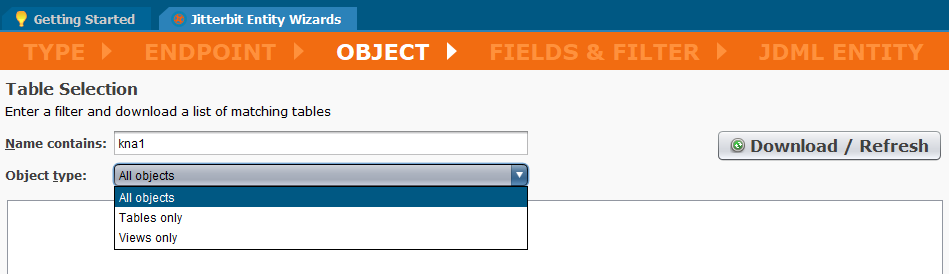
- Name Contains: Enter characters in the Name Contains field to filter the query. In the example, we entered KNA1 to filter on customer tables. Leave the Name Contains field blank to view all available objects or tables.
- Object Type: Select the Object Type from the dropdown list. In this example, Tables Only is selected.
-
Click the
 button to display the list of available objects or tables:
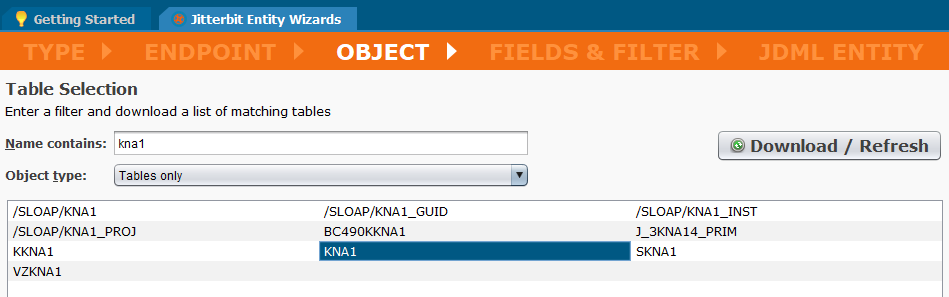
- Click on the Name of the object or table in the list to create the required data set. In this example, the KNA1 table is selected which contains the customer master information. Click Next to continue.
-
The Fields & Filter screen within the Jitterbit Entity Wizard should display similar to the image shown below. In this step specific fields will be selected to define the data set.
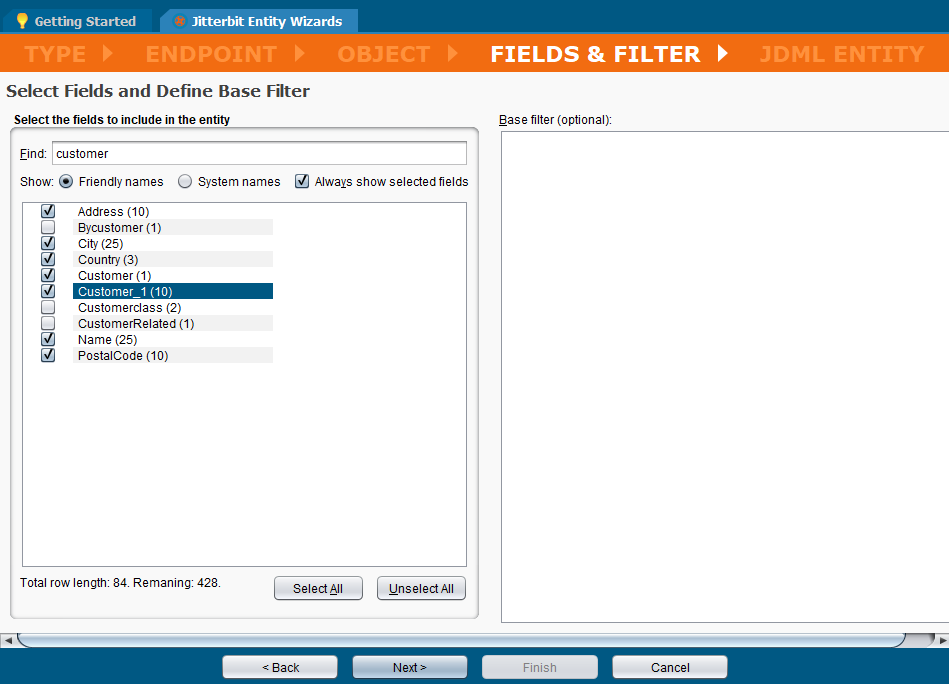
- Find: Enter partial or full field names in the Find field to display the list of fields available in a particular category. Leave the Find field blank to display all fields available in the previously selected object or table.
- Click on the associated checkbox to select each field to include in the data set.
- You can enter multiple field names in the Find field and select multiple fields from each resulting list. In this example the words City, Postal, Address, Name, Country, and Customer were entered into the Find field and multiple fields were selected from each list.
- Always Show Selected Fields: Click this checkbox to continue to display all previously selected fields as you cycle through multiple field lists.
- Select All: Click the Select All button to select and include every field contained in the table in the data set.
- Unselect All: Click the Unselect All button to remove every field contained in the table from the data set.
- Base Filter (Optional): You can also enter a base filter specific to your database or SAP system in the right column of the screen to filter your data.
- Once all the required fields have been selected, click Next to continue.
- Find: Enter partial or full field names in the Find field to display the list of fields available in a particular category. Leave the Find field blank to display all fields available in the previously selected object or table.
-
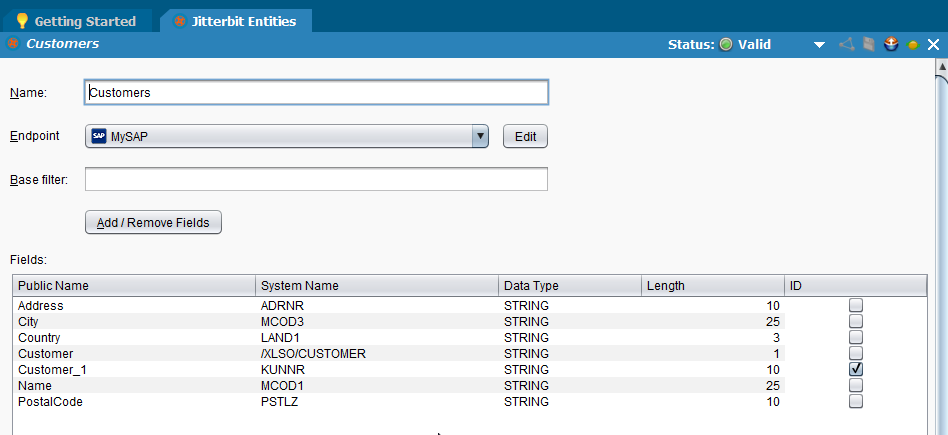
The JDML Entity screen within the Jitterbit Entity Wizard should display similar to the image shown below. In this step the entity name is defined, and the primary ID field is defined:

-
Jitterbit created a new Entity based on the previous selections.
-
Entity Name: Enter the name you would like to use in the Entity Name field. In this example the entity is named Customers.
Note
The Entity Name must be a single word. Consumers that access the API will be able to see the name as well.
-
ID: Click the associated checkbox to select one field as the Primary ID field and to be the unique key that identifies the entity or the new object. In this example, the Customer_1 field is selected as the unique key.
Note
- A popup error message displays if an ID field is not selected: "There is no ID field defined. Do you want to continue?" Click Continue to close the popup and finish the entity without the ID defined or click Cancel to return to the wizard screen.
- If the entity is finished without an ID field defined, a Status: Warning displays in the upper right corner of the Jitterbit Entities screen. The popup message is: "Validation problems. There is no ID field defined."
- If the returned data includes duplicate records with the same primary ID value or records without primary ID values, such data may be skipped at run-time.
-
Click Finish to continue.
-
-
The Jitterbit Entities tab displays similar to this image:
-
Next Step: For more information on configuring an OData service, see OData service configuration.
Edit a Jitterbit entity
- Open the project containing the entity in Design Studio.
- Scroll down within the project items panel on the left side of the Design Studio to Jitterbit Entities.
- Right-click on the name of the entity you want to edit. Select Open in the dropdown menu.
-
The Jitterbit Entities tab displays similar to this image:
-
To change the Primary ID, click the checkbox associated with the current Primary ID to first clear the checkbox and to remove the existing primary ID from the data set. Click the checkbox associated with the new Primary ID to define the new ID field in the data set.
- Click the Save
 icon on the toolbar in the upper right corner of the Jitterbit Entities tab.
 -
To add or remove fields from the data set, click the
 button. The Select Fields popup window opens:
-
Find: Enter partial or full field names in the Find field to display the list of fields available in a particular category. Leave the Find field blank to display all fields available in the previously selected object or table.
- Click on the associated checkbox to select each field to include in the data set.
- You can enter multiple field names in the Find field and select multiple fields from each resulting list.
-
Always show selected fields checkbox: Click this checkbox to continue to display all previously selected fields as you cycle through multiple field lists.
- Select All: Click the Select All button to select and include every field contained in the table in the data set.
- Unselect All: Click the Unselect All button to remove every field contained in the table from the data set.
- Once all the required fields have been selected, click OK to close the popup.
- Click the Save icon on the toolbar in the upper right corner of the Jitterbit Entities tab to save the changes.
-