Create an API entity operation
Introduction
This page describes how to create an API Entity operation. The Jitterbit entity and API Entity operation are used to create an OData service API. When the API Entity operation is complete, the operation will be assigned to an OData service API.
Tip
- You must be using Design Studio (not Cloud Studio) to create an API Entity operation.
- Before you can create an API Entity Operation, you must have completed the following:
- Operations reside within a project. Before you can create an API Entity operation, you will need to follow the instructions to Create a new project in Design Studio.
- API Entity Operations are assigned to a Jitterbit entity. You will need to follow the instructions in Create a Jitterbit entity prior to creating an API Entity Operation.
- A project may contain multiple entities. Each entity may contain one or more API entity operations, but only one operation per HTTP method.
Create an API entity operation
-
Open your project in the Design Studio application. The Getting Started screen should display:
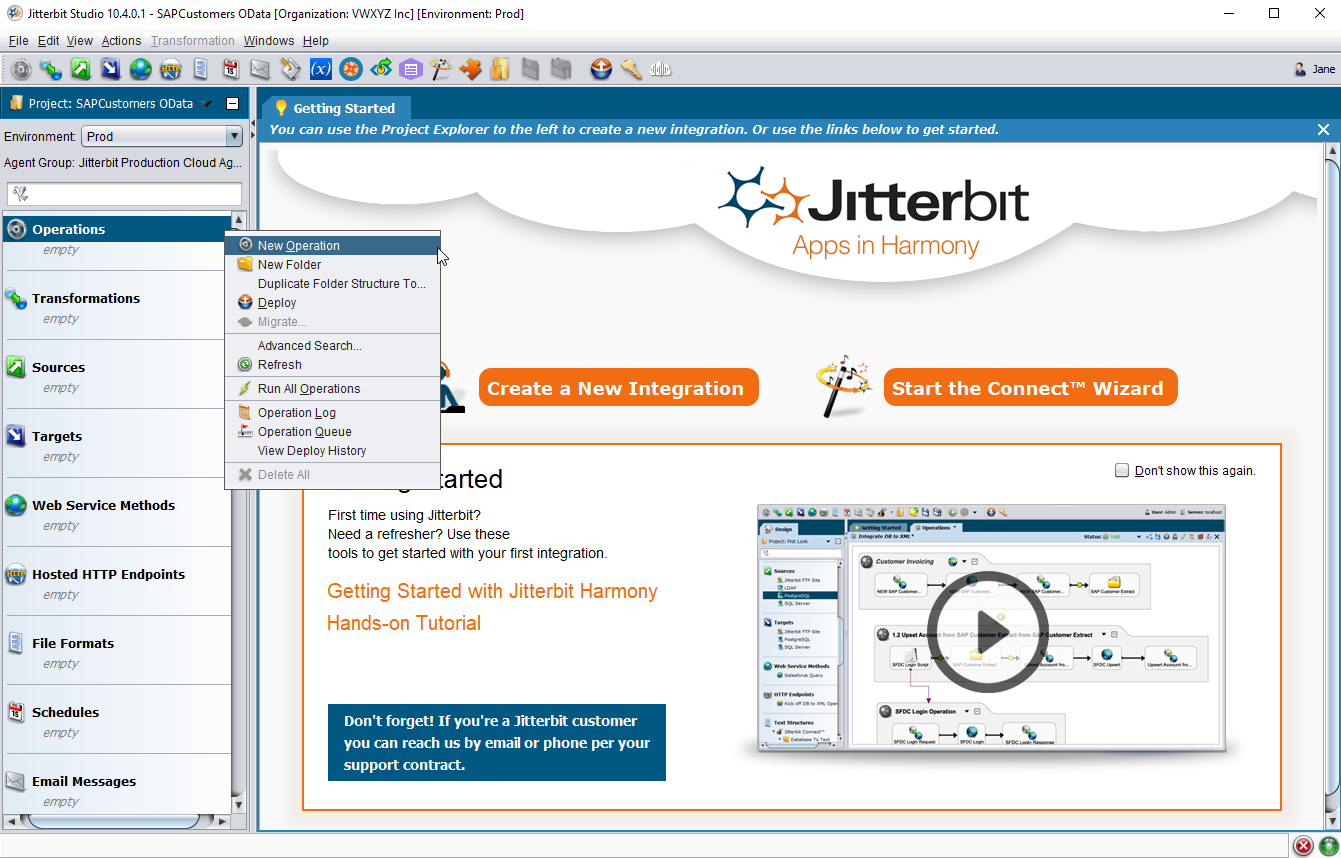
- The panel on the left side of the Design Studio lists the project items you will use to create your integration, such as Operations, Transformations, Scripts, etc. Scroll down within the panel to Operations.
- Right-click on Operations and select New Operation from the dropdown menu.
-
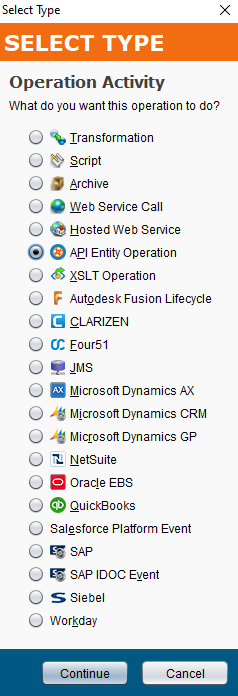
The Select Type popup window displays the list of operation types available within the Design Studio. Select API Entity Operation from the list of options, and then click Continue:
-
The Entity Wizard popup window should display similar to the image shown below. An Entity defines the data available to an OData service and consists of an endpoint, a selection of objects, and a selection of specific fields. Any existing entity available within the project is listed below the Jitterbit Entities folder:
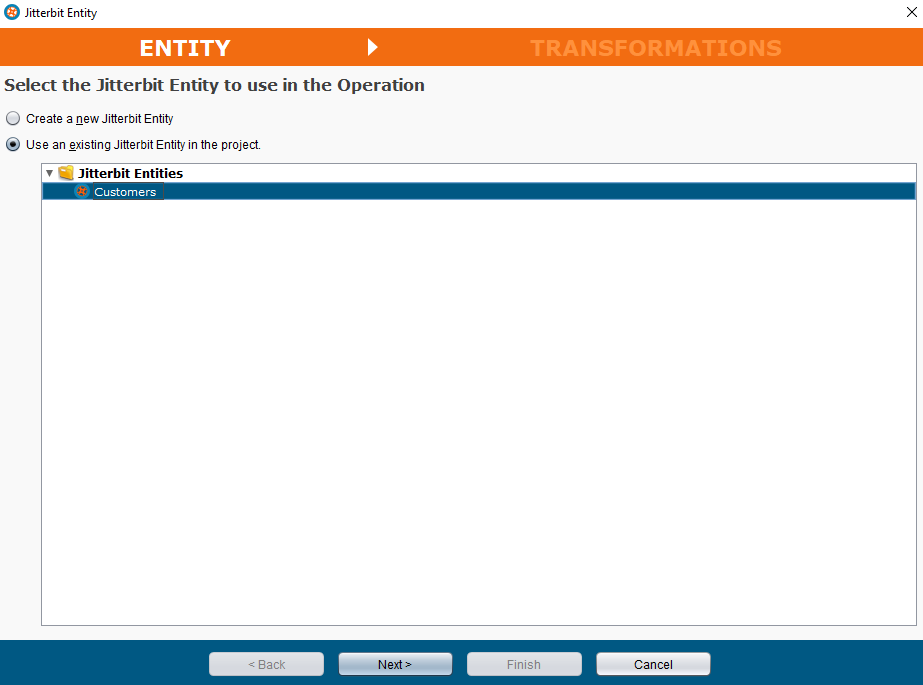
- Create new Jitterbit Entity: Select this option if an entity is not available in the project and is not listed in the Entity Wizard as shown above. The Entity Wizard then walks you through creating the entity, selecting the tables or objects, and selecting the fields. Follow the instructions outlined in Create a Jitterbit entity as you continue in the Entity Wizard.
- Use an existing Jitterbit Entity in the project: You can create the entity prior to creating your operation by following the instructions in Create a Jitterbit entity. Any existing entities available within your project are listed below the Jitterbit Entities folder in the upper right section of the Entity Wizard as shown above. Clicking on an existing entity in the list of available entities automatically selects Use an existing Jitterbit Entity in the project.
-
For this example, the Customers entity is selected. Click Next at the bottom of the screen to continue:
-
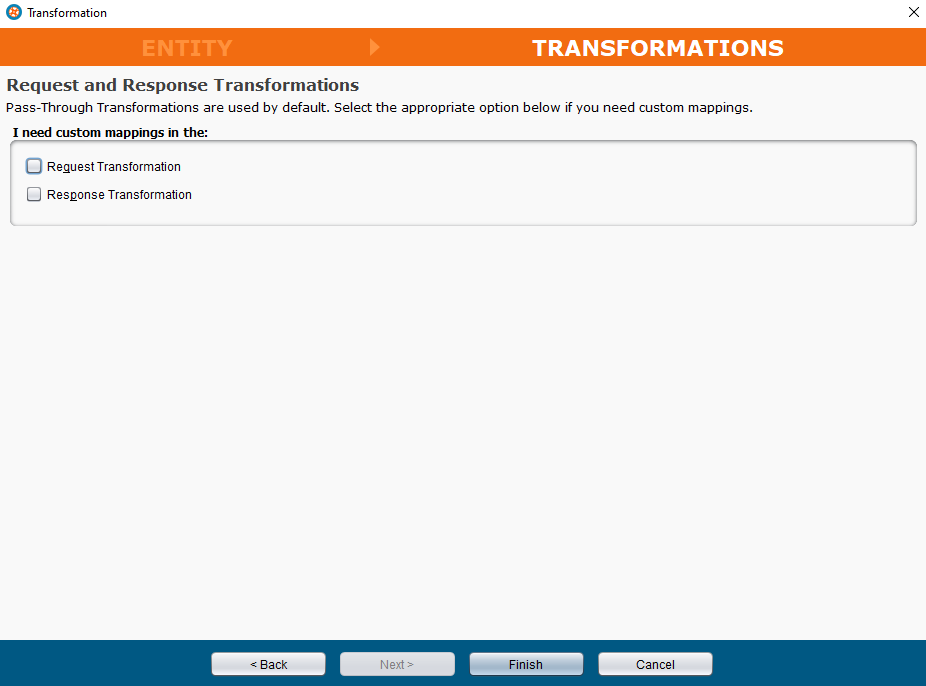
The Transformations screen displays:
-
Pass-Through Transformations:
- Jitterbit creates a pass-through operation by default.
- Leave both the Request Transformation and the Response Transformation checkboxes blank if a custom mapping is not required.
-
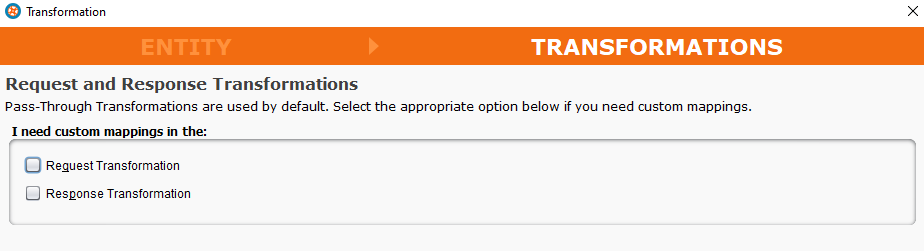
In this example, we have opted for the basic pass-through transformation and did not select either checkbox:
-
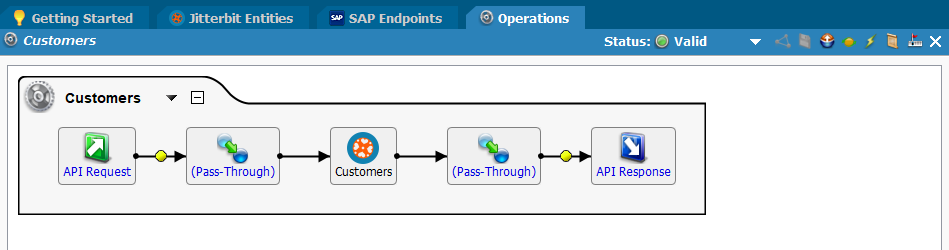
Click Finish at the bottom of the window. The pass-through operation is created and displays in the Operations tab of Design Studio:
-
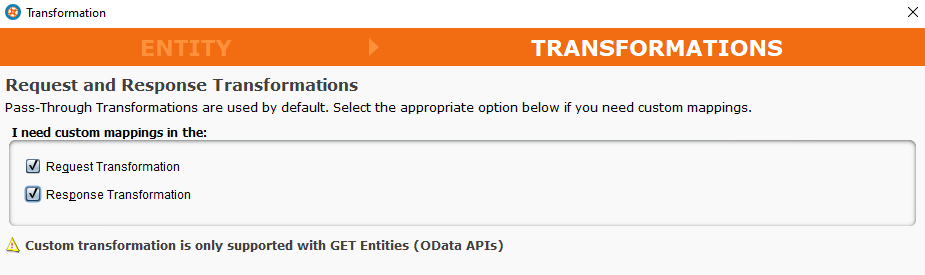
I need custom mappings in the:
- Request Transformation: Click the checkbox if custom mapping of the request is required.
- Response Transformation: Click the checkbox if custom mapping of the response is required.
-
In this example, both the Response Transformation and the Request Transformation checkboxes are selected:
-
The Next button is automatically activated. Click Next.
- A warning message displays within the Entity Wizard: "Custom transformation is only supported with GET Entities (OData APIs)".
-
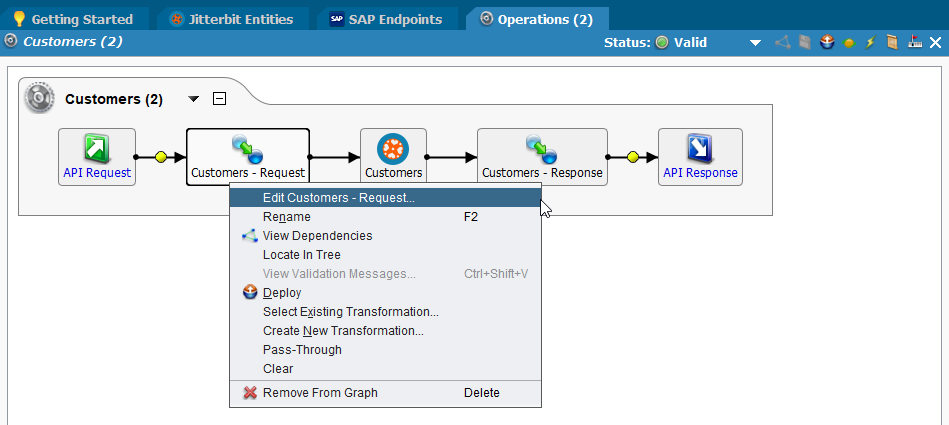
Click Finish at the bottom of the window. The operation is created and displays in the Design Studio with a custom request and a custom response transformation:
-
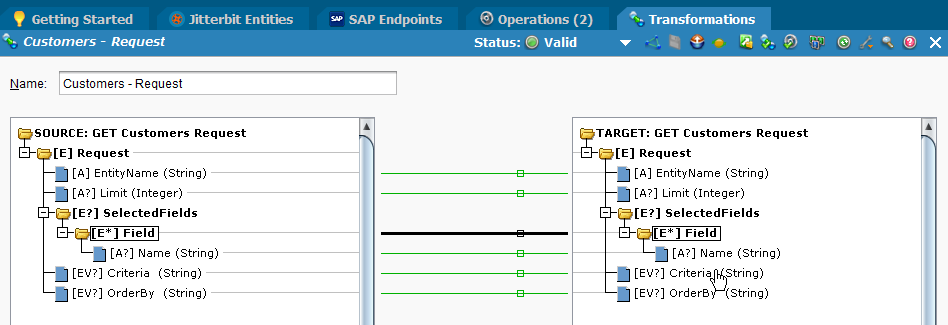
Right-click on the Customers - Request transformation and select Edit Customers - Request to open the field mapping screen in the Transformations tab. You can create custom mappings with scripting as required:
-
Repeat this step on the Customers - Response transformation to map the response fields appropriately.
- Once mapping is completed, click on the
 Save icon in the toolbar. Click on the Deploy icon in the toolbar to deploy the entire project to Harmony.
-
-
Next Step: See OData service configuration on using the new entity and API entity operation.