Create a script
Introduction
Scripts in Design Studio are used to manipulate data or to perform advanced logic (if, while, case statements, etc.). Scripts are often used within operations and transformations to provide additional functionality beyond basic operation/transformation capabilities. They can be written using the Jitterbit Script language or, if creating a script as a project item, using JavaScript.
There are several places in Design Studio where you can create a script depending on what you want to accomplish. Each of these is summarized below and described in more detail on this page. The user interface for building scripts is similar among all types and is described at the end of this document.
-
Script as a project item
This type of script can be inserted into an operation, either as a step within an operation or in an operation dedicated to running the script. It can also be called using the RunScript() function. This type of script will appear in the tree on the left under the Scripts section. -
Script on a target field in a transformation
This type of script can be edited on a field in a transformation in order to apply the specified logic to your transformation mapping. The last value returned in the script will be used as the value for your target field. This type of script is available on all fields within the transformation mapping only. -
Script as a condition within a transformation
This type of script can be created on a folder in a transformation in order to determine if the source instance will be used based on the outcome of the condition. The last value returned in the script should be true or false. This type of script can be added within the transformation mapping only.Note
Using a script as a condition within a transformation should not be confused with using a condition on an operation. The latter is covered separately under Create a condition.
-
Script testing using script pad
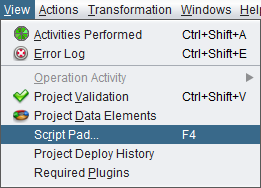
The script pad is a tool within Design Studio that can be used to run basic tests of scripts that you do not need to save. This tool is accessible from the menu bar under View > Script Pad.
Types of scripts
Script as a project item
Scripts can run separately from transformations as an independent operation step. You can, for example, create a script that truncates a database table before you run a transformation to fill it again. You can also save scripts with logic for reuse in several mappings in transformations. You can run scripts from other scripts using the RunScript() function, or by inserting them into an operation.
Within your project within Design Studio, there are several ways to create a new script as a project item:
- In the tree on the left, right-click on the Scripts section and select New Script or New JavaScript.
-
Within an existing operation, right-click on any insertion point
 and choose Insert > Script. Or, right-click on a source or target and choose Insert Before This > Script or Insert After This > Script. A script icon will appear within the operation graph. Then do one of the following:
- Right-click on the script icon and choose Select Existing Script, Create New Jitterbit Script, or Create New JavaScript.
- Double-click on the script icon and select an existing script from the list, or use the buttons to Create New Jitterbit Script or Create New JavaScript.
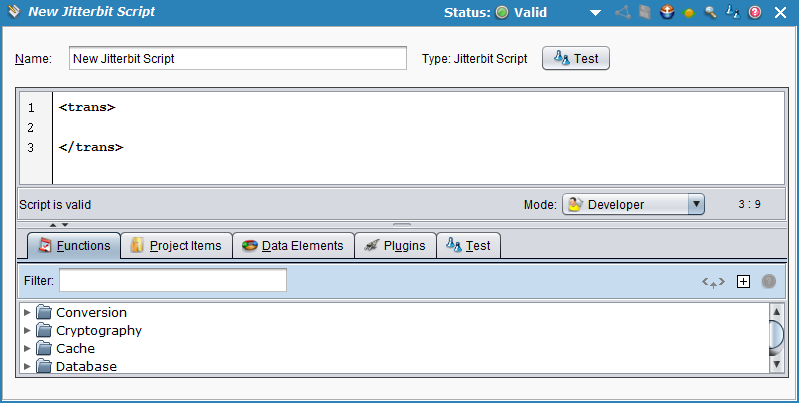
The options referring to "Jitterbit Script" or simply "Script" will display a script builder in Jitterbit Script language.
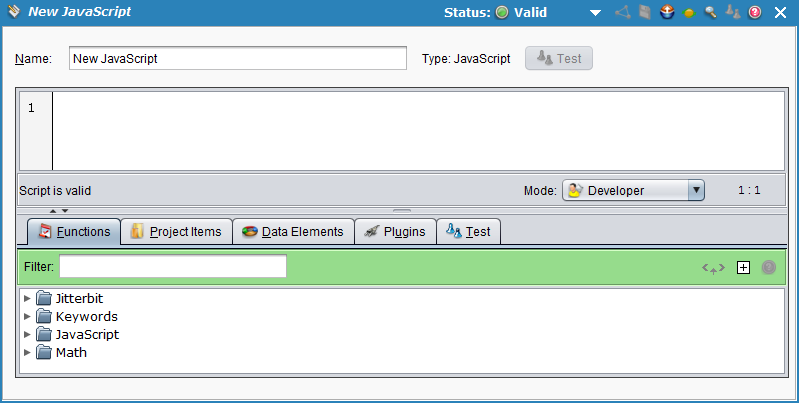
As of version 8.24.2, options referring to "Javascript" will open a script builder in JavaScript.
The script builder user interface for both types is covered under Build scripts at the end of this page.
You can also get back to the existing script at any time from the tree on the left under Scripts.
Script on a target field in a transformation
This type of script can be edited on a field in a transformation in order to apply the specified logic to your transformation mapping. The last value returned in the script will be used as the value for your target field. For example, you can use scripting to change a field from string to int, concatenate values, use a database look for a field, or set conditional population of the field.
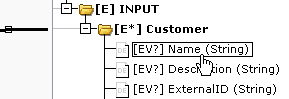
This type of script is available on all fields within the transformation mapping only. Within your transformation mapping, double-click on the target field you want to edit the script for.
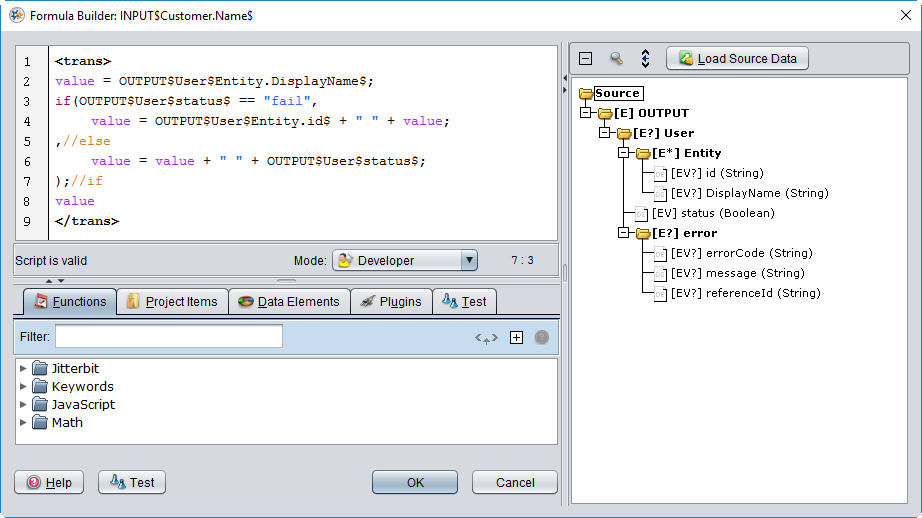
This will open the standard script builder on the left, and source tree on the right. Scripts in transformations must use the Jitterbit Script language. The script builder user interface is covered under Build scripts at the end of this page.
Script as a condition within a transformation
This type of script can be created on a folder in a transformation in order to determine if the source instance will be used based on the outcome of the condition. The last value returned in the script should be true or false. If the value returned is not a true/false value, it will be treated as false.
Note
Using a script as a condition within a transformation should not be confused with using a condition on an operation. The latter is covered separately under Create a condition.
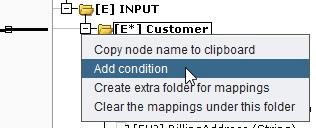
This type of script is accessible from within the transformation mapping only. Within your transformation mapping, right-click on a folder that has One or More Elements [E+] or Zero or More Elements [E*] (see hierarchical entity path notation explained) and choose Add condition.
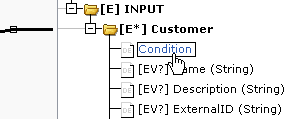
This will create a condition that now appears under your folder. Double-click it to open the standard script builder on the left, and source tree on the right.
Scripts in transformations must use the Jitterbit Script language. The script builder user interface is covered under Build scripts at the end of this page.
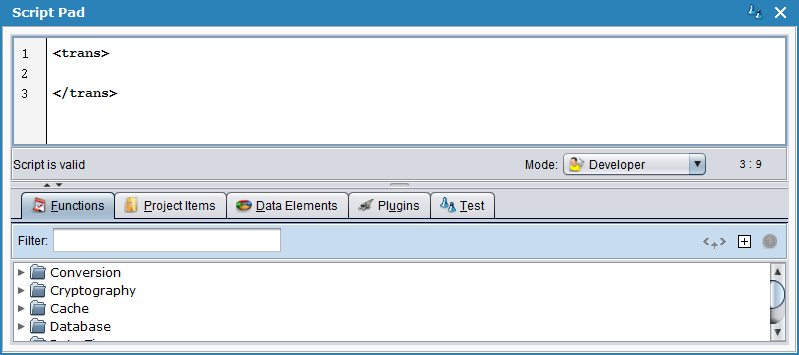
Script testing using script pad
The script pad is a tool within Design Studio that can be used to run basic tests of scripts that you do not need to save. This tool is accessible from the menu bar under View > Script Pad.
This will display a basic script pad for testing purposes. Scripts in the script pad must use the Jitterbit Script language. The script builder user interface is covered under Build scripts at the end of this page.
Build scripts
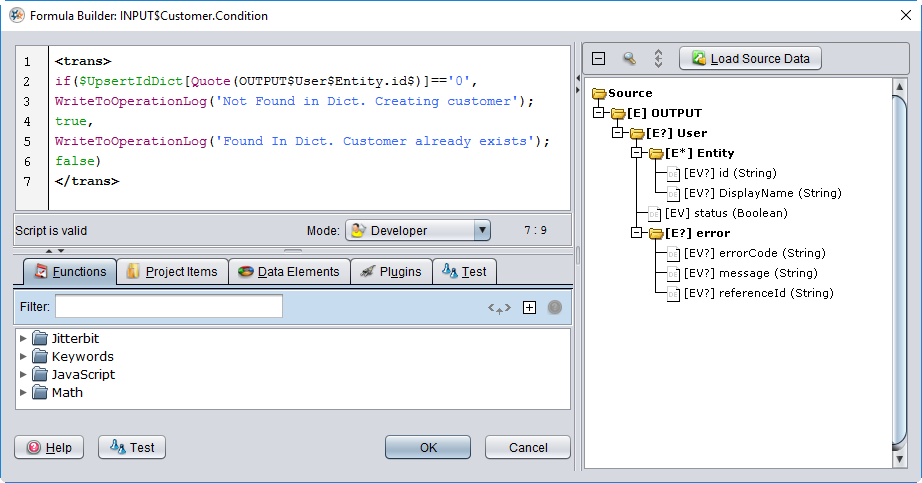
The script builder user interface is similar for all of the script types described earlier on this page. The following explains each possible element of the script builder interface and explains which elements are able to be used within the specified script types.
Note
Also see Formula builder features for a collection of tips for interacting with the user interface.
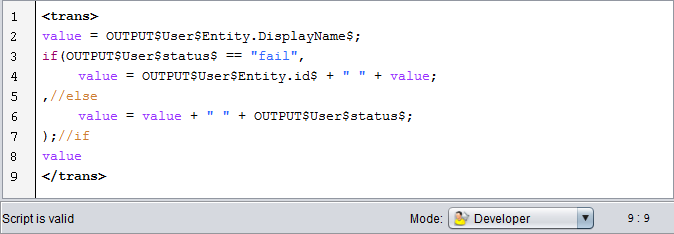
Script
The script area where you can enter your script is present in all types of scripts. Each element of the script is explained below.
- Line numbers: Line numbers appear on the far left of the script. To toggle line numbers on or off, right-click within the script background and select Show Line Numbers.
-
Script area: The script area is where you build your script. What you enter here depends on script language being used.
- Jitterbit Script Language: For scripts using Jitterbit's scripting language, the final expression must be contained within
<trans>...</trans>tags. Refer to Jitterbit Script language for additional syntax requirements and tips. - JavaScript: For scripts using JavaScript, no tags are necessary. Simply enter your script in JavaScript here. Refer to JavaScript for information specific to using JavaScript in Harmony.
Currently, using JavaScript is limited to scripts created as project items. For scripts created as project items, the type of script will also be listed above the script area, next to the name of the script:


- Jitterbit Script Language: For scripts using Jitterbit's scripting language, the final expression must be contained within
-
Validation: Design Studio provides basic syntax checking and highlighting. If the script passes basic syntax validation, a line below the script area will read: "Script is valid." If the script does not pass basic syntax validation, specific error information will be provided here.
- Mode: Use this dropdown to toggle between Developer and Business Analyst mode. The developer mode provides a user interface for advanced users, while the business analyst mode provides a wizard interface that is more user-friendly to non-developers.
- Line and column: The numbers to the bottom right of the script area indicate the line and column in the script where the cursor is located. To jump to a specific line, you can right-click within the script background and select Go To Line.
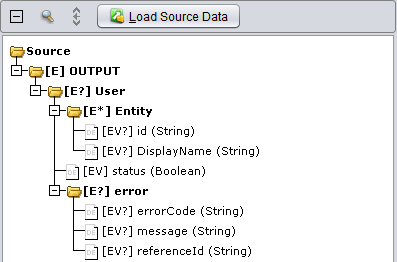
Source
The source tree appears in the right pane only for scripts created during transformation mapping, and is not applicable for scripts created as project items. Within the script, you can use source data elements to reference source data by the path of the field in the source tree.
You can add source data elements to your script in any of the following ways:
- Double-click on the field or folder in the source tree on the right to add it to your script on the left.
- Click on the field or folder in the source tree on the right, then use the
 icon to add it to your script on the left.
 - Enter the source path directly into the script area.
The following functionality is also available:
- Expand/Collapse: Use the
 icons to collapse or expand all elements in the source tree.
 - Search: If you have a lot of elements in your source tree, use the search icon
 to search within your source tree.
 - Load Source Data: Load source data into your transformation for testing purposes using the
 button.
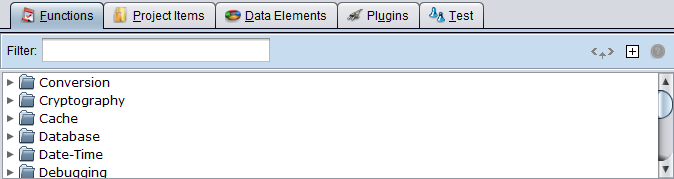
Functions
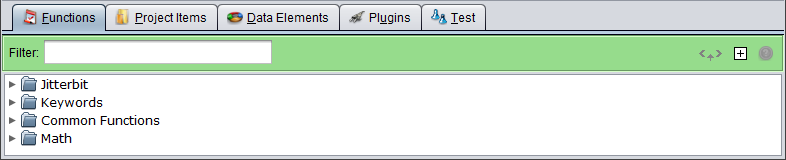
The Functions tab provides a list of functions available to use in your script. The specific functions available depend on whether your script is using Jitterbit Script language or JavaScript. The following functionality is available for both types:
- Filter: If you know the specific function you are looking for, use the search box appearing above the list of functions to search for it.
- Insert: To use a function in the script, double-click the function or, with the function selected, click the insert icon
 .
. - Expand/Collapse: Use the
 icons to collapse or expand the list of functions.
 - Help: With a function selected, click the
 icon to view documentation on the function directly within Studio.
If you are using Jitterbit Script language, the available functions are organized into folders by category.
Each Jitterbit Script function is documented within each category:
- Cache functions
- Connector functions
- Conversion functions
- Cryptographic functions
- Database functions
- Date and time functions
- Debugging functions
- Dictionary and array functions
- Diff functions
- Email functions
- Environment information functions
- File functions
- General functions
- Instance functions
- LDAP functions
- Logging and error functions
- Logical functions
- Math functions
- Salesforce functions
- String functions
- Text validation functions
- XML functions
If you are using JavaScript, the available functions are separated into folders for Jitterbit, Keywords, Common functions, or Math.
Jitterbit
This category contains a list of functions specific to Jitterbit. These include a limited number of standard Jitterbit functions, as well as a number of JavaScript functions specific to Jitterbit.
Currently, a limited number of the Jitterbit Script functions are available for use in JavaScript. To access one of those Jitterbit function in your JavaScript, prefix the function with "Jitterbit.". These Jitterbit functions are available for use in JavaScript in Jitterbit:
-
Jitterbit.ReadFile(string source_id[, string file_name])reads a file from the specified source as described in formula builder file functions. The returned value is a string. For example, in JavaScript, using this Jitterbit function to read a file:var MyData = Jitterbit.ReadFile("<TAG>Sources/myfile</TAG>"); -
Jitterbit.WriteFile(string target_id, type file_contents[, string file_name])writes to a file and automatically flushes file. No value is returned. See WriteFile under Formula Builder File functions. -
Jitterbit.DbExecute(string database_id, string sql_str, ...)Executes a SQL statement on a database and returns the results. The returned value is a string. See DBExecute under Formula Builder Database functions. -
Jitterbit.DbLookup(string database_id, string sql_str)Executes a SQL statement on a database and returns the first result matching the specified criteria. The returned value is a string. See DBLookup under Formula Builder Database functions. -
Jitterbit.GetVar(string name)andJitterbit.SetVar(string name, string value)Warning
The
Jitterbit.GetVarandJitterbit.SetVarfunctions are designed to allow the use of variables that contain periods within the variable name. However, using periods in a variable name is not recommended. As the value will be converted to a string when the variable is set, these functions cannot be used with complex data types such as arrays, dictionaries, or JSON objects. Instead, it is recommended that you create global variables without periods and instead use underscores in place of periods and use the standard dollar sign$syntax as described in Global variables.The
Jitterbit.GetVarfunction retrieves a previously assigned Jitterbit global variable (a variable prefixed with "Jitterbit"). The returned value is the appropriate data type.The
Jitterbit.SetVarfunction assigns a value to a Jitterbit global variable (a variable prefixed with "Jitterbit"). The returned value is a string. This example uses a custom API that runs an operation containing a JavaScript usingJitterbit.GetVarandJitterbit.SetVar:var response="Hello World"; response += "\r\nProject name: " + Jitterbit.GetVar("$jitterbit.operation.project_name"); response += "\r\nOperation Name: " + Jitterbit.GetVar("$jitterbit.operation.name"); response += "\r\ntest_var: " + Jitterbit.GetVar("$jitterbit.api.request.parameters.test_var"); Jitterbit.SetVar("$jitterbit.api.response.headers.content_type","text/plain"); Jitterbit.SetVar("$jitterbit.api.response.headers.test_header", "This is a header test"); Jitterbit.SetVar("$jitterbit.api.response",response);
Included in this category are several functions adapted for use with JavaScript in Jitterbit. These functions are not prefixed with "Jitterbit.".
-
WriteToOperationLogsends output to the current Jitterbit operation log. Created for use with JavaScript in Jitterbit, and works similarly to the Jitterbit function described in Formula Builder Logging and error functions. -
SetScriptOutputandSetScriptResultsets the output for the script. These two functions are aliases, and either can be used depending on your preference. Unlike Jitterbit Scripts, which automatically return the value of the last line, Jitterbit JavaScripts do not automatically return a value. You can use either of these functions in your JavaScript to return the script result. For example:var MyVariable = "Hello World"; WriteToOperationLog(MyVariable); SetScriptResult(MyVariable);
Keywords
This category contains a list of JavaScript keywords in the ECMAScript 5.1 standard, and are included here for convenience.
Common functions
This category contains a list of JavaScript functions in the ECMAScript 5.1 standard that may be relevant to Jitterbit users. This category is not comprehensive – you can use other JavaScript functions that are not listed here, such as JavaScript Array, Date, and String objects and their associated functions.
Note
For a comprehensive list of JavaScript functions, refer to the ECMAScript 5.1 standard at https://www.ecma-international.org/ecma-262/5.1/.
Math
This category contains function properties available for the JavaScript math object as specified in the ECMAScript 5.1 standard. This category is provided for ease of reference; for the comprehensive documentation, see the ECMAScript 5.1 standard.
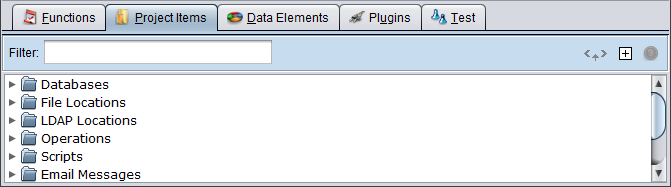
Project items
The Project Items tab provides a list of project items that are available to use in your script, organized by type of item. These correspond with the items you see on the left side of Studio within the project items tree (e.g. an existing source or target).
The filter, insert, and expand/collapse options are the same as those described under functions above.
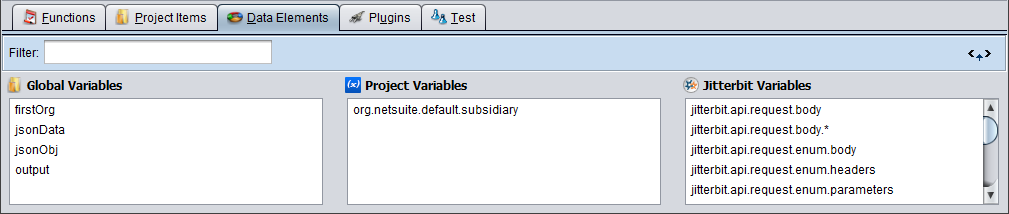
Data elements
The Data Elements tab provides available Global Variables, Project Variables, and Jitterbit Variables.
-
Global Variables: Global variables are set at runtime of the operation and become available to use downstream of the operation (i.e. in an operation chain). See Global variables for more information.
-
Project Variables: Project variables can predefined before runtime of the operation and become available to use globally within your project (e.g. in sources and targets, for credentials, etc.). Project variables are created as project objects and appear within the project tree on the left side of Design Studio. They can also be edited from the Management Console from the Projects page under the Project Variables tab or from Citizen Integrator if included in a Citizen Integrator recipe.
Note
Any edits to project variables via the Management Console take effect immediately.
-
Jitterbit Variables: Jitterbit variables are predefined by Harmony or can be predefined in the private agent configuration file (see Edit the configuration file (jitterbit.conf)). Jitterbit variables are also referred to as predefined global variables. Each Jitterbit variable is documented:
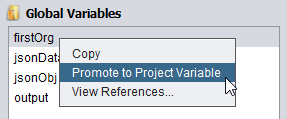
From the Data Elements tab, you can also convert a global variable to a project variable, and see where each of your data elements is used within your project. To access these options, right-click on a variable to display the following options:
-
Promote to a Project Variable: If you have a global variable that you want to make static, you can use this option to convert to a project variable. This option will be grayed out for current project variables and Jitterbit variables.
-
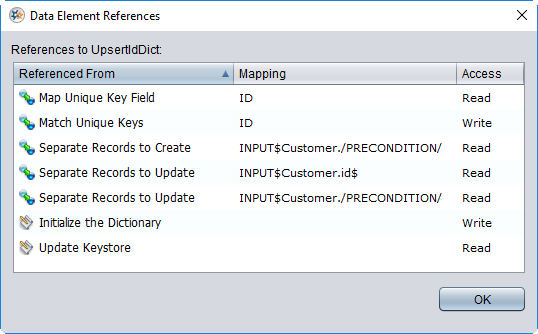
View References: If you have a lot of variables within your project, you can use this option to see where each is used. Viewing references will display a table of project items including information about mapping and access.
The filter and insert options are the same as those described under functions above.
Note
Local variables are not listed in this section because they are not globally available to use. However, you can still use them locally within your script. See Local variables for more information.
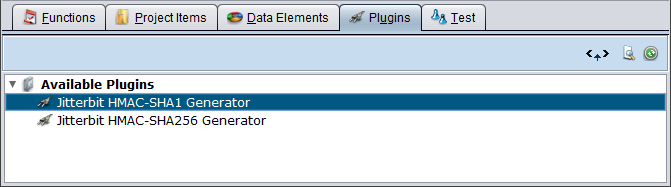
Plugins
The Plugins tab lists the plugins available for use in your Jitterbit Script. Currently, using plugins in a JavaScript is not supported. If you would like to use a plugin in a script, please use a Jitterbit Script.
Note
Not all plugins are able to be used in scripts; some apply to sources/targets only. Refer to Customizations > Plug-ins for instructions on adding plugins.
- Insert: To access a plugin in the script, double-click the plugin or, with the plugin selected, click the insert icon .
- View Manifest: With the plugin selected, click the
 icon to view the plugin manifest.
 - Refresh: If you have just added a plugin, you may need to click the refresh icon
 to refresh the list of available plugins.
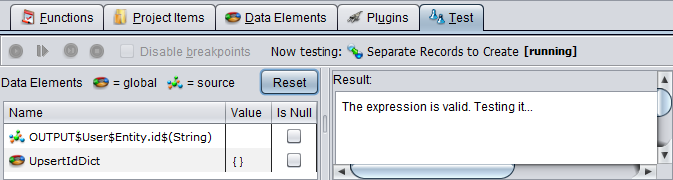
Test
The Test tab enables you to perform an independent test run of your script for resulting values of data elements.
-
Run: The top row presents options for running or stopping your script, including Start testing, Resume the current testing session, Run the next statement in the current test, and Stop the current testing session. The
 icon that begins the test has the same functionality as the test buttons seen elsewhere in the user interface.
 -
Disable breakpoints: Use this checkbox to toggle off breakpoints in a Jitterbit Script. Breakpoints can be used for debugging purposes, for example to pause the test run to look at variables. See Debugging functions for more information.
Note
This option is not applicable in JavaScript since debugging is not available in JavaScript.
-
Reset: Click the reset button
 to prepare for a new test by resetting the data element list.
 -
Data Elements: Global data elements are denoted by a global
 icon. Source data elements (those referenced from a source tree in a transformation) are denoted by a source icon. Use the Is Null checkbox if you want to toggle off values for testing purposes.
 -
Result: The box on the right will show the status of the test run during testing, and the result after completion.