Validate a REST API
Introduction
On this page, we show how to use an independent tool to validate a REST API's request and response structures. This page continues the REST API tutorial using Atlassian Jira Cloud REST API v2 as an example, continuing from the previous step of researching a REST API. This walkthrough is intended for an inexperienced user who is unfamiliar with API testing and validation.
Before connecting to a REST API with Harmony, testing and validation using an independent tool is strongly recommended for several reasons:
-
Focused troubleshooting: Most issues with REST APIs in Harmony are the result of not having constructed the request as required to retrieve the desired response from the API. Performing this troubleshooting using an independent tool ensures that the specific requests are valid before introducing automation.
-
Fast iteration: When designing an integration, you might not know all the fields or values you want, or be able to make valid requests on the first attempt. Performing quick tests that elicit immediate feedback can help you create the requests for your specific use case in an efficient manner, enabling you to modify your request until the response you want is generated.
-
Actual structures: API documentation for sample request and response structures can be out of date, fail to take into account a configuration specific to your endpoint, be incomplete, or be inaccurate in some other manner. Based on experience, we strongly recommend using the actual structured data responses from the API itself so that Harmony knows how to process your data correctly.
There are a variety of tools available for validating REST APIs. In this tutorial, we use the Postman tool because of its simplicity, but you are welcome to use any tool of your preference, such as SoapUI. If available, you could also use an API provider's developer portal or OpenAPI/Swagger testing functionality, as long as the request and response structures are provided.
Test authentication
The first step in testing is to make sure that you can successfully connect to the REST API using the configured type of authentication.
From the API documentation, find a request URL to test that provides a response. Using a GET to test the authentication is often the simplest way to make sure you can connect. Other methods where data is transferred to the endpoint may require permissions that you can then troubleshoot later, once knowing that the authentication piece is working.
First, construct the request URL, replacing the base URL with that for your specific endpoint, as applicable. For now, don't worry about providing the specific request details; we just want to make sure we can establish a connection. Using Jira's "Get Create Issue Metadata" as an example, we find in the documentation that the request URL is constructed using https://<your-domain>.atlassian.net/rest/api/2/issue/createmeta. In Postman, since the method is GET, we use the dropdown to select GET and enter the request URL for our endpoint.
Next, provide the authentication details for your endpoint. In Postman, this is done under the Authorization section. Since we're using basic authentication, we selected Basic Auth and entered the Jira credentials that we'll use in Design Studio later. Although this example uses basic authentication, you can use any authentication type supported by your endpoint.

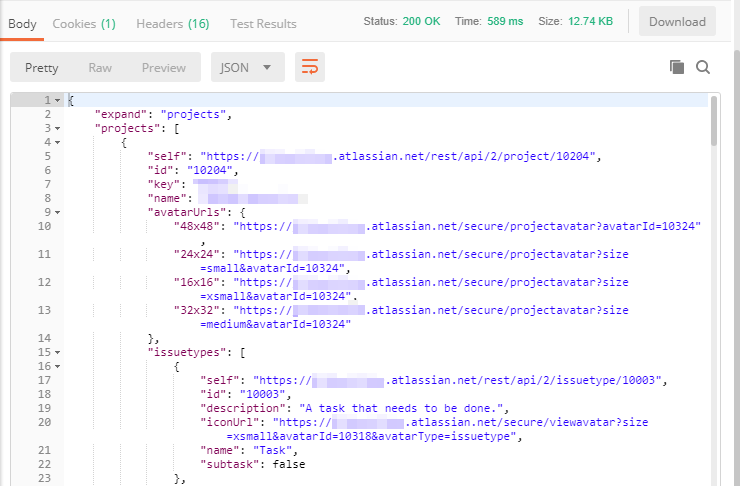
With the request URL and authentication information entered, submit the request to the API (In Postman, click Send). If the connection is successful, you should get back a response from the API, usually as a structure, a successful status code, or both, depending on the specific method and API. If the connection fails, check the API documentation and your endpoint for configuration errors.
Warning
If you cannot connect in Postman or similar tool, you will not be able to connect in Harmony.
Validate and save structures for each request and response
After you have confirmed you can connect to the REST API successfully, use the same process to (1) validate each request that you want Harmony to be able to make to the API to interact with your endpoint's data, and (2) save out the request and response structures (if present) to separate files that you will later need in Design Studio.
To validate each request in Postman, follow the same steps as before to provide the request URL (for each call) and authentication details.
If a call requires a request structure, which you should earlier have obtained a sample of from the API documentation, you'll need to provide this in Postman. In the Body section, select the raw radio button and use the dropdown to set the appropriate format (content-type). In the example, as with most REST APIs, the format is JSON (application/json). Paste in the request structure and make any adjustments as needed so that the request is valid (for example, changing the Jira project key and issue type). These adjustments will depend on your actual API request.
Once you have completed the request information, click Send. If necessary, troubleshoot and iterate until you get the API response structure you want. The actual data included in the sample response is not relevant, as the REST API will provide the actual data to Harmony at the time the request is made.
After you have the data structure to use in your integration, save out each request and response structure (if present) to their own files. Make sure you're saving in the correct file format; most REST APIs provide responses in JSON, but some may use XML or another type depending on the API. Save the files wherever you can access them when you are setting up your project in Design Studio.
Note that if you do not intend to use all of the fields provided in the response in your integration, this is perfectly fine and expected. You can simply leave them in, or if desired you can choose to remove them manually from the sample structure. But you must make sure that all fields you plan to use are included; otherwise, you will not be able to use them in Harmony.
Caution
If you remove fields from the sample structure, note that during execution Harmony may report warnings that there are extra elements in your transformation. These warnings can be ignored if the fields were removed intentionally.
For this example, we've used Postman to validate the following request and response structures, and then saved these structures to local files. These are the files that we will later need to provide in Design Studio while configuring the transformation so that Harmony can process the data correctly.
Jira GET "Get Issue"
In this common scenario, we first use a GET method that returns actual fields and values from an existing object within the endpoint. After seeing what those fields and values are, we could later use them in a PUT, POST, DELETE, or other method.
-
Request URL: GET
https://my-domain.atlassian.net/rest/api/2/issue/TEST-10 -
Request Structure: None. The Jira API documentation indicates that no input data is associated with the request, which makes sense because the specific object being requested is provided in the request URL.
-
Response Structure: We edited the response structure to remove fields that we do not want to use (an optional step), and saved it to a local file called
Jira_GET_GetIssue_Response.json:Jira_GET_GetIssue_Response.json{ "expand": "renderedFields,names,schema,operations,editmeta,changelog,versionedRepresentations", "id": "10572", "self": "https://my-domain.atlassian.net/rest/api/2/issue/10572", "key": "TEST-10", "fields": { "issuetype": { "self": "https://my-domain.atlassian.net/rest/api/2/issuetype/10003", "id": "10003", "description": "A task that needs to be done.", "name": "Task", "subtask": false }, "project": { "id": "10200", "key": "TEST" }, "priority": { "self": "https://my-domain.atlassian.net/rest/api/2/priority/3", "iconUrl": "https://my-domain.atlassian.net/images/icons/priorities/medium.svg", "name": "Medium", "id": "3" }, "labels": [], "versions": [], "status": { "name": "To Do" }, "description": "This task is for manually updating JIRA because there is no integration in place.", "security": null, "summary": "Manual Updates", "comment": { "comments": [], "maxResults": 0, "total": 0, "startAt": 0 } } }
Jira POST "Create Issue"
We now send a request to create a new object using some of the same fields returned from the GET. To know the possible values, you could first call a different GET that returns the same structure.
-
Request URL: POST
https://my-domain.atlassian.net/rest/api/2/issue/ -
Request Structure: Saved to a local file called
Jira_POST_CreateIssue_Request.json.Jira_POST_CreateIssue_Request.json{ "fields": { "project": { "key": "TEST" }, "summary": "Jitterbit REST API Integration", "description": "Build an integration in Jitterbit so we can automatically sync our systems using our endpoint's REST API.", "priority": { "name": "Medium" }, "issuetype": { "name": "Task" } } } -
Response Structure: Saved to a local file called
Jira_POST_CreateIssue_Response.json. We can also check our endpoint to see that the new issue has been created or do a GET on the identifier of the new object.Jira_POST_CreateIssue_Response.json{ "id": "10576", "key": "TEST-11", "self": "https://jitterbitse.atlassian.net/rest/api/2/issue/10576" }
Jira PUT "Edit Issue"
Next, we edit the issue that we just created to modify the values of some of its existing fields and add new ones.
-
Request URL: PUT
https://my-domain.atlassian.net/rest/api/2/issue/TEST-11 -
Request Structure: Saved to a local file called
Jira_PUT_EditIssue_Request.json.Jira_PUT_EditIssue_Request.json{ "update": { "comment": [ { "add": { "body": "Ticket updated via REST API." } } ] }, "fields": { "priority": { "name": "Highest" }, "labels": ["business-priority", "customer-priority"] } } -
Response Structure: None. In Postman, we received a status code 204, which the API documentation indicates is the expected response if the issue was updated successfully. We can also check our endpoint in the Jira web application or perform another GET to see that the updates have been made.
Jira DELETE "Delete Issue"
Finally, we delete the object that we created and edited.
-
Request URL: DELETE
https://my-domain.atlassian.net/rest/api/2/issue/TEST-11 -
Request Structure: None. The object identifier is provided in the URL.
-
Response Structure: None. The status code returned is 204, which from the Jira API documentation indicates that the issue was successfully removed. This can also be verified in the Jira web application or confirmed with an unsuccessful GET.
Next steps
After you have validated and saved the structure for each request and response, refer to these pages for next steps:
-
Connecting to a REST API
In Design Studio, an HTTP source or target must be configured for the appropriate HTTP method of your request (GET, PUT, POST, DELETE, or custom method) so you can use it in an operation. While this page focuses on common configuration options, the pages HTTP source and HTTP target provide more detailed information about all options that are available to configure. -
Using a REST API in Operations
Although each REST API adheres to the same architectural constraints, they are not all designed the same way for each HTTP method. As each specific request and response depends on the specific API, we present four design patterns for designing operations.