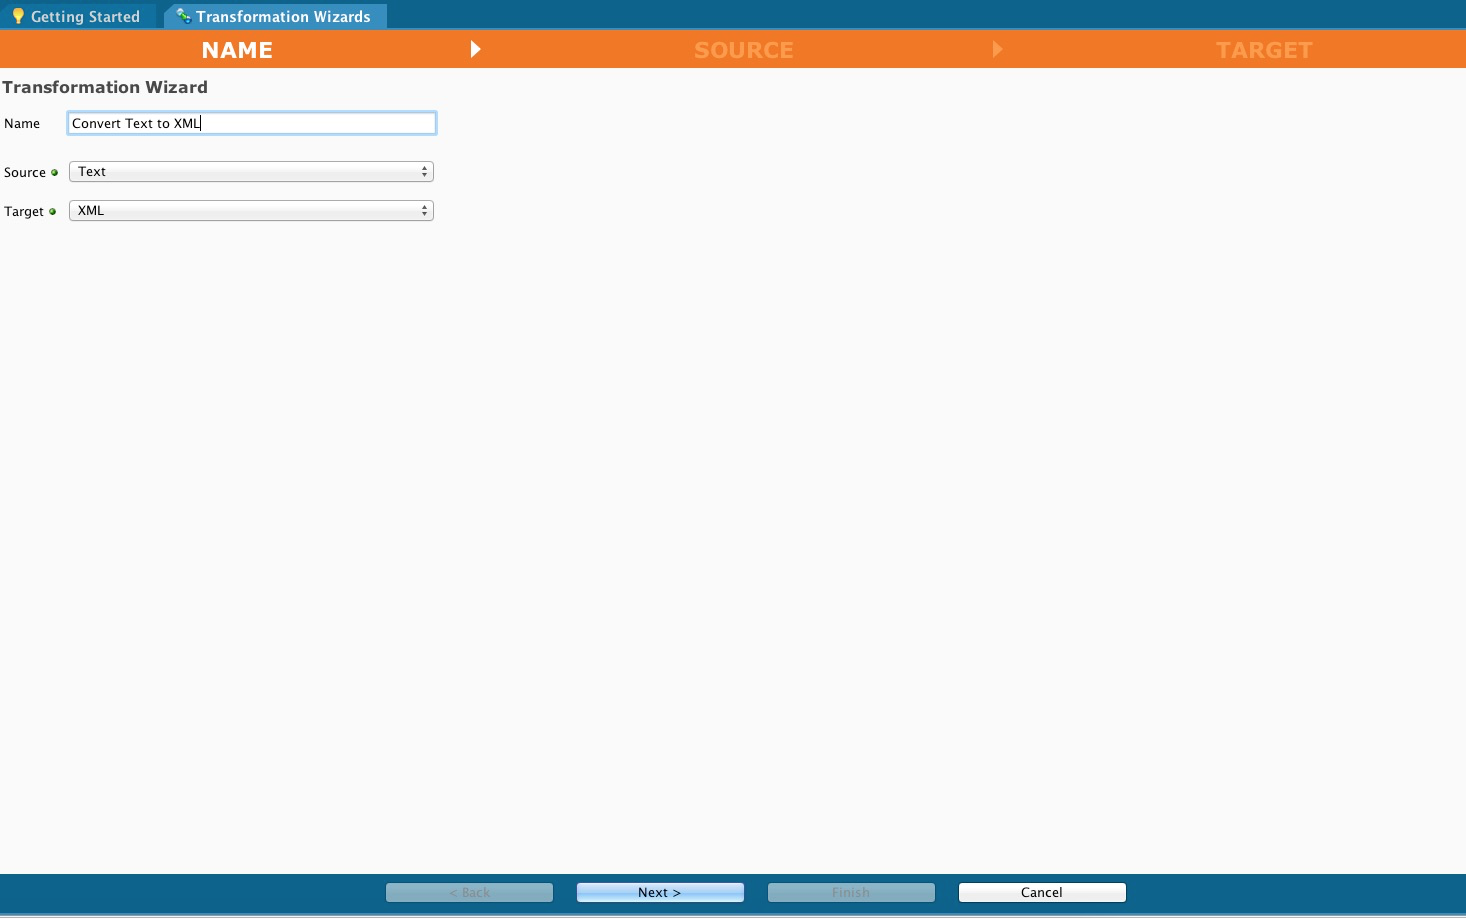
Text to XML transformation wizard in Jitterbit Design Studio
The Transformation Wizard is used by a number of operations, and is the final step after creating them.
-
Type a name for the transformation in the Name window.
-
Select a target type from the target drop-down. In this example, we are creating an XML target for the response.
-
Click Next to display the Target screen.
-
Click the Back button to return to the previous screen.
-
Click Cancel to close the wizard without saving your entries.
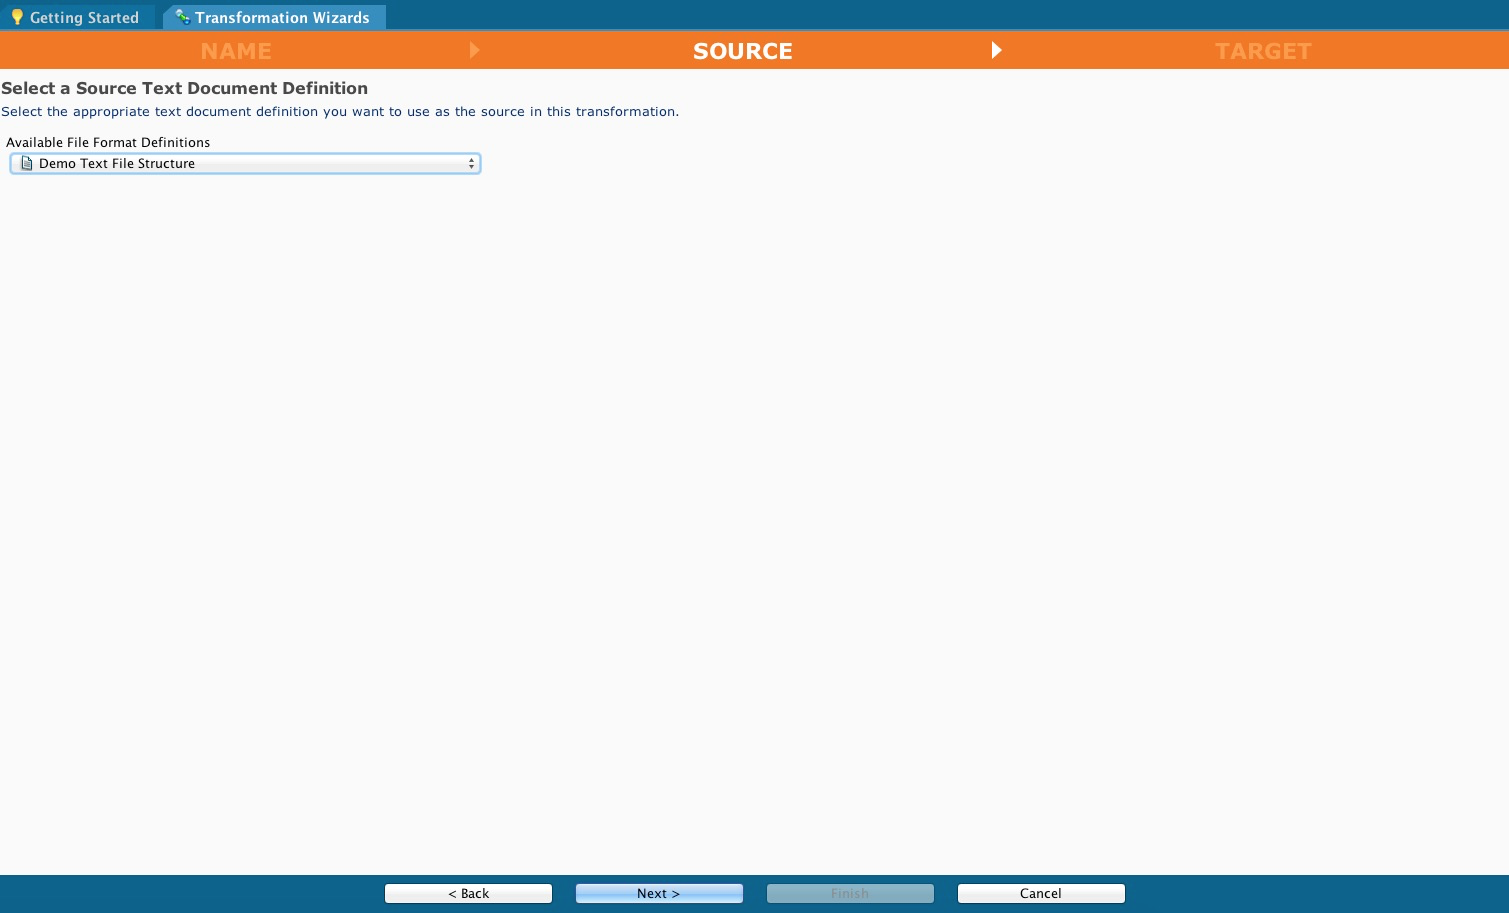
Select a source text structure file
-
Select a text file format or Create New.
-
Click the Back button to return to the previous screen.
-
Click Cancel to close the wizard without saving your entries.
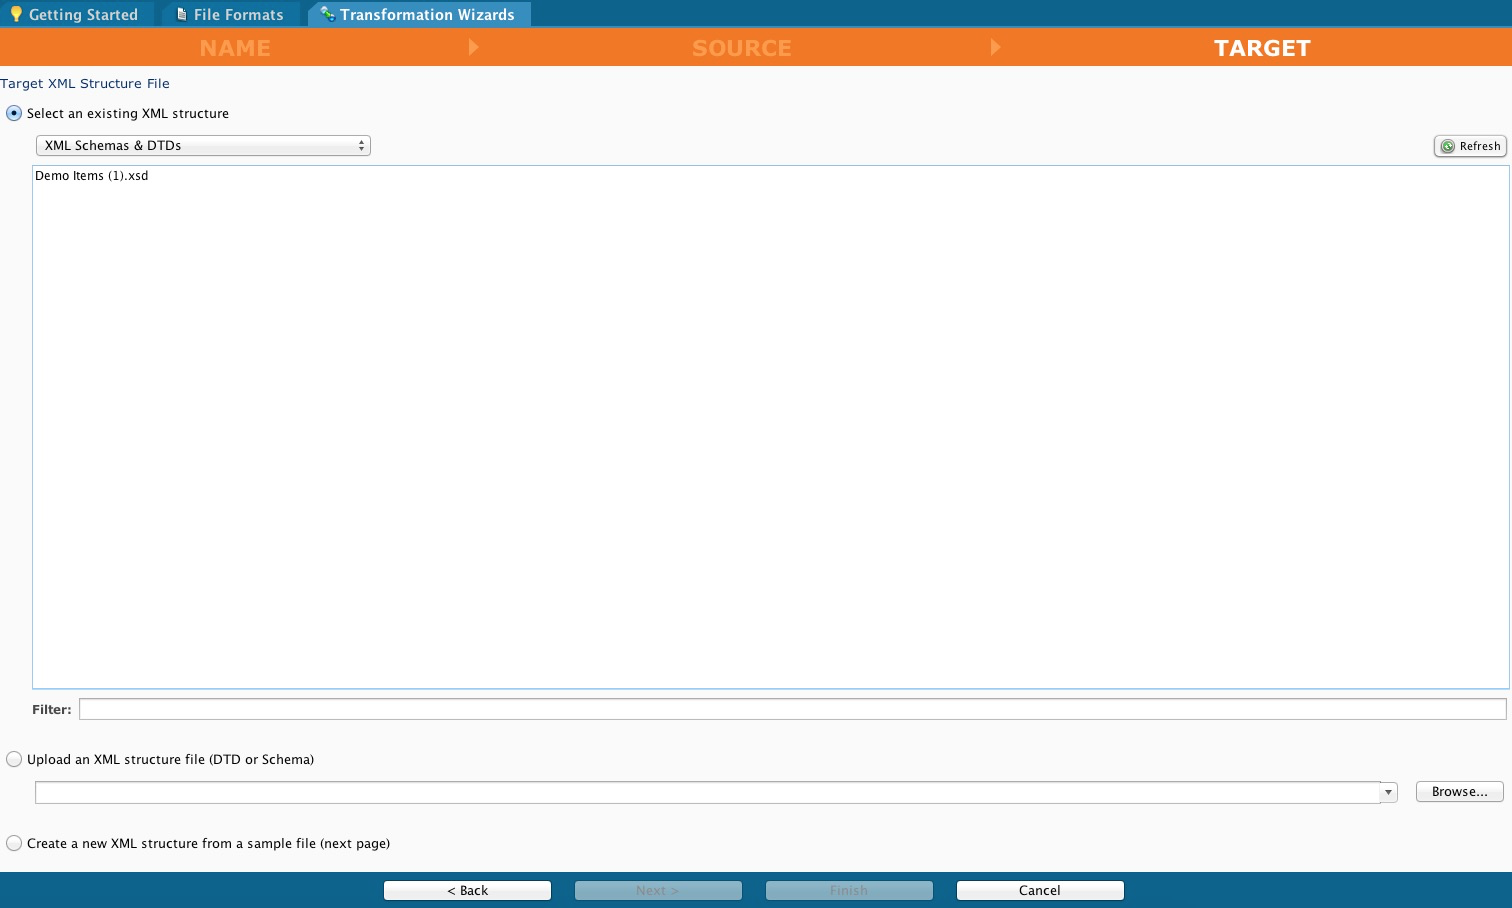
Select a target XML structure file
-
Select a structure file for the target.
-
After making your selection, click Next to select a root element.
-
Click the Back button to return to the previous screen.
-
Click Cancel to close the wizard without saving your entries.
Select a root element
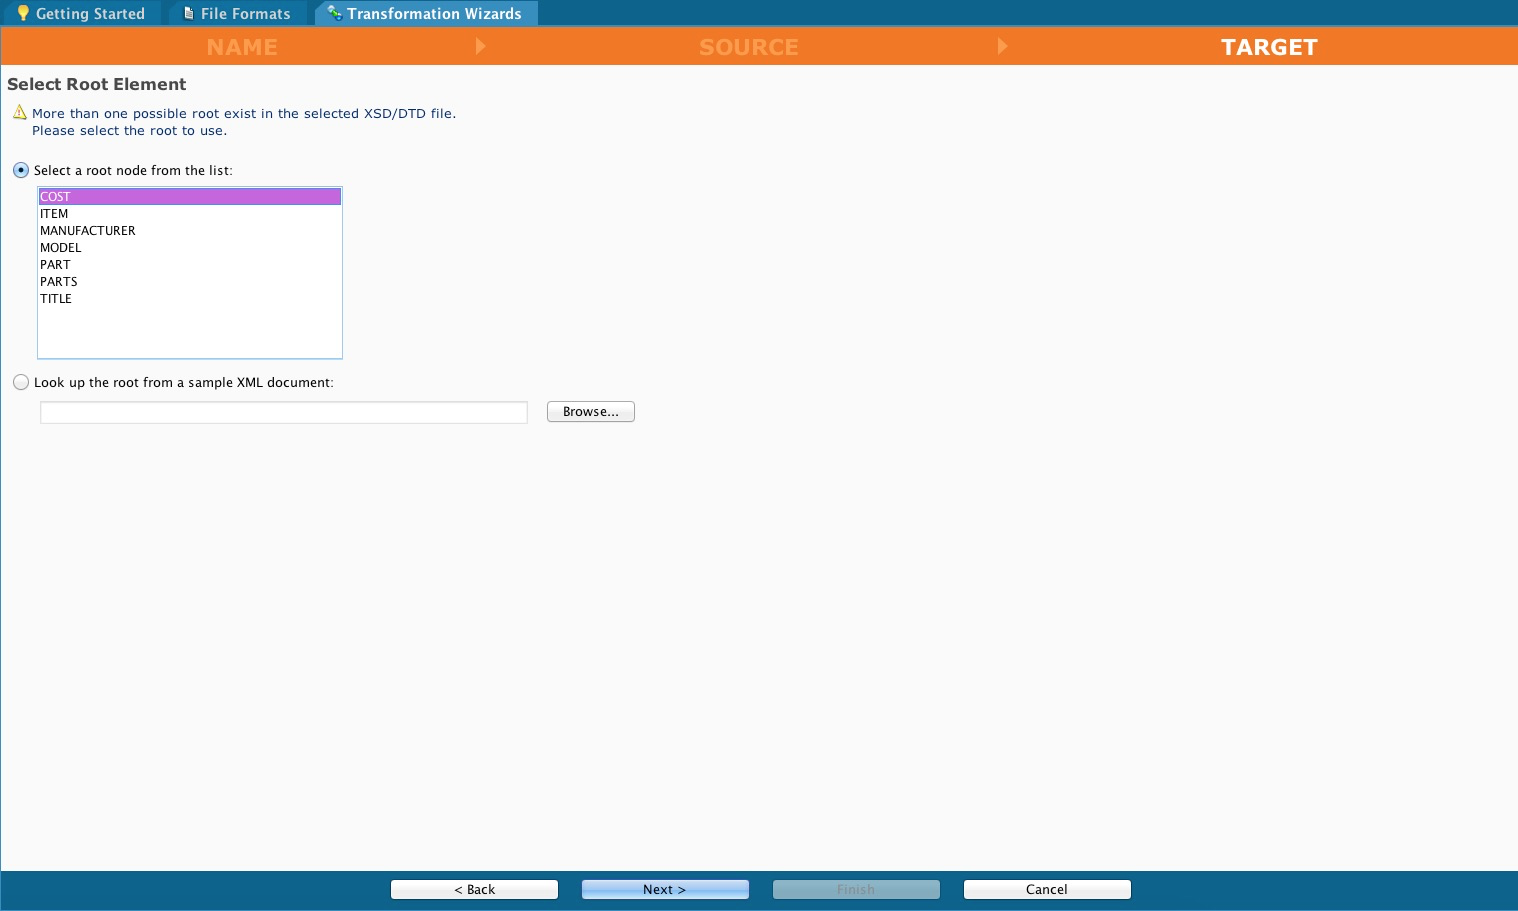
Select a root element using one of the radio buttons:
-
Select a root node from the list; OR
-
Look up the root from a sample XML document.
After you have selected your root element:
-
Click Next to display the Target screen.
-
Click the Back button to return to the previous screen.
-
Click Cancel to close the wizard without saving your entries.
Create a target
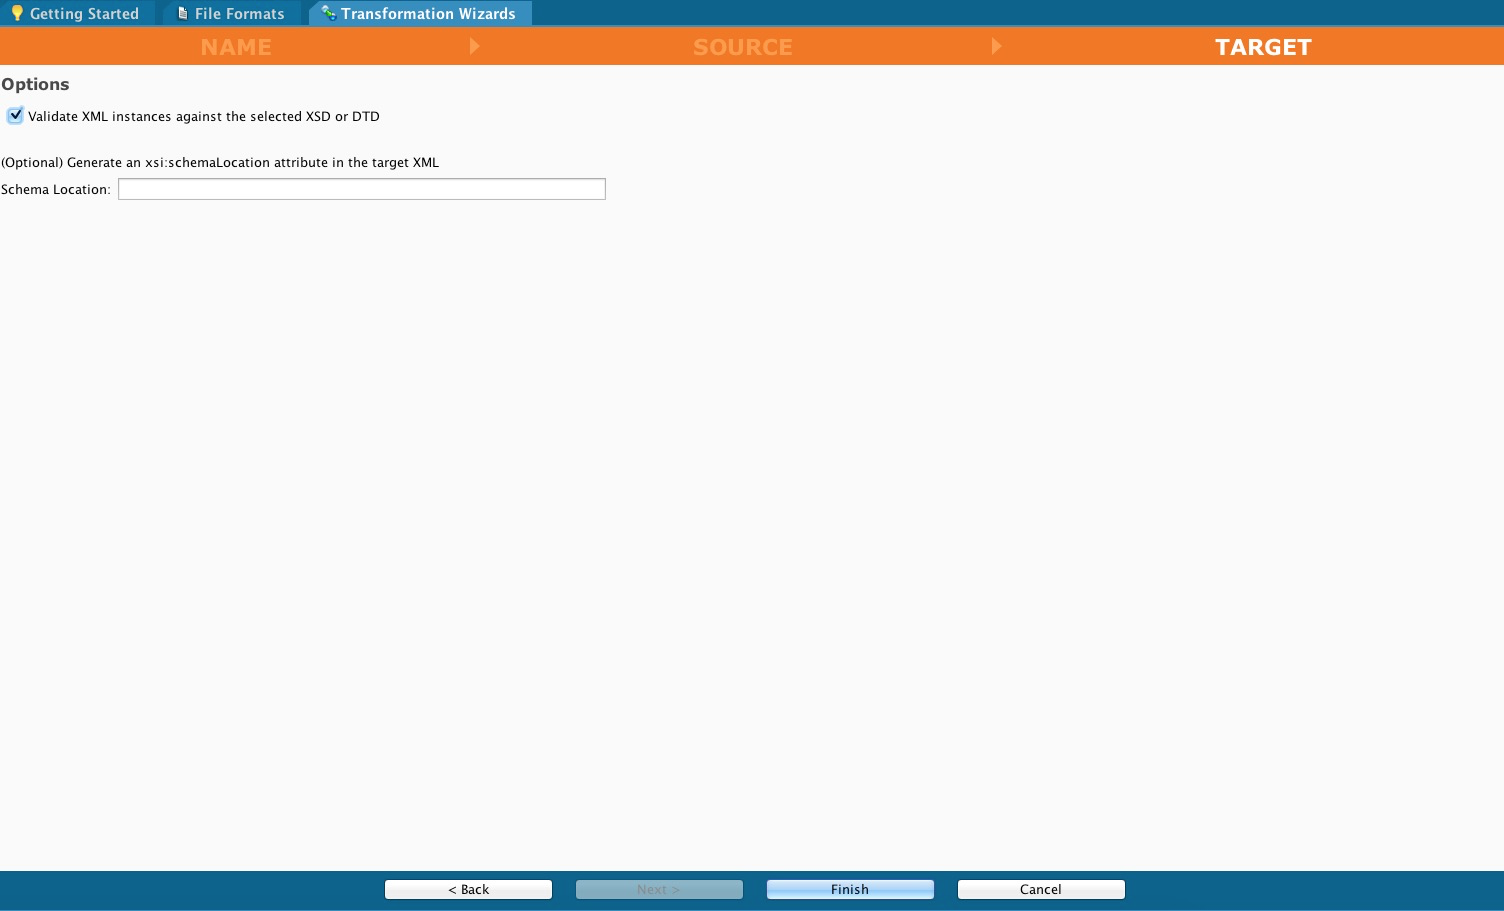
On this screen you may:
-
Select the checkbox Validate XML instances against the selected XSD or DTD.
-
Use the optional textbox to generate an XML schema location attribute in the target XML.
After you have completed your entries:
-
Click Finish to complete your operation.
-
Click the Back button to return to the previous screen.
-
Click Cancel to close the wizard without saving your entries.
Complete the operation
When you Click Finish on the Target screen, the Transformations Request tab opens in the workspace. You can also open it at any time by selecting the name of your project under Transformations.
The Response Mappings message is also displayed above the tab. If you have received this message, click Close. Before closing, you may also select the Do not show me again checkbox.
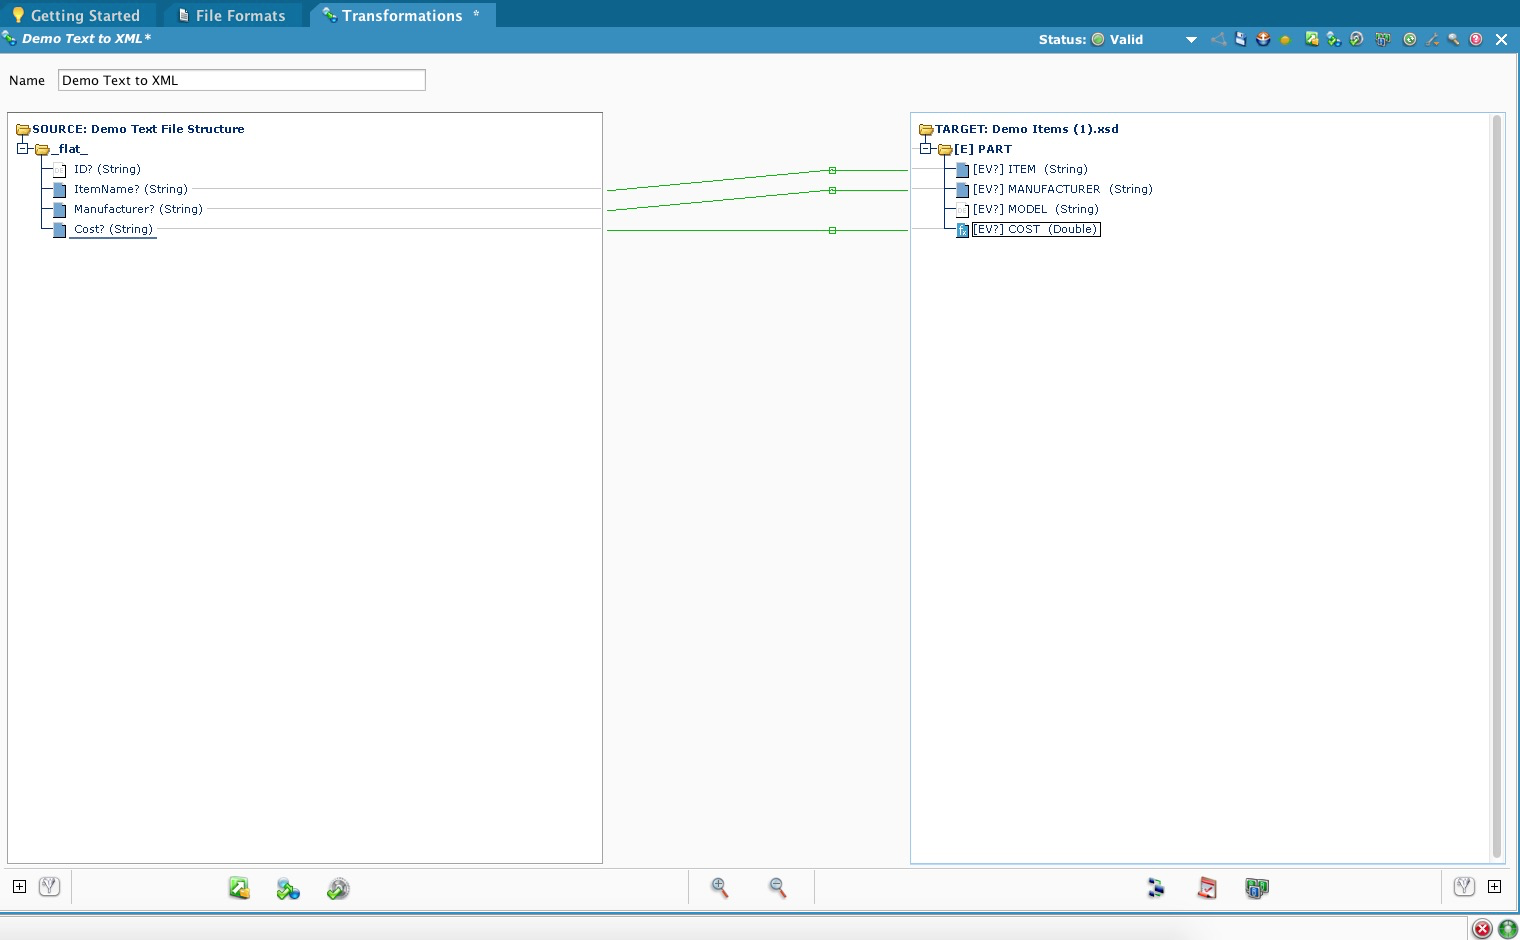
Valid mapping is indicated by green lines between items in the Source and Target columns and, in addition, by the presence of a blue square next to each validly mapped item name.
-
A red line indicates invalid mapping.
-
A yellow line indicates that Jitterbit isn't sure if the mapping is valid, but will attempt the transformation with this mapping.
-
You can complete the mapping on the Transformations tab by dragging and dropping from Source on the left to Target on the right. When you do so, the Target item will take on the same name as the Source item, and a blue square will appear to the left of both Source item and Target item.
-
To save your transformation, click the down arrow on the Status ribbon and select Save.
-
Click the X on the far right of the tab to exit this screen.