Create a web service method in Jitterbit Design Studio
Jitterbit lets you access SOAP web services as part of your transformation process. To call a SOAP web service using Jitterbit, you need to define: a web service method; transformations to deal with the input and output of the web service; and an operation to hold everything together.
-
Make sure you have opened the appropriate project where you want to store the new web service method.
-
Create a new web service method using one of these methods:
- Select New in the File menu and then choose New Web Service Method from the sub-menu; or
- Click the down arrow next to the file icon in the toolbar and then choose New Web Service Method from the sub-menu; or
- Right-click on Web Service Methods in the hierarchical tree in the Interchange tab in the left pane of the screen and then choose New Web Service Method from the pop-up menu.
-
Your new web service method appears in its own New Web Service Method tab in the right pane of the window.
-
Enter an appropriate Name for your new web service method in the Name field.
Specify a WSDL
-
In the WSDL (Web Services Description Language) area, either select from an existing WSDL file, enter a URL, or enter a directory path that points to the WSDL of the web service you want to call.
-
Click the Next button in the toolbar to continue.
Note
A current limitation of Harmony is that any local WSDL loaded from a file must have any schemaLocation resolved to a local file using a relative reference. This usually means that instead of supplying a tuple such as
xsi:schemaLocation='http://schemas.xmlsoap.org/wsdl/mime/ http://ws-i.org/profiles/basic/1.1/wsdlmime-2004-08-24.xsd'
you supply
xsi:schemaLocation='http://schemas.xmlsoap.org/wsdl/mime/ wsdlmime-2004-08-24.xsd'
where the XSD file wsdlmime-2004-08-24.xsd is located either in the same directory or a path relative to the WSDL being loaded.
Select an operation
-
In the next screen of the Web Services Wizard, choose the desired WSDL operation from the drop-down list Select Operation.
-
The web service's Request and Response structures are then loaded into their respective hierarchical trees for you to review. You may optionally add any notes to the Documentation field.
-
Click the Next button in the toolbar to continue.
Specify additional details
The last screen of the Web Services Wizard is optional. It shows the default web service URL and SoapAction HTTP Header that were extracted from the WSDL.
If the web service requires authentication, it displays fields where you can enter a User Name, Password, and select a Certificate to be used during authentication.
This screen also lets you provide access limit details (i.e., call delay and/or max data) if the web service sets such limits.
-
Enter the appropriate values when needed to properly access the web service you specified.
-
When you've finished, click Finish in the toolbar to create and save your web service.
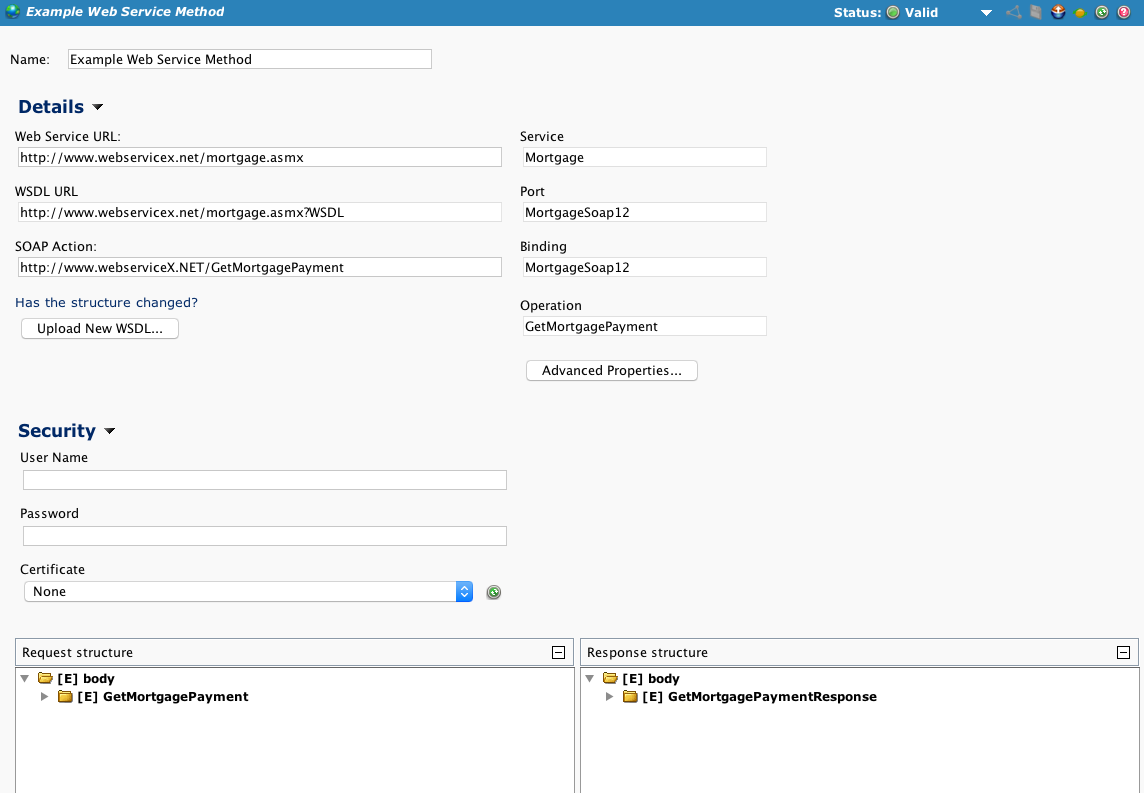
Completed web service
The new Web Service will be created, saved, and the configuration displayed:
Advanced properties
If you need, the Advanced Properties button allows access to settings for Advanced HTTP Properties:
![]()
These advanced options modify the HTTP headers that are being sent with the request:
-
Enable content encoding: If checked, the Accept-Encoding header will be sent with the encodings supported by Jitterbit. Currently Gzip is supported. This option is off by default.
-
Enable chunked transfer encoding: If checked, the "Transfer-Encoding: chunked" header will be sent. Use this option if you are transfering large data sets. This option is off by default.
-
Send Expect: 100-continue: If checked, the "Expect: 100-continue" header will be sent. With this option, no data will be sent until the HTTP server has validated the headers. Use this option if you are sending large amounts of data but don't want to use chunked transfer encoding. This option is off by default.
-
Allow weak ciphers: If checked, this will allow communication with HTTP endpoints that use weak ciphers (DES/3DES and RC4). This option is off by default.
-
Set Accept-Encoding to GZip: Checked by default, this option tells the HTTP server that Jitterbit can accept a Gzip-compressed response. In return, Jitterbit will follow the RFC 1952 standard and automatically decompress Gzip HTTP responses. If the server does not use Gzip, Jitterbit will see that the response is not compressed and handle it as usual. This feature was added as of Jitterbit version 8.20 and is now checked by default for all new and existing HTTP sources.
-
Request Headers (one line per header): Any text entered in this box will be sent as HTTP headers. Specify one header per line unless the header is wrapped according to the HTTP standard. Global variables in square brackets will be replaced with their values.
-
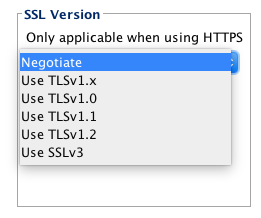
SSL Version: Only applicable when using HTTPS, it allows the specification of a specific SSL version if the HTTP server requires it. The default is "Negotiate". Options available are:
Set up a web service call in an operation
An operation that calls a web service consists of two transformations: the first transforms data into a web service request and the second transforms data from a web service response to a target system
-
Follow the steps to Define a New Operation.
-
Choose Web Service Call from the Activity drop-down list.
-
Select an existing source from the Source drop-down list, or click the control button to the right of the field to create a new source.
-
Select a predefined request transformation (which transforms data from your source to the web service) from the Request Transformation drop-down menu, or click the control button to the right of the field to create a new request transformation.
-
Select a predefined web service from the Web Service drop-down list, or click the control button to the right of the field to create a new web service.
-
Select a predefined response transformation (which is used to transform data from the web service's response to your target) from the Response Transformation drop-down list, or click the control button to the right of the field to create a new response transformation.
-
Select an existing target from the Target drop-down menu, or click the control button to the right of the field to create a new target.
Test a web service call
-
Edit the response transformation and select Test and Operation from the Transformation Toolkit button in the transformation builder toolbar.
-
You will be asked to select the operation you want to test, which makes the request according to that operation and returns the response in the graphical tree.