Check for a valid SSL certificate or proxy filter setting error message in Jitterbit Design Studio
Overview
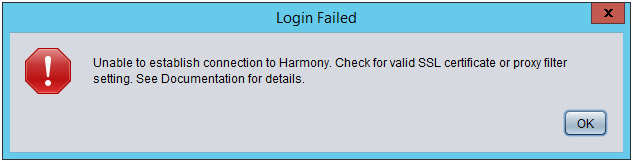
This error message occurs while trying to log in to Jitterbit Studio or Jitterbit Cloud Data Loader. Follow the steps below to troubleshoot what is causing the error to occur and to resolve the error.
Note
Any of the Java Keytool commands presented in this document may be used for Jitterbit Studio, Jitterbit Cloud Data Loader, or Jitterbit agent by substituting the home directory for the product you are working with. If the default is accepted during installation, the home directory will be one of:
- Windows (Cloud Data Loader):
C:\Program Files (x86)\Jitterbit Cloud Data Loader\ - Windows (Jitterbit Design Studio):
C:\Program Files\Jitterbit Studio x.xx\ - Windows (Jitterbit agent):
C:\Program Files (x86)\Jitterbit agent\ - Linux (Jitterbit agent):
/opt/jitterbit/
Step 1: Verify you can log into the Management Console with the same desktop machine
Verify that you can log into the Jitterbit Management Console from the same desktop machine that the Jitterbit Studio Is running on.
Step 2: Verify Jitterbit Studio is using the Java version installed with the product
Jitterbit Studio and Jitterbit Cloud Data Loader should be running on the Java version that is installed with the product.
-
Open
<Jitterbit Studio Home>\configuration\client.propertiesin a text editor. -
Search for "JRE_HOME" in the file for instructions
-
Verify the
client.propertiesfile has not been modified to point to a different Java version.
Step 3: Verify IP allowlist
Verify if your browser is using a proxy server (such as Websense), a web filter (such as zScaler), a SSL inspection service on outgoing connections (such as Websense or zScaler) or a VPN (such as Pulse Secure) and make sure the correct Jitterbit sites are included in the IP allowlist.
- You may have to contact your Network Administrator or the third-party vendor that set up your Internet access to verify what browser services are being used.
- The following addresses will need to be included in the IP allowlist for these services:
*jitterbit.com,*jitterbit.euand*jitterbit.net. - If the proxy server, web filter, packet inspection service or VPN also use a trusted root CA certificate, please follow the steps below to add the certificate to the Jitterbit Java KeyStore.
Step 4: Verify SSL certificate is not located in the Jitterbit Java KeyStore
The error frequently occurs when a signed SSL or CA xxxxxxx.cer certificate is not located in the Jitterbit Java KeyStore. The error will also occur if a SSL inspection service, web filter, proxy server, or VPN changes which certificate is used and the certificate is not located in the Jitterbit Java KeyStore.
- You need to identify which certificates are being used and install each of them into the
\jre\lib\securityfolder that Jitterbit included in the product installation. - A process must be developed to install the certificate in the
\jre\lib\securityfolder that Jitterbit ships with the product each time you upgrade or re-install Jitterbit. - Each time you change the certificate(s) that are used, it will be necessary to get the certificate(s) from your Network Administrator or the third-party vendor and install them in the
\jre\lib\securityfolder that Jitterbit ships with the product..
How to get the list of security certificates
- Run this command from within the
Java\jre\lib\securityfolder: >keytool -list -v -keystore cacerts - Verify the certificates are all located in
<Jitterbit Studio>\jre\lib\security\. - To add certificates that are not located in
<Jitterbit Studio>\jre\lib\security\, follow the steps below.
How to add a new certificate to the Jitterbit Studio keystore
Command using Java keytool
Note
- The following Java command may be used for Jitterbit Studio, Jitterbit Cloud Data Loader, and Jitterbit agent by substituting the home directory for the product you are working with.
- You must be in administrator mode.
- The default password for all of the Jitterbit keystores is '
changeit'.
The Java Keytool Command is:
> <Jitterbit Studio Home>\jre\bin\keytool -importcert -trustcacerts -alias <alias> -file <certfile> -keystore "<Jitterbit agent Home>\jre\lib\security\cacerts"
Example
This example is a Websense certificate in Cloud Data Loader. In this example, the Websense certificate file was first copied into C:\temp\cacerts. The certificate can be installed directly from the original directory using this command as well.
> cd C:\Program Files (x86)\Jitterbit Cloud Data Loader\jre\bin
> C:\Program Files (x86)\Jitterbit Cloud Data Loader\jre\bin\keytool -importcert -trustcacerts -alias Websense -file C:\temp\cacerts\xxxxx.cer -keystore "C:\Program Files (x86)\Jitterbit Cloud Data Loader\jre\lib\security\cacerts"
Additional KeyTool command resources:
- Adding certificates to keystore for private agents
- https://www.sslshopper.com/article-most-common-java-keytool-keystore-commands.html
- https://azure.microsoft.com/en-us/documentation/articles/java-add-certificate-ca-store/
Note
- A process must be developed to install the certificate(s) in the
\jre\lib\securityfolder that Jitterbit ships with the product each time you upgrade or re-install Design Studio, Jitterbit agent or Cloud Data Loader. - Each time you change the certificate(s) that are used, it will be necessary to get the new certificate(s) from your Network Administrator or the third-party vendor and install them in the
\jre\lib\securityfolder that Jitterbit ships with the product.
Instructions for using portecle
-
Download and install Portecle.
-
First, be certain which JRE or JDK is being used to run your program. On a 64-bit Windows 7, there can be quite a few JREs. Process Explorer can help you with this, or you can use this Jitterbit script command:
System.out.println(System.getProperty("java.home")); -
Copy the file
JAVA_HOME\lib\security\cacertsto another folder. -
In Portecle, click File > Open Keystore File
-
Select the cacerts file.
-
Enter this password:
changeit -
Click Tools > Import Trusted Certificate
-
Browse for the file
mycertificate.pem -
Click Import
-
Click OK when the trust path warning displays.
-
Click OK when the details about the certificate display.
-
Click Yes to accept the certificate as trusted.
-
When it asks for an alias, click OK.
-
Click OK when message indicating it has imported the certificate displays.
-
Click Save. Don't forget to do this or the change will be discarded.
-
Copy the file
cacertsback to its original location (JAVA_HOME\lib\security\cacerts).
Note
- A process must be developed to install the certificate(s) in the
\jre\lib\securityfolder that Jitterbit ships with the product each time you upgrade or re-install Design Studio, Jitterbit agent, or Cloud Data Loader. - Each time you change the certificate(s) that are used, it will be necessary to get the new certificate(s) from your Network Administrator or the third-party vendor and install them in the
\jre\lib\securityfolder that Jitterbit ships with the product.
Turn on SSL debug logging to determine which certificate is not being accepted
-
Turning on logging will show what is causing the error. It will show which certificate is not being accepted. The certificate will need to be added to the Jitterbit Java KeyStore by following the steps above.
-
Open
<Jitterbit Studio Home>\configuration\client.propertiesin a text editor -
Make a note of the current value of the
STARTUP_ARGUMENTSproperty -
Change the
STARTUP_ARGUMENTSproperty to:STARTUP_ARGUMENTS='-Djavax.net.debug=ssl:handshake -Xms512m -Xmx1024m -Djava.util.Arrays.useLegacyMergeSort=true' -
Save the file
-
Launch Jitterbit Studio and attempt to log in
-
Once the error displays, dismiss the error dialog
-
Go to the folder
C:\Users\[windows username]\JitterbitStudio\ -
Zip up the
logssub-folder -
Create a support case and attach the zip file to the support case
-
Reset the startup argument property back to its original value to turn off logging