Transactions
Introduction
When you have set up your trading partners and started exchanging documents with them, the Transactions page is where you see the related transaction details, and save, copy, reprocess, upload, or acknowledge transactions. To open it, use the Harmony portal menu to select EDI > Transactions:
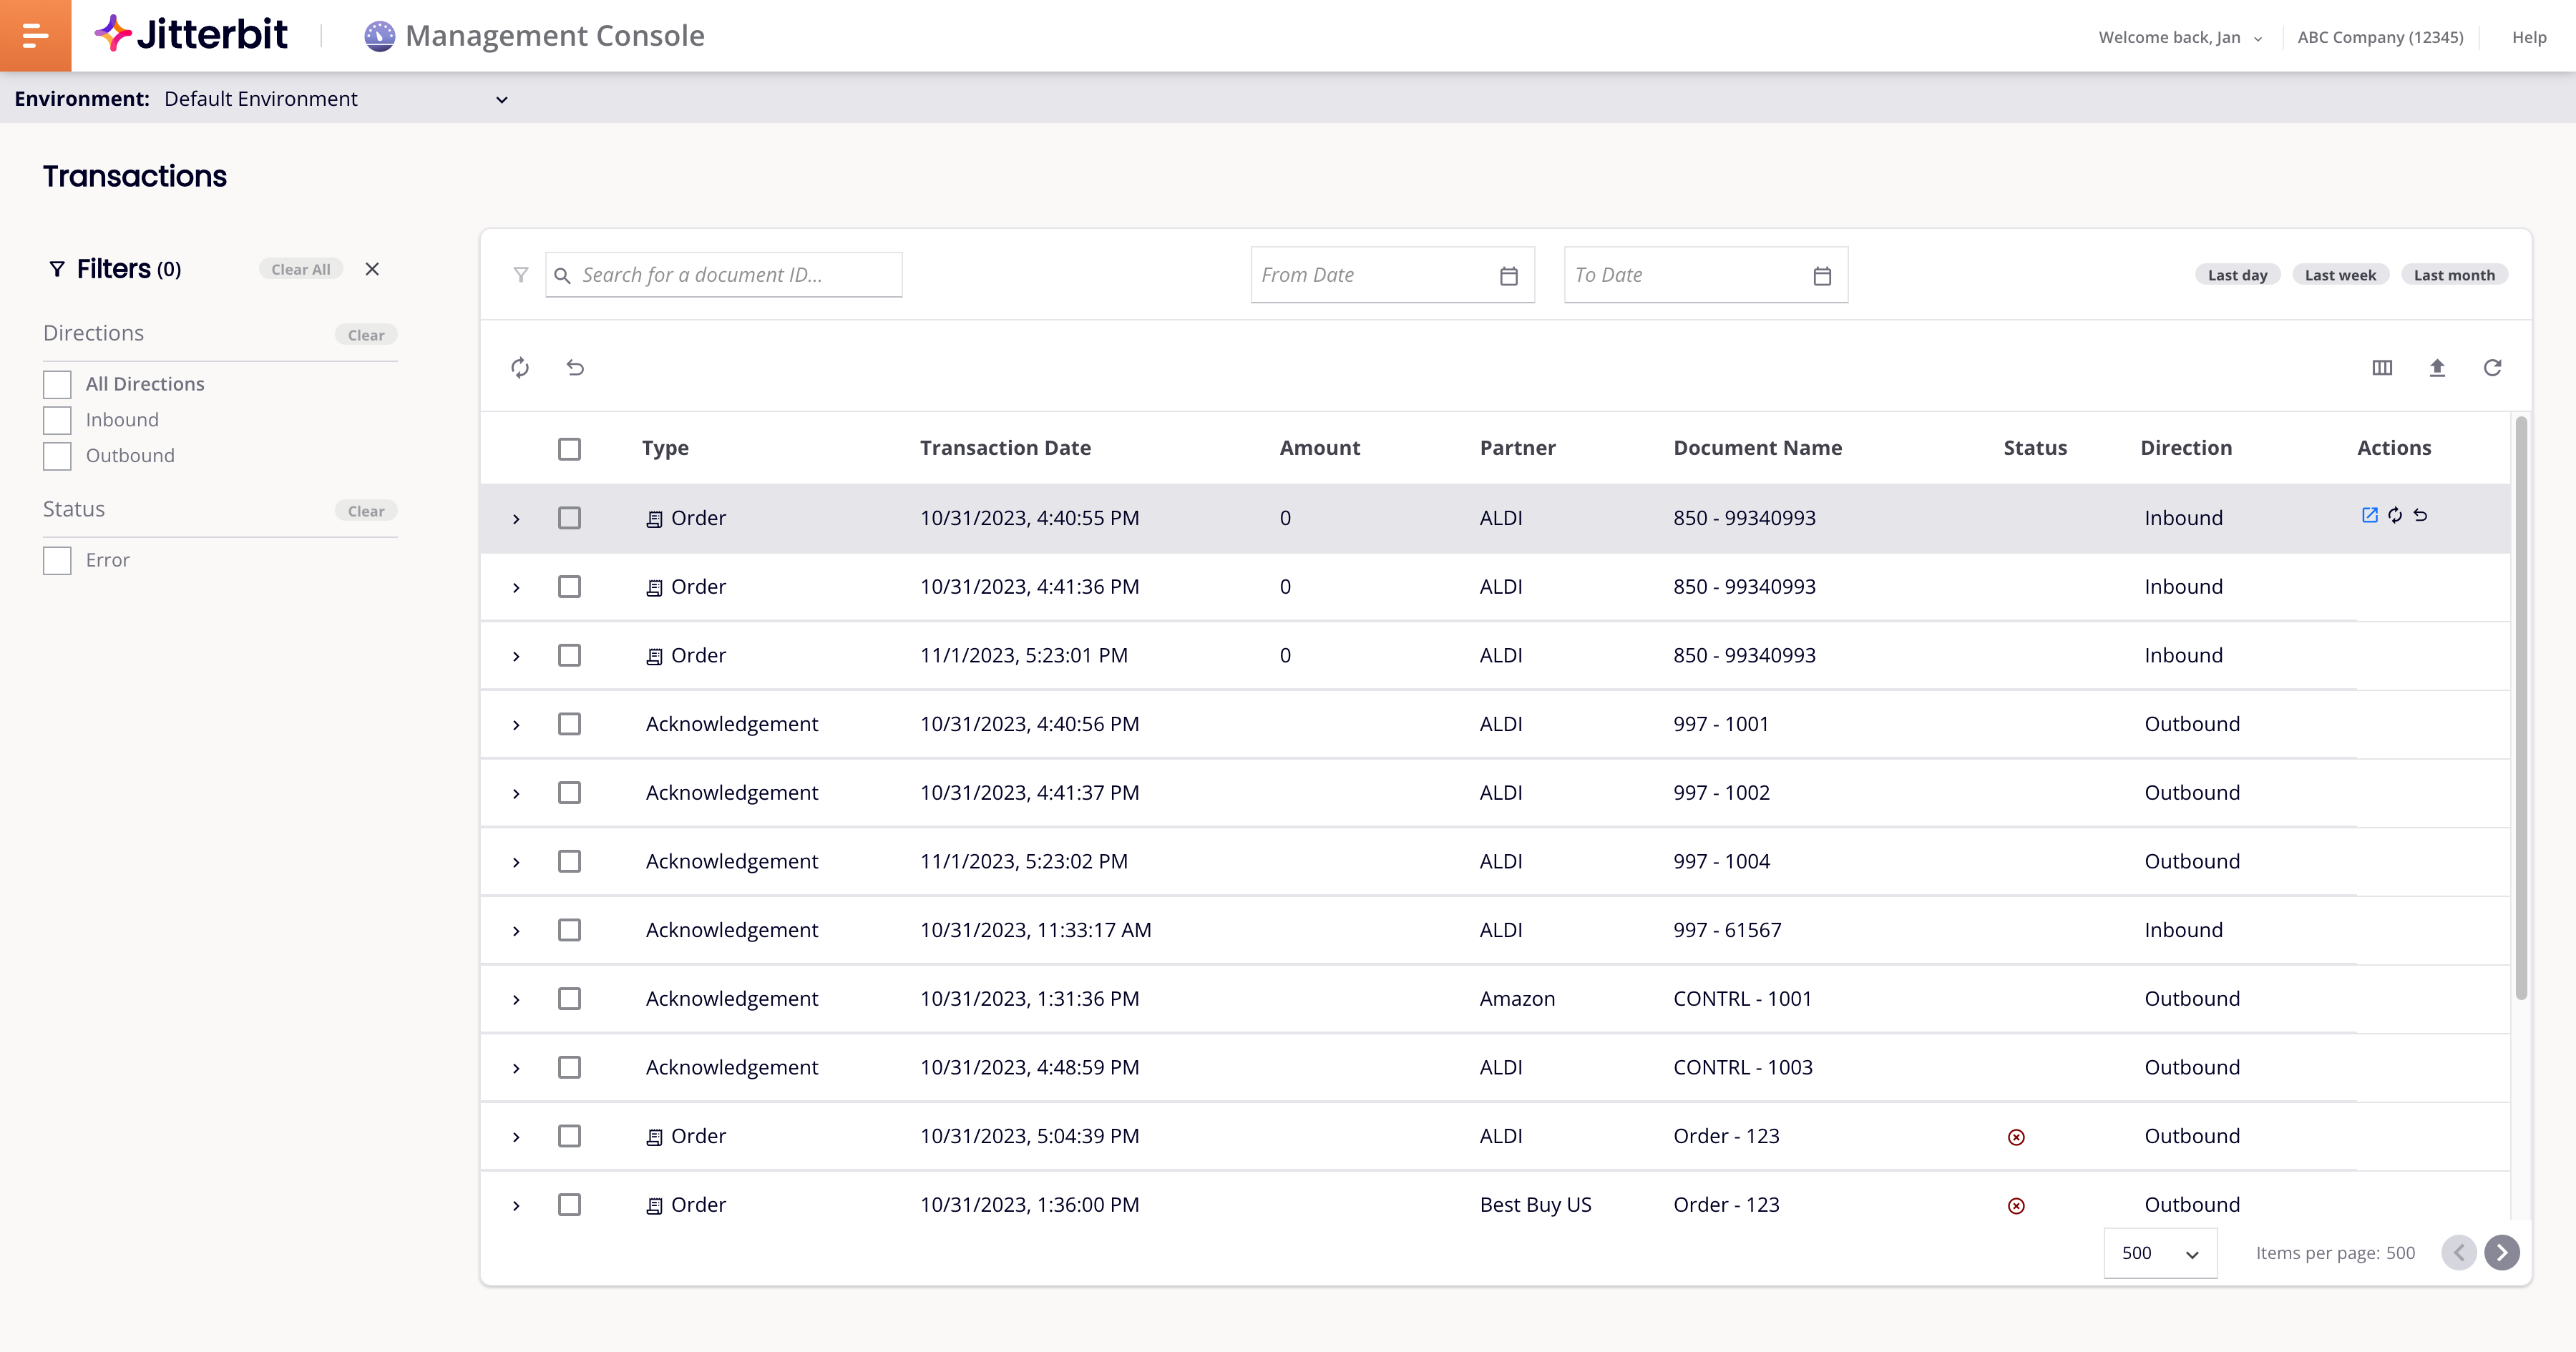
The page comprises two panes:
- On the left, the filters pane;
- In the main area, the transactions pane.
Filters pane
Use the Filters pane to select filter options for direction, status, trading partners, and any document types defined in partner workflows:
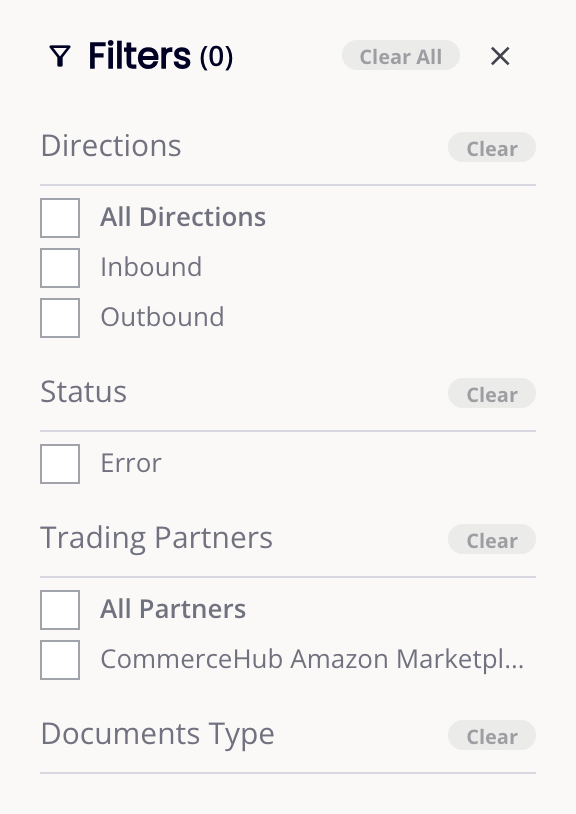
You can set the following filters:
- Directions: Filter by document direction:
- All Directions: Select both directions.
- Inbound: Select inbound documents.
- Outbound: Select outbound documents.
- Status: Filter by transaction status:
- All: Select all statuses.
- Success: Select transactions with success status.
- Error: Select transactions with error status.
- Trading Partners: Filter by trading partner:
- All Partners: Select all partners.
- (Partner) Select specific partners.
- Show More: Show more partners.
- Documents Type: Filter by document types defined in partner workflows:
- All Types: Select all document types.
- (Document type): Select a specific document type.
- Show More: Show more document types.
To clear individual filters, click a section's Clear button. To clear all filters, click Clear All.
To collapse the filters pane, click the collapse icon . To expand it, click the expand icon .
Transactions pane
The transactions pane shows transactions, optionally filtered according to the settings in the Filters pane:
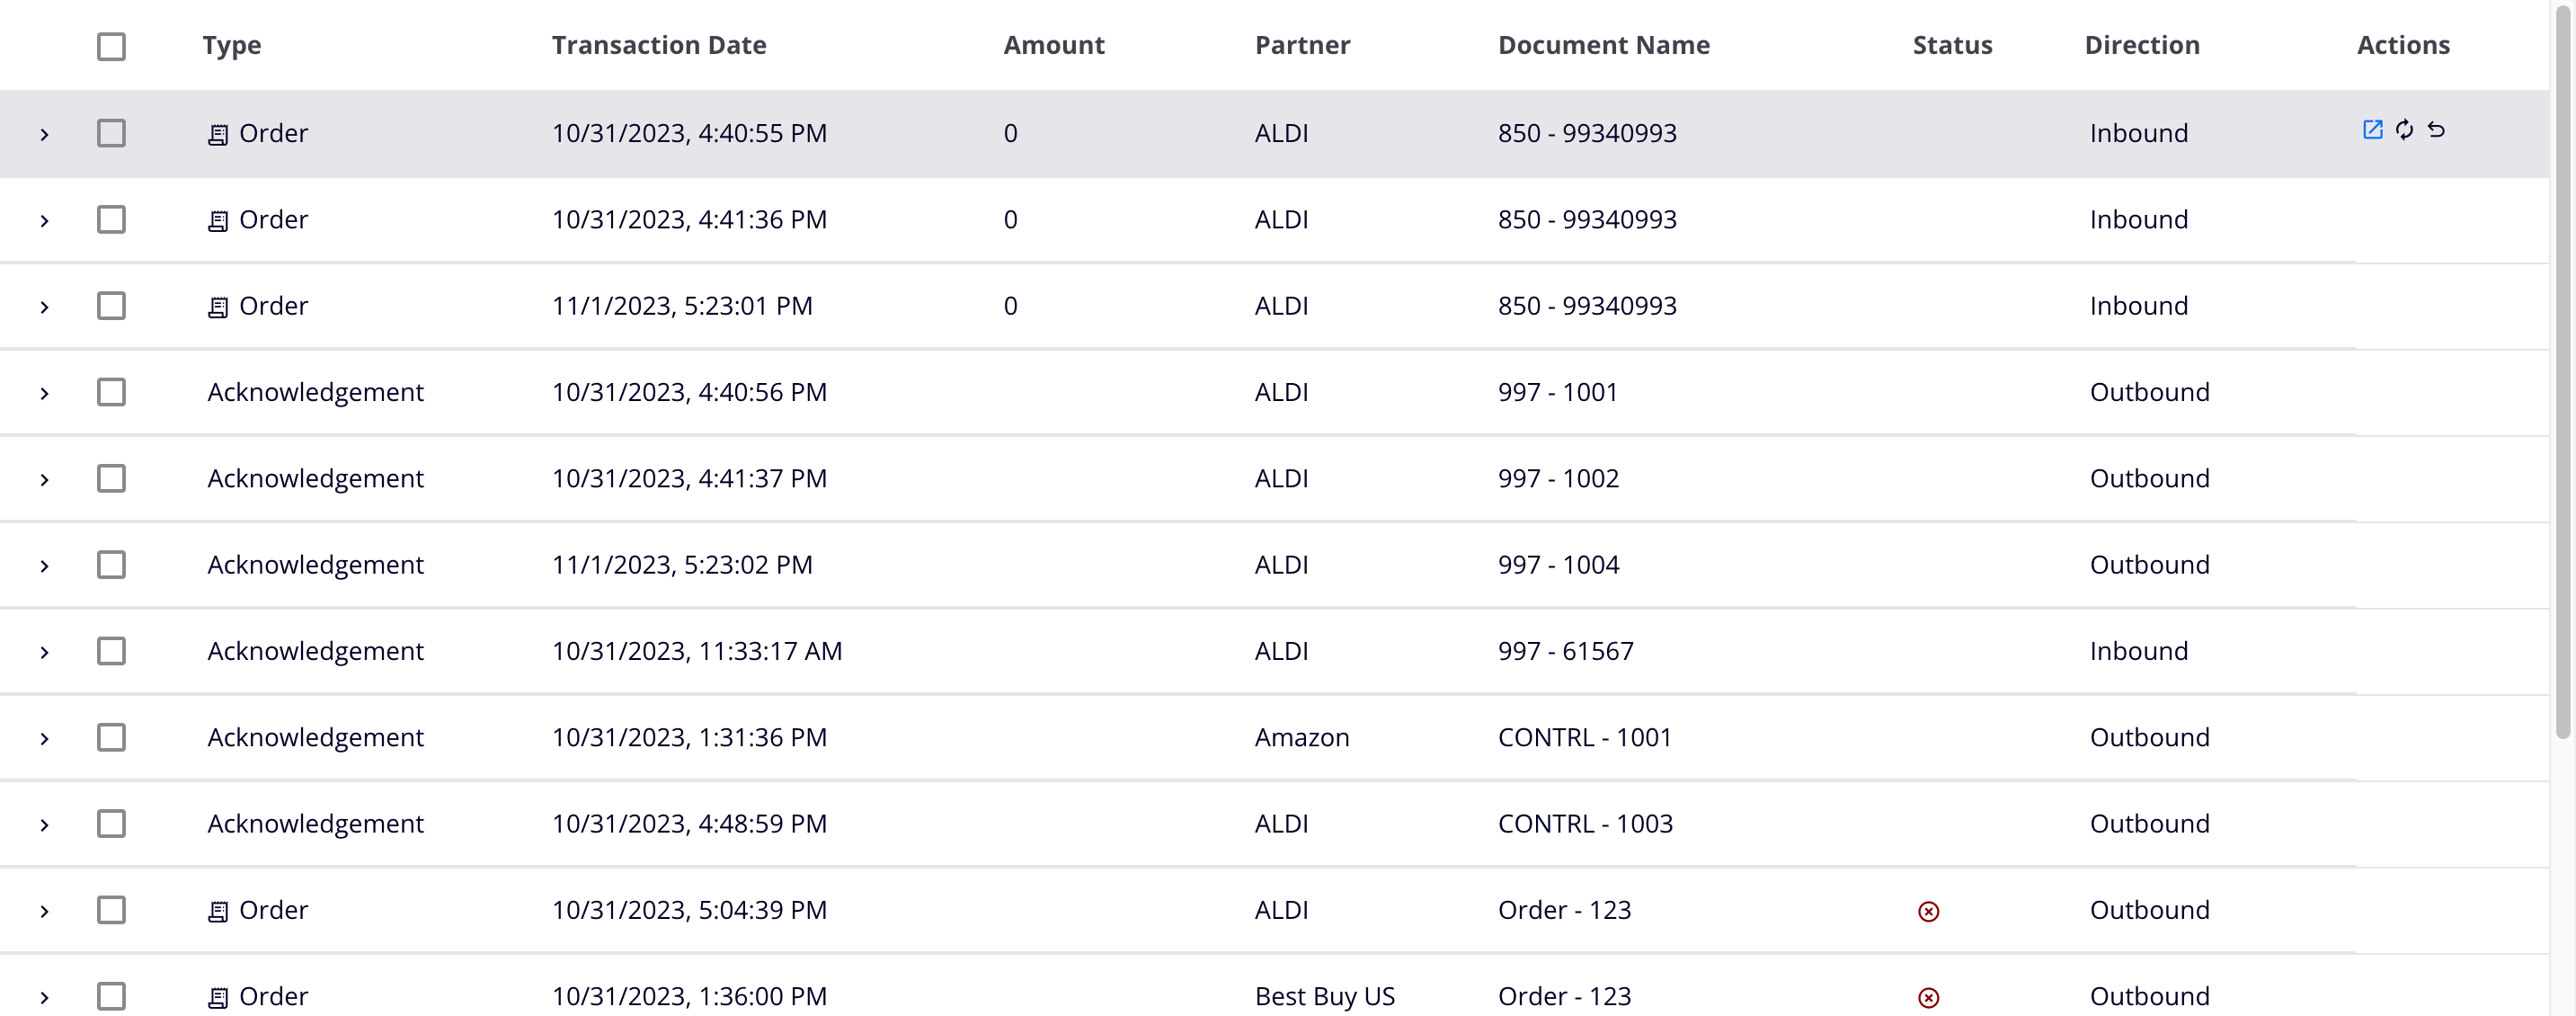
Click a row or the expand icon to show document information and messages.
Click the row again or the collapse button to hide the document information.
Hover on then click the Document Name, Type, Direction, Partner, or Transaction Date column headings to sort transactions (you can only sort one column at a time). The first click sorts in ascending order, the second click reverses the sort order, and the third click returns the sort order to its original state. When sorted, an arrow remains visible next to the sorted column, the direction indicating the sort order: up for ascending, down for descending.
Column headings
The columns editor lets you choose what to see in the transactions pane.
The following fields are always visible:
-
Expand: Click to see the transaction's document information and messages.
-
Select: Select all transactions on all pages. Use the action buttons to process selected transactions.
-
Actions: The actions tools column. Hover to reveal these action buttons for the transaction:
-
Open in New Tab: Click to open the transaction's document information in a new tab.
-
Reprocess: Click to reprocess a failed document.
-
Resend Acknowledgment: Click to resend an acknowledgment.
-
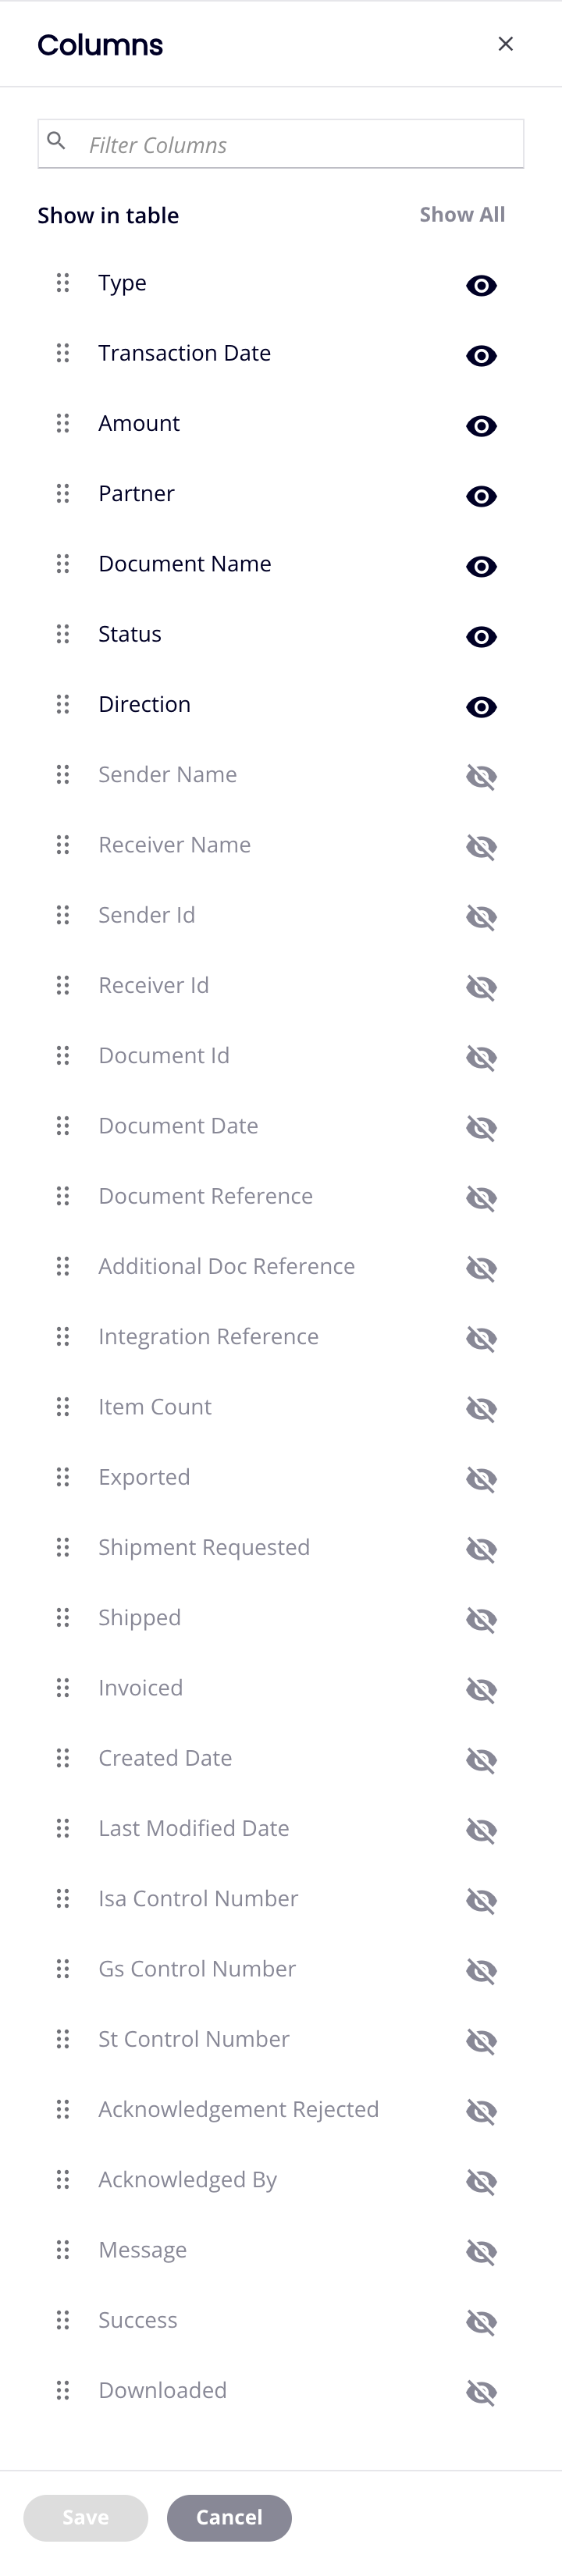
Columns editor
Use the columns editor to move columns and change their visibility:
-
Filter Columns: Enter part or all of a column name to reduce the list to those matching the text.
-
Show All: Make all columns visible.
-
Move: Drag and drop to change the position of the column relative to others.
-
Hide: The column is visible. Click to hide it.
-
Show: The column is hidden. Click to show it.
-
Save: Save the columns.
-
Cancel: Close the columns editor without saving changes.
Search and date range controls
The top row of the transactions pane contains the following:

- Search bar: Enter text in the search bar to find documents by document ID.
- From Date: Set to show transactions occurring after this date.
- To Date: Set to show transactions occurring before this date.
- Date range: Select one of Last Day, Last Week, or Last Month. This sets the dates in From Date and To Date to show only those transactions made in the chosen range.
Action buttons
The next row of the pane contains the following buttons:

-
Reprocess: Reprocess selected transactions.
-
Resend Acknowledgment: Resend acknowledgments for selected transactions.
-
Columns: Click to open the columns editor.
-
Upload file for processing: Upload an EDI or XML file for processing in the current environment. The file must be correctly formatted in one of the following standards: EDI, XML, EDIFACT, or TRADACOM EDI (see Upload file formats for more details). If an upload fails, a log entry on the Messages page gives more information.
-
Refresh: Refresh the transactions list.
Page controls
At the bottom of the pane are the following page controls:

-
Items per page: The number of items per page. Select one of 100, 250, or 500.
-
Previous page: Go to the previous page.
-
Next page: Go to the next page.
Document information
Select this tab to view document details, related documents, and document views:

The format of the Document Information pane varies according to the document type.
Related docs
The Related Docs pane shows related documents for the same order number.
Click the linked text to open the related document in a new tab.
Views
The Views pane shows document views, with links to the raw XML data for each view.
Click the Raw link to open a new browser tab showing the raw EDI message.
Hover on the Raw link to reveal these action icons:
- View: Click to view the document in a dialog window.
- Save: Click to save the document as a text file.
- Copy: Click to copy the document's contents to your system's clipboard.
- Print: Click to open your browser's print dialog.
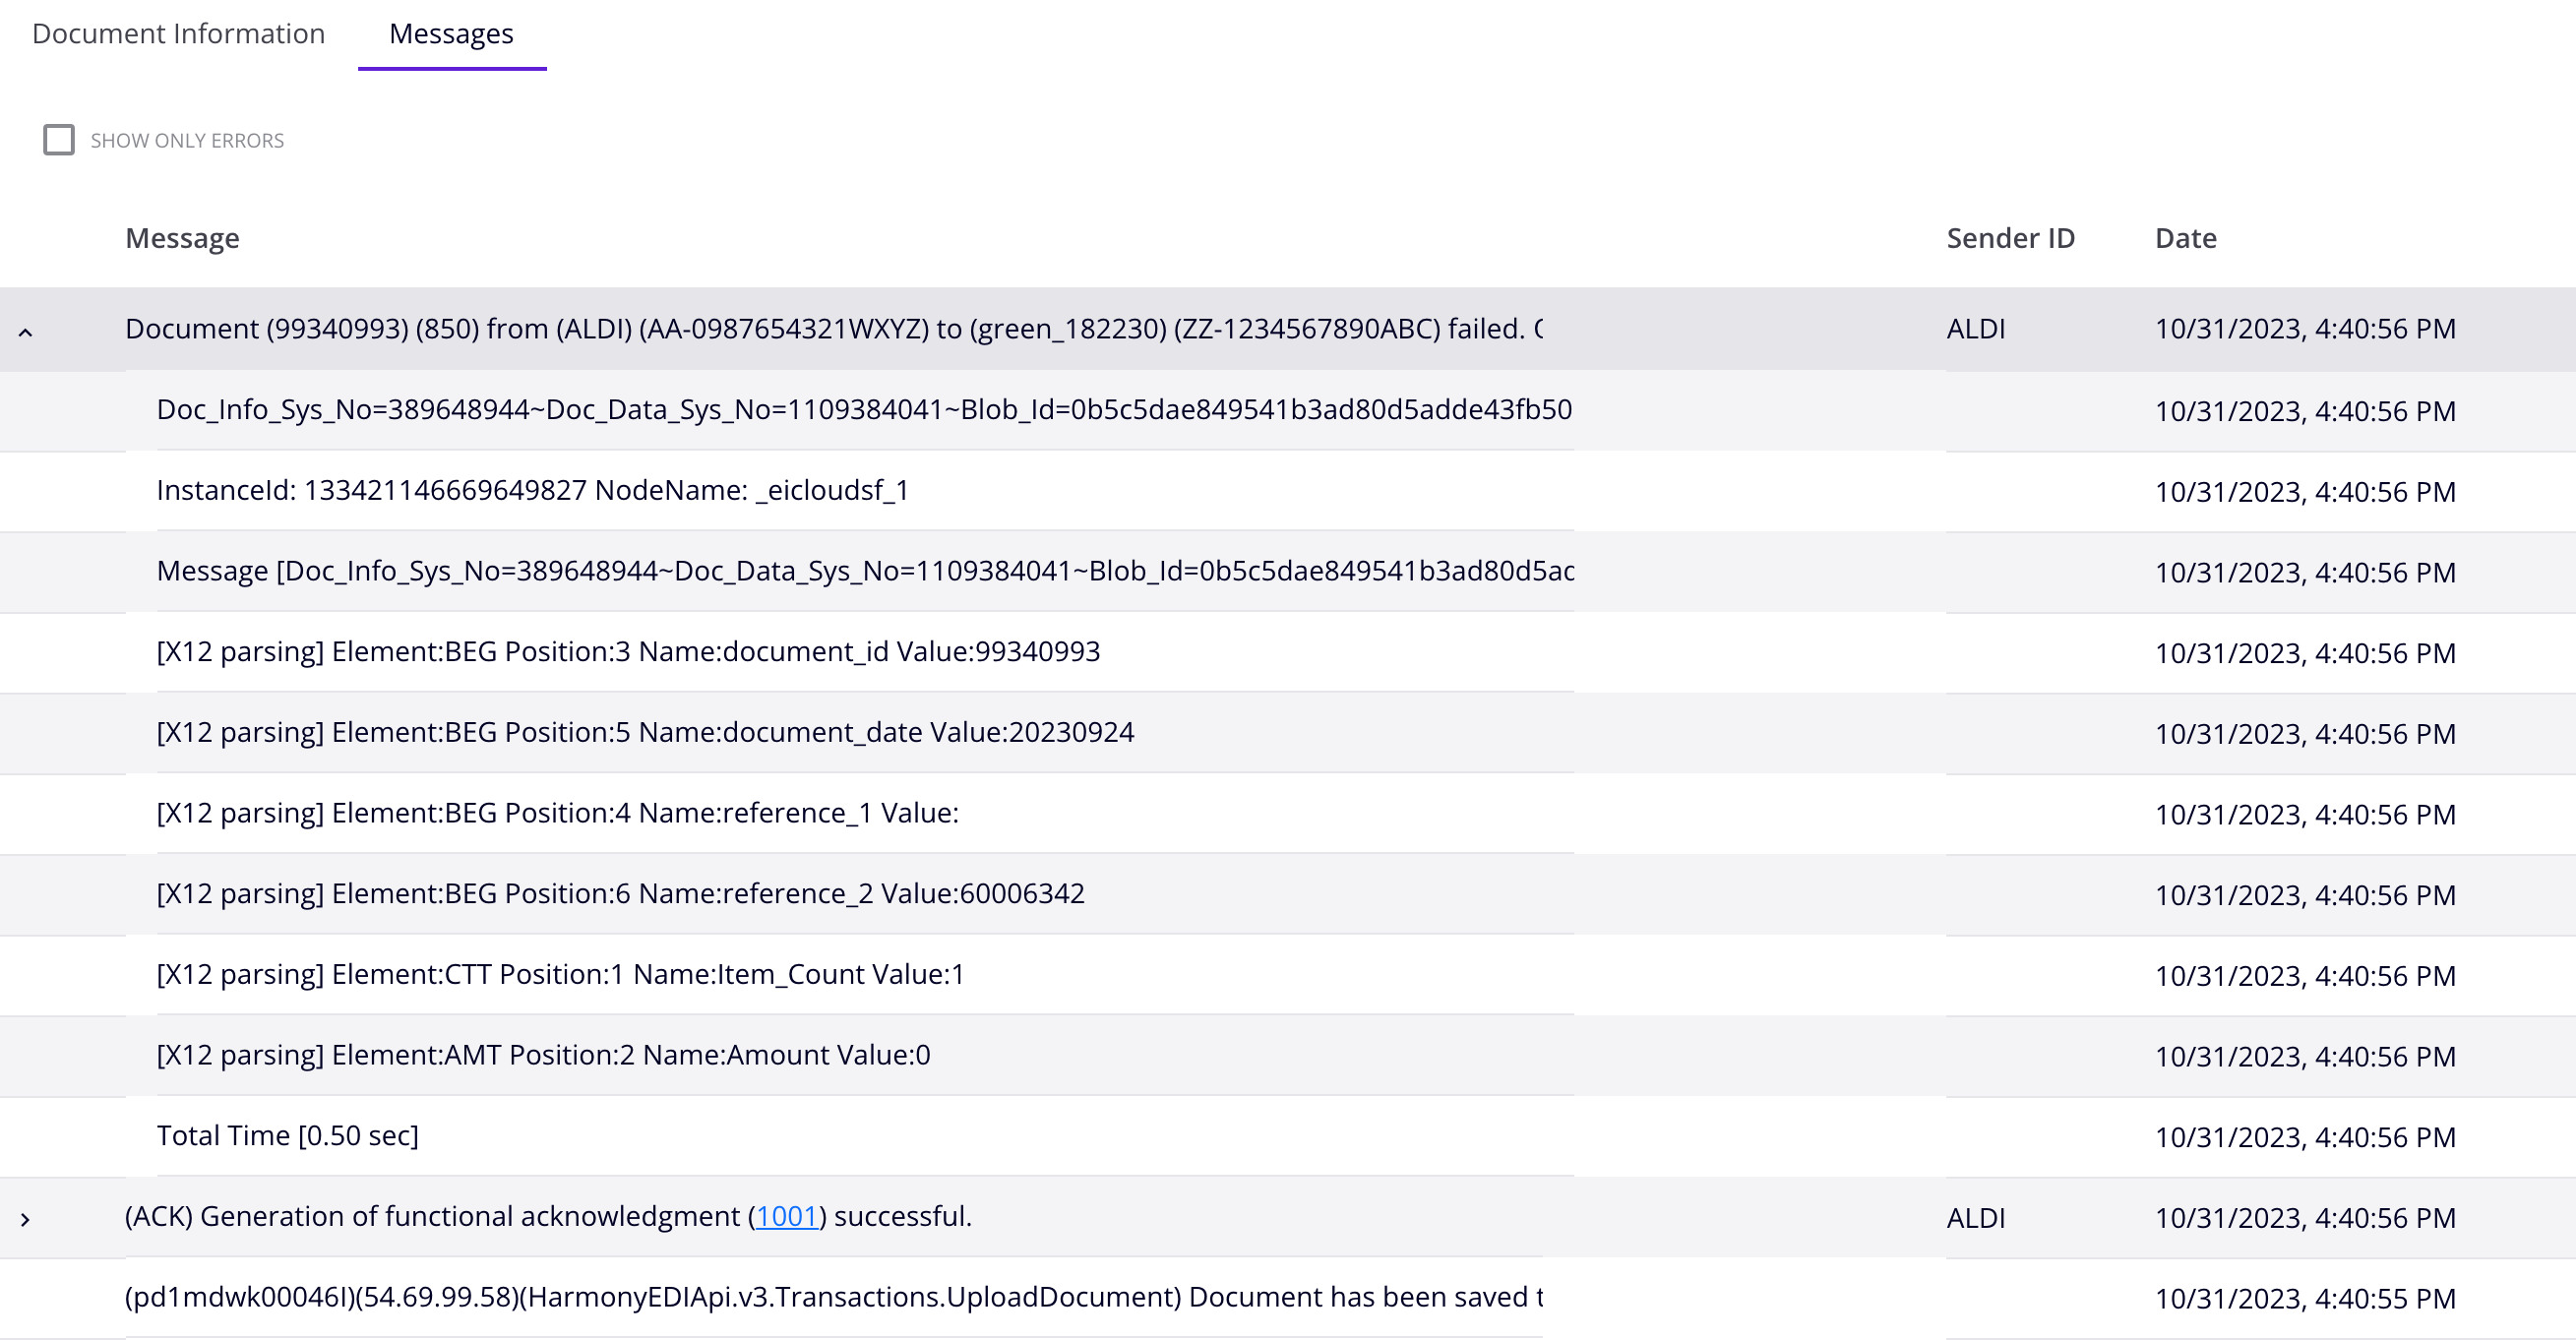
Messages
Select this tab to see and filter messages related to the transaction:

The messages pane contains the following:
- Show Only Errors: Filter messages. Enable to show only errors.
-
Expand: Show a message's child messages:
When expanded, click the collapse icon to hide child messages.