Azure AD SAML 2.0
Introduction
Important
Azure Active Directory (Azure AD) is now known as Microsoft Entra ID.
Harmony supports single sign-on (SSO) with Microsoft Azure Active Directory (Azure AD) using SAML 2.0. This page shows how to set up and test Harmony SSO with Azure AD by following these steps:
- Set Up a SAML Application in Azure AD
Configure Harmony as an application in the Microsoft Azure portal. As part of this process, you will also obtain the identity provider metadata and assign users to the application. - Construct the Service Provider Metadata
Construct the service provider metadata you will need to use as input for configuring SSO in Harmony. - Configure SSO in Harmony
Configure and test Azure AD as the SSO provider in the Harmony Portal. You will need to use the identity provider metadata and service provider metadata obtained in the previous steps. - Test SSO in Azure AD
Finally, test from within the Microsoft Azure portal to confirm that SSO is working.
After SSO is configured in both Azure AD and Harmony, members of your Harmony organization will be able to use their Azure AD credentials to log in to Harmony.
For additional information, see Microsoft's Single sign-on SAML protocol documentation.
Prerequisites
To set up Azure AD as an identity provider, Microsoft Azure AD Premium P2 edition is required.
SAML and Callback URLs
During configuration, the SAML and callback URLs referenced throughout this page should be replaced with the URL values appropriate for your region (see Finding My Region).
SAML URLs
- NA:
https://na-east.jitterbit.com/jitterbit-cloud-mgmt-console/saml - EMEA:
https://emea-west.jitterbit.com/jitterbit-cloud-mgmt-console/saml - APAC:
https://apac-southeast.jitterbit.com/jitterbit-cloud-mgmt-console/saml
Callback URLs
- NA:
https://na-east.jitterbit.com/jitterbit-cloud-mgmt-console/login/studio/callback - EMEA:
https://emea-west.jitterbit.com/jitterbit-cloud-mgmt-console/login/studio/callback - APAC:
https://apac-southeast.jitterbit.com/jitterbit-cloud-mgmt-console/login/studio/callback
1. Set Up a SAML Application in Azure AD
Follow these steps to set up Harmony as a SAML application in the Microsoft Azure portal. As part of this process, you will also obtain the identity provider metadata and assign users to the application.
-
Log in to the Microsoft Azure portal.
-
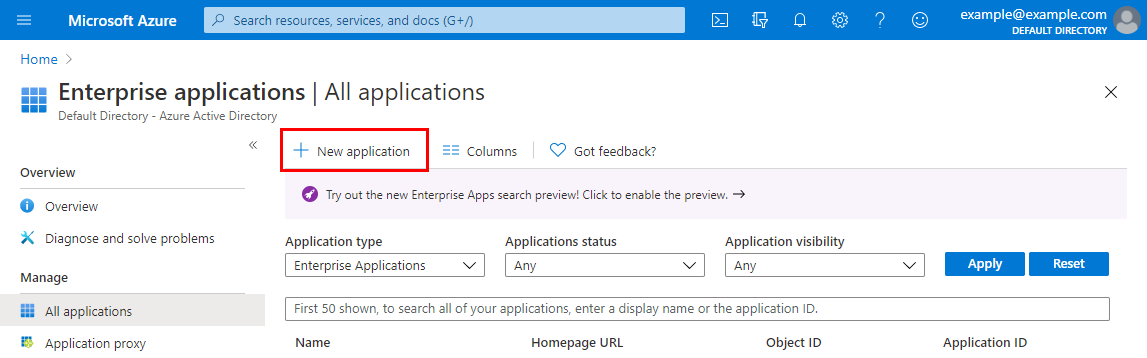
In the Microsoft Azure portal, go to the Enterprise applications blade and click New application:
-
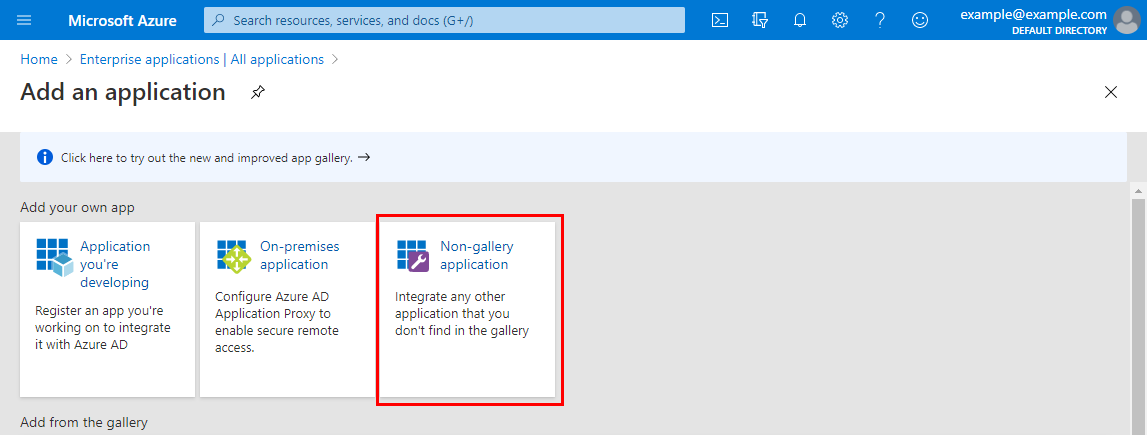
On the Add an application screen under Add your own app, select Non-gallery application:
-
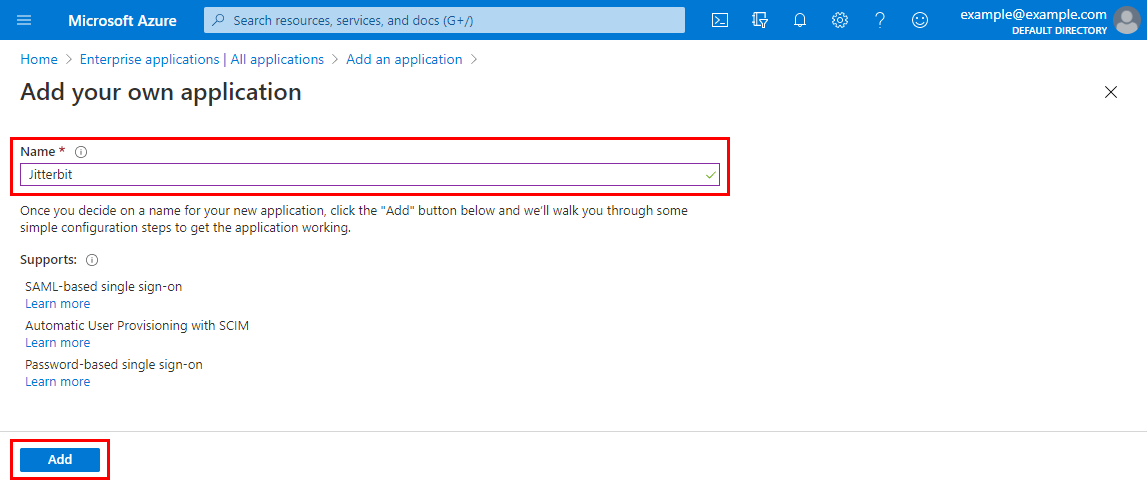
On the Add your own application screen, enter a name for the new application, such as Jitterbit. Then click Add:
-
On the Overview screen for the new application, under the Manage category on the left, select Single sign-on:
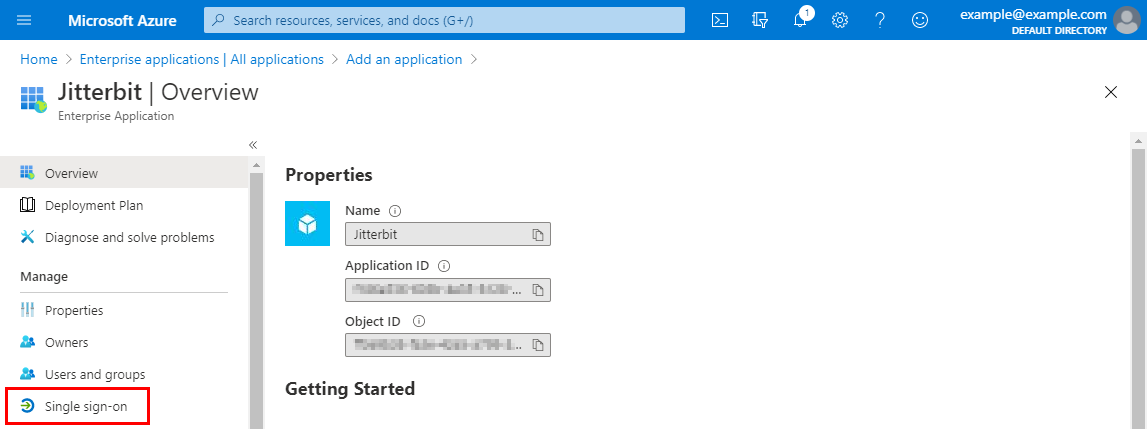
-
On the Single sign-on screen for the new application, under Select a single sign-on method, select SAML:
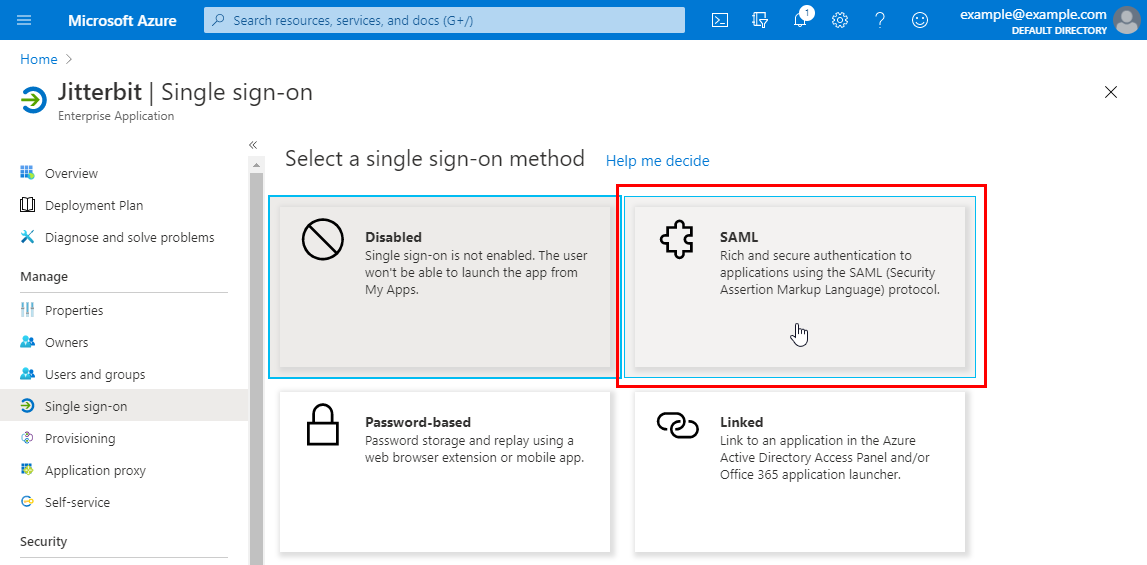
-
On the SAML-based Sign-on screen, edit the first step, Basic SAML Configuration:

-
On the Basic SAML Configuration screen, enter the following into these configuration fields, then click Save and close. For more information about each parameter, see the Microsoft Azure documentation Configure SAML-based single sign-on.
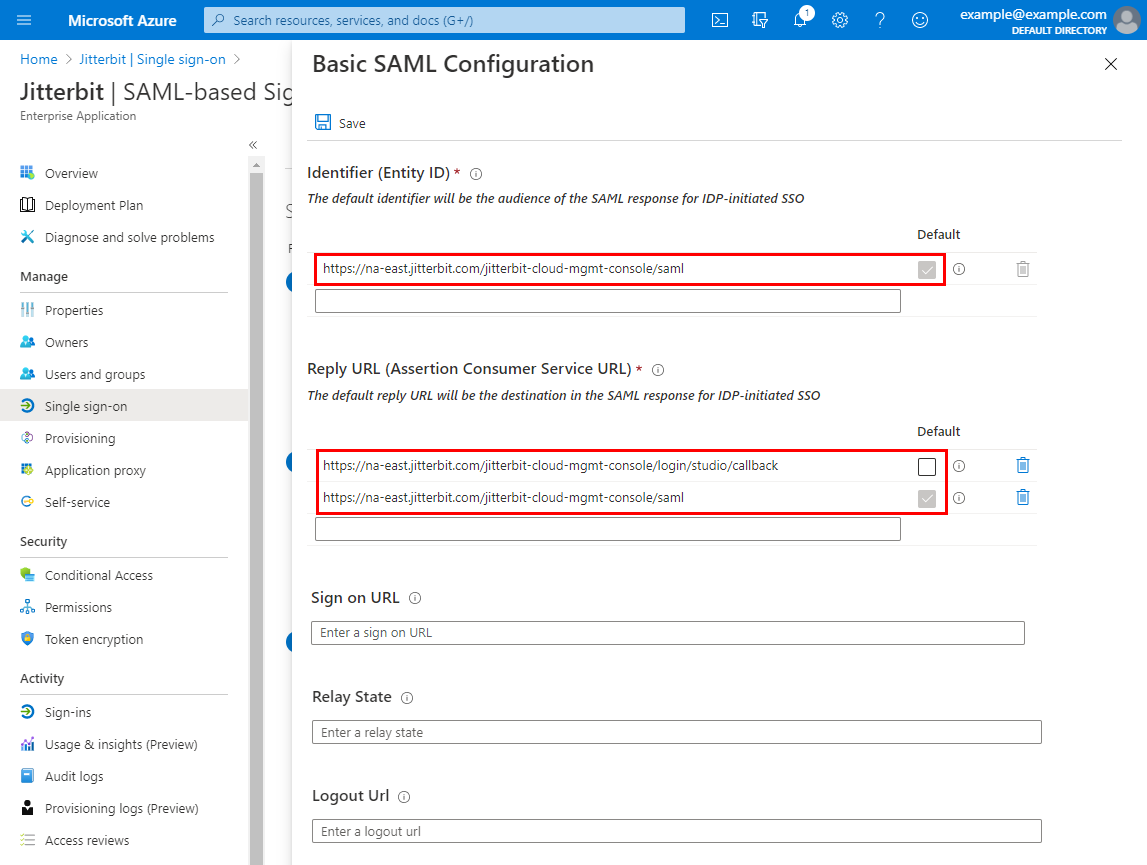
- Identifier (Entity ID): Enter the SAML URL for the Harmony region (see SAML URLs). The Default checkbox should be selected.
- Reply URL (Assertion Consumer Service URL): On separate lines, enter the callback and SAML URLs for the Harmony region (see SAML and Callback URLs). The Default checkbox should be selected for the SAML URL.
-
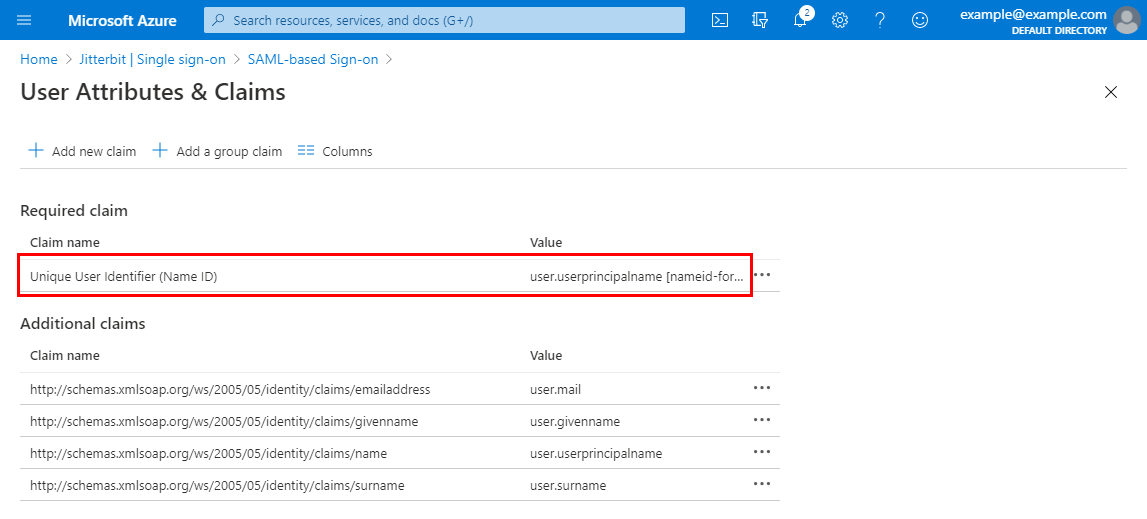
On the SAML-based Sign-on screen, edit the second step, User Attributes & Claims:
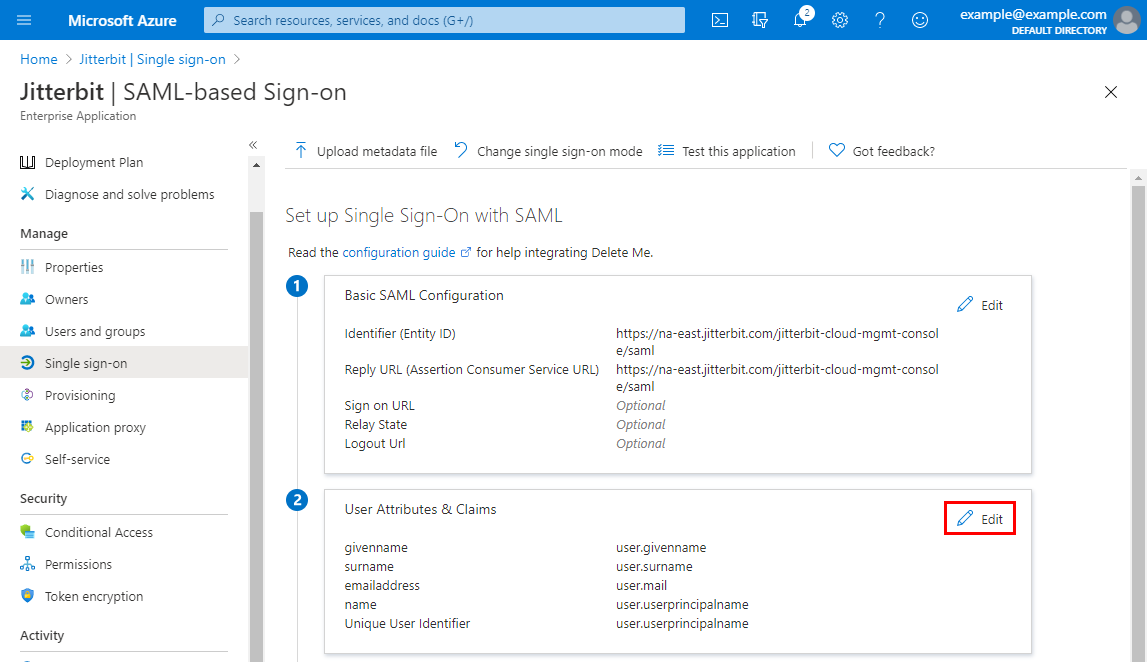
-
By default, Microsoft Azure uses the user.userprincipalname as the identifier, which is onemicrosoft.com. This needs to be updated to user.mail. To open the claim for modifying, click the row with a Claim name of Unique User Identifier (Name ID):
-
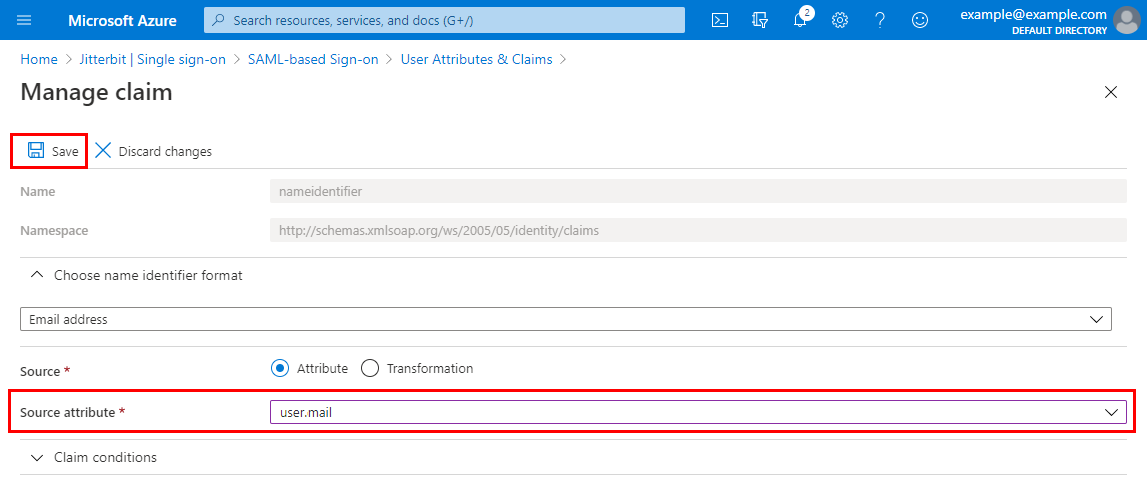
On the Manage claim screen, change the Source attribute field from user.userprincipalname to user.mail. Then click Save and close.
-
On the SAML-based Sign-on screen, in the third step, SAML Signing Certificate, download the Federation Metadata XML. (You will need this metadata when configuring SSO in Harmony for the Identity Provider Metadata field.)
Important
Multiple certificate definitions (
<X509Data>elements) in the metadata are supported with agents version 10.84 / 11.22 and later.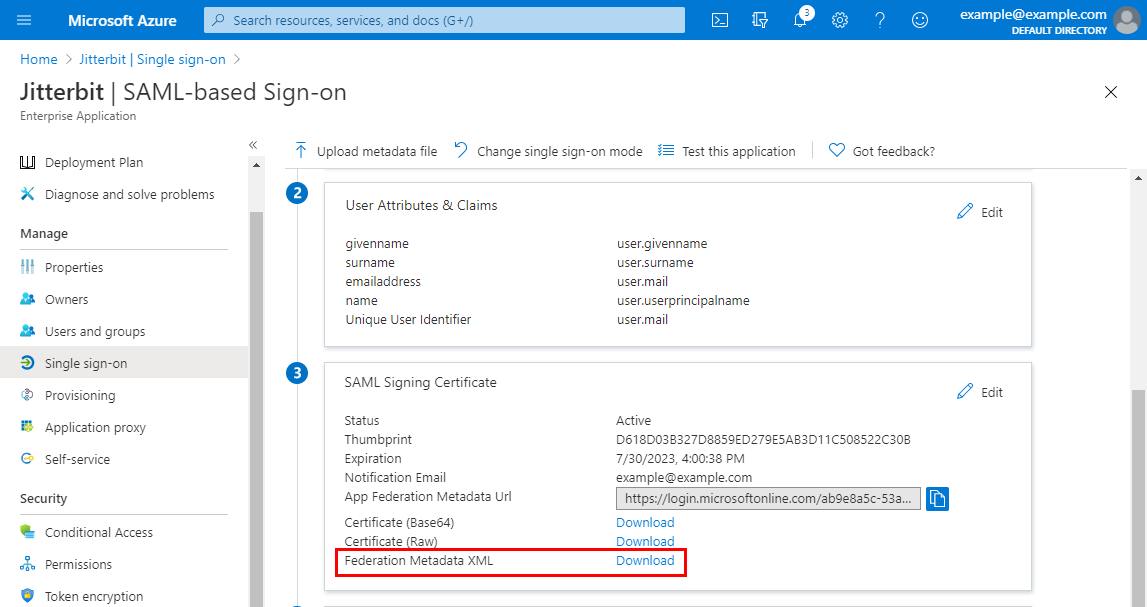
-
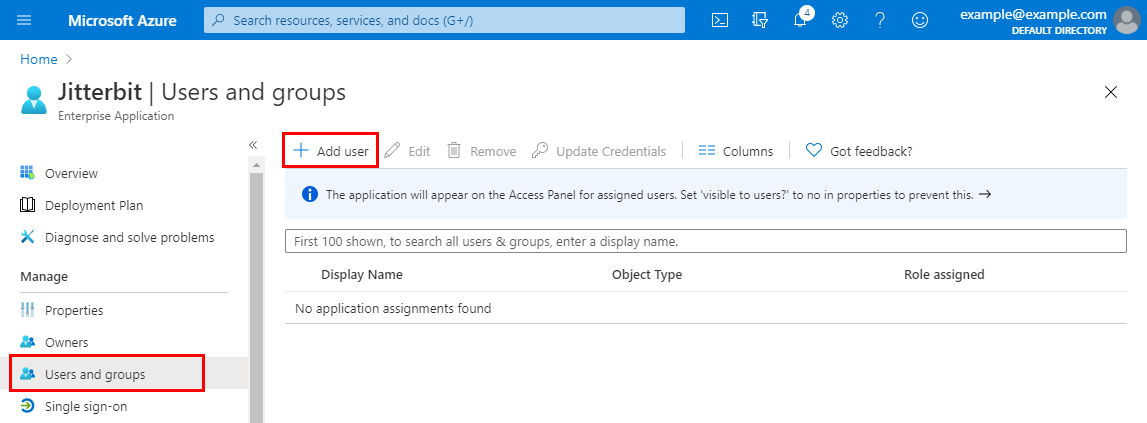
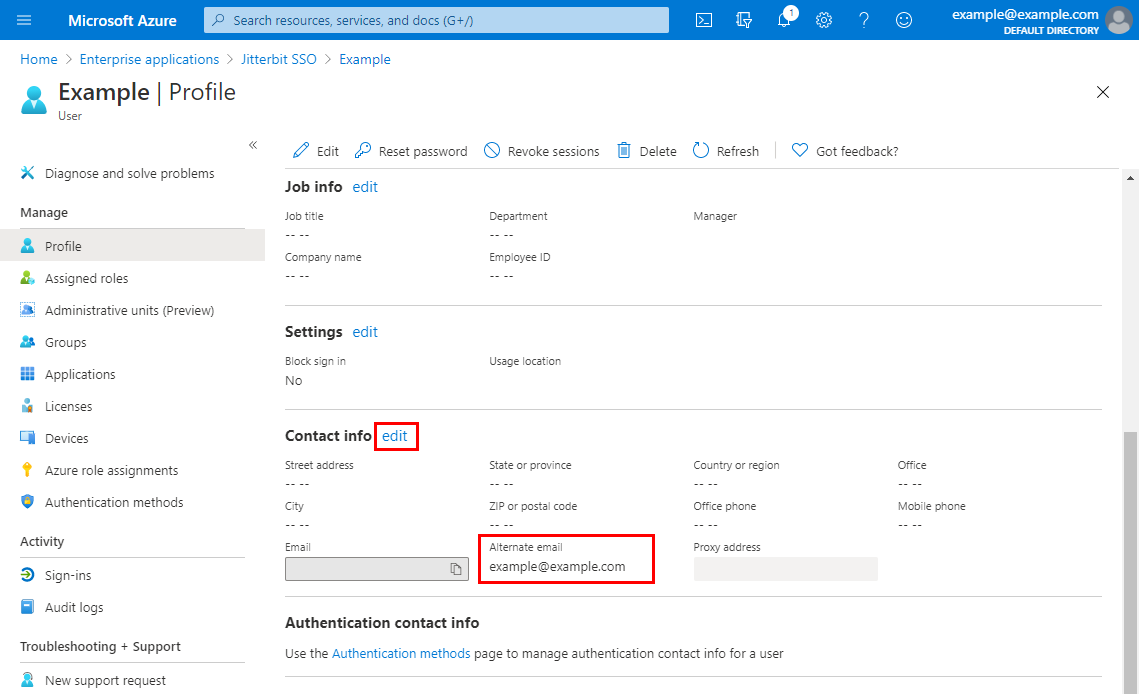
Under the Manage category on the left, select Users and groups. Then click Add user and and add each member of the Harmony organization that will log in to Harmony using Azure AD credentials. Repeat for each user.
-
After adding each user, provide an Alternate email that matches the Harmony username.
Note
These users also need to be members of the Harmony organization with SSO enabled, as described under Add New Members in Register and Log In Using Harmony SSO.
2. Construct the Service Provider Metadata
Use these instructions to construct the input for the Service Provider Metadata field required for configuring SSO in Harmony.
WMC
This section shows how to construct the XML metadata for the Harmony Portal, to be entered for the WMC client.
Note
Although the user interface refers to WMC (the former name for the Management Console), the WMC Harmony client configuration applies to all of the web-based products accessible via the Harmony Portal.
Use the sample provided below, replacing the values for entityID and Location with the SAML URL for the Harmony region (see SAML URLs).
<md:EntityDescriptor xmlns:md="urn:oasis:names:tc:SAML:2.0:metadata"
    xmlns:ds="http://www.w3.org/2000/09/xmldsig#"
    entityID="https://na-east.jitterbit.com/jitterbit-cloud-mgmt-console/saml">
    <md:SPSSODescriptor
        protocolSupportEnumeration="urn:oasis:names:tc:SAML:2.0:protocol">
        <md:NameIDFormat>urn:oasis:names:tc:SAML:1.1:nameid-format:emailAddress</md:NameIDFormat>
        <md:AssertionConsumerService index="1" isDefault="true"
            Binding="urn:oasis:names:tc:SAML:2.0:bindings:HTTP-POST"
            Location="https://na-east.jitterbit.com/jitterbit-cloud-mgmt-console/saml"/>
    </md:SPSSODescriptor>
</md:EntityDescriptor>
Studio
This section shows how to construct the XML metadata for Design Studio, to be entered for the Studio client.
Use the sample provided below, replacing the value for entityID with the SAML URL and the value for Location with the callback URL for the Harmony region (see SAML and Callback URLs).
<md:EntityDescriptor xmlns:md="urn:oasis:names:tc:SAML:2.0:metadata"
    xmlns:ds="http://www.w3.org/2000/09/xmldsig#"
    entityID="https://na-east.jitterbit.com/jitterbit-cloud-mgmt-console/saml">
    <md:SPSSODescriptor
        protocolSupportEnumeration="urn:oasis:names:tc:SAML:2.0:protocol">
        <md:NameIDFormat>urn:oasis:names:tc:SAML:1.1:nameid-format:emailAddress</md:NameIDFormat>
        <md:AssertionConsumerService index="1" isDefault="true"
            Binding="urn:oasis:names:tc:SAML:2.0:bindings:HTTP-POST"
            Location="https://na-east.jitterbit.com/jitterbit-cloud-mgmt-console/login/studio/callback"/>
    </md:SPSSODescriptor>
</md:EntityDescriptor>
3. Configure SSO in Harmony
Follow the instructions for Configure SSO in the Management Console. When entering information into the Edit Organization SSO Provider Info screen, use the values obtained above:
- Identity Provider Metadata: Paste the contents of the Federation Metadata XML downloaded during step 12 of Set Up a SAML Application in Azure AD above.
- Service Provider Metadata: Paste the contents of the metadata constructed in Construct the Service Provider Metadata above for the WMC and Studio Harmony clients.
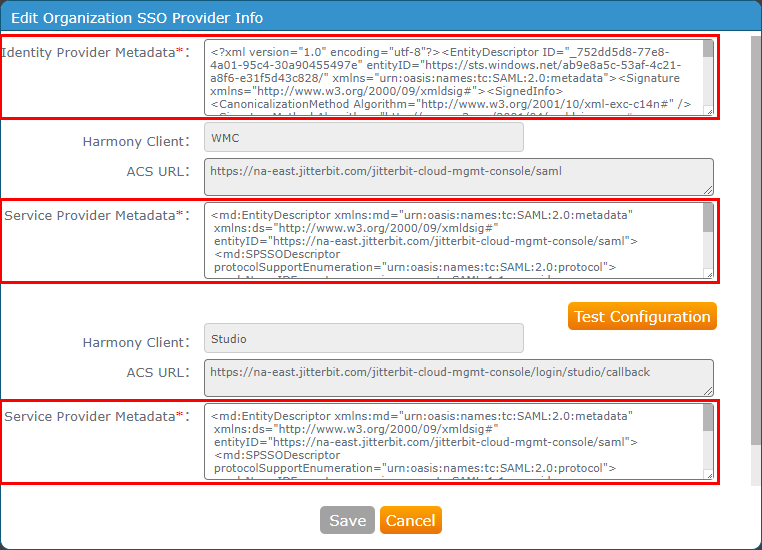
Click Test Configuration for each Harmony client and then click Save. Both clients need to be successfully tested before the Save button becomes enabled.
4. Test SSO in Azure AD
Test from within the Microsoft Azure portal to confirm that SSO is working. If you still have the browser open from creating the SAML application, you can begin at step 4 below.
-
Log in to the Microsoft Azure portal.
-
Go to the Enterprise applications blade and click the SAML application you just created.
-
Under the Manage category on the left, select Single sign-on.
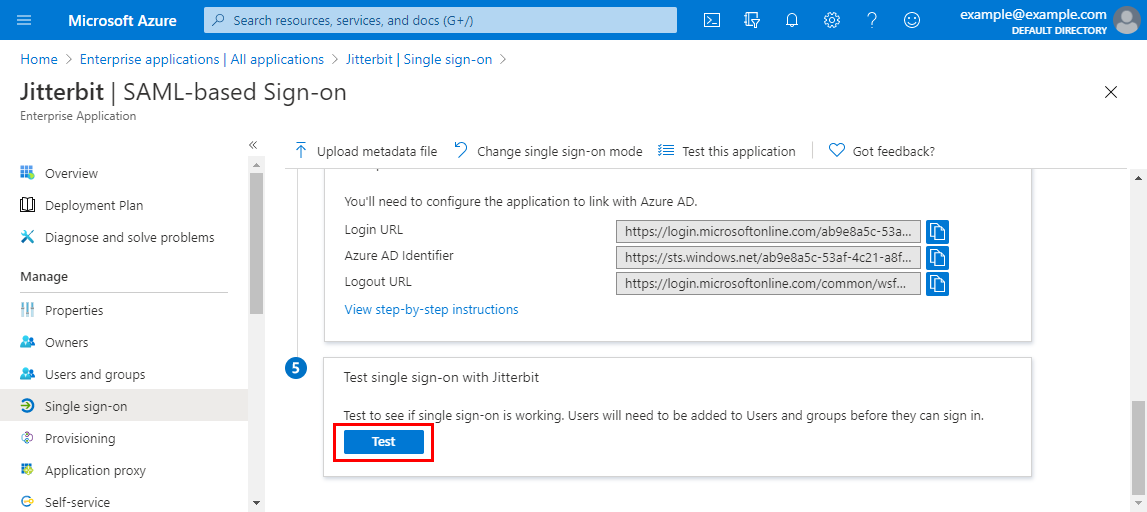
-
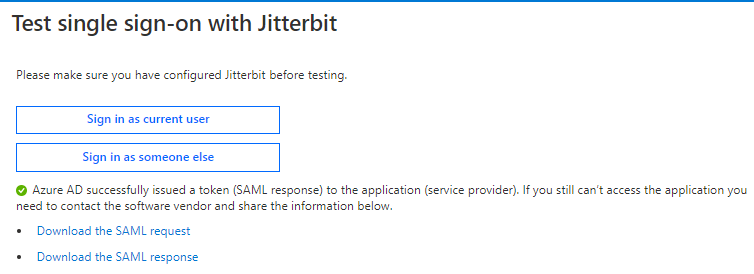
On the SAML-based Sign-on screen, in the fifth step, Test single sign-on with \<Application>, click Test:
-
In the next screen, click Sign in as current user:
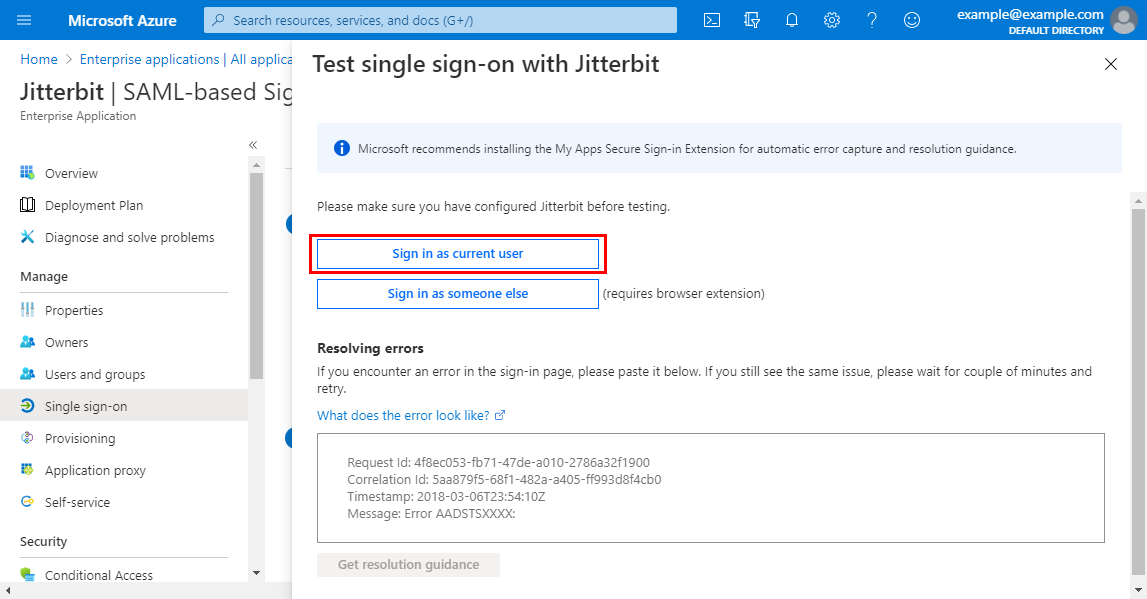
-
If the test is successful, the response will indicate that Azure AD has successfully issued a token (SAML response) to the application (service provider):