Okta SAML 2.0
Introduction
Harmony supports single sign-on (SSO) with Okta using SAML 2.0. This page shows how to set up and test Harmony SSO with Okta by following these steps:
- Set Up a SAML Application in Okta
Configure Harmony as an application in Okta. As part of this process, you will also obtain the identity provider metadata and assign users to the application. - Download the Identity Provider Metadata
Obtain the identity provider metadata that you will need to use as input for configuring SSO in Harmony. - Assign Users
Assign users in Okta to the Harmony SAML application. - Construct Service Provider Metadata
Construct the service provider metadata you will need to use as input for configuring SSO in Harmony. - Configure SSO in Harmony
Configure and test Okta as the SSO provider in the Harmony Portal. You will need to use the identity provider metadata and service provider metadata obtained in the previous steps.
After SSO is configured in both Okta and Harmony, members of your Harmony organization will be able to use their Okta credentials to log in to Harmony.
For additional information, see the Okta documentation on Build a Single Sign-on (SSO) integration.
SAML and Callback URLs
During configuration, the SAML and callback URLs referenced throughout this page should be replaced with the URL values appropriate for your region (see Finding My Region).
SAML URLs
- NA:
https://na-east.jitterbit.com/jitterbit-cloud-mgmt-console/saml - EMEA:
https://emea-west.jitterbit.com/jitterbit-cloud-mgmt-console/saml - APAC:
https://apac-southeast.jitterbit.com/jitterbit-cloud-mgmt-console/saml
Callback URLs
- NA:
https://na-east.jitterbit.com/jitterbit-cloud-mgmt-console/login/studio/callback - EMEA:
https://emea-west.jitterbit.com/jitterbit-cloud-mgmt-console/login/studio/callback - APAC:
https://apac-southeast.jitterbit.com/jitterbit-cloud-mgmt-console/login/studio/callback
1. Set Up a SAML Application in Okta
Follow these steps to set up Harmony as a SAML application:
-
Log in to your Okta organization as a user with administrative privileges.
Caution
In order to set up Harmony SSO, your Okta username must match your Harmony email address. This applies to the members of your Harmony organization as well, unless they are configured to bypass SSO and instead use their Harmony credentials (see Configuring SSO in the Management Console).
-
On the main menu, go to Applications > Applications, then click Create App Integration.
-
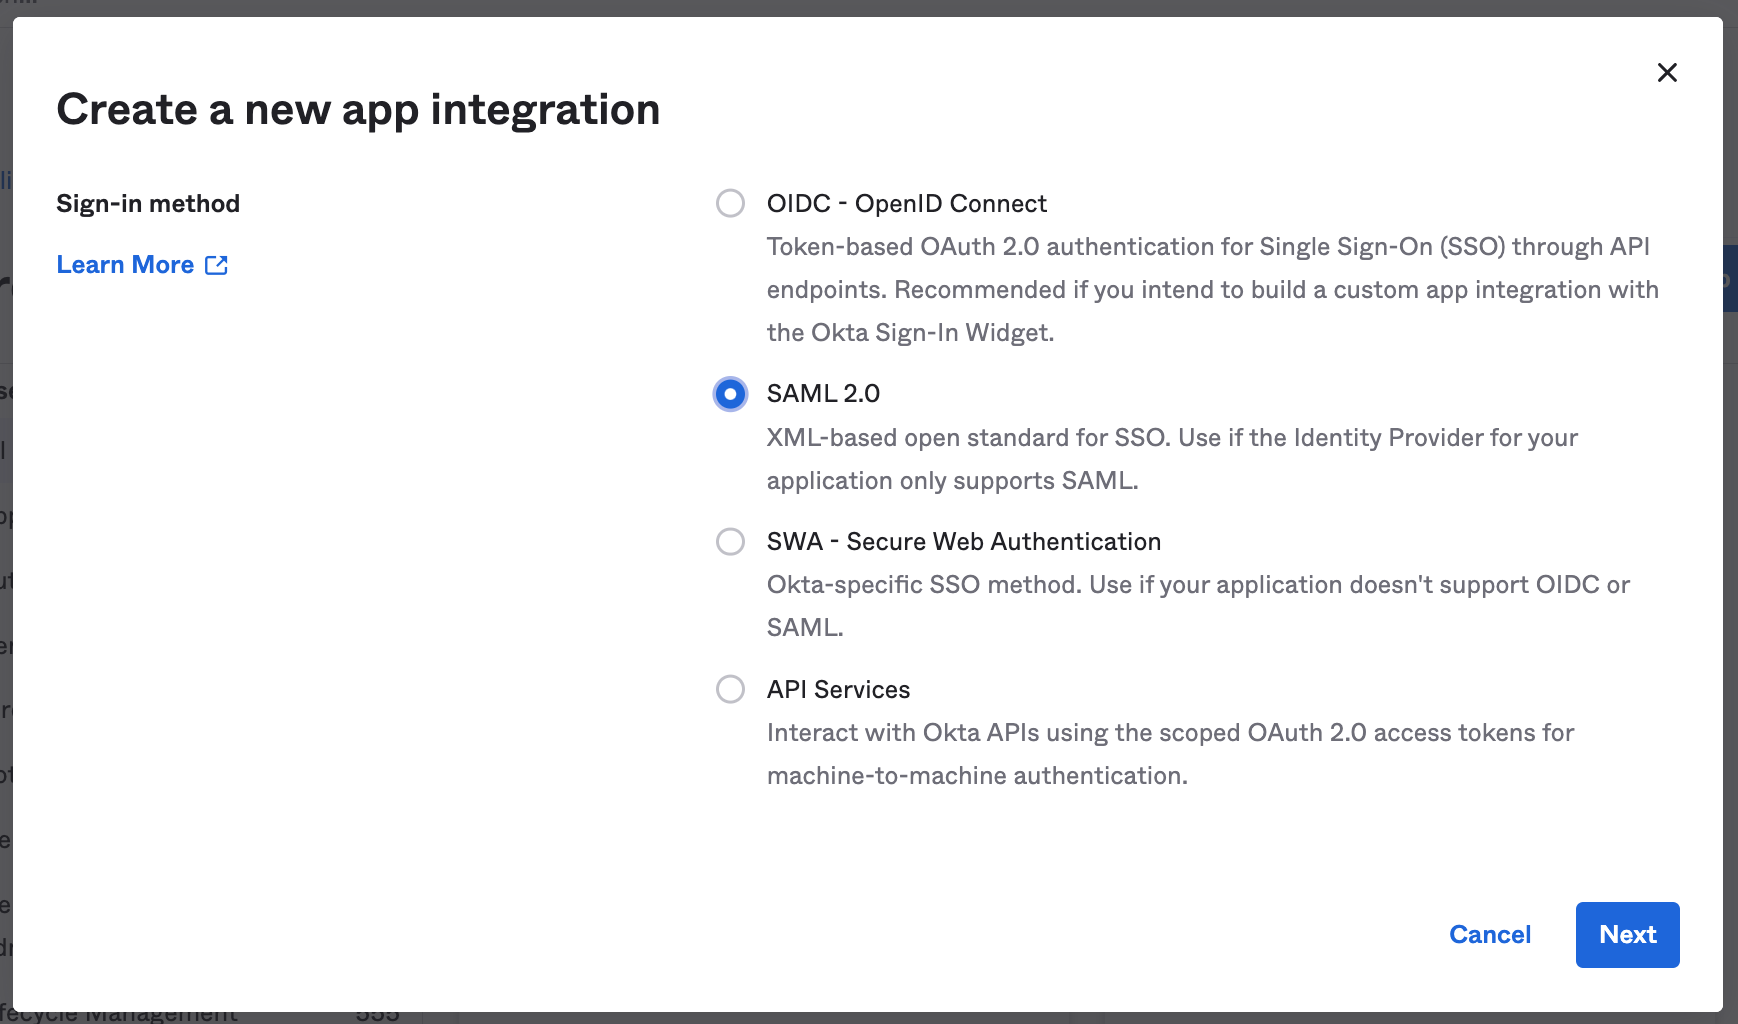
In the Create a new app integration window, select SAML 2.0 and click Next.
-
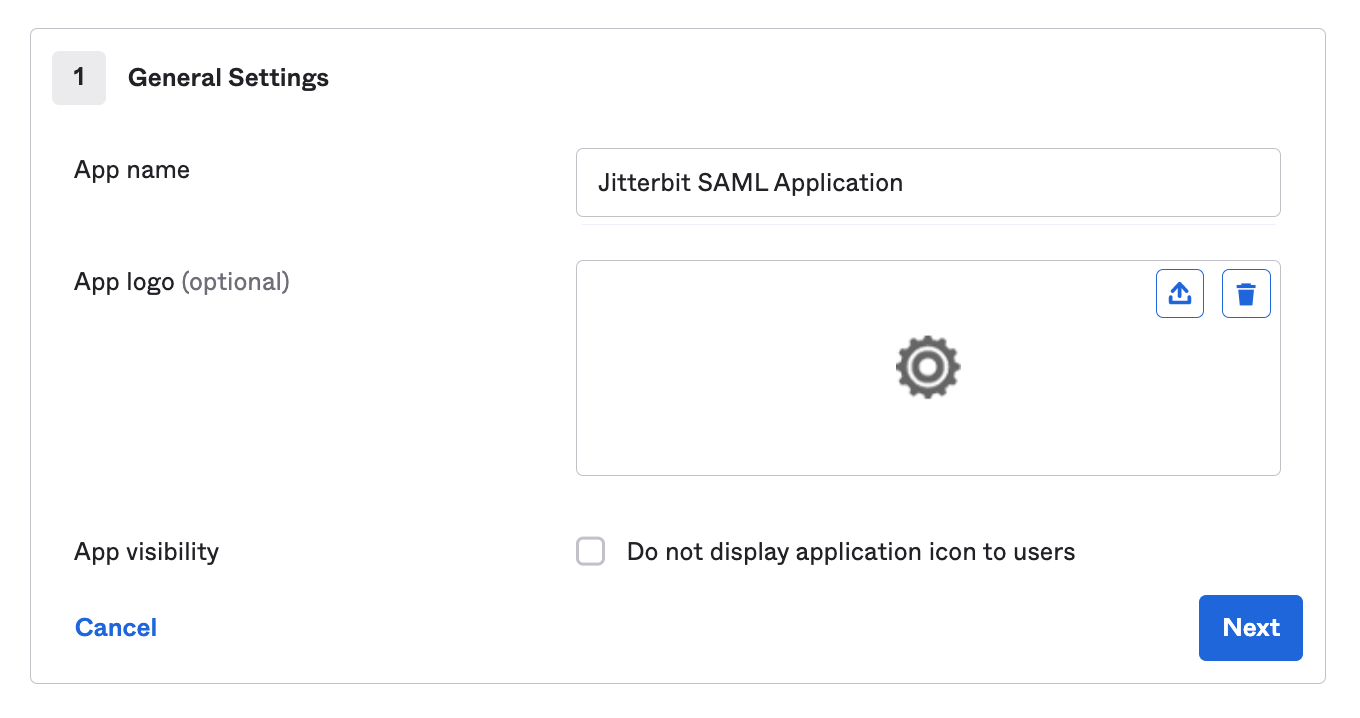
On the Create SAML Integration page, several steps walk you through configuring the new app. In the first step, General Settings, enter an App name for Jitterbit, such as Jitterbit SAML Application, and click Next:
-
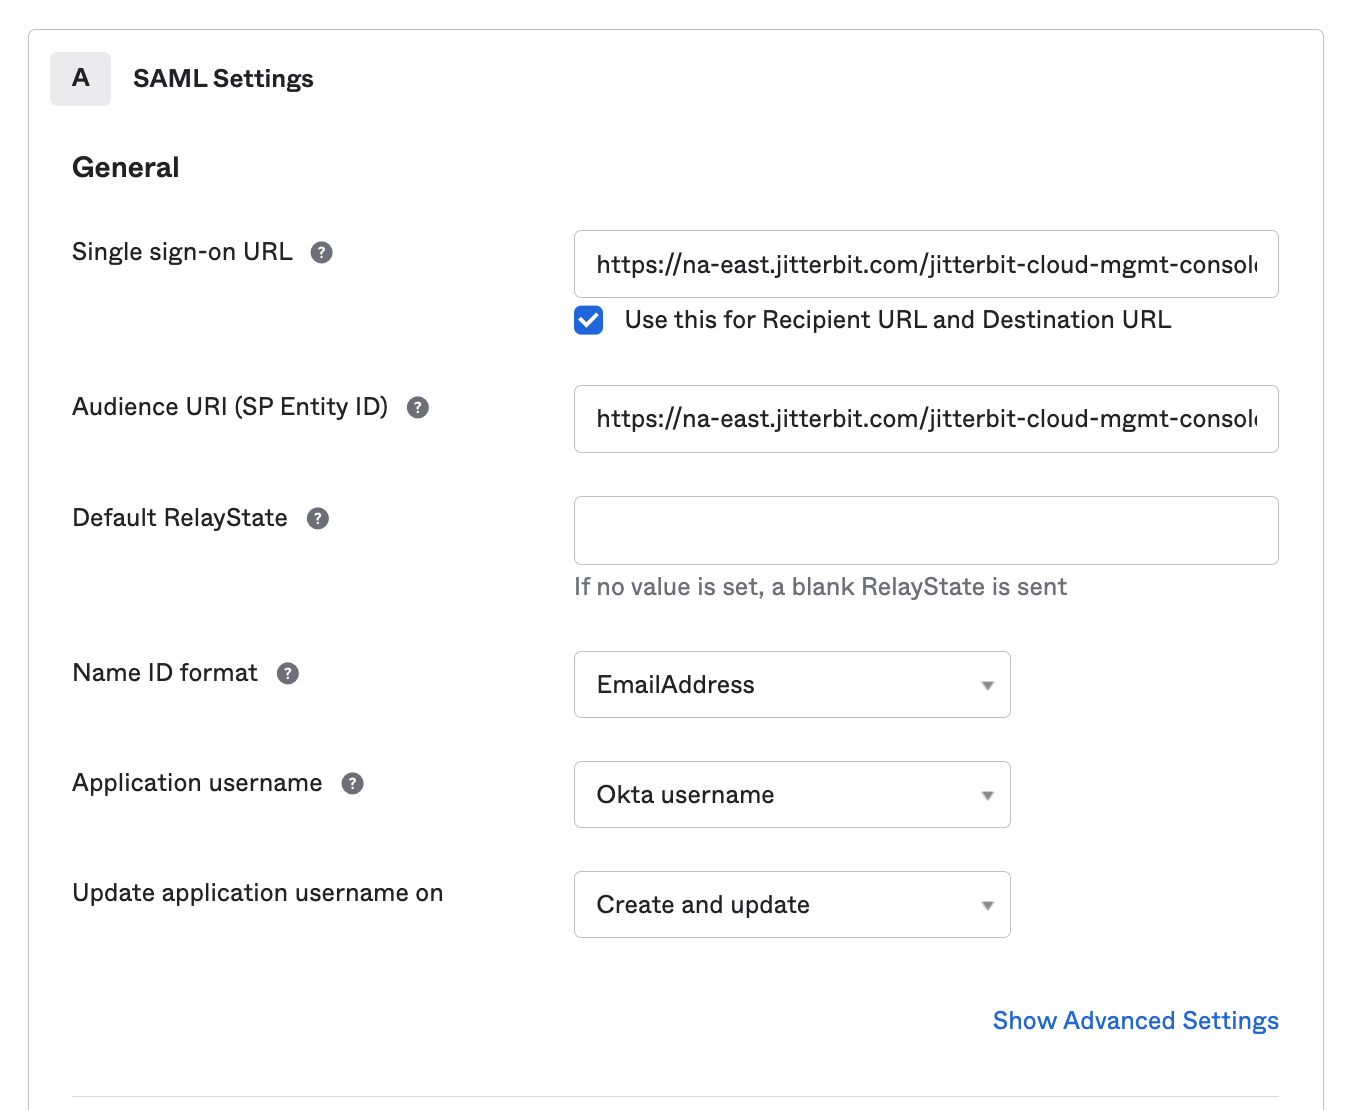
In the next step, Configure SAML, provide the following information under part A, SAML Settings. Do not change any other default settings. When finished, you can skip part B and click Next to continue:
-
Single sign on URL: Enter the SAML URL for the Harmony region (see SAML URLs).
-
Audience URI (SP Entity ID): Enter the appropriate SAML URL for the Harmony region (see SAML URLs).
-
Name ID format: Click the dropdown and choose the EmailAddress option.
-
Show Advanced Settings: Click to show additional fields. Under Other Requestable SSO URLs, click Add Another. Then enter the callback URL for the Harmony region (see Callback URLs).
-
-
Complete the last step, Feedback, and click Finish to finish creating the app.
2. Download the Identity Provider Metadata
These steps show how to obtain the identity provider metadata from Okta. You will need this metadata when configuring SSO in Harmony for the Identity Provider Metadata field.
-
Go to the Sign On tab of your newly created Harmony application. If continuing from Set Up a SAML Application in Okta, you will already be here.
-
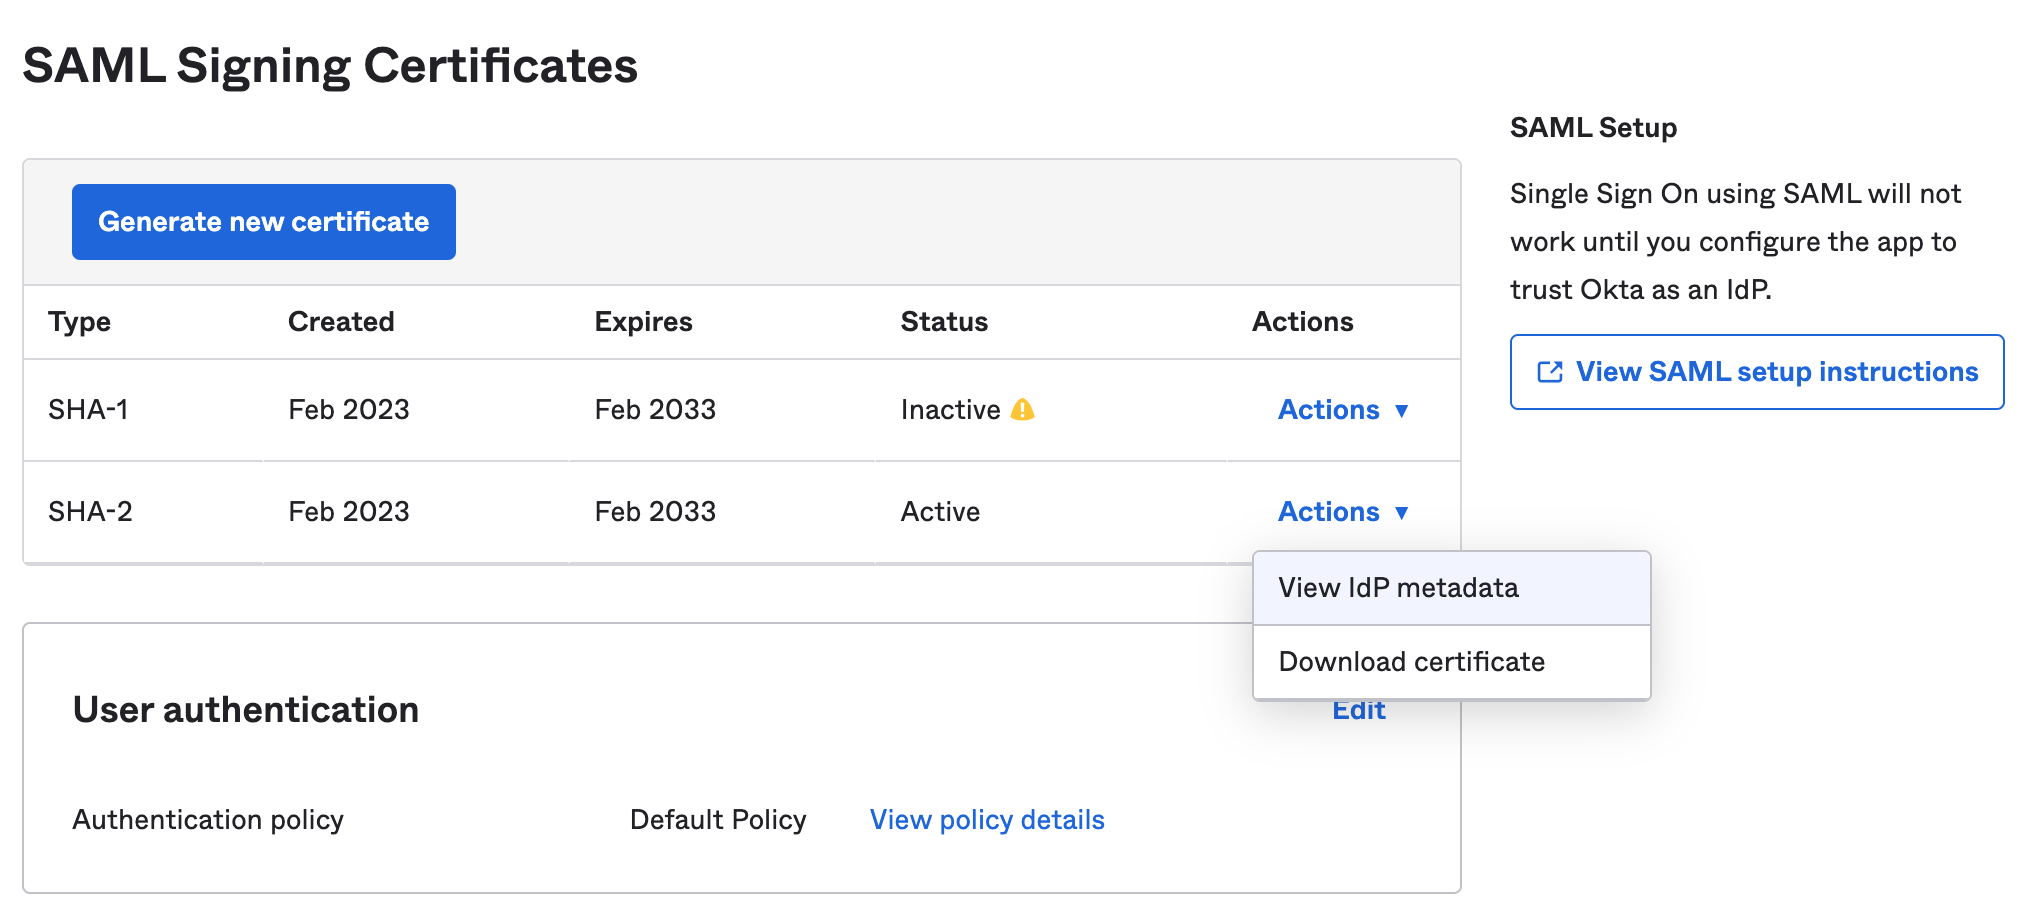
In the Actions column, select Actions > View IdP Metadata to download the metadata file needed by Jitterbit:
-
The contents of the metadata file are similar to the following sample. You will need to use your own identity provider metadata as input when setting up SSO in Harmony.
Sample Identity Provider Metadata
<md:EntityDescriptor xmlns:md="urn:oasis:names:tc:SAML:2.0:metadata" entityID="http://www.okta.com/exknvfdjbL8smSRvK2p6"><md:IDPSSODescriptor WantAuthnRequestsSigned="false" protocolSupportEnumeration="urn:oasis:names:tc:SAML:2.0:protocol"><md:KeyDescriptor use="signing"><ds:KeyInfo xmlns:ds="http://www.w3.org/2000/09/xmldsig#"><ds:X509Data><ds:X509Certificate>MIIDqjCCApKgAwIBAgIGAWFj+QgOMA0GCSqGSIb3DQEBCwUAMIGVMQswCQYDVQQGEwJVUzETMBEG
A1UECAwKQ2FsaWZvcm5pYTEWMBQGA1UEBwwNU2FuIEZyYW5jaXNjbzENMAsGA1UECgwET2t0YTEU
MBIGA1UECwwLU1NPUHJvdmlkZXIxFjAUBgNVBAMMDWppdHRlcmJpdGJsdWUxHDAaBgkqhkiG9w0B
CQEWDWluZm9Ab2t0YS5jb20wHhcNMTgwMjA1MDMxNzQwWhcNMjgwMjA1MDMxODQwWjCBlTELMAkG
A1UEBhMCVVMxEzARBgNVBAgMCkNhbGlmb3JuaWExFjAUBgNVBAcMDVNhbiBGcmFuY2lzY28xDTAL
BgNVBAoMBE9rdGExFDASBgNVBAsMC1NTT1Byb3ZpZGVyMRYwFAYDVQQDDA1qaXR0ZXJiaXRibHVl
MRwwGgYJKoZIhvcNAQkBFg1pbmZvQG9rdGEuY29tMIIBIjANBgkqhkiG9w0BAQEFAAOCAQ8AMIIB
CgKCAQEAwRuDKQWs/uWFEulxYk1/V436/zhy/XxAL3swKUdfFlevC4XZcQtTdpspgwdt0TIgTpz1
dZGx5ystxz1slZ5e9jk20iHAsRuzKKeL657DDFHlG8Qg7HCg8B55TKKhTUsYQLikqeWx8R7F+rHh
dG6eEJut4/CHOMlb/G4Ynrq8tpwlqVtaqLZrL2GPfEKUJVOvqxHeqVqmB7Pduh3E9/7rgEN6yXiL
6hISTRLIb13TGGyqpLPMRsgJnkMifQMI12OK0PQnFqRc2ES0JUnWhpv/WN4VYuvN3SgaIgE5VY86
C0J8IB6ljXx6uJj6EeC60KTmDUPtC1Au345jzBwY9yKLoQIDAQABMA0GCSqGSIb3DQEBCwUAA4IB
AQAD7Ba6pwUUmxCtiqKE4E4JwMMCUrlHghL80Vru3SHWU3GdMEM9kVizVUcM57QzyIlwx8KdCXbB
yfxo8Eh88mAYDRifLmeospLQvC5OhfF/5XKmsTa5JnF+bSB41iCZUsB88byLI1nARFZGznboQXK9
pT3egaEHsWffiIYR+Y2lcAW66OH6FEZ0lTy628q1LsuS/UruA3so+qFgPqTc0yiZEv65MZQWd1cg
qRlLK1bcoR4d5Qfo0nWFDBXWqX4LX4c5xe7zh4wtbiG1i9Oh8qWJp8KUmgfSkQf79mUhib9YvzBE
RdXU7eUS0/E3G21yLa9wQtHkEY3cIDs58AEIpuR0</ds:X509Certificate></ds:X509Data></ds:KeyInfo></md:KeyDescriptor><md:NameIDFormat>urn:oasis:names:tc:SAML:1.1:nameid-format:unspecified</md:NameIDFormat><md:NameIDFormat>urn:oasis:names:tc:SAML:1.1:nameid-format:emailAddress</md:NameIDFormat><md:SingleSignOnService Binding="urn:oasis:names:tc:SAML:2.0:bindings:HTTP-POST" Location="https://jitterbitblue.okta.com/app/jitterbitorg316974_jitterbitsamlapplication_1/exknvfdjbL8smSRvK2p6/sso/saml"/><md:SingleSignOnService Binding="urn:oasis:names:tc:SAML:2.0:bindings:HTTP-Redirect" Location="https://jitterbitblue.okta.com/app/jitterbitorg316974_jitterbitsamlapplication_1/exknvfdjbL8smSRvK2p6/sso/saml"/></md:IDPSSODescriptor></md:EntityDescriptor>
3. Assign Users
Follow these steps to assign users to the Jitterbit SAML application within Okta.
Note
These users also need to be members of the Harmony organization with SSO enabled, as described under Add New Members in Register and Log In Using Harmony SSO.
-
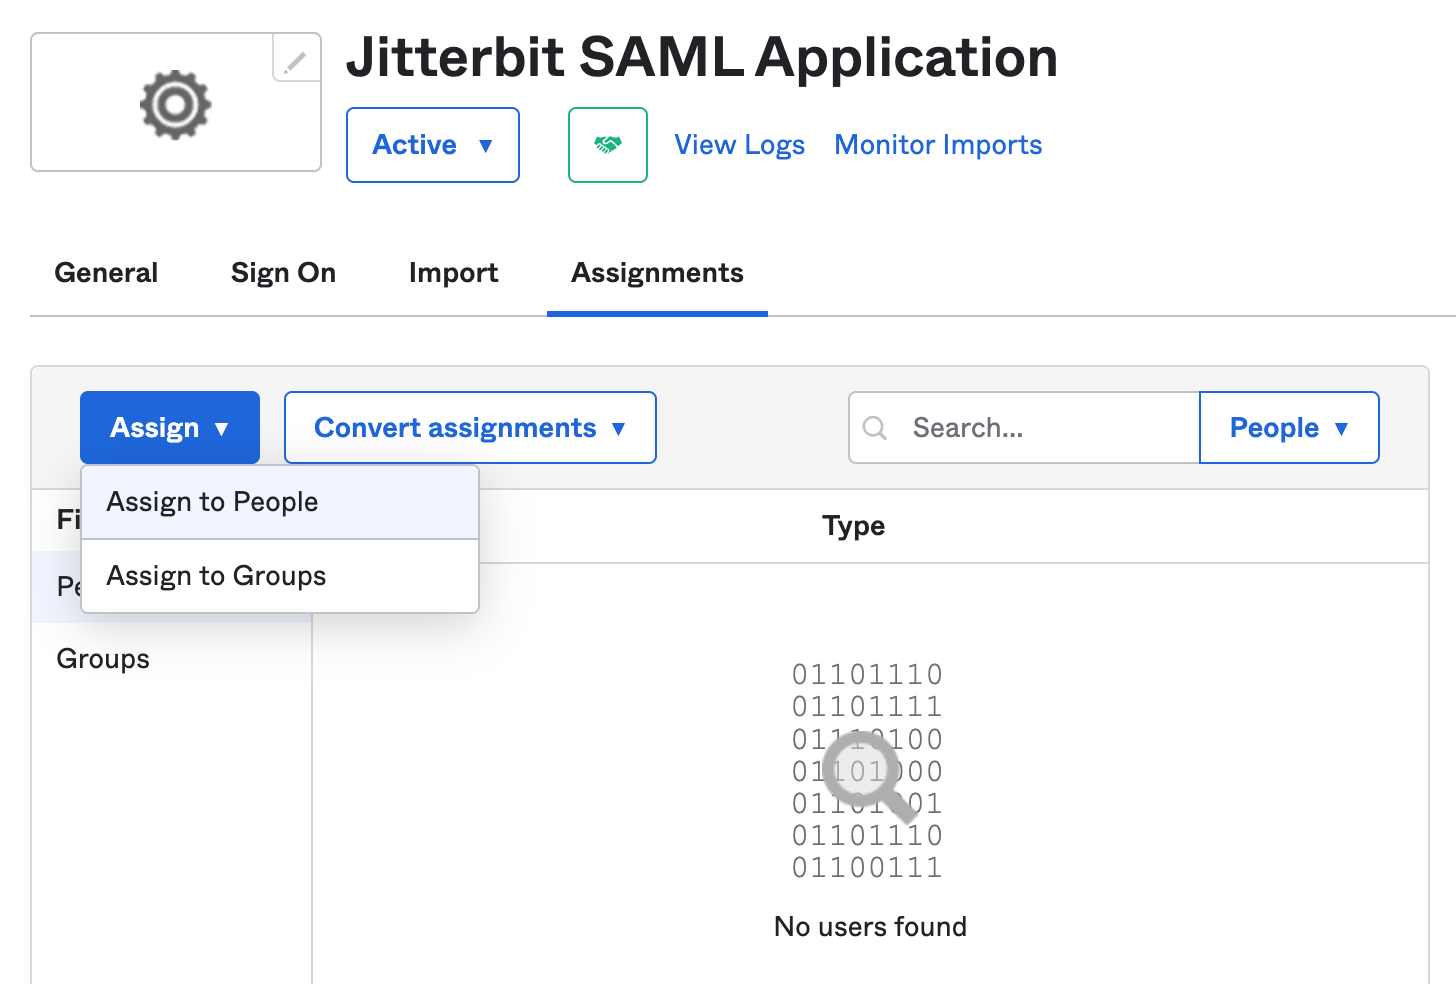
Go to the Assignments tab of your newly created Harmony application.
-
Click the Assign dropdown and select Assign to People. Then assign each member of the Harmony organization that will log in to Harmony using their Okta credentials. Repeat for each user.
-
When finished, click Done.
4. Construct Service Provider Metadata
Use these instructions to construct the input for the Service Provider Metadata field required for configuring SSO in Harmony.
WMC
This section shows how to construct the XML metadata for the Harmony Portal, to be entered for the WMC client.
Note
Although the user interface refers to WMC (the former name for the Management Console), the WMC Harmony client configuration applies to all of the web-based products accessible via the Harmony Portal.
Use the sample provided below, replacing the values for entityID and Location with the SAML URL for the Harmony region (see SAML URLs).
<md:EntityDescriptor xmlns:md="urn:oasis:names:tc:SAML:2.0:metadata"
    xmlns:ds="http://www.w3.org/2000/09/xmldsig#"
    entityID="https://na-east.jitterbit.com/jitterbit-cloud-mgmt-console/saml">
    <md:SPSSODescriptor
        protocolSupportEnumeration="urn:oasis:names:tc:SAML:2.0:protocol">
        <md:NameIDFormat>urn:oasis:names:tc:SAML:1.1:nameid-format:emailAddress</md:NameIDFormat>
        <md:AssertionConsumerService index="1" isDefault="true"
            Binding="urn:oasis:names:tc:SAML:2.0:bindings:HTTP-POST"
            Location="https://na-east.jitterbit.com/jitterbit-cloud-mgmt-console/saml"/>
    </md:SPSSODescriptor>
</md:EntityDescriptor>
Studio
This section shows how to construct the XML metadata for Design Studio, to be entered for the Studio client.
Use the sample provided below, replacing the value for entityID with the SAML URL and the value for Location with the callback URL for the Harmony region (see SAML and Callback URLs).
<md:EntityDescriptor xmlns:md="urn:oasis:names:tc:SAML:2.0:metadata"
    xmlns:ds="http://www.w3.org/2000/09/xmldsig#"
    entityID="https://na-east.jitterbit.com/jitterbit-cloud-mgmt-console/saml">
    <md:SPSSODescriptor
        protocolSupportEnumeration="urn:oasis:names:tc:SAML:2.0:protocol">
        <md:NameIDFormat>urn:oasis:names:tc:SAML:1.1:nameid-format:emailAddress</md:NameIDFormat>
        <md:AssertionConsumerService index="1" isDefault="true"
            Binding="urn:oasis:names:tc:SAML:2.0:bindings:HTTP-POST"
            Location="https://na-east.jitterbit.com/jitterbit-cloud-mgmt-console/saml"/>
    </md:SPSSODescriptor>
</md:EntityDescriptor>
5. Configure SSO in Harmony
Follow the instructions for Configure SSO in the Management Console. When entering information into the Edit Organization SSO Provider Info screen, use the values obtained above:
- Identity Provider Metadata: Paste the contents of the metadata downloaded during Download Identity Provide Metadata above.
- Service Provider Metadata: Paste the contents of the metadata constructed in Construct the Service Provider Metadata above for the WMC and Studio Harmony clients.
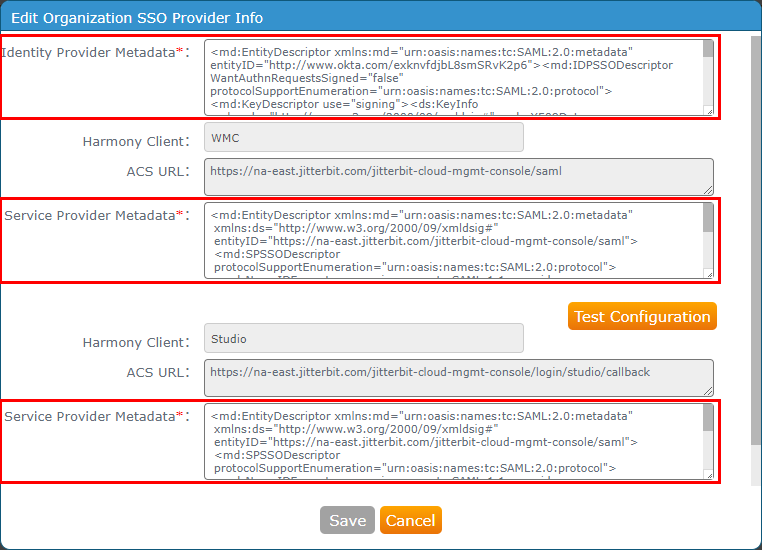
Click Test Configuration for each Harmony client and then click Save. Both clients need to be successfully tested before the Save button becomes enabled.
Troubleshooting
If you receive an error of "No valid signing cert found," make sure that the identity provider metadata has a KeyDescriptor tag and sub-tag with use="signing" specified, similar to the example shown in step 3 of Download the Identity Provider Metadata above.