Configure single sign-on (SSO) for Jitterbit Harmony
Introduction
To enable and configure SSO, you must do the following:
-
(Optional) Add users to the Bypass SSO list.
These steps are explained in the following sections.
1. Enable SSO
To enable SSO, follow these steps:
-
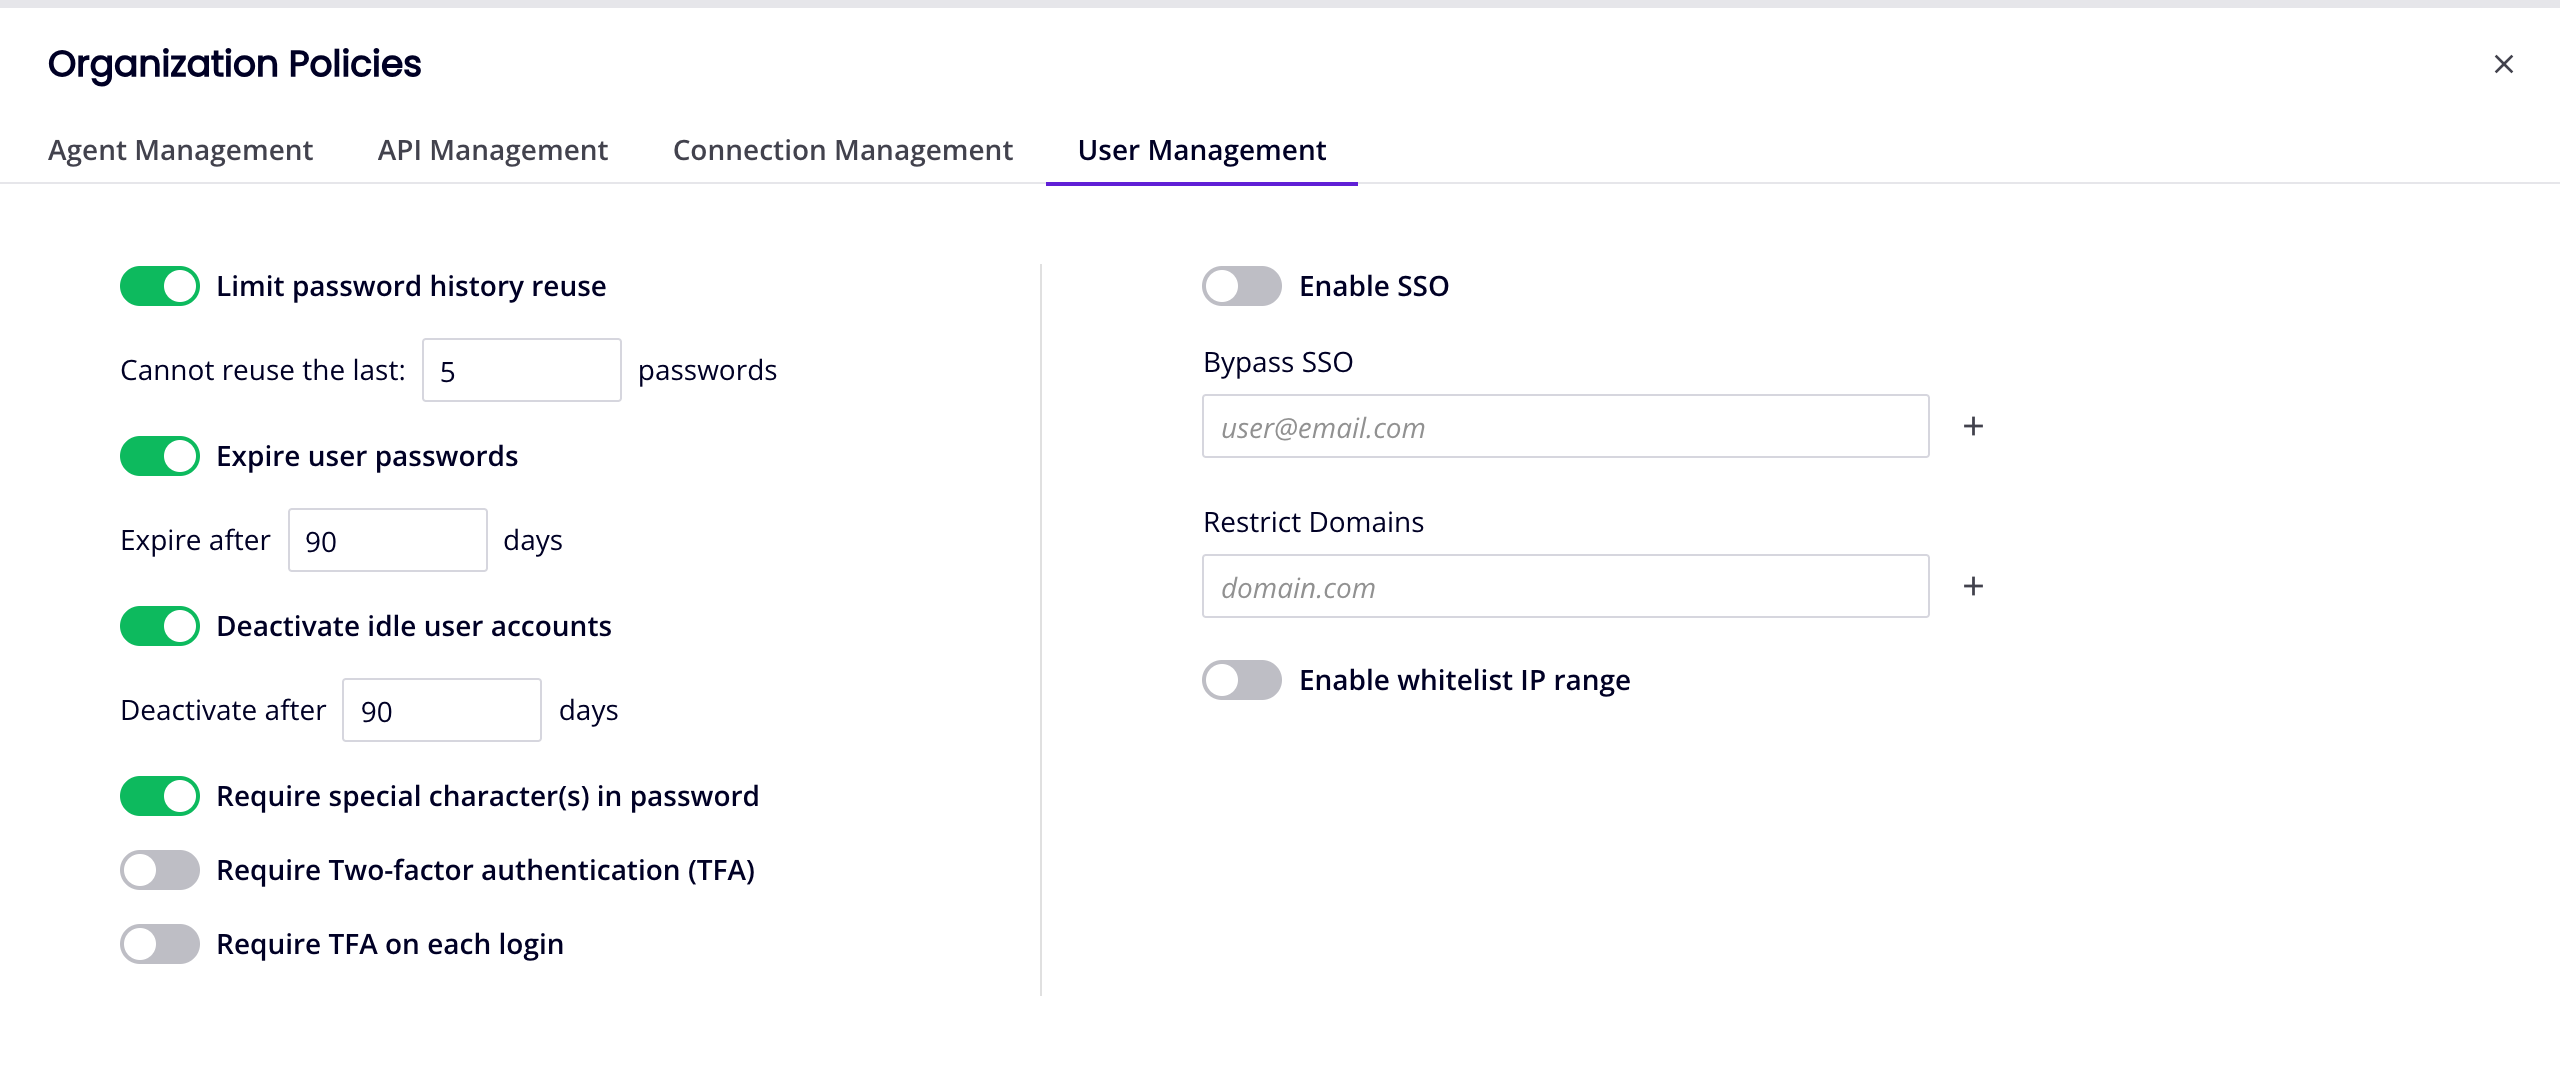
On the Management Console Organizations page, select an organization, then select the User Management tab:
-
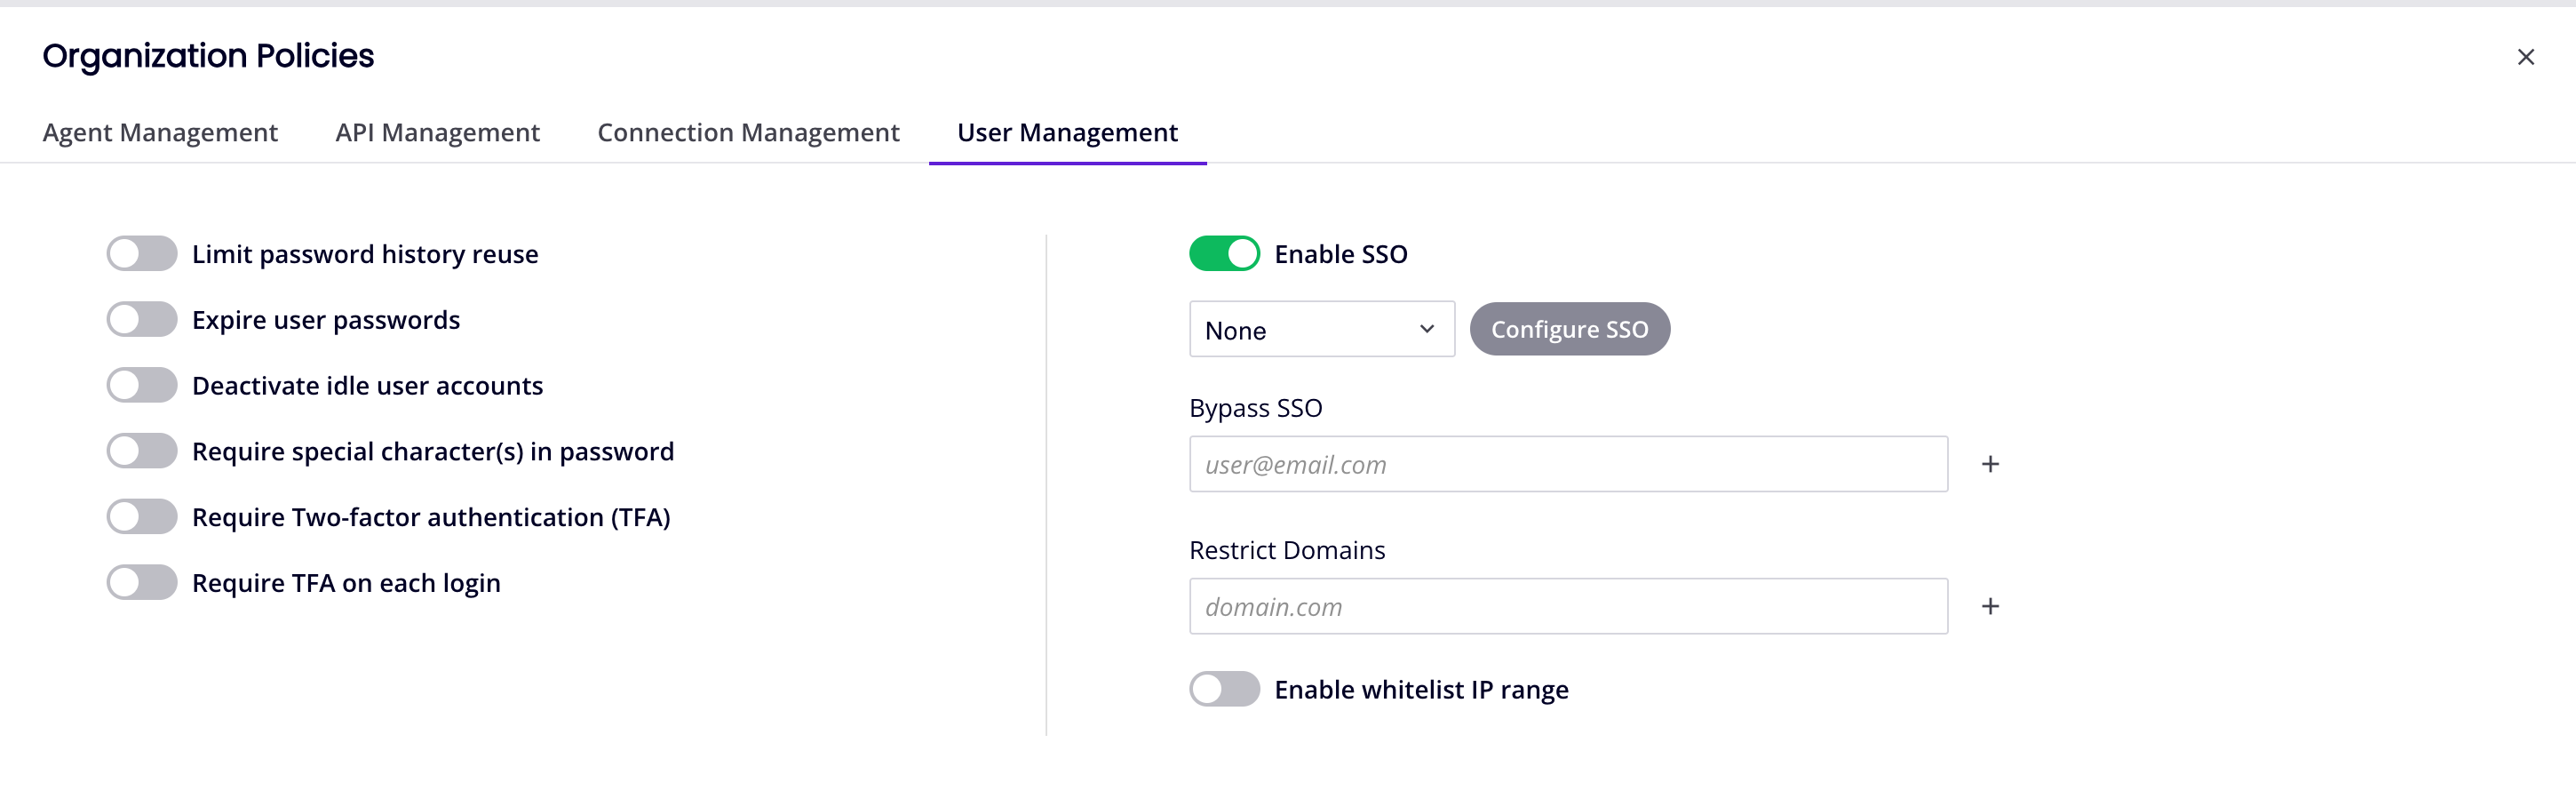
Click the Enable SSO switch to enable SSO for all organization members (except those listed under Bypass SSO).
When Enable SSO is active, the SSO protocol menu and Configure SSO button become visible:
2. SSO protocol
To set the SSO protocol, click the menu under the Enable SSO switch and select one of these options:

-
None: (Default) Users log in with their Harmony credentials. When None selected, there is nothing more to configure.
-
OAuth 2.0: Users log in with the identity provider's OAuth 2.0 protocol.
-
SAML 2.0: Users log in with the identity provider's SAML 2.0 protocol.
When either of OAuth 2.0 or SAML 2.0 are selected, click the Configure SSO button to open a configuration drawer for the protocol.
3. Configure SSO
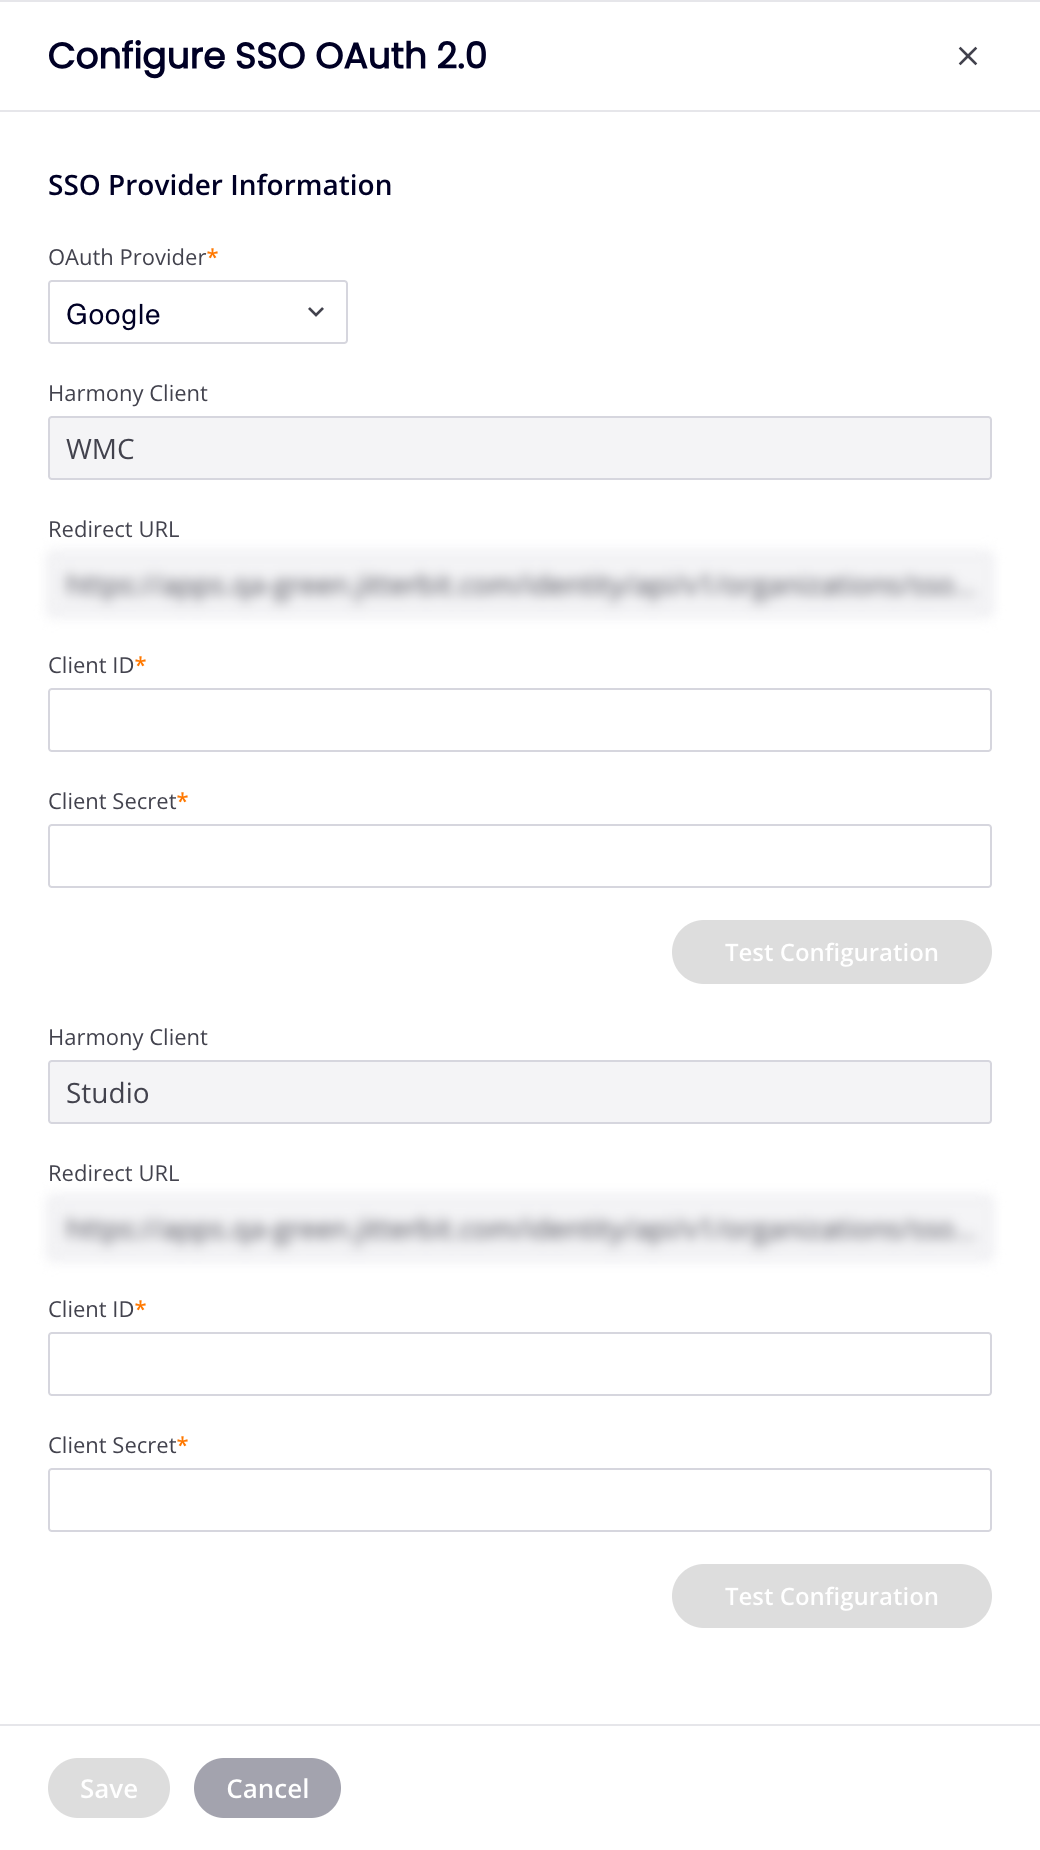
To enable SSO in Harmony, you must configure two Jitterbit client applications:
-
WMC: This client provides SSO authentication via the Harmony portal to all Harmony web applications. (WMC is the former name of the Management Console.)
-
Studio: This client provides SSO authentication to Design Studio. (Not required for BMC customers.)
Important
You must configure both client applications, even if you don't intend to use them all. (For BMC, only WMC is required.)
For OAuth 2.0, configuration involves the following:
-
From your identity provider, obtain the client ID and client secret for both Jitterbit client applications.
-
On the Management Console Organizations page, copy and paste these values into the relevant fields as described below.
For SAML 2.0, configuration involves the following:
-
From your identity provider, download metadata files for both Jitterbit client applications.
-
On the Management Console Organizations page, copy and paste the contents of these files into the relevant fields as described below.
OAuth 2.0
To configure an OAuth 2.0 identity provider, follow these steps:
-
Configure your identity provider to get the client ID and client secret for both the WMC and Studio Jitterbit client applications.
-
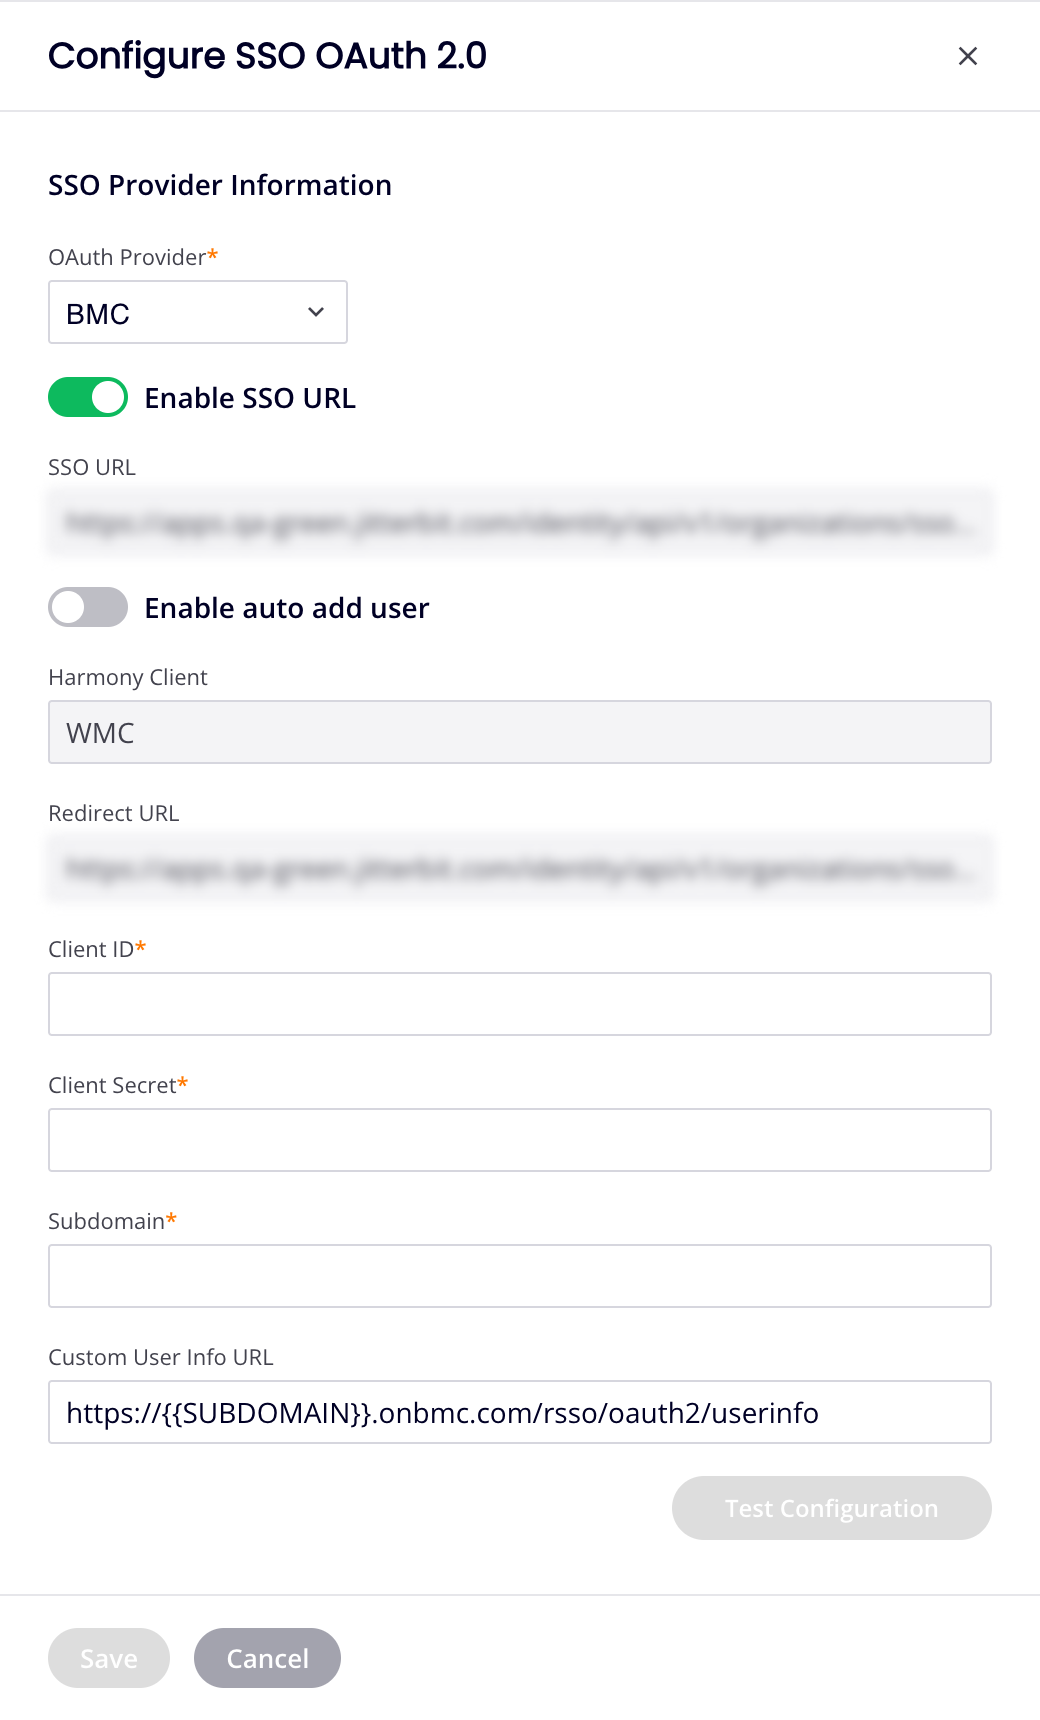
In the Configure SSO OAuth 2.0 drawer, open the OAuth Provider menu and select one of Google, Salesforce, Autodesk, or BMC (for BMC customers only). The contents of the pane depend on your selection:
For Google, Salesforce, or Autodesk:
For BMC:
-
If OAuth Provider is Google, Salesforce, or Autodesk, there are separate sections for WMC and Studio. Set the following values for both Jitterbit client applications:
-
Client ID: Enter the client ID from your identity provider.
-
Client Secret: Enter the client secret from your identity provider.
(For BMC customers) If OAuth Provider is BMC, there is a section for WMC only. Set the following values:
-
Enable SSO URL: When selected, the fields SSO URL and Auto Add User are displayed:
-
SSO URL: Displays an organization-specific URL that is used to identify the organization in BMC Helix iPaaS. This link is used in the BMC Helix Platform as a tile for BMC Helix iPaaS or as a clickable link.
-
Auto Add User: Select to automatically add users to the organization if they are not an existing member in the organization. When selected, the field Default Role is displayed:
- Default Role: Use the menu to select the default role for users that are automatically added to the organization (required when Auto Add User is selected).
-
Client ID: Enter the BMC client ID.
-
Client Secret: Enter the BMC client secret.
-
Subdomain: Enter the BMC customer's subdomain to identify the tenant.
-
Custom User Info URL: Enter the URL to be used to verify the BMC customer's email address. The provided URL must be a GET request and should also be using the same token received from the OAuth token endpoint.
-
-
-
For all providers, the following fields cannot be edited and are for information only:
-
Harmony Client: The client name.
-
Redirect URL: The URL associated with the client is provided by default for each.
-
-
When configured, click each section's Test Configuration button to open the identity provider's login portal in a new tab. Log in with your credentials and follow the prompts.
Caution
Repeated configuration tests may lock you out of your identity provider's account.
If SSO is configured properly, you are redirected to the Management Console with a message indicating success. If not, you are redirected to the Management Console with an error message providing more information about the specific error.
-
When tests are successful, the Save button is enabled. Click it to save the configuration and close the drawer.
Changes to SSO configurations take effect when a user next logs in.
Tip
To disable SSO after it has been enabled, change the selection to None in the Enable SSO dropdown. In this case, users who already have Harmony credentials will again be able to use them for this organization. Users without Harmony credentials (that is, those whose only organization was the SSO organization) will not be able to access the organization.
SAML 2.0
To configure a SAML 2.0 identity provider, follow these steps:
-
In the Configure SSO SAML 2.0 drawer, set the following fields:
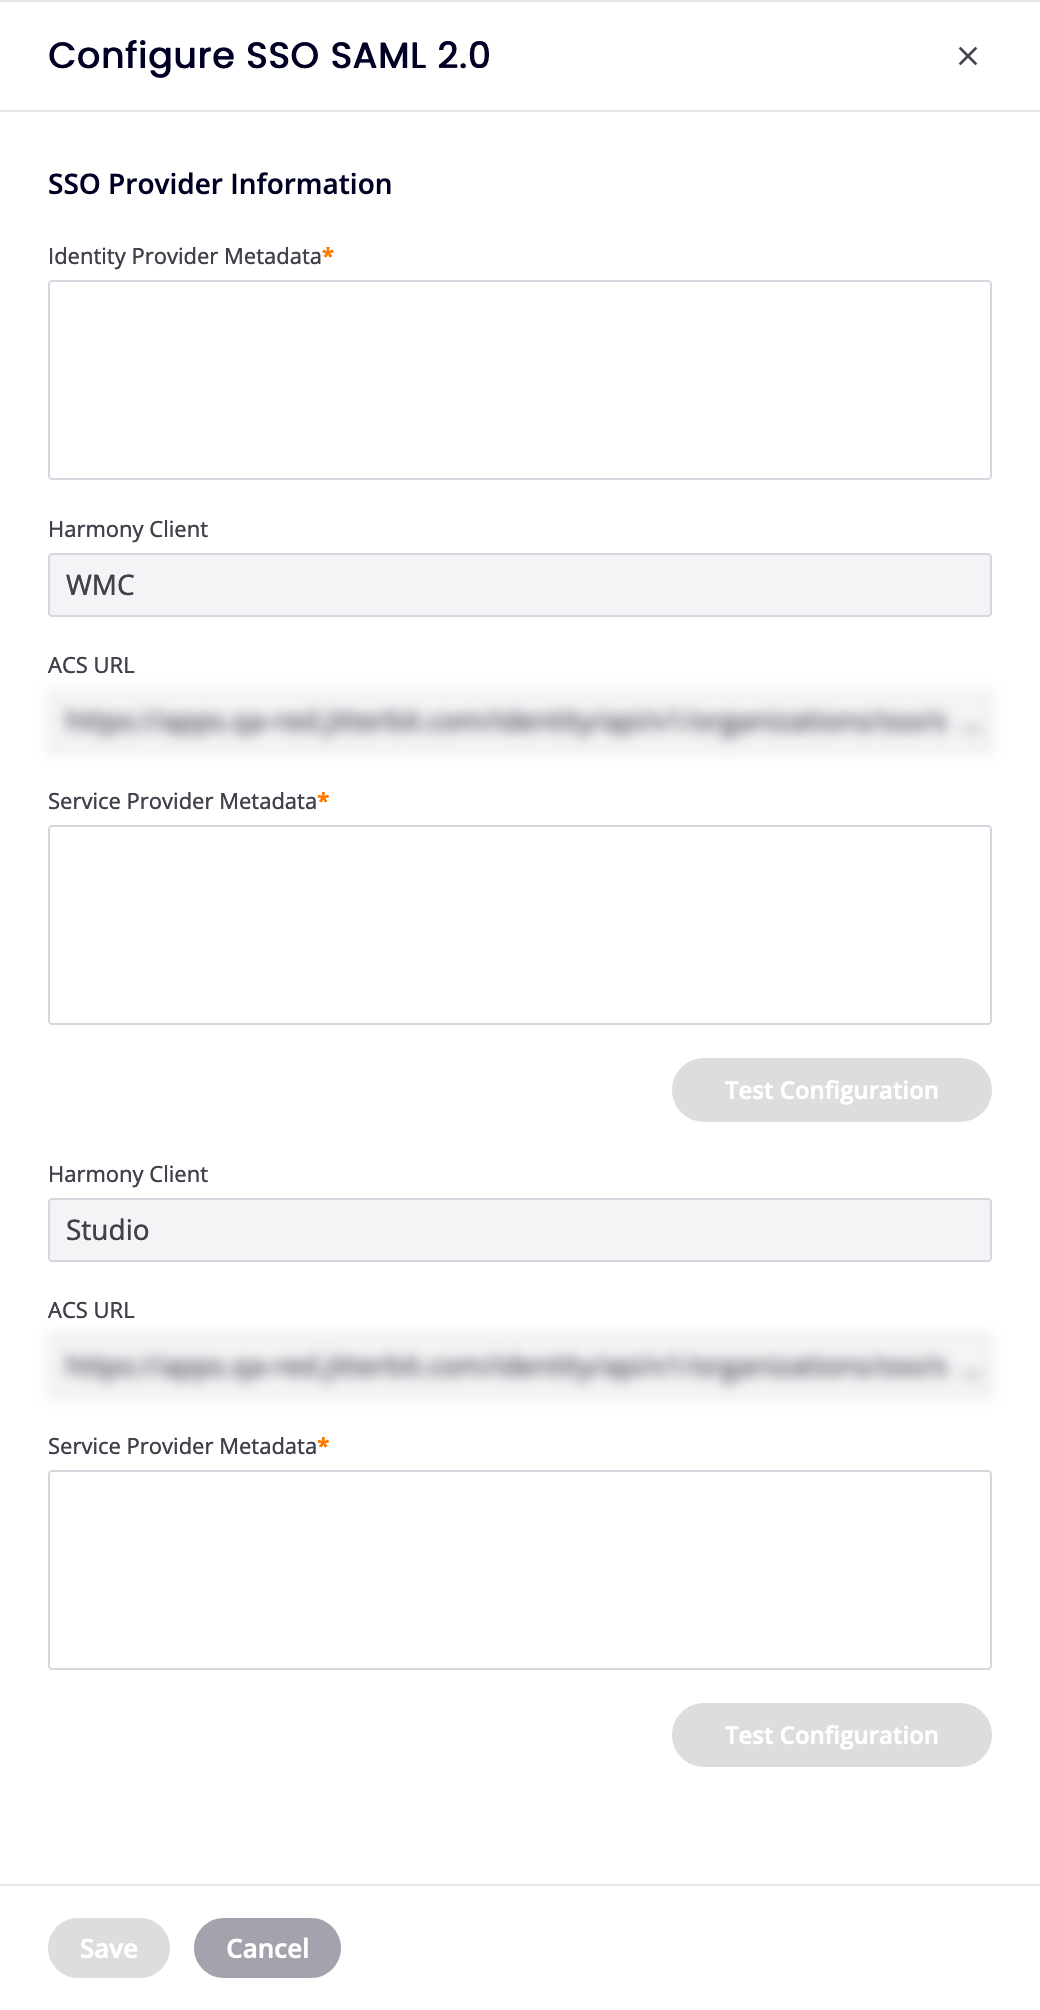
- Identity Provider Metadata: Enter the XML metadata obtained from the Azure, Okta, or Salesforce identity provider.
Set the following for both Jitterbit client applications:
- Service Provider Metadata: Enter the XML metadata from the service provider.
The following fields cannot be edited and are for information only:
-
Harmony Client: The client.
-
ACS URL: The URL associated with the Harmony client.
-
When configured, click each section's Test Configuration button to open the identity provider's login portal in a new tab. Log in with your credentials and follow the prompts.
Caution
Repeated configuration tests may lock you out of your identity provider's account.
If SSO is configured properly, you are redirected to the Management Console with a message indicating success. If not, you are redirected to the Management Console with an error message providing more information about the specific error.
-
When tests are successful, the Save button is enabled. Click it to save the configuration and close the drawer.
4. Bypass SSO
To let a user log in to an SSO-enabled organization using their Harmony credentials, add them to the Bypass SSO list before adding them to the organization. You should add at least one Harmony organization administrator for disaster recovery purposes.
Important
You cannot add members of the current organization to its Bypass SSO list. If existing members need to be added, remove their access to the current organization and then re-add them after placing them on the Bypass SSO list.
To let a user bypass SSO, enter their email address into the field, then click Add. To remove a user, click Delete.
Caution
Do not add users belonging to another SSO-enabled Harmony organization, as they cannot then join the selected organization.