Module 1: Database to text
Introduction
Module 1 in the Introduction to the Harmony Cloud Studio training course demonstrates querying data from a single table in a PostgreSQL database and writing it to an SFTP server as a flat text file.
Prerequisites
These modules assume you have registered for the Jitterbit Learning Sandbox provided as part of the Introduction to the Harmony Cloud Studio training course. Registration for the Jitterbit Learning Sandbox provides access to the Harmony training organization, complete with two environments, as well as accounts on Jitterbit's training SFTP server and PostgreSQL database.
If you do not have this access, see Getting training to register for Jitterbit University, then enroll in the Introduction to the Harmony Cloud Studio course. Learning Sandbox Registration is covered in Chapter 4 – Learning Sandbox Registration.
Summary
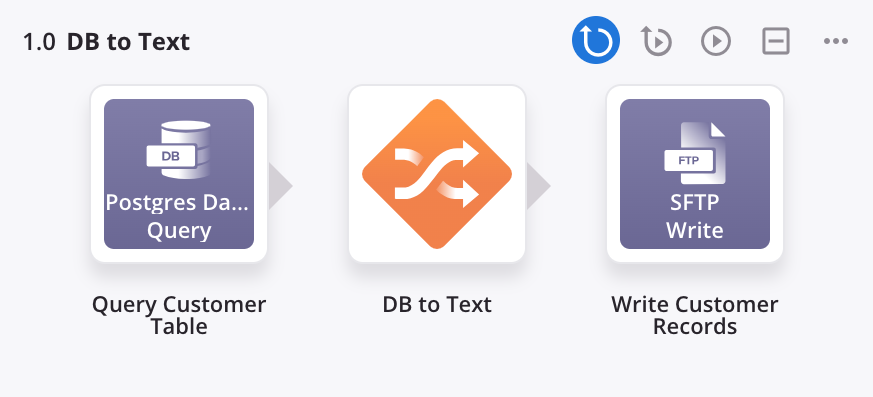
In this module, you will connect to the customer table from the training PostgreSQL database, create a CSV file with similar fields, and write that data to the training SFTP server.
The completed operation will look like this:
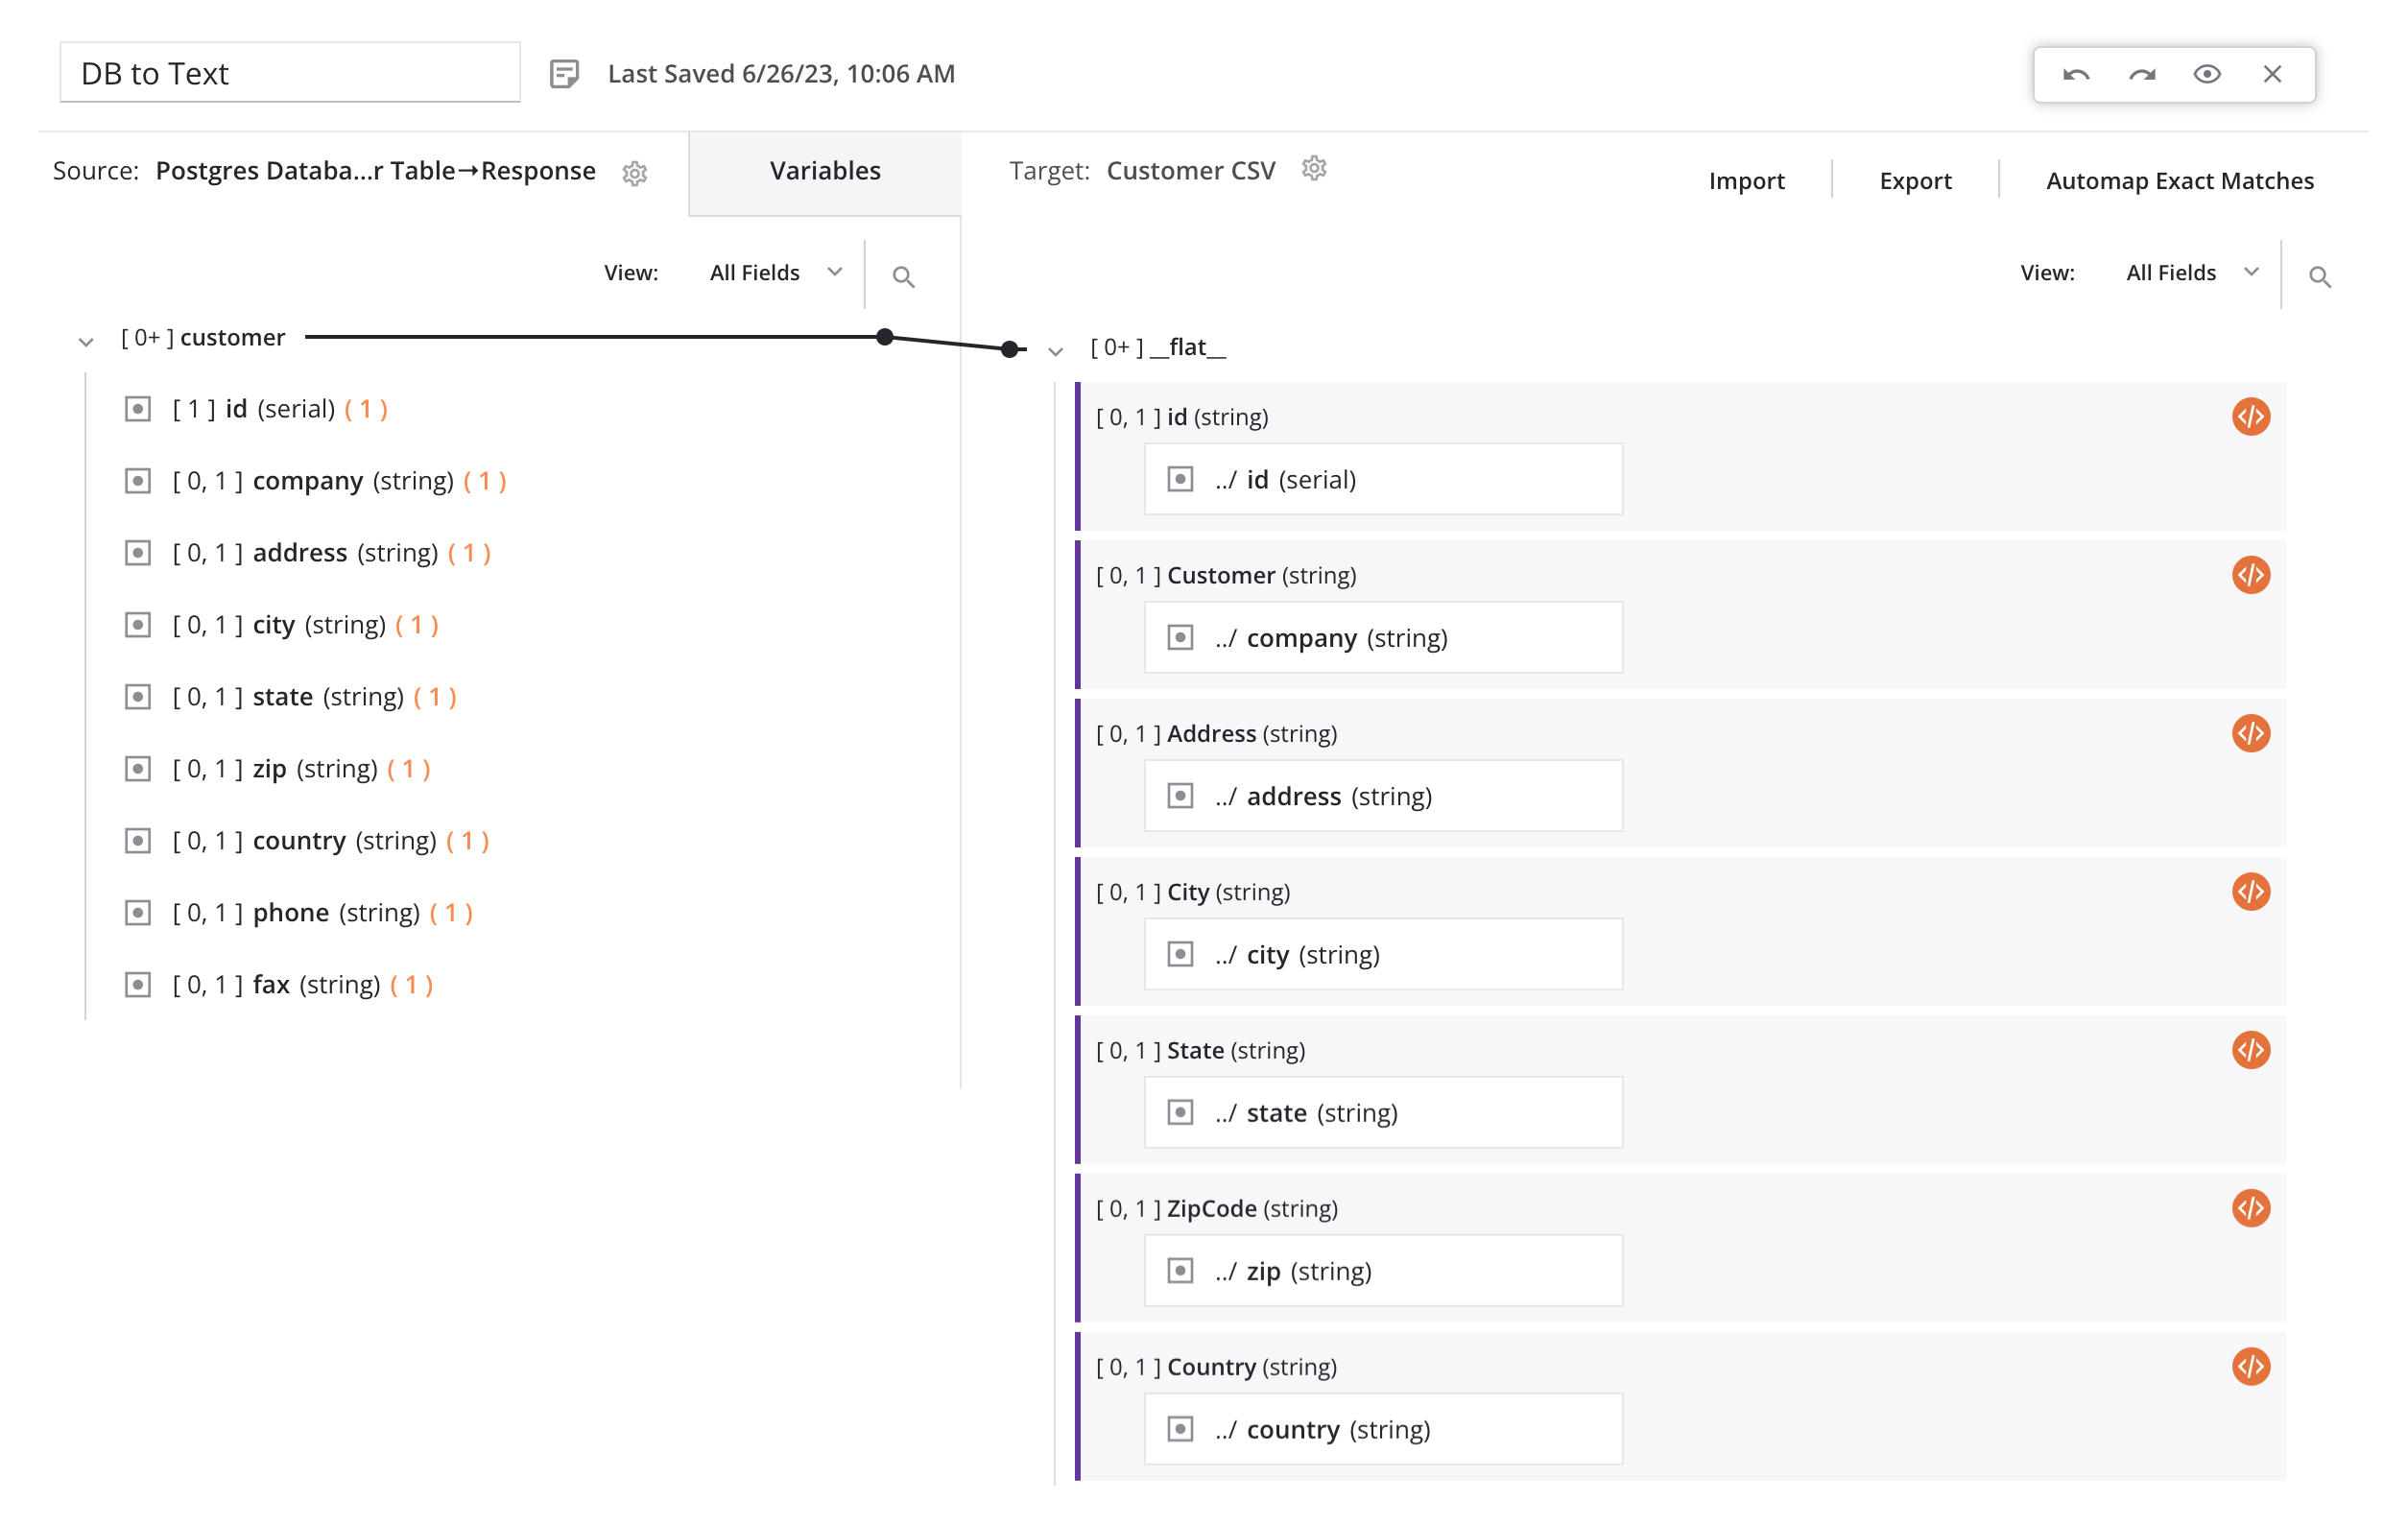
This operation uses this transformation mapping:
1. Create a new project
All of the modules covered in this course are created in a single project. Before beginning the first module, create a project:
-
Log in to the Harmony portal at https://login.jitterbit.com and switch to the Jitterbit Learning Sandbox organization within the top right of the header.
-
Click the Cloud Studio application card.
-
From the project index, click New Project. Give the project a name, such as "Jitterbit University Examples," and select the environment.
-
Once within the project, rename the workflow to "Module 1."
Tip
Adhering to an accepted naming convention within your organization for your workflows, operations, and components is a recommended best practice.
2. Configure a database connection
For this module, first you establish a connection to the PostgreSQL training database:
-
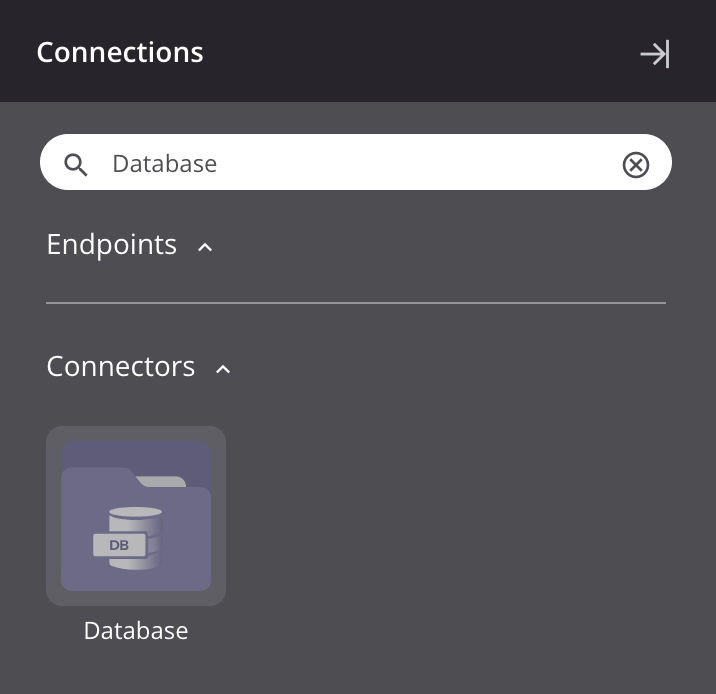
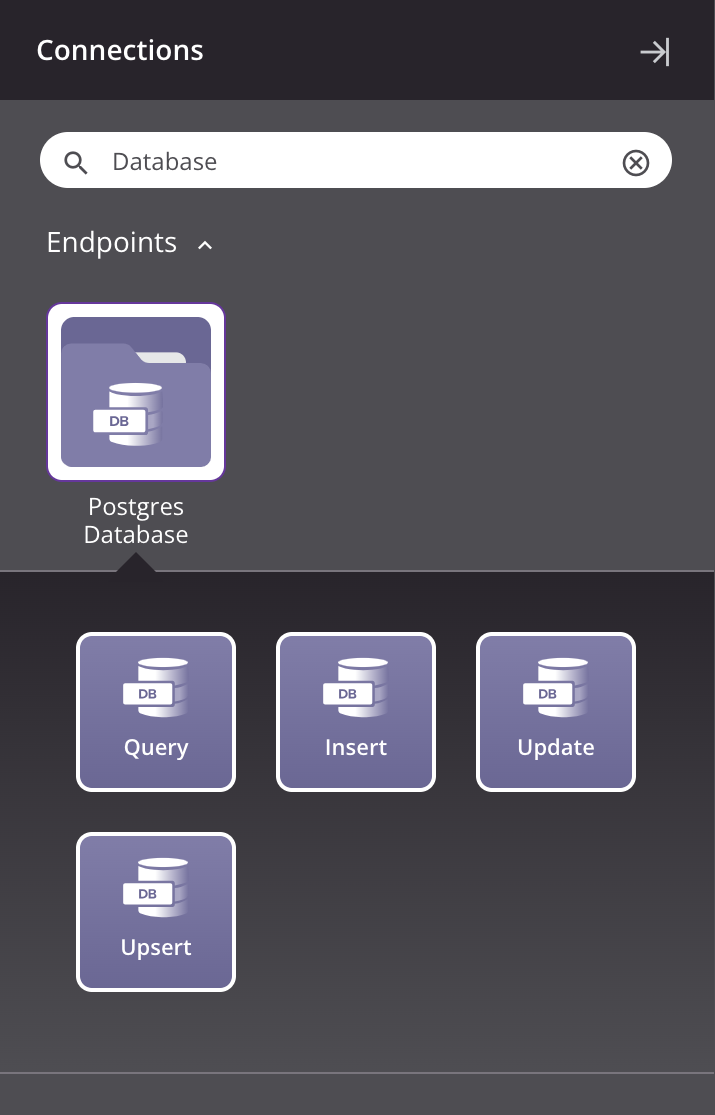
From the design component palette Project endpoints and connectors tab under the Connectors filter, click the Database connector:
-
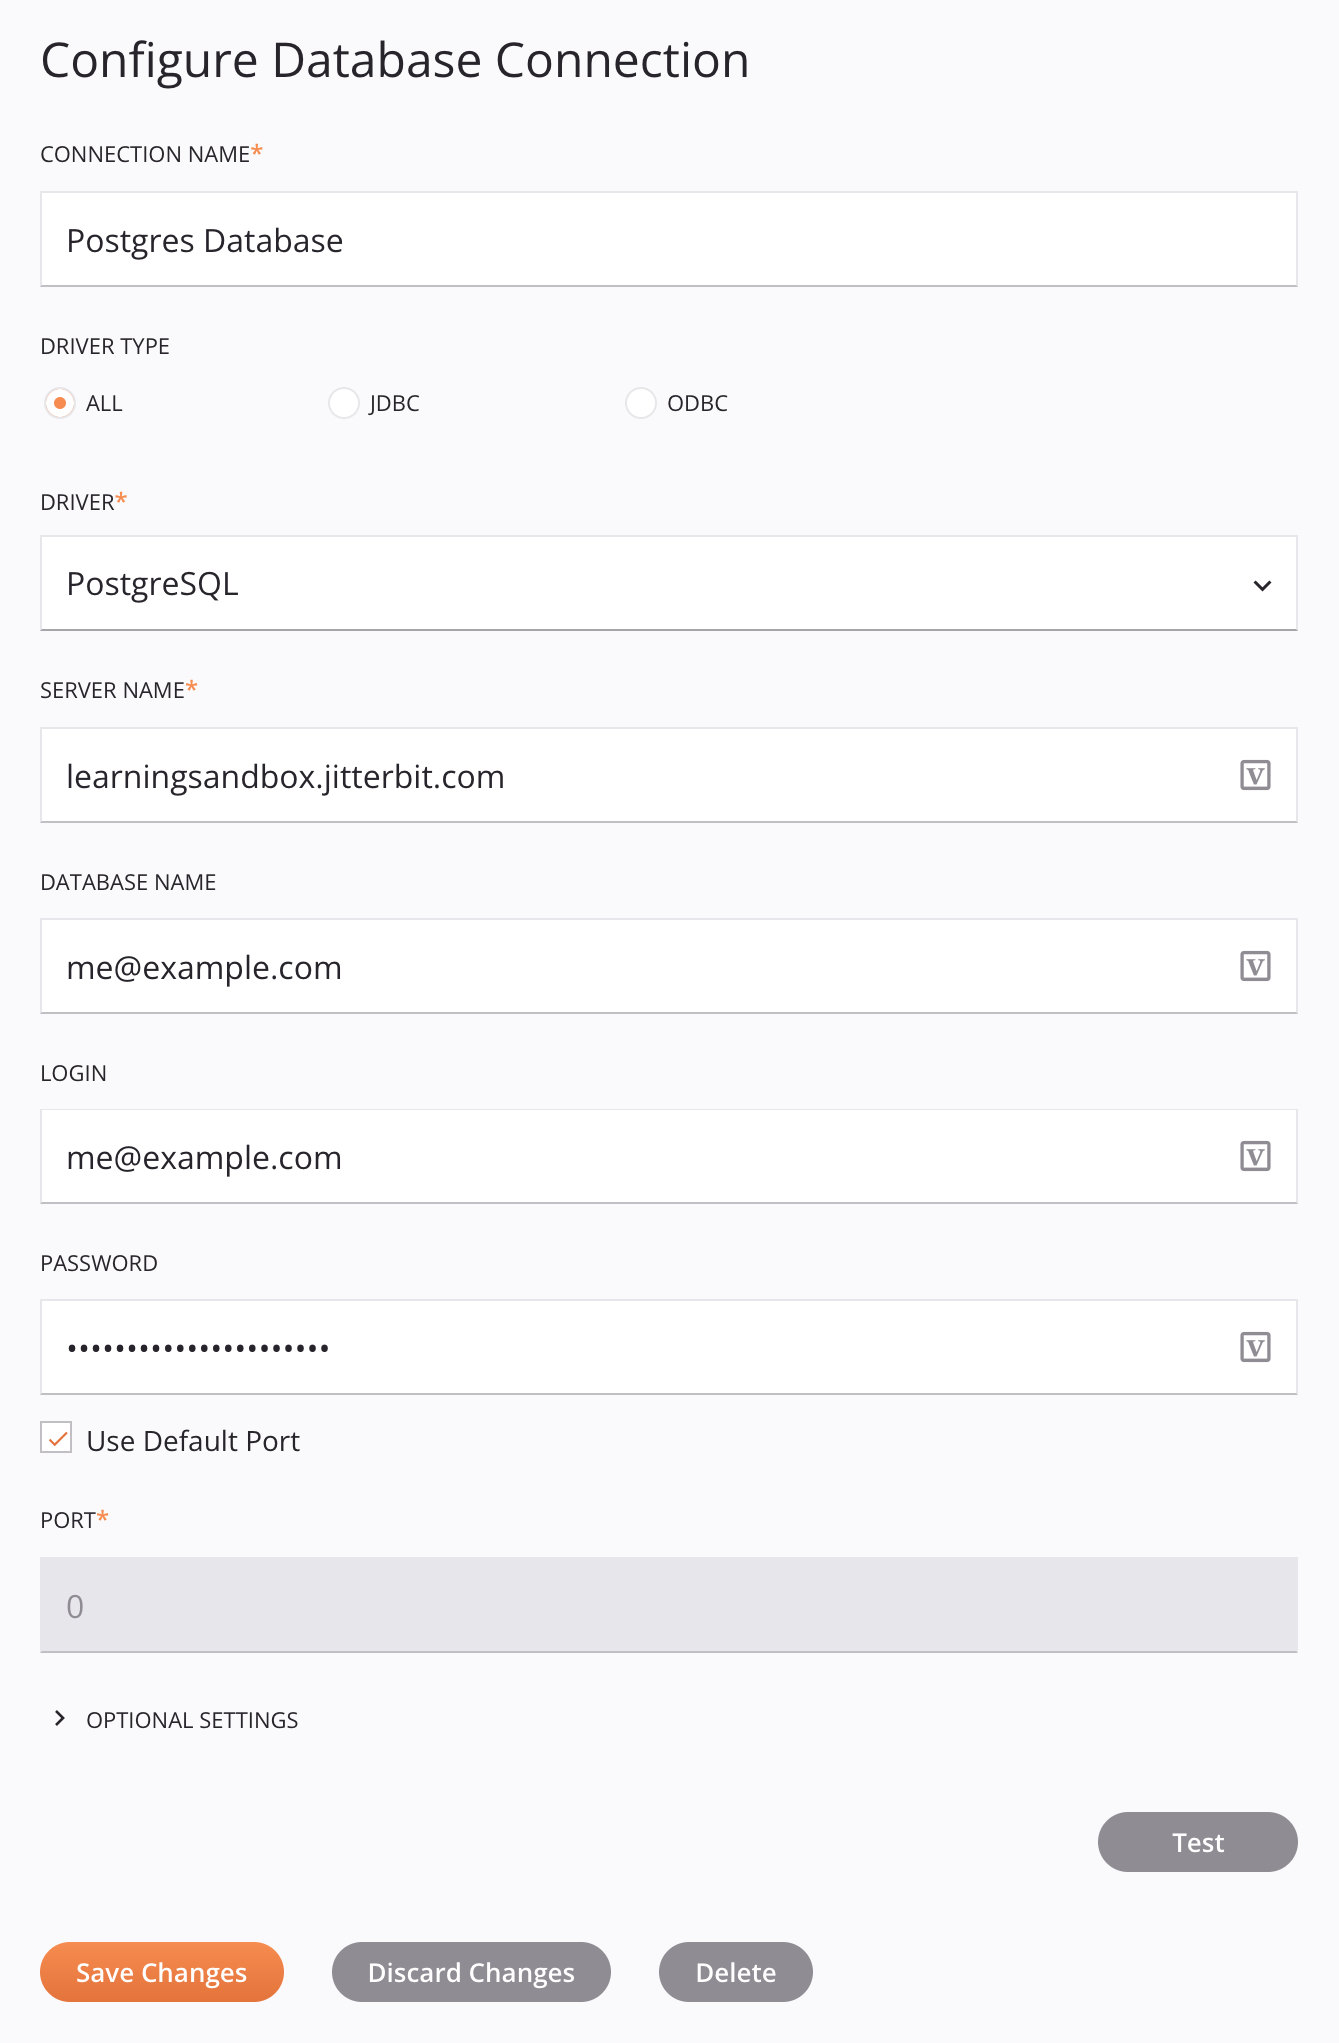
Configure the Database connection:
-
Endpoint Name: "Postgres Database"
-
Driver: "PostgreSQL"
-
Server Name: "learningsandbox.jitterbit.com"
-
Database Name, Login, Password: These credentials are from the information you provided when completing the Learning Sandbox Registration form. This information can be found in the Learning Sandbox confirmation email.
-
Port: No changes from defaults are needed.
Tip
Cloud agents can use JDBC drivers only, while private agents can use JDBC or ODBC drivers.
-
-
Click Test at the bottom of the configuration to verify connectivity.
-
Once connected, click Save Changes. This returns you to the design canvas.
The "Postgres Database" connection should have a configuration similar to this:
3. Configure a database activity
Next, you configure an activity to query data from the PostgreSQL database:
-
From the component palette's Project endpoints and connectors tab under the Endpoints filter, click the "Postgres Database" connection you have just created to show the connection's activity types:
-
Drag a Database Query activity type to the component drop zone on the design canvas to create an instance of a Database Query activity in a new operation.
-
Rename the operation to "DB to Text."
-
Double-click the Query activity within the operation to open its configuration.
-
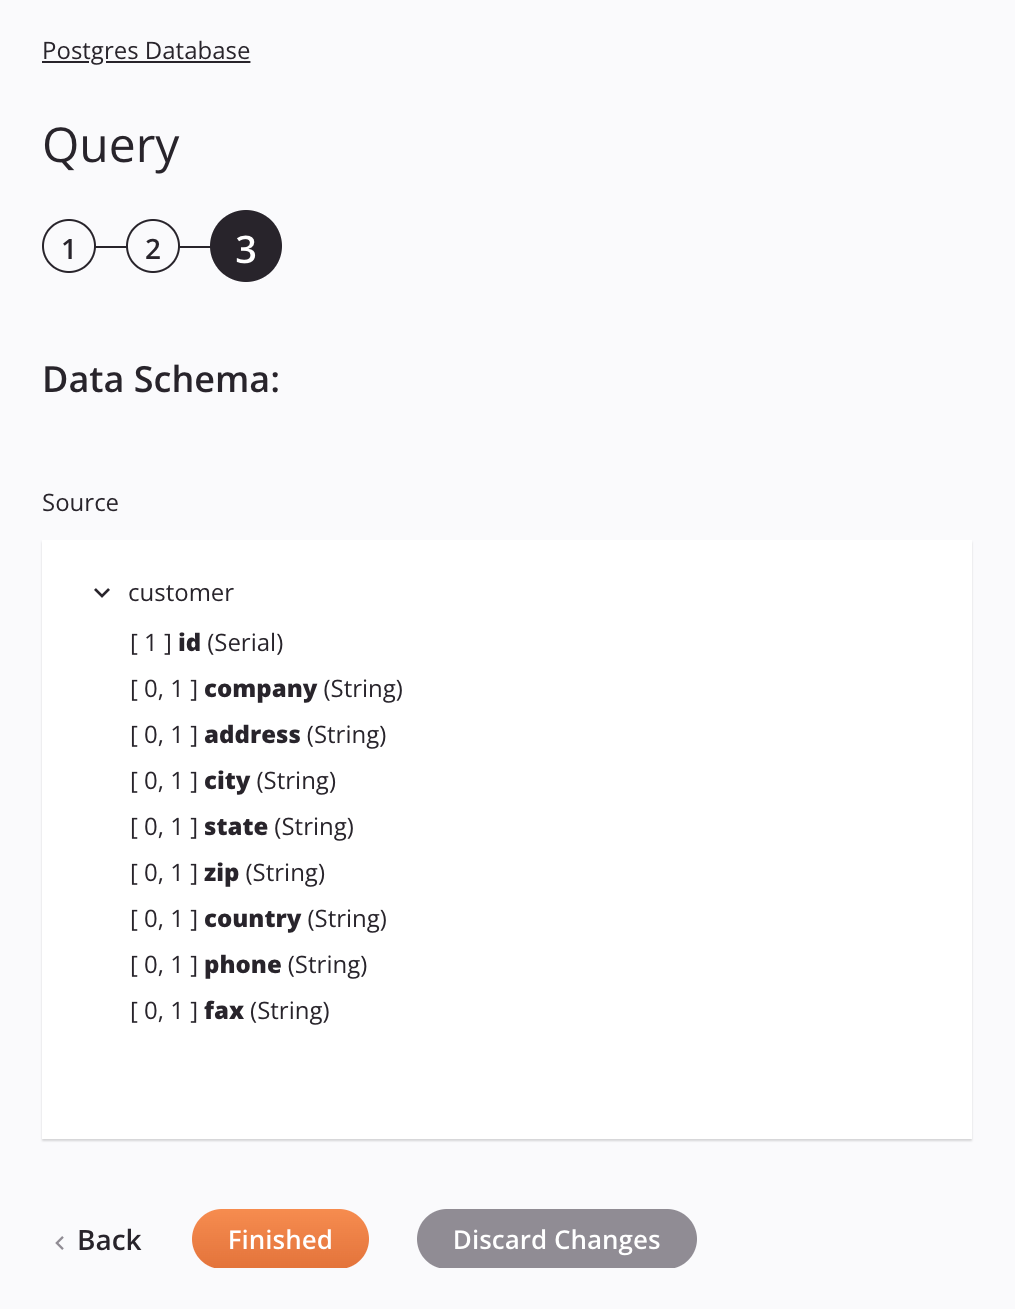
Configure the Database query activity:
- Name: "Query Customer Table"
- Select Table(s): Refresh the tables and select the
customertable. Click Next. - Select Fields: Select the
id(Key),company,address,city,state,zip,country,phone, andfaxfields. Click Next. - Data Schema: Review the data schema and click Finished to return to the design canvas.
The final screen of activity configuration should look similar to this:
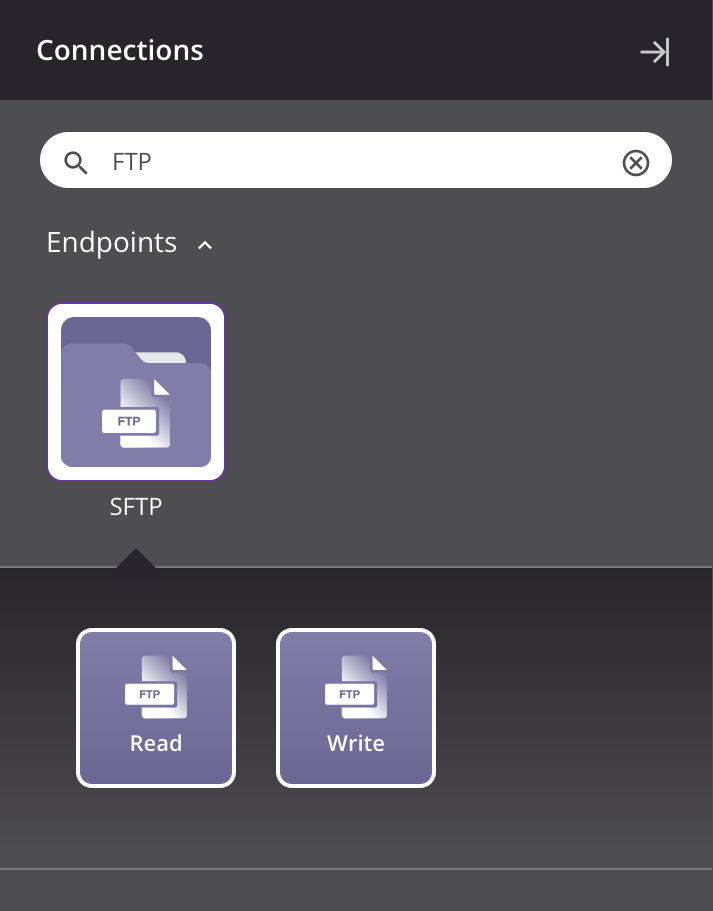
4. Configure an FTP connection
Next, you configure a connection to the training SFTP server:
-
From the component palette's Project endpoints and connectors tab under the Connectors filter, click the FTP connector:
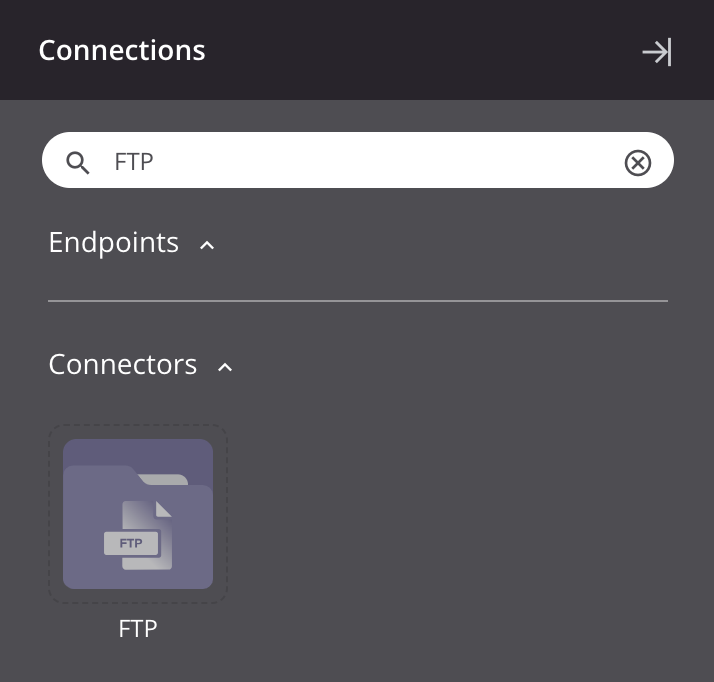
-
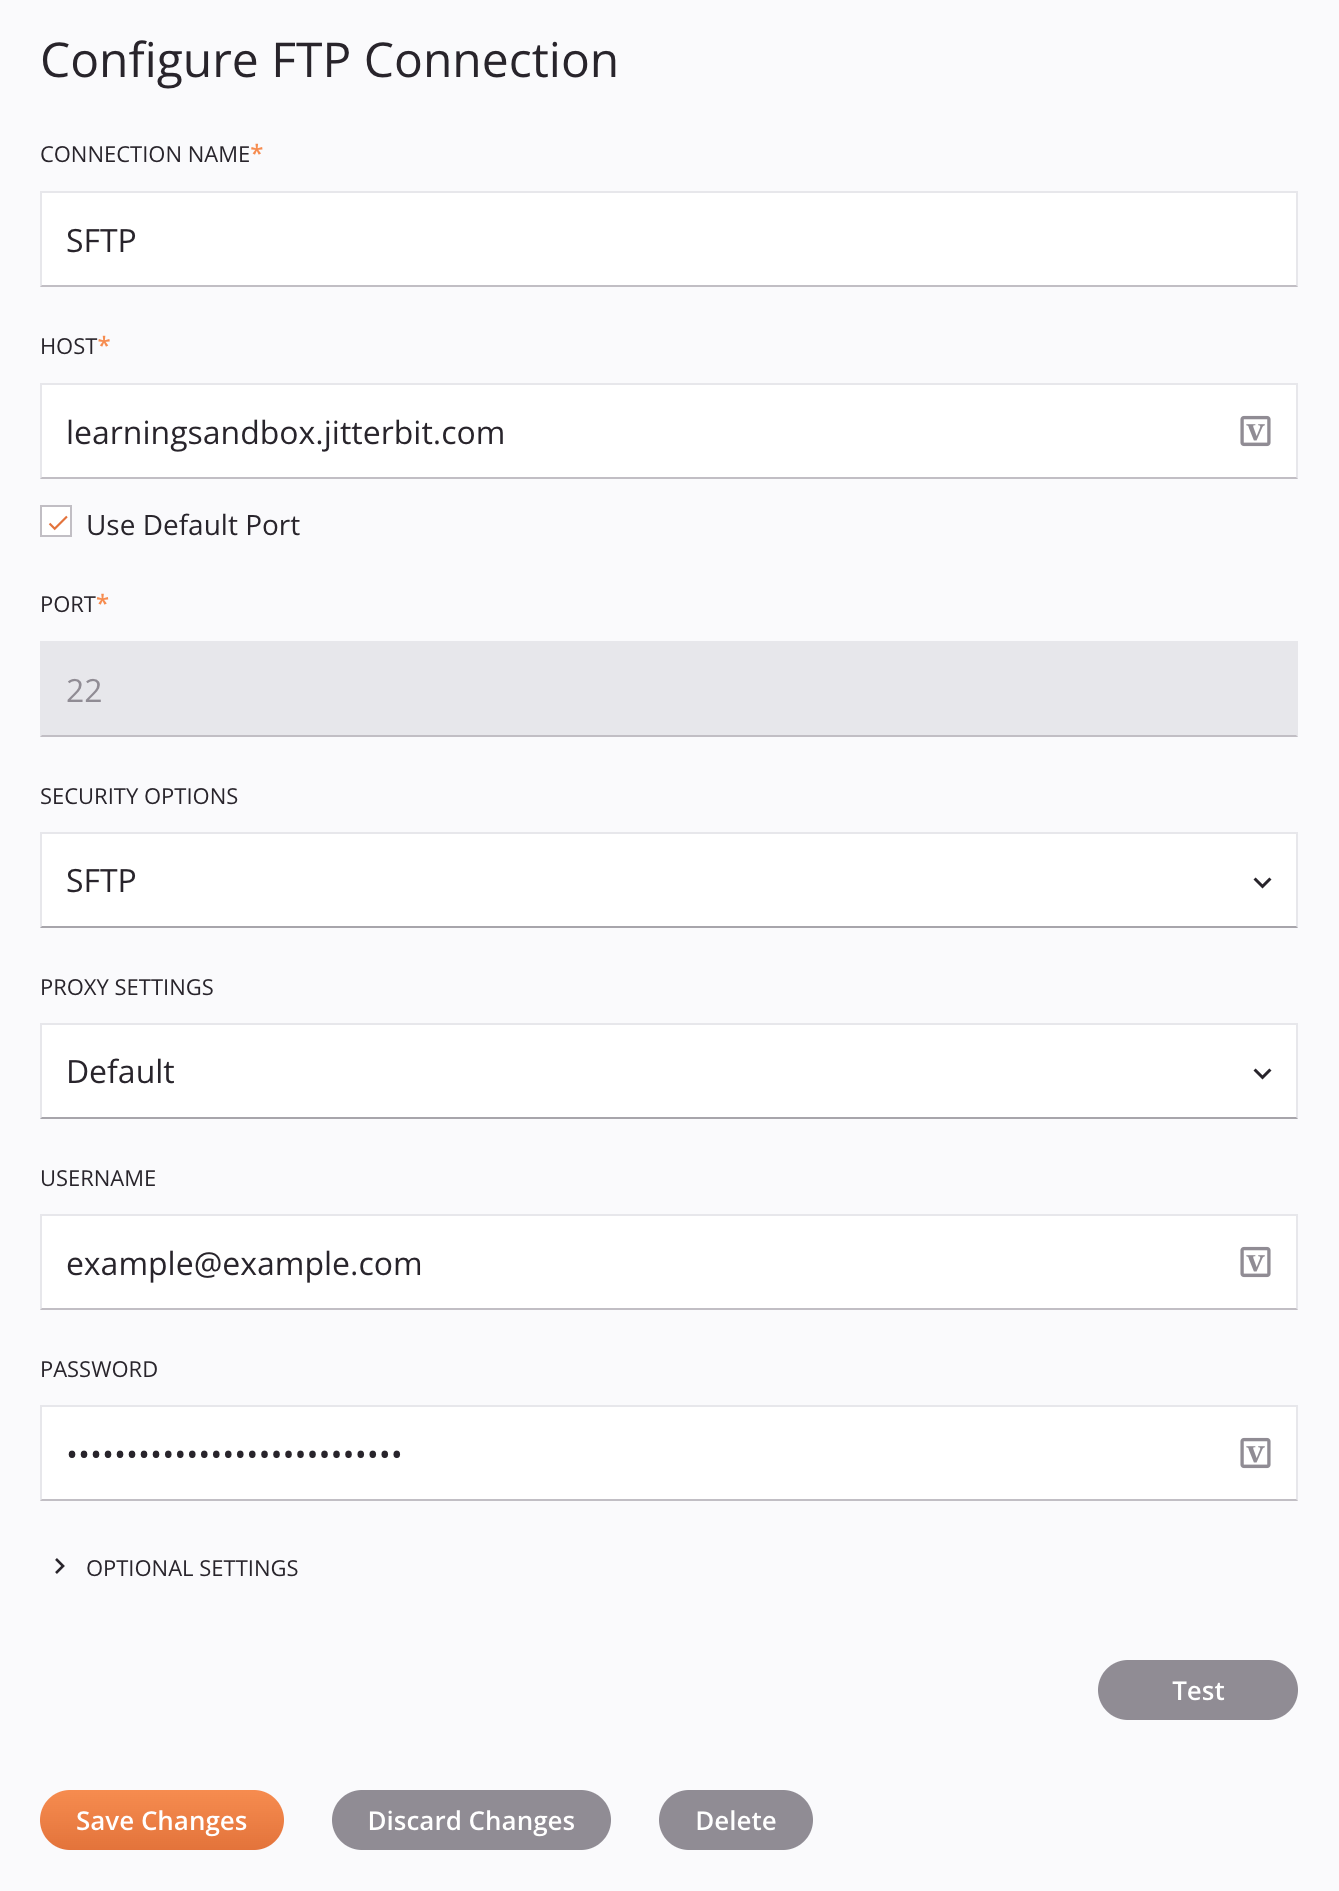
Configure the FTP connection:
- Endpoint Name: "SFTP"
- Host: "learningsandbox.jitterbit.com"
- Username and Password: These credentials are from the information you provided when completing the Learning Sandbox Registration form. This information can be found in the Learning Sandbox confirmation email.
-
Click Test to verify connectivity and click Save Changes when done.
The FTP connection should have a configuration similar to this:
5. Configure an FTP activity
Once the FTP connection is configured, you configure an FTP Write activity associated with that connection:
-
From the component palette's Project endpoints and connectors tab under the Endpoints filter, click the "SFTP" connection you have just created to show the connection's activity types:
-
Drag an FTP Write activity to a component drop zone on the right of the Database Query activity within the operation on the design canvas.
-
Double-click the FTP Write activity within the operation to open its configuration.
-
Configure the FTP Write activity:
- Name: "Write Customer Records"
- Path: "/" (forward slash)
- Filename(s): "result_[date]_[time].csv". Click Next.
- Data Schema: Since you didn't provide a schema, there is nothing to review in the second screen. Click Finished.
6. Configure a transformation
Next, you create a transformation to transform data from the database source to the FTP target:
- On the design canvas, hover over the area between the Database Query activity and the FTP Write activity until a component drop zone appears.
- Click the drop zone and select New Transformation. A new transformation will open for you to configure:
- Transformation Name: "DB to Text"
- Source: The source schema is already provided (on the left).
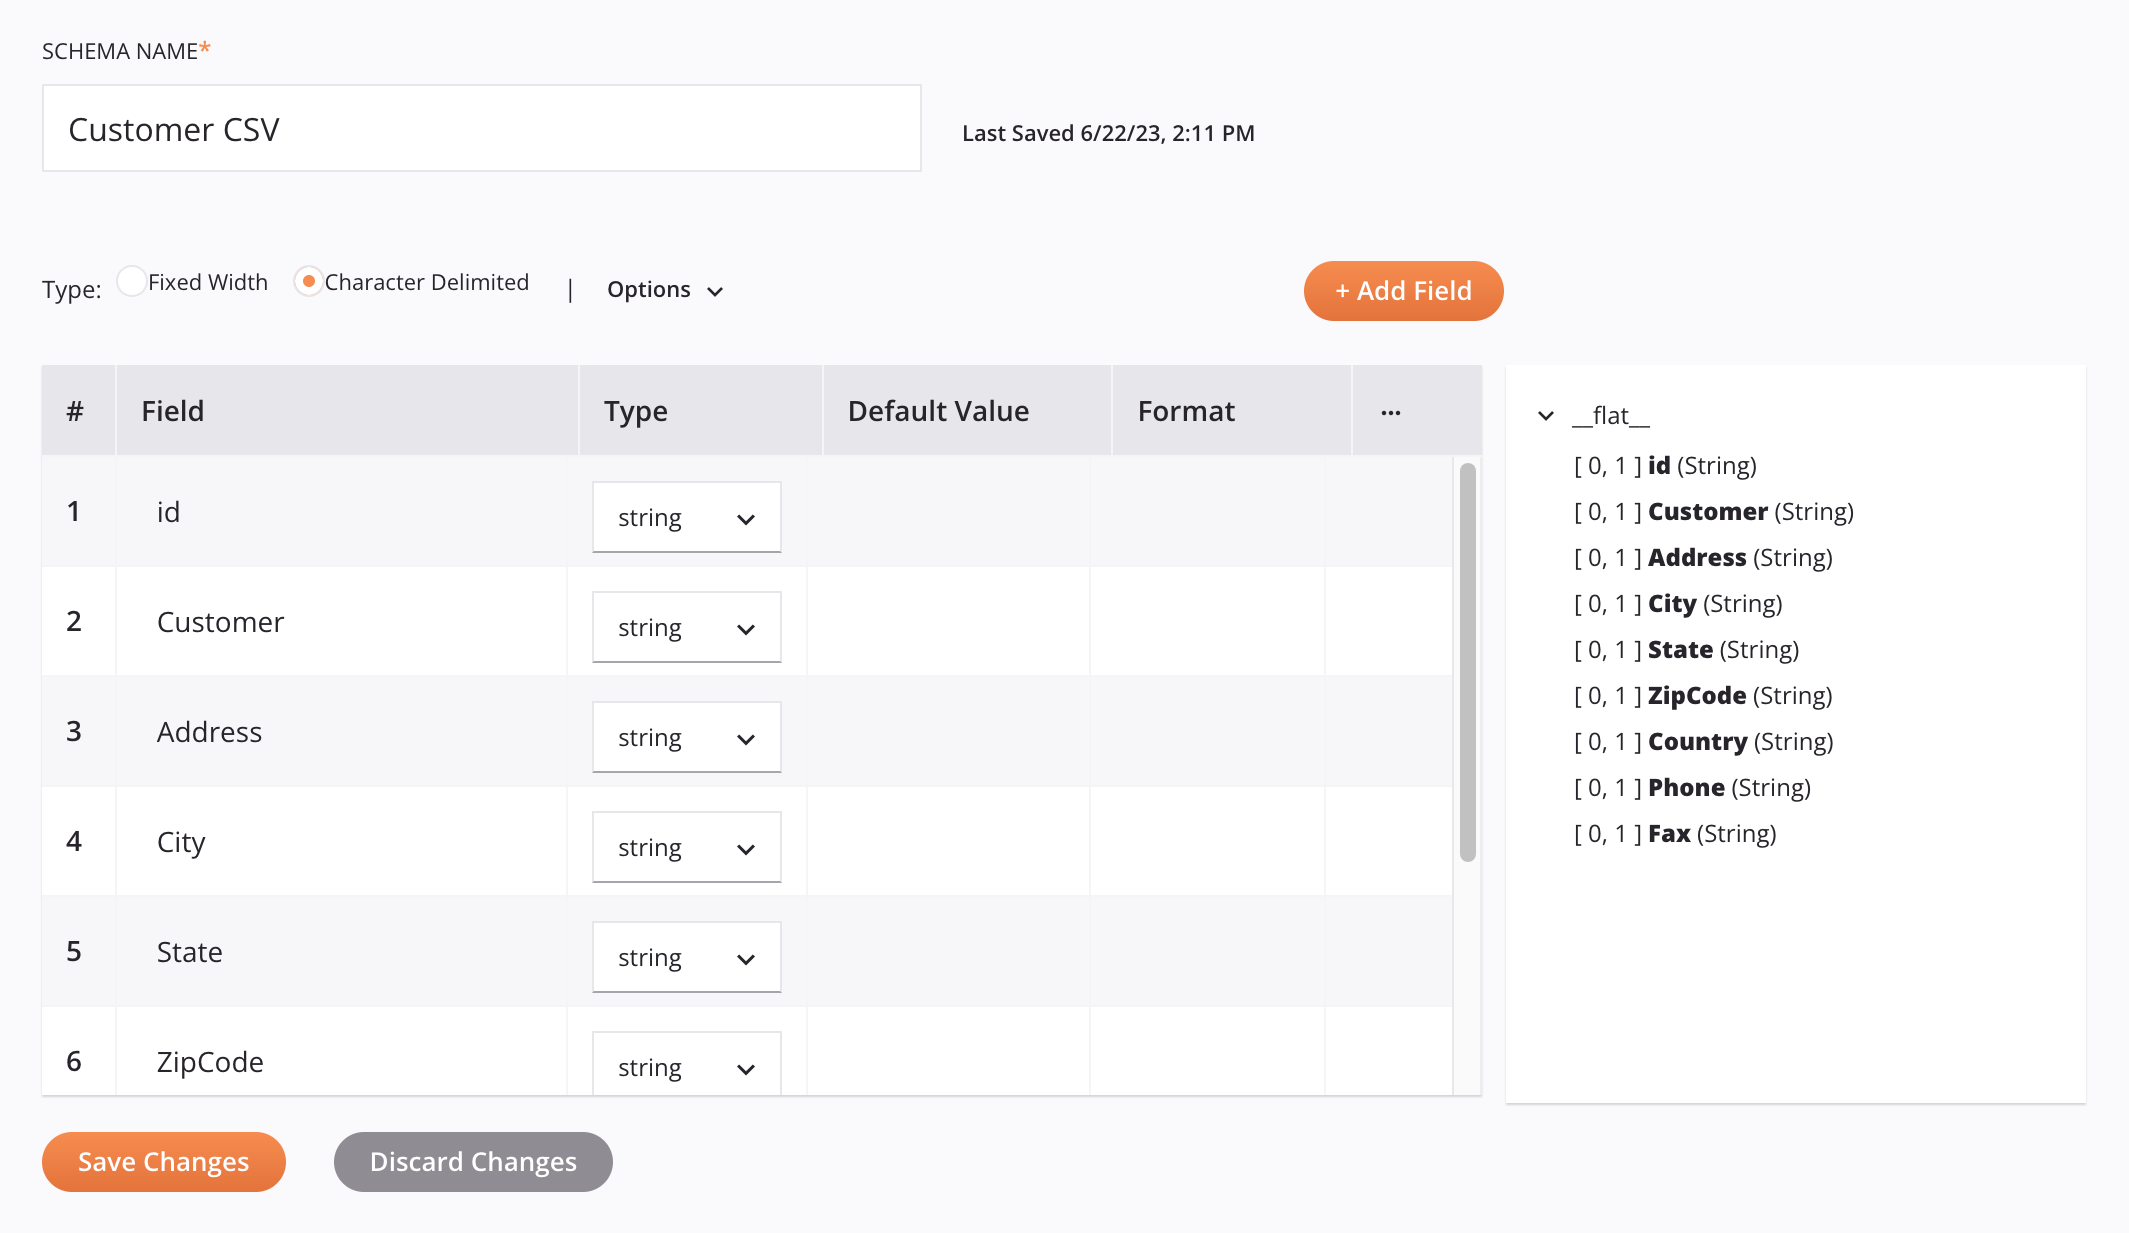
- Target: You need to define the target schema (on the right). Click Define Schema, then select Create Flat. Configure the custom flat schema:
- Schema Name: "Customer CSV"
- Add Field: Use this button to add these fields:
id,Customer,Address,City,State,ZipCode,Country,Phone, andFax. Once the fields are added, click Save Changes.
- Along the top right of the target schema, click Automap Exact Matches.
- Manually map (drag and drop) the fields that weren't exact matches: map
companytoCustomer, andziptoZipCode. - Along the top of the transformation header, click the gray Preview button to begin the preview process for testing and validating the mappings. Click Next to deploy the components listed and then click Finished.
- The preview screen displays data populated from the source and mapped to the target. Click the right and left arrows to cycle through the imported data.
- After reviewing the data, click Return to Workflow. Clicking this button saves the work you did in the transformation.
The custom flat schema configuration should look similar to this:
The transformation preview should look similar to this:
7. Deploy and run the operation
Finally, with all operation steps configured, you deploy and run the operation:
- In the top right of the operation, click the actions menu icon
 and from the menu click Deploy and Run. The operation status is displayed in the lower left of the operation.
 - Once the operation is successful, log in to Jitterbit's training SFTP server and view the file you generated.