Module 4: SOAP web service
Introduction
Module 4 in the Introduction to the Harmony Cloud Studio training course demonstrates querying a SOAP web service and writing the response to an SFTP server as a text file.
Prerequisites
This page assumes you have completed Module 1 - Database to text, where you configured a connection to Jitterbit's training SFTP server.
Summary
In this module, you will perform a SOAP call using a provided WSDL to query a weather service based on zip code, and then write that data to the training SFTP server as a text file.
The completed operation will look like this:

This operation uses these request and response transformation mappings:
1. Configure a SOAP Connection And activity
For this module, you continue working within the same project as in Module 1, and create a new SOAP connection and activity:
-
Within the same project as Module 1, create a new workflow and name it "Module 4."
-
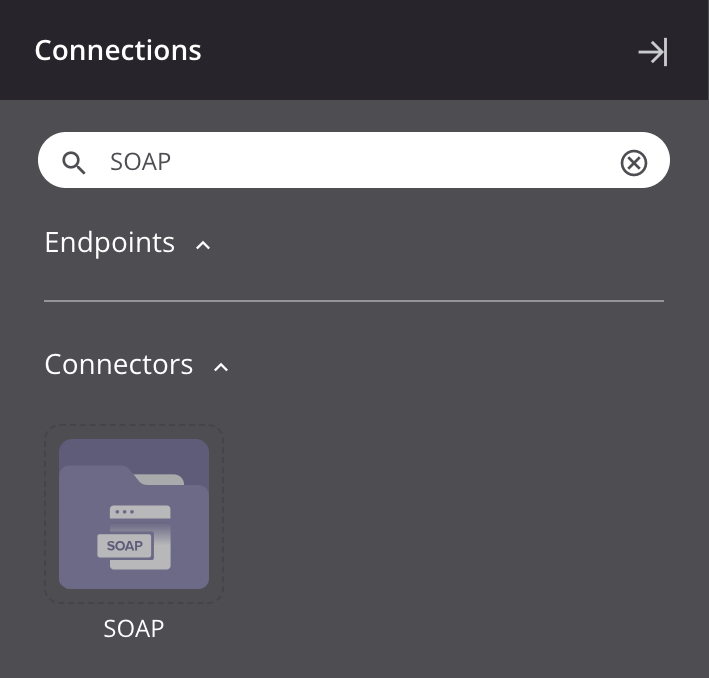
From the component palette's Project endpoints and connectors tab under the Connectors filter, click the SOAP connector:
Tip
SOAP, or Simple Object Access Protocol, is a well-established standards-based protocol for accessing web services.
-
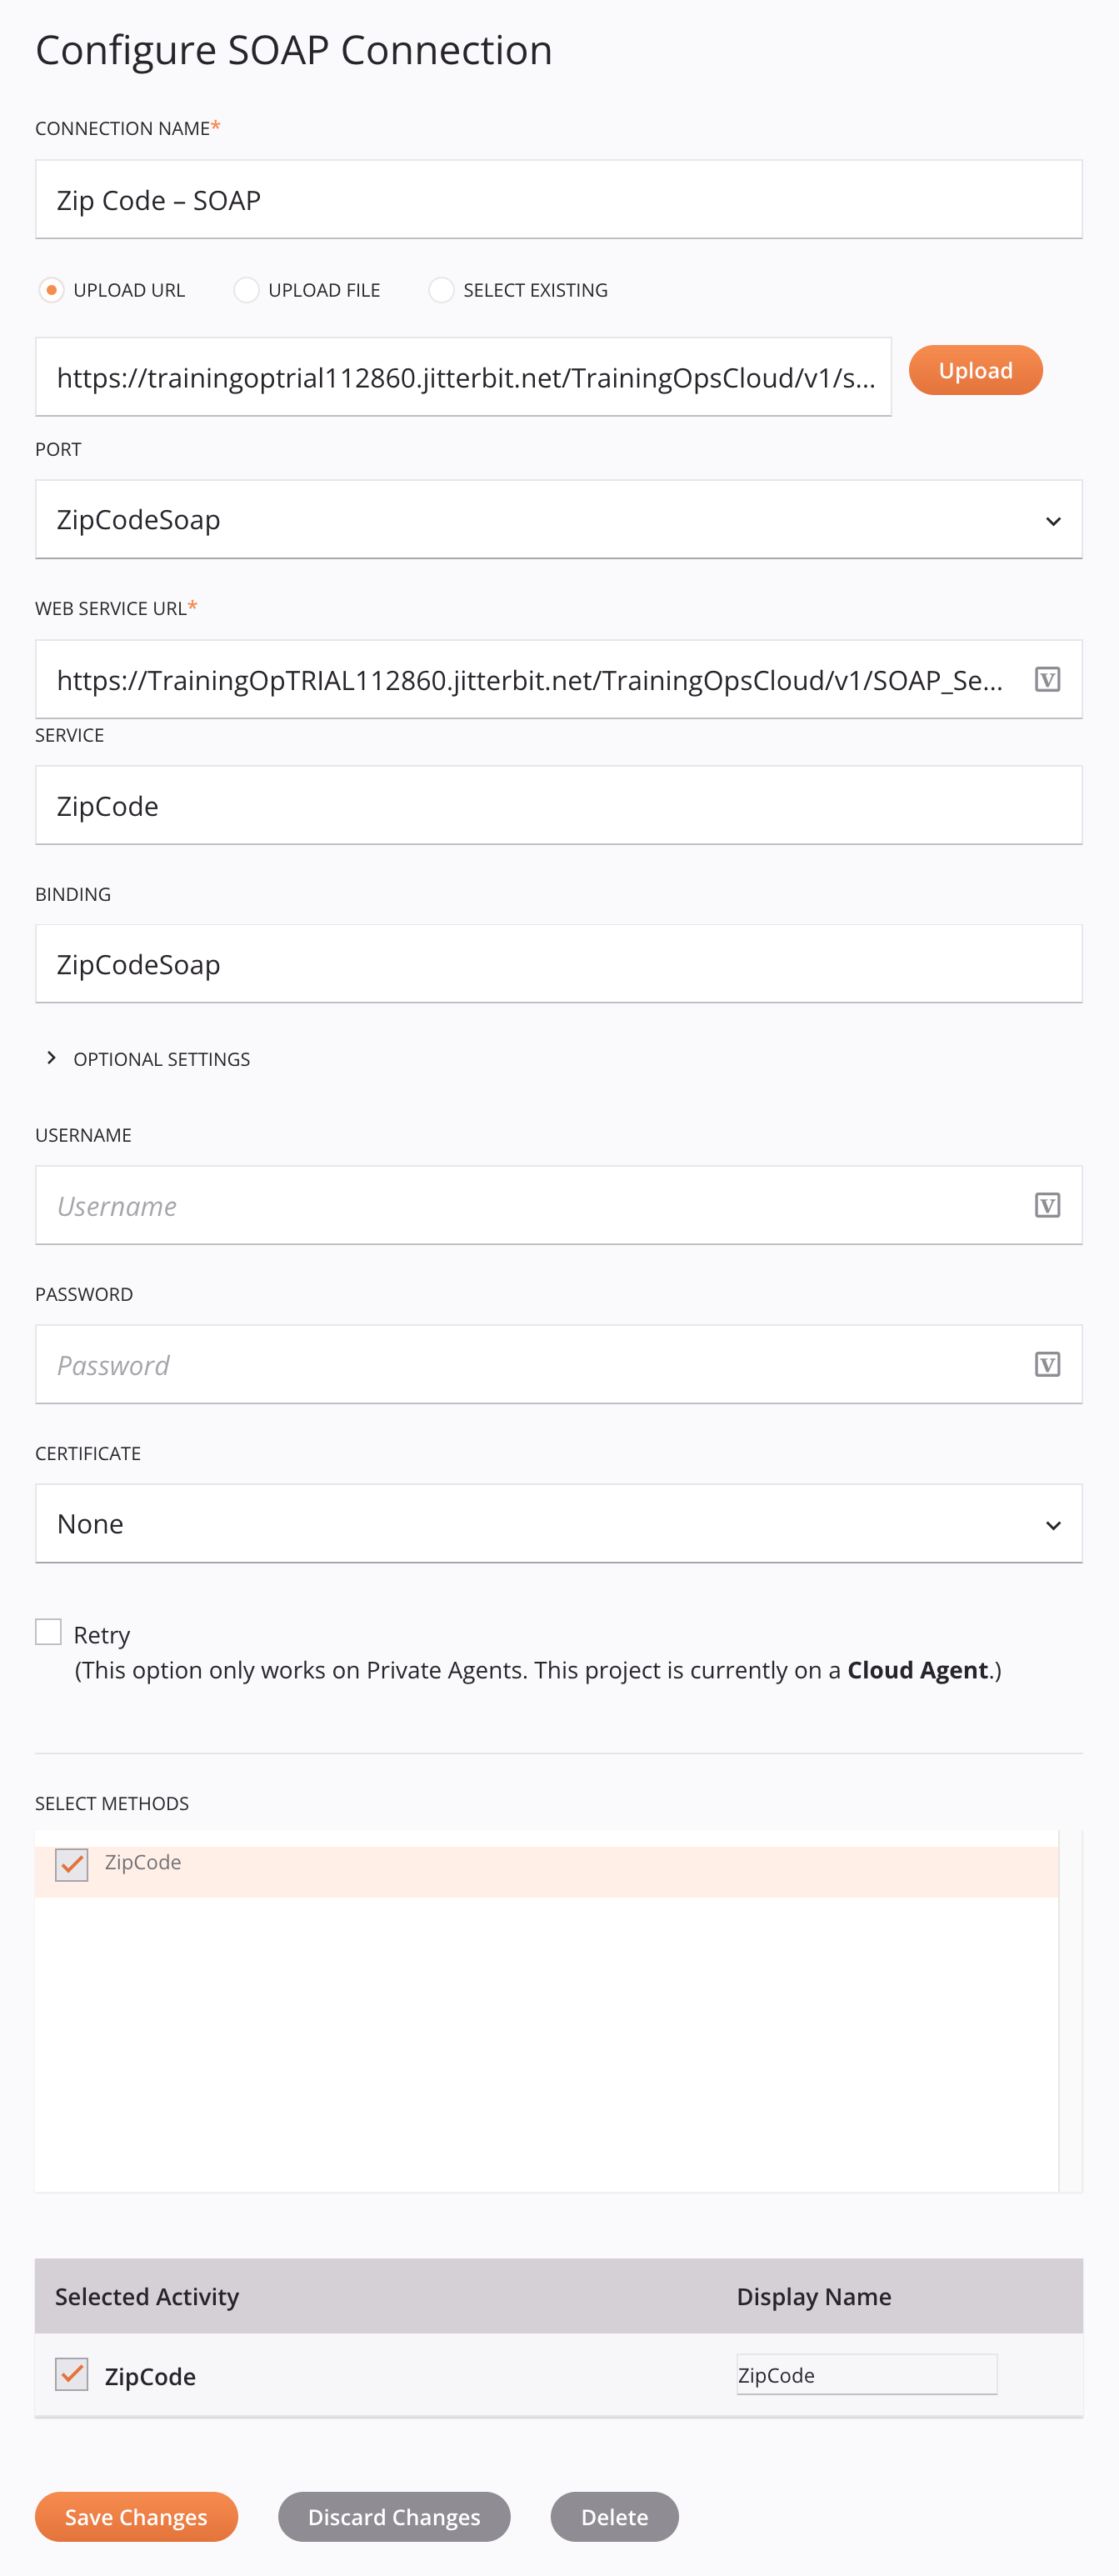
Configure the SOAP connection:
- Endpoint Name: "Zip Code – SOAP"
- Upload URL: Paste the URL to this Web Service Definition Language (WSDL) file: "
https://trainingoptrial112860.jitterbit.net/TrainingOpsCloud/v1/SOAP_Service/?WSDL". Click Upload. - Port: Select "ZipCodeSoap".
- Web Service URL: This is automatically populated from the uploaded WSDL.
- Select Methods: Select "ZipCode". Click Save Changes.
-
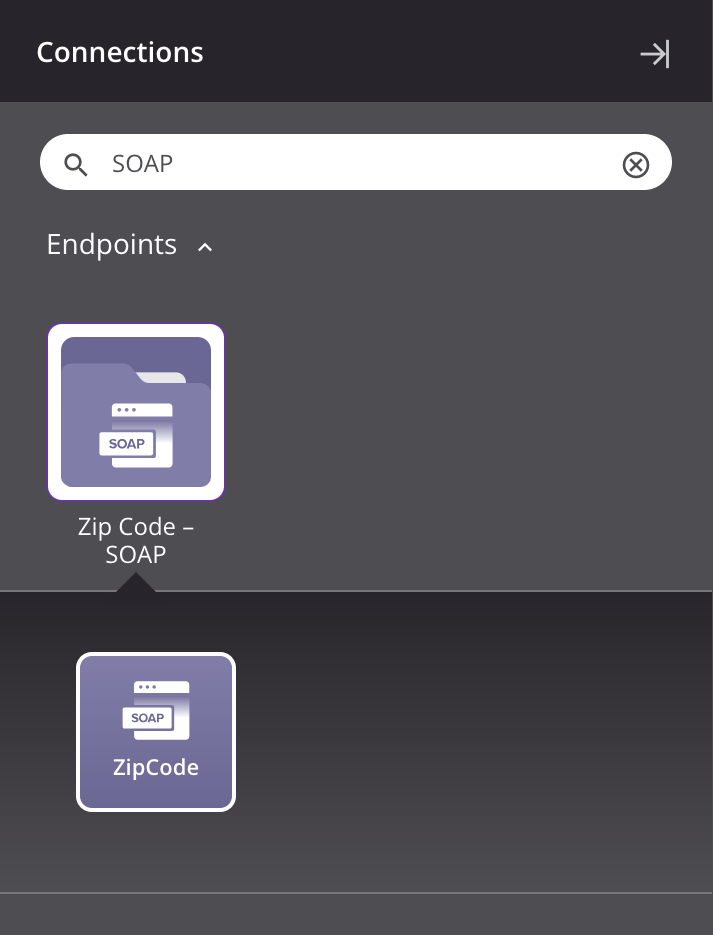
From the component palette's Project endpoints and connectors tab under the Endpoints filter, click the "Zip Code – SOAP" connection you just created. This shows the SOAP activity type for the method you selected while configuring the SOAP connection:
-
Drag the SOAP activity type to a component drop zone on the design canvas to create an instance of a SOAP activity in a new operation.
-
Rename the operation "Zip Code – SOAP." You don't need to open the SOAP activity to configure it because it already automatically configured with all required information.
The SOAP connection should have a configuration similar to this:
2. Configure an FTP activity
In this step, you use the same connection to the SFTP server as in Module 1, but configure a separate FTP Write activity:
-
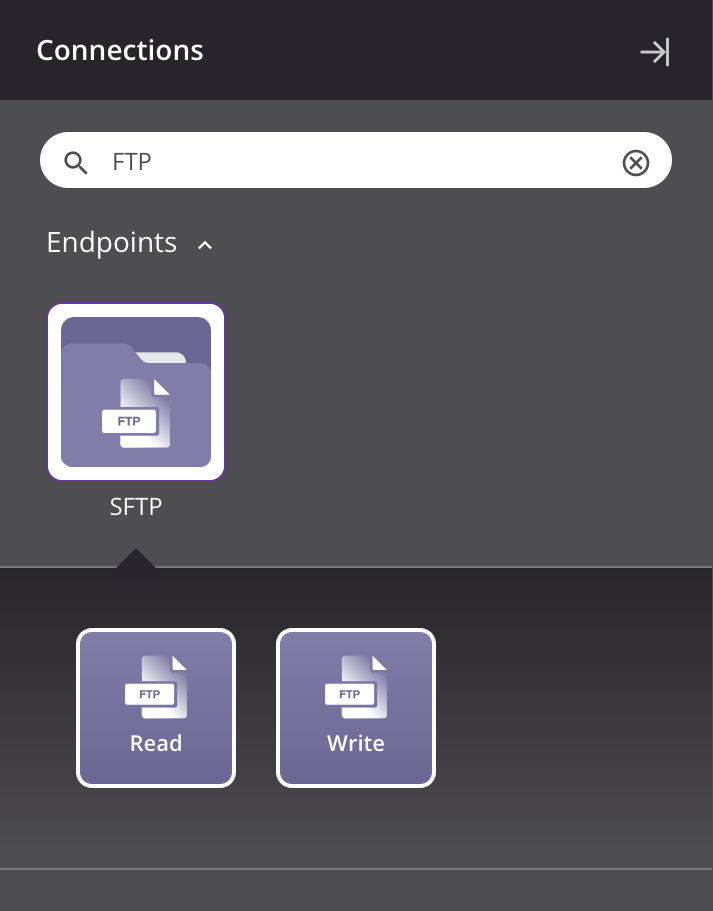
From the component palette's Project endpoints and connectors tab under the Endpoints filter, click the "SFTP" connection you created in Module 1 to show the connection's activity types:
-
Drag an FTP Write activity to a component drop zone on the right of the SOAP activity within the operation on the design canvas.
-
Double-click the FTP Write activity within the operation to open its configuration.
-
Configure the FTP Write activity:
- Name: "Zip Code Data"
- Filename(s): "zipCode.txt"
- Use FTP Rename: Clear this selection. Click Next.
- Data Schema: Since you didn't provide a schema, there is nothing to review in the second screen. Click Finished.
3. Configure a request transformation
Next, you create a transformation for the SOAP web service request:
- On the design canvas, hover over the area to the left of the SOAP activity until a component drop zone appears.
- Click the drop zone and select New Transformation. A new transformation will open for you to configure:
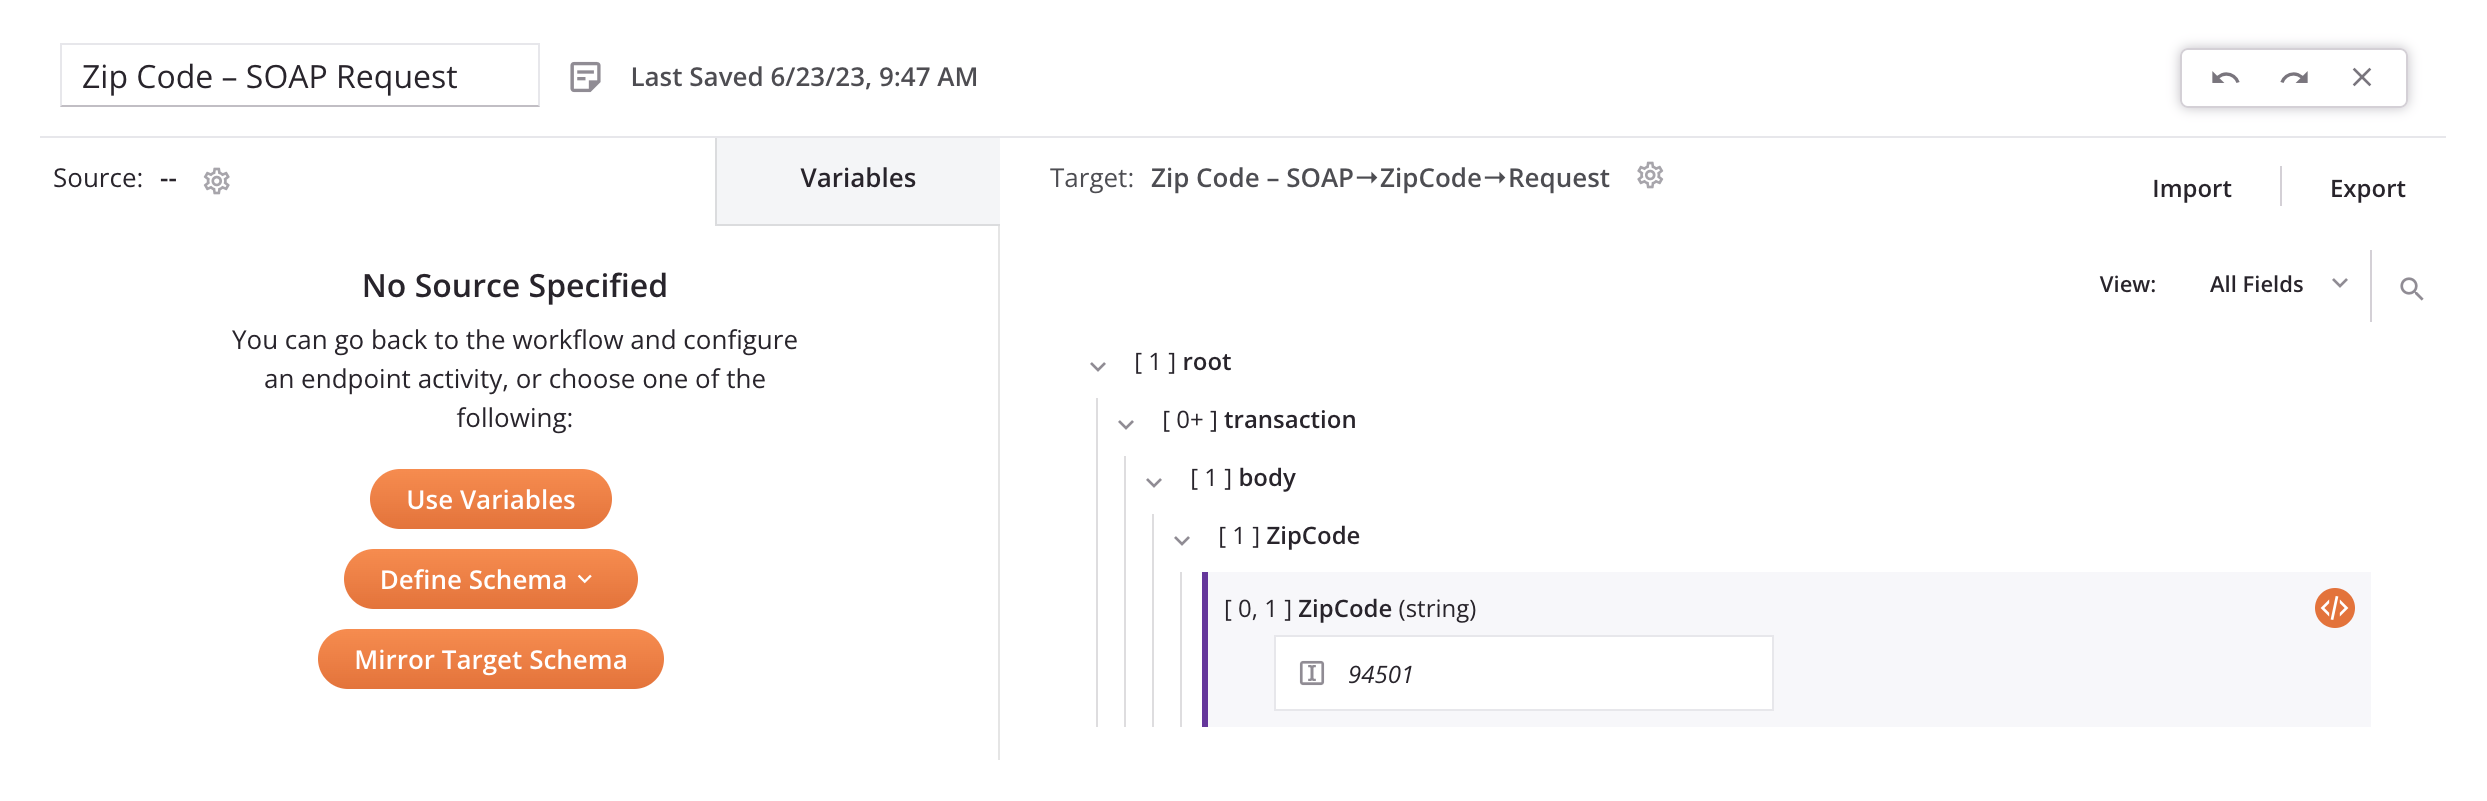
- Transformation Name: "Zip Code – SOAP Request"
- Source: Leave the source schema undefined (on the left).
- Target: Within the target schema (on the right), hover over the
ZipCodefield and click the add icon . From the menu, click Add Custom Value. Then enter a zip code into the text area. Click Return to Workflow.
The request transformation should look similar to this:
4. Configure a response transformation
Next, you create a transformation to write the SOAP web service response to the FTP target:
- On the design canvas, hover over the area between the SOAP activity and the FTP Write activity until a component drop zone appears.
- Click the drop zone and select New Transformation. A new transformation will open for you to configure:
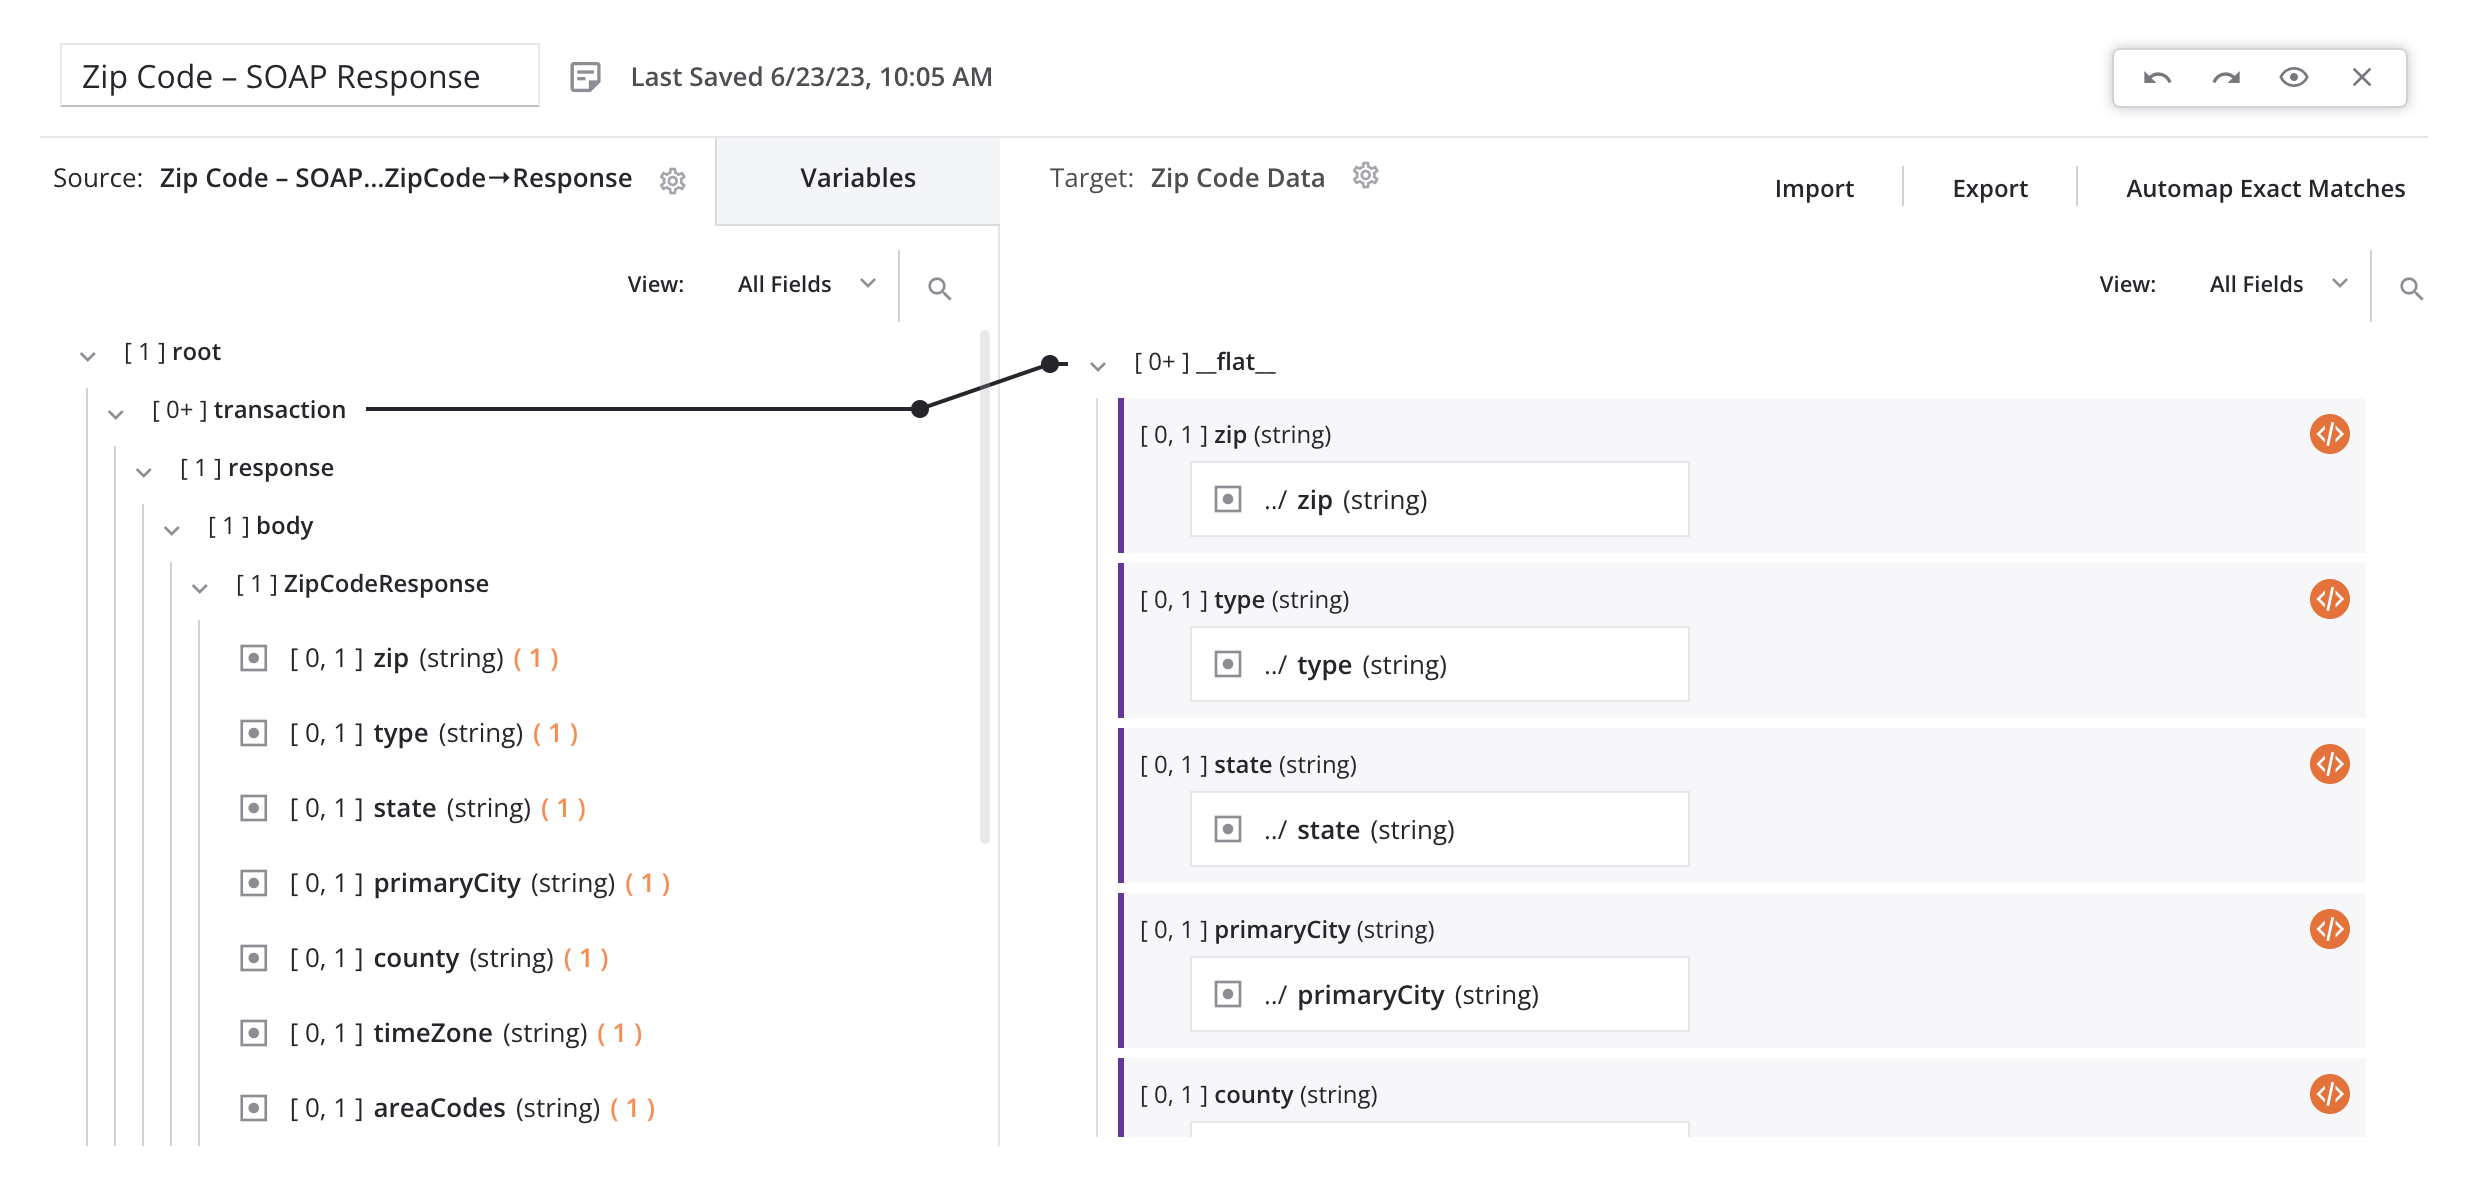
- Transformation Name: "Zip Code – SOAP Response"
- Source: The source schema is already provided (on the left).
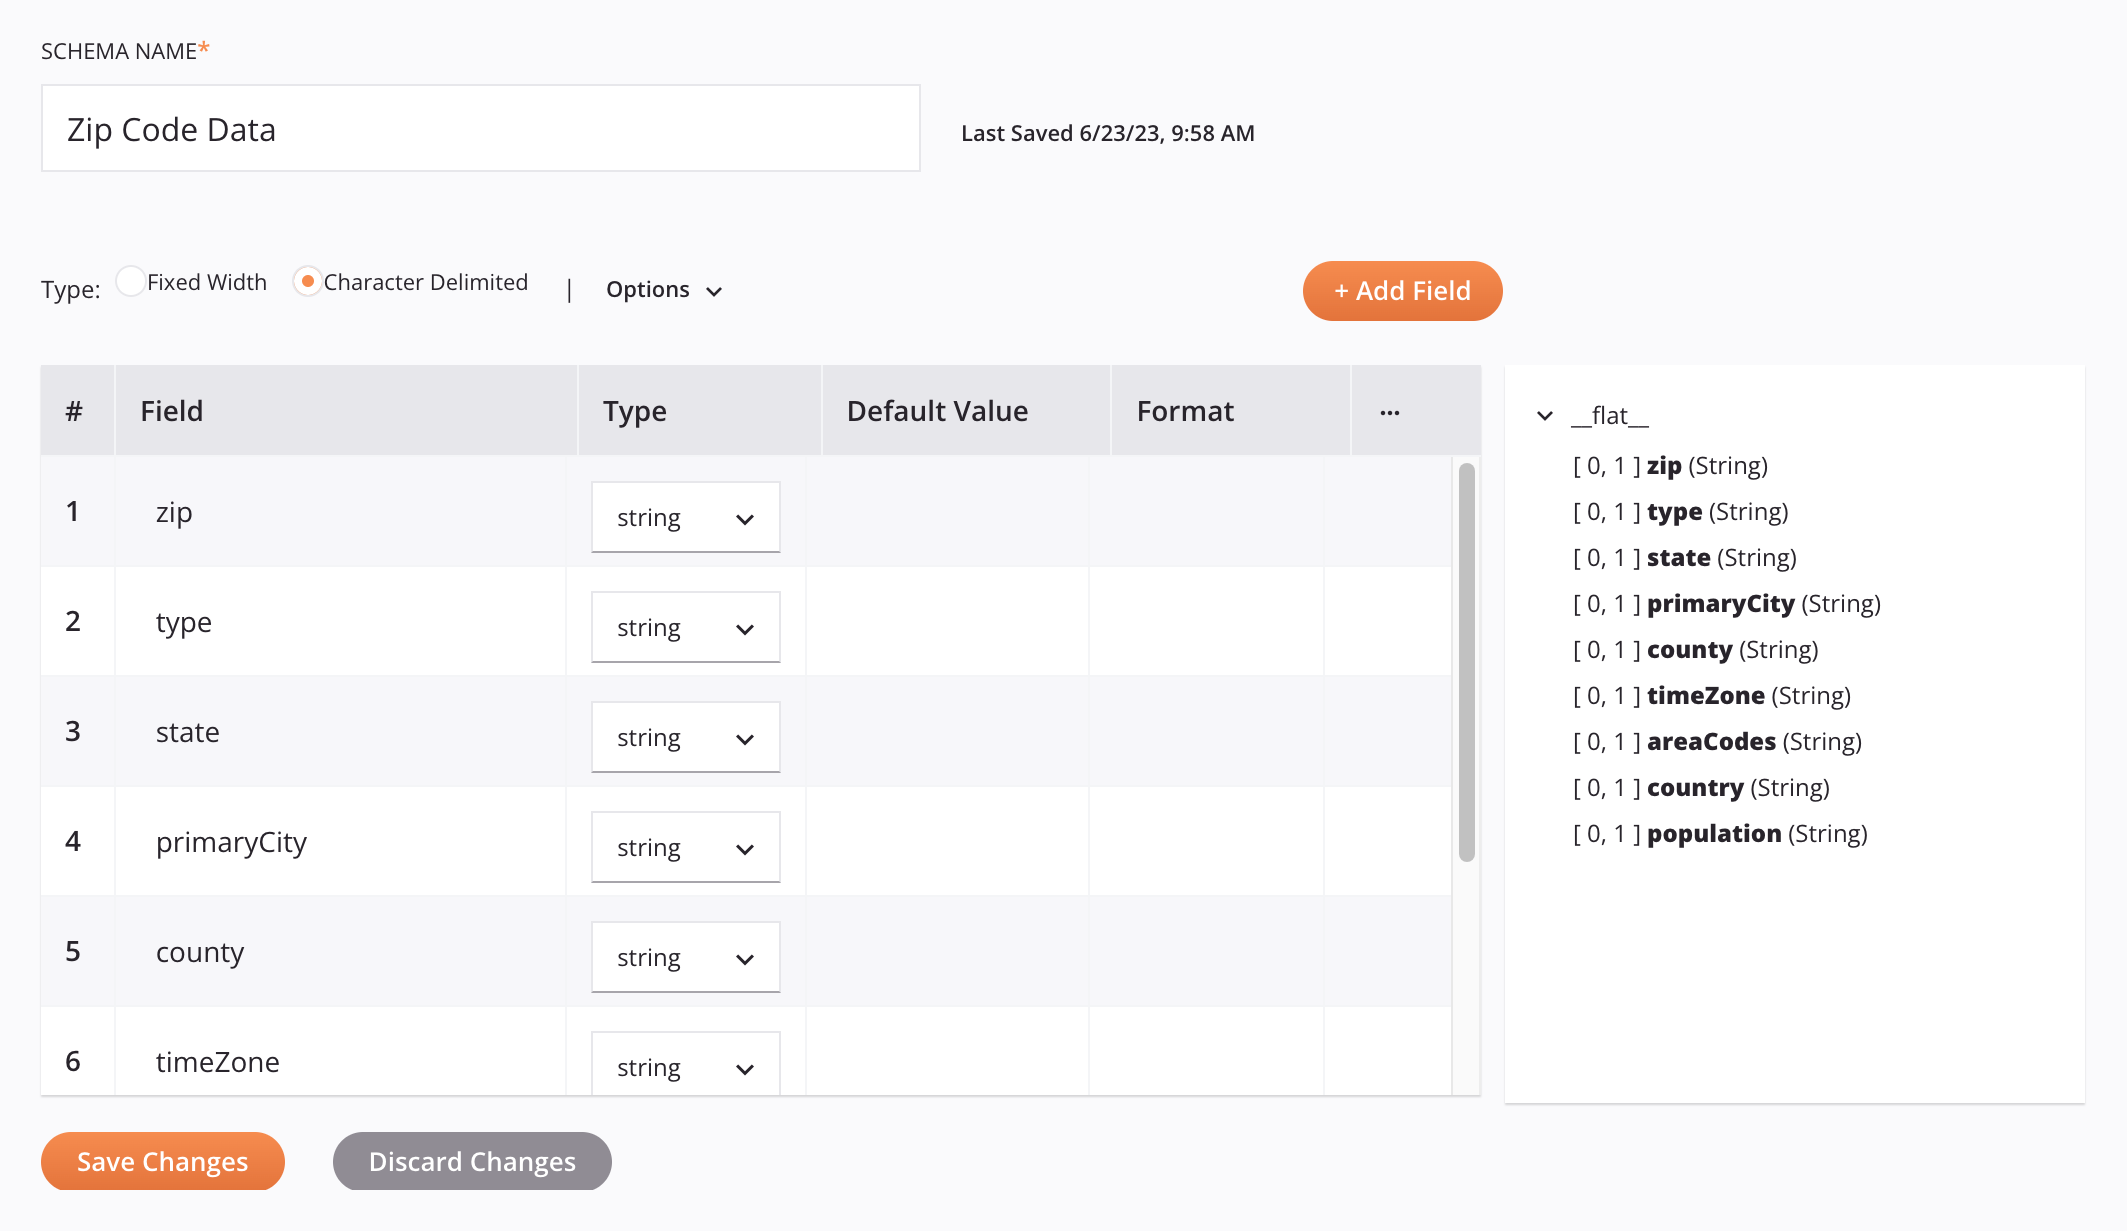
- Target: You need to define the target schema (on the right). Click Define Schema, then select Create Flat. Configure the custom flat schema:
- Schema Name: "Zip Code Data"
- Options: Change the Delimiter from a comma to a tab by entering "\t".
- Add Field: Use this button to add these fields:
zip, type, state, primaryCity, county, timeZone, areaCodes, country, and population. Once the fields are added, click Save Changes.
- Drag the
zipCodeResponsesource node to the__flat__target node and select Automap. Then click Return to Workflow.
The custom flat schema configuration should look similar to this:
The request transformation should look similar to this:
5. Deploy and run the operation
Finally, with all operation steps configured, you deploy and run the operation:
- In the top right of the operation, click the actions menu icon
 and from the menu click Deploy and Run. The operation status is displayed in the lower left of the operation.
 - Once the operation is successful, log in to Jitterbit's training SFTP server and view the file you generated.