Introduction to Vinyl 3.3: UI Enhancements and Reporting
UI / UX Enhancements
In this section we will review some methods that can be used to improve the overall look and feel of an application. The first feature we review is control sets, which are groups (or containers) that can be used to group together similar information to make it more easily understood or interpreted by the user.
Add a Control Set to the Product Page
First, we create a control set on the Product page for Price and Unit of Measure. Then you will add a similar control set to the Products page.
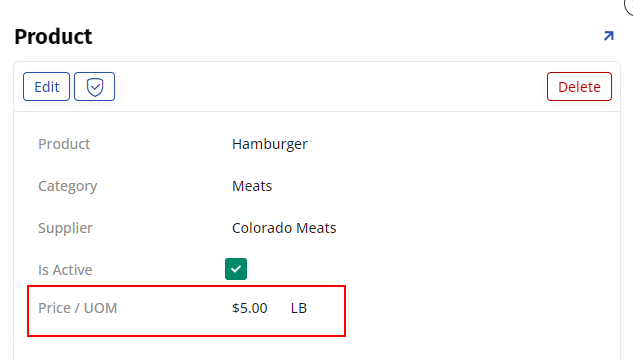
An image showing the created control set on the Product page:
-
Navigate to the application view Product page.
-
Go to the Action Drawer > Live Designer.
-
Select the Controls button for the Product panel.
-
Click the + Control button.
-
Set the Control Type to Group.
-
Assign the Name as
Price / UOM. -
Set the Layout Type to Side by Side.
-
Confirm Sizing Method is set to Compress.
-
Click the Next button.
-
Confirm and click the Finish button.
-
Click the All Controls tab.
-
Set the Parent value for Price to be Price / UOM (Group).
-
Set the Parent value for Unit Of Measure to be Price / UOM (Group).
-
Change the Order value for Unit of Measure to
35, so that Price will be displayed before UOM. -
Change the Order value for Is Active to
80, so that Is Active will be displayed after Price / UOM. -
Close the Live Designer and confirm updates.
Hands-on: Add a Control Set to the Products Page
Following the process used to add a control set to the Product page, add a Price / UOM Control Set to the Products page.
Configure Controls as Required
In this section we will step through how you can manually set a control to be Required in order for a record to be saved. Required controls are indicated in Vinyl by the appearance of a blue vertical bar appearing on the left side of the corresponding field. For this exercise we will use the Product page.
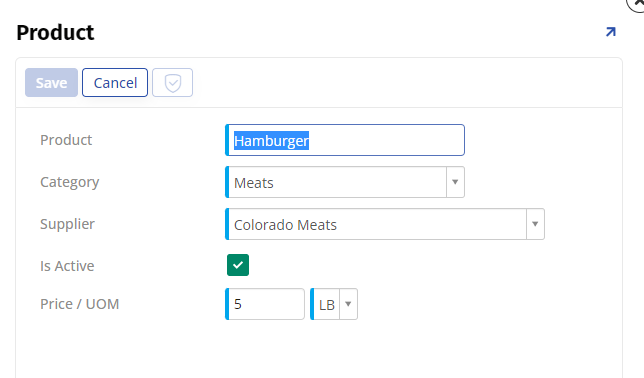
The Product page with controls set to Required:
-
Navigate to the Product page.
-
Go to Action Drawer > Live Designer.
-
Select the Product panel.
-
Click the All Controls tab.
-
Open the Product control detail.
-
Click the Position & Width tab.
-
Set the Edit Options to Required.
-
Click the Save button.
-
Repeat the steps to set all controls on the Product panel to be Required.
-
Close the Live Designer and confirm the updates by clicking the Edit button and reviewing the control appearance.
Add Control Sets to the Customers Page
In this section we will move the City, State, and Postal Code controls into a control set for the Customers page.
-
Navigate to the Customers page.
-
Go to the Action Drawer > Live Designer.
-
Select the Customers panel.
-
Click the All Controls tab.
-
Click the + Control button.
-
Set the Control Type to Group.
-
Assign the Name as
City State Postal Code. -
Click the Next button.
-
Confirm and click Finish.
-
Set the Parent value for City to be City State Postal Code (Group).
-
Set the Parent value for State to be City State Postal Code (Group).
-
Set the Parent value for Postal Code to be City State Postal Code (Group).
-
Open the detail for City and set the Width value to be
20. -
Open the detail for State and set the Width value to be
6. -
Open the detail for Postal and set the Width value to be
9. -
Change the Order value for the City State Postal Code control set to
35, so that the information follows the Address on the application UI layer. -
Close the Live Designer and confirm the updates.
Hands-on: Add Additional Control Sets
Add a City State Postal Code control set to the Customer, Orders, and Order pages.
Change Products Panel Type to Tile
-
Navigate to the Products page.
-
Go to the Action Drawer > Live Designer.
-
Select the Products panel.
-
Set the Panel Type to Tile.
-
Click the Save button.
-
Click the All Controls tab.
-
Open the detail for the Price / UOM control set.
-
Set Group Borders to Hidden.
-
Open the detail for Price.
-
Select the Label tab.
-
Set Label Visibility to Hidden.
-
Click the Save button.
-
Open the detail for Unit of Measure.
-
Select the Label tab.
-
Set Label Visibility to Hidden.
-
Click the Save button.
-
Close the Live Designer and confirm the updates.
Add a Sort Direction by Ascending
In this section we step through how to apply a Sort on a control. Here we will sort ascending on the Product control so that the Products displayed sort alphabetically from A to Z, based on the Product value.
The Products page now sorted alphabetically on Product:

-
From the Products page navigate to Action Drawer > Live Designer.
-
Select the Product control from the Products panel.
-
Click the Position & Width tab.
-
Set the Sort Direction to ASC.
-
Click the Save button.
-
Close the Live Designer and confirm the updates.
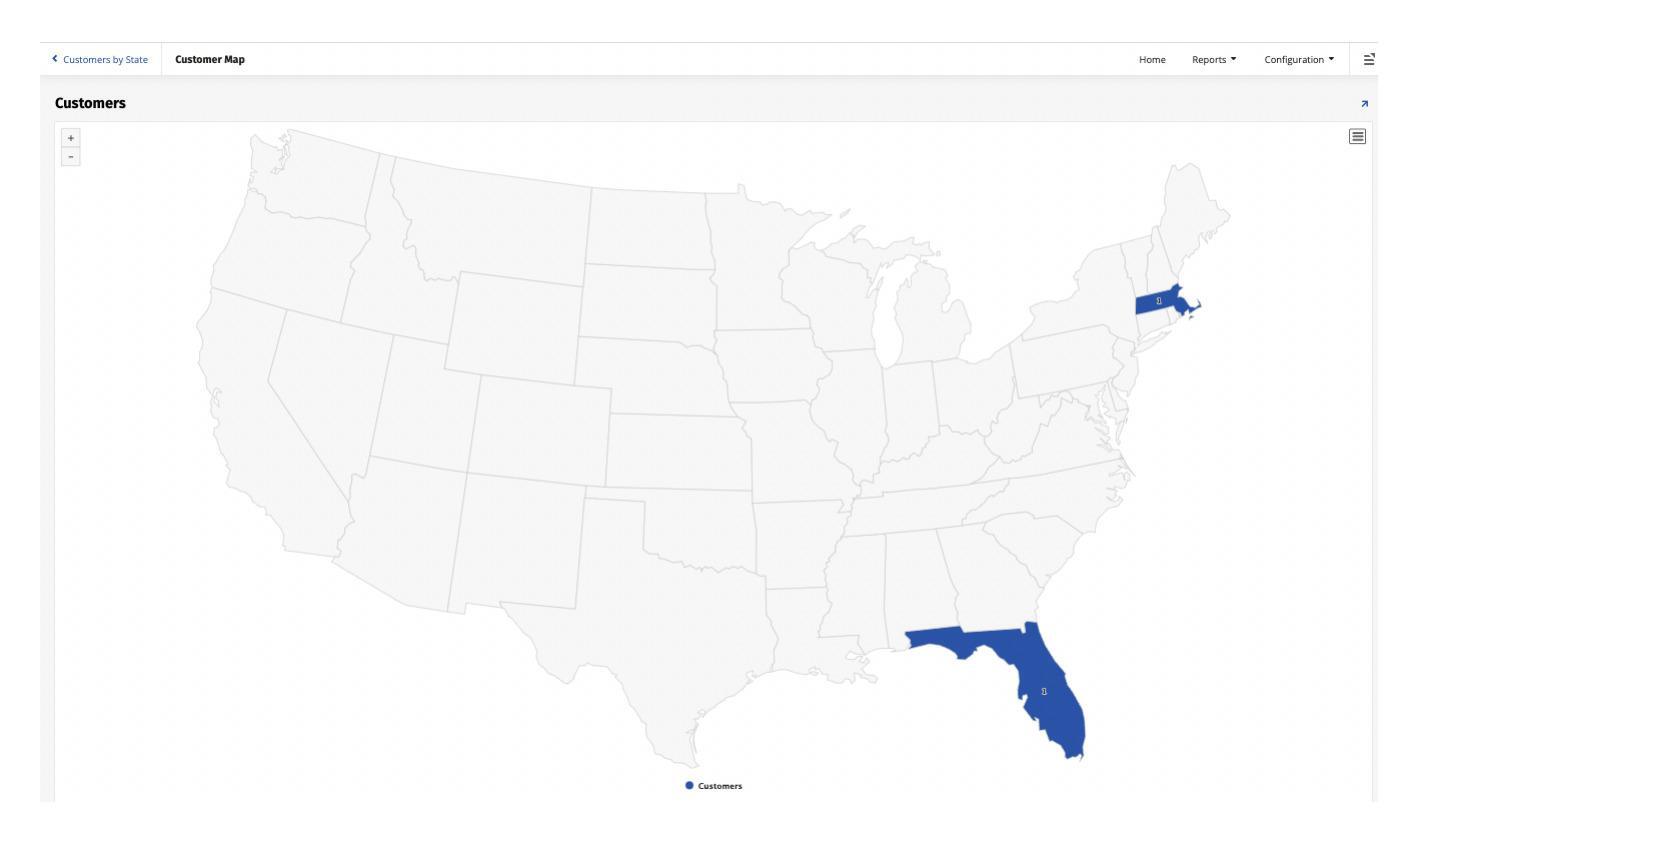
Add a Google Map to Customer
In this section we will add a Google map to the Customer page to enhance the information being displayed to an app user.
Note
Google Maps requires valid address information to display the map correctly.
-
Navigate to the application view Customer page.
-
Go to the Action Drawer > Live Designer.
-
Click the + Panel button.
-
Select the Form tile.
-
Click the Next button.
-
Select the Customer (Business Object).
-
Click the Next button.
-
Select Choose Manually.
-
Click the Next button.
-
Review and click Finish.
-
Select the new Customer2 panel.
-
Modify the Panel Name to be
Map. -
Click the Save button.
-
Click the + Control button.
-
Set the Control Type to Template.
-
Assign the name as
Map. -
Set the template to Google Maps Map View By Address Interactive.
-
Click the Next button.
-
Review and click Finish.
-
Click the Binding button.
-
Confirm there are binding records that map the Address, City, and State from the Template Parameter to the Value or Name.
-
Click the X to exit out of the Bindings screen.
-
Select the Customer panel.
-
Set the page size Width value to Large.
-
Click the Save button.
-
Close the Live Designer and confirm the updates.
Additional UI / UX Improvements
In this section we will step through a few additional UI/UX improvements that can be made to our Global Imports app. First, we will reorder the Is Active control on the Product page. This control should typically be displayed as the last value on a screen. Second, we will take a look at using the AutoComplete control type, which gives users the option of completing syntax, text, or values by selecting from a dropdown menu.
-
Navigate to the application view Customer page.
-
Go to Action Drawer > Live Designer.
-
Select the Customer panel.
-
Select the All Controls tab.
-
Open the details for the State control.
-
Change the Control Type value to AutoComplete.
-
Click the Save button.
-
Close the Live Designer and confirm the updates by testing adding a new Customer record.
Reporting
Now that we have the foundation of our application developed, we will look at some reporting options. Vinyl has intuitive options and shortcuts available to quickly make reports available in an app.
Create a Products by Category Chart
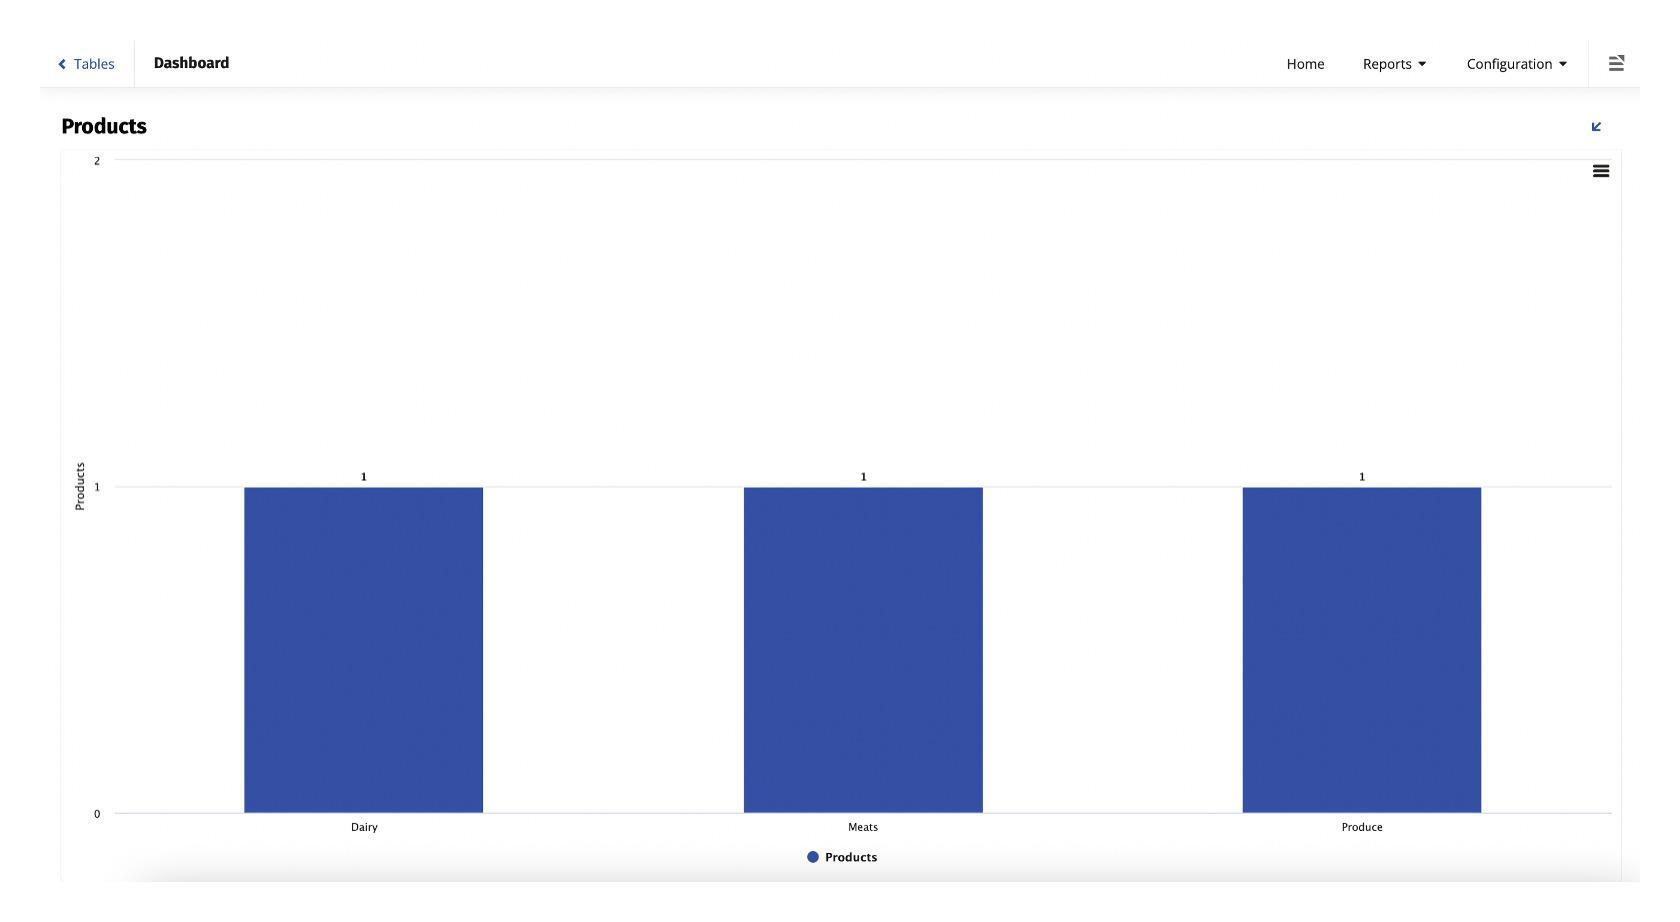
A chart showing Products by Category:
-
From the application navigate to Action Drawer > Design Center.
-
Click the + Page button.
-
Enter a Name for the page. For example:
Products by Category. -
Click the Next button.
-
Select Reports as the menu.
-
Click the Next button.
-
Select Full Page as the layout.
-
Click the Next button.
-
Confirm and click the Finish button.
-
Click the Proceed button.
-
Select the Chart report option.
-
Click the Next button.
-
Click the + New Source button.
-
Assign the Name as
Product (Count By Category). -
Set the Chart Type to Column.
-
Set the Target to Product.
-
Click the Create button.
-
Select the CategoryID and ProductID from the Product table.
-
Click the Columns tab.
-
Confirm that CategoryID has Usage Type set to Category.
-
In the Column or Expression field for ProductID, wrap the product ID with the Count() expression so it appears as Count(ProductID):

-
Click the Proceed button.
-
Confirm that Count(ProductID) has Usage Type set as Value and Alias is Products.
-
Click the Proceed button.
-
Select Product (Count by Category).
-
Click the Next button.
-
Confirm and click the Finish button.
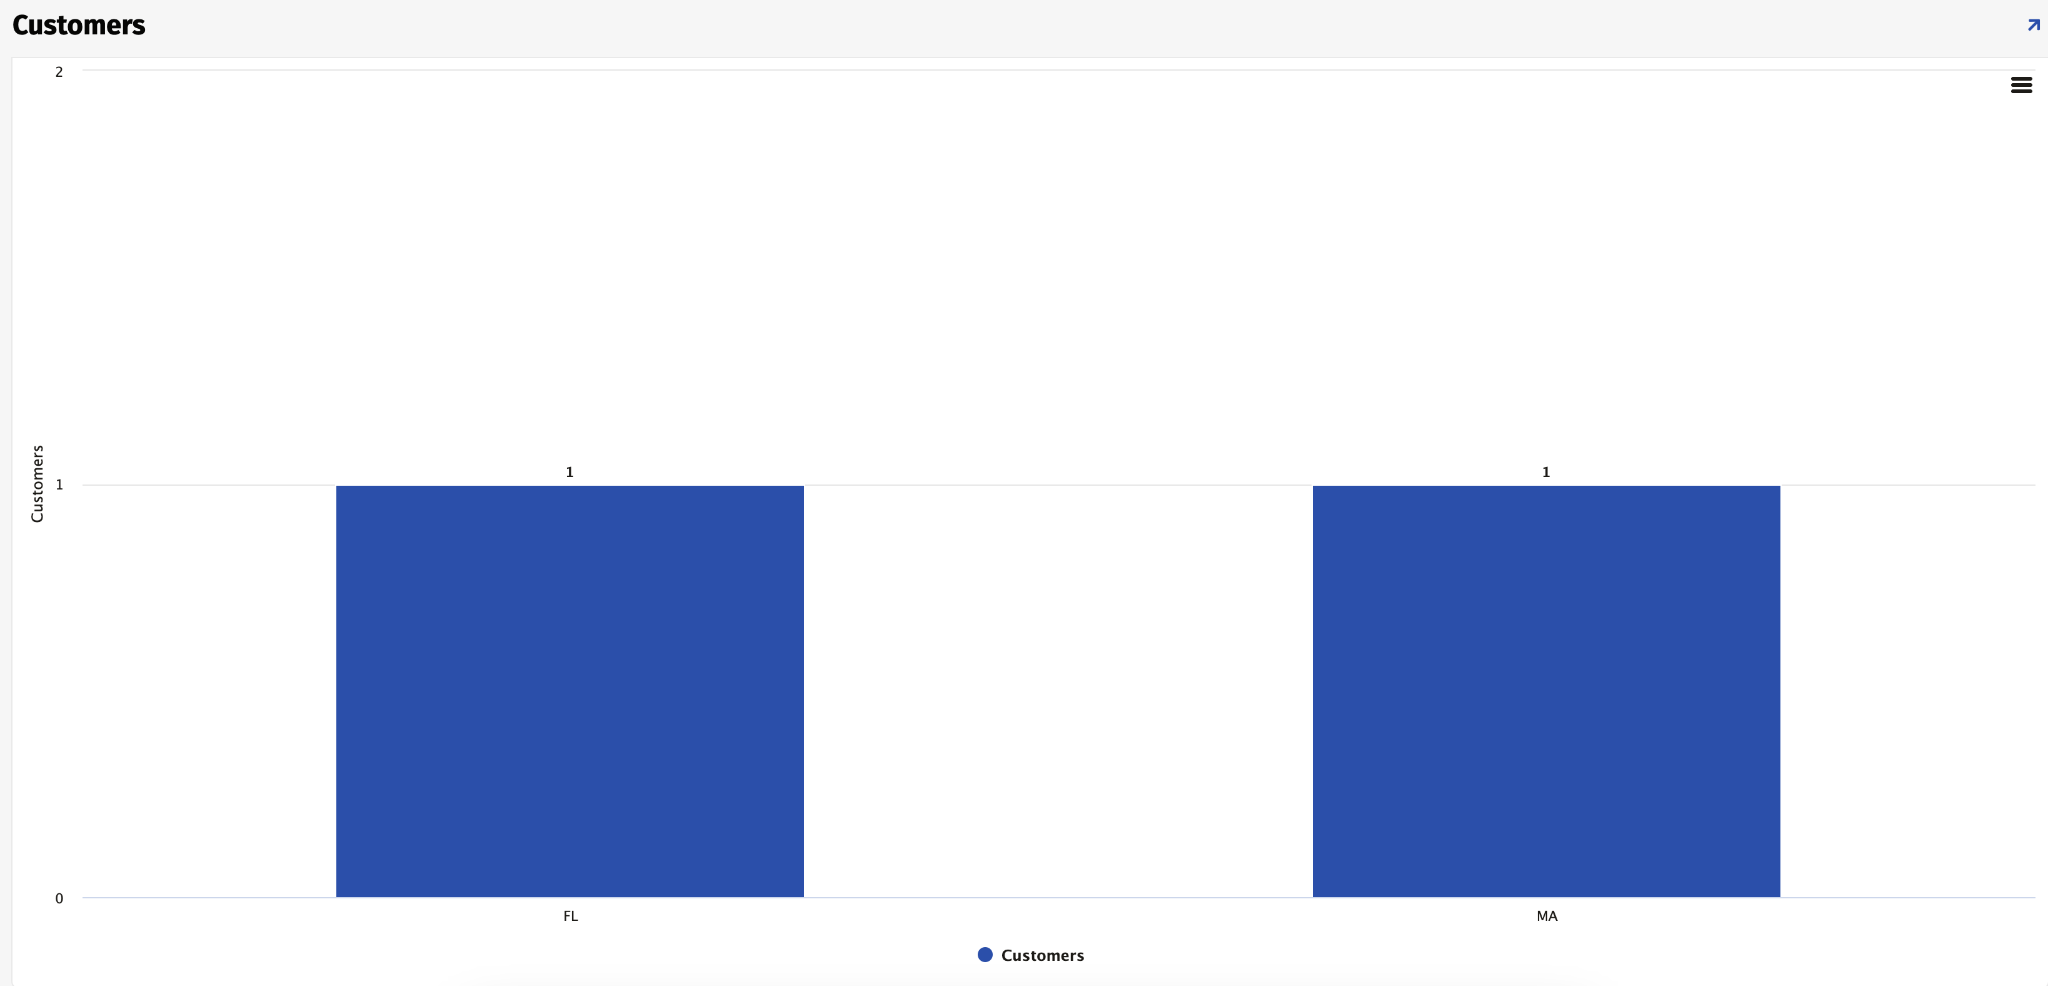
Hands-on: Create a Customers by State Chart
Following the process used to create the Products by Category chart, create a Customers by State chart:
Create a Customer Map
In this step, create a page named Customer Map that connects to the Reports menu. Directions for completing the Map panel are below.
-
From the application, navigate to Action Drawer > Design Center.
-
Click the + Page button.
-
Enter a name for the page. For example:
Customer Count By State. -
Click the Next button.
-
Select Reports as the Menu.
-
Click the Next button.
-
Select Full Page as the layout.
-
Click the Next button.
-
Confirm and click the Finish button.
-
Click the Proceed button.
-
Select the Map panel type.
-
Click the Next button.
-
Click the + New Source button.
-
Assign the name as Customer (Count By State).
-
Set the purpose as Map.
-
Set the target to Customer.
-
Select the State and then CustomerID from the Customer table.
-
Click the Columns tab.
-
Confirm the State control has Usage Type set to Category.
-
In the Column or Expression field for CustomerID, wrap the customer ID with the Count() expression so it appears as Count(“C.”CustomerID).
-
Click the Proceed button.
-
Confirm that Count(“C.”CustomerID) has Usage Type set as Value and Alias as Customers.
-
Click the Proceed button.
-
Select the Customer (Map) business rule.
-
Click the Next button.
-
Click the Finish button.
-
Confirm you now see a Customer Map page with a map panel displaying the customer count by state.
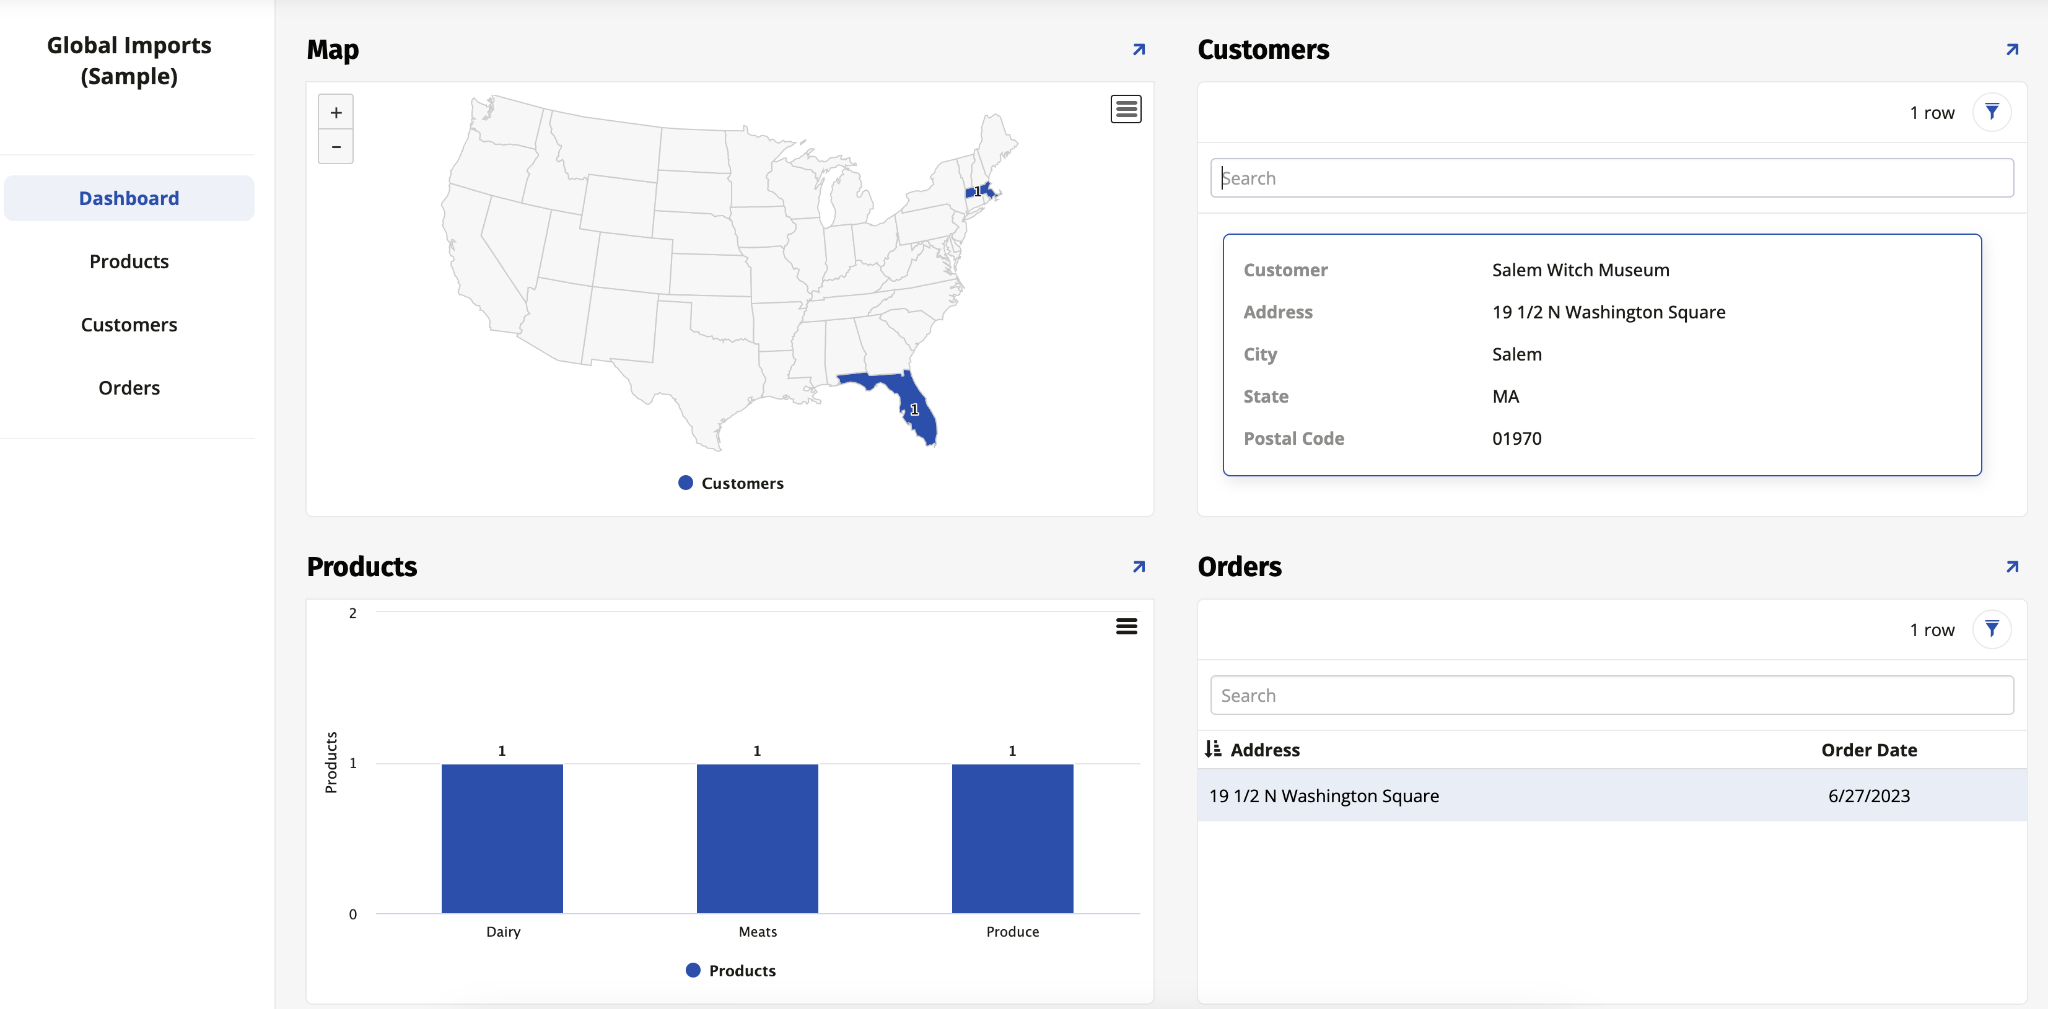
Dashboard
In this section we will create a Dashboard page in our Global Imports application. Dashboards are often used in Vinyl apps to convey key performance indicator (KPI) data to management and executives. The dashboard we build will display the customer map linked to a list of customers, a corresponding list of orders below the list of customers, and product by category.
Note
In this scenario we are repurposing charts that have already been built and validated.
Create the Dashboard Panels
-
From the application, navigate to Action Drawer > Design Center.
-
Click the + Page button.
-
Assign the Page Name as
Dashboard. -
Click the Next button.
-
Select Home as the menu.
-
Click the Next button.
-
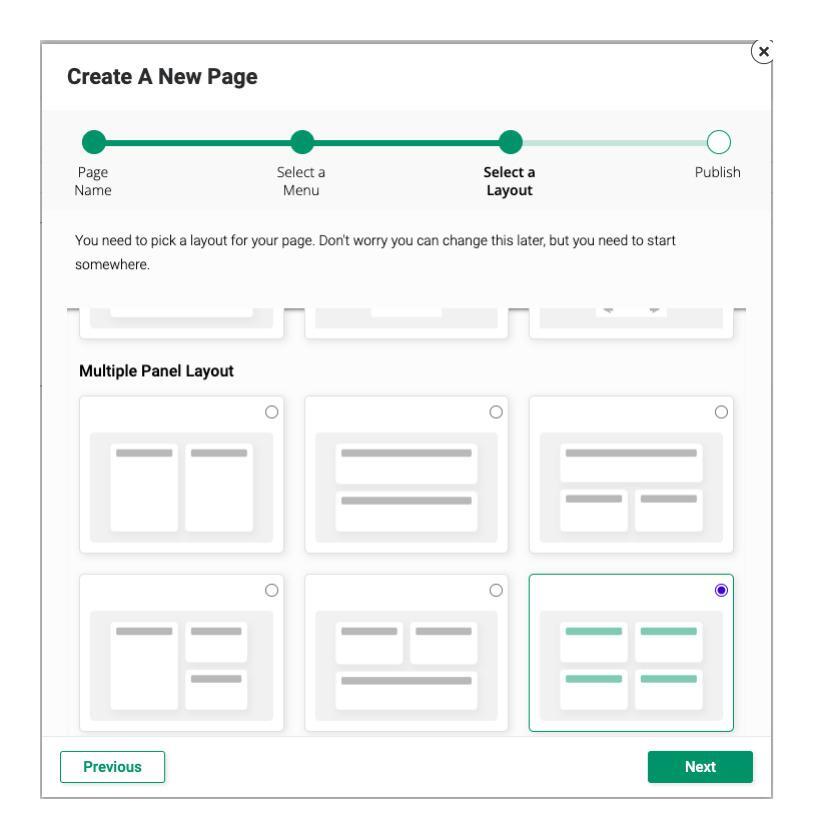
Select the 2x2 tile as the Multiple Panel Layout option.
-
Click the Next button.
-
Confirm and click the Finish button.
-
Click the Proceed button in the top left grid.
-
Click to select the Map tile.
-
Click the Next button.
-
Select the Customer (Map) business rule.
-
Click the Next button.
-
Confirm and click the Finish button.
-
Rename the Panel Name to
Map. -
Click the Proceed button in the top right grid.
-
Click to select the Tile panel layout.
-
Click the Next button.
-
Select the Customer business object.
-
Click the Next button.
-
Select Choose Manually.
-
Click the Next button.
-
Select the following controls to add:
-
Customer
-
Address
-
City
-
State
-
Postal Code
-
-
Click the Next button.
-
Confirm and click the Finish button.
-
For this panel to be connected to the customer map, we need to add binding information. Open Live Designer and select the Customers panel.
-
Click the Bindings button from Parent Panel & Binding.
-
Click the + Binding button.
-
Set the Child Column to State.
-
Set the Parent Column to State.
-
Click the checkmark icon to save.
-
Click the X to exit the Binding Columns screen.
-
Click the Proceed button in the bottom right grid.
-
Select the Grid tile.
-
Click the Next button.
-
Select the Order (Business Object).
-
Click the Next button.
-
Select Choose Manually.
-
Click the Next button.
-
Select the Address and OrderDate controls.
-
Click the Next button.
-
Confirm and click the Finish button.
-
Confirm Parent Panel & Binding is set to Customers (Tile).
-
Click the Bindings button.
-
Confirm a binding record exists mapping CustomerID to CustomerID.
-
Click the X to exit the Binding Columns screen.
-
Click the Proceed button in the bottom left grid.
-
Select the Chart panel type.
-
Click the Next button.
-
Select the Product (Count by Category).
-
Click the Next button.
-
Confirm and click the Finish button.
-
Review the Dashboard page.
Dashboard Improvements
Looking at the current Dashboard page, there are a few improvements we can make:
-
Remove edit, delete, and create capabilities so that information is read-only.
-
Reposition the Dashboard button to be at the top.
Dashboard page from the Global Imports app:
-
From the Dashboard page design view, click to select the Orders panel.
-
Click the Update Methods tab.
-
Set the Edit method to No.
-
Set the Insert method to No.
-
Set the Delete method Supported to No.
-
Click the Save button.
-
Return to the application home page, refresh the browser, and confirm the updates.
-
Return to the Dashboard page design view.
-
Click to select the Orders panel.
-
Click the Update Methods tab.
-
Set the Link to Page to be Order.
-
Click the Save button.
-
From the application view home page, go to Action Drawer > Design Center.
-
Click the Menus button.
-
Click the pencil edit icon for the home page menu.
-
Change the Order for Dashboard to
5. -
Return to the application home page, refresh the browser, and confirm the updates.