Custom component groups in Jitterbit Integration Studio
Introduction
Project components can be grouped into categories, known as custom component groups, to help you organize a project. These groups are used only as an organizational tool and don't affect the way components are referenced by Harmony. Project components can belong to multiple custom groups.
Create a new custom group
A new custom component group is created using the Add to Group option accessible from these locations:
- The project pane's Components tab (see Component actions menu in Project pane Components tab).
- The design canvas (see Component actions menu in Design canvas).
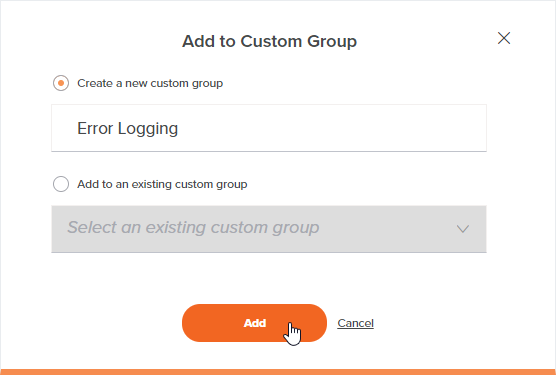
In the dialog, select Create a New Custom Group and specify a name for the group. Then click Add:

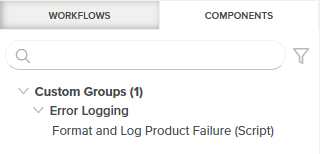
The new group is displayed in the Components tab under the Custom Groups category, containing the component that you added to the new group:

The type of component is displayed in parentheses after the component name.
Add a component to an existing group
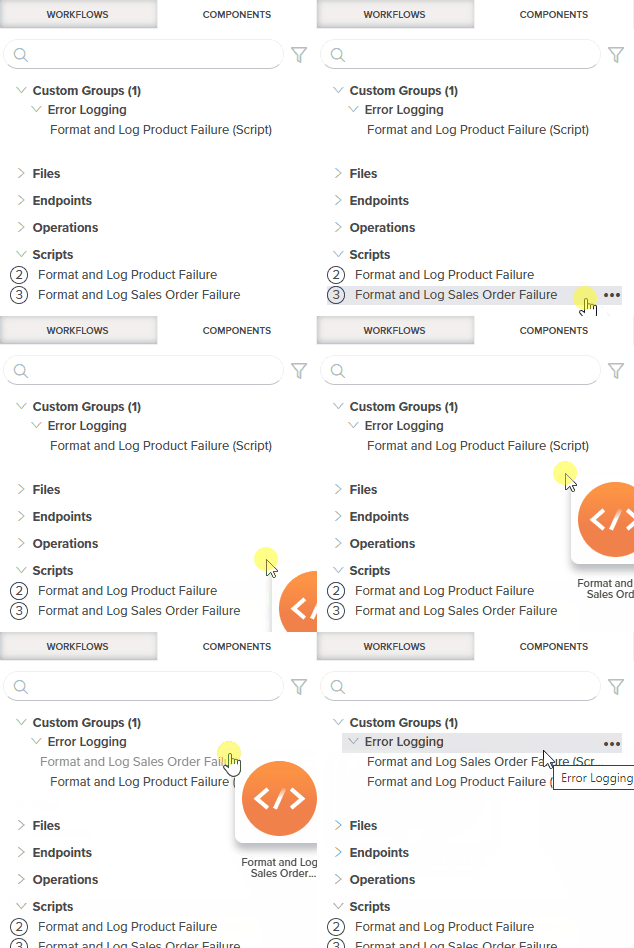
To add a component to an existing group, in the project pane's Components tab, drag a component name to an existing custom group under the Custom Groups category:

You can also use the Add to Group option accessible from these locations:
- The project pane's Components tab (see Component actions menu in Project pane Components tab).
- The design canvas (see Component actions menu in Design canvas).
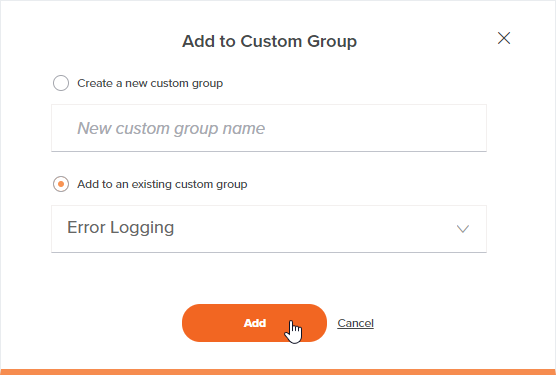
In the dialog, select Add to an Existing Custom Group and use the dropdown to select the appropriate group. Then click Add:

The component is displayed within the existing group in the Components tab under the Custom Groups category.
Remove a component from a group
Components can be removed from a group from the project pane's Components tab.
In the existing group in the Custom Groups category, do one of these to open the actions menu:
- Right-click the component.
- Hover over the component, and then click the actions menu icon .
From the menu, select Remove from Group to remove the component from the group.
If a group contains only one component and that component is removed from the group, the group remains, without any components in it. To delete a group, use the Ungroup option described below under Ungrouping a group.
Rename or ungroup a group
Groups can be renamed or disbanded from the project pane's Components tab.
In the Custom Groups category, do one of these to open the actions menu:
- Right-click the group.
- Hover over the group, and then click the actions menu icon .
From the menu, select either of these actions:
| Menu Item | Description |
|---|---|
Rename group positions the cursor on the group name for you to make edits. | |
| Ungroup deletes the group. Note that any components that were part of the group are not deleted. |